Difference between pages "Berlin (Air Forces)" and "Halifax B Mk IIIa"
Inceptor57 (talk | contribs) m |
(→Armaments) |
||
| Line 1: | Line 1: | ||
| − | {{ | + | {{Specs-Card|code=halifax_mk3}} |
| − | + | == Description == | |
| + | <!--''In the description, the first part needs to be about the history of and the creation and combat usage of the aircraft, as well as its key features. In the second part, tell the reader about the aircraft in the game. Insert a screenshot of the vehicle. If the novice player does not remember the vehicle by name, he will immediately understand what kind of vehicle it is talking about.''--> | ||
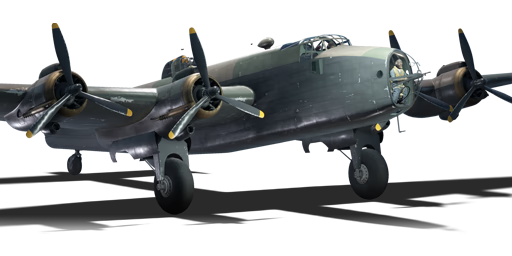
| − | {| | + | [[File:GarageImage_{{PAGENAME}}.jpg|420px|thumb|left|The '''{{PAGENAME}}''' in the garage]] |
| − | | | + | {{break}} |
| − | + | The '''{{Specs|name}}''' is a Rank {{Specs|rank}} British bomber {{Battle-rating|3}}. This aircraft was introduced in [[Update 1.59 "Flaming Arrows"]]. | |
| − | |||
| − | |} | ||
| − | < | + | The Halifax is an interesting member of the British bomber line. It is the first true British heavy bomber, a big change from its predecessors, which are all either flying boats, medium, or light bombers. With the transition to heavy bombers, comes a change in tactics. The Halifax will out class almost every tier 2 and 3 bomber in terms of payload. It will also generally beat every same BR bomber in payload as well. However, being a heavy bomber has its draw backs. Compared to nearly all previous British bombers, this one is slower, and has a noticeably slow climb rate. While the payload upgrade is nice, the Halifax is not very durable. Worse, the Halifax lacks effective defensive weapons, a flaw of nearly all British bombers. The main priority, as a result, should be targeting bases, and avoiding opposing pilots as much as possible. Use high altitude and less direct travel routes to get to your targets. If you are engaged, your defensive guns can save you, but they are not very reliable. In addition, you have no ventral turret, leaving a massive defensive gap. If you can keep safe, and deliver your payload, you will find this to be a very effective bomber. |
| − | + | == General info == | |
| − | {| | + | === Flight Performance === |
| + | <!--''Describe how the aircraft behaves in the air. Maximum speed, maneuverability, speed and allowable loads - these are the most important characteristics of the vehicle.''--> | ||
| + | {| class="wikitable" style="text-align:center" | ||
| + | |- | ||
| + | ! colspan="8" | Characteristics | ||
| + | |- | ||
| + | ! colspan="8" | ''Stock'' | ||
| + | |- | ||
| + | ! colspan="2" | Max Speed<br>(km/h at 4,115 m) | ||
| + | ! rowspan="2" | Max altitude<br>(meters) | ||
| + | ! colspan="2" | Turn time<br>(seconds) | ||
| + | ! colspan="2" | Rate of climb<br>(meters/second) | ||
| + | ! rowspan="2" |Take-off run<br>(meters) | ||
| + | |- | ||
| + | ! AB | ||
| + | ! RB | ||
| + | ! AB | ||
| + | ! RB | ||
| + | ! AB | ||
| + | ! RB | ||
| + | |- | ||
| + | |432||418|| {{Specs|ceiling}} ||35.3||35.8||2.3||3.8||750 | ||
| + | |- | ||
| + | ! colspan="8" | ''Upgraded'' | ||
| + | |- | ||
| + | ! colspan="2" | Max Speed<br>(km/h at 4,115 m) | ||
| + | ! rowspan="2" |Max altitude (meters) | ||
| + | ! colspan="2" | Turn time (seconds) | ||
| + | ! colspan="2" | Rate of climb<br>(meters/second) | ||
| + | ! rowspan="2" |Take-off run (meters) | ||
| + | |- | ||
| + | ! AB | ||
| + | ! RB | ||
| + | ! AB | ||
| + | ! RB | ||
| + | ! AB | ||
| + | ! RB | ||
| + | |- | ||
| + | | ? || ? || {{Specs|ceiling}} || ??.? || ??.? || ??.? || ??.? ||750 | ||
|- | |- | ||
| − | |||
| − | |||
| − | |||
|} | |} | ||
| − | + | ====Details==== | |
| − | + | {| class="wikitable" style="text-align:center" | |
| − | + | |- | |
| − | + | ! colspan="5" | Features | |
| − | + | |- | |
| − | + | ! Combat flap | |
| − | + | ! Take-off flap | |
| − | === | + | ! Landing flap |
| − | + | ! Air brakes | |
| − | + | ! Arrestor gear | |
| − | + | |- | |
| − | + | | ✓ || ✓ || ✓ || X || X <!-- ✓ --> | |
| − | + | |- | |
| − | |||
| − | |||
| − | |||
| − | |||
| − | {| style=" | ||
| − | |- | ||
| − | | | ||
| − | |||
| − | |||
| − | |||
| − | <!-- | ||
| − | | | ||
|} | |} | ||
| − | |||
| − | |||
| − | |||
| − | |||
| − | |||
| − | + | {| class="wikitable" style="text-align:center" | |
| − | + | |- | |
| − | + | ! colspan="5" | Limits | |
| − | + | |- | |
| − | | | + | ! rowspan="2" | Wing-break speed<br>(km/h) |
| − | ! | + | ! rowspan="2" | Gear limit<br>(km/h) |
| − | ! | + | ! rowspan="2" | Combat flap<br> (km/h) |
| − | + | ! colspan="2" | Max Static G | |
| + | |- | ||
| + | ! + | ||
| + | ! - | ||
|- | |- | ||
| − | | | + | | {{Specs|разрушение|конструкции}} || {{Specs|разрушение|шасси}} || ??? || ~?? || ~? |
| − | | | ||
| − | | | ||
|- | |- | ||
| − | |||
| − | |||
| − | |||
|} | |} | ||
| − | + | {| class="wikitable" style="text-align:center" | |
| − | + | |- | |
| − | + | ! colspan="4" | Optimal velocities | |
| − | + | |- | |
| − | + | ! Ailerons<br>(km/h) | |
| − | + | ! Rudder<br>(km/h) | |
| − | < | + | ! Elevators<br>(km/h) |
| − | | | + | ! Radiator<br>(km/h) |
| + | |- | ||
| + | | < ??? || < ??? || < ??? || > ??? | ||
| + | |- | ||
|} | |} | ||
| − | + | {| class="wikitable" style="text-align:center" | |
| − | {| | + | |- |
| − | + | ! colspan="3" | Compressor (RB/SB) | |
| − | | | + | |- |
| − | + | ! colspan="3" | Setting 1 | |
| − | + | |- | |
| − | + | ! Optimal altitude | |
| − | + | ! 100% Engine power | |
| − | + | ! WEP Engine power | |
| − | | | + | |- |
| − | ! | + | | 2,000 m || ??? hp || ?,??? hp |
| − | ! | + | |- |
| − | ! | + | ! colspan="3" | Setting 2 |
|- | |- | ||
| − | + | ! Optimal altitude | |
| − | + | ! 100% Engine power | |
| − | + | ! WEP Engine power | |
|- | |- | ||
| − | | | + | | 4,300 m || ?,??? hp || ?,??? hp |
| − | | | ||
| − | | | ||
|- | |- | ||
| − | + | <!--! colspan="3" | Setting 3 | |
| − | |||
| − | |||
| − | |||
| − | |||
| − | |||
| − | |||
| − | |||
| − | |||
| − | |||
| − | |||
| − | <!-- | ||
| − | |||
| − | |||
| − | |||
| − | |||
| − | |||
| − | |||
| − | |||
| − | |||
| − | |||
| − | |||
| − | |||
| − | |||
| − | | | ||
| − | |||
| − | |||
| − | |||
|- | |- | ||
| − | + | ! Optimal altitude | |
| − | + | ! 100% Engine power | |
| − | + | ! WEP Engine power | |
|- | |- | ||
| − | | | + | | ?,??? m || ?,??? hp || ?,??? hp |
| − | | | + | |- --> |
| − | | | ||
|} | |} | ||
| − | '' | + | === Survivability and armour === |
| − | + | <!--''Examine the survivability of the aircraft. Note how vulnerable the structure is and how secure the pilot is, whether the fuel tanks are armoured. Describe the armour, if there is any, also mention the vulnerability of other critical aircraft systems.''--> | |
| − | + | * 6.35 mm steel in front and floor of cockpit | |
| − | + | * 8 mm steel behind pilot and in rear fuselage bulkhead | |
| + | * No armour glazing | ||
| + | * Critical components located in the wings of aircraft (fuel, engine, controls) | ||
| − | <!-- | + | == Armaments == |
| − | | | + | <!--=== Offensive armament === |
| − | + | ''Describe the offensive armament of the aircraft, if any. Describe how effective the cannons and machine guns are in a battle, and also what belts or drums are better to use. If there is no offensive weaponry, delete this subsection.'' | |
| + | {{main|MAC 1934 (7.5 mm)}} | ||
| − | + | The '''''{{PAGENAME}}''''' is armed with: | |
| − | |||
| − | { | ||
| − | |||
| − | |||
| − | + | * 4 x 7.5 mm [[MAC 1934 (7.5 mm)|MAC 1934]] machine guns (300 rpg = 1,200 total) | |
| − | + | --> | |
| + | === Suspended armament === | ||
| + | <!--''Describe the aircraft's suspended armament: additional cannons under the wings, bombs, rockets and torpedoes. This section is especially important for bombers and attackers. If there is no suspended weaponry remove this subsection.''--> | ||
| + | {{main|:Category:Suspended armaments|l1=Suspended armaments}} | ||
| − | ''' | + | The '''''{{PAGENAME}}''''' can be outfitted with the following ordinance" |
| − | |||
| − | + | * 15 x G.P 250 lb Mk.IV bombs | |
| − | + | * 15 x G.P 500 lb Mk.IV bombs | |
| + | * 9 x M.C. 1000 lb Mk.I bombs + 6 x G.P 500 lb Mk.IV bombs | ||
| − | <!-- | + | === Defensive armament === |
| − | + | <!--''Defensive armament with turret machine guns or cannons, crewed by gunners. Examine the number of gunners and what belts or drums are better to use. If defensive weaponry is not available remove this subsection.''--> | |
| − | |||
| − | + | {{main|Browning .303 (7.7 mm)|Vickers K (7.7 mm)}} | |
| − | {| | ||
| − | | | ||
| − | |||
| − | ''' | + | The '''''{{PAGENAME}}''''' is defended by: |
| − | |||
| − | + | * 4 x 7.7mm Browning machine gun, tail turret (1,700 RPG= 6,800 total) | |
| − | + | * 4 x 7.7mm Browning machine gun, dorsal turret (600 RPG = 2,400 total) | |
| + | * 1 x 7.7mm Vickers K machine gun, nose turret (1000 RPG) | ||
| − | '' | + | == Usage in the battles == |
| − | + | <!--''Describe the tactics of playing in an aircraft, the features of using vehicles in a team and advice on tactics. Refrain from creating a "guide" - do not impose a single point of view but give the reader food for thought. Examine the most dangerous enemies and give recommendations on fighting them. If necessary, note the specifics of the game in different modes (AB, RB, SB).''--> | |
| − | + | ===Manual Engine Control=== | |
| − | | | + | {| class="wikitable" style="text-align:center" |
| + | |- | ||
| + | ! colspan="7" | MEC elements | ||
| + | |- | ||
| + | ! rowspan="2" |Mixer | ||
| + | ! rowspan="2" |Pitch | ||
| + | ! colspan="3" |Radiator | ||
| + | ! rowspan="2" |Supercharger | ||
| + | ! rowspan="2" |Turbocharger | ||
| + | |- | ||
| + | ! Oil | ||
| + | ! Water | ||
| + | ! Type | ||
| + | |- | ||
| + | | Controllable || rowspan="2" | Not controllable || rowspan="2" | Not controllable || rowspan="2" | Not controllable || rowspan="2" | Separate || rowspan="2" | Not ontrollable || rowspan="2" | Not controllable | ||
| + | |- | ||
|} | |} | ||
| − | === | + | ===Modules=== |
| − | + | {| class="wikitable" | |
| − | + | ! colspan="1" | Tier | |
| − | = | + | ! colspan="2" | Flight performance |
| − | = | + | ! colspan="1" | Survivability |
| − | + | ! colspan="2" | Weaponry | |
| − | + | |- | |
| − | | | + | | I |
| − | + | | Fuselage Repair | |
| − | + | | Radiator | |
| − | + | | | |
| − | + | | | |
| − | + | |- | |
| − | + | | II | |
| − | + | | | |
| − | + | | Compressor | |
| − | + | | Airframe | |
| − | + | | | |
| − | + | |- | |
| − | | | + | | III |
| + | | Wings Repair | ||
| + | | Engine | ||
| + | | | ||
| + | | | ||
| + | |- | ||
| + | | IV | ||
| + | | | ||
| + | | Engine Injection | ||
| + | | Cover | ||
| + | | | ||
| + | |- | ||
|} | |} | ||
| − | === | + | === Pros and cons === |
| − | + | <!--''Summarise and briefly evaluate the vehicle regarding its characteristics and combat effectiveness. Mark its pros and cons in the bulleted list. Do not use more than 6 points for each of the characteristics. Avoid using categorical definitions such as "bad", "good" and the like - they have a substitution in the form of softer "inadequate", "effective".''--> | |
| − | |||
| − | |||
| − | ''' | + | '''Pros:''' |
| − | ''' | + | * Can carry an overwhelming '''12,000 lb''' of bombs, giving it the heaviest payload at tiers 2 and 3 and outclasses many tier 4 bombers. |
| − | + | * Game changer if left unchecked | |
| + | * (Realistic Battle) Full payload lets it take out all three bases in one pass with two 1,000 lb bombs to spare (first base : 6 x 500 lb + 1 x 1,000 lb / second base : 3 x 1,000 lb / third base : 3 x 1,000 lb / airfield : 2 x 1,000 lb. | ||
| + | * Defensive armament is decent for a British bomber | ||
| + | * Internal payload options, doesn't create any drag | ||
| + | * Performance is almost unaffected by payload options | ||
| + | * Low Battle Rating means it faces planes less deadly than the ones later British bombers face | ||
| + | * Fantastic climb rate with WEP; can easily reach 6,000 m with full payload just by side climbing (which is heavily advised to minimize interception). | ||
| + | * Fast and fairly manoeuvrable for a heavy bomber | ||
| + | * Can fly with two engines if needed | ||
| + | * Easy Silver Lion and Research Points grinder | ||
| + | * Incredibly cheap repair cost | ||
| + | * Has no problem playing at higher ranks and battle ratings | ||
| + | * Arguably outclasses the Stirling in most aspects | ||
| + | * Being at Rank II, it requires little RP to grind modules, especially when the final payload option is unlocked | ||
| + | * Tail gunner has a lot of ammunition (4 x 7.7 mm machine guns with 1,700 rounds per gun) | ||
| − | ''' | + | '''Cons:''' |
| − | |||
| − | + | * Large target | |
| − | + | * '''Priority target'''(Arcade battle). Smart players flying fighters will aim for you first | |
| − | + | * Stock payload is useless for base bombing | |
| + | * Nose is defended by a single 7.7 mm gun and the belly has no machine gun coverage | ||
| + | * Being attacked from the front is usually lethal for the bomber | ||
| + | * 7.7 mm turrets are overall not very effective | ||
| + | * Only one pilot, no copilot like other bombers | ||
| + | * WEP causes overheating unless manual engine control is used to force radiators open | ||
| + | * Fragile compared to most competing bombers, and previous British bombers | ||
| + | * Severe lack of armour | ||
| + | * Lack of armour for crew leaves them vulnerable | ||
| − | ==== | + | == History == |
| − | + | ''Describe the history of the creation and combat usage of the aircraft in more detail than in the introduction. If the historical reference turns out to be too big, take it to a separate article, taking a link to an article about the vehicle and adding a block "/ historical reference" (example: https://wiki.warthunder.com/Name-vehicles/historical reference) and add a link to it here using the <code>main</code> template. Be sure to include links to sources at the end of the article.'' | |
| − | |||
| − | |||
| − | |||
| − | '' | ||
| − | |||
| − | |||
| − | |||
| − | |||
| − | |||
| − | |||
| − | |||
| − | |||
| − | |||
| − | |||
| − | |||
| − | |||
| − | |||
| − | |||
| − | |||
| − | |||
| − | |||
| − | |||
| − | |||
| − | |||
| − | |||
| − | |||
| − | |||
| − | |||
| − | |||
| − | |||
| − | |||
== Media == | == Media == | ||
''An excellent addition to the article will be video guides, as well as screenshots from the game and photos.'' | ''An excellent addition to the article will be video guides, as well as screenshots from the game and photos.'' | ||
| − | |||
| − | |||
| − | |||
== Read also == | == Read also == | ||
''Links to the articles on the War Thunder Wiki that you think will be useful for the reader, for example,'' | ''Links to the articles on the War Thunder Wiki that you think will be useful for the reader, for example,'' | ||
| − | * ''reference to the series of the | + | |
| + | * ''reference to the series of the aircraft;'' | ||
* ''links to approximate analogues of other nations and research trees.'' | * ''links to approximate analogues of other nations and research trees.'' | ||
| − | ''ETC.'' | + | <!--''ETC.''--> |
== Sources == | == Sources == | ||
''Paste links to sources and external resources, such as:'' | ''Paste links to sources and external resources, such as:'' | ||
| + | |||
* ''topic on the official game forum;'' | * ''topic on the official game forum;'' | ||
| + | * ''page on aircraft encyclopedia;'' | ||
* ''other literature.'' | * ''other literature.'' | ||
| − | + | {{Britain bombers}} | |
| − | |||
Revision as of 22:10, 12 February 2019
Contents
Description

The Halifax B Mk IIIa is a Rank III British bomber
with a battle rating of 4.0 (AB/RB) and 4.3 (SB). This aircraft was introduced in Update 1.59 "Flaming Arrows".
The Halifax is an interesting member of the British bomber line. It is the first true British heavy bomber, a big change from its predecessors, which are all either flying boats, medium, or light bombers. With the transition to heavy bombers, comes a change in tactics. The Halifax will out class almost every tier 2 and 3 bomber in terms of payload. It will also generally beat every same BR bomber in payload as well. However, being a heavy bomber has its draw backs. Compared to nearly all previous British bombers, this one is slower, and has a noticeably slow climb rate. While the payload upgrade is nice, the Halifax is not very durable. Worse, the Halifax lacks effective defensive weapons, a flaw of nearly all British bombers. The main priority, as a result, should be targeting bases, and avoiding opposing pilots as much as possible. Use high altitude and less direct travel routes to get to your targets. If you are engaged, your defensive guns can save you, but they are not very reliable. In addition, you have no ventral turret, leaving a massive defensive gap. If you can keep safe, and deliver your payload, you will find this to be a very effective bomber.
General info
Flight Performance
| Characteristics | |||||||
|---|---|---|---|---|---|---|---|
| Stock | |||||||
| Max Speed (km/h at 4,115 m) |
Max altitude (meters) |
Turn time (seconds) |
Rate of climb (meters/second) |
Take-off run (meters) | |||
| AB | RB | AB | RB | AB | RB | ||
| 432 | 418 | 7620 | 35.3 | 35.8 | 2.3 | 3.8 | 750 |
| Upgraded | |||||||
| Max Speed (km/h at 4,115 m) |
Max altitude (meters) | Turn time (seconds) | Rate of climb (meters/second) |
Take-off run (meters) | |||
| AB | RB | AB | RB | AB | RB | ||
| ? | ? | 7620 | ??.? | ??.? | ??.? | ??.? | 750 |
Details
| Features | ||||
|---|---|---|---|---|
| Combat flap | Take-off flap | Landing flap | Air brakes | Arrestor gear |
| ✓ | ✓ | ✓ | X | X |
| Limits | ||||
|---|---|---|---|---|
| Wing-break speed (km/h) |
Gear limit (km/h) |
Combat flap (km/h) |
Max Static G | |
| + | - | |||
| 0 | 260 | ??? | ~?? | ~? |
| Optimal velocities | |||
|---|---|---|---|
| Ailerons (km/h) |
Rudder (km/h) |
Elevators (km/h) |
Radiator (km/h) |
| < ??? | < ??? | < ??? | > ??? |
| Compressor (RB/SB) | ||
|---|---|---|
| Setting 1 | ||
| Optimal altitude | 100% Engine power | WEP Engine power |
| 2,000 m | ??? hp | ?,??? hp |
| Setting 2 | ||
| Optimal altitude | 100% Engine power | WEP Engine power |
| 4,300 m | ?,??? hp | ?,??? hp |
Survivability and armour
- 6.35 mm steel in front and floor of cockpit
- 8 mm steel behind pilot and in rear fuselage bulkhead
- No armour glazing
- Critical components located in the wings of aircraft (fuel, engine, controls)
Armaments
Suspended armament
The Halifax B Mk IIIa can be outfitted with the following ordinance"
- 15 x G.P 250 lb Mk.IV bombs
- 15 x G.P 500 lb Mk.IV bombs
- 9 x M.C. 1000 lb Mk.I bombs + 6 x G.P 500 lb Mk.IV bombs
Defensive armament
The Halifax B Mk IIIa is defended by:
- 4 x 7.7mm Browning machine gun, tail turret (1,700 RPG= 6,800 total)
- 4 x 7.7mm Browning machine gun, dorsal turret (600 RPG = 2,400 total)
- 1 x 7.7mm Vickers K machine gun, nose turret (1000 RPG)
Usage in the battles
Manual Engine Control
| MEC elements | ||||||
|---|---|---|---|---|---|---|
| Mixer | Pitch | Radiator | Supercharger | Turbocharger | ||
| Oil | Water | Type | ||||
| Controllable | Not controllable | Not controllable | Not controllable | Separate | Not ontrollable | Not controllable |
Modules
| Tier | Flight performance | Survivability | Weaponry | ||
|---|---|---|---|---|---|
| I | Fuselage Repair | Radiator | |||
| II | Compressor | Airframe | |||
| III | Wings Repair | Engine | |||
| IV | Engine Injection | Cover | |||
Pros and cons
Pros:
- Can carry an overwhelming 12,000 lb of bombs, giving it the heaviest payload at tiers 2 and 3 and outclasses many tier 4 bombers.
- Game changer if left unchecked
- (Realistic Battle) Full payload lets it take out all three bases in one pass with two 1,000 lb bombs to spare (first base : 6 x 500 lb + 1 x 1,000 lb / second base : 3 x 1,000 lb / third base : 3 x 1,000 lb / airfield : 2 x 1,000 lb.
- Defensive armament is decent for a British bomber
- Internal payload options, doesn't create any drag
- Performance is almost unaffected by payload options
- Low Battle Rating means it faces planes less deadly than the ones later British bombers face
- Fantastic climb rate with WEP; can easily reach 6,000 m with full payload just by side climbing (which is heavily advised to minimize interception).
- Fast and fairly manoeuvrable for a heavy bomber
- Can fly with two engines if needed
- Easy Silver Lion and Research Points grinder
- Incredibly cheap repair cost
- Has no problem playing at higher ranks and battle ratings
- Arguably outclasses the Stirling in most aspects
- Being at Rank II, it requires little RP to grind modules, especially when the final payload option is unlocked
- Tail gunner has a lot of ammunition (4 x 7.7 mm machine guns with 1,700 rounds per gun)
Cons:
- Large target
- Priority target(Arcade battle). Smart players flying fighters will aim for you first
- Stock payload is useless for base bombing
- Nose is defended by a single 7.7 mm gun and the belly has no machine gun coverage
- Being attacked from the front is usually lethal for the bomber
- 7.7 mm turrets are overall not very effective
- Only one pilot, no copilot like other bombers
- WEP causes overheating unless manual engine control is used to force radiators open
- Fragile compared to most competing bombers, and previous British bombers
- Severe lack of armour
- Lack of armour for crew leaves them vulnerable
History
Describe the history of the creation and combat usage of the aircraft in more detail than in the introduction. If the historical reference turns out to be too big, take it to a separate article, taking a link to an article about the vehicle and adding a block "/ historical reference" (example: https://wiki.warthunder.com/Name-vehicles/historical reference) and add a link to it here using the main template. Be sure to include links to sources at the end of the article.
Media
An excellent addition to the article will be video guides, as well as screenshots from the game and photos.
Read also
Links to the articles on the War Thunder Wiki that you think will be useful for the reader, for example,
- reference to the series of the aircraft;
- links to approximate analogues of other nations and research trees.
Sources
Paste links to sources and external resources, such as:
- topic on the official game forum;
- page on aircraft encyclopedia;
- other literature.
| Britain bombers | |
|---|---|
| Torpedo | Swordfish Mk I · Swordfish Mk II · ▄Avenger Mk II |
| Dive | V-156-B1 |
| Hydroplanes | ▄Catalina Mk IIIa · Sunderland Mk IIIa · Sunderland Mk V |
| Light | Blenheim Mk IV · Beaufort Mk VIII · ▄Hudson Mk V · Brigand B 1 |
| Based on A20 | ▄Havoc Mk I · ▄Boston Mk I · ▄DB-7 |
| Hampden | Hampden Mk I · Hampden TB Mk I |
| Wellington | Wellington Mk Ic · Wellington Mk Ic/L · Wellington Mk III · Wellington Mk X |
| Halifax | Halifax B Mk IIIa |
| Stirling | Stirling B Mk I · Stirling B Mk III |
| Lancaster | Lancaster B Mk I · Lancaster B Mk III |
| Lincoln | Lincoln B Mk II |
| Shackleton | Shackleton MR.Mk.2 |
