Difference between revisions of "BMD-4"
(→Main armament) |
bangerland (talk | contribs) (Base text.I dunno if they will or will not nerf the ludicrous 5 sec reload or atgm loadout, but it's still there. Also i understand that overpressure area of effect may not sound important, but if you fire that at forest, you need 2 shots, not 20 with tht) |
||
| Line 6: | Line 6: | ||
== Description == | == Description == | ||
<!-- ''In the description, the first part should be about the history of the creation and combat usage of the vehicle, as well as its key features. In the second part, tell the reader about the ground vehicle in the game. Insert a screenshot of the vehicle, so that if the novice player does not remember the vehicle by name, he will immediately understand what kind of vehicle the article is talking about.'' --> | <!-- ''In the description, the first part should be about the history of the creation and combat usage of the vehicle, as well as its key features. In the second part, tell the reader about the ground vehicle in the game. Insert a screenshot of the vehicle, so that if the novice player does not remember the vehicle by name, he will immediately understand what kind of vehicle the article is talking about.'' --> | ||
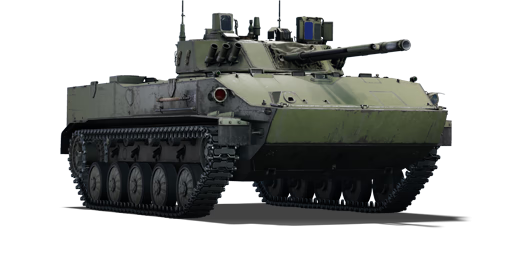
| − | The '''{{Specs|name}}''' is a gift rank {{Specs|rank}} Soviet light tank {{Battle-rating}}. It was introduced during [[Update "Red Skies"]] as a reward for the [[wt:en/news/7267-event-summer-landing-en|2021 Summer Landing event]]. | + | The '''{{Specs|name}}''' is a gift rank {{Specs|rank}} Soviet light tank {{Battle-rating}}. It was introduced during [[Update "Red Skies"]] as a reward for the [[wt:en/news/7267-event-summer-landing-en|2021 Summer Landing event]]. On technical level, can be viewed as a [[BMP-3]], but with less armour and faster ATGM reload. |
== General info == | == General info == | ||
| Line 12: | Line 12: | ||
{{Specs-Tank-Armour}} | {{Specs-Tank-Armour}} | ||
<!-- ''Describe armour protection. Note the most well protected and key weak areas. Appreciate the layout of modules as well as the number and location of crew members. Is the level of armour protection sufficient, is the placement of modules helpful for survival in combat? If necessary use a visual template to indicate the most secure and weak zones of the armour.'' --> | <!-- ''Describe armour protection. Note the most well protected and key weak areas. Appreciate the layout of modules as well as the number and location of crew members. Is the level of armour protection sufficient, is the placement of modules helpful for survival in combat? If necessary use a visual template to indicate the most secure and weak zones of the armour.'' --> | ||
| − | + | ||
| + | BMD-4 is very poorly armoured. Front has okay-ish armour thickness, but upper front plate of the hull is more vulnerable than the turret or the lower front plate and allow for penetrations with 12.7 mm MG, even from afar. Autocannons are very likely to just shred this tank instantly, but how soon this happends depends on enemy attention span, autocannon rate of fire and where an enemy aims first. | ||
| + | |||
| + | Researching movement modules adds some of them to the front of the tank, which reduces likelihood of taking overpressure damage from ATGM and increases chances of blocking autocannon rounds when they hit the hull. | ||
| + | |||
| + | Roof is vulnerable to even HEAT overpressure and turret hits with chemical shells are very dangerous for this tank. It is easy to strafe BMD-4 from the sky for the same reason. | ||
| + | |||
| + | There are 3 crew members, both of the turret crew members can fire all weapons, so it is not enough to take out the gunner to stop BMD-4 and it will not just explode upon being hit like [[Shturm-S]], so at the very least it can avenge itself after being hit. | ||
'''Armour type:''' <!-- The types of armour present on the vehicle and their general locations --> | '''Armour type:''' <!-- The types of armour present on the vehicle and their general locations --> | ||
| Line 38: | Line 45: | ||
{{tankMobility|abMinHp=697|rbMinHp=398}} | {{tankMobility|abMinHp=697|rbMinHp=398}} | ||
| + | |||
| + | BMD-4 somewhat resembles [[BMP-2]] in terms of mobility, but can drive equally fast in either direction and accelerates much faster. | ||
| + | |||
| + | It also can swim, like all the other Soviet light tanks. | ||
=== Modifications and economy === | === Modifications and economy === | ||
| Line 47: | Line 58: | ||
{{Specs-Tank-Weapon|2}} | {{Specs-Tank-Weapon|2}} | ||
<!-- ''Give the reader information about the characteristics of the main gun. Assess its effectiveness in a battle based on the reloading speed, ballistics and the power of shells. Do not forget about the flexibility of the fire, that is how quickly the cannon can be aimed at the target, open fire on it and aim at another enemy. Add a link to the main article on the gun: <code><nowiki>{{main|Name of the weapon}}</nowiki></code>. Describe in general terms the ammunition available for the main gun. Give advice on how to use them and how to fill the ammunition storage.'' --> | <!-- ''Give the reader information about the characteristics of the main gun. Assess its effectiveness in a battle based on the reloading speed, ballistics and the power of shells. Do not forget about the flexibility of the fire, that is how quickly the cannon can be aimed at the target, open fire on it and aim at another enemy. Add a link to the main article on the gun: <code><nowiki>{{main|Name of the weapon}}</nowiki></code>. Describe in general terms the ammunition available for the main gun. Give advice on how to use them and how to fill the ammunition storage.'' --> | ||
| + | |||
| + | BMD-4 has two main weapons - the 30 mm and 100 mm. Currently, unlike with [[BMP-3]], the autocannon counts as the main weapon and 100 mm is fired with "additional weapon" button. The aim assist and scope is, therefore, displayed for 30 mm. While this is fine if BMD-4 user only carries ATGM, the only way to swap scope or aim assist towards 100 mm to aim HE is to switch main weapon to "secondary weapon". This, unfortunately, breaks the weapon layout, and 30 mm becomes unusable until the control scheme is reset. Either way, the 30 mm counts as a "primary" weapon as of writing of this text. | ||
| + | |||
{{main|2A72 (30 mm)}} | {{main|2A72 (30 mm)}} | ||
| + | |||
| + | The 30 mm fires the same shells as the [[BMP-2]] autocannon does and is identical to the one on [[BMP-3]]. There is only one fire rate option for the cannon this time around - slow. Despite low fire rate, it still fires faster than the one on the [[Warrior]] and if user fires first it can neutralize many light tanks at close to medium range before BMD-4 disintegrates from their retaliatory fire. | ||
{| class="wikitable" style="text-align:center" width="100%" | {| class="wikitable" style="text-align:center" width="100%" | ||
| Line 109: | Line 125: | ||
<!-- ''Some tanks are armed with several guns in one or more turrets. Evaluate the additional weaponry and give advice on its use. Describe the ammunition available for additional weaponry. Give advice on about how to use them and how to fill the ammunition storage. If there is no additional weaponry remove this subsection.'' --> | <!-- ''Some tanks are armed with several guns in one or more turrets. Evaluate the additional weaponry and give advice on its use. Describe the ammunition available for additional weaponry. Give advice on about how to use them and how to fill the ammunition storage. If there is no additional weaponry remove this subsection.'' --> | ||
{{main|2A70 (100 mm)}} | {{main|2A70 (100 mm)}} | ||
| + | |||
| + | The 100 mm of this tank is near identical to the one on [[BMP-3]], however, its autoloader can load ATGMs as well, removing the 28 second reload penalty which makes the BMP-3 unsuitable for skirmish, at a cost of 1 second of reload time overall. | ||
| + | |||
| + | While the gun is stabilized, it is not a very good idea to rush uphill at full speed until gun drives were upgraded, as the gun has poor depression and kicks upwards when the tank drives uphill. Without upgrades it will not put itself back on target in time, and the tank can't sustain even accidental hits unlike BMP-3. | ||
| + | |||
| + | Gun itself can load two ammunition types at once. | ||
| + | |||
| + | The ammunition types are: Slow HE, super slow HE, Normal ATGM and Tandem ATGM. It is only possible to take 4 ATGM of each type (with total of 8). Overall, it is same as with the BMP-3. | ||
| + | |||
| + | HE shells are mostly designed to be fired in a mortar fashion and for comfortable use it is necessary to install laser rangefinder or play in AB mode. Unlike with BMP-3 it is also necessary to swap primary weapon to "secondary weapon" to be able to aim HE precisely. The projectiles fall very slowly, but they are very small and will often squeeze inbetween ERA bricks and hit the enemy tank roof, causing overpressure damage and destroying the tank. Overall, they can be used to weed out other tanks out of cover (including other ATGM carriers) or fired along with the autocannon to blow up light tanks in general melee range (although it is far more awkward than with the BMP-3). | ||
| + | |||
| + | ATGMs are the 9M117 and 9M117M1. | ||
| + | |||
| + | The missiles are launched at near maximum speed from the get go, which makes them ones of the deadliest at the rank (as many missiles at the BR start at around 250 m/s at best), but also make them mostly unsuitable for trickshots of any kind. Even default missile is powerful enough to annihilate ERA-covered tanks if it manages to hit the cracks between ERA platings, tandem modification usually does not even require user to aim any more than in the enemy tanks direction. Both missiles have huge area of the blast wave, like [[IT-1]], but BMD-4 cannot just destroy all of the surrounding cover, as it itself is fragile and needs it to survive, so some restraint should be kept, at least until you are sure that it's possible to get away with such behaviour. | ||
| + | |||
| + | Ammo distribution combinations: | ||
| + | |||
| + | ATGM+ATGM = tank runs out of ammo fast, but can dominate in close range combat until it does. BMD-4 can get away with this loadout unlike BMP-3, because it does not have a reload penalty. | ||
| + | |||
| + | Best ATGM + HE = tank can fight at close range with ATGM and autocannon. If there is a problem, user can swap to 100 mm and bombard enemy campers with HE. HE can also be used to fight light tanks, even if the BMD-4 runs out of ATGM. Slower HE can fire vertically at ranges as close as 400 m, but may fail to penetrate medium tanks and it is easier to see for moving targets, so faster HE might be a better choice. | ||
| + | |||
| + | HE+HE = Not recommended, as 100 MM HE cannot deal with most of medium tanks directly, and they definitely will storm BMD-4 thinking it is disrespecting them and trying to style on them with HE. They will also show no mercy, as most BMD-4 are likely carry at least one ATGM pack, so they will shoot to kill. | ||
{| class="wikitable" style="text-align:center" width="100%" | {| class="wikitable" style="text-align:center" width="100%" | ||
| Line 206: | Line 244: | ||
'''Pros:''' | '''Pros:''' | ||
| − | * Moves quite fast even when stock | + | * Moves quite fast even when stock, can drive fast in either direction unlike BMPs |
* Autoloader with a 5-second reload for ATGMs (fastest ATGM reload, reloads faster than most conventional tanks as well) | * Autoloader with a 5-second reload for ATGMs (fastest ATGM reload, reloads faster than most conventional tanks as well) | ||
* Can fire on the move without restrictions | * Can fire on the move without restrictions | ||
| + | * ATGMs start at near maximum speed, do very high damage on direct hit and have a high blast and overpressure radius | ||
* Can carry up to 8 (4 x 9M117 + 4 x 9M117M1) ATGMs | * Can carry up to 8 (4 x 9M117 + 4 x 9M117M1) ATGMs | ||
* Commander can still fire weapons even if the gunner was shot | * Commander can still fire weapons even if the gunner was shot | ||
| Line 214: | Line 253: | ||
* Also has an autocannon which can be fired along with the main weapon | * Also has an autocannon which can be fired along with the main weapon | ||
* Can act as a scout and also has thermal scope, smoke grenades and ESS, which can be used to scout or fight | * Can act as a scout and also has thermal scope, smoke grenades and ESS, which can be used to scout or fight | ||
| + | * Can swim | ||
'''Cons:''' | '''Cons:''' | ||
Revision as of 13:52, 27 August 2021

Contents
Description
The BMD-4 is a gift rank VI Soviet light tank with a battle rating of 8.7 (AB) and 9.0 (RB/SB). It was introduced during Update "Red Skies" as a reward for the 2021 Summer Landing event. On technical level, can be viewed as a BMP-3, but with less armour and faster ATGM reload.
General info
Survivability and armour
BMD-4 is very poorly armoured. Front has okay-ish armour thickness, but upper front plate of the hull is more vulnerable than the turret or the lower front plate and allow for penetrations with 12.7 mm MG, even from afar. Autocannons are very likely to just shred this tank instantly, but how soon this happends depends on enemy attention span, autocannon rate of fire and where an enemy aims first.
Researching movement modules adds some of them to the front of the tank, which reduces likelihood of taking overpressure damage from ATGM and increases chances of blocking autocannon rounds when they hit the hull.
Roof is vulnerable to even HEAT overpressure and turret hits with chemical shells are very dangerous for this tank. It is easy to strafe BMD-4 from the sky for the same reason.
There are 3 crew members, both of the turret crew members can fire all weapons, so it is not enough to take out the gunner to stop BMD-4 and it will not just explode upon being hit like Shturm-S, so at the very least it can avenge itself after being hit.
Armour type:
| Armour | Front (Slope angle) | Sides | Rear | Roof |
|---|---|---|---|---|
| Hull | 32 mm | 20 mm Top 20 mm Bottom |
10 mm | 10 - 12 mm |
| Turret | 40 mm Turret front 40 mm Gun mantlet |
20 - 40 mm | 20 mm | 10 - 12 mm |
| Cupola | ___ mm | ___ mm | ___ mm | ___ mm |
Notes:
Mobility
| Game Mode | Max Speed (km/h) | Weight (tons) | Engine power (horsepower) | Power-to-weight ratio (hp/ton) | |||
|---|---|---|---|---|---|---|---|
| Forward | Reverse | Stock | Upgraded | Stock | Upgraded | ||
| Arcade | 78 | 78 | 13.6 | 697 | 859 | 51.25 | 63.16 |
| Realistic | 70 | 70 | 398 | 450 | 29.26 | 33.09 | |
BMD-4 somewhat resembles BMP-2 in terms of mobility, but can drive equally fast in either direction and accelerates much faster.
It also can swim, like all the other Soviet light tanks.
Modifications and economy
| Mobility | Protection | Firepower | ||||||||||||||||||||||||
|---|---|---|---|---|---|---|---|---|---|---|---|---|---|---|---|---|---|---|---|---|---|---|---|---|---|---|
|
|
|
Armaments
Main armament
BMD-4 has two main weapons - the 30 mm and 100 mm. Currently, unlike with BMP-3, the autocannon counts as the main weapon and 100 mm is fired with "additional weapon" button. The aim assist and scope is, therefore, displayed for 30 mm. While this is fine if BMD-4 user only carries ATGM, the only way to swap scope or aim assist towards 100 mm to aim HE is to switch main weapon to "secondary weapon". This, unfortunately, breaks the weapon layout, and 30 mm becomes unusable until the control scheme is reset. Either way, the 30 mm counts as a "primary" weapon as of writing of this text.
The 30 mm fires the same shells as the BMP-2 autocannon does and is identical to the one on BMP-3. There is only one fire rate option for the cannon this time around - slow. Despite low fire rate, it still fires faster than the one on the Warrior and if user fires first it can neutralize many light tanks at close to medium range before BMD-4 disintegrates from their retaliatory fire.
| 30 mm 2A72 | Turret rotation speed (°/s) | Reloading rate (seconds) | ||||||||||||
|---|---|---|---|---|---|---|---|---|---|---|---|---|---|---|
| Mode | Capacity (Belt) | Fire rate | Vertical | Horizontal | Stabilizer | Stock | Upgraded | Full | Expert | Aced | Stock | Full | Expert | Aced |
| Arcade | 500 (250) | 330 | -6°/+60° | ±180° | Two-plane | __._ | __._ | __._ | __._ | __._ | __.__ | __.__ | __.__ | __.__ |
| Realistic | __._ | __._ | __._ | __._ | __._ | |||||||||
Ammunition
- 30 mm HE: HEF-I* · AP-T · HEF-I* · HEF-T*
- 30 mm APT: AP-T · AP-T · AP-T · HEF-T*
- 30 mm APDS: APDS · APDS · APDS · APDS · HEF-T*
| Penetration statistics | ||||||
|---|---|---|---|---|---|---|
| Belt | Penetration @ 0° Angle of Attack (mm) | |||||
| 10 m | 100 m | 500 m | 1,000 m | 1,500 m | 2,000 m | |
| 30 mm HE | 65 | 63 | 54 | 44 | 36 | 30 |
| 30 mm APT | 65 | 63 | 54 | 44 | 36 | 30 |
| 30 mm APDS | 82 | 81 | 79 | 75 | 72 | 69 |
Ammo racks
| Full ammo |
1st rack empty |
2nd rack empty |
3rd rack empty |
4th rack empty |
5th rack empty |
6th rack empty |
Visual discrepancy |
|---|---|---|---|---|---|---|---|
| 2 | __ (+__) | __ (+__) | __ (+__) | __ (+__) | __ (+__) | __ (+__) | __ |
Additional armament
The 100 mm of this tank is near identical to the one on BMP-3, however, its autoloader can load ATGMs as well, removing the 28 second reload penalty which makes the BMP-3 unsuitable for skirmish, at a cost of 1 second of reload time overall.
While the gun is stabilized, it is not a very good idea to rush uphill at full speed until gun drives were upgraded, as the gun has poor depression and kicks upwards when the tank drives uphill. Without upgrades it will not put itself back on target in time, and the tank can't sustain even accidental hits unlike BMP-3.
Gun itself can load two ammunition types at once.
The ammunition types are: Slow HE, super slow HE, Normal ATGM and Tandem ATGM. It is only possible to take 4 ATGM of each type (with total of 8). Overall, it is same as with the BMP-3.
HE shells are mostly designed to be fired in a mortar fashion and for comfortable use it is necessary to install laser rangefinder or play in AB mode. Unlike with BMP-3 it is also necessary to swap primary weapon to "secondary weapon" to be able to aim HE precisely. The projectiles fall very slowly, but they are very small and will often squeeze inbetween ERA bricks and hit the enemy tank roof, causing overpressure damage and destroying the tank. Overall, they can be used to weed out other tanks out of cover (including other ATGM carriers) or fired along with the autocannon to blow up light tanks in general melee range (although it is far more awkward than with the BMP-3).
ATGMs are the 9M117 and 9M117M1.
The missiles are launched at near maximum speed from the get go, which makes them ones of the deadliest at the rank (as many missiles at the BR start at around 250 m/s at best), but also make them mostly unsuitable for trickshots of any kind. Even default missile is powerful enough to annihilate ERA-covered tanks if it manages to hit the cracks between ERA platings, tandem modification usually does not even require user to aim any more than in the enemy tanks direction. Both missiles have huge area of the blast wave, like IT-1, but BMD-4 cannot just destroy all of the surrounding cover, as it itself is fragile and needs it to survive, so some restraint should be kept, at least until you are sure that it's possible to get away with such behaviour.
Ammo distribution combinations:
ATGM+ATGM = tank runs out of ammo fast, but can dominate in close range combat until it does. BMD-4 can get away with this loadout unlike BMP-3, because it does not have a reload penalty.
Best ATGM + HE = tank can fight at close range with ATGM and autocannon. If there is a problem, user can swap to 100 mm and bombard enemy campers with HE. HE can also be used to fight light tanks, even if the BMD-4 runs out of ATGM. Slower HE can fire vertically at ranges as close as 400 m, but may fail to penetrate medium tanks and it is easier to see for moving targets, so faster HE might be a better choice.
HE+HE = Not recommended, as 100 MM HE cannot deal with most of medium tanks directly, and they definitely will storm BMD-4 thinking it is disrespecting them and trying to style on them with HE. They will also show no mercy, as most BMD-4 are likely carry at least one ATGM pack, so they will shoot to kill.
| 100 mm 2A70 | Reloading rate (seconds) | ||||||
|---|---|---|---|---|---|---|---|
| Capacity | Vertical | Horizontal | Stabilizer | Stock | Full | Expert | Aced |
| 38 | -6°/+60° | ±180° | Two-plane | 5.00 | 5.00 | 5.00 | 5.00 |
Ammunition
| Penetration statistics | |||||||
|---|---|---|---|---|---|---|---|
| Ammunition | Type of warhead |
Penetration @ 0° Angle of Attack (mm) | |||||
| 10 m | 100 m | 500 m | 1,000 m | 1,500 m | 2,000 m | ||
| 3OF32 | HE | 31 | 31 | 31 | 31 | 31 | 31 |
| 3OF70 | HE | 36 | 36 | 36 | 36 | 36 | 36 |
| 9M117 | ATGM | 600 | 600 | 600 | 600 | 600 | 600 |
| 9M117M1 | ATGM (tandem) | 750 | 750 | 750 | 750 | 750 | 750 |
| Shell details | |||||||||
|---|---|---|---|---|---|---|---|---|---|
| Ammunition | Type of warhead |
Velocity (m/s) |
Projectile Mass (kg) |
Fuse delay (m) |
Fuse sensitivity (mm) |
Explosive Mass (TNT equivalent) (g) |
Ricochet | ||
| 0% | 50% | 100% | |||||||
| 3OF32 | HE | 250 | 15.6 | 0 | 0.1 | 2,600 | 79° | 80° | 81° |
| 3OF70 | HE | 355 | 13.41 | 0 | 0.1 | 3,540 | 79° | 80° | 81° |
| 9M117 | ATGM | 370 | 18.8 | 0.05 | 0.1 | 4,620 | 80° | 82° | 90° |
| 9M117M1 | ATGM (tandem) | 370 | 18.8 | 0.4 | 0.1 | 4,620 | 80° | 82° | 90° |
Ammo racks
| Full ammo |
1st rack empty |
2nd rack empty |
3rd rack empty |
4th rack empty |
5th rack empty |
6th rack empty |
Visual discrepancy |
|---|---|---|---|---|---|---|---|
| 38 | __ (+__) | __ (+__) | __ (+__) | __ (+__) | __ (+__) | __ (+__) | __ |
Machine guns
| 7.62 mm PKT | ||||
|---|---|---|---|---|
| Mount | Capacity (Belt) | Fire rate | Vertical | Horizontal |
| Coaxial | 2,000 (250) | 700 | N/A | N/A |
Usage in battles
Describe the tactics of playing in the vehicle, the features of using vehicles in the team and advice on tactics. Refrain from creating a "guide" - do not impose a single point of view but instead give the reader food for thought. Describe the most dangerous enemies and give recommendations on fighting them. If necessary, note the specifics of the game in different modes (AB, RB, SB).
Pros and cons
Pros:
- Moves quite fast even when stock, can drive fast in either direction unlike BMPs
- Autoloader with a 5-second reload for ATGMs (fastest ATGM reload, reloads faster than most conventional tanks as well)
- Can fire on the move without restrictions
- ATGMs start at near maximum speed, do very high damage on direct hit and have a high blast and overpressure radius
- Can carry up to 8 (4 x 9M117 + 4 x 9M117M1) ATGMs
- Commander can still fire weapons even if the gunner was shot
- Also can fire HE at enemy tank roofs by using laser rangefinder or AB aim assist
- Also has an autocannon which can be fired along with the main weapon
- Can act as a scout and also has thermal scope, smoke grenades and ESS, which can be used to scout or fight
- Can swim
Cons:
- Low armour protection, hull can be penetrated even by a 12.7 MG until movement modules are researched, which will protect BMD-4 from some frontal shots or even block overpressure
- Only 3 crew members
- Extremely awkward sight controls for HE - to even access it, user must swap main weapon to "secondary weapon" which disables the autocannon and MG completely
History
Describe the history of the creation and combat usage of the vehicle in more detail than in the introduction. If the historical reference turns out to be too long, take it to a separate article, taking a link to the article about the vehicle and adding a block "/History" (example: https://wiki.warthunder.com/(Vehicle-name)/History) and add a link to it here using the main template. Be sure to reference text and sources by using <ref></ref>, as well as adding them at the end of the article with <references />. This section may also include the vehicle's dev blog entry (if applicable) and the in-game encyclopedia description (under === In-game description ===, also if applicable).
Media
Excellent additions to the article would be video guides, screenshots from the game, and photos.
See also
Links to the articles on the War Thunder Wiki that you think will be useful for the reader, for example:
- reference to the series of the vehicles;
- links to approximate analogues of other nations and research trees.
External links
| USSR light tanks | |
|---|---|
| T-26 | T-26 · T-26 (1st Gv.T.Br.) · T-26-4 · T-26E |
| BT | BT-5 · RBT-5 · BT-7 · BT-7 TD · BT-7M · BT-7A (F-32) |
| T-50 | T-126 · T-50 |
| T-70 | T-70 · T-80 |
| PT-76 | PT-76B · PT-76-57 · Object 906 |
| BMP | BMP-1 · BMP-2 · BMP-2M · BMP-3 |
| BMD | BMD-4 |
| 2S25 | 2S25 · 2S25M |
| Wheeled | BA-11 · BTR-80A |
| Other | T-60 · Object 685 · 2S38 |
| China | ▂Type 62 |
- Ground vehicles
- USSR ground vehicles
- Sixth rank ground vehicles
- Light tanks
- Gift ground vehicles
- Ground vehicles with smoke grenades
- Ground vehicles with engine smoke generating system
- Amphibious ground vehicles
- Ground vehicles with hydropneumatic suspension
- Ground vehicles with night vision device
- Ground vehicles with thermal sight
- Multi-weapon ground vehicles
- Ground vehicles with autoloader
- Ground vehicles with gun stabilizer
- ATGM vehicles
