Difference between revisions of "B7A2"
m |
Colok76286 (talk | contribs) (→Media: Added skins) |
||
| (15 intermediate revisions by 11 users not shown) | |||
| Line 1: | Line 1: | ||
| − | {{Specs-Card|code=b7a2}} | + | {{Specs-Card |
| + | |code=b7a2 | ||
| + | |images={{Specs-Card-Image|GarageImage_{{PAGENAME}}.jpg}} | ||
| + | }} | ||
== Description == | == Description == | ||
| − | <!--''In the description, the first part | + | <!-- ''In the description, the first part should be about the history of and the creation and combat usage of the aircraft, as well as its key features. In the second part, tell the reader about the aircraft in the game. Insert a screenshot of the vehicle, so that if the novice player does not remember the vehicle by name, he will immediately understand what kind of vehicle the article is talking about.'' --> |
| − | + | The '''{{Specs|name}}''' is a rank {{Specs|rank}} Japanese bomber {{Battle-rating}}. It was introduced in [[Update 1.37]]. | |
| − | {{ | ||
| − | |||
| − | The | + | The Allied reporting name for this aircraft was "Grace". |
| − | The B7A2 wields two | + | The B7A2 was designed as a carrier-based dive/torpedo bomber. For an aircraft of its size, it has exceptionally good manoeuvrability, on par with the A6M Zero. Therefore it can be used in the fighter role as well, since its two 20 mm cannons perform very well against all other aircraft. When using the B7A2 in either dive or torpedo bombing, it is important to not rely on the B7A2's defensive gunner if an enemy is approaching. The B7A2 can quickly outmanoeuvre most American and Russian aircraft so use this to your advantage if you're being intercepted. You will then be able to quickly tail your enemy, and be able to engage them with your forward firing cannons. As the aircraft is seen, it is a very big target, with minimal armour. This is why it is important to not rely on your defensive gunner. In addition, the B7A2 does not have a very good climb rate, and works best at lower altitudes. Getting your guns on target can also be a pain, especially when traveling at higher speeds since the B7A2's roll rate is very poor. Most enemies are able to easily out roll the B7A2, giving them a distinct advantage in a dogfight. Nonetheless, many pilots do not expect death to come from a dive bomber. |
| + | |||
| + | The B7A2 wields two 20 mm Type 99 mk 2 cannons placed in the wings. Since the B7A2 can be used as a multi-purpose aircraft, the B7A2's weapons will also serve those roles. Equipping the ground targets belt for the 20 mm cannons can be helpful if attacking targets like light pillboxes or light tanks. The Ryusei is also capable of equipping the "Stealth" belt which is composed entirely of HEF and API shells. This belt is the best choice for air to air combat. The B7A2 pilot should remember to set his or her gun convergence lower than 400 meters to take down enemy fighters effectively. Since the cannons themselves are a fair ways apart from each other on the actual aircraft, having a low gun convergence ensures each round hits a single point on a target. | ||
== General info == | == General info == | ||
| − | === Flight | + | === Flight performance === |
| − | <!--''Describe how the aircraft behaves in the air. | + | {{Specs-Avia-Flight}} |
| − | + | <!-- ''Describe how the aircraft behaves in the air. Speed, manoeuvrability, acceleration and allowable loads - these are the most important characteristics of the vehicle.'' --> | |
| − | {| class="wikitable" style="text-align:center" | + | |
| − | + | {| class="wikitable" style="text-align:center" width="70%" | |
| − | + | ! rowspan="2" | Characteristics | |
| − | |||
| − | ! | ||
| − | |||
! colspan="2" | Max Speed<br>(km/h at 6,550 m) | ! colspan="2" | Max Speed<br>(km/h at 6,550 m) | ||
| − | ! rowspan="2" | Max altitude<br>( | + | ! rowspan="2" | Max altitude<br>(metres) |
! colspan="2" | Turn time<br>(seconds) | ! colspan="2" | Turn time<br>(seconds) | ||
| − | ! colspan="2" | Rate of climb<br>( | + | ! colspan="2" | Rate of climb<br>(metres/second) |
| − | ! rowspan="2" |Take-off run<br>( | + | ! rowspan="2" | Take-off run<br>(metres) |
| − | |||
| − | |||
| − | |||
| − | |||
| − | |||
| − | |||
| − | |||
| − | |||
| − | |||
| − | |||
| − | |||
|- | |- | ||
| − | ! | + | ! AB !! RB !! AB !! RB !! AB !! RB |
| − | ! | ||
| − | ! | ||
| − | ! | ||
| − | ! | ||
|- | |- | ||
| − | ! | + | ! Stock |
| − | + | | 542 || 525 || rowspan="2" | {{Specs|ceiling}} || 28.8 || 29.6 || 7.3 || 7.3 || rowspan="2" | 270 | |
| − | |||
| − | |||
| − | |||
| − | |||
|- | |- | ||
| − | | 594 || 565 | + | ! Upgraded |
| + | | 594 || 565 || 26.7 || 28.0 || 17.7 || 10.4 | ||
|- | |- | ||
|} | |} | ||
| − | ====Details==== | + | ==== Details ==== |
| − | {| class="wikitable" style="text-align:center" | + | {| class="wikitable" style="text-align:center" width="50%" |
|- | |- | ||
! colspan="5" | Features | ! colspan="5" | Features | ||
|- | |- | ||
| − | ! Combat | + | ! Combat flaps !! Take-off flaps !! Landing flaps !! Air brakes !! Arrestor gear |
| − | ! Take-off | ||
| − | ! Landing | ||
| − | ! Air brakes | ||
| − | ! Arrestor gear | ||
|- | |- | ||
| − | | ✓ || ✓ || ✓ || ✓ || ✓ | + | | ✓ || ✓ || ✓ || ✓ || ✓ <!-- ✓ --> |
|- | |- | ||
|} | |} | ||
| − | {| class="wikitable" style="text-align:center" | + | {| class="wikitable" style="text-align:center" width="50%" |
|- | |- | ||
| − | ! colspan=" | + | ! colspan="7" | Limits |
|- | |- | ||
| − | ! rowspan="2" | | + | ! rowspan="2" | Wings (km/h) |
| − | ! rowspan="2" | Gear | + | ! rowspan="2" | Gear (km/h) |
| − | ! | + | ! colspan="3" | Flaps (km/h) |
! colspan="2" | Max Static G | ! colspan="2" | Max Static G | ||
|- | |- | ||
| − | ! + | + | ! Combat !! Take-off !! Landing !! + !! - |
| − | ! - | ||
|- | |- | ||
| − | | | + | | {{Specs|destruction|body}} || {{Specs|destruction|gear}} || 457 || 428 || 280 || ~15 || ~15 |
|- | |- | ||
|} | |} | ||
| Line 88: | Line 65: | ||
{| class="wikitable" style="text-align:center" | {| class="wikitable" style="text-align:center" | ||
|- | |- | ||
| − | ! colspan="4" | Optimal velocities | + | ! colspan="4" | Optimal velocities (km/h) |
|- | |- | ||
| − | ! Ailerons | + | ! Ailerons !! Rudder !! Elevators !! Radiator |
| − | ! Rudder | ||
| − | ! Elevators | ||
| − | ! Radiator | ||
|- | |- | ||
| − | | < | + | | < 380 || < 380 || < 450 || > 312 |
|- | |- | ||
|} | |} | ||
| − | + | === Survivability and armour === | |
| − | + | {{Specs-Avia-Armour}} | |
| − | + | <!-- ''Examine the survivability of the aircraft. Note how vulnerable the structure is and how secure the pilot is, whether the fuel tanks are armoured, etc. Describe the armour, if there is any, and also mention the vulnerability of other critical aircraft systems.'' --> | |
| − | |||
| − | |||
| − | |||
| − | |||
| − | |||
| − | |||
| − | |||
| − | |||
| − | |||
| − | ! | ||
| − | |||
| − | |||
| − | |||
| − | |||
| − | |||
| − | |||
| − | |||
| − | |||
| − | + | * 13 mm steel plate in the nose | |
| − | + | * Fuel tanks are not self-sealing (3 in each wing) | |
| − | |||
| − | |||
| − | |||
| − | |||
| − | |||
| − | |||
| − | |||
| − | |||
| − | |||
| − | |||
| − | |||
| − | |||
| − | |||
| − | |||
| − | |||
| − | |||
| − | |||
| − | |||
| − | |||
| − | |||
| − | |||
| − | |||
| − | |||
| − | |||
| − | |||
| − | |||
| − | |||
| − | |||
| − | |||
| − | |||
| − | |||
| − | |||
| − | |||
| − | |||
| − | |||
| − | |||
| − | |||
| − | + | === Modifications and economy === | |
| − | + | {{Specs-Economy}} | |
| − | |||
| − | |||
| − | |||
| − | |||
| − | |||
| − | |||
| − | |||
| − | |||
| − | + | Since the B7A2 is a multi-role aircraft any module research path is viable. Unlocking performance modules will boost survivability and damage potential in dogfights, whereas unlocking armament modules will help with the ground attack. Some of the best modules to unlock are the "Engine injection" and "Offensive 20 mm belts". | |
| − | |||
| − | |||
== Armaments == | == Armaments == | ||
| + | {{Specs-Avia-Armaments}} | ||
=== Offensive armament === | === Offensive armament === | ||
| − | <!--''Describe the offensive armament of the aircraft, if any. Describe how effective the cannons and machine guns are in a battle, and also what belts or drums are better to use. If there is no offensive weaponry, delete this subsection.''--> | + | {{Specs-Avia-Offensive}} |
| − | {{main|Type 99 Model 2 | + | <!-- ''Describe the offensive armament of the aircraft, if any. Describe how effective the cannons and machine guns are in a battle, and also what belts or drums are better to use. If there is no offensive weaponry, delete this subsection.'' --> |
| + | {{main|Type 99 Model 2 (20 mm)}} | ||
The '''''{{PAGENAME}}''''' is armed with: | The '''''{{PAGENAME}}''''' is armed with: | ||
| − | * 2 x 20 mm Type 99 | + | * 2 x 20 mm Type 99 Model 2 cannons, wing-mounted (200 rpg = 400 total) |
=== Suspended armament === | === Suspended armament === | ||
| − | <!--''Describe the aircraft's suspended armament: additional cannons under the wings, bombs, rockets and torpedoes. This section is especially important for bombers and attackers. If there is no suspended weaponry remove this subsection.''--> | + | {{Specs-Avia-Suspended}} |
| − | {{main| | + | <!-- ''Describe the aircraft's suspended armament: additional cannons under the wings, bombs, rockets and torpedoes. This section is especially important for bombers and attackers. If there is no suspended weaponry remove this subsection.'' --> |
| + | {{main|Navy Type 97 Number 6 (60 kg)|Navy Type 98 Number 25 (250 kg)|Navy Type Number 80 Model 1 (800 kg)|Type 91 Model 3 (850 kg)}} | ||
| − | The | + | The '''''{{PAGENAME}}''''' can be outfitted with the following ordnance: |
| − | * 10 | + | * 10 x 60 kg Navy Type 97 Number 6 bombs (600 kg total) |
| − | * 2 | + | * 2 x 250 kg Navy Type 98 Number 25 bombs + 4 x 60 kg Navy Type 97 Number 6 bombs (740 kg total) |
| − | * 1 | + | * 1 x 800 kg Navy Type Number 80 Model 1 bomb (800 kg total) |
| − | * 1 | + | * 1 x 850 kg Type 91 Model 3 torpedo |
=== Defensive armament === | === Defensive armament === | ||
| − | <!--''Defensive armament with turret machine guns or cannons, crewed by gunners. Examine the number of gunners and what belts or drums are better to use. If defensive weaponry is not available remove this subsection.''--> | + | {{Specs-Avia-Defensive}} |
| − | {{main|Type 2 | + | <!-- ''Defensive armament with turret machine guns or cannons, crewed by gunners. Examine the number of gunners and what belts or drums are better to use. If defensive weaponry is not available, remove this subsection.'' --> |
| + | {{main|Type 2 (13 mm)}} | ||
| − | The | + | The '''''{{PAGENAME}}''''' is defended by: |
* 1 x 13 mm Type 2 machine gun, dorsal turret (1,000 rpg) | * 1 x 13 mm Type 2 machine gun, dorsal turret (1,000 rpg) | ||
| − | == Usage in | + | == Usage in battles == |
| − | <!--''Describe the tactics of playing in | + | <!-- ''Describe the tactics of playing in the aircraft, the features of using aircraft in a team and advice on tactics. Refrain from creating a "guide" - do not impose a single point of view, but instead, give the reader food for thought. Examine the most dangerous enemies and give recommendations on fighting them. If necessary, note the specifics of the game in different modes (AB, RB, SB).'' --> |
| − | The Ryusei is best utilized as a multi-role aircraft, similar to the role the [[Ju 87 D-5]] plays. Once its payload is dropped, the B7A2 becomes a low altitude, low-speed dogfighter similar to an A6M. In realistic battles, the B7A2 is often paired with aircraft such as the [[A6M3]], [[A6M3 mod. 22]], and [[A6M3 mod. 22Ko]]. If unable to shake an enemy off your tail, these "Zeroes" can be relied on as they have impressive low altitude capabilities. | + | The Ryusei is best utilized as a multi-role aircraft, similar to the role the [[Ju 87 D-5]] plays. Once its payload is dropped, the B7A2 becomes a low altitude, low-speed dogfighter similar to an A6M. In realistic battles, the B7A2 is often paired with aircraft such as the [[A6M3]], [[A6M3 mod. 22]], and [[A6M3 mod. 22Ko]]. If unable to shake an enemy off your tail, these "Zeroes" can be relied on as they have impressive low altitude capabilities. |
| − | Payload choice is dependent on target choice. If the target is a light pillbox, for instance, one does not need an 800 kg bomb. Instead, equip either of the other bomb loadout options. The same goes for most ground units, apart from arcade mini bases. The Ryusei is similar to aircraft such as the [[Ki-49-IIa]] in that it can "hover" above an enemy base or airfield, rapidly dropping its payload and diving up to altitude again. Since the B7A2 is a dive bomber, it does not have to be level to drop its payload accurately. The Ryusei's ability to "hover" above enemy mini bases and airfields can be a great help to any arcade battles team. Upgrading the crew reload speed makes this aircraft a potential game-winner, especially when in a squad. | + | Payload choice is dependent on target choice. If the target is a light pillbox, for instance, one does not need an 800 kg bomb. Instead, equip either of the other bomb loadout options. The same goes for most ground units, apart from arcade mini bases. The Ryusei is similar to aircraft such as the [[Ki-49-IIa]] in that it can "hover" above an enemy base or airfield, rapidly dropping its payload and diving up to altitude again. Since the B7A2 is a dive bomber, it does not have to be level to drop its payload accurately. The Ryusei's ability to "hover" above enemy mini bases and airfields can be a great help to any arcade battles team. Upgrading the crew reload speed makes this aircraft a potential game-winner, especially when in a squad. |
Similar to the [[Ju 87 D-5]], the Ryusei's airspeed is not on par with the aircraft it faces, no matter the game mode. This handicaps the B7A2 to playing solely a support role, only being able to engage the aircraft it can catch. Nonetheless, having a B7A2 on any team, no matter the game mode, never hurts. | Similar to the [[Ju 87 D-5]], the Ryusei's airspeed is not on par with the aircraft it faces, no matter the game mode. This handicaps the B7A2 to playing solely a support role, only being able to engage the aircraft it can catch. Nonetheless, having a B7A2 on any team, no matter the game mode, never hurts. | ||
| − | + | === Manual Engine Control === | |
| − | |||
| − | |||
| − | ===Manual Engine Control=== | ||
{| class="wikitable" style="text-align:center" | {| class="wikitable" style="text-align:center" | ||
|- | |- | ||
! colspan="7" | MEC elements | ! colspan="7" | MEC elements | ||
|- | |- | ||
| − | ! rowspan="2" |Mixer | + | ! rowspan="2" | Mixer |
| − | ! rowspan="2" |Pitch | + | ! rowspan="2" | Pitch |
! colspan="3" | Radiator | ! colspan="3" | Radiator | ||
| − | ! rowspan="2" |Supercharger | + | ! rowspan="2" | Supercharger |
| − | ! rowspan="2" |Turbocharger | + | ! rowspan="2" | Turbocharger |
|- | |- | ||
| − | ! Oil | + | ! Oil !! Water !! Type |
| − | ! Water | ||
| − | ! Type | ||
|- | |- | ||
| − | | Controllable | | + | | Controllable || Controllable<br>Not auto controlled || Controllable<br>Auto control available || Controllable<br>Auto control available || Separate || Controllable<br>2 gears || Not controllable |
|- | |- | ||
|} | |} | ||
=== Pros and cons === | === Pros and cons === | ||
| − | <!--'' | + | <!-- ''Summarise and briefly evaluate the vehicle in terms of its characteristics and combat effectiveness. Mark its pros and cons in the bulleted list. Try not to use more than 6 points for each of the characteristics. Avoid using categorical definitions such as "bad", "good" and the like - use substitutions with softer forms such as "inadequate" and "effective".'' --> |
| + | |||
'''Pros:''' | '''Pros:''' | ||
| − | * | + | |
| − | * | + | * '''B'''7A for Carrier-based torpedo bomber |
| − | * | + | ** Bomber spawn |
| − | * | + | ** 1x [[Type 91 Model 3 (850 kg)|Type 91 Aerial Torpedo]] |
| − | * | + | *** Torpedo has the highest drop speed in the game at {{Annotation|580 km/h|350 mph}} and is one of the most feared torpedoes in Naval Battles |
| + | ** 10x [[Navy Type 97 Number 6 (60 kg)|Type 97 No.6 Land Bomb (60kg)]] | ||
| + | *** Gets a bomb bay of 6 x 60 kg bombs which can be used to hit multiple targets (+4 on the wings that drop in pairs) | ||
| + | ** 1x [[Navy Type Number 80 Model 1 (800 kg)|No.80 Land Bomb (800kg)]] | ||
| + | *** Heaviest bomb Japanese Navy can offer | ||
| + | * Common Navy plane construction: | ||
| + | ** Excellent manoeuvrability | ||
| + | * '''{{PAGENAME}}''' specific | ||
| + | ** Airbrakes | ||
| + | ** 2x wing mounted [[Type 99 Model 2 (20 mm)]] | ||
| + | ** 1x tail defensive [[Type 2 (13 mm)]] | ||
'''Cons:''' | '''Cons:''' | ||
| − | * Large | + | |
| − | * | + | * '''B'''7A for Carrier-based torpedo bomber |
| − | * | + | ** Relatively Large target |
| − | * | + | * Common Navy plane construction: |
| − | + | ** Fragile, little armour, and no self-sealing fuel tanks | |
| − | + | ** Exposed tail gunner | |
| − | * | ||
| − | * | ||
== History == | == History == | ||
| − | <!--''Describe the history of the creation and combat usage of the aircraft in more detail than in the introduction. If the historical reference turns out to be too | + | <!-- ''Describe the history of the creation and combat usage of the aircraft in more detail than in the introduction. If the historical reference turns out to be too long, take it to a separate article, taking a link to the article about the vehicle and adding a block "/History" (example: <nowiki>https://wiki.warthunder.com/(Vehicle-name)/History</nowiki>) and add a link to it here using the <code>main</code> template. Be sure to reference text and sources by using <code><nowiki><ref></ref></nowiki></code>, as well as adding them at the end of the article with <code><nowiki><references /></nowiki></code>. This section may also include the vehicle's dev blog entry (if applicable) and the in-game encyclopedia description (under <code><nowiki>=== In-game description ===</nowiki></code>, also if applicable).'' --> |
| − | Two-seat carrier-based Aichi B7A2 Ryusei "Shooting Star" or "Meteor" Torpedo/Dive Bomber (Allied reporting name: Grace). The B7A was an answer to a specification for a carrier-based torpedo/dive bomber in 1941. It was intended to replace B6N and D4Y, having an internal and external payload, increased speed and long-range. Some of the design features of the B7A include; inverted gull-wings, conventional fuselage, and tail unit and a four-bladed propeller. During its development, it went through a series of shortcomings, such as the delivery of engines, and an accidental earthquake which destroyed the main factory housing most of the B7A's. Thus not seeing active service until 1944. By this time, there were no aircraft carriers capable of operating the B7A. The last aircraft carrier being the Shinano was sunk 10 days after its commission. The B7A2 was then forced to operate in home-defence operations, seeing limited service. | + | Two-seat carrier-based Aichi B7A2 Ryusei "Shooting Star" or "Meteor" Torpedo/Dive Bomber (Allied reporting name: Grace). The B7A was an answer to a specification for a carrier-based torpedo/dive bomber in 1941. It was intended to replace B6N and D4Y, having an internal and external payload, increased speed and long-range. Some of the design features of the B7A include; inverted gull-wings, conventional fuselage, and tail unit and a four-bladed propeller. During its development, it went through a series of shortcomings, such as the delivery of engines, and an accidental earthquake which destroyed the main factory housing most of the B7A's. Thus not seeing active service until 1944. By this time, there were no aircraft carriers capable of operating the B7A. The last aircraft carrier being the Shinano was sunk 10 days after its commission. The B7A2 was then forced to operate in home-defence operations, seeing limited service. |
| − | Known as the AM-23 within Aichi, the first prototype was completed and flown in May 1942 which was designated the B7A1 by the Navy. The B7A used the Nakajima NK9C 12 Model radial engine, producing 1,825 hp. This gave the aircraft exceptionally good speed, even when fully loaded with ammunition and bombs. During flight testing, the Navy was very impressed with its performance. Despite it being a very large light bomber, the B7A1 displayed handling and performance comparable to the Mitsubishi's A6M Zero and a further 8 prototypes were ordered. However, with more testing underway, it was noted that the engine (which was experimental as well) suffered teething problems, and the airframe of the aircraft needed modifying structurally. It was not until two years later that the B7A would begin production in 1944. | + | Known as the AM-23 within Aichi, the first prototype was completed and flown in May 1942 which was designated the B7A1 by the Navy. The B7A used the Nakajima NK9C 12 Model radial engine, producing 1,825 hp. This gave the aircraft exceptionally good speed, even when fully loaded with ammunition and bombs. During flight testing, the Navy was very impressed with its performance. Despite it being a very large light bomber, the B7A1 displayed handling and performance comparable to the Mitsubishi's A6M Zero and a further 8 prototypes were ordered. However, with more testing underway, it was noted that the engine (which was experimental as well) suffered teething problems, and the airframe of the aircraft needed modifying structurally. It was not until two years later that the B7A would begin production in 1944. |
| − | Up until May 1945, 80 B7A2's had been completed. But soon after, a severe earthquake occurred, destroying the factory housing the aircraft that were being assembled. A further 25 more examples were completed by another factory. Throughout the B7A2's service, different variants were planned. Firstly, was an experimental production B7A2, that was fitted with the Nakajima Homare 23 radial engine, producing 2,000 hp. Only 1 was built. Secondly, came the B7A3 Ryusei-Kai. This was to use the Mitsubishi Ha-43 radial engine producing 2,200 hp but it was not built. Lastly, came the B8A1 Mokusei "Planet". This was to have no carrier equipment and no gull wings. In addition, 2 x Type 99 20mm cannons were to be replaced with 2 x Type 5 30mm cannons. The B8A remained on the drawing board before the war ended, with no mock-up even though it was accepted to be built. | + | Up until May 1945, 80 B7A2's had been completed. But soon after, a severe earthquake occurred, destroying the factory housing the aircraft that were being assembled. A further 25 more examples were completed by another factory. Throughout the B7A2's service, different variants were planned. Firstly, was an experimental production B7A2, that was fitted with the Nakajima Homare 23 radial engine, producing 2,000 hp. Only 1 was built. Secondly, came the B7A3 Ryusei-Kai. This was to use the Mitsubishi Ha-43 radial engine producing 2,200 hp but it was not built. Lastly, came the B8A1 Mokusei "Planet". This was to have no carrier equipment and no gull wings. In addition, 2 x Type 99 20mm cannons were to be replaced with 2 x Type 5 30mm cannons. The B8A remained on the drawing board before the war ended, with no mock-up even though it was accepted to be built. |
| − | In all, 9 B7A1's, and 105 B7A2's were produced. 114 in total. | + | In all, 9 B7A1's, and 105 B7A2's were produced. 114 in total. |
Katori Naval Air Base, Chiba-Prefecture, Japan, May 1945 | Katori Naval Air Base, Chiba-Prefecture, Japan, May 1945 | ||
| Line 267: | Line 184: | ||
Kanogawa-Prefecture, Japan, April 1945 | Kanogawa-Prefecture, Japan, April 1945 | ||
| − | <br> - ''Yokosuka Naval Air Group | + | <br> - ''Yokosuka Naval Air Group'' |
== Media == | == Media == | ||
| − | + | <!-- ''Excellent additions to the article would be video guides, screenshots from the game, and photos.'' --> | |
| − | == | + | ;Skins |
| − | + | * [https://live.warthunder.com/feed/camouflages/?vehicleCountry=japan&vehicleType=aircraft&vehicleClass=bomber&vehicle=b7a2 Skins and camouflages for the {{PAGENAME}} from live.warthunder.com.] | |
| − | == | + | == See also == |
| − | + | ''Links to the articles on the War Thunder Wiki that you think will be useful for the reader, for example:'' | |
| − | |||
| − | |||
| − | |||
| − | |||
| − | |||
| − | == | + | * ''reference to the series of the aircraft;'' |
| − | ''Paste links to sources and external resources, such as:'' | + | * ''links to approximate analogues of other nations and research trees.'' |
| + | |||
| + | == External links == | ||
| + | <!-- ''Paste links to sources and external resources, such as:'' | ||
* ''topic on the official game forum;'' | * ''topic on the official game forum;'' | ||
| − | * ''page on aircraft | + | * ''encyclopedia page on the aircraft;'' |
| − | * ''other literature.'' | + | * ''other literature.'' --> |
| + | |||
| + | * [https://forum.warthunder.com/index.php?/topic/87947-aichi-b7a2/ Official data sheet - more details about the performance] | ||
| + | * [http://www.aviastar.org/air/japan/aichi_b7a.php [aviastar.org<nowiki>]</nowiki> Aichi B7A Ryusei / Grace] | ||
| + | * [http://www.militaryfactory.com/aircraft/detail.asp?aircraft_id=442 [MilitaryFactory.com<nowiki>]</nowiki> Aichi B7A Ryusei (Grace)] | ||
| + | * [https://airandspace.si.edu/collection-objects/aichi-b7a2-ryusei-shooting-star-grace/nasm_A19630360000 [Smithsonian NASM<nowiki>]</nowiki> Aichi B7A2 Ryusei (Shooting Star) GRACE] | ||
| + | * [http://www.hyperscale.com/features/2000/graceir_1.htm [HyperScale.com<nowiki>]</nowiki> Aichi B7A2 Ryusei Kai "Grace"] | ||
| + | * [http://www.hyperscale.com/2013/reviews/kits/sword72069reviewmd_1.htm [HyperScale.com<nowiki>]</nowiki> Aichi B7A2 Ryusei Kai (Grace)] | ||
{{AirManufacturer Aichi}} | {{AirManufacturer Aichi}} | ||
{{Japan bombers}} | {{Japan bombers}} | ||
Revision as of 20:57, 28 March 2021

Contents
Description
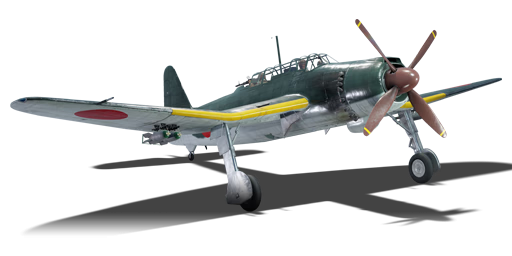
The B7A2 Ryusei is a rank III Japanese bomber with a battle rating of 3.7 (AB/RB) and 4.0 (SB). It was introduced in Update 1.37.
The Allied reporting name for this aircraft was "Grace".
The B7A2 was designed as a carrier-based dive/torpedo bomber. For an aircraft of its size, it has exceptionally good manoeuvrability, on par with the A6M Zero. Therefore it can be used in the fighter role as well, since its two 20 mm cannons perform very well against all other aircraft. When using the B7A2 in either dive or torpedo bombing, it is important to not rely on the B7A2's defensive gunner if an enemy is approaching. The B7A2 can quickly outmanoeuvre most American and Russian aircraft so use this to your advantage if you're being intercepted. You will then be able to quickly tail your enemy, and be able to engage them with your forward firing cannons. As the aircraft is seen, it is a very big target, with minimal armour. This is why it is important to not rely on your defensive gunner. In addition, the B7A2 does not have a very good climb rate, and works best at lower altitudes. Getting your guns on target can also be a pain, especially when traveling at higher speeds since the B7A2's roll rate is very poor. Most enemies are able to easily out roll the B7A2, giving them a distinct advantage in a dogfight. Nonetheless, many pilots do not expect death to come from a dive bomber.
The B7A2 wields two 20 mm Type 99 mk 2 cannons placed in the wings. Since the B7A2 can be used as a multi-purpose aircraft, the B7A2's weapons will also serve those roles. Equipping the ground targets belt for the 20 mm cannons can be helpful if attacking targets like light pillboxes or light tanks. The Ryusei is also capable of equipping the "Stealth" belt which is composed entirely of HEF and API shells. This belt is the best choice for air to air combat. The B7A2 pilot should remember to set his or her gun convergence lower than 400 meters to take down enemy fighters effectively. Since the cannons themselves are a fair ways apart from each other on the actual aircraft, having a low gun convergence ensures each round hits a single point on a target.
General info
Flight performance
| Characteristics | Max Speed (km/h at 6,550 m) |
Max altitude (metres) |
Turn time (seconds) |
Rate of climb (metres/second) |
Take-off run (metres) | |||
|---|---|---|---|---|---|---|---|---|
| AB | RB | AB | RB | AB | RB | |||
| Stock | 542 | 525 | 8260 | 28.8 | 29.6 | 7.3 | 7.3 | 270 |
| Upgraded | 594 | 565 | 26.7 | 28.0 | 17.7 | 10.4 | ||
Details
| Features | ||||
|---|---|---|---|---|
| Combat flaps | Take-off flaps | Landing flaps | Air brakes | Arrestor gear |
| ✓ | ✓ | ✓ | ✓ | ✓ |
| Limits | ||||||
|---|---|---|---|---|---|---|
| Wings (km/h) | Gear (km/h) | Flaps (km/h) | Max Static G | |||
| Combat | Take-off | Landing | + | - | ||
| 0 | 350 | 457 | 428 | 280 | ~15 | ~15 |
| Optimal velocities (km/h) | |||
|---|---|---|---|
| Ailerons | Rudder | Elevators | Radiator |
| < 380 | < 380 | < 450 | > 312 |
Survivability and armour
- 13 mm steel plate in the nose
- Fuel tanks are not self-sealing (3 in each wing)
Modifications and economy
| Flight performance | Survivability | Weaponry | ||||||||||||||||||||
|---|---|---|---|---|---|---|---|---|---|---|---|---|---|---|---|---|---|---|---|---|---|---|
|
|
|
Since the B7A2 is a multi-role aircraft any module research path is viable. Unlocking performance modules will boost survivability and damage potential in dogfights, whereas unlocking armament modules will help with the ground attack. Some of the best modules to unlock are the "Engine injection" and "Offensive 20 mm belts".
Armaments
Offensive armament
The B7A2 is armed with:
- 2 x 20 mm Type 99 Model 2 cannons, wing-mounted (200 rpg = 400 total)
Suspended armament
The B7A2 can be outfitted with the following ordnance:
- 10 x 60 kg Navy Type 97 Number 6 bombs (600 kg total)
- 2 x 250 kg Navy Type 98 Number 25 bombs + 4 x 60 kg Navy Type 97 Number 6 bombs (740 kg total)
- 1 x 800 kg Navy Type Number 80 Model 1 bomb (800 kg total)
- 1 x 850 kg Type 91 Model 3 torpedo
Defensive armament
The B7A2 is defended by:
- 1 x 13 mm Type 2 machine gun, dorsal turret (1,000 rpg)
Usage in battles
The Ryusei is best utilized as a multi-role aircraft, similar to the role the Ju 87 D-5 plays. Once its payload is dropped, the B7A2 becomes a low altitude, low-speed dogfighter similar to an A6M. In realistic battles, the B7A2 is often paired with aircraft such as the A6M3, A6M3 mod. 22, and A6M3 mod. 22Ko. If unable to shake an enemy off your tail, these "Zeroes" can be relied on as they have impressive low altitude capabilities.
Payload choice is dependent on target choice. If the target is a light pillbox, for instance, one does not need an 800 kg bomb. Instead, equip either of the other bomb loadout options. The same goes for most ground units, apart from arcade mini bases. The Ryusei is similar to aircraft such as the Ki-49-IIa in that it can "hover" above an enemy base or airfield, rapidly dropping its payload and diving up to altitude again. Since the B7A2 is a dive bomber, it does not have to be level to drop its payload accurately. The Ryusei's ability to "hover" above enemy mini bases and airfields can be a great help to any arcade battles team. Upgrading the crew reload speed makes this aircraft a potential game-winner, especially when in a squad.
Similar to the Ju 87 D-5, the Ryusei's airspeed is not on par with the aircraft it faces, no matter the game mode. This handicaps the B7A2 to playing solely a support role, only being able to engage the aircraft it can catch. Nonetheless, having a B7A2 on any team, no matter the game mode, never hurts.
Manual Engine Control
| MEC elements | ||||||
|---|---|---|---|---|---|---|
| Mixer | Pitch | Radiator | Supercharger | Turbocharger | ||
| Oil | Water | Type | ||||
| Controllable | Controllable Not auto controlled |
Controllable Auto control available |
Controllable Auto control available |
Separate | Controllable 2 gears |
Not controllable |
Pros and cons
Pros:
- B7A for Carrier-based torpedo bomber
- Bomber spawn
- 1x Type 91 Aerial Torpedo
- Torpedo has the highest drop speed in the game at 580 km/h and is one of the most feared torpedoes in Naval Battles
- 10x Type 97 No.6 Land Bomb (60kg)
- Gets a bomb bay of 6 x 60 kg bombs which can be used to hit multiple targets (+4 on the wings that drop in pairs)
- 1x No.80 Land Bomb (800kg)
- Heaviest bomb Japanese Navy can offer
- Common Navy plane construction:
- Excellent manoeuvrability
- B7A2 specific
- Airbrakes
- 2x wing mounted Type 99 Model 2 (20 mm)
- 1x tail defensive Type 2 (13 mm)
Cons:
- B7A for Carrier-based torpedo bomber
- Relatively Large target
- Common Navy plane construction:
- Fragile, little armour, and no self-sealing fuel tanks
- Exposed tail gunner
History
Two-seat carrier-based Aichi B7A2 Ryusei "Shooting Star" or "Meteor" Torpedo/Dive Bomber (Allied reporting name: Grace). The B7A was an answer to a specification for a carrier-based torpedo/dive bomber in 1941. It was intended to replace B6N and D4Y, having an internal and external payload, increased speed and long-range. Some of the design features of the B7A include; inverted gull-wings, conventional fuselage, and tail unit and a four-bladed propeller. During its development, it went through a series of shortcomings, such as the delivery of engines, and an accidental earthquake which destroyed the main factory housing most of the B7A's. Thus not seeing active service until 1944. By this time, there were no aircraft carriers capable of operating the B7A. The last aircraft carrier being the Shinano was sunk 10 days after its commission. The B7A2 was then forced to operate in home-defence operations, seeing limited service.
Known as the AM-23 within Aichi, the first prototype was completed and flown in May 1942 which was designated the B7A1 by the Navy. The B7A used the Nakajima NK9C 12 Model radial engine, producing 1,825 hp. This gave the aircraft exceptionally good speed, even when fully loaded with ammunition and bombs. During flight testing, the Navy was very impressed with its performance. Despite it being a very large light bomber, the B7A1 displayed handling and performance comparable to the Mitsubishi's A6M Zero and a further 8 prototypes were ordered. However, with more testing underway, it was noted that the engine (which was experimental as well) suffered teething problems, and the airframe of the aircraft needed modifying structurally. It was not until two years later that the B7A would begin production in 1944.
Up until May 1945, 80 B7A2's had been completed. But soon after, a severe earthquake occurred, destroying the factory housing the aircraft that were being assembled. A further 25 more examples were completed by another factory. Throughout the B7A2's service, different variants were planned. Firstly, was an experimental production B7A2, that was fitted with the Nakajima Homare 23 radial engine, producing 2,000 hp. Only 1 was built. Secondly, came the B7A3 Ryusei-Kai. This was to use the Mitsubishi Ha-43 radial engine producing 2,200 hp but it was not built. Lastly, came the B8A1 Mokusei "Planet". This was to have no carrier equipment and no gull wings. In addition, 2 x Type 99 20mm cannons were to be replaced with 2 x Type 5 30mm cannons. The B8A remained on the drawing board before the war ended, with no mock-up even though it was accepted to be built.
In all, 9 B7A1's, and 105 B7A2's were produced. 114 in total.
Katori Naval Air Base, Chiba-Prefecture, Japan, May 1945
- 752nd Naval Air Group
Kanogawa-Prefecture, Japan, April 1945
- Yokosuka Naval Air Group
Media
- Skins
See also
Links to the articles on the War Thunder Wiki that you think will be useful for the reader, for example:
- reference to the series of the aircraft;
- links to approximate analogues of other nations and research trees.
External links
- Official data sheet - more details about the performance
- [aviastar.org] Aichi B7A Ryusei / Grace
- [MilitaryFactory.com] Aichi B7A Ryusei (Grace)
- [Smithsonian NASM] Aichi B7A2 Ryusei (Shooting Star) GRACE
- [HyperScale.com] Aichi B7A2 Ryusei Kai "Grace"
- [HyperScale.com] Aichi B7A2 Ryusei Kai (Grace)
| Aichi Aircraft Company, Limited (愛知航空機株式会社) | |
|---|---|
| Bombers | D3A1 |
| B7A2 · B7A2 (Homare 23) | |
| Recon | E13A1 |
| Japan bombers | |
|---|---|
| Navy | |
| Carrier-based attack bomber | |
| B5N | B5N2 |
| B6N | B6N1 · B6N2 · B6N2a |
| B7A | B7A2 · B7A2 (Homare 23) |
| Carrier-based dive bomber | |
| D3A | D3A1 |
| D4Y | D4Y1 · D4Y2 · D4Y3 Ko |
| Shipboard Observation seaplane | |
| F1M | F1M2 |
| Land-based Attack bomber | |
| G4M | G4M1 |
| G5N | G5N1 |
| G8N | G8N1 |
| Flying boat | |
| H6K | H6K4 |
| H8K | H8K2 · H8K3 |
| Land-based Bomber | |
| P1Y | P1Y1 |
| Army | |
| Light | Ki-32 |
| Ki-48-II otsu | |
| Heavy | Ki-21-Ia · Ki-21-I hei |
| Ki-49-I · Ki-49-IIa · Ki-49-IIb · Ki-49-IIb/L | |
| Ki-67-I Ko · Ki-67-I otsu | |
| Other countries | ▅B-17E |
