Difference between revisions of "B6N2a Model 12Ko"
(→Usage in battles) (Tag: Visual edit) |
(Edits. Please do not plagiarise from wikipedia, rewrite it in your own words.) |
||
| Line 13: | Line 13: | ||
== General info == | == General info == | ||
=== Flight performance === | === Flight performance === | ||
| − | The B6N2a Model 12 Ko "Tenzan" is a high performance torpedo bomber, capable of not only ground attack but naval attack, and can successfully | + | <!-- ''Describe how the aircraft behaves in the air. Speed, manoeuvrability, acceleration and allowable loads - these are the most important characteristics of the vehicle.'' --> |
| + | The B6N2a Model 12 Ko "Tenzan" is a high performance torpedo bomber, capable of not only ground attack but naval attack, and can successfully outmanoeuvre anything it wishes (excluding biplanes). It has a powerful 1,600 hp engine and a supercharger for high altitude base bombing, and it is a highly capable aircraft. | ||
| + | |||
{| class="wikitable" style="text-align:center" width="70%" | {| class="wikitable" style="text-align:center" width="70%" | ||
! rowspan="2" | Characteristics | ! rowspan="2" | Characteristics | ||
| Line 31: | Line 33: | ||
|- | |- | ||
|} | |} | ||
| + | |||
==== Details ==== | ==== Details ==== | ||
{| class="wikitable" style="text-align:center" width="50%" | {| class="wikitable" style="text-align:center" width="50%" | ||
| Line 53: | Line 56: | ||
! Combat !! Take-off !! Landing !! + !! - | ! Combat !! Take-off !! Landing !! + !! - | ||
|- | |- | ||
| − | | {{Specs|destruction|body}} || {{Specs|destruction|gear}} ||380||380||280||~11||~3 | + | | {{Specs|destruction|body}} || {{Specs|destruction|gear}} || 380 || 380 || 280 || ~11 || ~3 |
|- | |- | ||
|} | |} | ||
| Line 63: | Line 66: | ||
! Ailerons !! Rudder !! Elevators !! Radiator | ! Ailerons !! Rudder !! Elevators !! Radiator | ||
|- | |- | ||
| − | |< 300||< 300||< 310||> 300 | + | | < 300 || < 300 || < 310 || > 300 |
|- | |- | ||
|} | |} | ||
| Line 71: | Line 74: | ||
=== Survivability and armour === | === Survivability and armour === | ||
<!-- ''Examine the survivability of the aircraft. Note how vulnerable the structure is and how secure the pilot is, whether the fuel tanks are armoured, etc. Describe the armour, if there is any, and also mention the vulnerability of other critical aircraft systems.'' --> | <!-- ''Examine the survivability of the aircraft. Note how vulnerable the structure is and how secure the pilot is, whether the fuel tanks are armoured, etc. Describe the armour, if there is any, and also mention the vulnerability of other critical aircraft systems.'' --> | ||
| − | |||
| − | |||
[[File:War Thunder - In battle 7 9 2020 11 13 59 AM (2).png|thumb|The B6N2a Tenzan fires its lower turret at an approaching enemy fighter]] | [[File:War Thunder - In battle 7 9 2020 11 13 59 AM (2).png|thumb|The B6N2a Tenzan fires its lower turret at an approaching enemy fighter]] | ||
| + | The B6N2 has no armour protection, and no self-sealing fuel tanks, so it is very susceptible to critical damage and fires. | ||
== Armaments == | == Armaments == | ||
| Line 100: | Line 102: | ||
[[File:War Thunder - In battle 7 9 2020 11 21 24 AM (2).png|thumb|A Peashooter tries to tackle the B6N2a Ko ]] | [[File:War Thunder - In battle 7 9 2020 11 21 24 AM (2).png|thumb|A Peashooter tries to tackle the B6N2a Ko ]] | ||
| − | + | For the 13 mm machine gun, select "Default" belt because it has the most incendiary potential. It's a great turret for its BR. The 7.92 mm gun is a great gun, use the AP-T belt, as it has the most tracers and the most incendiary potential. | |
| − | |||
| − | For the | ||
== Usage in battles == | == Usage in battles == | ||
<!-- ''Describe the tactics of playing in the aircraft, the features of using aircraft in a team and advice on tactics. Refrain from creating a "guide" - do not impose a single point of view, but instead, give the reader food for thought. Examine the most dangerous enemies and give recommendations on fighting them. If necessary, note the specifics of the game in different modes (AB, RB, SB).'' --> | <!-- ''Describe the tactics of playing in the aircraft, the features of using aircraft in a team and advice on tactics. Refrain from creating a "guide" - do not impose a single point of view, but instead, give the reader food for thought. Examine the most dangerous enemies and give recommendations on fighting them. If necessary, note the specifics of the game in different modes (AB, RB, SB).'' --> | ||
| − | This plane is great for bombing medium tanks, light pillboxes, howitzers, and vehicles. Since it is so fast, it can make multiple trips to the airfield if a resupply of bombs is needed. | + | This plane is great for bombing medium tanks, light pillboxes, howitzers, and vehicles. Since it is so fast, it can make multiple trips to the airfield if a resupply of bombs is needed. There is also a chance that you will be placed in a pacific map, where the torpedo may actually come in handy. The torpedo is a good pick for destroyers and light cruisers. If you choose to squad up with friends, you can tackle battleships and carriers with multiple torpedoes. |
| + | |||
| + | === Manual Engine Control === | ||
| + | {| class="wikitable" style="text-align:center" | ||
| + | |- | ||
| + | ! colspan="7" | MEC elements | ||
| + | |- | ||
| + | ! rowspan="2" | Mixer | ||
| + | ! rowspan="2" | Pitch | ||
| + | ! colspan="3" | Radiator | ||
| + | ! rowspan="2" | Supercharger | ||
| + | ! rowspan="2" | Turbocharger | ||
| + | |- | ||
| + | ! Oil !! Water !! Type | ||
| + | |- | ||
| + | | Controllable || Controllable<br>Not auto controlled || Controllable<br>Not auto controlled || Controllable<br>Not auto controlled || Separate || Controllable<br>2 gears || Not controllable | ||
| + | |- | ||
| + | |} | ||
=== Modules === | === Modules === | ||
| Line 148: | Line 165: | ||
|- | |- | ||
|} | |} | ||
| + | |||
Go for all of the bomb loads first, as they are very important, next, research suitability and engine mods, prioritize the Engine. Then unlock the turret and belts, finally, unlock wings repair and wings repair. | Go for all of the bomb loads first, as they are very important, next, research suitability and engine mods, prioritize the Engine. Then unlock the turret and belts, finally, unlock wings repair and wings repair. | ||
| Line 155: | Line 173: | ||
'''Pros:''' | '''Pros:''' | ||
| − | * Regular Japanese navy torpedo bomber armaments | + | * Regular Japanese navy torpedo bomber armaments |
| − | * Decent | + | * Decent manoeuvrability for a bomber |
* High top speed for a torpedo bomber | * High top speed for a torpedo bomber | ||
* 13 mm Type 2 machine gun in the rear can tear apart chasers | * 13 mm Type 2 machine gun in the rear can tear apart chasers | ||
| − | * 7. | + | * 7.92 mm underneath has more firepower than the standard [[Type 92 (7.7 mm)|Type 92]] machine gun used on the two previous models |
* Torpedo has the highest drop speed in the game at 350 mph (580 km/h) and is one of the most feared torpedoes in Naval Battles | * Torpedo has the highest drop speed in the game at 350 mph (580 km/h) and is one of the most feared torpedoes in Naval Battles | ||
* 1550 hp engine | * 1550 hp engine | ||
| Line 169: | Line 187: | ||
== History == | == History == | ||
| − | + | ''Describe the history of the creation and combat usage of the aircraft in more detail than in the introduction. If the historical reference turns out to be too long, take it to a separate article, taking a link to the article about the vehicle and adding a block "/History" (example: <nowiki>https://wiki.warthunder.com/(Vehicle-name)/History</nowiki>) and add a link to it here using the <code>main</code> template. Be sure to reference text and sources by using <code><nowiki><ref></ref></nowiki></code>, as well as adding them at the end of the article with <code><nowiki><references /></nowiki></code>. This section may also include the vehicle's dev blog entry (if applicable) and the in-game encyclopedia description (under <code><nowiki>=== In-game description ===</nowiki></code>, also if applicable).'' | |
| − | |||
| − | |||
| − | |||
| − | |||
| − | |||
| − | |||
| − | |||
| − | |||
== Media == | == Media == | ||
<!-- ''Excellent additions to the article would be video guides, screenshots from the game, and photos.'' --> | <!-- ''Excellent additions to the article would be video guides, screenshots from the game, and photos.'' --> | ||
| + | <gallery mode="packed" heights="200px"> | ||
| + | File:War Thunder - In battle 7 9 2020 11 10 22 AM (2).png|The Tenzan using its superior defensive turrets to successfully down an enemy aircraft | ||
| + | File:War Thunder - In battle 7 9 2020 11 23 28 AM (2).png|The Tenzan in Japan | ||
| + | </gallery> | ||
== See also == | == See also == | ||
| Line 202: | Line 216: | ||
* ''other literature.'' | * ''other literature.'' | ||
| − | {{ | + | {{AirManufacturer Nakajima}} |
{{Japan bombers}} | {{Japan bombers}} | ||
Revision as of 18:47, 9 July 2020
Contents
Description

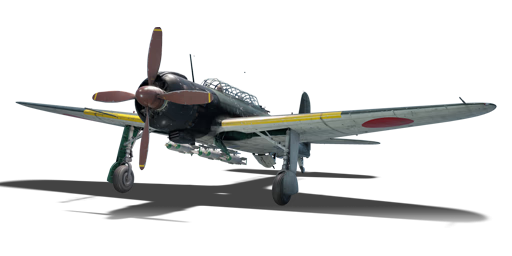
The B6N2a Model 12Ko is a rank II Japanese bomber
with a battle rating of 2.0 (AB) and 2.3 (RB/SB). It was introduced in Update "Starfighters".
It is the sucsessor to the B5N, and if you liked the B5N2, you will LOVE the B6N! Simply put, the B6N is a faster, more well defended B5N, and it will prove useful in a combat situation.
General info
Flight performance
The B6N2a Model 12 Ko "Tenzan" is a high performance torpedo bomber, capable of not only ground attack but naval attack, and can successfully outmanoeuvre anything it wishes (excluding biplanes). It has a powerful 1,600 hp engine and a supercharger for high altitude base bombing, and it is a highly capable aircraft.
| Characteristics | Max Speed (km/h at 4,900 m) |
Max altitude (metres) |
Turn time (seconds) |
Rate of climb (metres/second) |
Take-off run (metres) | |||
|---|---|---|---|---|---|---|---|---|
| AB | RB | AB | RB | AB | RB | |||
| Stock | 454 | 441 | 9600 | 21.6 | 22.3 | 7.9 | 7.9 | 270 |
| Upgraded | 512 | 481 | 20.8 | 21.0 | 16.2 | 11.5 | ||
Details
| Features | ||||
|---|---|---|---|---|
| Combat flaps | Take-off flaps | Landing flaps | Air brakes | Arrestor gear |
| ✓ | ✓ | ✓ | X | ✓ |
| Limits | ||||||
|---|---|---|---|---|---|---|
| Wings (km/h) | Gear (km/h) | Flaps (km/h) | Max Static G | |||
| Combat | Take-off | Landing | + | - | ||
| 650 | 310 | 380 | 380 | 280 | ~11 | ~3 |
| Optimal velocities (km/h) | |||
|---|---|---|---|
| Ailerons | Rudder | Elevators | Radiator |
| < 300 | < 300 | < 310 | > 300 |
Survivability and armour
The B6N2 has no armour protection, and no self-sealing fuel tanks, so it is very susceptible to critical damage and fires.
Armaments
Suspended armament
The B6N2a Model 12Ko can be outfitted with the following ordnance:
- 6 x 60 kg Navy Type 97 Number 6 bombs (360 kg total)
- 2 x 250 kg Navy Type Number 25 Model 2 bombs (500 kg total)
- 1 x 800 kg Navy Type Number 80 Model 1 bomb (800 kg total)
- 1 x 835 kg Type 91 Model 2 torpedo
- 1 x 850 kg Type 91 Model 3 torpedo
The 800 kg bomb will destroy 1 base, it's a good pick for maps with few ground targets! The 250 kg bombs are great for destroying pillboxes and tanks, but you can only have two of them. Make sure to use a slight dive when bombing and use the bombsight for increased accuracy! The 6 x 60 kg bombs are a great option for this plane. Since they weigh so little, you can be super accurate with these bombs, just aim the crosshair where you want the bomb to drop, and pull up. No need for a bomb sight!!! Use these bombs for light targets such as AAA, Vehicles, Armoured Cars, Artillery, Howitzers, Machine Guns, and Bridges. The torpedoes are not really useful for this plane in air battles, as ships only spawn in pacific maps, and this plane is at too low of a BR to be put in a Pacific Theater battle.
Defensive armament
The B6N2a Model 12Ko is defended by:
- 1 x 13 mm Type 2 machine gun, turret (750 rpg)
- 1 x 7.92 mm Type 1 machine gun, turret (300 rpg)
For the 13 mm machine gun, select "Default" belt because it has the most incendiary potential. It's a great turret for its BR. The 7.92 mm gun is a great gun, use the AP-T belt, as it has the most tracers and the most incendiary potential.
Usage in battles
This plane is great for bombing medium tanks, light pillboxes, howitzers, and vehicles. Since it is so fast, it can make multiple trips to the airfield if a resupply of bombs is needed. There is also a chance that you will be placed in a pacific map, where the torpedo may actually come in handy. The torpedo is a good pick for destroyers and light cruisers. If you choose to squad up with friends, you can tackle battleships and carriers with multiple torpedoes.
Manual Engine Control
| MEC elements | ||||||
|---|---|---|---|---|---|---|
| Mixer | Pitch | Radiator | Supercharger | Turbocharger | ||
| Oil | Water | Type | ||||
| Controllable | Controllable Not auto controlled |
Controllable Not auto controlled |
Controllable Not auto controlled |
Separate | Controllable 2 gears |
Not controllable |
Modules
| Tier | Flight performance | Survivability | Weaponry | |||
|---|---|---|---|---|---|---|
| I | Fuselage repair | Radiator | Turret 7 mm | 17 3/4 in (mod45) | ||
| II | Compressor | Airframe | Turret 13 mm | Improved torpedo | ||
| III | Wings repair | Engine | New 7 mm MGs (turret) | 12 in (mod30) | ||
| IV | Engine injection | Cover | New 13 mm MGs (turret) | 14 in (mod35) | ||
Go for all of the bomb loads first, as they are very important, next, research suitability and engine mods, prioritize the Engine. Then unlock the turret and belts, finally, unlock wings repair and wings repair.
Pros and cons
Pros:
- Regular Japanese navy torpedo bomber armaments
- Decent manoeuvrability for a bomber
- High top speed for a torpedo bomber
- 13 mm Type 2 machine gun in the rear can tear apart chasers
- 7.92 mm underneath has more firepower than the standard Type 92 machine gun used on the two previous models
- Torpedo has the highest drop speed in the game at 350 mph (580 km/h) and is one of the most feared torpedoes in Naval Battles
- 1550 hp engine
Cons:
- No frontal offensive armament
- Dead zones directly behind the aircraft, you are better off turn fighting and using your turrets while they struggle to complete the turn
History
Describe the history of the creation and combat usage of the aircraft in more detail than in the introduction. If the historical reference turns out to be too long, take it to a separate article, taking a link to the article about the vehicle and adding a block "/History" (example: https://wiki.warthunder.com/(Vehicle-name)/History) and add a link to it here using the main template. Be sure to reference text and sources by using <ref></ref>, as well as adding them at the end of the article with <references />. This section may also include the vehicle's dev blog entry (if applicable) and the in-game encyclopedia description (under === In-game description ===, also if applicable).
Media
- War Thunder - In battle 7 9 2020 11 10 22 AM (2).png
The Tenzan using its superior defensive turrets to successfully down an enemy aircraft
- War Thunder - In battle 7 9 2020 11 23 28 AM (2).png
The Tenzan in Japan
See also
Links to the articles on the War Thunder Wiki that you think will be useful for the reader, for example:
- reference to the series of the aircraft;
- links to approximate analogues of other nations and research trees.
External links
Paste links to sources and external resources, such as:
- topic on the official game forum;
- encyclopedia page on the aircraft;
- other literature.
| Nakajima Aircraft Company (中島飛行機株式会社 ) | |
|---|---|
| Fighters | Ki-27 otsu · Ki-27 otsu Tachiarai |
| Ki-43-I · Ki-43-II · Ki-43-III otsu | |
| Ki-44-I · Ki-44-I 34 · Ki-44-II otsu · Ki-44-II hei | |
| Ki-84 ko · Ki-84 otsu · Ki-84 hei | |
| Ki-87 | |
| Hydroplanes | A6M2-N* |
| Interceptors | J1N1 · J5N1 |
| Bombers | B5N2 |
| B6N1 Model 11 · B6N2 Model 12 · B6N2a Model 12Ko | |
| G5N1 · G8N1 | |
| Ki-49-I · Ki-49-IIa · Ki-49-IIb · Ki-49-IIb/L | |
| Recon | E8N2 |
| Jet Fighters | Kikka |
| Captured | ␗Ki-27 otsu · ▃Ki-43-II · ␗Ki-43-III ko · ␗Ki-44-II hei · ␗Ki-84 ko |
| *Refit of the Mitsubishi A6M2 mod. 11 | |
| See also | Fuji Heavy Industries (1957-2017) |
| Japan bombers | |
|---|---|
| Navy | |
| Carrier-based attack bomber | |
| B5N | B5N2 |
| B6N | B6N1 · B6N2 · B6N2a |
| B7A | B7A2 · B7A2 (Homare 23) |
| Carrier-based dive bomber | |
| D3A | D3A1 |
| D4Y | D4Y1 · D4Y2 · D4Y3 Ko |
| Shipboard Observation seaplane | |
| F1M | F1M2 |
| Land-based Attack bomber | |
| G4M | G4M1 |
| G5N | G5N1 |
| G8N | G8N1 |
| Flying boat | |
| H6K | H6K4 |
| H8K | H8K2 · H8K3 |
| Land-based Bomber | |
| P1Y | P1Y1 |
| Army | |
| Light | Ki-32 |
| Ki-48-II otsu | |
| Heavy | Ki-21-Ia · Ki-21-I hei |
| Ki-49-I · Ki-49-IIa · Ki-49-IIb · Ki-49-IIb/L | |
| Ki-67-I Ko · Ki-67-I otsu | |
| Other countries | ▅B-17E |

.png)
.png)
.png)
.png)