Difference between revisions of "B6N1 Model 11"
(→Usage in battles) (Tag: Visual edit) |
(Tag: Visual edit) |
||
| Line 10: | Line 10: | ||
{{Break}} | {{Break}} | ||
The '''{{Specs|name}}''' is a rank {{Specs|rank}} Japanese bomber {{Battle-rating}}. It was introduced in [[Update "Starfighters"]]. | The '''{{Specs|name}}''' is a rank {{Specs|rank}} Japanese bomber {{Battle-rating}}. It was introduced in [[Update "Starfighters"]]. | ||
| + | |||
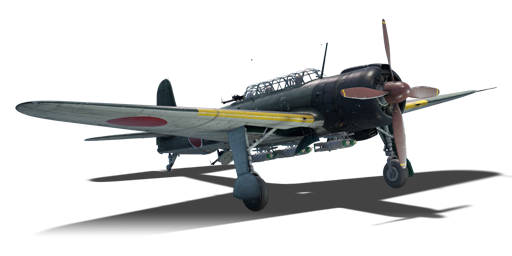
| + | [[File:War Thunder - In battle 7 8 2020 12 32 55 PM (2).png|thumb|The B6N1 in flight]] | ||
The Allied reporting name for this aircraft was "Jill". | The Allied reporting name for this aircraft was "Jill". | ||
It is the sucsessor to the B5N, and if you liked the [[B5N2]], you will LOVE the {{PAGENAME}}. Simply put, the B6N is a faster, more well defended B5N, and it will prove useful in a combat situation. | It is the sucsessor to the B5N, and if you liked the [[B5N2]], you will LOVE the {{PAGENAME}}. Simply put, the B6N is a faster, more well defended B5N, and it will prove useful in a combat situation. | ||
| − | |||
| − | |||
== General info == | == General info == | ||
| Line 91: | Line 91: | ||
The '''''{{PAGENAME}}''''' is armed with: | The '''''{{PAGENAME}}''''' is armed with: | ||
| − | * 1 x 7.7 mm Type 97 navy machine gun, wing-mounted (400 rpg) | + | * 1 x 7.7 mm Type 97 navy machine gun, wing-mounted (400 rpg)[[File:B6N1GrayCamo.png|thumb|B6N1 in Gray camouflage, available on WT Live ]] |
Choose your rounds wisely. The Stealth belt is a great pick because it has two incendiary bullets, and lots of armour-piercing rounds. Universal is a great pick if you need a tracer or two to guide your shots. Don't use the Tracers belt, it won't do much. Default isn't really good, the ball bullets hinder performance. | Choose your rounds wisely. The Stealth belt is a great pick because it has two incendiary bullets, and lots of armour-piercing rounds. Universal is a great pick if you need a tracer or two to guide your shots. Don't use the Tracers belt, it won't do much. Default isn't really good, the ball bullets hinder performance. | ||
| Line 108: | Line 108: | ||
The 800 kg bomb will destroy 1 base, it's a good pick for maps with few ground targets! The 250 kg bombs are great for destroying pillboxes and tanks, but you can only have two of them. Make sure to use a slight dive when bombing and use the bombsight for increased accuracy! The 6 x 60 kg bombs are a great option for this plane. Since they weigh so little, you can be super accurate with these bombs, just aim the crosshair where you want the bomb to drop, and pull up. No need for a bomb sight!!! Use these bombs for light targets such as AAA, Vehicles, Armoured Cars, Artillery, Howitzers, Machine Guns, and Bridges. The torpedoes are not really useful for this plane in air battles, as ships only spawn in pacific maps, and this plane is at too low of a BR to be put in a Pacific Theater battle. | The 800 kg bomb will destroy 1 base, it's a good pick for maps with few ground targets! The 250 kg bombs are great for destroying pillboxes and tanks, but you can only have two of them. Make sure to use a slight dive when bombing and use the bombsight for increased accuracy! The 6 x 60 kg bombs are a great option for this plane. Since they weigh so little, you can be super accurate with these bombs, just aim the crosshair where you want the bomb to drop, and pull up. No need for a bomb sight!!! Use these bombs for light targets such as AAA, Vehicles, Armoured Cars, Artillery, Howitzers, Machine Guns, and Bridges. The torpedoes are not really useful for this plane in air battles, as ships only spawn in pacific maps, and this plane is at too low of a BR to be put in a Pacific Theater battle. | ||
| + | |||
| + | [[File:War Thunder - In battle 9 21 2020 4 15 17 PM.png|thumb|B6N1 showing off its large wings. These wings give the plane a great speed and turning ability]] | ||
=== Defensive armament === | === Defensive armament === | ||
| Line 189: | Line 191: | ||
=== Pros and cons === | === Pros and cons === | ||
| − | <!-- ''Summarise and briefly evaluate the vehicle in terms of its characteristics and combat effectiveness. Mark its pros and cons in the bulleted list. Try not to use more than 6 points for each of the characteristics. Avoid using categorical definitions such as "bad", "good" and the like - use substitutions with softer forms such as "inadequate" and "effective".'' --> | + | <!-- ''Summarise and briefly evaluate the vehicle in terms of its characteristics and combat effectiveness. Mark its pros and cons in the bulleted list. Try not to use more than 6 points for each of the characteristics. Avoid using categorical definitions such as "bad", "good" and the like - use substitutions with softer forms such as "inadequate" and "effective".'' -->[[File:War Thunder - In battle 9 21 2020 4 18 35 PM.png|thumb|B6N1 trying to torpedo the USS Sims]] |
| − | |||
'''Pros:''' | '''Pros:''' | ||
Revision as of 13:51, 15 October 2020
Contents
| This page is about the Japanese bomber B6N1 Model 11. For other versions, see B6N (Family). |
Description

The B6N1 Model 11 is a rank I Japanese bomber
with a battle rating of 1.7 (AB/RB) and 2.0 (SB). It was introduced in Update "Starfighters".
The Allied reporting name for this aircraft was "Jill".
It is the sucsessor to the B5N, and if you liked the B5N2, you will LOVE the B6N1 Model 11. Simply put, the B6N is a faster, more well defended B5N, and it will prove useful in a combat situation.
General info
Flight performance
Great rudder responsiveness, good roll rate, and surprisingly good energy retention! The B6N1 Model 11 is capable of turnfighting with its humble frontal machine gun, and if they get on your 6, your turrets will offer some protection.
| Characteristics | Max Speed (km/h at 4,800 m) |
Max altitude (metres) |
Turn time (seconds) |
Rate of climb (metres/second) |
Take-off run (metres) | |||
|---|---|---|---|---|---|---|---|---|
| AB | RB | AB | RB | AB | RB | |||
| Stock | 445 | 428 | 9400 | 21.4 | 22.3 | 7.7 | 7.7 | 270 |
| Upgraded | 484 | 464 | 20.8 | 21.0 | 15.3 | 11.1 | ||
Details
| Features | ||||
|---|---|---|---|---|
| Combat flaps | Take-off flaps | Landing flaps | Air brakes | Arrestor gear |
| ✓ | ✓ | ✓ | X | ✓ |
| Limits | ||||||
|---|---|---|---|---|---|---|
| Wings (km/h) | Gear (km/h) | Flaps (km/h) | Max Static G | |||
| Combat | Take-off | Landing | + | - | ||
| 0 | 310 | 380 | 380 | 280 | ~11 | ~3 |
| Optimal velocities (km/h) | |||
|---|---|---|---|
| Ailerons | Rudder | Elevators | Radiator |
| < 300 | < 300 | < 310 | > 300 |

Survivability and armour
- No armour
- Non-self sealing fuel tanks (3 in each wing)
Armaments
Offensive armament
The B6N1 Model 11 is armed with:
- 1 x 7.7 mm Type 97 navy machine gun, wing-mounted (400 rpg)

Choose your rounds wisely. The Stealth belt is a great pick because it has two incendiary bullets, and lots of armour-piercing rounds. Universal is a great pick if you need a tracer or two to guide your shots. Don't use the Tracers belt, it won't do much. Default isn't really good, the ball bullets hinder performance.
Suspended armament
The B6N1 Model 11 can be outfitted with the following ordnance:
- 6 x 60 kg Navy Type 97 Number 6 bombs (360 kg total)
- 2 x 250 kg Navy Type Number 25 Model 2 bombs (500 kg total)
- 1 x 800 kg Navy Type Number 80 Model 1 bomb (800 kg total)
- 1 x 835 kg Type 91 Model 2 torpedo
- 1 x 850 kg Type 91 Model 3 torpedo
The 800 kg bomb will destroy 1 base, it's a good pick for maps with few ground targets! The 250 kg bombs are great for destroying pillboxes and tanks, but you can only have two of them. Make sure to use a slight dive when bombing and use the bombsight for increased accuracy! The 6 x 60 kg bombs are a great option for this plane. Since they weigh so little, you can be super accurate with these bombs, just aim the crosshair where you want the bomb to drop, and pull up. No need for a bomb sight!!! Use these bombs for light targets such as AAA, Vehicles, Armoured Cars, Artillery, Howitzers, Machine Guns, and Bridges. The torpedoes are not really useful for this plane in air battles, as ships only spawn in pacific maps, and this plane is at too low of a BR to be put in a Pacific Theater battle.
Defensive armament
The B6N1 Model 11 is defended by:
- 1 x 7.7 mm Type 92 machine gun, dorsal turret (679 rpg)
- 1 x 7.7 mm Type 92 machine gun, ventral turret (679 rpg)
The Type 92 turrets are absolutely horrible at dealing with higher BR planes, but it works wonders on biplanes. You will often face certain biplanes at this BR, and since they are slow, you can often get good shots on them. Use the Default belt and shoot into the engine to start an inextinguishable engine fire. This works quite often with the Default belt. The AP-T round is a good pick if you aren't a good gunner, because the extra tracers will scare the enemy off. Most biplanes don't want to get too close when they see a wave of tracers appear from your turrets.
Usage in battles
This plane is great for bombing medium tanks, light pillboxes, howitzers, and vehicles. Since it is so fast, it can make multiple trips to the airfield if a resupply of bombs is needed.
For naval maps and naval gamemode it's best advised to bring the torpedo and hit ships in a quick, close, hit and run style torpedo run, the engine allows for high speeds and Japanese torpedoes are among the highest speed resistant torpedoes in-game at the cost of range of only 2 km. It is also a possibility of squading up with friends / other torpedo carrying planes to dispose of the enemy carriers / battleships in a multiple hit torpedo strike.
Your frontal machine gun is your biggest asset. Unlike the B5N2 or other B6Ns, the B6N1 carries a frontal machine gun that can destroy light AAA trucks or Armoured cars. Or even enemy planes in uptiers, as the B6N has an amazing turn rate for a monoplane, but will have issues trying to out-turn biplanes.
Manual Engine Control
| MEC elements | ||||||
|---|---|---|---|---|---|---|
| Mixer | Pitch | Radiator | Supercharger | Turbocharger | ||
| Oil | Water | Type | ||||
| Controllable | Controllable Not auto controlled |
Controllable Not auto controlled |
Controllable Not auto controlled |
Separate | Controllable 2 gears |
Not controllable |
Modules
| Tier | Flight performance | Survivability | Weaponry | |||
|---|---|---|---|---|---|---|
| I | Fuselage repair | Radiator | Offensive 7 mm | 17 3/4 in (mod45) | ||
| II | Compressor | Airframe | Turret 7 mm | Improved torpedo | ||
| III | Wings repair | Engine | New 7 mm MGs | 12 in (mod30) | ||
| IV | Engine injection | Cover | New 7 mm MGs (turret) | 14 in (mod35) | ||
Pros and cons
Pros:
- Regular Japanese navy torpedo bomber armaments
- Torpedo has the highest drop speed in the game at 350 mph (580 km/h) and is one of the most feared torpedoes in Naval Battles
- Has the heaviest bomb Japan can offer (800kg) and can be used perfectly for Ground Battles
- Great engine power, produces 1660 hp
- Decent manoeuvrability for a bomber
- High top speed for a torpedo bomber
- Has offensive capabilities
Cons:
- Single 7.7 mm in the left wing
- Dead zones directly behind the aircraft, you are better off turn fighting and using your turrets while they struggle to complete the turn
History
An excellent replacement for the Nakajima B5N in the role of on-board torpedo aircraft, the B6N Tenzan entered service very late, after more than two years of testing. Named JILL in the Allied code, this large single-engine plane appeared as a prototype in spring 1941. The first tests revealed serious steering stability problems. Subsequently, there were difficulties in developing the engine and the need to reinforce the landing gear. After 133 units of the first version of the B6N1 were built, the second production model began to be delivered towards the end of 1943. A total of 1,268 units were built.
The B6N1 was the first stage of the B6N series, and was fitted with a Nakajima NK7A Mamoru engine in favor by Nakajima instead of the more readily and proved Mitsubishi Kasei engine the Navy suggested.
After 2 prototypes of the B6N1, 133 B6N1s were manufactured and immediately issued to the last remaining aircraft carrier groups such as on the Japanese carrier Zuikaku.
Due the slow and costy production of the NK7A engine, the B6N1 was halted in production in favor of the B6N2 with Mitsubishi MK4T Kasei 25 engine.
Media
See also
- Related Development
- B5N - (predecessor)
- B6N1 mod. 11 - (base model)
- B6N2 mod. 12 - (main production model)
- B6N2a mod. 12A - (revised tail armament)
- Similar aircraft of comparable role, configuration and era
External links
| Nakajima Aircraft Company (中島飛行機株式会社 ) | |
|---|---|
| Fighters | Ki-27 otsu · Ki-27 otsu Tachiarai |
| Ki-43-I · Ki-43-II · Ki-43-III otsu | |
| Ki-44-I · Ki-44-I 34 · Ki-44-II otsu · Ki-44-II hei | |
| Ki-84 ko · Ki-84 otsu · Ki-84 hei | |
| Ki-87 | |
| Hydroplanes | A6M2-N* |
| Interceptors | J1N1 · J5N1 |
| Bombers | B5N2 |
| B6N1 Model 11 · B6N2 Model 12 · B6N2a Model 12Ko | |
| G5N1 · G8N1 | |
| Ki-49-I · Ki-49-IIa · Ki-49-IIb · Ki-49-IIb/L | |
| Recon | E8N2 |
| Jet Fighters | Kikka |
| Captured | ␗Ki-27 otsu · ▃Ki-43-II · ␗Ki-43-III ko · ␗Ki-44-II hei · ␗Ki-84 ko |
| *Refit of the Mitsubishi A6M2 mod. 11 | |
| See also | Fuji Heavy Industries (1957-2017) |
| Japan bombers | |
|---|---|
| Navy | |
| Carrier-based attack bomber | |
| B5N | B5N2 |
| B6N | B6N1 · B6N2 · B6N2a |
| B7A | B7A2 · B7A2 (Homare 23) |
| Carrier-based dive bomber | |
| D3A | D3A1 |
| D4Y | D4Y1 · D4Y2 · D4Y3 Ko |
| Shipboard Observation seaplane | |
| F1M | F1M2 |
| Land-based Attack bomber | |
| G4M | G4M1 |
| G5N | G5N1 |
| G8N | G8N1 |
| Flying boat | |
| H6K | H6K4 |
| H8K | H8K2 · H8K3 |
| Land-based Bomber | |
| P1Y | P1Y1 |
| Army | |
| Light | Ki-32 |
| Ki-48-II otsu | |
| Heavy | Ki-21-Ia · Ki-21-I hei |
| Ki-49-I · Ki-49-IIa · Ki-49-IIb · Ki-49-IIb/L | |
| Ki-67-I Ko · Ki-67-I otsu | |
| Other countries | ▅B-17E |

.png)
.png)
.png)