Difference between revisions of "B17A"
(→Flight performance) (Tag: Visual edit) |
(Edits) |
||
| Line 1: | Line 1: | ||
{{Specs-Card|code=saab_b17a}} | {{Specs-Card|code=saab_b17a}} | ||
{{About | {{About | ||
| − | | about = | + | | about = Swedish bomber '''{{PAGENAME}}''' |
| usage = other version | | usage = other version | ||
| link = B17B | | link = B17B | ||
| Line 7: | Line 7: | ||
== Description == | == Description == | ||
| − | <!--''In the description, the first part should be about the history of and the creation and combat usage of the aircraft, as well as its key features. In the second part, tell the reader about the aircraft in the game. Insert a screenshot of the vehicle, so that if the novice player does not remember the vehicle by name, he will immediately understand what kind of vehicle the article is talking about.''--> | + | <!-- ''In the description, the first part should be about the history of and the creation and combat usage of the aircraft, as well as its key features. In the second part, tell the reader about the aircraft in the game. Insert a screenshot of the vehicle, so that if the novice player does not remember the vehicle by name, he will immediately understand what kind of vehicle the article is talking about.'' --> |
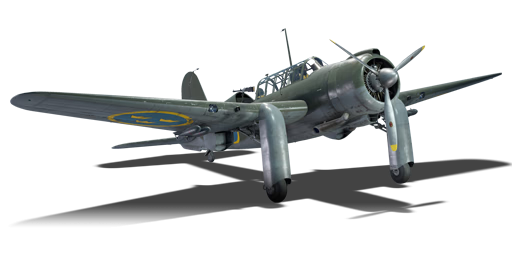
[[File:GarageImage_{{PAGENAME}}.jpg|420px|thumb|left]] | [[File:GarageImage_{{PAGENAME}}.jpg|420px|thumb|left]] | ||
| − | {{ | + | {{Break}} |
The '''{{Specs|name}}''' is a rank {{Specs|rank}} Swedish bomber {{Battle-rating}}. It was introduced in [[Update 1.95 "Northern Wind"]]. | The '''{{Specs|name}}''' is a rank {{Specs|rank}} Swedish bomber {{Battle-rating}}. It was introduced in [[Update 1.95 "Northern Wind"]]. | ||
| Line 20: | Line 20: | ||
== General info == | == General info == | ||
=== Flight performance === | === Flight performance === | ||
| − | <!--''Describe how the aircraft behaves in the air. Speed, manoeuvrability, acceleration and allowable loads - these are the most important characteristics of the vehicle.''--> | + | <!-- ''Describe how the aircraft behaves in the air. Speed, manoeuvrability, acceleration and allowable loads - these are the most important characteristics of the vehicle.'' --> |
The {{PAGENAME}} is relatively manoeuvrable aircraft for a light bomber, especially when loaded down with ordnance. Though it will not turn fight very well, it will not be as stiff as some find medium and heavy bombers to be. Through the use of flaps and extension of landing gear to act as a speed brake, pilots will find that the {{PAGENAME}} can be effectively used to bomb columns of vehicles or other targets of choice found on the map. | The {{PAGENAME}} is relatively manoeuvrable aircraft for a light bomber, especially when loaded down with ordnance. Though it will not turn fight very well, it will not be as stiff as some find medium and heavy bombers to be. Through the use of flaps and extension of landing gear to act as a speed brake, pilots will find that the {{PAGENAME}} can be effectively used to bomb columns of vehicles or other targets of choice found on the map. | ||
| Line 28: | Line 28: | ||
When using smaller bomb types, it is best to use this aircraft as a low-altitude bomber as trying to use it at mid or high altitude, the AI vehicles will tend to be able to easily avoid the bombs. Also, the smaller bombs tend to do piddly damage against bases, but when working with other bombers every little bit helps. | When using smaller bomb types, it is best to use this aircraft as a low-altitude bomber as trying to use it at mid or high altitude, the AI vehicles will tend to be able to easily avoid the bombs. Also, the smaller bombs tend to do piddly damage against bases, but when working with other bombers every little bit helps. | ||
| − | {| class="wikitable" style="text-align:center" | + | {| class="wikitable" style="text-align:center" width="70%" |
| − | + | ! rowspan="2" | Characteristics | |
| − | + | ! colspan="2" | Max Speed<br>(km/h at 4,200 m) | |
| − | + | ! rowspan="2" | Max altitude<br>(metres) | |
| − | ! | ||
| − | |||
| − | ! colspan="2" | Max Speed<br>(km/h at | ||
| − | ! rowspan="2" | Max altitude<br>( | ||
! colspan="2" | Turn time<br>(seconds) | ! colspan="2" | Turn time<br>(seconds) | ||
| − | ! colspan="2" | Rate of climb<br>( | + | ! colspan="2" | Rate of climb<br>(metres/second) |
| − | ! rowspan="2" | Take-off run<br>( | + | ! rowspan="2" | Take-off run<br>(metres) |
|- | |- | ||
| − | ! AB | + | ! AB !! RB !! AB !! RB !! AB !! RB |
| − | ! RB | ||
| − | ! AB | ||
| − | ! RB | ||
| − | ! AB | ||
| − | ! RB | ||
|- | |- | ||
| − | | | + | ! Stock |
| + | | 412 || 401 || rowspan="2" | {{Specs|ceiling}} || 20.0 || 20.7 || 8.2 || 8.2 || rowspan="2" | 300 | ||
|- | |- | ||
| − | ! | + | ! Upgraded |
| − | + | | 462 || 435 || 18.0 || 19.0 || 13.3 || 10.5 | |
| − | |||
| − | |||
| − | |||
| − | |||
| − | |||
| − | |||
| − | |||
| − | |||
| − | |||
| − | |||
| − | |||
| − | |||
| − | |||
| − | |462||435 | ||
|- | |- | ||
|} | |} | ||
==== Details ==== | ==== Details ==== | ||
| − | {| class="wikitable" style="text-align:center" | + | {| class="wikitable" style="text-align:center" width="50%" |
|- | |- | ||
! colspan="5" | Features | ! colspan="5" | Features | ||
|- | |- | ||
| − | ! Combat flaps | + | ! Combat flaps !! Take-off flaps !! Landing flaps !! Air brakes !! Arrestor gear |
| − | ! Take-off flaps | ||
| − | ! Landing flaps | ||
| − | ! Air brakes | ||
| − | ! Arrestor gear | ||
|- | |- | ||
| − | | | + | | ✓ || ✓ || ✓ || X || X <!-- ✓ --> |
|- | |- | ||
|} | |} | ||
| − | {| class="wikitable" style="text-align:center" | + | {| class="wikitable" style="text-align:center" width="50%" |
|- | |- | ||
| − | ! colspan=" | + | ! colspan="7" | Limits |
|- | |- | ||
| − | ! rowspan="2" | | + | ! rowspan="2" | Wings (km/h) |
| − | ! rowspan="2" | Gear | + | ! rowspan="2" | Gear (km/h) |
| − | ! | + | ! colspan="3" | Flaps (km/h) |
! colspan="2" | Max Static G | ! colspan="2" | Max Static G | ||
|- | |- | ||
| − | ! + | + | ! Combat !! Take-off !! Landing !! + !! - |
| − | ! - | ||
|- | |- | ||
| − | | {{Specs|destruction| | + | | {{Specs|destruction|body}} || {{Specs|destruction|gear}} || 400 || 400 || 280 || ~8 || ~6 |
|- | |- | ||
|} | |} | ||
[[File:B17 Armour Plates.png|450px|thumb|right|Protective components found in the '''{{PAGENAME}}'''.]] | [[File:B17 Armour Plates.png|450px|thumb|right|Protective components found in the '''{{PAGENAME}}'''.]] | ||
| − | |||
| − | |||
| − | |||
| − | |||
| − | |||
| − | |||
| − | |||
| − | |||
| − | |||
| − | |||
| − | |||
| − | |||
{| class="wikitable" style="text-align:center" | {| class="wikitable" style="text-align:center" | ||
|- | |- | ||
| − | ! colspan=" | + | ! colspan="4" | Optimal velocities (km/h) |
| − | |||
| − | |||
|- | |- | ||
| − | ! | + | ! Ailerons !! Rudder !! Elevators !! Radiator |
| − | ! | ||
| − | ! | ||
|- | |- | ||
| − | | | + | | < 300 || < 310 || < 320 || > 320 |
|- | |- | ||
|} | |} | ||
=== Survivability and armour === | === Survivability and armour === | ||
| − | <!--''Examine the survivability of the aircraft. Note how vulnerable the structure is and how secure the pilot is, whether the fuel tanks are armoured, etc. Describe the armour, if there is any, and also mention the vulnerability of other critical aircraft systems.''--> | + | <!-- ''Examine the survivability of the aircraft. Note how vulnerable the structure is and how secure the pilot is, whether the fuel tanks are armoured, etc. Describe the armour, if there is any, and also mention the vulnerability of other critical aircraft systems.'' --> |
* 10 mm steel - Pilot's seatback | * 10 mm steel - Pilot's seatback | ||
| Line 134: | Line 91: | ||
== Armaments == | == Armaments == | ||
=== Offensive armament === | === Offensive armament === | ||
| − | <!--''Describe the offensive armament of the aircraft, if any. Describe how effective the cannons and machine guns are in a battle, and also what belts or drums are better to use. If there is no offensive weaponry, delete this subsection.''--> | + | <!-- ''Describe the offensive armament of the aircraft, if any. Describe how effective the cannons and machine guns are in a battle, and also what belts or drums are better to use. If there is no offensive weaponry, delete this subsection.'' --> |
| − | {{main|Ksp m/22 | + | {{main|Ksp m/22 Fh (8 mm)|Ksp m/22 Fv (8 mm)}} |
| − | The '''''{{PAGENAME}}''''' is armed with:-- | + | The '''''{{PAGENAME}}''''' is armed with: |
| + | * 1 x 8 mm Ksp m/22 Fh machine gun, wing-mounted (500 rpg) | ||
| + | * 1 x 8 mm Ksp m/22 Fv machine gun, wing-mounted (500 rpg) | ||
| − | + | The Swedish Air Force chose to outfit the {{PAGENAME}} with license-built copies of the Browning M1919 machine gun, however originally was calibrated for 6.5 mm however this round was found to be less effective against fabric-covered aircraft and so the gun was recalibrated up to 8 mm. The Swedish variant is listed as the Ksp m/22 machine gun of which two were mounted on this bomber with a gun in each wing. To be of really any use to the pilot either in aerial combat (if forced into it) or during ground attack, convergence must be set preferably in a range of 250 m - 400 m for best results especially with ground attack as this will allow firing capability on ground targets with ample room to manoeuvre without fear of crashing into the ground. | |
| − | |||
| − | |||
| − | The Swedish Air Force chose to outfit the {{PAGENAME}} with license-built copies of the Browning M1919 machine gun, however originally was calibrated for 6.5 mm however this round was found to be less effective against fabric-covered aircraft and so the gun was recalibrated up to 8 mm. The Swedish variant is listed as the Ksp m/22 machine gun of which two were mounted on this bomber with a gun in each wing. To be of really any use to the pilot either in aerial combat (if forced into it) or during ground attack, convergence must be set preferably in a range of 250 m - 400 m for best results especially with ground attack as this will allow firing capability on ground targets with ample room to manoeuvre without fear of crashing into the ground. | ||
=== Suspended armament === | === Suspended armament === | ||
| − | <!--''Describe the aircraft's suspended armament: additional cannons under the wings, bombs, rockets and torpedoes. This section is especially important for bombers and attackers. If there is no suspended weaponry remove this subsection.''--> | + | <!-- ''Describe the aircraft's suspended armament: additional cannons under the wings, bombs, rockets and torpedoes. This section is especially important for bombers and attackers. If there is no suspended weaponry remove this subsection.'' --> |
| − | {{main|m/ | + | {{main|sb m/42 (50 kg)|mb m/40 (250 kg)|mb m/41 (500 kg)}} |
| − | The '''''{{PAGENAME}}''''' can be outfitted with the following | + | The '''''{{PAGENAME}}''''' can be outfitted with the following ordnance: |
| + | * 9 x 50 kg sb m/42 bombs (450 kg total) | ||
| + | * 1 x 250 kg mb m/40 bomb (250 kg total) | ||
| + | * 1 x 250 kg mb m/40 bomb + 4 x 50 kg sb m/42 bombs (450 kg total) | ||
| + | * 1 x 500 kg mb m/41 bomb (500 kg total) | ||
| − | + | While the initial payload option consisting of nine 50 kg bombs might feel a little on the weak side compared to a might 500 kg bomb, fear not as other nation aircraft such as the comparable Sukhoi [[Su-2 (Family)|Su-2]] or the massive Farman [[F.222.2]] and its 52 x 50 kg bombs can completely devastate columns of vehicles on early maps. These light trucks and anti-aircraft artillery are easily dispatched with the 50 kg bombs and can easily reward the bomber pilot with the [[Awards|awards]] "Antimech", "Heavy Metal Fury" or "Thunderer" to name a few. | |
| − | |||
| − | |||
| − | |||
| − | |||
| − | While the initial payload option consisting of nine 50 kg bombs might feel a little on the weak side compared to a might 500 kg bomb, fear not as other nation aircraft such as the comparable Sukhoi [[Su-2 (Family)|Su-2]] or the massive Farman [[F.222.2]] and | ||
Larger payload options should be reserved for targets which tend to be the tougher nut to crack such as pillboxes or medium and heavy tanks. Base bombing should be avoided unless flying in arcade battles without the threat of enemy fighters, but at the rate of 450 kg or 500 kg at a time, it will take a while to eliminate a base unless you are working with others. With a centre slung bomb mounted on a trapeze, there is a slight delay from release for the mechanism to actuate and fling the bomb free of the propeller arc to ensure enough clearance especially if the aircraft is in a slight dive. This is similar to early US light bombers/attackers which had a similar configuration. | Larger payload options should be reserved for targets which tend to be the tougher nut to crack such as pillboxes or medium and heavy tanks. Base bombing should be avoided unless flying in arcade battles without the threat of enemy fighters, but at the rate of 450 kg or 500 kg at a time, it will take a while to eliminate a base unless you are working with others. With a centre slung bomb mounted on a trapeze, there is a slight delay from release for the mechanism to actuate and fling the bomb free of the propeller arc to ensure enough clearance especially if the aircraft is in a slight dive. This is similar to early US light bombers/attackers which had a similar configuration. | ||
=== Defensive armament === | === Defensive armament === | ||
| − | <!--''Defensive armament with turret machine guns or cannons, crewed by gunners. Examine the number of gunners and what belts or drums are better to use. If defensive weaponry is not available, remove this subsection.''--> | + | <!-- ''Defensive armament with turret machine guns or cannons, crewed by gunners. Examine the number of gunners and what belts or drums are better to use. If defensive weaponry is not available, remove this subsection.'' --> |
{{main|Ksp m/22-37 R (8 mm)}} | {{main|Ksp m/22-37 R (8 mm)}} | ||
| − | The '''''{{PAGENAME}}''''' is | + | The '''''{{PAGENAME}}''''' is defended by: |
| − | + | * 1 x 8 mm Ksp m/22-37 R machine gun, dorsal turret (300 rpg) | |
| − | * 1 x 8 mm Ksp m/22-37 R machine gun (300 | ||
This single pivotable 8 mm machine gun is mostly a last resort defence weapon. With the limited range of motion and its blind spot directly to the rear (vertical stabilizer blind spot), the pilot will need to "wag" the tail of the aircraft to ensure the gunner can engage any trailing fighters. The entire bottom of the bomber is unprotected and largely from above and the sides too. | This single pivotable 8 mm machine gun is mostly a last resort defence weapon. With the limited range of motion and its blind spot directly to the rear (vertical stabilizer blind spot), the pilot will need to "wag" the tail of the aircraft to ensure the gunner can engage any trailing fighters. The entire bottom of the bomber is unprotected and largely from above and the sides too. | ||
== Usage in battles == | == Usage in battles == | ||
| − | <!--''Describe the tactics of playing in | + | <!-- ''Describe the tactics of playing in the aircraft, the features of using aircraft in a team and advice on tactics. Refrain from creating a "guide" - do not impose a single point of view, but instead, give the reader food for thought. Examine the most dangerous enemies and give recommendations on fighting them. If necessary, note the specifics of the game in different modes (AB, RB, SB).'' --> |
The {{PAGENAME}} is used effectively as a low-altitude bomber, however, it can also be used to an extent as an attacker too. | The {{PAGENAME}} is used effectively as a low-altitude bomber, however, it can also be used to an extent as an attacker too. | ||
| Line 195: | Line 149: | ||
! rowspan="2" | Turbocharger | ! rowspan="2" | Turbocharger | ||
|- | |- | ||
| − | ! Oil | + | ! Oil !! Water !! Type |
| − | ! Water | ||
| − | ! Type | ||
|- | |- | ||
| − | | | + | | Controllable || Controllable<br>Not auto controlled || Controllable<br>Not auto controlled || Controllable<br>Not auto controlled || Separate || Not controllable<br>1 gear || Not controllable |
|- | |- | ||
|} | |} | ||
| Line 205: | Line 157: | ||
=== Modules === | === Modules === | ||
{| class="wikitable" | {| class="wikitable" | ||
| − | ! | + | ! Tier |
! colspan="2" | Flight performance | ! colspan="2" | Flight performance | ||
| − | ! | + | ! Survivability |
! colspan="3" | Weaponry | ! colspan="3" | Weaponry | ||
|- | |- | ||
| Line 224: | Line 176: | ||
| | | | ||
| Turret 8 mm | | Turret 8 mm | ||
| − | | | + | | m/40 |
|- | |- | ||
| III | | III | ||
| Line 240: | Line 192: | ||
| | | | ||
| New 8 mm MGs (turret) | | New 8 mm MGs (turret) | ||
| − | | | + | | m/41 |
|- | |- | ||
|} | |} | ||
=== Pros and cons === | === Pros and cons === | ||
| − | <!--''Summarise and briefly evaluate the vehicle in terms of its characteristics and combat effectiveness. Mark its pros and cons in the bulleted list. Try not to use more than 6 points for each of the characteristics. Avoid using categorical definitions such as "bad", "good" and the like - use substitutions with softer forms such as "inadequate" and "effective".''--> | + | <!-- ''Summarise and briefly evaluate the vehicle in terms of its characteristics and combat effectiveness. Mark its pros and cons in the bulleted list. Try not to use more than 6 points for each of the characteristics. Avoid using categorical definitions such as "bad", "good" and the like - use substitutions with softer forms such as "inadequate" and "effective".'' --> |
'''Pros:''' | '''Pros:''' | ||
| Line 260: | Line 212: | ||
== History == | == History == | ||
| − | <!--''Describe the history of the creation and combat usage of the aircraft in more detail than in the introduction. If the historical reference turns out to be too long, take it to a separate article, taking a link to the article about the vehicle and adding a block "/ History" (example: <nowiki>https://wiki.warthunder.com/(Vehicle-name)/History</nowiki>) and add a link to it here using the <code>main</code> template. Be sure to reference text and sources by using <code><nowiki><ref></nowiki></code>, as well as adding them at the end of the article. This section may also include the vehicle's dev blog entry (if applicable) and the in-game encyclopedia description (under <code><nowiki>=== In-game description ===</nowiki></code>, also if applicable).''--> | + | <!-- ''Describe the history of the creation and combat usage of the aircraft in more detail than in the introduction. If the historical reference turns out to be too long, take it to a separate article, taking a link to the article about the vehicle and adding a block "/History" (example: <nowiki>https://wiki.warthunder.com/(Vehicle-name)/History</nowiki>) and add a link to it here using the <code>main</code> template. Be sure to reference text and sources by using <code><nowiki><ref></ref></nowiki></code>, as well as adding them at the end of the article with <code><nowiki><references /></nowiki></code>. This section may also include the vehicle's dev blog entry (if applicable) and the in-game encyclopedia description (under <code><nowiki>=== In-game description ===</nowiki></code>, also if applicable).'' --> |
Late in the 1930s, aircraft manufacture Armstrong Siddeley Jaguar began developing the L 10, a reconnaissance aircraft in response to requirements set forth by the Swedish Air Force. The hopes were to replace the ageing biplane force of Fokker S 6s. Partway through the initial development of the aircraft, ASJA merged with SAAB and as such, the designation of the aircraft changed to SAAB 17. In addition to the reconnaissance portion of the aircraft’s capabilities, the wings were strengthened in order to be able to withstand higher forces imposed when utilising this aircraft as a dive bomber. Though outfitted with a centreline hardpoint to mount bombs, problems during dive-bombing would have occurred because released bombs would impact with the propeller. To avoid this and clear the propeller arc, a rigging system was built to ensure the bomb was thrown clear of the propeller arc in the event of dive-bombing. | Late in the 1930s, aircraft manufacture Armstrong Siddeley Jaguar began developing the L 10, a reconnaissance aircraft in response to requirements set forth by the Swedish Air Force. The hopes were to replace the ageing biplane force of Fokker S 6s. Partway through the initial development of the aircraft, ASJA merged with SAAB and as such, the designation of the aircraft changed to SAAB 17. In addition to the reconnaissance portion of the aircraft’s capabilities, the wings were strengthened in order to be able to withstand higher forces imposed when utilising this aircraft as a dive bomber. Though outfitted with a centreline hardpoint to mount bombs, problems during dive-bombing would have occurred because released bombs would impact with the propeller. To avoid this and clear the propeller arc, a rigging system was built to ensure the bomb was thrown clear of the propeller arc in the event of dive-bombing. | ||
| Line 267: | Line 219: | ||
== Media == | == Media == | ||
| − | <!--''Excellent additions to the article would be video guides, screenshots from the game, and photos.''--> | + | <!-- ''Excellent additions to the article would be video guides, screenshots from the game, and photos.'' --> |
;Images | ;Images | ||
| − | < | + | <gallery mode="packed" widths="250px"> |
| − | + | File:SAAB_B17A_WTWallpaper_001.jpg | |
| − | + | File:SAAB_B17A_WTWallpaper_002.jpg | |
| − | + | File:SAAB_B17A_WTWallpaper_003.jpg | |
| − | + | File:SAAB_B17A_WTWallpaper_004.jpg | |
| − | + | File:SAAB_B17A_WTWallpaper_005.jpg | |
| − | + | File:SAAB_B17A_WTWallpaper_006.jpg | |
| − | </ | + | </gallery> |
== See also == | == See also == | ||
| − | <!--''Links to the articles on the War Thunder Wiki that you think will be useful for the reader, for example:'' | + | <!-- ''Links to the articles on the War Thunder Wiki that you think will be useful for the reader, for example:'' |
* ''reference to the series of the aircraft;'' | * ''reference to the series of the aircraft;'' | ||
| − | * ''links to approximate analogues of other nations and research trees.''--> | + | * ''links to approximate analogues of other nations and research trees.'' --> |
;Related development | ;Related development | ||
| Line 297: | Line 249: | ||
== External links == | == External links == | ||
| − | <!--''Paste links to sources and external resources, such as:'' | + | <!-- ''Paste links to sources and external resources, such as:'' |
* ''topic on the official game forum;'' | * ''topic on the official game forum;'' | ||
* ''encyclopedia page on the aircraft;'' | * ''encyclopedia page on the aircraft;'' | ||
| − | * ''other literature.''--> | + | * ''other literature.'' --> |
| − | * [ | + | * [[wt:en/news/6495-development-b17a-saab-s-first-en|[Development] B17A: SAAB's first]] |
{{AirManufacturer Saab}} | {{AirManufacturer Saab}} | ||
| − | {{ | + | {{Sweden bombers}} |
| − | |||
| − | |||
Revision as of 10:25, 23 April 2020
Contents
| This page is about the Swedish bomber B17A. For other version, see B17B. |
Description

The B17A is a rank I Swedish bomber
with a battle rating of 1.7 (AB/RB) and 2.0 (SB). It was introduced in Update 1.95 "Northern Wind".
In the late 1930s, the Swedish Air Force was looking to replace their ageing Fokker S 6 biplane reconnaissance aircraft with a newer aircraft. Work began by Armstrong Siddeley Jaguar and was designated as the L 10, however in 1939 after merging with Saab, the designation was changed to Saab 17. Updated requirements required the reinforcing of the wings to be able to utilise the aircraft as a dive bomber though further modifications were necessary to ensure clearance of bombs mounted on the underside of the fuselage so they would clear the propeller arc when dropped during a dive.
Though only serving for a few short years with the Swedish Air Force due to the advent of turbojet aircraft, the B17A continued to serve with other countries for another 20 years. In War Thunder, this bomber featuring a Swedish license-built Pratt & Whitney Twin Wasp engine can hustle to its target (though not faster than many fighters it will face), but diving towards the ground and making a b-line for the target will ensure you get there as fast as possible. Sometimes making a bit of a wide arc along the sides of the map will ensure fighters will ignore you until they start seeing you blow up a bunch of ground targets and become a threat to their side winning.
It often happens in the early rank matches of the game where the smaller bombers such as the B17A can decisively win the match by taking out all of the ground targets. Some pilots become known for effectively eliminating ground targets with their light bombers in so much that at the beginning of the match and after every respawn, they are immediately targeted for elimination to prevent the match from quickly ending in the enemies favour.
General info
Flight performance
The B17A is relatively manoeuvrable aircraft for a light bomber, especially when loaded down with ordnance. Though it will not turn fight very well, it will not be as stiff as some find medium and heavy bombers to be. Through the use of flaps and extension of landing gear to act as a speed brake, pilots will find that the B17A can be effectively used to bomb columns of vehicles or other targets of choice found on the map.
If pressed into an air-to-air battle or if an air target of opportunity presents itself, the B17A can be effective in either damaging or disabling the enemy aircraft. If the situation becomes dire and the B17A is still holding onto its suspended ordnance, it might be best to go ahead and drop them to allow for more manoeuvrability and increased chances of survival.
When using smaller bomb types, it is best to use this aircraft as a low-altitude bomber as trying to use it at mid or high altitude, the AI vehicles will tend to be able to easily avoid the bombs. Also, the smaller bombs tend to do piddly damage against bases, but when working with other bombers every little bit helps.
| Characteristics | Max Speed (km/h at 4,200 m) |
Max altitude (metres) |
Turn time (seconds) |
Rate of climb (metres/second) |
Take-off run (metres) | |||
|---|---|---|---|---|---|---|---|---|
| AB | RB | AB | RB | AB | RB | |||
| Stock | 412 | 401 | 8000 | 20.0 | 20.7 | 8.2 | 8.2 | 300 |
| Upgraded | 462 | 435 | 18.0 | 19.0 | 13.3 | 10.5 | ||
Details
| Features | ||||
|---|---|---|---|---|
| Combat flaps | Take-off flaps | Landing flaps | Air brakes | Arrestor gear |
| ✓ | ✓ | ✓ | X | X |
| Limits | ||||||
|---|---|---|---|---|---|---|
| Wings (km/h) | Gear (km/h) | Flaps (km/h) | Max Static G | |||
| Combat | Take-off | Landing | + | - | ||
| 620 | 320 | 400 | 400 | 280 | ~8 | ~6 |

| Optimal velocities (km/h) | |||
|---|---|---|---|
| Ailerons | Rudder | Elevators | Radiator |
| < 300 | < 310 | < 320 | > 320 |
Survivability and armour
- 10 mm steel - Pilot's seatback
- 10 mm steel - Gunner rear protective plate
Armaments
Offensive armament
The B17A is armed with:
- 1 x 8 mm Ksp m/22 Fh machine gun, wing-mounted (500 rpg)
- 1 x 8 mm Ksp m/22 Fv machine gun, wing-mounted (500 rpg)
The Swedish Air Force chose to outfit the B17A with license-built copies of the Browning M1919 machine gun, however originally was calibrated for 6.5 mm however this round was found to be less effective against fabric-covered aircraft and so the gun was recalibrated up to 8 mm. The Swedish variant is listed as the Ksp m/22 machine gun of which two were mounted on this bomber with a gun in each wing. To be of really any use to the pilot either in aerial combat (if forced into it) or during ground attack, convergence must be set preferably in a range of 250 m - 400 m for best results especially with ground attack as this will allow firing capability on ground targets with ample room to manoeuvre without fear of crashing into the ground.
Suspended armament
The B17A can be outfitted with the following ordnance:
- 9 x 50 kg sb m/42 bombs (450 kg total)
- 1 x 250 kg mb m/40 bomb (250 kg total)
- 1 x 250 kg mb m/40 bomb + 4 x 50 kg sb m/42 bombs (450 kg total)
- 1 x 500 kg mb m/41 bomb (500 kg total)
While the initial payload option consisting of nine 50 kg bombs might feel a little on the weak side compared to a might 500 kg bomb, fear not as other nation aircraft such as the comparable Sukhoi Su-2 or the massive Farman F.222.2 and its 52 x 50 kg bombs can completely devastate columns of vehicles on early maps. These light trucks and anti-aircraft artillery are easily dispatched with the 50 kg bombs and can easily reward the bomber pilot with the awards "Antimech", "Heavy Metal Fury" or "Thunderer" to name a few.
Larger payload options should be reserved for targets which tend to be the tougher nut to crack such as pillboxes or medium and heavy tanks. Base bombing should be avoided unless flying in arcade battles without the threat of enemy fighters, but at the rate of 450 kg or 500 kg at a time, it will take a while to eliminate a base unless you are working with others. With a centre slung bomb mounted on a trapeze, there is a slight delay from release for the mechanism to actuate and fling the bomb free of the propeller arc to ensure enough clearance especially if the aircraft is in a slight dive. This is similar to early US light bombers/attackers which had a similar configuration.
Defensive armament
The B17A is defended by:
- 1 x 8 mm Ksp m/22-37 R machine gun, dorsal turret (300 rpg)
This single pivotable 8 mm machine gun is mostly a last resort defence weapon. With the limited range of motion and its blind spot directly to the rear (vertical stabilizer blind spot), the pilot will need to "wag" the tail of the aircraft to ensure the gunner can engage any trailing fighters. The entire bottom of the bomber is unprotected and largely from above and the sides too.
Usage in battles
The B17A is used effectively as a low-altitude bomber, however, it can also be used to an extent as an attacker too.
- Bomber
Several different configurations of bombs area available for the B17A depending on the targets available on any given map. The smaller 50 kg bombs tend to be used best on low-altitude quick strikes against columns of vehicles driving down a roadway. Low-altitude works best here as the vehicles do not have as much time to scatter and avoid incoming bombs. The 50 kg bombs do not have a huge shrapnel radius, so the less time the vehicles have to scatter the more likely they will be destroyed by direct explosion or the shrapnel wave which follows.
The larger 250 kg and 500 kg bombs are not as effective against mobile vehicle targets unless they clustered relatively close together where the splash damage from the bombs will take out multiple targets at a time. Targets which are more heavily protected such as pillboxes, medium and heavy tanks are also good options for the heavier bombs. Though these bombs will put a small dent in the larger bases, those should be left to medium or heavy bombers which can carry multiple 500 kg+ bombs, however, if bombers are grouping up on a base, do not hesitate to lend a hand if you are close enough to toss in a few bombs.
- Ground/Fleet attacker
Typically this bomber will be found at a lower altitude and after dropping bombs (and either waiting for the reload timer or heading back to base), there are typically targets of opportunity which the 8 mm machine guns can inflict damage or destroy. Due to the limited machine guns on the aircraft, it may be necessary to make a second pass. The manoeuvrability of this aircraft is sufficient enough to quickly turn around and make another pass. Dwelling in one target environment for long is never a good option as you will draw the attention of fighters so be on the move and keep the speed of the aircraft at a good clip to ensure potential energy is there when you need it.
Manual Engine Control
| MEC elements | ||||||
|---|---|---|---|---|---|---|
| Mixer | Pitch | Radiator | Supercharger | Turbocharger | ||
| Oil | Water | Type | ||||
| Controllable | Controllable Not auto controlled |
Controllable Not auto controlled |
Controllable Not auto controlled |
Separate | Not controllable 1 gear |
Not controllable |
Modules
| Tier | Flight performance | Survivability | Weaponry | |||
|---|---|---|---|---|---|---|
| I | Fuselage repair | Radiator | Offensive 8 mm | |||
| II | Compressor | Airframe | Turret 8 mm | m/40 | ||
| III | Wings repair | Engine | New 8 mm MGs | |||
| IV | Engine injection | Cover | New 8 mm MGs (turret) | m/41 | ||
Pros and cons
Pros:
- Very good bomb load (rivals Sukhoi Su-2 light bombers)
- Extended landing gear can act as a "poor-man's" airbrake
- Very manoeuvrable low to the ground, can easily out turn most heavy fighters
Cons:
- Weak frontal and rear dorsal armament
- Rear dorsal machine gun has a limited range of motion, vertical stabilizer causes firing blindspot directly to the rear of the aircraft
- Limited dive-bombing capabilities (shallow dive only)
History
Late in the 1930s, aircraft manufacture Armstrong Siddeley Jaguar began developing the L 10, a reconnaissance aircraft in response to requirements set forth by the Swedish Air Force. The hopes were to replace the ageing biplane force of Fokker S 6s. Partway through the initial development of the aircraft, ASJA merged with SAAB and as such, the designation of the aircraft changed to SAAB 17. In addition to the reconnaissance portion of the aircraft’s capabilities, the wings were strengthened in order to be able to withstand higher forces imposed when utilising this aircraft as a dive bomber. Though outfitted with a centreline hardpoint to mount bombs, problems during dive-bombing would have occurred because released bombs would impact with the propeller. To avoid this and clear the propeller arc, a rigging system was built to ensure the bomb was thrown clear of the propeller arc in the event of dive-bombing.
The B17 saw limited usage with the Swedish Air Force, however, forty-six were sold to Ethiopia where they remained in active service all the way through 1968. Finland acquired two aircraft, however, they were utilised as target-tugs and quickly were destroyed during accidents. With the unique landing gear configuration, several were modified for usage with skis or floats for alternate landing locations, though the majority were outfitted with the unique covered landing gear.
Media
- Images


See also
- Related development
- SAAB B17B
- Aircraft of comparable role, configuration and era
External links
| Swedish Aeroplane Company Ltd. (SAAB) | |
|---|---|
| Pre-SAAB: ASJA | J6B |
| Fighters | J21A-1 · J21A-2 · A21A-3 |
| Jet fighters | A21RB · J21RA · J29A · A29B · J29D · J29F · J32B · J35A · J35D · JA37C · JA37D · JAS39A |
| Jet attackers | A32A · A32A Röd Adam · AJ37 · AJS37 · SAAB-105G · SK60B |
| Bombers | B17A · B17B · S17BS |
| Dive-bombers | B3C · B18A · B18B · T18B · T18B (57) |
| Export | SAAB-105OE · Saab J35XS · JAS39C · ◔JAS39EBS HU C |
| Sweden bombers | |
|---|---|
| B3 | B3C |
| B17 | B17A · B17B · S17BS |
| SAAB 18 | B18A · B18B · T18B · T18B (57) |
| T 2 | T 2 |
| Finland | ▄Ar 196 A-5 · ▄Ju 88 A-4 |
