Difference between revisions of "B-25J-20"
(→Flight Performance) (Tag: Visual edit) |
(Restored page from version archived 12-01-19.) |
||
| Line 16: | Line 16: | ||
! colspan="8" | ''Stock'' | ! colspan="8" | ''Stock'' | ||
|- | |- | ||
| − | ! colspan="2" | Max Speed<br>(km/h at | + | ! colspan="2" | Max Speed<br>(km/h at 3,049 m) |
! rowspan="2" | Max altitude<br>(meters) | ! rowspan="2" | Max altitude<br>(meters) | ||
! colspan="2" | Turn time<br>(seconds) | ! colspan="2" | Turn time<br>(seconds) | ||
| Line 29: | Line 29: | ||
! RB | ! RB | ||
|- | |- | ||
| − | | | + | |421||408|| {{Specs|ceiling}} ||32.4||33.8||5.4||5.3||750 |
|- | |- | ||
! colspan="8" | ''Upgraded'' | ! colspan="8" | ''Upgraded'' | ||
|- | |- | ||
| − | ! colspan="2" | Max Speed<br>(km/h at | + | ! colspan="2" | Max Speed<br>(km/h at 3,049 m) |
! rowspan="2" |Max altitude (meters) | ! rowspan="2" |Max altitude (meters) | ||
! colspan="2" | Turn time (seconds) | ! colspan="2" | Turn time (seconds) | ||
| Line 46: | Line 46: | ||
! RB | ! RB | ||
|- | |- | ||
| − | | | + | |472||444|| {{Specs|ceiling}} ||29.7||31.0||10.6||7.7||750 |
|- | |- | ||
|} | |} | ||
| Line 61: | Line 61: | ||
! Arrestor gear | ! Arrestor gear | ||
|- | |- | ||
| − | | | + | | ✓ || ✓ || ✓ || X || X <!-- ✓ --> |
|- | |- | ||
|} | |} | ||
| Line 77: | Line 77: | ||
! - | ! - | ||
|- | |- | ||
| − | | {{Specs|разрушение|конструкции}} || {{Specs|разрушение|шасси}} || | + | | {{Specs|разрушение|конструкции}} || {{Specs|разрушение|шасси}} ||340|| ~5 || ~2 |
|- | |- | ||
|} | |} | ||
| Line 90: | Line 90: | ||
! Radiator<br>(km/h) | ! Radiator<br>(km/h) | ||
|- | |- | ||
| − | | < | + | | < 300 || < 270 || < 350 || > 330 |
|- | |- | ||
|} | |} | ||
| Line 104: | Line 104: | ||
! WEP Engine power | ! WEP Engine power | ||
|- | |- | ||
| − | | | + | | 2,000 m || 1,500 hp || 1,669 hp |
|- | |- | ||
| − | + | ! colspan="3" | Setting 2 | |
|- | |- | ||
! Optimal altitude | ! Optimal altitude | ||
| Line 112: | Line 112: | ||
! WEP Engine power | ! WEP Engine power | ||
|- | |- | ||
| − | | | + | | 7,000 m || 1,350 hp || 1,502 hp |
|- | |- | ||
| − | ! colspan="3" | Setting 3 | + | <!--! colspan="3" | Setting 3 |
|- | |- | ||
! Optimal altitude | ! Optimal altitude | ||
| Line 127: | Line 127: | ||
<!--''Examine the survivability of the aircraft. Note how vulnerable the structure is and how secure the pilot is, whether the fuel tanks are armoured. Describe the armour, if there is any, also mention the vulnerability of other critical aircraft systems.''--> | <!--''Examine the survivability of the aircraft. Note how vulnerable the structure is and how secure the pilot is, whether the fuel tanks are armoured. Describe the armour, if there is any, also mention the vulnerability of other critical aircraft systems.''--> | ||
| − | * | + | * 10 mm steel - front, sides & rear of cockpit |
| − | * | + | * 10 mm steel - rim of pilot seats |
| − | * | + | * 8 mm steel - below nose gunner |
| − | * | + | * 8 mm steel - pilot seats |
| + | * 9.5 mm - bulkhead after of dorsal turret | ||
| + | * 6.35 mm steel - aft of waist gunners | ||
| + | * 9.5 mm steel - tail turret | ||
== Armaments == | == Armaments == | ||
=== Offensive armament === | === Offensive armament === | ||
| − | <!--''Describe the offensive armament of the aircraft, if any. Describe how effective the cannons and machine guns are in a battle, and also what belts or drums are better to use. If there is no offensive weaponry, delete this subsection.'' | + | <!--''Describe the offensive armament of the aircraft, if any. Describe how effective the cannons and machine guns are in a battle, and also what belts or drums are better to use. If there is no offensive weaponry, delete this subsection.''--> |
| − | {{main| | + | {{main|Browning M2 (12.7 mm)}} |
The '''''{{PAGENAME}}''''' is armed with: | The '''''{{PAGENAME}}''''' is armed with: | ||
| − | * | + | * 2 × 12.7 mm M2 Browning machine gun, nose-mounted (400 rpg = 800 total) |
| − | + | * 4 × 12.7 mm M2 Browning machine gun, cheek-mounted (400 rpg = 1,600 total) | |
| − | + | ||
| − | ''Describe the aircraft's suspended armament: additional cannons under the wings, bombs, rockets and torpedoes. This section is especially important for bombers and attackers. If there is no suspended weaponry remove this subsection.''--> | + | === Suspended armament === |
| − | + | <!--''Describe the aircraft's suspended armament: additional cannons under the wings, bombs, rockets and torpedoes. This section is especially important for bombers and attackers. If there is no suspended weaponry remove this subsection.''--> | |
| − | + | {{main|:Category:Suspended armaments|l1=Suspended armaments}} | |
| + | |||
| + | The '''''{{PAGENAME}}''''' can be outfitted with the following ordinance: | ||
| + | |||
| + | * 12 x 100 lb AN-M30A1 bombs | ||
| + | * 4 x 250 lb AN-M57 bombs | ||
| + | * 4 x 250 lb AN-M57 bombs + 8 x 100 lb AN-M30A1 bombs | ||
| + | * 8 x 250 lb AN-M57 bombs | ||
| + | * 8 x 100 lb AN-M30A1 bombs + 2 x 500 lb AN-M64A1 bombs | ||
| + | * 4 x 500 lb AN-M64A1 bombs | ||
| + | * 10 x 100 lb AN-M30A1 bombs + 1 x 1000 lbs AN-M65A1 bomb | ||
| + | * 3 x 1000 lb AN-M65A1 bombs | ||
| + | |||
=== Defensive armament === | === Defensive armament === | ||
| − | ''Defensive armament with turret machine guns or cannons, crewed by gunners. Examine the number of gunners and what belts or drums are better to use. If defensive weaponry is not available remove this subsection.'' | + | <!--''Defensive armament with turret machine guns or cannons, crewed by gunners. Examine the number of gunners and what belts or drums are better to use. If defensive weaponry is not available, remove this subsection.''--> |
| − | --> | + | {{main|Browning M2 (12.7 mm)}} |
| + | |||
| + | The '''''{{PAGENAME}}''''' is defended by: | ||
| + | |||
| + | * 1 x 12.7 mm M2 Browning machine gun, nose turret (300 rpg) | ||
| + | * 2 x 12.7 mm M2 Browning machine gun, tail turret (600 rpg = 1,200 total) | ||
| + | * 2 x 12.7 mm M2 Browning machine gun, dorsal turret (400 rpg = 800 total) | ||
| + | * 1 x 12.7 mm M2 Browning machine gun, 2 x beam turret, (250 rpg = 500 total) | ||
| + | |||
== Usage in the battles == | == Usage in the battles == | ||
| − | <!--''Describe the tactics of playing in an aircraft, the features of using vehicles in a team and advice on tactics. Refrain from creating a "guide" - do not impose a single point of view but give the reader food for thought. Examine the most dangerous enemies and give recommendations on fighting them. If necessary, note the specifics of the game in different modes (AB, RB, SB).''--> | + | <!--''Describe the tactics of playing in an aircraft, the features of using vehicles in a team and advice on tactics. Refrain from creating a "guide" - do not impose a single point of view but give the reader food for thought. Examine the most dangerous enemies and give recommendations on fighting them. If necessary, note the specifics of the game in different modes (AB, RB, SB).''-->The air frame makes this plane a particularly difficult target to bring down, however there are four main blindspots to be considered: Level with the leading edges of the wings, the complete underside, and each side in the rear presented by the twin tail. These are the easiest areas to kill an opposing B-25. With a max speed of 250 MPH under ideal conditions and a max air frame speed of 360 MPH, The B-25 is relatively fast for a bomber, but while climbing, can go no faster than 175 with optimal pitch. The twin engines makes for good acceleration, and allows the plane to get to an airfield to land, given you are at altitude and can maintain airspeed. This plane makes a great strategic bomber, but its wings make for nice large targets. The best way to ward off enemy fighters is to bank in toward them, giving your top gunner a chance to damage them before they can cause any real damage. Always try to fly at treetop level to cover the blindspot on the underside, or fly with bombers that have belly gunners, so you are fully covered. Also try to fly with friendly fighters, as they will prove invaluable to your survival. If you wind up with an enemy fighter or attacker on your tail, reduce engine power and adjust trim so you retain level flight, but give all rear facing gunners the ability to damage your opponent. NEVER FLY IN A STRAIGHT LINE WHILE FENDING OFF ATTACKERS!!! |
===Manual Engine Control=== | ===Manual Engine Control=== | ||
| Line 166: | Line 189: | ||
! Type | ! Type | ||
|- | |- | ||
| − | | Controllable || rowspan="2" | | + | | Controllable || rowspan="2" | Controllable || rowspan="2" | Not controllable || rowspan="2" | Controllable || rowspan="2" |Combined|| rowspan="2" | Controllable || rowspan="2" | Not controllable |
|- | |- | ||
|} | |} | ||
| Line 181: | Line 204: | ||
| Radiator | | Radiator | ||
| | | | ||
| − | | | + | |Offensive 12 mm |
| + | |SBC-25 | ||
|- | |- | ||
| II | | II | ||
| Line 187: | Line 211: | ||
| Compressor | | Compressor | ||
| Airframe | | Airframe | ||
| − | | | + | |New 12 mm MGs |
| + | |MBC-25 | ||
|- | |- | ||
| III | | III | ||
| Line 193: | Line 218: | ||
| Engine | | Engine | ||
| | | | ||
| − | | | + | |Turret 12 mm |
| + | | | ||
|- | |- | ||
| IV | | IV | ||
| Line 199: | Line 225: | ||
| Engine Injection | | Engine Injection | ||
| Cover | | Cover | ||
| − | | | + | |New 12 mm MGs (turret) |
| + | |LBC-25 | ||
|- | |- | ||
|} | |} | ||
| Line 208: | Line 235: | ||
'''Pros:''' | '''Pros:''' | ||
| − | * | + | * Very effective front facing armament of 6 x 12.7 mm machine guns allows for engaging enemy bombers at the start of the match, or incoming fighters. |
| + | * Durable airframe. | ||
| + | * Heavy defensive armament on both left and rights sides and especially on the rear. | ||
| + | * Can provide initial cover for other bombers until fighters reach their altitude. | ||
| + | * Can be used as both a tactical and strategic bomber. | ||
'''Cons:''' | '''Cons:''' | ||
| − | * | + | * The belly of the aircraft is a massive blindspot in the aircraft's defense. |
| + | * Slow. | ||
| + | * Poor climb rate and energy retention. | ||
| + | * For the most part, the offensive armament will only be useful in attacking enemy bombers, ground targets, or engaging fighters head-on, as the plane is too unmaneuverable for any real dogfighting of any kind. | ||
| + | * Steel construction makes this plane particularly heavy, and a small payload limits this plane's ability to be used as a tactical or strategic bomber. | ||
| + | * The Elevator can be shot off by an enemy plane easily. This can cause it to become uncontrollable in certain situations. However, it can still be controlled by operating flaps, or adjusting engine power. | ||
== History == | == History == | ||
Revision as of 19:26, 9 April 2019
Contents
| This page is about the aircraft B-25J-20. For other uses, see B-25 (Disambiguation) |
Description

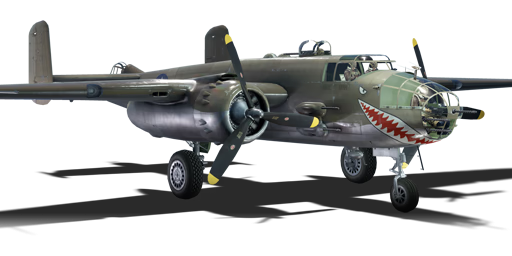
The B-25J-20 Mitchell is a Rank II American bomber
with a battle rating of 4.0 (AB/RB) and 4.3 (SB).
General info
Flight Performance
| Characteristics | |||||||
|---|---|---|---|---|---|---|---|
| Stock | |||||||
| Max Speed (km/h at 3,049 m) |
Max altitude (meters) |
Turn time (seconds) |
Rate of climb (meters/second) |
Take-off run (meters) | |||
| AB | RB | AB | RB | AB | RB | ||
| 421 | 408 | 7500 | 32.4 | 33.8 | 5.4 | 5.3 | 750 |
| Upgraded | |||||||
| Max Speed (km/h at 3,049 m) |
Max altitude (meters) | Turn time (seconds) | Rate of climb (meters/second) |
Take-off run (meters) | |||
| AB | RB | AB | RB | AB | RB | ||
| 472 | 444 | 7500 | 29.7 | 31.0 | 10.6 | 7.7 | 750 |
Details
| Features | ||||
|---|---|---|---|---|
| Combat flap | Take-off flap | Landing flap | Air brakes | Arrestor gear |
| ✓ | ✓ | ✓ | X | X |
| Limits | ||||
|---|---|---|---|---|
| Wing-break speed (km/h) |
Gear limit (km/h) |
Combat flap (km/h) |
Max Static G | |
| + | - | |||
| 0 | 294 | 340 | ~5 | ~2 |
| Optimal velocities | |||
|---|---|---|---|
| Ailerons (km/h) |
Rudder (km/h) |
Elevators (km/h) |
Radiator (km/h) |
| < 300 | < 270 | < 350 | > 330 |
| Compressor (RB/SB) | ||
|---|---|---|
| Setting 1 | ||
| Optimal altitude | 100% Engine power | WEP Engine power |
| 2,000 m | 1,500 hp | 1,669 hp |
| Setting 2 | ||
| Optimal altitude | 100% Engine power | WEP Engine power |
| 7,000 m | 1,350 hp | 1,502 hp |
Survivability and armour
- 10 mm steel - front, sides & rear of cockpit
- 10 mm steel - rim of pilot seats
- 8 mm steel - below nose gunner
- 8 mm steel - pilot seats
- 9.5 mm - bulkhead after of dorsal turret
- 6.35 mm steel - aft of waist gunners
- 9.5 mm steel - tail turret
Armaments
Offensive armament
The B-25J-20 is armed with:
- 2 × 12.7 mm M2 Browning machine gun, nose-mounted (400 rpg = 800 total)
- 4 × 12.7 mm M2 Browning machine gun, cheek-mounted (400 rpg = 1,600 total)
Suspended armament
The B-25J-20 can be outfitted with the following ordinance:
- 12 x 100 lb AN-M30A1 bombs
- 4 x 250 lb AN-M57 bombs
- 4 x 250 lb AN-M57 bombs + 8 x 100 lb AN-M30A1 bombs
- 8 x 250 lb AN-M57 bombs
- 8 x 100 lb AN-M30A1 bombs + 2 x 500 lb AN-M64A1 bombs
- 4 x 500 lb AN-M64A1 bombs
- 10 x 100 lb AN-M30A1 bombs + 1 x 1000 lbs AN-M65A1 bomb
- 3 x 1000 lb AN-M65A1 bombs
Defensive armament
The B-25J-20 is defended by:
- 1 x 12.7 mm M2 Browning machine gun, nose turret (300 rpg)
- 2 x 12.7 mm M2 Browning machine gun, tail turret (600 rpg = 1,200 total)
- 2 x 12.7 mm M2 Browning machine gun, dorsal turret (400 rpg = 800 total)
- 1 x 12.7 mm M2 Browning machine gun, 2 x beam turret, (250 rpg = 500 total)
Usage in the battles
The air frame makes this plane a particularly difficult target to bring down, however there are four main blindspots to be considered: Level with the leading edges of the wings, the complete underside, and each side in the rear presented by the twin tail. These are the easiest areas to kill an opposing B-25. With a max speed of 250 MPH under ideal conditions and a max air frame speed of 360 MPH, The B-25 is relatively fast for a bomber, but while climbing, can go no faster than 175 with optimal pitch. The twin engines makes for good acceleration, and allows the plane to get to an airfield to land, given you are at altitude and can maintain airspeed. This plane makes a great strategic bomber, but its wings make for nice large targets. The best way to ward off enemy fighters is to bank in toward them, giving your top gunner a chance to damage them before they can cause any real damage. Always try to fly at treetop level to cover the blindspot on the underside, or fly with bombers that have belly gunners, so you are fully covered. Also try to fly with friendly fighters, as they will prove invaluable to your survival. If you wind up with an enemy fighter or attacker on your tail, reduce engine power and adjust trim so you retain level flight, but give all rear facing gunners the ability to damage your opponent. NEVER FLY IN A STRAIGHT LINE WHILE FENDING OFF ATTACKERS!!!
Manual Engine Control
| MEC elements | ||||||
|---|---|---|---|---|---|---|
| Mixer | Pitch | Radiator | Supercharger | Turbocharger | ||
| Oil | Water | Type | ||||
| Controllable | Controllable | Not controllable | Controllable | Combined | Controllable | Not controllable |
Modules
| Tier | Flight performance | Survivability | Weaponry | ||
|---|---|---|---|---|---|
| I | Fuselage Repair | Radiator | Offensive 12 mm | SBC-25 | |
| II | Compressor | Airframe | New 12 mm MGs | MBC-25 | |
| III | Wings Repair | Engine | Turret 12 mm | ||
| IV | Engine Injection | Cover | New 12 mm MGs (turret) | LBC-25 | |
Pros and cons
Pros:
- Very effective front facing armament of 6 x 12.7 mm machine guns allows for engaging enemy bombers at the start of the match, or incoming fighters.
- Durable airframe.
- Heavy defensive armament on both left and rights sides and especially on the rear.
- Can provide initial cover for other bombers until fighters reach their altitude.
- Can be used as both a tactical and strategic bomber.
Cons:
- The belly of the aircraft is a massive blindspot in the aircraft's defense.
- Slow.
- Poor climb rate and energy retention.
- For the most part, the offensive armament will only be useful in attacking enemy bombers, ground targets, or engaging fighters head-on, as the plane is too unmaneuverable for any real dogfighting of any kind.
- Steel construction makes this plane particularly heavy, and a small payload limits this plane's ability to be used as a tactical or strategic bomber.
- The Elevator can be shot off by an enemy plane easily. This can cause it to become uncontrollable in certain situations. However, it can still be controlled by operating flaps, or adjusting engine power.
History
Describe the history of the creation and combat usage of the aircraft in more detail than in the introduction. If the historical reference turns out to be too big, take it to a separate article, taking a link to an article about the vehicle and adding a block "/ historical reference" (example: https://wiki.warthunder.com/Name-vehicles/historical reference) and add a link to it here using the main template. Be sure to include links to sources at the end of the article.
Media
An excellent addition to the article will be video guides, as well as screenshots from the game and photos.
Read also
Links to the articles on the War Thunder Wiki that you think will be useful for the reader, for example,
- reference to the series of the aircraft;
- links to approximate analogues of other nations and research trees.
Sources
Paste links to sources and external resources, such as:
- topic on the official game forum;
- page on aircraft encyclopedia;
- other literature.
| USA bombers | |
|---|---|
| Dive | SB2U-2 · SB2U-3 · SBD-3 · SB2C-1C · SB2C-4 |
| Torpedo | TBD-1 · PBY-5 Catalina · PBY-5A Catalina · TBF-1C · BTD-1 |
| Medium | B-10B · B-18A · B-34 · PV-2D · B-25J-1 · B-25J-20 · A-26C-45 · A-26C-45DT · B-26B |
| Heavy | B-17E · B-17E/L · B-17G-60-VE · PB4Y-2 · B-24D-25-CO · B-29A-BN |
| Hydroplanes | OS2U-1 · OS2U-3 · PBM-1 "Mariner" · PBM-3 "Mariner" |
