Difference between revisions of "B-17E (Japan)"
Colok76286 (talk | contribs) (→Modules: Added premium banner text) |
m (→Details) |
||
| (4 intermediate revisions by 3 users not shown) | |||
| Line 1: | Line 1: | ||
| − | |||
{{About | {{About | ||
| − | |about= | + | |about=premium Japanese bomber '''{{PAGENAME}}''' |
| − | |usage=other | + | |usage=other versions |
|link=B-17 (Family) | |link=B-17 (Family) | ||
| + | }} | ||
| + | {{Specs-Card | ||
| + | |code=b-17e_japan | ||
| + | |images={{Specs-Card-Image|GarageImage_{{PAGENAME}}.jpg}} | ||
}} | }} | ||
== Description == | == Description == | ||
| − | <!--''In the description, the first part | + | <!-- ''In the description, the first part should be about the history of and the creation and combat usage of the aircraft, as well as its key features. In the second part, tell the reader about the aircraft in the game. Insert a screenshot of the vehicle, so that if the novice player does not remember the vehicle by name, he will immediately understand what kind of vehicle the article is talking about.'' --> |
| − | + | The '''{{Specs|name}}''' is a premium rank {{Specs|rank}} Japanese bomber {{Battle-rating}}. It was introduced in [[Update 1.43]]. | |
| − | |||
| − | |||
| − | The '''{{Specs|name}}''' is a premium | ||
The B-17E Flying Fortress, as the name suggests, is intended to be used as a high-altitude level bomber, designed to target enemy airfields, military bases, factories, and other infrastructure crucial to winning the war. Despite its large bomb-load, it is not recommended to target moving ground targets, such as tank formations, unless they are the only targets. This is because of the inaccuracy of the bombs at such high altitude, and since columns will simply disperse when they sight bombs falling. When using the B-17E, it is always best to group up with others in a wedge-like formation for optimal defense against air targets and climb to an altitude of, at least, 4,000 m. A few fighter escorts, would ensure the survival of friendly bombers, only if they adopt fighter-sweep tactics to hunt down enemy fighters converging on the formation. | The B-17E Flying Fortress, as the name suggests, is intended to be used as a high-altitude level bomber, designed to target enemy airfields, military bases, factories, and other infrastructure crucial to winning the war. Despite its large bomb-load, it is not recommended to target moving ground targets, such as tank formations, unless they are the only targets. This is because of the inaccuracy of the bombs at such high altitude, and since columns will simply disperse when they sight bombs falling. When using the B-17E, it is always best to group up with others in a wedge-like formation for optimal defense against air targets and climb to an altitude of, at least, 4,000 m. A few fighter escorts, would ensure the survival of friendly bombers, only if they adopt fighter-sweep tactics to hunt down enemy fighters converging on the formation. | ||
== General info == | == General info == | ||
| − | === Flight | + | === Flight performance === |
| − | ''Describe how the aircraft behaves in the air. Speed, manoeuvrability, acceleration and allowable loads - these are the most important characteristics of the vehicle.'' | + | {{Specs-Avia-Flight}} |
| + | <!-- ''Describe how the aircraft behaves in the air. Speed, manoeuvrability, acceleration and allowable loads - these are the most important characteristics of the vehicle.'' --> | ||
| − | {| class="wikitable" style="text-align:center" | + | {| class="wikitable" style="text-align:center" width="70%" |
| − | + | ! rowspan="2" | Characteristics | |
| − | |||
| − | |||
| − | ! | ||
| − | |||
! colspan="2" | Max Speed<br>(km/h at 7,680 m) | ! colspan="2" | Max Speed<br>(km/h at 7,680 m) | ||
| − | ! rowspan="2" | Max altitude<br>( | + | ! rowspan="2" | Max altitude<br>(metres) |
! colspan="2" | Turn time<br>(seconds) | ! colspan="2" | Turn time<br>(seconds) | ||
| − | ! colspan="2" | Rate of climb<br>( | + | ! colspan="2" | Rate of climb<br>(metres/second) |
| − | ! rowspan="2" |Take-off run<br>( | + | ! rowspan="2" | Take-off run<br>(metres) |
| − | |||
| − | |||
| − | |||
| − | |||
| − | |||
| − | |||
| − | |||
| − | |||
| − | |||
| − | |||
| − | |||
|- | |- | ||
| − | ! | + | ! AB !! RB !! AB !! RB !! AB !! RB |
| − | ! | ||
| − | ! | ||
| − | ! | ||
| − | ! | ||
|- | |- | ||
| − | ! | + | ! Stock |
| − | + | | 497 || 483 || rowspan="2" | {{Specs|ceiling}} || 36.9 || 37.9 || 5.8 || 5.6 || rowspan="2" | 600 | |
| − | |||
| − | |||
| − | |||
| − | |||
|- | |- | ||
| − | | 523 || 510 | + | ! Upgraded |
| + | | 523 || 510 || 35.1 || 36.0 || 8.7 || 7.2 | ||
|- | |- | ||
|} | |} | ||
| − | ====Details==== | + | ==== Details ==== |
| − | {| class="wikitable" style="text-align:center" | + | {| class="wikitable" style="text-align:center" width="50%" |
|- | |- | ||
! colspan="5" | Features | ! colspan="5" | Features | ||
|- | |- | ||
| − | ! Combat | + | ! Combat flaps !! Take-off flaps !! Landing flaps !! Air brakes !! Arrestor gear |
| − | ! Take-off | ||
| − | ! Landing | ||
| − | ! Air brakes | ||
| − | ! Arrestor gear | ||
|- | |- | ||
| ✓ || ✓ || ✓ || X || X <!-- ✓ --> | | ✓ || ✓ || ✓ || X || X <!-- ✓ --> | ||
| Line 74: | Line 49: | ||
|} | |} | ||
| − | {| class="wikitable" style="text-align:center" | + | {| class="wikitable" style="text-align:center" width="50%" |
|- | |- | ||
| − | ! colspan=" | + | ! colspan="7" | Limits |
|- | |- | ||
| − | ! rowspan="2" | | + | ! rowspan="2" | Wings (km/h) |
| − | ! rowspan="2" | Gear | + | ! rowspan="2" | Gear (km/h) |
| − | ! | + | ! colspan="3" | Flaps (km/h) |
! colspan="2" | Max Static G | ! colspan="2" | Max Static G | ||
|- | |- | ||
| − | ! + | + | ! Combat !! Take-off !! Landing !! + !! - |
| − | ! - | ||
|- | |- | ||
| − | | {{Specs| | + | | {{Specs|destruction|body}} || {{Specs|destruction|gear}} || 383 || 361 || 249 || ~3 || ~2 |
|- | |- | ||
|} | |} | ||
| Line 92: | Line 66: | ||
{| class="wikitable" style="text-align:center" | {| class="wikitable" style="text-align:center" | ||
|- | |- | ||
| − | ! colspan="4" | Optimal velocities | + | ! colspan="4" | Optimal velocities (km/h) |
|- | |- | ||
| − | ! Ailerons | + | ! Ailerons !! Rudder !! Elevators !! Radiator |
| − | ! Rudder | ||
| − | ! Elevators | ||
| − | ! Radiator | ||
|- | |- | ||
| − | | < | + | | < 330 || < 310 || < 270 || > 300 |
|- | |- | ||
|} | |} | ||
| Line 113: | Line 84: | ||
! WEP Engine power | ! WEP Engine power | ||
|- | |- | ||
| − | | 6,180 || 4,000 hp || 4,708 hp | + | | 6,180 || 4,000 hp || 4,708 hp |
|- | |- | ||
| − | |||
| − | |||
| − | |||
| − | |||
| − | |||
| − | |||
| − | |||
| − | |||
| − | |||
| − | |||
| − | |||
| − | |||
| − | |||
| − | |||
| − | |||
| − | |||
|} | |} | ||
=== Survivability and armour === | === Survivability and armour === | ||
| − | <!--''Examine the survivability of the aircraft. Note how vulnerable the structure is and how secure the pilot is, whether the fuel tanks are armoured. Describe the armour, if there is any, also mention the vulnerability of other critical aircraft systems.''--> | + | {{Specs-Avia-Armour}} |
| + | <!-- ''Examine the survivability of the aircraft. Note how vulnerable the structure is and how secure the pilot is, whether the fuel tanks are armoured, etc. Describe the armour, if there is any, and also mention the vulnerability of other critical aircraft systems.'' --> | ||
| + | |||
* 6.35 mm Steel plate behind nose gunner | * 6.35 mm Steel plate behind nose gunner | ||
* 6.35 mm Steel plates behind pilots | * 6.35 mm Steel plates behind pilots | ||
| Line 141: | Line 98: | ||
* 6.35 mm Steel plates in front of tail gunner | * 6.35 mm Steel plates in front of tail gunner | ||
* 38 mm Bulletproof glass in front of tail gunner | * 38 mm Bulletproof glass in front of tail gunner | ||
| + | |||
| + | === Modifications and economy === | ||
| + | {{Specs-Economy}} | ||
== Armaments == | == Armaments == | ||
| + | {{Specs-Avia-Armaments}} | ||
=== Suspended armament === | === Suspended armament === | ||
| − | <!--''Describe the aircraft's suspended armament: additional cannons under the wings, bombs, rockets and torpedoes. This section is especially important for bombers and attackers. If there is no suspended weaponry remove this subsection.''--> | + | {{Specs-Avia-Suspended}} |
| + | <!-- ''Describe the aircraft's suspended armament: additional cannons under the wings, bombs, rockets and torpedoes. This section is especially important for bombers and attackers. If there is no suspended weaponry remove this subsection.'' --> | ||
{{main|AN-M64A1 (500 lb)|AN-M65A1 (1,000 lb)}} | {{main|AN-M64A1 (500 lb)|AN-M65A1 (1,000 lb)}} | ||
| Line 154: | Line 116: | ||
=== Defensive armament === | === Defensive armament === | ||
| − | <!--''Defensive armament with turret machine guns or cannons, crewed by gunners. Examine the number of gunners and what belts or drums are better to use. If defensive weaponry is not available remove this subsection.''--> | + | {{Specs-Avia-Defensive}} |
| − | {{main|Browning | + | <!-- ''Defensive armament with turret machine guns or cannons, crewed by gunners. Examine the number of gunners and what belts or drums are better to use. If defensive weaponry is not available, remove this subsection.'' --> |
| + | {{main|M2 Browning (12.7 mm)|Browning (7.62 mm)}} | ||
The '''''{{PAGENAME}}''''' is defended by: | The '''''{{PAGENAME}}''''' is defended by: | ||
| − | * | + | * 2 x 12.7 mm M2 Browning machine guns, front dorsal turret (500 rpg = 1,000 total) |
| − | * 2 x 12.7 mm Browning | + | * 2 x 12.7 mm M2 Browning machine guns, ventral turret (500 rpg = 1,000 total) |
| − | * 2 x 12.7 mm Browning M2 machine gun, rear dorsal turret (500 rpg) | + | * 2 x 12.7 mm M2 Browning machine guns, tail turret (500 rpg = 1,000 total) |
| − | * 1 x 12.7 mm Browning | + | * 1 x 12.7 mm M2 Browning machine gun, rear dorsal turret (500 rpg) |
| − | * | + | * 1 x 12.7 mm M2 Browning machine gun, 2 x beam turrets (400 rpg) |
| + | * 1 x 7.62 mm Browning machine gun, nose turret (500 rpg) | ||
== Usage in battles == | == Usage in battles == | ||
| − | <!--''Describe the tactics of playing in | + | <!-- ''Describe the tactics of playing in the aircraft, the features of using aircraft in a team and advice on tactics. Refrain from creating a "guide" - do not impose a single point of view, but instead, give the reader food for thought. Examine the most dangerous enemies and give recommendations on fighting them. If necessary, note the specifics of the game in different modes (AB, RB, SB).'' --> |
| − | Generally, the plane's role should not diverge from this norm, as it is ineffective and costly as a low altitude bomber. Survival is an utmost importance to be remembered when using this plane. While one target may be missed, there will always be another opportunity to make another pass once reloaded and repaired. The few M2 machine guns in the nose cannot protect the most vulnerable part of any B-17 - the nose. Protected only by a layer of Plexiglas and almost no | + | Generally, the plane's role should not diverge from this norm, as it is ineffective and costly as a low altitude bomber. Survival is an utmost importance to be remembered when using this plane. While one target may be missed, there will always be another opportunity to make another pass once reloaded and repaired. The few M2 machine guns in the nose cannot protect the most vulnerable part of any B-17 - the nose. Protected only by a layer of Plexiglas and almost no armour (excluding the frontal bulkhead, which only covers the pilot/co-pilot's torso), most of the crew critical in the success of the mission, including the pilot, co-pilot, bombardier and navigator would be knocked-out instantly. If targeted by German cannons, most notably, the [[MK_108 (30 mm)|Mk 108]]. Just a burst of 30 mm MK 108 placed anywhere on the aircraft , would compromise the crew's survival and even the aircraft's structural integrity. |
When facing German fighters and interceptors in realistic battles', it is best to use Omni-purpose or Armour-piercing/Ground Targets ammunition belts for the Browning M2 .50 cal turret machine guns, which is likely to punch through their noses when tailing the B-17E. These ammunition belts are effective at tearing through the engine block of a [[Fw_190_D-9|Focke-Wulf Fw 190D]] or [[Bf_109_G-6|Messerschmitt Bf 109G]], hopefully resulting in an internal engine fire, a pilot snipe, or an inoperable engine for the opponent. | When facing German fighters and interceptors in realistic battles', it is best to use Omni-purpose or Armour-piercing/Ground Targets ammunition belts for the Browning M2 .50 cal turret machine guns, which is likely to punch through their noses when tailing the B-17E. These ammunition belts are effective at tearing through the engine block of a [[Fw_190_D-9|Focke-Wulf Fw 190D]] or [[Bf_109_G-6|Messerschmitt Bf 109G]], hopefully resulting in an internal engine fire, a pilot snipe, or an inoperable engine for the opponent. | ||
| − | ===Manual Engine Control=== | + | === Manual Engine Control === |
{| class="wikitable" style="text-align:center" | {| class="wikitable" style="text-align:center" | ||
|- | |- | ||
! colspan="7" | MEC elements | ! colspan="7" | MEC elements | ||
|- | |- | ||
| − | ! rowspan="2" |Mixer | + | ! rowspan="2" | Mixer |
| − | ! rowspan="2" |Pitch | + | ! rowspan="2" | Pitch |
| − | ! colspan="3" |Radiator | + | ! colspan="3" | Radiator |
| − | ! rowspan="2" |Supercharger | + | ! rowspan="2" | Supercharger |
| − | ! rowspan="2" |Turbocharger | + | ! rowspan="2" | Turbocharger |
|- | |- | ||
| − | ! Oil | + | ! Oil !! Water !! Type |
| − | ! Water | ||
| − | ! Type | ||
|- | |- | ||
| − | | Controllable || | + | | Controllable || Controllable<br>Auto control available || Not controllable<br>Not auto controlled || Controllable<br>Auto control available || Combined || Controllable<br>1 gear || Auto controlled |
| − | | | ||
| − | | | ||
| − | |||
| − | |||
| − | |||
| − | |||
| − | |||
| − | |||
| − | |||
| − | |||
| − | |||
| − | |||
| − | |||
| − | |||
| − | |||
| − | |||
| − | |||
| − | |||
| − | |||
| − | |||
| − | |||
| − | |||
| − | |||
| − | |||
| − | |||
| − | |||
| − | |||
| − | |||
| − | |||
| − | |||
| − | |||
| − | |||
| − | |||
| − | |||
| − | |||
| − | |||
| − | |||
| − | | | ||
| − | |||
|- | |- | ||
|} | |} | ||
=== Pros and cons === | === Pros and cons === | ||
| − | <!--'' | + | <!-- ''Summarise and briefly evaluate the vehicle in terms of its characteristics and combat effectiveness. Mark its pros and cons in the bulleted list. Try not to use more than 6 points for each of the characteristics. Avoid using categorical definitions such as "bad", "good" and the like - use substitutions with softer forms such as "inadequate" and "effective".'' --> |
'''Pros:''' | '''Pros:''' | ||
| + | |||
* Large payload | * Large payload | ||
* Powerful air defense capabilities | * Powerful air defense capabilities | ||
| Line 244: | Line 168: | ||
'''Cons:''' | '''Cons:''' | ||
| + | |||
* Big target | * Big target | ||
* Fairly Slow | * Fairly Slow | ||
| − | * Nose is extremely vulnerable, the only | + | * Nose is extremely vulnerable, the only armour on the front is the front bulkhead, covering only the pilot and copilot's torso |
* Vulnerable to German "Minengeschoß" and > 20 mm gunfire | * Vulnerable to German "Minengeschoß" and > 20 mm gunfire | ||
* Engine fires are common | * Engine fires are common | ||
| Line 253: | Line 178: | ||
== History == | == History == | ||
| − | <!--''Describe the history of the creation and combat usage of the aircraft in more detail than in the introduction. If the historical reference turns out to be too | + | <!-- ''Describe the history of the creation and combat usage of the aircraft in more detail than in the introduction. If the historical reference turns out to be too long, take it to a separate article, taking a link to the article about the vehicle and adding a block "/History" (example: <nowiki>https://wiki.warthunder.com/(Vehicle-name)/History</nowiki>) and add a link to it here using the <code>main</code> template. Be sure to reference text and sources by using <code><nowiki><ref></ref></nowiki></code>, as well as adding them at the end of the article with <code><nowiki><references /></nowiki></code>. This section may also include the vehicle's dev blog entry (if applicable) and the in-game encyclopedia description (under <code><nowiki>=== In-game description ===</nowiki></code>, also if applicable).'' --> |
| − | In WW2 the Japanese army captured crashed B-17s in the Philippines and Netherlands East Indies. They were tested by the IJAAF Koku Gijutsu Kenkyujo (Air Technical Research Laboratory) at Tachikawa. Little is known about these B-17s, but their historical photographs are valuable to telling the story of the bombers. | + | In WW2 the Japanese army captured crashed B-17s in the Philippines and Netherlands East Indies. They were tested by the IJAAF Koku Gijutsu Kenkyujo (Air Technical Research Laboratory) at Tachikawa. Little is known about these B-17s, but their historical photographs are valuable to telling the story of the bombers. |
== Media == | == Media == | ||
Revision as of 10:36, 17 February 2021
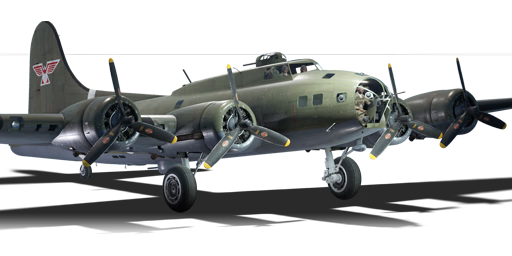
| This page is about the premium Japanese bomber B-17E (Japan). For other versions, see B-17 (Family). |
.jpg)
Contents
Description
The ▅B-17E Flying Fortress is a premium rank IV Japanese bomber with a battle rating of 4.7 (AB/RB) and 5.7 (SB). It was introduced in Update 1.43.
The B-17E Flying Fortress, as the name suggests, is intended to be used as a high-altitude level bomber, designed to target enemy airfields, military bases, factories, and other infrastructure crucial to winning the war. Despite its large bomb-load, it is not recommended to target moving ground targets, such as tank formations, unless they are the only targets. This is because of the inaccuracy of the bombs at such high altitude, and since columns will simply disperse when they sight bombs falling. When using the B-17E, it is always best to group up with others in a wedge-like formation for optimal defense against air targets and climb to an altitude of, at least, 4,000 m. A few fighter escorts, would ensure the survival of friendly bombers, only if they adopt fighter-sweep tactics to hunt down enemy fighters converging on the formation.
General info
Flight performance
| Characteristics | Max Speed (km/h at 7,680 m) |
Max altitude (metres) |
Turn time (seconds) |
Rate of climb (metres/second) |
Take-off run (metres) | |||
|---|---|---|---|---|---|---|---|---|
| AB | RB | AB | RB | AB | RB | |||
| Stock | 497 | 483 | 11156 | 36.9 | 37.9 | 5.8 | 5.6 | 600 |
| Upgraded | 523 | 510 | 35.1 | 36.0 | 8.7 | 7.2 | ||
Details
| Features | ||||
|---|---|---|---|---|
| Combat flaps | Take-off flaps | Landing flaps | Air brakes | Arrestor gear |
| ✓ | ✓ | ✓ | X | X |
| Limits | ||||||
|---|---|---|---|---|---|---|
| Wings (km/h) | Gear (km/h) | Flaps (km/h) | Max Static G | |||
| Combat | Take-off | Landing | + | - | ||
| 0 | 290 | 383 | 361 | 249 | ~3 | ~2 |
| Optimal velocities (km/h) | |||
|---|---|---|---|
| Ailerons | Rudder | Elevators | Radiator |
| < 330 | < 310 | < 270 | > 300 |
| Compressor (RB/SB) | ||
|---|---|---|
| Setting 1 | ||
| Optimal altitude | 100% Engine power | WEP Engine power |
| 6,180 | 4,000 hp | 4,708 hp |
Survivability and armour
- 6.35 mm Steel plate behind nose gunner
- 6.35 mm Steel plates behind pilots
- 6.35 mm Steel plates behind dorsal gunners
- 6.35 mm Steel plates in front of beam gunners
- 6.35 mm Steel plates in front of tail gunner
- 38 mm Bulletproof glass in front of tail gunner
Modifications and economy
| Flight performance | Survivability | Weaponry | ||||||||||||||||||||
|---|---|---|---|---|---|---|---|---|---|---|---|---|---|---|---|---|---|---|---|---|---|---|
|
|
|
Armaments
Suspended armament
The B-17E (Japan) can be outfitted with the following ordnance:
- 8 x 500 lb AN-M64A1 bombs (4,000 lb total)
- 12 x 500 lb AN-M64A1 bombs (6,000 lb total)
- 6 x 1,000 lb AN-M65A1 bombs (6,000 lb total)
Defensive armament
The B-17E (Japan) is defended by:
- 2 x 12.7 mm M2 Browning machine guns, front dorsal turret (500 rpg = 1,000 total)
- 2 x 12.7 mm M2 Browning machine guns, ventral turret (500 rpg = 1,000 total)
- 2 x 12.7 mm M2 Browning machine guns, tail turret (500 rpg = 1,000 total)
- 1 x 12.7 mm M2 Browning machine gun, rear dorsal turret (500 rpg)
- 1 x 12.7 mm M2 Browning machine gun, 2 x beam turrets (400 rpg)
- 1 x 7.62 mm Browning machine gun, nose turret (500 rpg)
Usage in battles
Generally, the plane's role should not diverge from this norm, as it is ineffective and costly as a low altitude bomber. Survival is an utmost importance to be remembered when using this plane. While one target may be missed, there will always be another opportunity to make another pass once reloaded and repaired. The few M2 machine guns in the nose cannot protect the most vulnerable part of any B-17 - the nose. Protected only by a layer of Plexiglas and almost no armour (excluding the frontal bulkhead, which only covers the pilot/co-pilot's torso), most of the crew critical in the success of the mission, including the pilot, co-pilot, bombardier and navigator would be knocked-out instantly. If targeted by German cannons, most notably, the Mk 108. Just a burst of 30 mm MK 108 placed anywhere on the aircraft , would compromise the crew's survival and even the aircraft's structural integrity.
When facing German fighters and interceptors in realistic battles', it is best to use Omni-purpose or Armour-piercing/Ground Targets ammunition belts for the Browning M2 .50 cal turret machine guns, which is likely to punch through their noses when tailing the B-17E. These ammunition belts are effective at tearing through the engine block of a Focke-Wulf Fw 190D or Messerschmitt Bf 109G, hopefully resulting in an internal engine fire, a pilot snipe, or an inoperable engine for the opponent.
Manual Engine Control
| MEC elements | ||||||
|---|---|---|---|---|---|---|
| Mixer | Pitch | Radiator | Supercharger | Turbocharger | ||
| Oil | Water | Type | ||||
| Controllable | Controllable Auto control available |
Not controllable Not auto controlled |
Controllable Auto control available |
Combined | Controllable 1 gear |
Auto controlled |
Pros and cons
Pros:
- Large payload
- Powerful air defense capabilities
- Multiple engines, can fly on one if necessary (But with a great loss in altitude and speed)
- Rugged design allows for soaking up damage
- Mostly unaffected by light machine gun fire, and to an extent, heavy machine guns
- Good speed for a bomber of its peers
- Multiple turrets covering almost all angles
- Can quite often return to base with extensive damage
- Pilot and co-pilot, if one of them is knocked out, the B-17E can keep flying
Cons:
- Big target
- Fairly Slow
- Nose is extremely vulnerable, the only armour on the front is the front bulkhead, covering only the pilot and copilot's torso
- Vulnerable to German "Minengeschoß" and > 20 mm gunfire
- Engine fires are common
- Wings are big and thus commonly torn off by gunfire
- Nose protection is extremely limited, try to avoid frontal attacks as much as possible
History
In WW2 the Japanese army captured crashed B-17s in the Philippines and Netherlands East Indies. They were tested by the IJAAF Koku Gijutsu Kenkyujo (Air Technical Research Laboratory) at Tachikawa. Little is known about these B-17s, but their historical photographs are valuable to telling the story of the bombers.
Media
Excellent additions to the article would be video guides, screenshots from the game, and photos.
See also
Links to the articles on the War Thunder Wiki that you think will be useful for the reader, for example:
- reference to the series of the aircraft;
- links to approximate analogues of other nations and research trees.
External links
Paste links to sources and external resources, such as:
- topic on the official game forum;
- encyclopedia page on the aircraft;
- other literature.
| Boeing Aircraft | |
|---|---|
| Aircraft | |
| Fighters | P-26A-33 · P-26A-34 M2 · P-26B-35 |
| Bombers | B-17E · B-17E/L · B-17G-60-VE |
| B-29A-BN | |
| Export | P-26A-34 · B-17G |
| Captured | ▅B-17E |
| Helicopters | |
| Attack | AH-64A · AH-64D |
| Export / Licensed | AH-64A (GR) · ▃AH-64A Peten · AH-64A Peten · ▅AH-64DJP · ▄AH Mk.1 · AHS |
| See Also | Tupolev Design Bureau · Westland Helicopters · Fuji Heavy Industries |
| For Boeing-built ships, see Boeing Marine Branch | |
| Japan bombers | |
|---|---|
| Navy | |
| Carrier-based attack bomber | |
| B5N | B5N2 |
| B6N | B6N1 · B6N2 · B6N2a |
| B7A | B7A2 · B7A2 (Homare 23) |
| Carrier-based dive bomber | |
| D3A | D3A1 |
| D4Y | D4Y1 · D4Y2 · D4Y3 Ko |
| Shipboard Observation seaplane | |
| F1M | F1M2 |
| Land-based Attack bomber | |
| G4M | G4M1 |
| G5N | G5N1 |
| G8N | G8N1 |
| Flying boat | |
| H6K | H6K4 |
| H8K | H8K2 · H8K3 |
| Land-based Bomber | |
| P1Y | P1Y1 |
| Army | |
| Light | Ki-32 |
| Ki-48-II otsu | |
| Heavy | Ki-21-Ia · Ki-21-I hei |
| Ki-49-I · Ki-49-IIa · Ki-49-IIb · Ki-49-IIb/L | |
| Ki-67-I Ko · Ki-67-I otsu | |
| Other countries | ▅B-17E |
| Japan premium aircraft | |
|---|---|
| Fighters | Hagiri's A5M4 · A7He1 · Ki-27 otsu Tachiarai |
| Ki-44-II otsu · ▅Bf 109 E-7 · ▅F4U-1A · Ki-100-II · Ki-44-I 34 | |
| ▅Fw 190 A-5 · A7M1 (NK9H) · Tada's Ki-61-I hei · ▅P-51C-11-NT | |
| J2M4 Kai · A6M5 Ko · A6M6c · J2M5 · Ki-87 · J6K1 | |
| Twin-engine fighters | Ki-96 |
| Jet fighters | F-86F-40 JASDF▅ · T-2 Early · F-4EJ ADTW |
| Bombers | Ki-21-I hei · Ki-48-II otsu · H8K3 · B7A2 (Homare 23) · ▅B-17E |
