Difference between revisions of "B-17E"
CobraKingII (talk | contribs) (→History) (Tag: Visual edit) |
Colok76286 (talk | contribs) (→Media: Added skin + video) |
||
| Line 226: | Line 226: | ||
== Media == | == Media == | ||
| − | ''Excellent additions to the article would be video guides, screenshots from the game, and photos.'' | + | <!-- ''Excellent additions to the article would be video guides, screenshots from the game, and photos.'' --> |
| + | |||
| + | ;Skins | ||
| + | * [https://live.warthunder.com/feed/camouflages/?vehicleCountry=usa&vehicleType=aircraft&vehicleClass=bomber&vehicle=b-17e Skins and camouflages for the {{PAGENAME}} from live.warthunder.com.] | ||
| + | |||
| + | ;Videos | ||
| + | {{Youtube-gallery|DoZLyWJ5lRw|'''The Shooting Range #222''' - ''Pages of History'' section at 03:55 discusses air combats between the {{PAGENAME}} and H6Ks in the Pacific.}} | ||
== See also == | == See also == | ||
Revision as of 18:48, 18 October 2020
Contents
| This page is about the American bomber B-17E. For other versions, see B-17 (Family). |
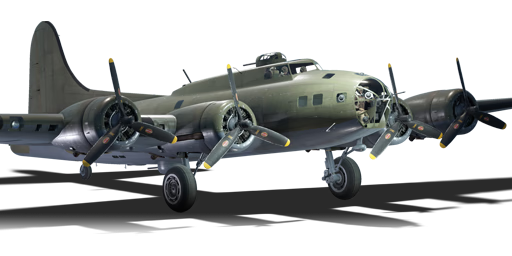
Description

The B-17E Flying Fortress is a rank III American bomber
with a battle rating of 4.7 (AB/RB) and 5.7 (SB). It has been in the game since the start of the Open Beta Test prior to Update 1.27.
General info
Flight performance
| Characteristics | Max Speed (km/h at 7,680 m) |
Max altitude (metres) |
Turn time (seconds) |
Rate of climb (metres/second) |
Take-off run (metres) | |||
|---|---|---|---|---|---|---|---|---|
| AB | RB | AB | RB | AB | RB | |||
| Stock | 496 | 483 | 11156 | 36.9 | 37.9 | 5.8 | 5.7 | 600 |
| Upgraded | 523 | 510 | 35.1 | 36.0 | 8.7 | 7.2 | ||
Details
| Features | ||||
|---|---|---|---|---|
| Combat flaps | Take-off flaps | Landing flaps | Air brakes | Arrestor gear |
| ✓ | ✓ | ✓ | X | X |
| Limits | ||||||
|---|---|---|---|---|---|---|
| Wings (km/h) | Gear (km/h) | Flaps (km/h) | Max Static G | |||
| Combat | Take-off | Landing | + | - | ||
| 0 | 290 | 400 | 400 | 249 | ~2 | ~1 |
| Optimal velocities (km/h) | |||
|---|---|---|---|
| Ailerons | Rudder | Elevators | Radiator |
| < 330 | < 310 | < 270 | > 300 |
| Compressor (RB/SB) | ||
|---|---|---|
| Setting 1 | ||
| Optimal altitude | 100% Engine power | WEP Engine power |
| 6,180 m | 4,000 hp | 4,708 hp |
Survivability and armour
- 6.35 mm Steel plate behind nose gunner.
- 6.35 mm Steel plates behind pilots.
- 6.35 mm Steel plates behind dorsal gunners.
- 6.35 mm Steel plates in front of beam gunners.
- 6.35 mm Steel plates in front of tail gunner.
- 38 mm Bulletproof glass in front of tail gunner.
- 38 mm Bulletproof glass ball turret.
Armaments
Suspended armament
The B-17E can be outfitted with the following ordnance:
- 8 x 500 lb AN-M64A1 bombs (4,000 lb total)
- 12 x 500 lb AN-M64A1 bombs (6,000 lb total)
- 6 x 1,000 lb AN-M65A1 bombs (6,000 lb total)
- 2 x 2,000 lb AN-M66A2 bombs (4,000 lb total)
Defensive armament
The B-17E is defended by:
- 1 x 7.62 mm Browning machine gun, nose turret (500 rpg)
- 2 x 12.7 mm M2 Browning machine gun, front dorsal turret (500 rpg = 1,000 total)
- 1 x 12.7 mm M2 Browning machine gun, rear dorsal turret (500 rpg)
- 1 x 12.7 mm M2 Browning machine gun, 2 x beam turret (400 rpg = 800 total)
- 2 x 12.7 mm M2 Browning machine gun, ventral turret (500 rpg = 1,000 total)
- 2 x 12.7 mm M2 Browning machine gun, tail turret (500 rpg = 1,000 total)
Usage in battles
The B-17E Flying Fortress is intended to be used as a high-altitude level bomber in order to target airfields, bases, and land fortifications. Despite its large bomb load, it's not recommended to target moving ground units, such as tanks or armoured cars, especially when they are travelling in tight columns due to the inaccuracy of your bombs at high altitudes and the ability for the AI on the ground to perform evasive manoeuvres when bombs are falling onto their position. When using the B-17E, it is best to fly with another friendly bomber or fighter (if possible) to ensure maximum protection. If you are flying alone, design a secure flight path towards your objective in the hopes of not being detected by enemy fighters.
The B-17E is designed specifically to withstand the harshest punishment during combat. The bomber itself provides plenty of armour along the fuselage and tail except for the nose, which is the only area that's not protected by any form of protection. The armour ranges from 6.35 mm sheets to a single 38 mm glass plate protecting the tail gunner. Speaking of armour protection, in order to ensure the greatest chance of survival during an interception, you must not move. The B-17E is not designed to execute sharp defensive manoeuvres (turns, dives, and rolls) unlike its predecessor the B-25, but rather designed to use its defensive armament provided (consisting of 12.7 mm and 7.62 mm turrets) to fight back against harassing enemy fighters. Some great advice for novice bombardiers is to include incendiary ammunition in your turret belts. This crucial precaution will guarantee more lethal firepower coming from your defensive armament, since not only are you penetrating armour, but you are also setting components ablaze. However, the armour and defensive armaments typically won't save you from the high tier interceptors and cannon-armed fighters (especially german heavy fighters/interceptors that are armed with 30 mm cannons and get air spawns) you will face. Since they are all heavily armoured, while possessing the ability to rip your wings off with a few 20 mm cannon shots or one shot you with the 30 mm from 1.5 km away, it is better to just avoid them all together by side climbing and using cloud cover when heading to the enemy base. NEVER head straight to the enemy base because the enemy player will trace your flight path from your spawn point to their base and easily intercept you. Also unlike the B-25, the B-17 does not have particularly effective armour or defensive armament in the front, so if an enemy fighter decides to go head on, try turning away to expose your tail, which is a lot more protected against the incoming fighter. If not then both pilots could get knocked out and send you straight back to the hanger.
In conclusion, the B-17E is a great introduction for players using the American bomber line. Although it is not the "immortal gunship" B-17 of old, if used well, the B-17E is a force be reckoned with.
Manual Engine Control
| MEC elements | ||||||
|---|---|---|---|---|---|---|
| Mixer | Pitch | Radiator | Supercharger | Turbocharger | ||
| Oil | Water | Type | ||||
| Controllable | Controllable Auto control available |
Not controllable Not auto controlled |
Controllable Auto control available |
Combined | Controllable 1 gear |
Auto controlled |
Modules
| Tier | Flight performance | Survivability | Weaponry | ||
|---|---|---|---|---|---|
| I | Fuselage repair | Radiator | Protective vest | Turret 7 mm | |
| II | Compressor | Airframe | New 7 mm MGs (turret) | LBC-17 | |
| III | Wings repair | Engine | Turret 12 mm | SBC-17 | |
| IV | Cover | New 12 mm MGs (turret) | MBC-17 | ||
As a slow and lumbering heavy bomber, the Flying Fortress relies entirely on its turrets for defence. Without it, the plane is a piñata. Thus, Protective vests should be the first unlock. Further survivability upgrades will make fending off attacks easier but do not think to stand successfully against enemy fighters. So upgrading the bomb load should be second priority. Performance modules can be considered least necessary, it will not go anywhere quick anyway.
Pros and cons
Pros:
- Large bomb load
- Heavy defensive armament
- Multiple engines (preserves speed when damaged)
- Very sturdy fuselage able to soak up heavy damage
- Calibres below 12.7 mm are ineffective against it
- Defensive armaments provide all-around coverage
- Performs well at high altitudes
Cons:
- Poor climb rate
- Nose is extremely vulnerable
- Cannons are very effective against it
- Multiple engines mean multiple fires
- Sluggish controls and very difficult to manoeuvre
- Engines will overheat at 100%
- Slow, will likely encounter enemies that will intercept before you ever get anywhere near target
- Wings and tail are rather fragile
- .50 cals don't do as much damage as hoped for
History
The B-17E Flying Fortress was an improved version of the B-17D and earlier B-17 variants. It featured a tail gunner's position and a rotating dorsal turret behind the cockpit; both turret had an armament of two .50 cal M2 Browning machine guns. Previously, the B-17 had a blind spot at the rear, where no gunners could fire. The tail gunner's position allowed protection from the rear. To fit the new tail gunner's position, the fuselage had to be up-sized. A larger, redesigned vertical stabilizer was also added to the tail. Additionally, the teardrop shaped sliding panels at the waist gunners' stations were replaced by rectangular windows. This increased visibility from those positions. On the first 1/5 of the production run, the B-17E was equipped with a ventral remote-controlled Bendix turret, similar to that on the B-25 Mitchell.
The production of the B-17E amounted to 512 aircraft, which gave the B-17E the distinction of being the first Flying Fortress variant to be mass produced. The production was too much for the Boeing factories to keep up with, so Lockheed and Douglas also produced the B-17E. Douglas built a new factory for the production of the Flying Fortress, and Boeing built an additional factory just for the production of the B-17.
45 B-17E Flying Fortresses were transferred to the Royal Air Force (RAF) in 1942. These were designated as the Fortress IIA, and they were used by the Coastal Command to carry out anti-submarine patrols.
In-game description
The legendary B-17 American heavy bombers were rightly called Flying Fortresses. This four-engined heavy bomber was an all-metal hero, an extremely durable aircraft that could return to the airfield with just one engine, riddled with bullets.
But the early models of the B-17 had a significant blind spot in the rear, so fighter support was required. To solve this problem, the B-17E was produced, and a turret with two 12.7mm machine guns was installed in the tail section of the aircraft. To do this, the fuselage size had to be increased. In addition, to improve control of the plane, the tail was broadened and a larger vertical fin was installed.
Although it lost some speed when compared to the B-17D, the new model fared favorably with its new protection and thus became the first truly mass-produced B-17. From September 5, 1941 to May 1942, 512 aircraft were made on the production line, before the development of the B-17F.
Media
- Skins
- Videos
See also
Links to the articles on the War Thunder Wiki that you think will be useful for the reader, for example:
- reference to the series of the aircraft;
- links to approximate analogues of other nations and research trees.
External links
Paste links to sources and external resources, such as:
- topic on the official game forum;
- encyclopedia page on the aircraft;
- other literature.
| Boeing Aircraft | |
|---|---|
| Aircraft | |
| Fighters | P-26A-33 · P-26A-34 M2 · P-26B-35 |
| Bombers | B-17E · B-17E/L · B-17G-60-VE |
| B-29A-BN | |
| Export | P-26A-34 · B-17G |
| Captured | ▅B-17E |
| Helicopters | |
| Attack | AH-64A · AH-64D |
| Export / Licensed | AH-64A (GR) · ▃AH-64A Peten · AH-64A Peten · ▅AH-64DJP · ▄AH Mk.1 · AHS |
| See Also | Tupolev Design Bureau · Westland Helicopters · Fuji Heavy Industries |
| For Boeing-built ships, see Boeing Marine Branch | |
| USA bombers | |
|---|---|
| Dive | SB2U-2 · SB2U-3 · SBD-3 · SB2C-1C · SB2C-4 |
| Torpedo | TBD-1 · PBY-5 Catalina · PBY-5A Catalina · TBF-1C · BTD-1 |
| Medium | B-10B · B-18A · B-34 · PV-2D · B-25J-1 · B-25J-20 · A-26C-45 · A-26C-45DT · B-26B |
| Heavy | B-17E · B-17E/L · B-17G-60-VE · PB4Y-2 · B-24D-25-CO · B-29A-BN |
| Hydroplanes | OS2U-1 · OS2U-3 · PBM-1 "Mariner" · PBM-3 "Mariner" |
