Ardennes
| Game Modes | ||||
|---|---|---|---|---|
Contents
Overview
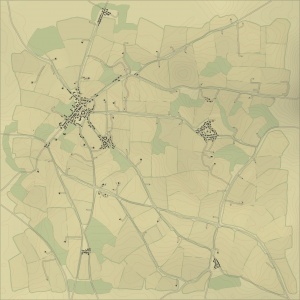
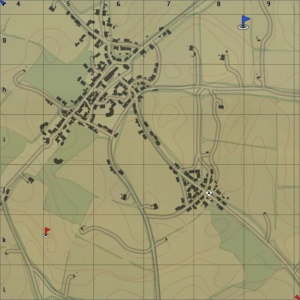
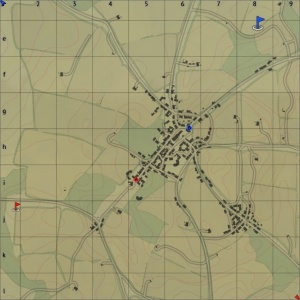
Ardennes is a ground forces map available in all modes. It depicts a town and countryside in the Ardennes region of Belgium, where the famous "Battle of the Bulge" took place. It was added in Update 1.67 "Assault". The full Ardennes map (seen to the right) contains two main town areas in the east and west, as well as a few smaller clusters of buildings in the south. However the play area is usually restricted to only one of the towns.
The tank battles map is 4km x 4km, however in games the battle area is restricted to much less than that. Dependent on the map configuration and the game mode (AB, RB or SB) the tank battle area changes. The air battle area is 65km x 65km in all modes. The battle areas are:
Domination: 1.4km x 1.4km or 2.2km x 2.2km (dependent on game mode)
Battle: 1.7km x 1.7km
Conquest #1: 1.2km x 1.2km or 1.8km x 1.8km (dependent on game mode)
Conquest #2: 1.3km x 1.3km or 2km x 2km (dependent on game mode)
Conquest #3: 1.2km x 1.2km or 1.6km x 1.6km (dependent on game mode)
Game Description
Historical Background
This map depicts the Ardennes region of Belgium, site of the famous "Battle of the Bulge". Notably there is no snow on the map, meaning it is set before 22nd of December 1944, when heavy snow fell over the region. The Battle of the Bulge started on the 16th of December 1944, and ended on the 25 January 1945; it was the last major German offensive on the Western Front before the end of the war. The Germans planned to launch a surprise attack through the thinly defended Ardennes forest of Belgium. They intended to launch an armored spearhead through the Allied forces, capturing the bridge crossings over the River Meuse and then attacking the port of Antwerp; splitting the Allied forces, denying them use of the port, and allowing them to be encircled and destroyed.
The German offensive's total strength was around 450,000 troops, 1,500 tanks /assault guns and 4,200 artillery pieces. The initial attack came as a complete surprise to the Allied forces and bad weather conditions prevented Allied air support from assisting in the defense. Fierce resistance in the north of the offensive, around Elsenborn Ridge, and in the south, around Bastogne, blocked German access to key roads to the northwest and west and put the German offensive behind schedule, allowing Allied forces to reinforce their defense. As the battle continued improving weather conditions allowed Allied air attacks on German forces and supply lines, which sealed the failure of the offensive. Allied forces are believed to have suffered between 89,500 – 107,00 casualties; and lost over 800 tanks and 1000 aircraft, setting their offensive plans back by up to six weeks. The Germans are believed to have lost over 800 tanks, over 800 aircraft, and suffered between 67,500 and 125,000 casualties. The failed offensive exhausted German resources on the western front, and eventually allowed the Allies to break through the Siegfried Line into Germany.
Notable Landmarks
Map configuration
Domination
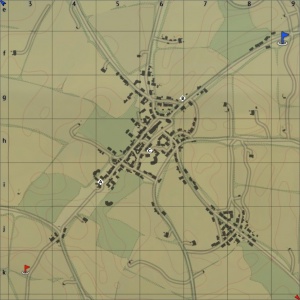
There are three capture points placed in the main town, in the north west of the map. The teams spawn on the two main roads running north-east and south-west into the town. Points A and B are at the start of the town area, and point C is in the middle of the town.
Conquest
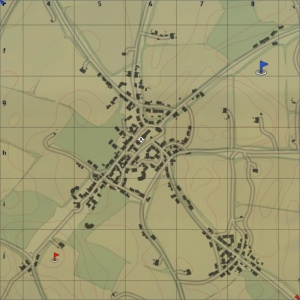
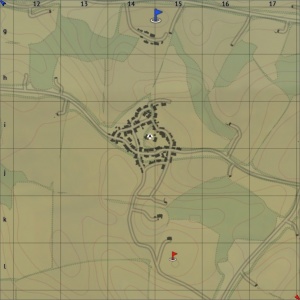
The are 3 configurations of the conquest mode, each with one capture point. In Conquest #1 the capture point is the church in the main town. In Conquest #2 the capture point is in the center of the east town. Finally in Conquest #3 the capture point is a small town, at a set of cross roads, south-east of the main town.
Battle
Strategy
Media
References
Read also
Sources
Paste links to sources and external resources, such as:
- topic on the official game forum;
- other literature.


