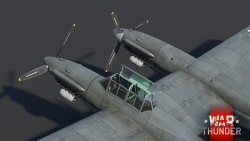
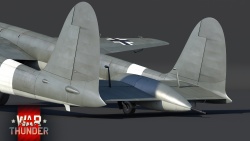
|
|
| Line 1: |
Line 1: |
| − | {{Specs-Card | + | {{Specs-Card|code=sm_92}} |
| − | |code=p-51_mk1a_usaaf | |
| − | |cockpit=334579/1111224
| |
| − | }}
| |
| − | {{About
| |
| − | | about = American fighter '''{{PAGENAME}}'''
| |
| − | | usage = other uses
| |
| − | | link = P-51 (Family)
| |
| − | }} | |
| | | | |
| | == Description == | | == Description == |
| | <!-- ''In the description, the first part should be about the history of and the creation and combat usage of the aircraft, as well as its key features. In the second part, tell the reader about the aircraft in the game. Insert a screenshot of the vehicle, so that if the novice player does not remember the vehicle by name, he will immediately understand what kind of vehicle the article is talking about.'' --> | | <!-- ''In the description, the first part should be about the history of and the creation and combat usage of the aircraft, as well as its key features. In the second part, tell the reader about the aircraft in the game. Insert a screenshot of the vehicle, so that if the novice player does not remember the vehicle by name, he will immediately understand what kind of vehicle the article is talking about.'' --> |
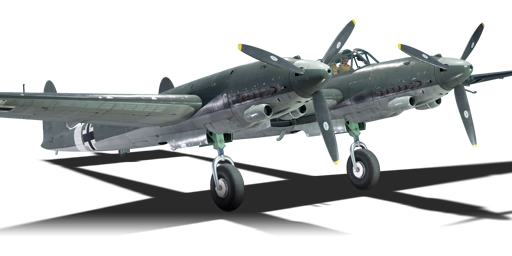
| | [[File:GarageImage_{{PAGENAME}}.jpg|420px|thumb|left]] | | [[File:GarageImage_{{PAGENAME}}.jpg|420px|thumb|left]] |
| − | {{Break}} | + | {{break}} |
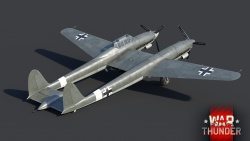
| − | The '''{{Specs|name}}''' is a rank {{Specs|rank}} American fighter {{Battle-rating}}. It was introduced in [[Update 1.49 "Weapons of Victory"]]. | + | The '''{{Specs|name}}''' is a rank {{Specs|rank}} Italian attacker {{Battle-rating}}. It was introduced in [[Update 1.87 "Locked On"]]. |
| − | | |
| − | The P-51 Mustang retains a lot of the traits that may be found in its later variants. The main difference comes from the limited Allison power plant and its formidable armament of 4 x 20 mm [[Hispano Mk.II (20 mm)|Hispano Mk.II]] cannons. The plane may not climb very well but does retain the traits of an energy fighter. Even with its limited climb rate the aircraft's dive-speed is excellent, but manoeuvrability is average at best. The armament is the true advantage of this aircraft. The 20 mm cannons are powerful, but with only 500 rounds do not try to go for more than what the P-51 can handle. The best way to use the P-51 is for [[Boom & Zoom]].
| |
| − | | |
| − | The P-51, when fully upgraded, is an extremely deadly opponent, especially as a rank III. The engine will have a hard time hitting the "overheated" mark, even when using WEP. Use caution though, as the engine will retain its heat when constantly on 100% power, so it takes a bit to cool down. Also be sure to utilise the flaps: they are a major asset to the plane's overall turn-fighting ability and sometimes allow it to survive a turn-fight with Soviet aircraft. This is an awesome plane for those just starting out in Realistic Battles, as the 20 mm cannons are good at scoring quick victories.
| |
| | | | |
| | == General info == | | == General info == |
| − | === Flight performance === | + | === Flight Performance === |
| − | <!-- ''Describe how the aircraft behaves in the air. Speed, manoeuvrability, acceleration and allowable loads - these are the most important characteristics of the vehicle.'' -->
| + | ''Describe how the aircraft behaves in the air. Speed, manoeuvrability, acceleration and allowable loads - these are the most important characteristics of the vehicle.'' |
| − | "The Need for Speed" is a worthy credo for all [[P-51 (Family)|Mustangs]]. This initial iteration boasts a significant speed advantage over many [[:Category:Third rank aircraft|Rank III]] aircraft, but sacrifices are obvious. On the upside, the good maximum velocity greatly benefits the energy retention coming out of dives and for staying out of trouble.
| |
| − | | |
| − | Manoeuvrability is nothing to write home about (except roll-rate), especially without speed to burn. The control surfaces lock up at high speeds which makes the Mustang a comparatively agile fighter when initiating combat, but this is quickly lost. Fortunately the combat flaps have a very high speed tolerance and greatly benefit it in dogfights. Overall the P-51 likes to bleed speed in manoeuvres and the lost energy cannot be easily regained. For another downside is the sluggish acceleration which further causes a low rate of climb. Managing both disadvantage is the Ace's true skill for this elite [[Boom & Run|Boom and Run]] fighter. However this is for an altitude range up to 4,000 m (13,000 ft). High altitude performance suffers which in combat, due the slow climb rate, is rarely reached anyway.
| |
| − | | |
| − | Thus all engagements, may they be Boom & Zoom or Boom & Run style, should be performed below said altitudes.
| |
| | | | |
| | {| class="wikitable" style="text-align:center" | | {| class="wikitable" style="text-align:center" |
| − | ! rowspan="2" | Characteristics | + | |- |
| − | ! colspan="2" | Max Speed<br>(km/h at 5,200 m) | + | ! colspan="8" | Characteristics |
| | + | |- |
| | + | ! colspan="8" | ''Stock'' |
| | + | |- |
| | + | ! colspan="2" | Max Speed<br>(km/h at 6,500 m) |
| | ! rowspan="2" | Max altitude<br>(meters) | | ! rowspan="2" | Max altitude<br>(meters) |
| | ! colspan="2" | Turn time<br>(seconds) | | ! colspan="2" | Turn time<br>(seconds) |
| Line 36: |
Line 23: |
| | ! rowspan="2" | Take-off run<br>(meters) | | ! rowspan="2" | Take-off run<br>(meters) |
| | |- | | |- |
| − | ! AB !! RB !! AB !! RB !! AB !! RB | + | ! AB |
| | + | ! RB |
| | + | ! AB |
| | + | ! RB |
| | + | ! AB |
| | + | ! RB |
| | |- | | |- |
| − | ! Stock
| + | | 606 || 590 || {{Specs|ceiling}} || 20.5 || 21.2 || 8.9 || 8.9 || 375 |
| − | | 589 || 577 || rowspan="2" | 8,839 <!-- {{Specs|ceiling}} --> || 21.3 || 22.2 || colspan="2" | 8.5 || rowspan="2" | 491 | |
| | |- | | |- |
| − | ! Upgraded | + | ! colspan="8" | ''Upgraded'' |
| − | | 677 || 631 || 19.6 || 20.0 || 19.9 || 13.1 | + | |- |
| | + | ! colspan="2" | Max Speed<br>(km/h at 6,500 m) |
| | + | ! rowspan="2" | Max altitude<br>(meters) |
| | + | ! colspan="2" | Turn time<br>(seconds) |
| | + | ! colspan="2" | Rate of climb<br>(meters/second) |
| | + | ! rowspan="2" | Take-off run<br>(meters) |
| | + | |- |
| | + | ! AB |
| | + | ! RB |
| | + | ! AB |
| | + | ! RB |
| | + | ! AB |
| | + | ! RB |
| | + | |- |
| | + | | ??? || ??? || {{Specs|ceiling}} || ??.? || ??.? || ??.? || ??.? || 375 |
| | |- | | |- |
| | |} | | |} |
| Line 49: |
Line 54: |
| | {| class="wikitable" style="text-align:center" | | {| class="wikitable" style="text-align:center" |
| | |- | | |- |
| − | ! colspan="6" | Features | + | ! colspan="5" | Features |
| | |- | | |- |
| − | ! Combat flaps !! Take-off flaps !! Landing flaps !! Air brakes !! Arrestor gear !! Drogue chute | + | ! Combat flaps |
| | + | ! Take-off flaps |
| | + | ! Landing flaps |
| | + | ! Air brakes |
| | + | ! Arrestor gear |
| | |- | | |- |
| − | | ✓ || ✓ || ✓ || X || X || X <!-- ✓ --> | + | | ✓ || ✓ || ✓ || ✓ || X <!-- ✓ --> |
| | |- | | |- |
| | |} | | |} |
| Line 59: |
Line 68: |
| | {| class="wikitable" style="text-align:center" | | {| class="wikitable" style="text-align:center" |
| | |- | | |- |
| − | ! colspan="7" | Limits | + | ! colspan="5" | Limits |
| | |- | | |- |
| − | ! rowspan="2" | Wings (km/h) | + | ! rowspan="2" | Wing-break speed<br>(km/h) |
| − | ! rowspan="2" | Gear (km/h) | + | ! rowspan="2" | Gear limit<br>(km/h) |
| − | ! colspan="3" | Flaps (km/h) | + | ! rowspan="2" | Combat flaps<br>(km/h) |
| | ! colspan="2" | Max Static G | | ! colspan="2" | Max Static G |
| | |- | | |- |
| − | ! Combat !! Take-off !! Landing !! + !! -
| + | ! + |
| | + | ! - |
| | |- | | |- |
| − | | 845 <!-- {{Specs|destruction|constructions}} --> || 295 <!-- {{Specs|destruction|chassis}} --> || 652 || 565 || 273 || ~12 || ~6 | + | | {{Specs|destruction|constructions}} || {{Specs|destruction|chassis}} || 600 || ~10 || ~5 |
| | |- | | |- |
| | |} | | |} |
| Line 74: |
Line 84: |
| | {| class="wikitable" style="text-align:center" | | {| class="wikitable" style="text-align:center" |
| | |- | | |- |
| − | ! colspan="4" | Optimal velocities (km/h) | + | ! colspan="4" | Optimal velocities |
| | |- | | |- |
| − | ! Ailerons !! Rudder !! Elevators !! Radiator | + | ! Ailerons<br>(km/h) |
| | + | ! Rudder<br>(km/h) |
| | + | ! Elevators<br>(km/h) |
| | + | ! Radiator<br>(km/h) |
| | |- | | |- |
| − | | < 600 || < 425 || < 440 || > 325 | + | | < 300 || < 240 || < 500 || > 380 |
| | |- | | |- |
| | |} | | |} |
| Line 84: |
Line 97: |
| | {| class="wikitable" style="text-align:center" | | {| class="wikitable" style="text-align:center" |
| | |- | | |- |
| − | ! Compressor | + | ! colspan="3" | Compressor (RB/SB) |
| | + | |- |
| | + | ! colspan="3" | Setting 1 |
| | + | |- |
| | ! Optimal altitude | | ! Optimal altitude |
| | ! 100% Engine power | | ! 100% Engine power |
| | ! WEP Engine power | | ! WEP Engine power |
| | |- | | |- |
| − | ! Setting 1
| + | | 6,000 m || 1,232 hp || 1,387 hp |
| − | | 3,597 m || 1,150 hp || 1,598 hp | |
| | |- | | |- |
| | |} | | |} |
| | | | |
| | === Survivability and armour === | | === Survivability and armour === |
| − | <!-- ''Examine the survivability of the aircraft. Note how vulnerable the structure is and how secure the pilot is, whether the fuel tanks are armoured, etc. Describe the armour, if there is any, and also mention the vulnerability of other critical aircraft systems.'' -->
| + | ''Examine the survivability of the aircraft. Note how vulnerable the structure is and how secure the pilot is, whether the fuel tanks are armoured, etc. Describe the armour, if there is any, and also mention the vulnerability of other critical aircraft systems.'' |
| − | * 19.5 mm Steel - Upper engine cowl armour plate
| |
| − | * 6.35 mm Steel - Fore cockpit armour plate
| |
| − | * 15.87 mm Steel - Armour plate behind pilot's seat
| |
| − | * 38 mm Bulletproof glass - Armoured windscreen
| |
| − | | |
| − | While the Mustang looks quite defensive on first glance, it is a deceptive one. The fuel tanks are wing-mounted and prone to fires (the D-series has got an inline one). The very small engine cowl plate could just as well be absent. Both issues combined leave many pilots a gliding and/or burning example of why to avoid bomber's defensive fire. The P-51's prime form of defence is speed. As a ''Boom & Run'' fighter, avoiding air-drag inducing bullet holes by not getting hit is a far preferable option anyway. Whilst setting up another attack (a.k.a. retreating from combat) the very generous backseat armour will absorb any stray shots. In general the pilot's survivability is great.
| |
| | | | |
| | == Armaments == | | == Armaments == |
| | === Offensive armament === | | === Offensive armament === |
| | <!-- ''Describe the offensive armament of the aircraft, if any. Describe how effective the cannons and machine guns are in a battle, and also what belts or drums are better to use. If there is no offensive weaponry, delete this subsection.'' --> | | <!-- ''Describe the offensive armament of the aircraft, if any. Describe how effective the cannons and machine guns are in a battle, and also what belts or drums are better to use. If there is no offensive weaponry, delete this subsection.'' --> |
| − | {{main|Hispano Mk.II (20 mm)}} | + | {{main|MG 151/20 (20 mm)|Breda-SAFAT (12.7 mm)}} |
| | | | |
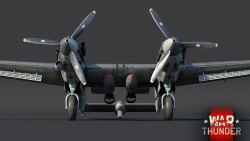
| | The '''''{{PAGENAME}}''''' is armed with: | | The '''''{{PAGENAME}}''''' is armed with: |
| − | * 4 x 20 mm Hispano Mk.II cannons, wing-mounted (125 rpg = 500 total) | + | * 2 x 20 mm MG 151/20 cannons, centre-mounted (300 rpg = 600 total) |
| | + | * 1 x 20 mm MG 151/20 cannon, mounted in right propeller hub (300 rpg) |
| | + | * 4 x 12.7 mm Breda-SAFAT machine guns, nose-mounted (350 rpg = 1,400 total) |
| | | | |
| − | Quadruple Hispanos are devastating: pressing the trigger will significantly slow down the P-51. Now how is that for firepower? Although this is caused by the too light airframe which further causes vibrations and heavy shaking due the wing mounted position of all arms. Hence the accuracy is appalling after the first shots leave the barrels. Trigger control is important, even more so as the Hispanos like to overheat.
| + | === Suspended armament === |
| | + | <!-- ''Describe the aircraft's suspended armament: additional cannons under the wings, bombs, rockets and torpedoes. This section is especially important for bombers and attackers. If there is no suspended weaponry remove this subsection.'' --> |
| | + | {{main|GP 50 (50 kg)|GP 100 (100 kg)|GP 250 (250 kg)|GP 500 (500 kg)}} |
| | | | |
| − | == Usage in battles ==
| + | The '''''{{PAGENAME}}''''' can be outfitted with the following ordnance: |
| − | <!-- ''Describe the tactics of playing in the aircraft, the features of using aircraft in a team and advice on tactics. Refrain from creating a "guide" - do not impose a single point of view, but instead, give the reader food for thought. Examine the most dangerous enemies and give recommendations on fighting them. If necessary, note the specifics of the game in different modes (AB, RB, SB).'' -->
| + | * Without load |
| − | In an RPG the Mustang would be a rogue, the damage dealer. Quickly darting in and out of combat to deal devastating blows, the P-51 in War Thunder is a DPS main, too. Featured playstyles are [[Boom & Zoom]], repeatedly diving on enemies and returning up high, and [[Boom & Run]], flying into danger zone, picking of a target and retreating, all while running at top speed. Coupled with its manoeuvrability and acceleration deficits, the P-51 punishes any pilot who does not play to its strength, namely the top speed. Only late war or diving aircraft are able to catch a Mustang on the run and for the latter only with the correct timing and plenty of altitude to burn. Maintaining a cool head and areal observation are important. Retreating may look the cowardice choice, but with the speed to disengage many options open up for reversals. Note, do not perform flat turns, but rather slow, deliberate high Yo-Yos or Immelmanns for turning around. A careful approach when leading up for a shot helps in conserving precious momentum, too.
| + | * 6 x 50 kg GP 50 bombs (300 kg total) |
| | + | * 6 x 100 kg GP 100 bombs (600 kg total) |
| | + | * 2 x 250 kg GP 250 bombs (500 kg total) |
| | + | * 2 x 500 kg GP 500 bombs (1,000 kg total) |
| | | | |
| − | In Arcade Battles the option for in-air reloads may tempt the pilot to spray & pray and dump all the ammunition. However, with the inaccuracy issues and the short fire windows, a more deliberate approach is necessary. Waiting outside a furball or dogfight for the right moment to intercept is key, as the key role for the Mustang is heavy fire support. This is especially helpful against armoured attackers such as the [[Ju 87 (Family)|Stuka]] or [[IL-2 (Family)|IL-2]]. Due to the lack of climb rate and poor altitude performance, bombers should not be sought out. In general the P-51 plays akin to many [[:Category:Twin-engine fighters|heavy fighters]] in Arcade mode.
| + | === Defensive armament === |
| | + | <!-- ''Defensive armament with turret machine guns or cannons, crewed by gunners. Examine the number of gunners and what belts or drums are better to use. If defensive weaponry is not available, remove this subsection.'' --> |
| | + | {{main|Breda-SAFAT (12.7 mm)}} |
| | | | |
| − | In Realistic Battles the combat role is a tricky game. Lacking climb rate and high altitude performance the Mustang pilot needs to wait for the combat to come down to about 4,000 m (13,000 ft). Climbing should be done away from the expected combat zone (a.k.a. side-climbing) and at 20° with or 14° without WEP. At this point initial combat should be Boom & Run, utilizing the superior top speed to avoid combat while the enemy is focused on other team mates. Once the hostiles have dropped to a lower altitude Boom & Zooming can be engaged in. With 125 rounds per gun the fighter has got plenty of ammo to kill about six aircraft and with 30 min of fuel minimum, returning to base will be a rare occurrence. Overall this is a support fighter as in the current climbing meta engagements against higher flying interceptor-fighters are often deadly, as the Mustang then lacks the critical ability to choose the time of engagement.
| + | The '''''{{PAGENAME}}''''' is defended by: |
| | + | * 1 x 12.7 mm Breda-SAFAT machine gun, tail turret (350 rpg) |
| | | | |
| − | Simulator Battles is where the P-51 (NA-91) truly shines. Flying at top speed with military rated power (100%) keeps the engine cool and enemies usually far away at one's tail. Most of all combat happens slightly below the Mustang's preferred altitude and the cockpit view is great, albeit with limited rearward view. Without the instructor the manoeuvrability markedly improves in comparison, for the P-51 has generous stall characteristics and is an overall stable gun platform, as long as one does not pull the trigger. Only the lack of acceleration in prolonged dogfights is a trap that even experienced pilots still fall into. An emergency dive to top speed will however fix this, if the pilot remembered to keep some altitude. And one should, for the greatest advantage is the ability to disengage any unfavourable battle and like with many things, the early Mustangs do not disappoint.
| + | == Usage in battles == |
| | + | ''Describe the tactics of playing in an aircraft, the features of using vehicles in a team and advice on tactics. Refrain from creating a "guide" - do not impose a single point of view, but instead, give the reader food for thought. Examine the most dangerous enemies and give recommendations on fighting them. If necessary, note the specifics of the game in different modes (AB, RB, SB).'' |
| | | | |
| | === Manual Engine Control === | | === Manual Engine Control === |
| Line 134: |
Line 154: |
| | ! rowspan="2" | Turbocharger | | ! rowspan="2" | Turbocharger |
| | |- | | |- |
| − | ! Oil !! Water !! Type | + | ! Oil |
| | + | ! Water |
| | + | ! Type |
| | |- | | |- |
| − | | Not controllable || Controllable<br>Not auto controlled || Not controllable<br>Not auto controlled || Controllable<br>Auto control available || Separate || Not controllable<br>1 gear || Not controllable | + | | Not controllable || rowspan="2" | Controllable<br>Not auto controlled || rowspan="2" | Controllable<br>Not auto controlled || rowspan="2" | Controllable<br>Not auto controlled || rowspan="2" | Separate || rowspan="2" | Not controllable<br>1 gear || rowspan="2" | Not controllable |
| | |- | | |- |
| | |} | | |} |
| − |
| |
| − | <div style="padding:0px; margin:0px; position: relative; width: 572px; height: 572px; background: #f0f0f0; border: solid 1px; font: sans-serif; font-size: 10pt;">
| |
| − | <div style="padding:0px; margin:0px; position: absolute; left: 50px; top: 20px; width: 500px; height: 500px; background: #f3f3f3; border: solid 1px;">
| |
| − | <div style="position: absolute; left:0px; top: 50px; height: 0px; width: 500px; border-bottom: 1px dashed lightgray;"></div>
| |
| − | <div style="position: absolute; left:0px; top: 100px; height: 0px; width: 500px; border-bottom: 1px dashed lightgray;"></div>
| |
| − | <div style="position: absolute; left:0px; top: 150px; height: 0px; width: 500px; border-bottom: 1px dashed lightgray;"></div>
| |
| − | <div style="position: absolute; left:0px; top: 200px; height: 0px; width: 500px; border-bottom: 1px dashed lightgray;"></div>
| |
| − | <div style="position: absolute; left:0px; top: 250px; height: 0px; width: 500px; border-bottom: 1px dashed lightgray;"></div>
| |
| − | <div style="position: absolute; left:0px; top: 300px; height: 0px; width: 500px; border-bottom: 1px dashed lightgray;"></div>
| |
| − | <div style="position: absolute; left:0px; top: 350px; height: 0px; width: 500px; border-bottom: 1px dashed lightgray;"></div>
| |
| − | <div style="position: absolute; left:0px; top: 400px; height: 0px; width: 500px; border-bottom: 1px dashed lightgray;"></div>
| |
| − | <div style="position: absolute; left:0px; top: 450px; height: 0px; width: 500px; border-bottom: 1px dashed lightgray;"></div>
| |
| − | <div style="position: absolute; top:0px; left: 450px; height: 500px; width: 1px; border-right: 1px dashed lightgray;"></div>
| |
| − | <div style="position: absolute; top:0px; left: 400px; height: 500px; width: 1px; border-right: 1px dashed lightgray;"></div>
| |
| − | <div style="position: absolute; top:0px; left: 350px; height: 500px; width: 1px; border-right: 1px dashed lightgray;"></div>
| |
| − | <div style="position: absolute; top:0px; left: 300px; height: 500px; width: 1px; border-right: 1px dashed lightgray;"></div>
| |
| − | <div style="position: absolute; top:0px; left: 250px; height: 500px; width: 1px; border-right: 1px dashed lightgray;"></div>
| |
| − | <div style="position: absolute; top:0px; left: 200px; height: 500px; width: 1px; border-right: 1px dashed lightgray;"></div>
| |
| − | <div style="position: absolute; top:0px; left: 150px; height: 500px; width: 1px; border-right: 1px dashed lightgray;"></div>
| |
| − | <div style="position: absolute; top:0px; left: 100px; height: 500px; width: 1px; border-right: 1px dashed lightgray;"></div>
| |
| − | <div style="position: absolute; top:0px; left: 50px; height: 500px; width: 1px; border-right: 1px dashed lightgray;"></div>
| |
| − | <div style="-ms-transform: rotate(6.5305deg); -webkit-transform: rotate(6.5305deg); transform: rotate(6.5305deg);position: absolute; left: 327.9412px; bottom: -0.59053px; width:0px; height:182.0246px; border-right:solid 2px rgb(86,180,233);"></div>
| |
| − | <div style="-ms-transform: rotate(-33.7293deg); -webkit-transform: rotate(-33.7293deg); transform: rotate(-33.7293deg);position: absolute; left: 239.7059px; bottom: 149.8967px; width:0px; height:355.8883px; border-right:solid 2px rgb(86,180,233);"></div>
| |
| − | <div style="-ms-transform: rotate(-38.4537deg); -webkit-transform: rotate(-38.4537deg); transform: rotate(-38.4537deg);position: absolute; left: 131.25px; bottom: 471.4296px; width:0px; height:32.924px; border-right:solid 2px rgb(86,180,233);"></div>
| |
| − | <div style="-ms-transform: rotate(9.0411deg); -webkit-transform: rotate(9.0411deg); transform: rotate(9.0411deg);position: absolute; left: 455.8382px; bottom: -1.1375px; width:0px; height:183.1126px; border-right:dashed 2px rgb(86,180,233);"></div>
| |
| − | <div style="-ms-transform: rotate(-42.8626deg); -webkit-transform: rotate(-42.8626deg); transform: rotate(-42.8626deg);position: absolute; left: 333.1912px; bottom: 125.9577px; width:0px; height:403.6676px; border-right:dashed 2px rgb(86,180,233);"></div>
| |
| − | <div style="-ms-transform: rotate(-38.4537deg); -webkit-transform: rotate(-38.4537deg); transform: rotate(-38.4537deg);position: absolute; left: 186.3088px; bottom: 471.4296px; width:0px; height:32.924px; border-right:dashed 2px rgb(86,180,233);"></div>
| |
| − | <p><br>
| |
| − | </p><p><br>
| |
| − | </p>
| |
| − | <div style="position: absolute; left:0px; top: 50px; height: 0px; width: 5px; border-bottom: 1px solid;"></div>
| |
| − | <div style="position: absolute; left:0px; top: 100px; height: 0px; width: 5px; border-bottom: 1px solid;"></div>
| |
| − | <div style="position: absolute; left:0px; top: 150px; height: 0px; width: 5px; border-bottom: 1px solid;"></div>
| |
| − | <div style="position: absolute; left:0px; top: 200px; height: 0px; width: 5px; border-bottom: 1px solid;"></div>
| |
| − | <div style="position: absolute; left:0px; top: 250px; height: 0px; width: 5px; border-bottom: 1px solid;"></div>
| |
| − | <div style="position: absolute; left:0px; top: 300px; height: 0px; width: 5px; border-bottom: 1px solid;"></div>
| |
| − | <div style="position: absolute; left:0px; top: 350px; height: 0px; width: 5px; border-bottom: 1px solid;"></div>
| |
| − | <div style="position: absolute; left:0px; top: 400px; height: 0px; width: 5px; border-bottom: 1px solid;"></div>
| |
| − | <div style="position: absolute; left:0px; top: 450px; height: 0px; width: 5px; border-bottom: 1px solid;"></div>
| |
| − | <div style="position: absolute; left:0px; top: 500px; height: 0px; width: 5px; border-bottom: 1px solid;"></div>
| |
| − | <div style="position: absolute; top:495px; left: 450px; height: 5px; width: 1px; border-right: 1px solid;"></div>
| |
| − | <div style="position: absolute; top:495px; left: 400px; height: 5px; width: 1px; border-right: 1px solid;"></div>
| |
| − | <div style="position: absolute; top:495px; left: 350px; height: 5px; width: 1px; border-right: 1px solid;"></div>
| |
| − | <div style="position: absolute; top:495px; left: 300px; height: 5px; width: 1px; border-right: 1px solid;"></div>
| |
| − | <div style="position: absolute; top:495px; left: 250px; height: 5px; width: 1px; border-right: 1px solid;"></div>
| |
| − | <div style="position: absolute; top:495px; left: 200px; height: 5px; width: 1px; border-right: 1px solid;"></div>
| |
| − | <div style="position: absolute; top:495px; left: 150px; height: 5px; width: 1px; border-right: 1px solid;"></div>
| |
| − | <div style="position: absolute; top:495px; left: 100px; height: 5px; width: 1px; border-right: 1px solid;"></div>
| |
| − | <div style="position: absolute; top:495px; left: 50px; height: 5px; width: 1px; border-right: 1px solid;"></div>
| |
| − | </div>
| |
| − | <div style="position: absolute; left: 22px; top: 515px; width: 18px; height: 1em;" align="right">0</div>
| |
| − | <div style="position: absolute; left: 22px; top: 465px; width: 18px; height: 1em;" align="right">1</div>
| |
| − | <div style="position: absolute; left: 22px; top: 415px; width: 18px; height: 1em;" align="right">2</div>
| |
| − | <div style="position: absolute; left: 22px; top: 365px; width: 18px; height: 1em;" align="right">3</div>
| |
| − | <div style="position: absolute; left: 22px; top: 315px; width: 18px; height: 1em;" align="right">4</div>
| |
| − | <div style="position: absolute; left: 22px; top: 265px; width: 18px; height: 1em;" align="right">5</div>
| |
| − | <div style="position: absolute; left: 22px; top: 215px; width: 18px; height: 1em;" align="right">6</div>
| |
| − | <div style="position: absolute; left: 22px; top: 165px; width: 18px; height: 1em;" align="right">7</div>
| |
| − | <div style="position: absolute; left: 22px; top: 115px; width: 18px; height: 1em;" align="right">8</div>
| |
| − | <div style="position: absolute; left: 22px; top: 65px; width: 18px; height: 1em;" align="right">9</div>
| |
| − | <div style="position: absolute; left: 22px; top: 15px; width: 18px; height: 1em;" align="right">10</div>
| |
| − | <div style="position: absolute; left: 50px; top:525px; width: 10px;" align="left">0</div>
| |
| − | <div style="position: absolute; left: 100px; top:525px; width: 10px;" align="left"> </div>
| |
| − | <div style="position: absolute; left: 150px; top:525px; width: 10px;" align="left">0.34</div>
| |
| − | <div style="position: absolute; left: 200px; top:525px; width: 10px;" align="left"> </div>
| |
| − | <div style="position: absolute; left: 250px; top:525px; width: 10px;" align="left">0.68</div>
| |
| − | <div style="position: absolute; left: 300px; top:525px; width: 10px;" align="left"> </div>
| |
| − | <div style="position: absolute; left: 350px; top:525px; width: 10px;" align="left">1.02</div>
| |
| − | <div style="position: absolute; left: 400px; top:525px; width: 10px;" align="left"> </div>
| |
| − | <div style="position: absolute; left: 450px; top:525px; width: 10px;" align="left">1.36</div>
| |
| − | <div style="position: absolute; left: 500px; top:525px; width: 10px;" align="left"> </div>
| |
| − | <div style="position: absolute; left: 550px; top:525px; width: 10px;" align="left">1.7</div>
| |
| − | <div style="position: absolute; left: 220px; top:540px; width: 150px;" align="right">Horsepower in 1000hp</div>
| |
| − | <div style="-ms-transform: rotate(90deg); -webkit-transform: rotate(90deg); transform: rotate(90deg); position: absolute; left: -140px; top:375px; width: 300px; word-wrap: break-word;" align="left">Altitude in 1000m</div>
| |
| − | </div>
| |
| − | <div style="padding:0px; margin:0px; position: relative; width: 527px; height: 60px; background: #f0f0f0; border: solid 1px; font: sans-serif; font-size: 10pt; padding-left: 45px;">
| |
| − | <div style="padding:0px; margin:0px; position: relative; width: 527px; height: 15px; background: #f0f0f0; border: none; font: sans-serif; font-size: 10pt;">
| |
| − | <p>Supercharger Stage #1: 100%
| |
| − | </p>
| |
| − | <div style="position: absolute; top:7px; left: 250px; height: 1px; width: 225px; border-bottom: solid 2px rgb(86,180,233);"></div>
| |
| − | <div style="padding:0px; margin:0px; position: relative; width: 527px; height: 15px; background: #f0f0f0; border: none; font: sans-serif; font-size: 10pt;">
| |
| − | <p>Supercharger Stage #1: WEP
| |
| − | </p>
| |
| − | <div style="position: absolute; top:7px; left: 250px; height: 1px; width: 225px; border-bottom: dashed 2px rgb(86,180,233);"></div>
| |
| − | </div>
| |
| − | </div>
| |
| − | </div>
| |
| | | | |
| | === Modules === | | === Modules === |
| | {| class="wikitable" | | {| class="wikitable" |
| − | ! Tier | + | ! colspan="1" | Tier |
| | ! colspan="2" | Flight performance | | ! colspan="2" | Flight performance |
| − | ! Survivability | + | ! colspan="1" | Survivability |
| − | ! Weaponry | + | ! colspan="3" | Weaponry |
| | |- | | |- |
| | | I | | | I |
| Line 238: |
Line 173: |
| | | Radiator | | | Radiator |
| | | | | | |
| − | | Offensive 20 mm | + | | Offensive 12 mm |
| | + | | Turret 12 mm |
| | + | | MCGP50 |
| | |- | | |- |
| | | II | | | II |
| Line 244: |
Line 181: |
| | | Compressor | | | Compressor |
| | | Airframe | | | Airframe |
| − | | New 20 mm cannons | + | | New 12 mm MGs |
| | + | | |
| | + | | MCSAP100 |
| | |- | | |- |
| | | III | | | III |
| Line 250: |
Line 189: |
| | | Engine | | | Engine |
| | | | | | |
| − | | Mk.II year 1942 | + | | Offensive 20 mm |
| | + | | New 12 mm MGs (turret) |
| | + | | MCGP250 |
| | |- | | |- |
| | | IV | | | IV |
| Line 256: |
Line 197: |
| | | Engine injection | | | Engine injection |
| | | Cover | | | Cover |
| − | | Mk.II year 1943 | + | | New 20 mm cannons |
| | + | | |
| | + | | MCRO500 |
| | |- | | |- |
| | |} | | |} |
| − |
| |
| − | The P-51 Mustang can seem a very underwhelming aircraft at first. The primary module to focus on for early success is the 20 mm ammo belts. Ground targets belts will give more consistent results as an attacker and the Air targets belts can be devastating against flying opponents. After improving the firepower on the aircraft, begin focusing on performance upgrades.
| |
| | | | |
| | === Pros and cons === | | === Pros and cons === |
| − | <!-- ''Summarise and briefly evaluate the vehicle in terms of its characteristics and combat effectiveness. Mark its pros and cons in the bulleted list. Try not to use more than 6 points for each of the characteristics. Avoid using categorical definitions such as "bad", "good" and the like - use substitutions with softer forms such as "inadequate" and "effective".'' --> | + | <!--Summarise and briefly evaluate the vehicle in terms of its characteristics and combat effectiveness. Mark its pros and cons in the bulleted list. Try not to use more than 6 points for each of the characteristics. Avoid using categorical definitions such as "bad", "good" and the like - use substitutions with softer forms such as "inadequate" and "effective".--> |
| | | | |
| | '''Pros:''' | | '''Pros:''' |
| − | * Great performance | + | * Lots of guns that can be brought to use |
| − | ** Great dive-speed and acceleration
| |
| − | ** High energy retention
| |
| − | ** Good performance at high speeds
| |
| − | ** Good roll rate
| |
| − | * Powerful armament
| |
| − | ** Gains access to British belt load-outs, incl. the devastating air-targets belt
| |
| − | ** Very efficient at destroying bombers
| |
| − | * 20 mm guns on the Mustang are mounted in close proximity, dealing a deadly double punch when hitting
| |
| − | * Can easily tackle higher BR foes
| |
| − | * Can be very deadly in the hands of a skilled pilot
| |
| | | | |
| | '''Cons:''' | | '''Cons:''' |
| − | * Mediocre climb rate | + | * Defensive turret is almost fixed (only ±2° in each direction); the target has to be at exact 6 o'clock to be engaged |
| − | * Low maximum altitude
| + | * Bad acceleration-rate, even when diving |
| − | * No separate gun control
| |
| − | * No payload options available
| |
| − | * Firing guns slows the plane down
| |
| − | * Poor visibility in simulator mode
| |
| − | * Hispano cannons overheat extremely quickly and are inaccurate unless upgraded
| |
| − | * Low ammo capacity compared to machine gun-armed variants
| |
| − | * Priority target when in AB mode due to its reputation of destroying planes with relative ease, smart players will try to eliminate the P-51 first.
| |
| − | * Minimal elevator authority without the engine producing net thrust as the plane relies heavily on streamline effect along the tail for elevator authority. Aircraft should not be landed with flaps down without an engine. | |
| | | | |
| | == History == | | == History == |
| − | <!-- ''Describe the history of the creation and combat usage of the aircraft in more detail than in the introduction. If the historical reference turns out to be too long, take it to a separate article, taking a link to the article about the vehicle and adding a block "/History" (example: <nowiki>https://wiki.warthunder.com/(Vehicle-name)/History</nowiki>) and add a link to it here using the <code>main</code> template. Be sure to reference text and sources by using <code><nowiki><ref></ref></nowiki></code>, as well as adding them at the end of the article with <code><nowiki><references /></nowiki></code>. This section may also include the vehicle's dev blog entry (if applicable) and the in-game encyclopedia description (under <code><nowiki>=== In-game description ===</nowiki></code>, also if applicable).'' -->
| + | ''Describe the history of the creation and combat usage of the aircraft in more detail than in the introduction. If the historical reference turns out to be too long, take it to a separate article, taking a link to the article about the vehicle and adding a block "/ History" (example: <nowiki>https://wiki.warthunder.com/(Vehicle-name)/History</nowiki>) and add a link to it here using the <code>main</code> template. Be sure to reference text and sources by using <code><nowiki><ref></ref></nowiki></code>, as well as adding them at the end of the article with <code><nowiki><references /></nowiki></code>. This section may also include the vehicle's dev blog entry (if applicable) and the in-game encyclopedia description (under <code><nowiki>=== In-game description ===</nowiki></code>, also if applicable).'' |
| − | The North American P-51 was born when the British Government showed interest in purchasing the Curtiss P-40C. Curtiss was at max production capacity, so the British inquired to North American Aviation if they would build it under license for them. North American agreed, but they wanted to build a better aircraft. A condition of the sale from North American to the British was to supply the U.S. Army with two samples free of charge. The original prototypes were designated XP-51. The U.S. Army was given fourth and tenth aircraft. One of them can still be found at the EAA Museum in OshKosh, Wisconsin. Testing of the two prototypes started in October of 1941. The new aircraft received high marks and were clearly superior to other U.S. fighters at that time. Although, the U.S. Army decided to not immediately place orders.
| |
| − | | |
| − | The first order of Mustangs to the British were designated Mustang I. The RAF received these aircraft behind schedule in October of 1941. Problems showed up immediately including the Allison power-plant and other design flaws. It is also important to note the Mustang Mk I's armament consisting of four .30 Cal machine guns mounted in the wings, as well as a set of two .50 Cal mounted in the wings and two .50 Cal machine guns mounted in the nose.
| |
| − | | |
| − | The next evolution of this aircraft was designated [[Mustang Mk IA (Great Britain)|Mustang Mk IA]]. Due to the recently signed Lend Lease Act the U.S. Army was able to place an order for 150 more Mustangs on behalf of the British. These aircraft were equipped with four 20 mm [[Hispano Mk.II (20 mm)|Hispano Mk.II]] cannons mounted in the wings. Only 93 of the new Mustangs made it to the RAF. The U.S. Army pulled 55 for themselves and they immediately saw service. Two were kept by North American Aviation for internal use.
| |
| − | | |
| − | These P-51 Mustangs first saw service in April 9th of 1943 and the first combat loss came shortly afterwards on April 23rd. Mustangs saw action against the Japanese in the Aleutian Islands but a majority of them found their way to the Mediterranean theatre. The Mustang saw combat early on in the country of Algeria. Over time these P-51 Mustangs were converted to Reconnaissance planes. A K-24 camera was placed in the left window behind the pilot. The camera faced towards the back and down and took pictures providing battlefield reconnaissance. These aircraft saw continued service until the later part of 1944 continuing to fill the Attacker and Recon role.
| |
| − | | |
| − | === In-game description ===
| |
| − | The North American P-51 Mustang was a single seat fighter which was designed, developed and entered service all during the course of the Second World War. The origins of the aircraft came about in April 1940, when the British Purchasing Commission approached the North American aviation company to design a fighter to augment those already in service with RAF Fighter Command. The prototype first flew on October 26th 1940 and, after a highly successful test and evaluation period, 320 aircraft were ordered and the first production aircraft flew on May 1st 1941. Delivered to No.26 Squadron at Gatwick, the new American fighter was designated the Mustang Mk.I by the RAF. It was considered to be superior to any other American fighter at the time, particularly at low level. However, the 1100 hp Allison V-1710 engine had a poorer performance at high altitude, particularly above 15,000 feet which was above where the engine supercharger was optimized for.
| |
| − | | |
| − | For this reason, the Mustangs were used in support of ground operations rather than in their intended original role as a fighter. The Mustang was very successful in this role and an additional order for a further 300 aircraft was placed. The new batch was modified by fitting self sealing fuel tanks and replacing the earlier Mustang's eight machine guns with a new armament of four 20 mm cannon, to create the Mustang Mk.IA. The RAF's successes with the Mustang led to a good deal of attention from the United States Army Air Force; after highlighting the fighter's only serious shortcoming as its high altitude performance, inquiries were made into fitting the aircraft with a different engine. The British Rolls-Royce Merlin was selected for testing in five converted Mustangs, and the performance of the fighter increased dramatically. The airframe and wings were strengthened to harness the power of the Merlin engine, which also resulted in the fitting of under wing stores now being an option. Mustangs could now carry bombs, rockets or long range drop tanks. Now more than capable of competing across all altitude bands and boasting a particularly long range for a single engine fighter, the Mustang was rapidly evolving into one of the most capable air assets of the entire war. However, with British and American interest in the fighter still growing, future variants of the Mustang would show yet more improvements.
| |
| − | | |
| − | Generally regarded as the greatest American fighter of the Second World War, Mustang pilots were to claim nearly 5,000 air-to-air kills by the end of the conflict. The Mustang would go on to serve the USAF in the Korean War, and was exported to over 50 foreign air forces.
| |
| | | | |
| | == Media == | | == Media == |
| | <!-- ''Excellent additions to the article would be video guides, screenshots from the game, and photos.'' --> | | <!-- ''Excellent additions to the article would be video guides, screenshots from the game, and photos.'' --> |
| − | {{Youtube-gallery|qsWhqJrd4og|'''"War Thunder Realistic: P-51 Mustang [Speed is Vital]"''' by ''Jengar''|aKgfzlJMxQU|'''"P-51: The Altitude Advantage (Lite New Player Tutorial)"''' by ''MagzTV''}}
| + | ;Images |
| − | * [https://live.warthunder.com/post/393387/en/ <nowiki>[</nowiki>Skin<nowiki>]</nowiki> "Big Mac Junior" - by ''PROx'']
| + | <div><ul> |
| − | * [https://live.warthunder.com/post/359448/en/ <nowiki>[</nowiki>Skin<nowiki>]</nowiki> Fictional; USAAF motto "Aim high... fly, fight, win" - by ''pathaber'']
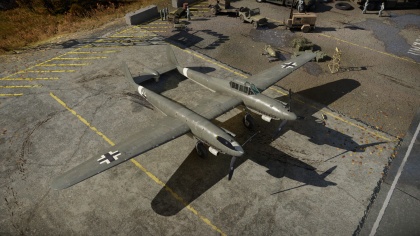
| + | <li style="display: inline-block;"> [[File:SM 92 WTWallpaper 001.jpg |thumb|none|250px|]] </li> |
| − | * [https://live.warthunder.com/post/508720/en/ <nowiki>[</nowiki>Skin<nowiki>]</nowiki> RAF experimental marking scheme - by ''JohnnyAlpha65'']
| + | <li style="display: inline-block;"> [[File:SM 92 WTWallpaper 002.jpg |thumb|none|250px|]] </li> |
| | + | <li style="display: inline-block;"> [[File:SM 92 WTWallpaper 003.jpg |thumb|none|250px|]] </li> |
| | + | <li style="display: inline-block;"> [[File:SM 92 WTWallpaper 004.jpg |thumb|none|250px|]] </li> |
| | + | <li style="display: inline-block;"> [[File:SM 92 WTWallpaper 005.jpg |thumb|none|250px|]] </li> |
| | + | <li style="display: inline-block;"> [[File:SM 92 WTWallpaper 006.jpg |thumb|none|250px|]] </li> |
| | + | <li style="display: inline-block;"> [[File:SM 92 WTWallpaper 007.jpg |thumb|none|250px|]] </li> |
| | + | <li style="display: inline-block;"> [[File:SM 92 WTWallpaper 008.jpg |thumb|none|250px|]] </li> |
| | + | </ul></div> |
| | | | |
| | == See also == | | == See also == |
| − | <!-- ''Links to the articles on the War Thunder Wiki that you think will be useful for the reader, for example:''
| + | ''Links to the articles on the War Thunder Wiki that you think will be useful for the reader, for example:'' |
| | * ''reference to the series of the aircraft;'' | | * ''reference to the series of the aircraft;'' |
| − | * ''links to approximate analogues of other nations and research trees.'' --> | + | * ''links to approximate analogues of other nations and research trees.'' |
| − | ;Related development
| |
| − | * North American [[P-51 (Family)|P-51 Mustang]] all variants
| |
| − | ** [[P-51A|P-51A ''TL'']] Thunder League Event vehicle, [[M2 Browning (12.7 mm)|M2 Browning HMG]] armed version
| |
| − | ** [[Mustang Mk IA (Great Britain)|Mustang Mk IA]] for Great Britain, better horse power due higher manifold pressure
| |
| − | ** [[A-36]] Attacker variant, bomb pylons and six 12.7 mm [[M2 Browning (12.7 mm)|M2 Brownings]]
| |
| − | ** [[P-51D-5|P-51''D'']] successor with British Merlin engine
| |
| − | | |
| − | ;Aircraft of comparable role, configuration and era
| |
| − | * [[Fw 190 A-5]]
| |
| − | * [[Typhoon Mk Ib]]
| |
| | | | |
| | == External links == | | == External links == |
| − | <!-- ''Paste links to sources and external resources, such as:'' | + | <!--''Paste links to sources and external resources, such as:'' |
| | * ''topic on the official game forum;'' | | * ''topic on the official game forum;'' |
| | * ''encyclopedia page on the aircraft;'' | | * ''encyclopedia page on the aircraft;'' |
| − | * ''other literature.'' --> | + | * ''other literature.''--> |
| − | * [[wikipedia:North_American_P-51_Mustang_variants#P-51/Mustang_IA_(NA-91)|[Wikipedia] P-51 (NA-91)]] | + | * [https://warthunder.com/en/news/6056-development-sm-92-second-chance-for-a-second-tail-en SM.92: Second Chance for a Second Tail] |
| − | * [http://www.wwiiaircraftperformance.org/mustang/mustang-I.html <nowiki>[</nowiki>wwiiaircraftperformance.org<nowiki>]</nowiki> P-51 Mustang (Allison Engine) Performance Trials]
| |
| | | | |
| − | {{AirManufacturer NAA}} | + | {{AirManufacturer SM}} |
| − | {{USA fighters}} | + | {{Italy attackers}} |


