Difference between revisions of "Achilles (65 Rg.)"
(→Main armament) (Tag: Visual edit) |
(→Description) (Tag: Visual edit) |
||
| (23 intermediate revisions by 9 users not shown) | |||
| Line 1: | Line 1: | ||
| − | |||
{{About | {{About | ||
| about = premium British tank destroyer '''{{PAGENAME}}''' | | about = premium British tank destroyer '''{{PAGENAME}}''' | ||
| − | | usage = | + | | usage = the regular version |
| link = Achilles | | link = Achilles | ||
| + | }} | ||
| + | {{Specs-Card | ||
| + | |code=uk_17_pdr_m10_achilles_norfolk_yeomanry | ||
| + | |images={{Specs-Card-Image|GarageImage_{{PAGENAME}}.jpg}} | ||
}} | }} | ||
== Description == | == Description == | ||
<!-- ''In the description, the first part should be about the history of the creation and combat usage of the vehicle, as well as its key features. In the second part, tell the reader about the ground vehicle in the game. Insert a screenshot of the vehicle, so that if the novice player does not remember the vehicle by name, he will immediately understand what kind of vehicle the article is talking about.'' --> | <!-- ''In the description, the first part should be about the history of the creation and combat usage of the vehicle, as well as its key features. In the second part, tell the reader about the ground vehicle in the game. Insert a screenshot of the vehicle, so that if the novice player does not remember the vehicle by name, he will immediately understand what kind of vehicle the article is talking about.'' --> | ||
| − | + | The '''{{Specs|name}}''' (shortened to '''{{specs|pseudonym}}''', full name '''17 pounder, Self-Propelled M10 Achilles (65th Anti-Tank Regiment)''') is a premium gift rank {{Specs|rank}} British tank destroyer {{Battle-rating}}. It was introduced as a [[wt:en/news/3472--en|premium pack]] in [[Update 1.53 "Firestorm"]] and removed from the store after the [[wt:en/news/4684-vday-victory-day-discounts-en/|2017 Victory Day sale]]. It has also been obtainable in the [[Warbonds|Warbond]] shop in [[wt:en/news/5243--en|January 2018]], [[wt:en/news/5858-news-how-can-you-get-premium-vehicles-warbonds-en|November 2018]] and [[wt:en/news/6463-news-how-can-you-get-premium-vehicles-warbonds-en|November 2019]]. It was also made available briefly in the store during the [[wt:en/news/6759/current|2020 D-Day sale]] and [[wt:en/news/8306-special-vehicles-of-d-day-for-golden-eagles-en|2023 D-Day sale]]. | |
| − | + | ||
| − | The '''{{Specs|name}}''' (shortened to '''{{specs|pseudonym}}''', full name '''17 pounder, Self-Propelled M10 Achilles (65th Anti-Tank Regiment)''') is a premium gift rank {{Specs|rank}} British tank destroyer {{Battle-rating}}. It was introduced in [[Update 1.53 "Firestorm"]] and was one of the first British tanks introduced in the game | + | It was one of the first British tanks introduced in the game as an Achilles tank destroyer with the insignia of 7th Armored Division, 65th Anti-Tank Regiment "Norfolk Yeomanry". |
| − | The [[Achilles]] is based on the American [[M10 GMC]], but carries a [[Ordnance QF 17-pounder (76 mm)|17-pounder]] cannon as the main armament, making it an effective tank destroyer. Thanks to a well assigned BR, the Achilles won't feel in the wrong game even when facing higher rank tanks. The Achilles has plenty of firepower, | + | The [[Achilles]] is based on the American [[M10 GMC]], but carries a [[Ordnance QF 17-pounder (76 mm)|17-pounder]] cannon as the main armament, making it an effective tank destroyer. Thanks to a well assigned BR, the Achilles won't feel in the wrong game even when facing higher rank tanks. The Achilles has plenty of firepower, as the Mk.8 APCBC shot is more effective against the [[T-34 (1942)|T-34]]'s sloped armour. The 17-pdr cuts through enemy [[Pz.III M|Panzer III]] and [[Pz.IV H|IV]] (the shots enter the front and exit from the rear) so try to aim vital points to cause the maximum damage (first shot to the turret to disable enemy firepower). The T-34 is a bigger problem due to its sloped armour. When facing Soviet tanks, the first shot should always be to the gunner. The Mk.8 APCBC is quite able to penetrate the T-34 glacis even from a distance but keep in mind that the damage caused is unreliable (sometimes two or more shots are required to destroy a T-34). The M10 mobility is not outstanding, but the Achilles is pretty capable to carry the player, the gun, and the team to where it needs to go. |
Protection is not good. The sloped armour and the track links added to the front will protect the Achilles from some low calibre shots, but the vast majority of the enemies will be able to destroy the Achilles easily. Side armour is paper thin. The high profile and the very slow turret traverse (man-powered) are not suitable for close range combat so avoid deep flanking tactics. | Protection is not good. The sloped armour and the track links added to the front will protect the Achilles from some low calibre shots, but the vast majority of the enemies will be able to destroy the Achilles easily. Side armour is paper thin. The high profile and the very slow turret traverse (man-powered) are not suitable for close range combat so avoid deep flanking tactics. | ||
| Line 18: | Line 21: | ||
== General info == | == General info == | ||
=== Survivability and armour === | === Survivability and armour === | ||
| − | <!--''Describe armour protection. Note the most well protected and key weak areas. Appreciate the layout of modules as well as the number and location of crew members. Is the level of armour protection sufficient, is the placement of modules helpful for survival in combat? | + | {{Specs-Tank-Armour}} |
| − | + | <!-- ''Describe armour protection. Note the most well protected and key weak areas. Appreciate the layout of modules as well as the number and location of crew members. Is the level of armour protection sufficient, is the placement of modules helpful for survival in combat? If necessary use a visual template to indicate the most secure and weak zones of the armour.'' --> | |
| − | |||
'''Armour type:''' | '''Armour type:''' | ||
| Line 43: | Line 45: | ||
=== Mobility === | === Mobility === | ||
| + | {{Specs-Tank-Mobility}} | ||
<!-- ''Write about the mobility of the ground vehicle. Estimate the specific power and manoeuvrability, as well as the maximum speed forwards and backwards.'' --> | <!-- ''Write about the mobility of the ground vehicle. Estimate the specific power and manoeuvrability, as well as the maximum speed forwards and backwards.'' --> | ||
| − | {{tankMobility|abMinHp= 582|rbMinHp= 363|AoAweight= 0. | + | {{tankMobility|abMinHp=582|rbMinHp=363|AoAweight=0.32}} |
| + | |||
| + | === Modifications and economy === | ||
| + | {{Specs-Economy}} | ||
== Armaments == | == Armaments == | ||
| + | {{Specs-Tank-Armaments}} | ||
=== Main armament === | === Main armament === | ||
| − | <!--''Give the reader information about the characteristics of the main gun. Assess its effectiveness in a battle based on the reloading speed, ballistics and the power of shells. Do not forget about the flexibility of the fire, that is how quickly the cannon can be aimed at the target, open fire on it and aim at another enemy. Add a link to the main article on the gun: <code><nowiki>{{main|Name of the weapon}}</nowiki></code>. Describe in general terms the ammunition available for the main gun. Give advice on how to use them and how to fill the ammunition storage.''--> | + | {{Specs-Tank-Weapon|1}} |
| − | {{main| | + | <!-- ''Give the reader information about the characteristics of the main gun. Assess its effectiveness in a battle based on the reloading speed, ballistics and the power of shells. Do not forget about the flexibility of the fire, that is how quickly the cannon can be aimed at the target, open fire on it and aim at another enemy. Add a link to the main article on the gun: <code><nowiki>{{main|Name of the weapon}}</nowiki></code>. Describe in general terms the ammunition available for the main gun. Give advice on how to use them and how to fill the ammunition storage.'' --> |
| + | {{main|QF 17-pounder (76 mm)}} | ||
{| class="wikitable" style="text-align:center" width="100%" | {| class="wikitable" style="text-align:center" width="100%" | ||
|- | |- | ||
| − | ! colspan="5" | [[ | + | ! colspan="5" | [[QF 17-pounder (76 mm)|76 mm QF 17-pounder]] || colspan="5" | Turret rotation speed (°/s) || colspan="4" | Reloading rate (seconds) |
|- | |- | ||
! Mode !! Capacity !! Vertical !! Horizontal !! Stabilizer | ! Mode !! Capacity !! Vertical !! Horizontal !! Stabilizer | ||
| Line 68: | Line 76: | ||
|} | |} | ||
| + | ==== Ammunition ==== | ||
| + | {{:QF 17-pounder (76 mm)/Ammunition|Shot Mk.6, Shell Mk.1, Shot Mk.4, Shot Mk.8, 17pdr Shell SS Mk.1}} | ||
| + | |||
| + | ==== [[Ammo racks]] ==== | ||
| + | [[File:Ammoracks_Achilles.png|right|thumb|x250px|[[Ammo racks]] of the Achilles.]] | ||
| + | <!-- '''Last updated:''' --> | ||
{| class="wikitable" style="text-align:center" | {| class="wikitable" style="text-align:center" | ||
|- | |- | ||
| − | ! | + | ! Full<br>ammo |
| − | + | ! 1st<br>rack empty | |
| − | + | ! 2nd<br>rack empty | |
| − | + | ! 3rd<br>rack empty | |
| − | + | ! 4th<br>rack empty | |
| − | + | ! 5th<br>rack empty | |
| − | + | ! 6th<br>rack empty | |
| − | + | ! Visual<br>discrepancy | |
| − | |||
| − | |||
| − | |||
| − | |||
| − | |||
| − | |||
| − | |||
| − | |||
| − | |||
| − | |||
| − | |||
| − | |||
| − | |||
| − | |||
| − | |||
| − | |||
| − | |||
| − | |||
| − | |||
| − | |||
| − | |||
| − | |||
| − | |||
| − | |||
| − | |||
| − | |||
| − | |||
| − | |||
| − | |||
| − | |||
| − | |||
| − | |||
| − | |||
| − | |||
| − | |||
| − | |||
| − | |||
| − | |||
| − | |||
| − | |||
| − | |||
| − | |||
| − | |||
| − | |||
| − | |||
| − | |||
| − | |||
| − | |||
| − | |||
| − | |||
| − | |||
| − | |||
| − | |||
| − | |||
| − | |||
| − | ! | ||
| − | |||
| − | |||
| − | |||
| − | |||
| − | |||
| − | |||
| − | |||
| − | |||
| − | |||
| − | |||
| − | |||
| − | |||
| − | |||
| − | |||
| − | |||
| − | |||
| − | |||
| − | |||
| − | |||
| − | |||
| − | |||
| − | |||
| − | |||
| − | |||
| − | |||
| − | ! | ||
| − | ! | ||
| − | ! | ||
| − | ! | ||
| − | ! | ||
| − | ! | ||
|- | |- | ||
| − | | | + | | '''50''' || 48 ''(+2)'' || 45 ''(+5)'' || 34 ''(+16)'' || 23 ''(+27)'' || 12 ''(+38)'' || 1 ''(+49)'' || Yes |
|- | |- | ||
|} | |} | ||
| − | + | Turret empty: 45 ''(+5)'' | |
| − | |||
| − | |||
| − | |||
| − | |||
| − | |||
| − | |||
| − | |||
| − | |||
| − | |||
| − | |||
| − | |||
| − | |||
| − | |||
| − | |||
| − | |||
| − | |||
| − | Turret empty: 45 ''(+5)'' | ||
| − | |||
| − | |||
| − | + | ==== Optics ==== | |
| − | |||
| − | |||
{| class="wikitable" style="text-align:center" width="50%" | {| class="wikitable" style="text-align:center" width="50%" | ||
| − | ! colspan="3" | {{PAGENAME}} [[Optics]] | + | ! colspan="3" | {{PAGENAME}} [[Optics]] |
|- | |- | ||
! Which ones | ! Which ones | ||
| Line 203: | Line 109: | ||
|- | |- | ||
! Main Gun optics | ! Main Gun optics | ||
| − | | x1.85 || x3.5 | + | | x1.85 || x3.5 |
|- | |- | ||
! Comparable optics | ! Comparable optics | ||
| − | | colspan="2 | + | | colspan="2" | [[M10 GMC]] |
|- | |- | ||
|} | |} | ||
=== Machine guns === | === Machine guns === | ||
| − | <!--''Offensive and anti-aircraft machine guns not only allow you to fight some aircraft but also are effective against lightly armoured vehicles. Evaluate machine guns and give recommendations on its use.''--> | + | {{Specs-Tank-Weapon|2}} |
| − | {{main| | + | <!-- ''Offensive and anti-aircraft machine guns not only allow you to fight some aircraft but also are effective against lightly armoured vehicles. Evaluate machine guns and give recommendations on its use.'' --> |
| + | {{main|M2HB (12.7 mm)}} | ||
| − | {| class="wikitable" style="text-align:center" | + | {| class="wikitable" style="text-align:center" width="50%" |
|- | |- | ||
| − | ! colspan=" | + | ! colspan="5" | [[M2HB (12.7 mm)|12.7 mm M2HB]] |
|- | |- | ||
| − | ! | + | ! Mount !! Capacity (Belt) !! Fire rate !! Vertical !! Horizontal |
|- | |- | ||
| − | + | | Pintle || 400 (200) || 577 || -10°/+70° || ±60° | |
| − | |||
| − | |||
| − | |||
| − | |||
| − | |||
|- | |- | ||
|} | |} | ||
== Usage in battles == | == Usage in battles == | ||
| − | <!--''Describe the tactics of playing in the vehicle, the features of using vehicles in the team and advice on tactics. Refrain from creating a "guide" - do not impose a single point of view but instead give the reader food for thought. Describe the most dangerous enemies and give recommendations on fighting them. If necessary, note the specifics of the game in different modes (AB, RB, SB).''--> | + | <!-- ''Describe the tactics of playing in the vehicle, the features of using vehicles in the team and advice on tactics. Refrain from creating a "guide" - do not impose a single point of view but instead give the reader food for thought. Describe the most dangerous enemies and give recommendations on fighting them. If necessary, note the specifics of the game in different modes (AB, RB, SB).'' --> |
| − | The Achilles is best used for sniping and shoot and scoot tactics. Find a good spot | + | The Achilles is best used for sniping and shoot and scoot tactics. Find a good spot to shoot at enemies, aim carefully (RB need a good use of mils range estimation) and enjoy the fireworks! To make full use of its decent sniping capacity, find a spot that: |
* overlooks key passageway / street / battle area | * overlooks key passageway / street / battle area | ||
| Line 239: | Line 141: | ||
* is not too hard to get to | * is not too hard to get to | ||
| − | With a location like that, the Achilles can utilise its -10° gun depression and use hull down. Its turret front and mantlet can consistently cause ricochets especially in a downtier. Looming behind bushes, an Achille's well aimed shots should be able to knock out most enemy tanks at the battle | + | With a location like that, the Achilles can utilise its -10° gun depression and use hull down. Its turret front and mantlet can consistently cause ricochets especially in a downtier. Looming behind bushes, an Achille's well aimed shots should be able to knock out most enemy tanks at the battle rating range from long range. Even if you get spotted, any slope or hard covers will provide protection for you. |
Keep in mind the low fire rate (compared to other 17-pdr AFVs). Once the Achilles has destroyed (or damaged) the enemy the best thing to do is to relocate. Don't stay in the same spot for too long: the Achilles has weak armour and an open top. Artillery barrages will cripple the Achilles or the crew. | Keep in mind the low fire rate (compared to other 17-pdr AFVs). Once the Achilles has destroyed (or damaged) the enemy the best thing to do is to relocate. Don't stay in the same spot for too long: the Achilles has weak armour and an open top. Artillery barrages will cripple the Achilles or the crew. | ||
| − | Another thing to think about is the turret traverse. Yes... It is **really** slow. Therefore, some changes need to be made in the typical | + | Another thing to think about is the turret traverse. Yes... It is **really** slow. Therefore, some changes need to be made in the typical playstyle. If the Achilles need to target an enemy quickly, do not rely on the turret. Instead, traverse the entire tank so that the hull is facing the enemy head-on, similar to turretless, casemate style tank destroyers. To avoid situations like this, stay way back, avoiding urban areas and other areas where the Achilles will be flanked easily. |
'''Enemies worth noting:''' | '''Enemies worth noting:''' | ||
| − | [[R3 T20 FA-HS]]: this vehicle is the exact opposite tank when comparing to an Achilles: extremely high | + | [[R3 T20 FA-HS]]: this vehicle is the exact opposite tank when comparing to an Achilles: extremely high top speed, great traverse and fast gun rotation. A well-manoeuvred R3 can easily circle around the Achilles and shoot AP shells through the thin side, while the Achilles struggles to get the gun on target even when traversing the hull with the gun. If you know an R3 is around, you better turn your hull towards the possible direction and be ready to engage. Move the hull with the gun to target quicker. Even if you miss, the M2 Browning can still penetrate the R3 and knock out its crews. Note that a side shot on the R3 does not guarantee a kill as the crew are pretty separated. The R3 can run away and repair for another attack. A frontal shot, however, is likely to knock it out with a single shot as the crew members are all lined up. |
| − | [[8,8 cm Flak 37 Sfl.]]: also known as the " | + | [[8,8 cm Flak 37 Sfl.]]: also known as the "Flak truck", it is rather hard to knock out due to the fact that its armour is so thin that almost every shell will over-penetrate, dealing almost no critical damage. Plus this vehicle mostly face their side to the targets, making it even harder to kill them as the crew are all far apart. So it can usually take quite some hits and take out the shooters one by one. As the shooter, aim for the left side of its turret first to disable its gunner first, then knock out the rest of its crew (right turret & driving compartment). Do not hope that the M2 HB can kill the crews, the Flak truck's armour is too thick for any MG to penetrate. |
| − | === | + | === Pros and cons === |
| − | + | <!-- ''Summarise and briefly evaluate the vehicle in terms of its characteristics and combat effectiveness. Mark its pros and cons in a bulleted list. Try not to use more than 6 points for each of the characteristics. Avoid using categorical definitions such as "bad", "good" and the like - use substitutions with softer forms such as "inadequate" and "effective".'' --> | |
| − | ! | ||
| − | |||
| − | |||
| − | |||
| − | |||
| − | |||
| − | |||
| − | |||
| − | |||
| − | |||
| − | |||
| − | |||
| − | |||
| − | |||
| − | |||
| − | |||
| − | |||
| − | |||
| − | |||
| − | |||
| − | |||
| − | |||
| − | |||
| − | |||
| − | |||
| − | |||
| − | |||
| − | |||
| − | |||
| − | |||
| − | |||
| − | |||
| − | |||
| − | |||
| − | |||
| − | |||
| − | |||
| − | |||
'''Pros:''' | '''Pros:''' | ||
| − | * | + | * Great gun (17-pounder!) |
* High level of penetration. Will often pass through the front of lighter vehicles and leave through the back. | * High level of penetration. Will often pass through the front of lighter vehicles and leave through the back. | ||
* Premium vehicle - instant access to the best shell (Shot Mk.8) | * Premium vehicle - instant access to the best shell (Shot Mk.8) | ||
| Line 307: | Line 171: | ||
* Armour is rather thin | * Armour is rather thin | ||
| − | * Big ammo racks | + | * Big ammo racks |
* Open top turret makes it vulnerable to artillery and strafing planes | * Open top turret makes it vulnerable to artillery and strafing planes | ||
* Very slow turret traverse | * Very slow turret traverse | ||
| Line 313: | Line 177: | ||
* Handling is poor on some rough terrain before mobility modifications are researched | * Handling is poor on some rough terrain before mobility modifications are researched | ||
* Reverse speed is bad | * Reverse speed is bad | ||
| − | * | + | * Limited ammo count for the commander's machine gun |
== History == | == History == | ||
| − | <!--''Describe the history of the creation and combat usage of the | + | <!-- ''Describe the history of the creation and combat usage of the vehicle in more detail than in the introduction. If the historical reference turns out to be too long, take it to a separate article, taking a link to the article about the vehicle and adding a block "/History" (example: <nowiki>https://wiki.warthunder.com/(Vehicle-name)/History</nowiki>) and add a link to it here using the <code>main</code> template. Be sure to reference text and sources by using <code><nowiki><ref></ref></nowiki></code>, as well as adding them at the end of the article with <code><nowiki><references /></nowiki></code>. This section may also include the vehicle's dev blog entry (if applicable) and the in-game encyclopedia description (under <code><nowiki>=== In-game description ===</nowiki></code>, also if applicable).'' --> |
===Development=== | ===Development=== | ||
| − | The [[M10 GMC|M10 tank destroyer]] was developed in 1942 to fulfil the anti-tank doctrine established by the US military. The doctrine, creating the tank destroyer force, was established with the objective to stop German blitzkrieg tactics by attacking the tanks. Unlike the other armoured fighting vehicles in the theatre, the tank destroyers were made to be placed in reserves to counter any breach in the front lines by taking out the enemy with ambushes. This role led to the desire for a fast vehicle with a powerful gun; armour was not a concern due to the emphasis in speed. The design ended up taking a turret design developed from the [[M6A1|M6A1 Heavy Tank]] and the body from the [[M4A2| M4A2 Sherman]], this with the 3-inch 1918 gun, provided the backbone of the American tank destroyer force in much of World War II. In total, 6,706 M10s and its variants were produced between September of 1942 to 1943 of the same month. | + | The [[M10 GMC|M10 tank destroyer]] was developed in 1942 to fulfil the anti-tank doctrine established by the US military. The doctrine, creating the tank destroyer force, was established with the objective to stop German blitzkrieg tactics by attacking the tanks. Unlike the other armoured fighting vehicles in the theatre, the tank destroyers were made to be placed in reserves to counter any breach in the front lines by taking out the enemy with ambushes. This role led to the desire for a fast vehicle with a powerful gun; armour was not a concern due to the emphasis in speed. The design ended up taking a turret design developed from the [[M6A1|M6A1 Heavy Tank]] and the body from the [[M4A2| M4A2 Sherman]], this with the 3-inch 1918 gun, provided the backbone of the American tank destroyer force in much of World War II. In total, 6,706 M10s and its variants were produced between September of 1942 to 1943 of the same month. |
===British Use=== | ===British Use=== | ||
| − | These M10s were given out to | + | These M10s were given out to America's allies, though the British were the most well-known of these users, receiving about 1,650 M10s from the Americans from 1943 onward. The British designated the M10s under their service as the '''Achilles''' and unlike popular usage, was called that for both the 3-inch gun variant (''Achilles I/II'') and the variant mounting the 17-pounder (''Achilles Ic / IIc''). Though in most usage, the vehicle was called the ''17pdr M10'', or ''17pdr SP M10'', or even the ''"Firefly"'', despite that name being used for a different design. |
| − | The British first received the M10s with the 3-inch cannons, which were much more powerful than the British tank armament at the time, giving them an edge in many tank confrontations in the North African Campaign. It was around 1943 that conversion is done onto the M10 to increase its firepower capabilities against the gradually upgraded German tank designs such as the [[Tiger H1|Tiger I]] and the [[Panther D|Panthers]]. The conversion used one of the best Allied anti-tank guns at the time, the 17-pounder, which could penetrate about 140 mm of armour at 500 | + | The British first received the M10s with the 3-inch cannons, which were much more powerful than the British tank armament at the time, giving them an edge in many tank confrontations in the North African Campaign. It was around 1943 that conversion is done onto the M10 to increase its firepower capabilities against the gradually upgraded German tank designs such as the [[Tiger H1|Tiger I]] and the [[Panther D|Panthers]]. The conversion used one of the best Allied anti-tank guns at the time, the 17-pounder, which could penetrate about 140 mm of armour at 500 m away with APCBC rounds, and 209 mm at the same distance with APDS rounds (Armour-Penetrating Discarding Sabot). The conversion is done onto the M10 also required a counterweight to be placed on the 17-pounder to compensate the heavier weight of the 17-pounder compared to the 3-inch gun. This gave the M10 Achilles a much more defining profile and attempts were made to hide this larger cannon length with optical illusion. Aside from the gun conversion, the M10 Achilles also had an extra 17 mm of armour welded onto the front and sides of the hull for added protection, plus a 20 mm shield on the top of the turret to compensate for the open-turret design. About 1,000 M10 Achilles with the 17-pounders were ordered, but by D-Day, only 124 were available, and 816 were done by the end of the year. The low number of these converted Achilles made meant that any lost units were hard to replace with a 17-pounder one, and the disgruntled crew would be issued an M10 with a 3-inch gun instead. In the end, about a total of 1,000 Achilles were converted into 17-pounder ones by the end of World War II, making the M10 Achilles the second-most numerous design to mount the 17-pounder, coming before the [[Sherman Firefly|Sherman Firefly]]. |
The Achilles were issued out as part of the Royal Artillery in armoured divisions in anti-tank regiments. One of such regiments was the '''65th Anti-Tank Regiment''' assigned to the 7th Armoured division during 1942 and onward until the end of the war. | The Achilles were issued out as part of the Royal Artillery in armoured divisions in anti-tank regiments. One of such regiments was the '''65th Anti-Tank Regiment''' assigned to the 7th Armoured division during 1942 and onward until the end of the war. | ||
===Combat Usage=== | ===Combat Usage=== | ||
| − | The British doctrine with the Achilles differed from the Americans who saw it as a reserve tank destroyer. The British viewed the Achilles as a mobile anti-tank gun, thus the Achilles served in a role akin to the [[StuG III G|StuG III]] in German service, moving the 17-pounder into position to take a shot on incoming German [[Tiger E|Tiger]] or [[Panther G|Panther]] tanks. These Achilles were used more with Churchill tank units rather than the medium tanks due to the lack of 17-pounder equipped on [[Churchill Mk III|Churchills]] while the medium tanks have the Firefly available for use. Disadvantages with the M10 Achilles design were carried over from the original, the slow turret traverse speed, high profile, and open-top turret made it a rather harder vehicle to use than a regular tank, but it still had its advantages and was still suitable for the role it had. | + | The British doctrine with the Achilles differed from the Americans who saw it as a reserve tank destroyer. The British viewed the Achilles as a mobile anti-tank gun, thus the Achilles served in a role akin to the [[StuG III G|StuG III]] in German service, moving the 17-pounder into position to take a shot on incoming German [[Tiger E|Tiger]] or [[Panther G|Panther]] tanks. These Achilles were used more with Churchill tank units rather than the medium tanks due to the lack of 17-pounder equipped on [[Churchill Mk III|Churchills]] while the medium tanks have the Firefly available for use. Disadvantages with the M10 Achilles design were carried over from the original, the slow turret traverse speed, high profile, and open-top turret made it a rather harder vehicle to use than a regular tank, but it still had its advantages and was still suitable for the role it had. |
The Achilles were deployed on D-Day onward in artillery forces in anti-tank regiments in armoured divisions. A typical anti-tank regiment would have four batteries, two with towed 17-pounders, one equipped with 17-pounder Achilles, and another with regular M10s with the 3-inch gun (though replaced with another Achilles unit once more were available). A notable event with the Achilles was during Operation Charnwood, where Achilles in the 62nd Anti-Tank Regiment fought off a German counterattack comprising of [[Pz.IV H|Panzer IVs]] and [[Panther G|Panthers]] from the 12th Panzer Regiment were routed by the Achilles 17-pounder fires, destroying about 13 German tanks with the loss of four Achilles knocked out and four more damaged. | The Achilles were deployed on D-Day onward in artillery forces in anti-tank regiments in armoured divisions. A typical anti-tank regiment would have four batteries, two with towed 17-pounders, one equipped with 17-pounder Achilles, and another with regular M10s with the 3-inch gun (though replaced with another Achilles unit once more were available). A notable event with the Achilles was during Operation Charnwood, where Achilles in the 62nd Anti-Tank Regiment fought off a German counterattack comprising of [[Pz.IV H|Panzer IVs]] and [[Panther G|Panthers]] from the 12th Panzer Regiment were routed by the Achilles 17-pounder fires, destroying about 13 German tanks with the loss of four Achilles knocked out and four more damaged. | ||
== Media == | == Media == | ||
| − | <!--''Excellent additions to the article would be video guides, screenshots from the game, and photos.''--> | + | <!-- ''Excellent additions to the article would be video guides, screenshots from the game, and photos.'' --> |
| − | + | ||
| + | ;Skins | ||
| + | |||
| + | * [https://live.warthunder.com/feed/camouflages/?vehicle=uk_17_pdr_m10_achilles_norfolk_yeomanry Skins and camouflages for the {{PAGENAME}} from live.warthunder.com.] | ||
== See also == | == See also == | ||
| − | + | ''Links to the articles on the War Thunder Wiki that you think will be useful for the reader, for example:'' | |
| + | |||
* ''reference to the series of the vehicles;'' | * ''reference to the series of the vehicles;'' | ||
| − | * ''links to approximate analogues of other nations and research trees.'' | + | * ''links to approximate analogues of other nations and research trees.'' |
| − | |||
| − | |||
== External links == | == External links == | ||
| − | <!--''Paste links to sources and external resources, such as:'' | + | <!-- ''Paste links to sources and external resources, such as:'' |
* ''topic on the official game forum;'' | * ''topic on the official game forum;'' | ||
| − | + | * ''other literature.'' --> | |
| − | * ''other literature.''--> | ||
| − | * [ | + | * [[wt:en/devblog/current/827/|[Devblog] Pioneering British Tanks in War Thunder with developer's answers]] |
| − | * [[Wikipedia:17pdr_SP_Achilles|[Wikipedia | + | * [[Wikipedia:17pdr_SP_Achilles|[Wikipedia] 17pdr SP Achilles]] |
| + | {{TankManufacturer Department of Tank Design}} | ||
{{Britain tank destroyers}} | {{Britain tank destroyers}} | ||
{{Britain premium ground vehicles}} | {{Britain premium ground vehicles}} | ||
Latest revision as of 19:36, 9 June 2023
| This page is about the premium British tank destroyer Achilles (65 Rg.). For the regular version, see Achilles. |
.jpg)
Contents
Description
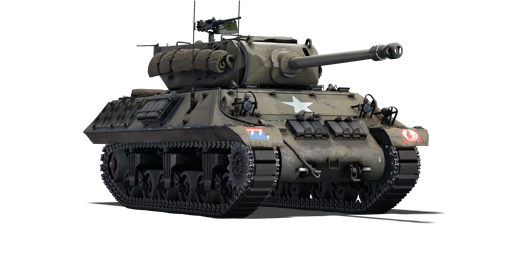
The 17pdr. M10 (65th Anti-Tank Regt) (shortened to Achilles (65 Rg.), full name 17 pounder, Self-Propelled M10 Achilles (65th Anti-Tank Regiment)) is a premium gift rank III British tank destroyer with a battle rating of 3.7 (AB) and 3.3 (RB/SB). It was introduced as a premium pack in Update 1.53 "Firestorm" and removed from the store after the 2017 Victory Day sale. It has also been obtainable in the Warbond shop in January 2018, November 2018 and November 2019. It was also made available briefly in the store during the 2020 D-Day sale and 2023 D-Day sale.
It was one of the first British tanks introduced in the game as an Achilles tank destroyer with the insignia of 7th Armored Division, 65th Anti-Tank Regiment "Norfolk Yeomanry".
The Achilles is based on the American M10 GMC, but carries a 17-pounder cannon as the main armament, making it an effective tank destroyer. Thanks to a well assigned BR, the Achilles won't feel in the wrong game even when facing higher rank tanks. The Achilles has plenty of firepower, as the Mk.8 APCBC shot is more effective against the T-34's sloped armour. The 17-pdr cuts through enemy Panzer III and IV (the shots enter the front and exit from the rear) so try to aim vital points to cause the maximum damage (first shot to the turret to disable enemy firepower). The T-34 is a bigger problem due to its sloped armour. When facing Soviet tanks, the first shot should always be to the gunner. The Mk.8 APCBC is quite able to penetrate the T-34 glacis even from a distance but keep in mind that the damage caused is unreliable (sometimes two or more shots are required to destroy a T-34). The M10 mobility is not outstanding, but the Achilles is pretty capable to carry the player, the gun, and the team to where it needs to go.
Protection is not good. The sloped armour and the track links added to the front will protect the Achilles from some low calibre shots, but the vast majority of the enemies will be able to destroy the Achilles easily. Side armour is paper thin. The high profile and the very slow turret traverse (man-powered) are not suitable for close range combat so avoid deep flanking tactics.
General info
Survivability and armour
Armour type:
- Rolled homogeneous armour
- Cast homogeneous armour (Gun mantlet, Transmission area)
- Structural steel (Counterweight)
| Armour | Front | Sides | Rear | Roof |
|---|---|---|---|---|
| Hull | 38.1 mm (55°) Front glacis 50.8 mm (7-55°) Transmission area |
19.05 mm (38°) Top hull 25.4 mm Bottom hull |
19.05 (28-33°) Top Hull 25.4 mm (7-52°) Bottom hull |
19.05 mm Front 9.5 mm Rear |
| Turret | 25.4 mm (66-88°) Turret front 57.15 mm (0-47°) Gun mantlet |
25.4 mm (22-46°) | 25.4 mm (1-29°) Turret rear 50 mm (0-50°) Counterweight |
N/A |
Notes:
- Suspension wheels and tracks are 20 mm thick while the bogies are 10 mm thick.
- Belly armour is 12.7 mm thick.
- Hull rear sides are protected by attached grousers that gives 20 mm of extra armour.
- Tracks placed on the front transmission area provide 30 mm extra armour.
Mobility
| Game Mode | Max Speed (km/h) | Weight (tons) | Engine power (horsepower) | Power-to-weight ratio (hp/ton) | ||||
|---|---|---|---|---|---|---|---|---|
| Forward | Reverse | Stock | AoA | Stock | Upgraded | Stock | Upgraded | |
| Arcade | 45 | 6 | 29.5 | 0.32 | 582 | 782 | 19.68 | 26.15 |
| Realistic | 42 | 5 | 363 | 410 | 12.27 | 13.71 | ||
Modifications and economy
| Mobility | Protection | Firepower | ||||||||||||||||||||
|---|---|---|---|---|---|---|---|---|---|---|---|---|---|---|---|---|---|---|---|---|---|---|
|
|
|
Armaments
Main armament
| 76 mm QF 17-pounder | Turret rotation speed (°/s) | Reloading rate (seconds) | |||||||||||
|---|---|---|---|---|---|---|---|---|---|---|---|---|---|
| Mode | Capacity | Vertical | Horizontal | Stabilizer | Stock | Upgraded | Full | Expert | Aced | Stock | Full | Expert | Aced |
| Arcade | 50 | -10°/+30° | ±180° | N/A | 4.0 | 5.5 | 6.7 | 7.4 | 7.8 | 8.71 | 7.70 | 7.10 | 6.70 |
| Realistic | 2.7 | 3.1 | 3.8 | 4.2 | 4.5 | ||||||||
Ammunition
| Penetration statistics | |||||||
|---|---|---|---|---|---|---|---|
| Ammunition | Type of warhead |
Penetration @ 0° Angle of Attack (mm) | |||||
| 10 m | 100 m | 500 m | 1,000 m | 1,500 m | 2,000 m | ||
| Shot Mk.6 | AP | 171 | 168 | 155 | 139 | 126 | 113 |
| Shell Mk.1 | HE | 20 | 20 | 18 | 16 | 15 | 13 |
| Shot Mk.4 | APC | 171 | 168 | 155 | 139 | 126 | 113 |
| Shot Mk.8 | APCBC | 190 | 187 | 172 | 155 | 140 | 126 |
| Shell details | ||||||||||||
|---|---|---|---|---|---|---|---|---|---|---|---|---|
| Ammunition | Type of warhead |
Velocity (m/s) |
Projectile mass (kg) |
Fuse delay (m) |
Fuse sensitivity (mm) |
Explosive mass (TNT equivalent) (g) |
Ricochet | |||||
| 0% | 50% | 100% | ||||||||||
| Shot Mk.6 | AP | 883 | 7.71 | - | - | - | 47° | 60° | 65° | |||
| Shell Mk.1 | HE | 883 | 6.98 | 0.2 | 0.1 | 580 | 79° | 80° | 81° | |||
| Shot Mk.4 | APC | 883 | 7.71 | - | - | - | 48° | 63° | 71° | |||
| Shot Mk.8 | APCBC | 883 | 7.71 | - | - | - | 48° | 63° | 71° | |||
| Smoke shell characteristics | ||||||
|---|---|---|---|---|---|---|
| Ammunition | Velocity (m/s) |
Projectile mass (kg) |
Screen radius (m) |
Screen deploy time (s) |
Screen hold time (s) |
Explosive mass (TNT equivalent) (g) |
| 17pdr Shell SS Mk.1 | 229 | 8.44 | 13 | 5 | 20 | 50 |
Ammo racks

| Full ammo |
1st rack empty |
2nd rack empty |
3rd rack empty |
4th rack empty |
5th rack empty |
6th rack empty |
Visual discrepancy |
|---|---|---|---|---|---|---|---|
| 50 | 48 (+2) | 45 (+5) | 34 (+16) | 23 (+27) | 12 (+38) | 1 (+49) | Yes |
Turret empty: 45 (+5)
Optics
| Achilles (65 Rg.) Optics | ||
|---|---|---|
| Which ones | Default magnification | Maximum magnification |
| Main Gun optics | x1.85 | x3.5 |
| Comparable optics | M10 GMC | |
Machine guns
| 12.7 mm M2HB | ||||
|---|---|---|---|---|
| Mount | Capacity (Belt) | Fire rate | Vertical | Horizontal |
| Pintle | 400 (200) | 577 | -10°/+70° | ±60° |
Usage in battles
The Achilles is best used for sniping and shoot and scoot tactics. Find a good spot to shoot at enemies, aim carefully (RB need a good use of mils range estimation) and enjoy the fireworks! To make full use of its decent sniping capacity, find a spot that:
- overlooks key passageway / street / battle area
- is not too close to the frontline
- has slopes, hard covers or bushes
- is not too hard to get to
With a location like that, the Achilles can utilise its -10° gun depression and use hull down. Its turret front and mantlet can consistently cause ricochets especially in a downtier. Looming behind bushes, an Achille's well aimed shots should be able to knock out most enemy tanks at the battle rating range from long range. Even if you get spotted, any slope or hard covers will provide protection for you.
Keep in mind the low fire rate (compared to other 17-pdr AFVs). Once the Achilles has destroyed (or damaged) the enemy the best thing to do is to relocate. Don't stay in the same spot for too long: the Achilles has weak armour and an open top. Artillery barrages will cripple the Achilles or the crew.
Another thing to think about is the turret traverse. Yes... It is **really** slow. Therefore, some changes need to be made in the typical playstyle. If the Achilles need to target an enemy quickly, do not rely on the turret. Instead, traverse the entire tank so that the hull is facing the enemy head-on, similar to turretless, casemate style tank destroyers. To avoid situations like this, stay way back, avoiding urban areas and other areas where the Achilles will be flanked easily.
Enemies worth noting:
R3 T20 FA-HS: this vehicle is the exact opposite tank when comparing to an Achilles: extremely high top speed, great traverse and fast gun rotation. A well-manoeuvred R3 can easily circle around the Achilles and shoot AP shells through the thin side, while the Achilles struggles to get the gun on target even when traversing the hull with the gun. If you know an R3 is around, you better turn your hull towards the possible direction and be ready to engage. Move the hull with the gun to target quicker. Even if you miss, the M2 Browning can still penetrate the R3 and knock out its crews. Note that a side shot on the R3 does not guarantee a kill as the crew are pretty separated. The R3 can run away and repair for another attack. A frontal shot, however, is likely to knock it out with a single shot as the crew members are all lined up.
8,8 cm Flak 37 Sfl.: also known as the "Flak truck", it is rather hard to knock out due to the fact that its armour is so thin that almost every shell will over-penetrate, dealing almost no critical damage. Plus this vehicle mostly face their side to the targets, making it even harder to kill them as the crew are all far apart. So it can usually take quite some hits and take out the shooters one by one. As the shooter, aim for the left side of its turret first to disable its gunner first, then knock out the rest of its crew (right turret & driving compartment). Do not hope that the M2 HB can kill the crews, the Flak truck's armour is too thick for any MG to penetrate.
Pros and cons
Pros:
- Great gun (17-pounder!)
- High level of penetration. Will often pass through the front of lighter vehicles and leave through the back.
- Premium vehicle - instant access to the best shell (Shot Mk.8)
- Good speed
- 5 crew members
- .50 cal Heavy machine gun on top to fight lightly armoured tanks and aircraft
- Sloped armour makes incoming rounds more likely to ricochet
- Spare tracks that provided some limited protection on the front and the rear section of the side armour.
- Good gun depression
Cons:
- Armour is rather thin
- Big ammo racks
- Open top turret makes it vulnerable to artillery and strafing planes
- Very slow turret traverse
- Lack of explosive filler for AP shells
- Handling is poor on some rough terrain before mobility modifications are researched
- Reverse speed is bad
- Limited ammo count for the commander's machine gun
History
Development
The M10 tank destroyer was developed in 1942 to fulfil the anti-tank doctrine established by the US military. The doctrine, creating the tank destroyer force, was established with the objective to stop German blitzkrieg tactics by attacking the tanks. Unlike the other armoured fighting vehicles in the theatre, the tank destroyers were made to be placed in reserves to counter any breach in the front lines by taking out the enemy with ambushes. This role led to the desire for a fast vehicle with a powerful gun; armour was not a concern due to the emphasis in speed. The design ended up taking a turret design developed from the M6A1 Heavy Tank and the body from the M4A2 Sherman, this with the 3-inch 1918 gun, provided the backbone of the American tank destroyer force in much of World War II. In total, 6,706 M10s and its variants were produced between September of 1942 to 1943 of the same month.
British Use
These M10s were given out to America's allies, though the British were the most well-known of these users, receiving about 1,650 M10s from the Americans from 1943 onward. The British designated the M10s under their service as the Achilles and unlike popular usage, was called that for both the 3-inch gun variant (Achilles I/II) and the variant mounting the 17-pounder (Achilles Ic / IIc). Though in most usage, the vehicle was called the 17pdr M10, or 17pdr SP M10, or even the "Firefly", despite that name being used for a different design.
The British first received the M10s with the 3-inch cannons, which were much more powerful than the British tank armament at the time, giving them an edge in many tank confrontations in the North African Campaign. It was around 1943 that conversion is done onto the M10 to increase its firepower capabilities against the gradually upgraded German tank designs such as the Tiger I and the Panthers. The conversion used one of the best Allied anti-tank guns at the time, the 17-pounder, which could penetrate about 140 mm of armour at 500 m away with APCBC rounds, and 209 mm at the same distance with APDS rounds (Armour-Penetrating Discarding Sabot). The conversion is done onto the M10 also required a counterweight to be placed on the 17-pounder to compensate the heavier weight of the 17-pounder compared to the 3-inch gun. This gave the M10 Achilles a much more defining profile and attempts were made to hide this larger cannon length with optical illusion. Aside from the gun conversion, the M10 Achilles also had an extra 17 mm of armour welded onto the front and sides of the hull for added protection, plus a 20 mm shield on the top of the turret to compensate for the open-turret design. About 1,000 M10 Achilles with the 17-pounders were ordered, but by D-Day, only 124 were available, and 816 were done by the end of the year. The low number of these converted Achilles made meant that any lost units were hard to replace with a 17-pounder one, and the disgruntled crew would be issued an M10 with a 3-inch gun instead. In the end, about a total of 1,000 Achilles were converted into 17-pounder ones by the end of World War II, making the M10 Achilles the second-most numerous design to mount the 17-pounder, coming before the Sherman Firefly.
The Achilles were issued out as part of the Royal Artillery in armoured divisions in anti-tank regiments. One of such regiments was the 65th Anti-Tank Regiment assigned to the 7th Armoured division during 1942 and onward until the end of the war.
Combat Usage
The British doctrine with the Achilles differed from the Americans who saw it as a reserve tank destroyer. The British viewed the Achilles as a mobile anti-tank gun, thus the Achilles served in a role akin to the StuG III in German service, moving the 17-pounder into position to take a shot on incoming German Tiger or Panther tanks. These Achilles were used more with Churchill tank units rather than the medium tanks due to the lack of 17-pounder equipped on Churchills while the medium tanks have the Firefly available for use. Disadvantages with the M10 Achilles design were carried over from the original, the slow turret traverse speed, high profile, and open-top turret made it a rather harder vehicle to use than a regular tank, but it still had its advantages and was still suitable for the role it had.
The Achilles were deployed on D-Day onward in artillery forces in anti-tank regiments in armoured divisions. A typical anti-tank regiment would have four batteries, two with towed 17-pounders, one equipped with 17-pounder Achilles, and another with regular M10s with the 3-inch gun (though replaced with another Achilles unit once more were available). A notable event with the Achilles was during Operation Charnwood, where Achilles in the 62nd Anti-Tank Regiment fought off a German counterattack comprising of Panzer IVs and Panthers from the 12th Panzer Regiment were routed by the Achilles 17-pounder fires, destroying about 13 German tanks with the loss of four Achilles knocked out and four more damaged.
Media
- Skins
See also
Links to the articles on the War Thunder Wiki that you think will be useful for the reader, for example:
- reference to the series of the vehicles;
- links to approximate analogues of other nations and research trees.
External links
- [Devblog] Pioneering British Tanks in War Thunder with developer's answers
- [Wikipedia] 17pdr SP Achilles
| Department of Tank Design | |
|---|---|
| Medium Tanks | |
| Sherman Firefly | Sherman Firefly · Sherman IC "Trzyniec" |
| MBTs | |
| Centurion | Centurion Mk 1 · Centurion Mk.2 · Centurion Mk 3 · Centurion Action X · Centurion Mk.5 AVRE · Centurion Mk 10 |
| Challenger* | Challenger Mk.2 · Challenger Mk.3 · Challenger DS |
| Tank Destroyers | |
| Achilles | Achilles · Achilles (65 Rg.) |
| Centurion-based | Conway · FV4005 |
| Export | |
| Sherman Firefly | Sherman Ic · ▄Sherman Vc |
| Centurion | Centurion Mk.5/1 · Strv 81 · Strv 81 (RB 52) · ▄Strv 81 (RB 52) · Strv 101 · Strv 104** · Strv 105** · Sho't |
| See also | US Ordnance Department · Israeli Ordnance Corps · Vickers-Armstrongs Limited |
| *By successor, the Military Vehicles and Engineering Establishment | |
| **Swedish modernizations incorporating innovations from the Israeli Sho't Kals. | |
| Britain tank destroyers | |
|---|---|
| Infantry tank derivatives | Archer · Gun Carrier (3-in) |
| Light tank derivatives | Alecto I |
| M10 Achilles | Achilles · Achilles (65 Rg.) |
| Centurion derivatives | FV4005 · Conway |
| ATGM | Swingfire · Striker |
| Other | Tortoise · ▄M109A1 |
| Canada | QF 3.7 Ram · ADATS (M113) |
| South Africa | G6 · ZT3A2 |
| Britain premium ground vehicles | |
|---|---|
| Light tanks | A13 Mk I (3rd R.T.R.) · A13 Mk II 1939 · AEC Mk II · Crusader "The Saint" · Rooikat 105 |
| Medium tanks | A.C.I · Grant I · Cromwell V (RP-3) · Sherman IC "Trzyniec" · A.C.IV · Comet I "Iron Duke IV" |
| Centurion Mk.2 · ▄Strv 81 (RB 52) · Centurion Mk.5 AVRE · Centurion Mk.5/1 · ▄Sho't Kal Dalet · Centurion Action X | |
| Vijayanta · Khalid · Challenger DS · Challenger 2 OES | |
| Heavy tanks | Independent · Matilda Hedgehog · Excelsior · TOG II · Churchill Crocodile · Black Prince |
| Tank destroyers | Alecto I · Achilles (65 Rg.) · QF 3.7 Ram |
