Difference between revisions of "AMX-13 (HOT)"
Inceptor57 (talk | contribs) m (→Additional armament) |
(→Ammunition: Updated) |
||
| (35 intermediate revisions by 8 users not shown) | |||
| Line 1: | Line 1: | ||
| − | {{Specs-Card|code=fr_amx_13_hot}} | + | {{About |
| + | |about=French light tank '''{{PAGENAME}}''' | ||
| + | |usage=other versions | ||
| + | |link=AMX-13 (Family) | ||
| + | }} | ||
| + | {{Specs-Card | ||
| + | |code=fr_amx_13_hot | ||
| + | |images={{Specs-Card-Image|GarageImage_{{PAGENAME}}.jpg}} | ||
| + | }} | ||
== Description == | == Description == | ||
| − | <!--''In the description, the first part | + | <!-- ''In the description, the first part should be about the history of the creation and combat usage of the vehicle, as well as its key features. In the second part, tell the reader about the ground vehicle in the game. Insert a screenshot of the vehicle, so that if the novice player does not remember the vehicle by name, he will immediately understand what kind of vehicle the article is talking about.'' --> |
| − | + | The '''{{Specs|name}}''' is a rank {{Specs|rank}} French light tank {{Battle-rating}}. It was introduced in [[Update 1.75 "La Résistance"]]. | |
| − | |||
| − | The '''{{Specs|name}}''' is a | ||
| − | + | At its current battle rating, the AMX-13 (HOT) can definitely do some serious damage, even to top-rank MBTs and (as of 1.81) helicopters too. The six HOT ATGMs are enough to penetrate almost any conventional armour on direct hit, and may even penetrate the [[T-64B]]'s upper glacis with ERA in place if hit it directly, though strong NERA screen might be too much for it. All six missiles can be fired in short succession, although only the one fired last can be controlled. | |
| + | |||
| + | This makes it a viable tank destroyer, but, unlike any of the MBTs, it cannot take a hit and survive. Even certain machine guns and aircraft cannons are capable of destroying it easily. Use its spotting ability to alert your team to enemies, and try to guide ATGM into a critical spot, like crew or ammo, since ATGM can overpenetrate. | ||
| + | |||
| + | Just remember: AMX-13s only have six ATGMs, after that, it is using a conventional gun, firing solid shot AP, which technically can ammo rack tanks like T-64 and T-80 from the side, but it's not a guaranteed kill. | ||
== General info == | == General info == | ||
=== Survivability and armour === | === Survivability and armour === | ||
| − | <!--''Describe armour protection. Note the most well protected and key weak areas. Appreciate the layout of modules as well as the number and location of crew members. Is the level of armour protection sufficient, is the placement of modules | + | {{Specs-Tank-Armour}} |
| + | <!-- ''Describe armour protection. Note the most well protected and key weak areas. Appreciate the layout of modules as well as the number and location of crew members. Is the level of armour protection sufficient, is the placement of modules helpful for survival in combat? If necessary use a visual template to indicate the most secure and weak zones of the armour.'' --> | ||
| + | '''Armour type:''' | ||
| − | |||
| − | |||
* Cast homogeneous armour (Turret base, Turret front) | * Cast homogeneous armour (Turret base, Turret front) | ||
* Rolled homogeneous armour | * Rolled homogeneous armour | ||
| + | |||
{| class="wikitable" | {| class="wikitable" | ||
|- | |- | ||
| Line 25: | Line 36: | ||
| Turret || 40 mm (32-47°) ''Turret front'' <br> 40 mm (12-41°) ''Turret base'' <br> 40 mm (15-75°) ''Barrel shroud'' || 20 mm (0-30°) ''Turret'' <br> 20 mm (12-14°) ''Turret base'' || 20 mm ''Turret bustle'' <br> 20 mm (17-22°) ''Pivot ball'' <br> 10 mm (77-90°) ''Turret underside'' || 10 mm | | Turret || 40 mm (32-47°) ''Turret front'' <br> 40 mm (12-41°) ''Turret base'' <br> 40 mm (15-75°) ''Barrel shroud'' || 20 mm (0-30°) ''Turret'' <br> 20 mm (12-14°) ''Turret base'' || 20 mm ''Turret bustle'' <br> 20 mm (17-22°) ''Pivot ball'' <br> 10 mm (77-90°) ''Turret underside'' || 10 mm | ||
|- | |- | ||
| − | ! Armour !! Sides !! Roof | + | ! Armour !! Sides !! Roof |
|- | |- | ||
| Cupola || 20 mm || 10 mm | | Cupola || 20 mm || 10 mm | ||
| Line 31: | Line 42: | ||
|} | |} | ||
'''Notes:''' | '''Notes:''' | ||
| + | |||
* Suspension wheels and tracks are 15 mm thick. | * Suspension wheels and tracks are 15 mm thick. | ||
* Belly armour is 10 mm thick. | * Belly armour is 10 mm thick. | ||
| Line 37: | Line 49: | ||
=== Mobility === | === Mobility === | ||
| − | <!--''Write about the mobility of the ground vehicle. Estimate the specific power and | + | {{Specs-Tank-Mobility}} |
| − | {| | + | <!-- ''Write about the mobility of the ground vehicle. Estimate the specific power and manoeuvrability, as well as the maximum speed forwards and backwards.'' --> |
| − | | | + | |
| − | + | {{tankMobility|abMinHp=418|rbMinHp=239}} | |
| − | + | ||
| − | + | === Modifications and economy === | |
| − | + | {{Specs-Economy}} | |
| − | |||
| − | |||
| − | |||
| − | |||
| − | |||
| − | |||
| − | |||
| − | |||
| − | |||
| − | |||
| − | |||
| − | |||
| − | |||
| − | |||
| − | |||
| − | |||
| − | |||
| − | |||
| − | |||
| − | |||
| − | |||
| − | |||
| − | |||
| − | |||
| − | |||
| − | |||
| − | |||
| − | |||
| − | |||
| − | |||
| − | |||
| − | |||
| − | |||
| − | |||
| − | |||
== Armaments == | == Armaments == | ||
| + | {{Specs-Tank-Armaments}} | ||
=== Main armament === | === Main armament === | ||
| − | <!--''Give the reader information about the characteristics of the main gun. Assess its effectiveness in a battle based on the reloading speed, ballistics and the power of shells. Do not forget about the | + | {{Specs-Tank-Weapon|2}} |
| − | {{main|SA50 (75 mm)}} | + | <!-- ''Give the reader information about the characteristics of the main gun. Assess its effectiveness in a battle based on the reloading speed, ballistics and the power of shells. Do not forget about the flexibility of the fire, that is how quickly the cannon can be aimed at the target, open fire on it and aim at another enemy. Add a link to the main article on the gun: <code><nowiki>{{main|Name of the weapon}}</nowiki></code>. Describe in general terms the ammunition available for the main gun. Give advice on how to use them and how to fill the ammunition storage.'' --> |
| + | {{main|SA50 L/57 (75 mm)}} | ||
| − | {| class="wikitable" style="text-align:center | + | {| class="wikitable" style="text-align:center" width="100%" |
| − | |||
| − | |||
| − | |||
| − | |||
| − | |||
| − | |||
| − | |||
|- | |- | ||
| − | + | ! colspan="5" | [[SA50 L/57 (75 mm)|75 mm SA50 L/57]] || colspan="5" | Turret rotation speed (°/s) || colspan="4" | Reloading rate (seconds) | |
|- | |- | ||
| − | ! | + | ! Mode !! Capacity !! Vertical !! Horizontal !! Stabilizer |
| + | ! Stock !! Upgraded !! Full !! Expert !! Aced | ||
| + | ! Stock !! Full !! Expert !! Aced | ||
|- | |- | ||
| − | ! | + | ! ''Arcade'' |
| − | + | | rowspan="2" | 36 || rowspan="2" | -6°/+13° || rowspan="2" | ±180° || rowspan="2" | N/A || 28.6 || 39.5 || 48.0 || 53.1 || 56.5 || rowspan="2" | 5.00 || rowspan="2" | 5.00 || rowspan="2" | 5.00 || rowspan="2" | 5.00 | |
| − | |||
| − | |||
| − | |||
| − | |||
|- | |- | ||
| − | + | ! ''Realistic'' | |
| − | + | | 17.9 || 21.0 || 25.5 || 28.2 || 30.0 | |
| − | |||
| − | |||
| − | |||
| − | |||
| − | |||
| − | |||
| − | |||
| − | |||
| − | |||
| − | |||
|- | |- | ||
|} | |} | ||
| − | + | ==== Ammunition ==== | |
{| class="wikitable sortable" style="text-align:center" width="100%" | {| class="wikitable sortable" style="text-align:center" width="100%" | ||
! colspan="8" | Penetration statistics | ! colspan="8" | Penetration statistics | ||
|- | |- | ||
! rowspan="2" data-sort-type="text" | Ammunition | ! rowspan="2" data-sort-type="text" | Ammunition | ||
| − | ! rowspan="2 | + | ! rowspan="2" | Type of<br>warhead |
| − | ! colspan="6" | | + | ! colspan="6" | Penetration @ 0° Angle of Attack (mm) |
|- | |- | ||
| − | ! | + | ! 10 m !! 100 m !! 500 m !! 1,000 m !! 1,500 m !! 2,000 m |
| − | ! | ||
| − | ! | ||
| − | ! | ||
| − | ! | ||
| − | ! | ||
|- | |- | ||
| − | | POT-51A || | + | | POT-51A || APBC || 182 || 178 || 162 || 143 || 127 || 113 |
| + | |- | ||
| + | | 75 mm HE || HE || 10 || 10 || 10 || 10 || 10 || 10 | ||
| + | |- | ||
| + | | PCOT-51P || APCBC || 202 || 198 || 180 || 159 || 141 || 125 | ||
|- | |- | ||
| − | |||
| − | |||
| − | |||
| − | |||
|} | |} | ||
{| class="wikitable sortable" style="text-align:center" width="100%" | {| class="wikitable sortable" style="text-align:center" width="100%" | ||
| − | ! colspan=" | + | ! colspan="10" | Shell details |
|- | |- | ||
! rowspan="2" data-sort-type="text" | Ammunition | ! rowspan="2" data-sort-type="text" | Ammunition | ||
| − | ! rowspan="2 | + | ! rowspan="2" | Type of<br>warhead |
| − | ! rowspan="2" |Velocity <br | + | ! rowspan="2" | Velocity<br>(m/s) |
| − | ! rowspan="2" |Projectile<br | + | ! rowspan="2" | Projectile<br>mass (kg) |
| − | ! rowspan="2" | | + | ! rowspan="2" | Fuse delay<br>(m) |
| − | + | ! rowspan="2" | Fuse sensitivity<br>(mm) | |
| − | ! rowspan="2" | | + | ! rowspan="2" | Explosive mass<br>(TNT equivalent) (g) |
| − | + | ! colspan="3" | Ricochet | |
| − | ! rowspan="2" | | ||
| − | |||
| − | ! colspan="3" | | ||
|- | |- | ||
| − | ! 0% | + | ! 0% !! 50% !! 100% |
| − | ! 50% | ||
| − | ! 100% | ||
|- | |- | ||
| − | | POT-51A || | + | | POT-51A || APBC || 1,000 || 6.4 || N/A || N/A || N/A || 47° || 60° || 65° |
| + | |- | ||
| + | | 75 mm HE || HE || 753 || 6.2 || 0 || 0.1 || 675 || 79° || 80° || 81° | ||
| + | |- | ||
| + | | PCOT-51P || APCBC || 1,000 || 6.4 || N/A || N/A || N/A || 48° || 63° || 71° | ||
|- | |- | ||
| − | |||
| − | |||
| − | |||
| − | |||
|} | |} | ||
| − | + | ==== [[Ammo racks]] ==== | |
| − | [[File: | + | [[File:Ammoracks_AMX-13.png|right|thumb|x250px|[[Ammo racks]] of the AMX-13 (identical).]] |
| − | {| class="wikitable | + | <!-- '''Last updated: 1.101.2.67''' --> |
| + | {| class="wikitable" style="text-align:center" | ||
|- | |- | ||
| − | ! | + | ! Full<br>ammo |
| − | ! | + | ! 1st<br>rack empty |
| − | ! | + | ! 2nd<br>rack empty |
| − | ! | + | ! 3rd<br>rack empty |
| − | ! | + | ! 4th<br>rack empty |
| − | ! | + | ! 5th<br>rack empty |
| − | ! | + | ! 6th<br>rack empty |
| − | ! | + | ! 7th<br>rack empty |
| + | ! Visual<br>discrepancy | ||
|- | |- | ||
| − | + | | '''36''' || 32 ''(+4)'' || 28 ''(+8)'' || 23 ''(+13)'' || 18 ''(+18)'' || 13 ''(+23)'' || 7 ''(+29)'' || 1 ''(+35)'' || No | |
|- | |- | ||
|} | |} | ||
| + | Notes: | ||
| + | |||
| + | * Shells are modeled individually and disappear after having been shot or loaded. | ||
| + | * Rack 6* and 7* (autoloader magazines) are first stage ammo racks. They total 12 shells. | ||
| + | * These racks get filled first when loading up the tank and are also emptied first. | ||
| + | * As the {{PAGENAME}} is equipped with an autoloader, manual reloading of the gun is not possible. | ||
| + | * Once the autoloader magazines have been depleted, you can't shoot until the loader has restocked the autoloader. The restocking time is longer than the normal reload time of the gun (about 15 seconds). Take this into account when playing. | ||
| + | * Simply not firing when the gun is loaded will move ammo from racks 1 to 5 into rack 7* then 6*. Firing will interrupt the restocking of the ready racks. | ||
| + | * The depletion order at full capacity is: 6* - 7* - 1 - 2 up to 5. | ||
=== Additional armament === | === Additional armament === | ||
| − | <!--''Some tanks are armed with several guns in one or more turrets. Evaluate the additional weaponry and give advice on its use. Describe the ammunition available for additional weaponry. Give advice on how to use them and how to fill the ammunition storage. If there is no additional weaponry remove this subsection.''--> | + | {{Specs-Tank-Weapon|1}} |
| + | <!-- ''Some tanks are armed with several guns in one or more turrets. Evaluate the additional weaponry and give advice on its use. Describe the ammunition available for additional weaponry. Give advice on about how to use them and how to fill the ammunition storage. If there is no additional weaponry remove this subsection.'' --> | ||
| + | {{main|HOT}} | ||
| + | |||
{| class="wikitable" style="text-align:center" | {| class="wikitable" style="text-align:center" | ||
|- | |- | ||
| − | ! colspan=" | + | ! colspan="4" | [[HOT]] ATGM |
|- | |- | ||
| − | ! | + | ! Capacity !! Vertical !! Horizontal !! Stabilizer |
| − | ! | ||
| − | ! | ||
| − | ! | ||
|- | |- | ||
| − | + | | 6 || N/A || N/A || N/A | |
|- | |- | ||
|} | |} | ||
| − | + | ==== Ammunition ==== | |
| − | {| class="wikitable | + | {| class="wikitable" style="text-align:center" width="100%" |
! colspan="8" | Penetration statistics | ! colspan="8" | Penetration statistics | ||
|- | |- | ||
! rowspan="2" data-sort-type="text" | Ammunition | ! rowspan="2" data-sort-type="text" | Ammunition | ||
| − | ! rowspan="2 | + | ! rowspan="2" | Type of<br>warhead |
| − | ! colspan="6" | | + | ! colspan="6" | Penetration @ 0° Angle of Attack (mm) |
|- | |- | ||
| − | ! | + | ! 10 m !! 100 m !! 500 m !! 1,000 m !! 1,500 m !! 2,000 m |
| − | ! | + | |- |
| − | ! | + | | HOT || ATGM || 700 || 700 || 700 || 700 || 700 || 700 |
| − | ! | ||
| − | |||
| − | |||
|- | |- | ||
| − | |||
| − | |||
|} | |} | ||
| − | {| class="wikitable | + | {| class="wikitable" style="text-align:center" width="100%" |
| − | ! colspan="11" | | + | ! colspan="11" | Missile details |
|- | |- | ||
! rowspan="2" data-sort-type="text" | Ammunition | ! rowspan="2" data-sort-type="text" | Ammunition | ||
| − | ! rowspan="2 | + | ! rowspan="2" | Type of<br>warhead |
| − | ! rowspan="2" |Velocity <br | + | ! rowspan="2" | Velocity<br>(m/s) |
| − | ! rowspan="2" | | + | ! rowspan="2" | Range<br>(m) |
| − | ! rowspan="2" | | + | ! rowspan="2" | Projectile<br>mass (kg) |
| − | + | ! rowspan="2" | Fuse delay<br>(m) | |
| − | ! rowspan="2" | | + | ! rowspan="2" | Fuse sensitivity<br>(mm) |
| − | + | ! rowspan="2" | Explosive mass<br>(TNT equivalent) (g) | |
| − | ! rowspan="2" | | + | ! colspan="3" | Ricochet |
| − | ! rowspan="2" | | ||
| − | ! colspan="3" | | ||
|- | |- | ||
| − | ! 0% | + | ! 0% !! 50% !! 100% |
| − | ! 50% | + | |- |
| − | ! 100% | + | | HOT || ATGM || 250 || 4,000 || 23 || 0.05 || 0.1 || 3,800 || 80° || 82° || 90° |
|- | |- | ||
| − | |||
| − | |||
|} | |} | ||
| − | + | ==== [[Ammo racks]] ==== | |
| − | {| class="wikitable | + | [[File:Ammoracks_{{PAGENAME}}.png|right|thumb|x250px|[[Ammo racks]] of the {{PAGENAME}}]] |
| + | <!-- '''Last updated: 1.101.2.67''' --> | ||
| + | {| class="wikitable" style="text-align:center" | ||
|- | |- | ||
| − | ! | + | ! Full<br>ammo |
| − | ! | + | ! Visual<br>discrepancy |
| − | |||
| − | |||
| − | |||
| − | |||
| − | |||
| − | |||
|- | |- | ||
| − | | | + | | '''6''' || No |
|- | |- | ||
|} | |} | ||
| + | Notes: | ||
| + | |||
| + | * The missiles are fired from 1 to 6. | ||
| + | * It is not possible to select how many missiles to bring into battle. | ||
=== Machine guns === | === Machine guns === | ||
| − | <!--''Offensive and anti-aircraft machine guns not only allow you to fight some aircraft | + | {{Specs-Tank-Weapon|3}} |
| + | <!-- ''Offensive and anti-aircraft machine guns not only allow you to fight some aircraft but also are effective against lightly armoured vehicles. Evaluate machine guns and give recommendations on its use.'' --> | ||
{{main|MAC 31 (7.5 mm)}} | {{main|MAC 31 (7.5 mm)}} | ||
| − | {| class="wikitable" style="text-align:center" | + | {| class="wikitable" style="text-align:center" width="50%" |
| − | |||
| − | |||
|- | |- | ||
| − | ! colspan="7 | + | ! colspan="5" | [[MAC 31 (7.5 mm)|7.5 mm MAC 31]] |
|- | |- | ||
| − | ! | + | ! Mount !! Capacity (Belt) !! Fire rate !! Vertical !! Horizontal |
| − | ! | ||
| − | ! | ||
| − | ! | ||
|- | |- | ||
| − | | | + | | Coaxial || 4,950 (150) || 551 || N/A || N/A |
|- | |- | ||
|} | |} | ||
| − | == Usage in | + | == Usage in battles == |
| − | ''Describe the tactics of playing in the vehicle, the features of using vehicles in the team and advice on tactics. Refrain from creating a "guide" - do not impose a single point of view but give the reader food for thought. Describe the most dangerous enemies and give recommendations on fighting them. If necessary, note the specifics of the game in different modes (AB, RB, SB).'' | + | <!-- ''Describe the tactics of playing in the vehicle, the features of using vehicles in the team and advice on tactics. Refrain from creating a "guide" - do not impose a single point of view but instead give the reader food for thought. Describe the most dangerous enemies and give recommendations on fighting them. If necessary, note the specifics of the game in different modes (AB, RB, SB).'' --> |
| + | The AMX-13 HOT cannot be played as the standard AMX-13 due to the increased battle rating. This particular modification should be used always as a support vehicle. The commander should always keep this in mind: | ||
| + | |||
| + | * ATGM: frontal engagements at 100 m (the ATGM has to fly up a couple of metres to be able to follow the crosshair due to the launcher placement). Distance engagements past 200-300 m. | ||
| + | |||
| + | * 75 mm gun: Side shots at distances between 0-200 m | ||
| + | |||
| + | It should be noted that the AMX-13 HOT can face [[Leopard 1 (Family)|Leopard 1s]], meaning the main gun is capable of destroying the tank from all sides. Enemy targets like [[T-54/55 (Family)|T-54/55]] will only be able to be penetrated frontally with the ATGM and from the sides with the 75 mm gun. The [[T-55AM-1]] can be one of the toughest enemies it will face as the ATGM will not be able to penetrate the turret mantlet when seen directly from the front, aim for centre-mass with the ATGM. | ||
| + | |||
| + | Do not stay alone with this tank unless you are being a scout vehicle (as it has that capacity). | ||
| + | |||
| + | '''When in urban combat:''' | ||
| + | |||
| + | The AMX-13 should be played as a flanker or as a "medic" vehicle thanks to being able to repair friendlies due to being a light tank. It should be noted that the ATGM use is reduced considerably when in urban combat due to the way the launchers are placed. Use your mobility, scouting capabilities and autoloader to mark, disable and support allies in killing enemy vehicles. When facing Russian tanks, always try to get side shots. When facing NATO tanks (excluding heavy tanks and WW2 tanks), side shots might not be required depending on the armour the AMX-13 is facing. | ||
| + | |||
| + | '''When in rural combat:''' | ||
| + | |||
| + | The AMX-13 should be played as a scout or as an ATGM sniper. Be aware of your zoom sights as the AMX-13 lacks potent zoom. Use ATGMs when engaging far targets as your main gun will lose penetration at ranges longer than 300 m, reducing spalling or not penetrating enemy armour at all. Use your scout ability to mark targets for teammates and let them engage them. Using your speed, you are able to flank the enemy as you are able to cross the map side to side with relative ease and speed. | ||
=== Pros and cons === | === Pros and cons === | ||
| − | <!--'' | + | <!-- ''Summarise and briefly evaluate the vehicle in terms of its characteristics and combat effectiveness. Mark its pros and cons in a bulleted list. Try not to use more than 6 points for each of the characteristics. Avoid using categorical definitions such as "bad", "good" and the like - use substitutions with softer forms such as "inadequate" and "effective".'' --> |
| + | |||
'''Pros:''' | '''Pros:''' | ||
| − | * Mouse-guided HOT missiles | + | |
| + | * Mouse-guided HOT missiles, capable of breaching some ERA screens on direct hit | ||
| + | * Can annihilate a lot of tanks in quick succession since all 6 ATGM are always armed and ready to fire | ||
* Reasonably fast turret rotation speed | * Reasonably fast turret rotation speed | ||
| + | |||
'''Cons:''' | '''Cons:''' | ||
| − | * | + | |
| − | + | * Since ATGMs are stored outside the tank turret, stray artillery shells can hit and detonate ammo | |
| + | * Horrendous gun performance at top tier, you will be unable to penetrate almost all enemies frontally | ||
| + | * Long replenishment time for the autoloader after the 12 shots have been spent | ||
* Only 6 ATGMs | * Only 6 ATGMs | ||
| − | |||
* Oscillating turret causes up and down bobbing of the gunsight when coming to a stop | * Oscillating turret causes up and down bobbing of the gunsight when coming to a stop | ||
* Mediocre mobility for a light tank | * Mediocre mobility for a light tank | ||
== History == | == History == | ||
| − | ''Describe the history of the creation and combat usage of the | + | <!-- ''Describe the history of the creation and combat usage of the vehicle in more detail than in the introduction. If the historical reference turns out to be too long, take it to a separate article, taking a link to the article about the vehicle and adding a block "/History" (example: <nowiki>https://wiki.warthunder.com/(Vehicle-name)/History</nowiki>) and add a link to it here using the <code>main</code> template. Be sure to reference text and sources by using <code><nowiki><ref></ref></nowiki></code>, as well as adding them at the end of the article with <code><nowiki><references /></nowiki></code>. This section may also include the vehicle's dev blog entry (if applicable) and the in-game encyclopedia description (under <code><nowiki>=== In-game description ===</nowiki></code>, also if applicable).'' --> |
| + | '''Development''' | ||
| + | |||
| + | Development of the AMX-13 began in 1946 in response to a requirement by the French Army for a light tank to support paratroopers. It was designed at Atelier de Construction d'Issy-les-Moulineaux (AMX). A long line of prototypes lead to the production model. The first prototype was the AMX-13 2A in 1948, with four road wheels. Next came the 2B with five road wheels and a raised idler wheel, and the 2C with the FL-10 turret and two return rollers. The 2D introduced an arrangement with four return rollers. | ||
| + | |||
| + | '''Design''' | ||
| + | |||
| + | The turret held the commander and gunner, and was set to the rear of the vehicle. The hull was very compact and low profile, with the engine on the right side and the driver in the front, left side. | ||
| + | |||
| + | The main feature of the AMX-13 was the FL-10 oscillating turret, armed with a 75 mm gun with an automatic loader system fed by two six-round magazines, for a total of 12 rounds in the autoloading mechanism. The gun could depress 8° and elevate 12°, with 5° per second of elevation speed. The turret could rotate 360° with 30° per second of traverse speed. A TCV 107 laser rangefinder was provided to the gunner. 6 smoke grenade launchers were fitted on the turret, with 6 more grenades stored in the vehicle. One coaxial 7.62 mm machine gun was fitted, with 1,800 rounds in belts of 200. Another 7.62 mm machine gun could be fitted on an anti-aircraft mount with 1,800 rounds. | ||
| + | |||
| + | The gasoline engine produced 250 horsepower, and the manual transmission had five forward and one reverse gear. The suspension was of the torsion bar type. The drive sprockets were in the front, return rollers in the back, and there were five road wheels and four return rollers. The AMX-13 could reach a speed of 60 km/h, and it had a range of 400 km. | ||
| + | |||
| + | The protection of the AMX-13, it being a light tank, was not great. It could withstand heavy machine gun and low-calibre autocannon rounds from the front, but the sides could not even withstand heavy machine gun fire. An appliqué armour package was developed to increase protection at the choice of the user. | ||
| + | |||
| + | '''Production''' | ||
| + | |||
| + | Production began in 1952, at Atelier de Construction Roanne (ARE). Over 7,000 AMX-13s of all variants were produced, seeing export to a number of nations as well as seeing service with the French Army. Production shifted to Creusot-Loire at Chalon-sur-Saône in 1964, since ARE began producing the AMX-30 in that year. | ||
| + | |||
| + | '''Service''' | ||
| + | |||
| + | The French Army received most of the original 75 mm-armed version, with about 3,000 entering service. They were assigned to the regular armoured units, which were mostly filled with M47 and M48 Patton medium tanks at the time. AMX-13 squadrons had four tanks, and were split into two sections of one infantry section and one light tank section each, along with an ammunition truck and command vehicle. These squadrons were used for screening and reconnaissance, locating enemy forces and engaging them. After the first section had engaged the enemy and was reloading, the second section engaged the enemy. The process of alternating reloading and firing between the sections allowed the tanks to hold off the enemy until medium tanks arrived. | ||
| + | |||
| + | In the 1960's, the AMX-30 entered service. AMX-13s were used during the decolonization war in Algeria (1954-1962), although they saw little combat due to the lack of opposition and the terrain. After the French AMX-13s were up-gunned with the 90 mm gun, they often saw service in foreign theaters of operation due to their relative inexpensiveness. The AMX-13s were decommissioned and put into reserve starting in 1985. | ||
| + | |||
| + | '''HOT variant''' | ||
| + | |||
| + | The AMX-13 HOT was a prototype made by AMX featuring HOT launchers and ATGM as an intent to upgrade the AMX-13 SS.11 | ||
== Media == | == Media == | ||
| − | <!--'' | + | <!-- ''Excellent additions to the article would be video guides, screenshots from the game, and photos.'' --> |
| − | |||
| − | |||
| − | == | + | ;Skins |
| − | <!--''Links to the articles on the War Thunder Wiki that you think will be useful for the reader, for example | + | |
| + | * [https://live.warthunder.com/feed/camouflages/?vehicle=fr_amx_13_hot Skins and camouflages for the {{PAGENAME}} from live.warthunder.com.] | ||
| + | |||
| + | ;Videos | ||
| + | {{Youtube-gallery|G-sMfeWsEq0|'''The Shooting Range #148''' - ''Metal Beasts'' section at 04:54 discusses the {{PAGENAME}}.|r4d1v8Qm-Mc|'''{{PAGENAME}} Tank Review''' - ''NUSensei''|uhgodizubC4|'''The Shooting Range #77''' - ''Pages of History'' section at 05:19 discusses the AMX-13.|MmHV4ddBtik|'''{{PAGENAME}} - Not Good For BR 9.0''' - ''Napalmratte''}} | ||
| + | |||
| + | == See also == | ||
| + | <!-- ''Links to the articles on the War Thunder Wiki that you think will be useful for the reader, for example:'' | ||
* ''reference to the series of the vehicles;'' | * ''reference to the series of the vehicles;'' | ||
| − | * ''links to approximate analogues of other nations and research trees | + | * ''links to approximate analogues of other nations and research trees.'' --> |
| − | + | ||
| − | * [ | + | ;Vehicles equipped with the same missile |
| + | * [[RakJPz 2 (HOT)]] | ||
| − | == | + | == External links == |
| − | ''Paste links to sources and external resources, such as:'' | + | <!-- ''Paste links to sources and external resources, such as:'' |
* ''topic on the official game forum;'' | * ''topic on the official game forum;'' | ||
| − | * ''other literature.'' | + | * ''other literature.'' --> |
| + | |||
| + | * [[wikipedia:AMX-13|[Wikipedia] AMX-13]] | ||
| + | * [https://tanks-encyclopedia.com/coldwar/France/AMX-13.php <nowiki>[Tanks Encyclopedia]</nowiki> AMX-13] | ||
| + | {{TankManufacturer AMX}} | ||
{{France light tanks}} | {{France light tanks}} | ||
[[Category:ATGM vehicles]] | [[Category:ATGM vehicles]] | ||
Revision as of 16:49, 1 October 2022
| This page is about the French light tank AMX-13 (HOT). For other versions, see AMX-13 (Family). |
.jpg)
Contents
Description
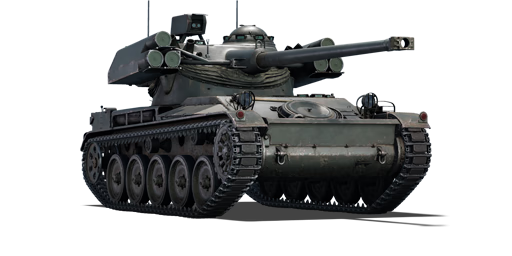
The AMX-13 (HOT) is a rank VI French light tank with a battle rating of 8.3 (AB/RB/SB). It was introduced in Update 1.75 "La Résistance".
At its current battle rating, the AMX-13 (HOT) can definitely do some serious damage, even to top-rank MBTs and (as of 1.81) helicopters too. The six HOT ATGMs are enough to penetrate almost any conventional armour on direct hit, and may even penetrate the T-64B's upper glacis with ERA in place if hit it directly, though strong NERA screen might be too much for it. All six missiles can be fired in short succession, although only the one fired last can be controlled.
This makes it a viable tank destroyer, but, unlike any of the MBTs, it cannot take a hit and survive. Even certain machine guns and aircraft cannons are capable of destroying it easily. Use its spotting ability to alert your team to enemies, and try to guide ATGM into a critical spot, like crew or ammo, since ATGM can overpenetrate.
Just remember: AMX-13s only have six ATGMs, after that, it is using a conventional gun, firing solid shot AP, which technically can ammo rack tanks like T-64 and T-80 from the side, but it's not a guaranteed kill.
General info
Survivability and armour
Armour type:
- Cast homogeneous armour (Turret base, Turret front)
- Rolled homogeneous armour
| Armour | Front (Slope angle) | Sides | Rear | Roof |
|---|---|---|---|---|
| Hull | 20 mm (67°) Front glacis 20-40 mm (5-50°) Lower glacis |
20 mm | 15 mm Top 15 mm (45°) Bottom |
10 mm 5 mm Engine grille |
| Turret | 40 mm (32-47°) Turret front 40 mm (12-41°) Turret base 40 mm (15-75°) Barrel shroud |
20 mm (0-30°) Turret 20 mm (12-14°) Turret base |
20 mm Turret bustle 20 mm (17-22°) Pivot ball 10 mm (77-90°) Turret underside |
10 mm |
| Armour | Sides | Roof | ||
| Cupola | 20 mm | 10 mm |
Notes:
- Suspension wheels and tracks are 15 mm thick.
- Belly armour is 10 mm thick.
- 8 mm Structural steel firewall separates the driver from the engine.
- The track and wheel on the front glacis offer about 15 mm structural steel thickness.
Mobility
| Game Mode | Max Speed (km/h) | Weight (tons) | Engine power (horsepower) | Power-to-weight ratio (hp/ton) | |||
|---|---|---|---|---|---|---|---|
| Forward | Reverse | Stock | Upgraded | Stock | Upgraded | ||
| Arcade | 68 | 8 | 15 | 418 | 515 | 27.87 | 34.33 |
| Realistic | 61 | 7 | 239 | 270 | 15.93 | 18 | |
Modifications and economy
| Mobility | Protection | Firepower | ||||||||||||||||||||||||
|---|---|---|---|---|---|---|---|---|---|---|---|---|---|---|---|---|---|---|---|---|---|---|---|---|---|---|
|
|
|
Armaments
Main armament
| 75 mm SA50 L/57 | Turret rotation speed (°/s) | Reloading rate (seconds) | |||||||||||
|---|---|---|---|---|---|---|---|---|---|---|---|---|---|
| Mode | Capacity | Vertical | Horizontal | Stabilizer | Stock | Upgraded | Full | Expert | Aced | Stock | Full | Expert | Aced |
| Arcade | 36 | -6°/+13° | ±180° | N/A | 28.6 | 39.5 | 48.0 | 53.1 | 56.5 | 5.00 | 5.00 | 5.00 | 5.00 |
| Realistic | 17.9 | 21.0 | 25.5 | 28.2 | 30.0 | ||||||||
Ammunition
| Penetration statistics | |||||||
|---|---|---|---|---|---|---|---|
| Ammunition | Type of warhead |
Penetration @ 0° Angle of Attack (mm) | |||||
| 10 m | 100 m | 500 m | 1,000 m | 1,500 m | 2,000 m | ||
| POT-51A | APBC | 182 | 178 | 162 | 143 | 127 | 113 |
| 75 mm HE | HE | 10 | 10 | 10 | 10 | 10 | 10 |
| PCOT-51P | APCBC | 202 | 198 | 180 | 159 | 141 | 125 |
| Shell details | |||||||||
|---|---|---|---|---|---|---|---|---|---|
| Ammunition | Type of warhead |
Velocity (m/s) |
Projectile mass (kg) |
Fuse delay (m) |
Fuse sensitivity (mm) |
Explosive mass (TNT equivalent) (g) |
Ricochet | ||
| 0% | 50% | 100% | |||||||
| POT-51A | APBC | 1,000 | 6.4 | N/A | N/A | N/A | 47° | 60° | 65° |
| 75 mm HE | HE | 753 | 6.2 | 0 | 0.1 | 675 | 79° | 80° | 81° |
| PCOT-51P | APCBC | 1,000 | 6.4 | N/A | N/A | N/A | 48° | 63° | 71° |
Ammo racks

| Full ammo |
1st rack empty |
2nd rack empty |
3rd rack empty |
4th rack empty |
5th rack empty |
6th rack empty |
7th rack empty |
Visual discrepancy |
|---|---|---|---|---|---|---|---|---|
| 36 | 32 (+4) | 28 (+8) | 23 (+13) | 18 (+18) | 13 (+23) | 7 (+29) | 1 (+35) | No |
Notes:
- Shells are modeled individually and disappear after having been shot or loaded.
- Rack 6* and 7* (autoloader magazines) are first stage ammo racks. They total 12 shells.
- These racks get filled first when loading up the tank and are also emptied first.
- As the AMX-13 (HOT) is equipped with an autoloader, manual reloading of the gun is not possible.
- Once the autoloader magazines have been depleted, you can't shoot until the loader has restocked the autoloader. The restocking time is longer than the normal reload time of the gun (about 15 seconds). Take this into account when playing.
- Simply not firing when the gun is loaded will move ammo from racks 1 to 5 into rack 7* then 6*. Firing will interrupt the restocking of the ready racks.
- The depletion order at full capacity is: 6* - 7* - 1 - 2 up to 5.
Additional armament
| HOT ATGM | |||
|---|---|---|---|
| Capacity | Vertical | Horizontal | Stabilizer |
| 6 | N/A | N/A | N/A |
Ammunition
| Penetration statistics | |||||||
|---|---|---|---|---|---|---|---|
| Ammunition | Type of warhead |
Penetration @ 0° Angle of Attack (mm) | |||||
| 10 m | 100 m | 500 m | 1,000 m | 1,500 m | 2,000 m | ||
| HOT | ATGM | 700 | 700 | 700 | 700 | 700 | 700 |
| Missile details | ||||||||||
|---|---|---|---|---|---|---|---|---|---|---|
| Ammunition | Type of warhead |
Velocity (m/s) |
Range (m) |
Projectile mass (kg) |
Fuse delay (m) |
Fuse sensitivity (mm) |
Explosive mass (TNT equivalent) (g) |
Ricochet | ||
| 0% | 50% | 100% | ||||||||
| HOT | ATGM | 250 | 4,000 | 23 | 0.05 | 0.1 | 3,800 | 80° | 82° | 90° |
Ammo racks
.png)
| Full ammo |
Visual discrepancy |
|---|---|
| 6 | No |
Notes:
- The missiles are fired from 1 to 6.
- It is not possible to select how many missiles to bring into battle.
Machine guns
| 7.5 mm MAC 31 | ||||
|---|---|---|---|---|
| Mount | Capacity (Belt) | Fire rate | Vertical | Horizontal |
| Coaxial | 4,950 (150) | 551 | N/A | N/A |
Usage in battles
The AMX-13 HOT cannot be played as the standard AMX-13 due to the increased battle rating. This particular modification should be used always as a support vehicle. The commander should always keep this in mind:
- ATGM: frontal engagements at 100 m (the ATGM has to fly up a couple of metres to be able to follow the crosshair due to the launcher placement). Distance engagements past 200-300 m.
- 75 mm gun: Side shots at distances between 0-200 m
It should be noted that the AMX-13 HOT can face Leopard 1s, meaning the main gun is capable of destroying the tank from all sides. Enemy targets like T-54/55 will only be able to be penetrated frontally with the ATGM and from the sides with the 75 mm gun. The T-55AM-1 can be one of the toughest enemies it will face as the ATGM will not be able to penetrate the turret mantlet when seen directly from the front, aim for centre-mass with the ATGM.
Do not stay alone with this tank unless you are being a scout vehicle (as it has that capacity).
When in urban combat:
The AMX-13 should be played as a flanker or as a "medic" vehicle thanks to being able to repair friendlies due to being a light tank. It should be noted that the ATGM use is reduced considerably when in urban combat due to the way the launchers are placed. Use your mobility, scouting capabilities and autoloader to mark, disable and support allies in killing enemy vehicles. When facing Russian tanks, always try to get side shots. When facing NATO tanks (excluding heavy tanks and WW2 tanks), side shots might not be required depending on the armour the AMX-13 is facing.
When in rural combat:
The AMX-13 should be played as a scout or as an ATGM sniper. Be aware of your zoom sights as the AMX-13 lacks potent zoom. Use ATGMs when engaging far targets as your main gun will lose penetration at ranges longer than 300 m, reducing spalling or not penetrating enemy armour at all. Use your scout ability to mark targets for teammates and let them engage them. Using your speed, you are able to flank the enemy as you are able to cross the map side to side with relative ease and speed.
Pros and cons
Pros:
- Mouse-guided HOT missiles, capable of breaching some ERA screens on direct hit
- Can annihilate a lot of tanks in quick succession since all 6 ATGM are always armed and ready to fire
- Reasonably fast turret rotation speed
Cons:
- Since ATGMs are stored outside the tank turret, stray artillery shells can hit and detonate ammo
- Horrendous gun performance at top tier, you will be unable to penetrate almost all enemies frontally
- Long replenishment time for the autoloader after the 12 shots have been spent
- Only 6 ATGMs
- Oscillating turret causes up and down bobbing of the gunsight when coming to a stop
- Mediocre mobility for a light tank
History
Development
Development of the AMX-13 began in 1946 in response to a requirement by the French Army for a light tank to support paratroopers. It was designed at Atelier de Construction d'Issy-les-Moulineaux (AMX). A long line of prototypes lead to the production model. The first prototype was the AMX-13 2A in 1948, with four road wheels. Next came the 2B with five road wheels and a raised idler wheel, and the 2C with the FL-10 turret and two return rollers. The 2D introduced an arrangement with four return rollers.
Design
The turret held the commander and gunner, and was set to the rear of the vehicle. The hull was very compact and low profile, with the engine on the right side and the driver in the front, left side.
The main feature of the AMX-13 was the FL-10 oscillating turret, armed with a 75 mm gun with an automatic loader system fed by two six-round magazines, for a total of 12 rounds in the autoloading mechanism. The gun could depress 8° and elevate 12°, with 5° per second of elevation speed. The turret could rotate 360° with 30° per second of traverse speed. A TCV 107 laser rangefinder was provided to the gunner. 6 smoke grenade launchers were fitted on the turret, with 6 more grenades stored in the vehicle. One coaxial 7.62 mm machine gun was fitted, with 1,800 rounds in belts of 200. Another 7.62 mm machine gun could be fitted on an anti-aircraft mount with 1,800 rounds.
The gasoline engine produced 250 horsepower, and the manual transmission had five forward and one reverse gear. The suspension was of the torsion bar type. The drive sprockets were in the front, return rollers in the back, and there were five road wheels and four return rollers. The AMX-13 could reach a speed of 60 km/h, and it had a range of 400 km.
The protection of the AMX-13, it being a light tank, was not great. It could withstand heavy machine gun and low-calibre autocannon rounds from the front, but the sides could not even withstand heavy machine gun fire. An appliqué armour package was developed to increase protection at the choice of the user.
Production
Production began in 1952, at Atelier de Construction Roanne (ARE). Over 7,000 AMX-13s of all variants were produced, seeing export to a number of nations as well as seeing service with the French Army. Production shifted to Creusot-Loire at Chalon-sur-Saône in 1964, since ARE began producing the AMX-30 in that year.
Service
The French Army received most of the original 75 mm-armed version, with about 3,000 entering service. They were assigned to the regular armoured units, which were mostly filled with M47 and M48 Patton medium tanks at the time. AMX-13 squadrons had four tanks, and were split into two sections of one infantry section and one light tank section each, along with an ammunition truck and command vehicle. These squadrons were used for screening and reconnaissance, locating enemy forces and engaging them. After the first section had engaged the enemy and was reloading, the second section engaged the enemy. The process of alternating reloading and firing between the sections allowed the tanks to hold off the enemy until medium tanks arrived.
In the 1960's, the AMX-30 entered service. AMX-13s were used during the decolonization war in Algeria (1954-1962), although they saw little combat due to the lack of opposition and the terrain. After the French AMX-13s were up-gunned with the 90 mm gun, they often saw service in foreign theaters of operation due to their relative inexpensiveness. The AMX-13s were decommissioned and put into reserve starting in 1985.
HOT variant
The AMX-13 HOT was a prototype made by AMX featuring HOT launchers and ATGM as an intent to upgrade the AMX-13 SS.11
Media
- Skins
- Videos
See also
- Vehicles equipped with the same missile
External links
| Ateliers de construction d'Issy-les-Moulineaux (AMX) | |
|---|---|
| Light tanks | |
| AMX-13 | AMX-13-M24 · AMX-13 (FL11) · AMX-13 · AMX-13 (SS.11) · AMX-13-90 · AMX-13 (HOT) |
| Armoured cars | AMX-10RC |
| Medium tanks | AMX M4 · AMX-50 (TOA100) |
| MBTs | |
| AMX-30 | AMX-30 · AMX-30 ACRA · AMX-30 (1972) · AMX-30B2 · AMX-30B2 BRENUS · AMX-30 Super |
| AMX-32/40 | AMX-32 (105) · AMX-32 · AMX-40 |
| Heavy tanks | AMX-50 Surbaissé · AMX-50 Surblindé |
| Tank destroyers | ELC bis · AMX-50 Foch |
| SPAAGs | AMX-13 DCA 40 · AMX-30 DCA |
| Export | AMX-13 |
| France light tanks | |
|---|---|
| AMC.34/35 | AMC.34 YR · AMC.35 (ACG.1) |
| H.35/39 | H.35 · H.39 · H.39 "Cambronne" |
| AMX-13 | AMX-13 (FL11) · AMX-13-M24 · AMX-13 · AMX-13 (SS.11) · AMX-13-90 · AMX-13 (HOT) |
| Wheeled | AML-90 · AMX-10RC |
| AMD.35 | AMD.35 · AMD.35 (SA35) |
| E.B.R. | E.B.R. (1951) · E.B.R. (1954) · E.B.R. (1963) |
| Other | FCM.36 · R.35 (SA38) · Char 25t · MARS 15 · VBCI-2 (MCT30) |
| Austria | SK-105A2 |
| Great Britain | ▄Crusader Mk.II |
| USA | LVT-4/40 · ▄M3A3 Stuart |
