Difference between revisions of "AML-90 (Israel)"
(→Mobility) |
_97thGalaxy (talk | contribs) (Copied info over from the french AML-90) (Tag: Visual edit) |
||
| Line 17: | Line 17: | ||
{{Specs-Tank-Armour}} | {{Specs-Tank-Armour}} | ||
<!-- ''Describe armour protection. Note the most well protected and key weak areas. Appreciate the layout of modules as well as the number and location of crew members. Is the level of armour protection sufficient, is the placement of modules helpful for survival in combat? If necessary use a visual template to indicate the most secure and weak zones of the armour.'' --> | <!-- ''Describe armour protection. Note the most well protected and key weak areas. Appreciate the layout of modules as well as the number and location of crew members. Is the level of armour protection sufficient, is the placement of modules helpful for survival in combat? If necessary use a visual template to indicate the most secure and weak zones of the armour.'' --> | ||
| − | + | The armour of the AML-90 can barley stop the coaxial of most tanks and can be easely killed by 12.7mm MG's | |
| − | '''Armour type:''' <!-- The types of armour present on the vehicle and their general locations --> | + | '''Armour type:''' |
| + | |||
| + | * Rolled homogeneous armour (hull, turret) | ||
| + | * Structural steel (mudguards, storage boxes) | ||
| + | * Wheel (tires)<!-- The types of armour present on the vehicle and their general locations --> | ||
<!-- Example: * Rolled homogeneous armour (Front, Side, Rear, Hull roof) | <!-- Example: * Rolled homogeneous armour (Front, Side, Rear, Hull roof) | ||
* Cast homogeneous armour (Turret, Transmission area) --> | * Cast homogeneous armour (Turret, Transmission area) --> | ||
{| class="wikitable" | {| class="wikitable" | ||
| + | !Armour | ||
| + | !Front (Slope angle) | ||
| + | !Sides | ||
| + | !Rear | ||
| + | !Roof | ||
|- | |- | ||
| − | + | |Hull | |
| − | | | + | |10 mm (51°) ''Upper glacis'' |
| − | | | + | 10 mm (17°) ''Upper glacis'' |
| − | | | + | |10 mm (4°) ''Front half'' |
| − | + | 10 mm (6°) ''Rear half'' | |
| + | |10 mm ''Upper plate'' | ||
| + | 10 mm (46°) ''Upper glacis'' | ||
| + | 10 mm (20°) ''Lower glacis'' | ||
| + | |10 mm (40°) ''Front glacis'' | ||
| + | 10 mm (44°) ''Rear glacis'' | ||
|- | |- | ||
| − | | | + | |Turret |
| + | |12 mm (30°) ''Turret front'' | ||
| + | 12 mm (8°) ''Gun mantlet'' | ||
| + | |10 mm (17-21°) | ||
| + | 10 mm ''Viewports'' | ||
| + | |10 mm (16°) | ||
| + | |10 mm (16°) ''Front part'' | ||
| + | 10 mm ''Rear part'' | ||
| + | 8 mm ''Gunner hatch'' | ||
|- | |- | ||
| + | |Cupola | ||
| + | | colspan="4" |8 mm (spherical) | ||
|} | |} | ||
| + | '''Notes:''' | ||
| + | |||
| + | * Wheels are 10 mm thick and a spare wheel covers the left side of the hull. | ||
| + | * Storage boxes and mudguards are 5 mm thick. | ||
| + | * The belly is 8 mm thick. | ||
| + | * The gun barrel is 20 mm thick. | ||
| − | + | The AML-90 lacks protection against heavy machine gun fire and is susceptible to damage by light machine gun fire. The crew is located in a rather small compartment, making the armoured car prompt to being knocked out by a single shot from almost any direction. It is also vulnerable to overpressure, meaning chemical energy ammunition will take out your vehicle regardless of where they impact. A kinetic energy ammunition can damage your AML through the projectile itself or the spalling generated but the inflicted damages are lesser and has a higher chance to knock out the crew members or critical modules than to destroy the vehicle. It should be noted that the thin armour has a chance to not activate fused shells like APHE, APCBC, etc, although it will trigger HEAT, HEATFS, HE and ATGM.<!-- Any additional notes which the user needs to be aware of --> | |
<!-- Example: * Suspension wheels are 20 mm thick, tracks are 30 mm thick, and torsion bars are 60 mm thick. --> | <!-- Example: * Suspension wheels are 20 mm thick, tracks are 30 mm thick, and torsion bars are 60 mm thick. --> | ||
| Line 161: | Line 191: | ||
== Usage in battles == | == Usage in battles == | ||
<!-- ''Describe the tactics of playing in the vehicle, the features of using vehicles in the team and advice on tactics. Refrain from creating a "guide" - do not impose a single point of view but instead give the reader food for thought. Describe the most dangerous enemies and give recommendations on fighting them. If necessary, note the specifics of the game in different modes (AB, RB, SB).'' --> | <!-- ''Describe the tactics of playing in the vehicle, the features of using vehicles in the team and advice on tactics. Refrain from creating a "guide" - do not impose a single point of view but instead give the reader food for thought. Describe the most dangerous enemies and give recommendations on fighting them. If necessary, note the specifics of the game in different modes (AB, RB, SB).'' --> | ||
| − | '' | + | ''AML-90 should be primarily used as a scout flanking vehicle due to its high speed, low profile, scouting capabilities and firepower (tremendous for such a small vehicle). The AML-90 has primarily 3 uses:'' |
| + | |||
| + | '''''Scouting:''''' | ||
| + | |||
| + | ''As its name says, scouting. When on large maps, the scouting ability should be used at its full potential. The low profile and high speed make it able to crawl to cover fast and without creating much suspicion, while marking targets for friendlies to engage.'' | ||
| + | |||
| + | '''''Flanking:''''' | ||
| + | |||
| + | ''Due to the high speed and really powerful gun, the AML-90 can be used to hit any enemy from the back. This tactic should be a "Hit n' Run", you should disable or destroy targets and leave before they can engage you. The powerful gun can even be able to take on a [[Maus]] or [[E-100]] if used properly (320 mm of penetration at all ranges at 0°). Use smoke to cover your trail when you have been spotted.'' | ||
| + | |||
| + | '''''Sniping:''''' | ||
| + | |||
| + | ''Despite the optics not having a huge zoom, it is enough to be able to detect, target and engage enemy vehicles at all ranges thanks to the HEAT-FS round. Be aware of your ammo as it can only carry 20, so make all shots count. It also creates a relatively small smoke trail when firing compared to other cannons at the battle rating (105 mm, other 90 mm, 122 mm) thanks to the muzzle brake. Bushes can also be used to make this vehicle invisible due to its low profile. A big bunch of branches can cover almost 70% of the front of the AML-90, making it a moving and deadly bush. It also creates a small engine sound that will be, most of the time, masked up by other tanks, giving you a stealth capability which can be exploited in urban combat.'' | ||
=== Pros and cons === | === Pros and cons === | ||
| Line 195: | Line 237: | ||
* ''reference to the series of the vehicles;'' | * ''reference to the series of the vehicles;'' | ||
* ''links to approximate analogues of other nations and research trees.'' --> | * ''links to approximate analogues of other nations and research trees.'' --> | ||
| − | + | * [[AML-90 (Family)]] | |
| − | + | * [[AML-90]] | |
| − | * | ||
| − | * | ||
== External links == | == External links == | ||
Revision as of 12:58, 25 April 2022
| This page is about the light tank AML-90 (Israel). For other versions, see AML-90 (Family). |
.jpg)
Contents
Description
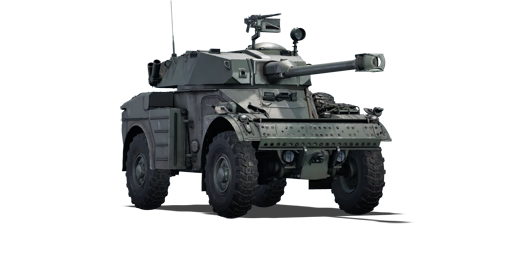
The AML-90 is a rank IV Israeli light tank with a battle rating of 7.0 (AB) and 7.7 (RB/SB). It was introduced in Update "Wind of Change".
General info
Survivability and armour
The armour of the AML-90 can barley stop the coaxial of most tanks and can be easely killed by 12.7mm MG's
Armour type:
- Rolled homogeneous armour (hull, turret)
- Structural steel (mudguards, storage boxes)
- Wheel (tires)
| Armour | Front (Slope angle) | Sides | Rear | Roof |
|---|---|---|---|---|
| Hull | 10 mm (51°) Upper glacis
10 mm (17°) Upper glacis |
10 mm (4°) Front half
10 mm (6°) Rear half |
10 mm Upper plate
10 mm (46°) Upper glacis 10 mm (20°) Lower glacis |
10 mm (40°) Front glacis
10 mm (44°) Rear glacis |
| Turret | 12 mm (30°) Turret front
12 mm (8°) Gun mantlet |
10 mm (17-21°)
10 mm Viewports |
10 mm (16°) | 10 mm (16°) Front part
10 mm Rear part 8 mm Gunner hatch |
| Cupola | 8 mm (spherical) | |||
Notes:
- Wheels are 10 mm thick and a spare wheel covers the left side of the hull.
- Storage boxes and mudguards are 5 mm thick.
- The belly is 8 mm thick.
- The gun barrel is 20 mm thick.
The AML-90 lacks protection against heavy machine gun fire and is susceptible to damage by light machine gun fire. The crew is located in a rather small compartment, making the armoured car prompt to being knocked out by a single shot from almost any direction. It is also vulnerable to overpressure, meaning chemical energy ammunition will take out your vehicle regardless of where they impact. A kinetic energy ammunition can damage your AML through the projectile itself or the spalling generated but the inflicted damages are lesser and has a higher chance to knock out the crew members or critical modules than to destroy the vehicle. It should be noted that the thin armour has a chance to not activate fused shells like APHE, APCBC, etc, although it will trigger HEAT, HEATFS, HE and ATGM.
Mobility
| Game Mode | Max Speed (km/h) | Weight (tons) | Engine power (horsepower) | Power-to-weight ratio (hp/ton) | |||
|---|---|---|---|---|---|---|---|
| Forward | Reverse | Stock | Upgraded | Stock | Upgraded | ||
| Arcade | 101 | 20 | 5.5 | 139 | 172 | 25.27 | 31.27 |
| Realistic | 91 | 18 | 80 | 90 | 14.55 | 16.36 | |
Modifications and economy
| Mobility | Protection | Firepower | ||||||||||||||||||||||||
|---|---|---|---|---|---|---|---|---|---|---|---|---|---|---|---|---|---|---|---|---|---|---|---|---|---|---|
|
|
|
Armaments
Main armament
| 90 mm DEFA F1 | Turret rotation speed (°/s) | Reloading rate (seconds) | |||||||||||
|---|---|---|---|---|---|---|---|---|---|---|---|---|---|
| Mode | Capacity | Vertical | Horizontal | Stabilizer | Stock | Upgraded | Full | Expert | Aced | Stock | Full | Expert | Aced |
| Arcade | 20 | -8°/+15° | ±180° | N/A | 23.8 | 32.9 | 40.0 | 44.2 | 47.1 | 8.71 | 7.71 | 7.10 | 6.70 |
| Realistic | 14.9 | 17.5 | 21.3 | 23.5 | 25.0 | ||||||||
Ammunition
| Penetration statistics | |||||||
|---|---|---|---|---|---|---|---|
| Ammunition | Type of warhead |
Penetration @ 0° Angle of Attack (mm) | |||||
| 10 m | 100 m | 500 m | 1,000 m | 1,500 m | 2,000 m | ||
| OCC 60-62 | HEATFS | 320 | 320 | 320 | 320 | 320 | 320 |
| OE 90 F1 | HE | 13 | 13 | 13 | 13 | 13 | 13 |
| Shell details | |||||||||
|---|---|---|---|---|---|---|---|---|---|
| Ammunition | Type of warhead |
Velocity (m/s) |
Projectile Mass (kg) |
Fuse delay (m) |
Fuse sensitivity (mm) |
Explosive Mass (TNT equivalent) (g) |
Ricochet | ||
| 0% | 50% | 100% | |||||||
| OCC 60-62 | HEATFS | 750 | 8.95 | 0.05 | 0.1 | 877.7 | 65° | 72° | 77° |
| OE 90 F1 | HE | 640 | 10.45 | 0 | 0.1 | 945 | 79° | 80° | 81° |
| Smoke shell characteristics | ||||||
|---|---|---|---|---|---|---|
| Ammunition | Velocity (m/s) |
Projectile Mass (kg) |
Screen radius (m) |
Screen deploy time (s) |
Screen hold time (s) |
Explosive Mass (TNT equivalent) (g) |
| OFUM PH90-F2 | 640 | 10.2 | 13 | 5 | 20 | 50 |
Ammo racks

| Full ammo |
1st rack empty |
2nd rack empty |
3rd rack empty |
4th rack empty |
Visual discrepancy |
|---|---|---|---|---|---|
| 20 | 17 (+3) | 11 (+9) | 6 (+14) | 1 (+19) | No |
Notes:
- Shells are modeled individually and disappear after having been shot or loaded.
- Racks 3 and 4 are first stage ammo racks. They total 10 shells and get filled first when loading up the tank.
- These racks are also emptied early: the rack depletion order at full capacity is: 3 - 4 - 1 - 2.
- Simply not firing when the gun is loaded will move ammunition from rack 1 then 2 into ready rack 4 then 3. Firing will interrupt the restocking of the ready racks.
Machine guns
| 7.62 mm A-A-F1N | ||||
|---|---|---|---|---|
| Mount | Capacity (Belt) | Fire rate | Vertical | Horizontal |
| Pintle | 800 (100) | 900 | -10°/+40° | ±120° |
| Coaxial | 2,150 (100) | 900 | N/A | N/A |
Usage in battles
AML-90 should be primarily used as a scout flanking vehicle due to its high speed, low profile, scouting capabilities and firepower (tremendous for such a small vehicle). The AML-90 has primarily 3 uses:
Scouting:
As its name says, scouting. When on large maps, the scouting ability should be used at its full potential. The low profile and high speed make it able to crawl to cover fast and without creating much suspicion, while marking targets for friendlies to engage.
Flanking:
Due to the high speed and really powerful gun, the AML-90 can be used to hit any enemy from the back. This tactic should be a "Hit n' Run", you should disable or destroy targets and leave before they can engage you. The powerful gun can even be able to take on a Maus or E-100 if used properly (320 mm of penetration at all ranges at 0°). Use smoke to cover your trail when you have been spotted.
Sniping:
Despite the optics not having a huge zoom, it is enough to be able to detect, target and engage enemy vehicles at all ranges thanks to the HEAT-FS round. Be aware of your ammo as it can only carry 20, so make all shots count. It also creates a relatively small smoke trail when firing compared to other cannons at the battle rating (105 mm, other 90 mm, 122 mm) thanks to the muzzle brake. Bushes can also be used to make this vehicle invisible due to its low profile. A big bunch of branches can cover almost 70% of the front of the AML-90, making it a moving and deadly bush. It also creates a small engine sound that will be, most of the time, masked up by other tanks, giving you a stealth capability which can be exploited in urban combat.
Pros and cons
Pros:
- Is very short and narrow, can effectively hide itself
- High speed on road (~50-80 km/h), faster than tracked light tanks like M41
- 90mm HEATFS is lethal thanks to its high penetration. Can go through almost all common tanks like Leopard 1
- -18 km/h reverse speed can pull it out of a dangerous situation rather quickly
- Small wheel spacing leading to tight turn radius, good for urban combat
- Smoke grenades can conceal the vehicle when needed
Cons:
- Cannon isn't stabilised in any way, can be very fatal considering that the gun needs a while to fully stabilise when braking a fast vehicle
- HEAT has limited post-penetration damage especially against spacious tanks like M60
- HEAT trajectory is quite curved, so long range shots are challenging
- Wheeled design makes it extremely sluggish in off-road conditions
- Armour cannot stop any projectile except rifle-caliber bullets shot from a distance (eg. 400m)
History
Describe the history of the creation and combat usage of the vehicle in more detail than in the introduction. If the historical reference turns out to be too long, take it to a separate article, taking a link to the article about the vehicle and adding a block "/History" (example: https://wiki.warthunder.com/(Vehicle-name)/History) and add a link to it here using the main template. Be sure to reference text and sources by using <ref></ref>, as well as adding them at the end of the article with <references />. This section may also include the vehicle's dev blog entry (if applicable) and the in-game encyclopedia description (under === In-game description ===, also if applicable).
Media
Excellent additions to the article would be video guides, screenshots from the game, and photos.
See also
External links
Paste links to sources and external resources, such as:
- topic on the official game forum;
- other literature.
| Israel light tanks | |
|---|---|
