Difference between revisions of "AEC AA"
Inceptor57 (talk | contribs) (→Usage in the battles: Fleshed out section vs. armored target, removed independent section) |
|||
| (5 intermediate revisions by 4 users not shown) | |||
| Line 2: | Line 2: | ||
== Description == | == Description == | ||
| − | ''In the description, the first part needs to be about the history of the creation and combat usage of the vehicle, as well as its key features. In the second part, tell the reader about the ground vehicle in the game. Insert the screenshot of the vehicle. If the novice player does not remember the vehicle by name, they will immediately understand what kind of vehicle it is talking about.'' | + | <!--''In the description, the first part needs to be about the history of the creation and combat usage of the vehicle, as well as its key features. In the second part, tell the reader about the ground vehicle in the game. Insert the screenshot of the vehicle. If the novice player does not remember the vehicle by name, they will immediately understand what kind of vehicle it is talking about.''--> |
| + | [[File:GarageImage_{{PAGENAME}}.jpg|420px|thumb|left]] | ||
| + | {{break}} | ||
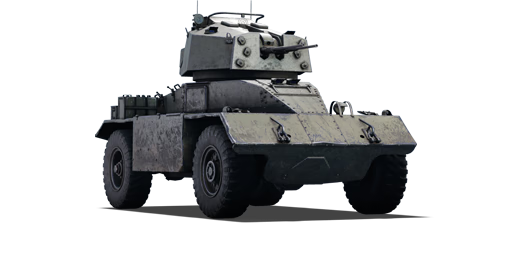
| + | The '''{{Specs|name}}''' is a Rank {{Specs|rank}} British Self-Propelled Anti-Aircraft Gun {{Battle-rating|1}}. It was introduced in [[Update 1.55 "Royal Armour"]] along with the rest of the British tree. | ||
| + | |||
| + | This is a low rank British AA car, which, while lacking armour, can pack quite the punch. It has two 20mm autocannons on its turret, and good maneuverability and speed. Unlike the AA of many other countries at this rank, this is a closed top vehicle, and performs well in anti-tank roles. | ||
== General info == | == General info == | ||
=== Survivability and armour === | === Survivability and armour === | ||
| − | ''Describe armour protection. Note the most well protected and key weak areas. Appreciate the layout of modules as well as the number and location of crew members. Is the level of armour protection sufficient, is the placement of modules helpfull for survival in combat?'' | + | <!--''Describe armour protection. Note the most well protected and key weak areas. Appreciate the layout of modules as well as the number and location of crew members. Is the level of armour protection sufficient, is the placement of modules helpfull for survival in combat?'' |
| + | |||
| + | ''If necessary use a visual template to indicate the most secure and weak zones of the armour.''--> | ||
| + | The AC Mk II AA lacks armour, although it is protected from most smaller caliber machine guns at its battle rating. It is advisable to attempt to position yourself above an enemy, so that: A) they will have a lower ability to see you, and B) so that they will most likely end up shooting the lower part of the tank, which juts out. If they shoot here with an AP shell, it will most likely go straight through and merely take out your transmission. | ||
| + | |||
| + | '''Armour type:''' | ||
| + | |||
| + | * Rolled homogeneous armour | ||
| + | * Structural steel (Sand skirts) | ||
| − | '' | + | {| class="wikitable" |
| + | |- | ||
| + | ! Armour !! Front !! Sides !! Rear !! Roof | ||
| + | |- | ||
| + | | Hull || 17 mm (62-78°) ''Front glacis'' <br> 10 mm (42°) ''Lower glacis'' <br> 17 mm (49°) + 31 mm ''Joint plate'' || 25 mm (0-1°) || 10 mm (58°) ''Top'' <br> 14 mm (13°) ''Bottom'' || 12 mm <br> 10 mm ''Rear'' | ||
| + | |- | ||
| + | | Turret || 50.8 mm (1-6°) ''Turret front'' <br> 50.8 mm (13-60°) ''Gun mantlet'' || 50.8 mm (7-9°) || 50.8 mm (6-38°) || 20 mm | ||
| + | |- | ||
| + | |} | ||
| + | |||
| + | * Wheels are 2 mm thick, structural chassis is 5 mm thick. | ||
| + | * A 14 mm RHA plate separates the engine from the crew compartment. | ||
=== Mobility === | === Mobility === | ||
| − | ''Write about the mobility of the ground vehicle. Estimate the specific power and maneuverability as well as the maximum speed forward and backward.'' | + | <!--''Write about the mobility of the ground vehicle. Estimate the specific power and maneuverability as well as the maximum speed forward and backward.''--> |
| + | The AC Mk II AA is decently maneuverable and has high top speeds, especially on the road. ''Warning'': do '''not''' attempt to drive this vehicle on the snow or sand, as it will go more slowly than most heavy tanks at its BR. | ||
| + | |||
| + | {| class="wikitable" style="text-align:center" | ||
| + | |- | ||
| + | ! colspan="3" | Mobility characteristic | ||
| + | |- | ||
| + | ! Weight (tons) | ||
| + | ! colspan="1" | Add-on Armor<br>weight (tons) | ||
| + | ! colspan="1" | Max speed (km/h) | ||
| + | |- | ||
| + | | rowspan="2" | 12.7 || colspan="1" rowspan="2" | N/A || colspan="1" | 72 (AB) | ||
| + | |- | ||
| + | |66 (RB/SB) | ||
| + | |- | ||
| + | ! colspan="3" | Engine power (horsepower) | ||
| + | |- | ||
| + | ! colspan="1" | Mode | ||
| + | !Stock | ||
| + | !Upgraded | ||
| + | |- | ||
| + | |''Arcade'' | ||
| + | |224 | ||
| + | |276 | ||
| + | |- | ||
| + | |''Realistic/Simulator'' | ||
| + | |140 | ||
| + | |158 | ||
| + | |- | ||
| + | ! colspan="3" | Power-to-weight ratio (hp/ton) | ||
| + | |- | ||
| + | ! colspan="1" | Mode | ||
| + | !Stock | ||
| + | !Upgraded | ||
| + | |- | ||
| + | |''Arcade'' | ||
| + | |17.64 | ||
| + | |21.73 | ||
| + | |- | ||
| + | |''Realistic/Simulator'' | ||
| + | |11.02 | ||
| + | |12.44 | ||
| + | |- | ||
| + | |} | ||
== Armaments == | == Armaments == | ||
=== Main armament === | === Main armament === | ||
| − | ''Give the reader information about the characteristics of the main gun. Assess its effectiveness in a battle based on the reloading speed, ballistics and the power of shells. Do not forget about the flexibilty of the fire, that is how quickly the cannon can be aimed at the target, open fire on it and aim at another enemy. Add a link to the main article on the gun: <code><nowiki>{{main|Name of the weapon}}</nowiki></code>. Describe in general terms the ammunition available for the main gun. Give advice on how to use them and how to fill the ammunition storage.'' | + | <!--''Give the reader information about the characteristics of the main gun. Assess its effectiveness in a battle based on the reloading speed, ballistics and the power of shells. Do not forget about the flexibilty of the fire, that is how quickly the cannon can be aimed at the target, open fire on it and aim at another enemy. Add a link to the main article on the gun: <code><nowiki>{{main|Name of the weapon}}</nowiki></code>. Describe in general terms the ammunition available for the main gun. Give advice on how to use them and how to fill the ammunition storage.''--> |
| + | {{main|Oerlikon Mk.II (20 mm)}} | ||
| + | |||
| + | The AC Mk II AA sports a dual-mount 20mm autocannons, which excels at devastating planes and even light or medium tanks. The AP rounds provided will shred through almost anything, and it is always advisable to take these. Additionally, these allow you to down heavy bombers. | ||
| + | |||
| + | {| class="wikitable" style="text-align:center" | ||
| + | |- | ||
| + | ! colspan="6" | [[Oerlikon Mk.II (20 mm)|20 mm Oerlikon Mk.II]] (x2) | ||
| + | |- | ||
| + | ! colspan="2" rowspan="1" style="width:5em" |Capacity (Belt capacity each) | ||
| + | ! rowspan="1" | Fire rate <br> (shots/minute) | ||
| + | ! rowspan="1" | Vertical <br> guidance | ||
| + | ! rowspan="1" | Horizontal <br> guidance | ||
| + | ! rowspan="1" | Stabilizer | ||
| + | |- | ||
| + | | colspan="2" | 600 (60) || 450 || -5°/+87° || ±180° || N/A | ||
| + | |- | ||
| + | ! colspan="6" | Turret rotation speed (°/s) | ||
| + | |- | ||
| + | ! style="width:4em" |Mode | ||
| + | ! style="width:4em" |Stock | ||
| + | ! style="width:4em" |Upgraded | ||
| + | ! style="width:4em" |Prior + Full crew | ||
| + | ! style="width:4em" |Prior + Expert qualif. | ||
| + | ! style="width:4em" |Prior + Ace qualif. | ||
| + | |- | ||
| + | | ''Arcade'' || 23.8 || 32.9 || 40.0 || 44.2 || 47.0 | ||
| + | |- | ||
| + | | ''Realistic'' || 23.8 || 28.0 || 34.0 || 37.6 || 40.0 | ||
| + | |- | ||
| + | ! colspan="4" | Reloading rate (seconds) | ||
| + | |- | ||
| + | ! colspan="1" style="width:4em" |Stock | ||
| + | ! colspan="1" style="width:4em" |Prior + Full crew | ||
| + | ! colspan="1" style="width:4em" |Prior + Expert qualif. | ||
| + | ! colspan="1" style="width:4em" |Prior + Ace qualif. | ||
| + | |- | ||
| + | | 7.8 || __.__ || __.__ || __.__ | ||
| + | |- | ||
| + | |} | ||
| + | |||
| + | === Ammunition === | ||
| + | {| class="wikitable sortable" style="text-align:center" width="100%" | ||
| + | ! colspan="8" | Penetration statistics | ||
| + | |- | ||
| + | ! rowspan="2" data-sort-type="text" | Ammunition | ||
| + | ! rowspan="2" class="unsortable" | Belt <br /> composition | ||
| + | ! colspan="6" | '''Penetration''' '''''in mm''''' '''@ 90°''' | ||
| + | |- | ||
| + | ! 10m | ||
| + | ! 100m | ||
| + | ! 500m | ||
| + | ! 1000m | ||
| + | ! 1500m | ||
| + | ! 2000m | ||
| + | |- | ||
| + | | Default || AP-T, HEF-I || 42 || 40 || 30 || 21 || 15 || 11 | ||
| + | |- | ||
| + | | HET || HEFI-T, HEF-I || 4 || 4 || 4 || 4 || 4 || 4 | ||
| + | |- | ||
| + | | APT || AP-T || 42 || 40 || 30 || 21 || 15 || 11 | ||
| + | |- | ||
| + | |} | ||
| + | |||
| + | ===Belt types=== | ||
| + | {| class="catlist" | ||
| + | | '''Belts''' || '''Shell composition''' || '''Combat usage''' | ||
| + | |- | ||
| + | | align="left" |''Default'' || align="left" | AP-T – HEF-I || align="left" | This belts carry an equal mixture of HET and APT. | ||
| + | |- | ||
| + | | align="left" |''HET'' || align="left" | HEFI-T – HEF-I || align="left" | This is the belts you want to research first, since they are the best against aircraft. | ||
| + | |- | ||
| + | | align="left" |''APT'' || align="left" | AP-T || align="left" | These are purely APCR belts that, as mentioned above, are not very useful with 40mm of penetration, it is always a good idea to carry a round of them for self-defence - It can knockout lightly armoured vehicles. | ||
| + | |} | ||
| + | |||
| + | === [[Ammo racks|Ammo racks]] === | ||
| + | [[File:Ammoracks AC Mk II AA.png|right|thumbnail|x250px|[[Ammo racks|Ammo rack]] of Armoured Car Mk.II AA.]] | ||
| + | {| class="wikitable sortable" style="text-align:center" | ||
| + | |- | ||
| + | ! class="wikitable unsortable" |Full<br /> ammo | ||
| + | ! class="wikitable unsortable" |1st<br /> rack empty | ||
| + | ! class="wikitable unsortable" |2nd<br /> rack empty | ||
| + | ! class="wikitable unsortable" |3rd<br /> rack empty | ||
| + | ! class="wikitable unsortable" |4th<br /> rack empty | ||
| + | ! class="wikitable unsortable" |Visual<br /> discrepancy | ||
| + | |- | ||
| + | || '''10''' || 8 ''(+2)'' || 6 ''(+4)'' || 4 ''(+6)'' || 2 ''(+8)''|| style="text-align:center" | Yes | ||
| + | |- | ||
| + | |} | ||
| + | |||
| + | === Optics === | ||
| + | |||
| + | ''Explain how the optic's status can affect the tank's gameplay in any unique or meaningful way. A comparison to rival tanks of the rank is welcome.'' | ||
| − | + | ''If you are having problems with it, refer to the [[Optics|optics gallery]] page for examples.'' | |
| − | '' | ||
| − | === | + | {| class="wikitable" style="text-align:center" width="50%" |
| − | + | ! colspan="3" | {{PAGENAME}} [[Optics]] | |
| + | |- | ||
| + | ! Which ones | ||
| + | ! Default magnification | ||
| + | ! Maximum magnification | ||
| + | |- | ||
| + | ! Main Gun optics | ||
| + | | x1.85 || x3.5 <!--Sometimes the actual value may not be known and here it should be referenced if the optic values are an estimate such as with an "X8.3 (estimated)" notation or something else that way the user will then be able to look to the comparable optics section and see a referenced optic which will have actual in-game data to back up the claim.--> | ||
| + | |- | ||
| + | ! Comparable optics | ||
| + | | colspan="2;" style="text-align:center;" | [[So-Ki]] | ||
| + | |- | ||
| + | |} | ||
== Usage in the battles == | == Usage in the battles == | ||
| − | ''Describe the tactics of playing in the vehicle, the features of using vehicles in the team and advice on tactics. Refrain from creating a "guide" - do not impose a single point of view but give the reader food for thought. Describe the most dangerous enemies and give recommendations on fighting them. If necessary, note the specifics of the game in different modes (AB, RB, SB).'' | + | <!--''Describe the tactics of playing in the vehicle, the features of using vehicles in the team and advice on tactics. Refrain from creating a "guide" - do not impose a single point of view but give the reader food for thought. Describe the most dangerous enemies and give recommendations on fighting them. If necessary, note the specifics of the game in different modes (AB, RB, SB).''--> |
| + | The AC Mk II AA can be used as a support tank in most battles and excels at ambushes. It works well at holding down a capture point, or setting traps along roads. It is advisable to always stay near allies so that you can receive help if necessary. If you choose to play the original role of anti-aircraft, make sure to stay in an open (but safe) area, allowing you full range of fire. Sometimes it is advisable to "harass" planes by giving scattered fire to make them think you are a light tank, and then pretending you don't notice them turning to attack you. Aim down the scope until they are within firing range, and shred them to pieces before they have time to react. | ||
| + | |||
| + | Due to the heavy ammunition consumption as SPAA in AA fights, stay at an allied capture point to get free ammunition reload during battle. | ||
| + | |||
| + | When encountering an enemy that's armour can't be pierced, attempt to immobilise the vehicle by disabling the tracks. From here, multiple options are available for the {{PAGENAME}} depending on the foe. If the enemy has known weak spots, the {{PAGENAME}} could attempt to maneuvre to a favourable position. If the enemy is known to be impervious to the {{PAGENAME}}'s armaments, simply keep them disabled (hit the gun barrel as well to increase the enemy's repair time), drop artillery, and withdraw to a safe position until a friendly with a bigger gun can handle the situation. | ||
| + | |||
| + | ===Modules=== | ||
| + | Like every other vehicle, the "Parts" and "FPE" modifications should be prioritised so you won't lose your vehicle due to being disabled. After that, prioritise ammunition, aiming for "APT". Everything else is still essential to upgrading the vehicle. | ||
=== Pros and cons === | === Pros and cons === | ||
| − | ''Summarize and briefly evaluate the vehicle in terms of its characteristics and combat effectiveness. Mark its pros and cons in a bulleted list. Do not use more than 6 points for each of the characteristics. Avoid using categorical definitions such as "bad", "good" and the like - they have a substitution in the form of softer "inadequate", "effective".'' | + | <!--''Summarize and briefly evaluate the vehicle in terms of its characteristics and combat effectiveness. Mark its pros and cons in a bulleted list. Do not use more than 6 points for each of the characteristics. Avoid using categorical definitions such as "bad", "good" and the like - they have a substitution in the form of softer "inadequate", "effective".''--> |
| + | '''Pros:''' | ||
| − | ' | + | * Excellent rate of fire |
| − | * | + | * Fast and mobile with good acceleration |
| + | * Closed top, can't be strafed from the sky or hit by artillery shrapnel | ||
| + | * Good turret armour | ||
| + | * Fast turret rotation speed | ||
| + | * 20 mm cannon velocity gives good anti-air capability | ||
| + | * Can decimate lightly armoured tank destroyers | ||
'''Cons:''' | '''Cons:''' | ||
| − | * | + | |
| + | * Useless against heavily armoured tanks | ||
| + | * Low ammo capacity can't allow for reckless firing | ||
| + | * Poor hull armour | ||
| + | * Taller than other vehicles, making it a large target (easier to hit) | ||
| + | * Has wheels, therefore it can't turn on the spot | ||
| + | * Terrible at driving off-road and on sand or mud | ||
| + | * Turret ring is fairly large, therefore it may become jammed often if hit | ||
| + | * Not enough gun depression (be careful when getting up hills) | ||
== History == | == History == | ||
| − | ''Describe the history of the creation and combat usage of the ground vehicle in more detail than in the introduction. If the historical reference turns out to be too big, take it to a separate article, taking a link to an article about the vehicle and adding a block "/historical reference" (example: https://wiki.warthunder.com/Name-vehicles/historical reference) and add a link to it here using the <code>main</code> template. Be sure to include links to sources at the end of the article.'' | + | <!--''Describe the history of the creation and combat usage of the ground vehicle in more detail than in the introduction. If the historical reference turns out to be too big, take it to a separate article, taking a link to an article about the vehicle and adding a block "/historical reference" (example: https://wiki.warthunder.com/Name-vehicles/historical reference) and add a link to it here using the <code>main</code> template. Be sure to include links to sources at the end of the article.''--> |
| + | ===Development=== | ||
| + | The basis of the armoured car comes from Associated Equipment Company (AEC) of Southall, Middlesex. AEC was a manufacturer of truck and bus chassis and the Matador artillery tractor. The armoured car was privately developed in 1941 and was based off the Matador. The design was shown to British officials in the same year during the Horse Guards Parade and was received favourably by many, including Winston Churchill. Orders started filing in for the armoured car, and AEC tried to give it comparable firepower to current tanks at the time. Thus, the first version, Mk.I, came with a turret adapted from the [[Valentine Mk I|Valentine tank]] equipped with the 2-pounder. The next version, Mk.II, had this upgraded with a heavier turret and a 6-pounder gun, then with the QF 75 mm gun on the Mk.III. An anti-aircraft version using the same turret from the [[Crusader AA Mk II|Crusader AA Mk II]] and the twin Oerlikon guns was also developed onto the armoured car. During its production life from 1942 to 1943, 629 Armoured cars in total were built. | ||
| + | |||
| + | ===Combat usage=== | ||
| + | The Armoured cars equipped with the tank guns were used in North Africa in late 1942. Some on-field modifications include changing out the Valentine turret for a [[Crusader Mk III|Crusader]] turret with the 6-pounder. The armoured cars continued to see fighting in various parts of Europe in combination with other armoured cars and remained in service until replaced by the Alvis Saladin in 1958. | ||
| + | |||
| + | Though the anti-aircraft version was made, it never entered production due to the growing Allied air superiority over the Axis forces, making the anti-aircraft version unnecessary to guard the advancing Allied units from air attacks. | ||
== Media == | == Media == | ||
| Line 42: | Line 241: | ||
== Read also == | == Read also == | ||
| − | + | ||
| − | * | + | * [https://warthunder.com/en/devblog/current/854/ [Devblog<nowiki>]</nowiki> T17E2 and Armoured Car Mk II SPAA]<br /> |
| − | |||
| − | |||
== Sources == | == Sources == | ||
''Paste links to sources and external resources, such as:'' | ''Paste links to sources and external resources, such as:'' | ||
| + | |||
* ''topic on the official game forum;'' | * ''topic on the official game forum;'' | ||
* ''other literature.'' | * ''other literature.'' | ||
| + | |||
| + | {{Britain anti-aircraft vehicles}} | ||
Revision as of 15:44, 31 October 2019
Contents
Description

The Armoured Car, AEC AA is a Rank II British Self-Propelled Anti-Aircraft Gun
with a battle rating of 3.7 (AB) and 3.3 (RB/SB). It was introduced in Update 1.55 "Royal Armour" along with the rest of the British tree.
This is a low rank British AA car, which, while lacking armour, can pack quite the punch. It has two 20mm autocannons on its turret, and good maneuverability and speed. Unlike the AA of many other countries at this rank, this is a closed top vehicle, and performs well in anti-tank roles.
General info
Survivability and armour
The AC Mk II AA lacks armour, although it is protected from most smaller caliber machine guns at its battle rating. It is advisable to attempt to position yourself above an enemy, so that: A) they will have a lower ability to see you, and B) so that they will most likely end up shooting the lower part of the tank, which juts out. If they shoot here with an AP shell, it will most likely go straight through and merely take out your transmission.
Armour type:
- Rolled homogeneous armour
- Structural steel (Sand skirts)
| Armour | Front | Sides | Rear | Roof |
|---|---|---|---|---|
| Hull | 17 mm (62-78°) Front glacis 10 mm (42°) Lower glacis 17 mm (49°) + 31 mm Joint plate |
25 mm (0-1°) | 10 mm (58°) Top 14 mm (13°) Bottom |
12 mm 10 mm Rear |
| Turret | 50.8 mm (1-6°) Turret front 50.8 mm (13-60°) Gun mantlet |
50.8 mm (7-9°) | 50.8 mm (6-38°) | 20 mm |
- Wheels are 2 mm thick, structural chassis is 5 mm thick.
- A 14 mm RHA plate separates the engine from the crew compartment.
Mobility
The AC Mk II AA is decently maneuverable and has high top speeds, especially on the road. Warning: do not attempt to drive this vehicle on the snow or sand, as it will go more slowly than most heavy tanks at its BR.
| Mobility characteristic | ||
|---|---|---|
| Weight (tons) | Add-on Armor weight (tons) |
Max speed (km/h) |
| 12.7 | N/A | 72 (AB) |
| 66 (RB/SB) | ||
| Engine power (horsepower) | ||
| Mode | Stock | Upgraded |
| Arcade | 224 | 276 |
| Realistic/Simulator | 140 | 158 |
| Power-to-weight ratio (hp/ton) | ||
| Mode | Stock | Upgraded |
| Arcade | 17.64 | 21.73 |
| Realistic/Simulator | 11.02 | 12.44 |
Armaments
Main armament
The AC Mk II AA sports a dual-mount 20mm autocannons, which excels at devastating planes and even light or medium tanks. The AP rounds provided will shred through almost anything, and it is always advisable to take these. Additionally, these allow you to down heavy bombers.
| 20 mm Oerlikon Mk.II (x2) | |||||
|---|---|---|---|---|---|
| Capacity (Belt capacity each) | Fire rate (shots/minute) |
Vertical guidance |
Horizontal guidance |
Stabilizer | |
| 600 (60) | 450 | -5°/+87° | ±180° | N/A | |
| Turret rotation speed (°/s) | |||||
| Mode | Stock | Upgraded | Prior + Full crew | Prior + Expert qualif. | Prior + Ace qualif. |
| Arcade | 23.8 | 32.9 | 40.0 | 44.2 | 47.0 |
| Realistic | 23.8 | 28.0 | 34.0 | 37.6 | 40.0 |
| Reloading rate (seconds) | |||||
| Stock | Prior + Full crew | Prior + Expert qualif. | Prior + Ace qualif. | ||
| 7.8 | __.__ | __.__ | __.__ | ||
Ammunition
| Penetration statistics | |||||||
|---|---|---|---|---|---|---|---|
| Ammunition | Belt composition |
Penetration in mm @ 90° | |||||
| 10m | 100m | 500m | 1000m | 1500m | 2000m | ||
| Default | AP-T, HEF-I | 42 | 40 | 30 | 21 | 15 | 11 |
| HET | HEFI-T, HEF-I | 4 | 4 | 4 | 4 | 4 | 4 |
| APT | AP-T | 42 | 40 | 30 | 21 | 15 | 11 |
Belt types
| Belts | Shell composition | Combat usage |
| Default | AP-T – HEF-I | This belts carry an equal mixture of HET and APT. |
| HET | HEFI-T – HEF-I | This is the belts you want to research first, since they are the best against aircraft. |
| APT | AP-T | These are purely APCR belts that, as mentioned above, are not very useful with 40mm of penetration, it is always a good idea to carry a round of them for self-defence - It can knockout lightly armoured vehicles. |
Ammo racks

| Full ammo |
1st rack empty |
2nd rack empty |
3rd rack empty |
4th rack empty |
Visual discrepancy |
|---|---|---|---|---|---|
| 10 | 8 (+2) | 6 (+4) | 4 (+6) | 2 (+8) | Yes |
Optics
Explain how the optic's status can affect the tank's gameplay in any unique or meaningful way. A comparison to rival tanks of the rank is welcome.
If you are having problems with it, refer to the optics gallery page for examples.
| AEC AA Optics | ||
|---|---|---|
| Which ones | Default magnification | Maximum magnification |
| Main Gun optics | x1.85 | x3.5 |
| Comparable optics | So-Ki | |
Usage in the battles
The AC Mk II AA can be used as a support tank in most battles and excels at ambushes. It works well at holding down a capture point, or setting traps along roads. It is advisable to always stay near allies so that you can receive help if necessary. If you choose to play the original role of anti-aircraft, make sure to stay in an open (but safe) area, allowing you full range of fire. Sometimes it is advisable to "harass" planes by giving scattered fire to make them think you are a light tank, and then pretending you don't notice them turning to attack you. Aim down the scope until they are within firing range, and shred them to pieces before they have time to react.
Due to the heavy ammunition consumption as SPAA in AA fights, stay at an allied capture point to get free ammunition reload during battle.
When encountering an enemy that's armour can't be pierced, attempt to immobilise the vehicle by disabling the tracks. From here, multiple options are available for the AEC AA depending on the foe. If the enemy has known weak spots, the AEC AA could attempt to maneuvre to a favourable position. If the enemy is known to be impervious to the AEC AA's armaments, simply keep them disabled (hit the gun barrel as well to increase the enemy's repair time), drop artillery, and withdraw to a safe position until a friendly with a bigger gun can handle the situation.
Modules
Like every other vehicle, the "Parts" and "FPE" modifications should be prioritised so you won't lose your vehicle due to being disabled. After that, prioritise ammunition, aiming for "APT". Everything else is still essential to upgrading the vehicle.
Pros and cons
Pros:
- Excellent rate of fire
- Fast and mobile with good acceleration
- Closed top, can't be strafed from the sky or hit by artillery shrapnel
- Good turret armour
- Fast turret rotation speed
- 20 mm cannon velocity gives good anti-air capability
- Can decimate lightly armoured tank destroyers
Cons:
- Useless against heavily armoured tanks
- Low ammo capacity can't allow for reckless firing
- Poor hull armour
- Taller than other vehicles, making it a large target (easier to hit)
- Has wheels, therefore it can't turn on the spot
- Terrible at driving off-road and on sand or mud
- Turret ring is fairly large, therefore it may become jammed often if hit
- Not enough gun depression (be careful when getting up hills)
History
Development
The basis of the armoured car comes from Associated Equipment Company (AEC) of Southall, Middlesex. AEC was a manufacturer of truck and bus chassis and the Matador artillery tractor. The armoured car was privately developed in 1941 and was based off the Matador. The design was shown to British officials in the same year during the Horse Guards Parade and was received favourably by many, including Winston Churchill. Orders started filing in for the armoured car, and AEC tried to give it comparable firepower to current tanks at the time. Thus, the first version, Mk.I, came with a turret adapted from the Valentine tank equipped with the 2-pounder. The next version, Mk.II, had this upgraded with a heavier turret and a 6-pounder gun, then with the QF 75 mm gun on the Mk.III. An anti-aircraft version using the same turret from the Crusader AA Mk II and the twin Oerlikon guns was also developed onto the armoured car. During its production life from 1942 to 1943, 629 Armoured cars in total were built.
Combat usage
The Armoured cars equipped with the tank guns were used in North Africa in late 1942. Some on-field modifications include changing out the Valentine turret for a Crusader turret with the 6-pounder. The armoured cars continued to see fighting in various parts of Europe in combination with other armoured cars and remained in service until replaced by the Alvis Saladin in 1958.
Though the anti-aircraft version was made, it never entered production due to the growing Allied air superiority over the Axis forces, making the anti-aircraft version unnecessary to guard the advancing Allied units from air attacks.
Media
An excellent addition to the article will be video guides, as well as screenshots from the game and photos.
Read also
Sources
Paste links to sources and external resources, such as:
- topic on the official game forum;
- other literature.
| Britain anti-aircraft vehicles | |
|---|---|
| Crusader AA | Crusader AA Mk I · Crusader AA Mk II |
| Wheeled | Staghound AA · AEC AA |
| Radar SPAAG | Chieftain Marksman |
| Missile SPAA | Stormer HVM |
| Other | Light AA Mk I · Falcon |
| Canada | Skink |
| South Africa | Ystervark · Bosvark · ZA-35 |
