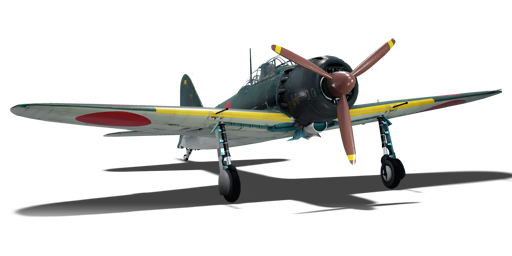
A6M5 Ko
Contents
| This page is about the Japanese gift fighter A6M5 Ko. For other uses, see A6M (Family). |
Description

The A6M5 Ko Reisen is a gift rank IV Japanese fighter
with a battle rating of 5.0 (AB), 5.3 (RB), and 4.7 (SB). It has been in the game since the start of the Open Beta Test prior to Update 1.27.
General info
Flight performance
Describe how the aircraft behaves in the air. Speed, manoeuvrability, acceleration and allowable loads - these are the most important characteristics of the vehicle.
| Characteristics | |||||||
|---|---|---|---|---|---|---|---|
| Stock | |||||||
| Max Speed (km/h at 6,000 m) |
Max altitude (meters) |
Turn time (seconds) |
Rate of climb (meters/second) |
Take-off run (meters) | |||
| AB | RB | AB | RB | AB | RB | ||
| 521 | 503 | 10900 | 16.6 | 17.2 | 13.4 | 13.4 | 190 |
| Upgraded | |||||||
| Max Speed (km/h at 6,000 m) |
Max altitude (meters) |
Turn time (seconds) |
Rate of climb (meters/second) |
Take-off run (meters) | |||
| AB | RB | AB | RB | AB | RB | ||
| 563 | 540 | 10900 | 15.8 | 16.0 | 21.4 | 16.9 | 190 |
Details
| Features | ||||
|---|---|---|---|---|
| Combat flaps | Take-off flaps | Landing flaps | Air brakes | Arrestor gear |
| ✓ | ✓ | ✓ | X | ✓ |
| Limits | ||||
|---|---|---|---|---|
| Wing-break speed (km/h) |
Gear limit (km/h) |
Combat flaps (km/h) |
Max Static G | |
| + | - | |||
| 420 | ~14 | ~6 | ||
| Optimal velocities | |||
|---|---|---|---|
| Ailerons (km/h) |
Rudder (km/h) |
Elevators (km/h) |
Radiator (km/h) |
| < 280 | < 420 | < 410 | > 336 |
| Compressor (RB/SB) | ||
|---|---|---|
| Setting 1 | ||
| Optimal altitude | 100% Engine power | WEP Engine power |
| 2,500 m | 1,095 hp | 1,226 hp |
| Setting 2 | ||
| Optimal altitude | 100% Engine power | WEP Engine power |
| 5,000 m | 965 hp | 1,081 hp |
Survivability and armour
Examine the survivability of the aircraft. Note how vulnerable the structure is and how secure the pilot is, whether the fuel tanks are armoured, etc. Describe the armour, if there is any, and also mention the vulnerability of other critical aircraft systems.
Armaments
Offensive armament
The A6M5 Ko is armed with:
- 2 x 20 mm Type 99 Model 2 navy cannons, wing-mounted (125 rpg = 250 total)
- 2 x 7.7 mm Type 97 navy machine guns, nose-mounted (700 rpg = 1,400 total)
Suspended armament
The A6M5 Ko can be outfitted with the following ordnance:
- Without load
- 2 x 60 kg Navy Type 97 Number 6 bombs (120 kg total)
- 1 x 250 kg Navy Type Number 25 Model 2 bomb (250 kg total)
Usage in battles
Describe the tactics of playing in an aircraft, the features of using aircraft in a team and advice on tactics. Refrain from creating a "guide" - do not impose a single point of view, but instead, give the reader food for thought. Examine the most dangerous enemies and give recommendations on fighting them. If necessary, note the specifics of the game in different modes (AB, RB, SB).
RB (Realistic Battles) Usage:
- Taking off from the runway, This plane has an extremely short take off length and can take off from carriers without the use of flaps. If you wish to take off 0.10 seconds quicker, you can manually control your engine set the Propeller Pitch to 100%, Fuel mixture to 120%, and radiator to 0%. This is not recommended settings for general flying as you will over heat, and the extreme fuel mixture will cause issues with altitudes above roughly 3,000 feet (1,000 meters) and the closed radiator will cause overheating under constant use.
- In RB this plane is fairly dominate for it's BR. It's climb rate is comparable to a considerable amount of planes including the German 109's, Russian LA's, and American Mustangs. With the British Spitfires generally being the only plane that will be out climbing you. When climbing, 17 degrees is a generally decent climbing angle for all Japanese planes until 10,000 feet (3,000 meters) at that point pitch down to 10 degrees climb rate, as it is best to keep your speed up in the A6M5 since you are not as quick as other planes at this altitude and have a tendency to stall easily at high altitude (due to your low speed). You can climb from the runway till your desired altitude using WEP and your plane should not overheat unless your map is specifically large or you are side climbing.
- At high elevation 15,000 feet (4,500 meters) the plane suffers, with the engine having to use WEP (War Emergency Power) to keep speed with many aircraft it has a tendency to overheat easily without manually opening the Radiator cowlings at high altitude due to the decreased amount of going through the radiator. At high elevations the plane suffers from low air pressure on the wings making its turning radius less than Spitfires and 109's. This being said, most pilots are not aware of high elevation fighting and will shy away from turn fighting you at high elevations. Being aggressive can force them lower where your plane will shine. But be careful as an experienced pilot will know you are not in your optimal zone and can force you to stall in a dog fight.
- In a dive the plane gets compression lock which is extremely noticeable above 400mph (630kph) IAS (indicated air speed). Compression lock means the air speed over the control surfaces equals a force greater than which you can apply, meaning you have reduced input and response over the aircraft. At 450+ mph (725kph) IAS you run the risk of ripping your wings in a high G turn. At 480 mph (775 kph) you now run the risk of ripping your wings.
- Due to the light weight of the plane and high torque of the engine (Sakae 21) the plane does not have equal roll rate even in RB. the roll rate to your left should be slightly better than to the right, though not entirely noticeable. This is due to the propeller spinning to the right naturally forcing your plane to the left.
General tactics that work in the A6M5 KO:
- The A6M5 KO favors a pilot that is patient but aggressive. At high elevation you should be extremely cautious as your plane will be sluggish and non-responsive. The goal of the pilot is to avoid being the first into a battle, and supporting Friendly aircraft if they are being attacked. By simply engaging in a dog fight you can either push or lure the enemies to a lower altitude. Be patient as your fight will not start once combat begins, you will be on the defensive until the battle drops below roughly 6,000 feet (1,800 meters). Below that altitude your plane is a menace to anyone who has lost their energy.
- Germans, Americans, and Russian pilots will have a tendency to want to "head-on" you. (where two pilots fly towards eachother guns firing). Avoid this at all cost in the A6M5, your 50 caliber machineguns located in your nose have low damage threshold and your cannons on the wings while extremely good, will have a spread that will only connect at a specific distance, where as their guns will be more likely to connect for longer. A "Split S" or "Immelmann" can be used preemptively to position yourself on the enemies tail if you are new to tactics. A more advanced Pilot will use a High or Low Yo-Yo. The "High Yo-Yo" being nice to chase a target that is not at a high velocity and the "Low Yo-Yo" being used against a target with high velocity to allow you to fire some rounds as he over shoots.
- When pursuing a target you will be slower than nearly every fighter (unless they are damaged) to counter this your pursuit should always be leading, never lagging (meaning you are aiming your plane ahead of theirs, not on them or behind). This pursuit will compliment your high rate of turn allowing you to more easily catch fleeing targets.
- In a simple turning circle fight, I strongly recommend against the use flaps unless absolutely necessary. As your turning circle will be smaller than any aircraft excluding a highly advanced Spitfire Pilot (in that case use flaps). The reason for this is that your maneuverability is directly tied to a very specific range of speed of roughly 200mph (320kph). Without flaps your turning speed under constant full elevator usage will vary between 170-180mph (270-290 kph) with combat flaps it will vary between 145-160 (233-260kph). The decreased speed leaves you more vulnerable and less maneuverable if another enemy decides to engage you while in the turn fight.
- The A6M5 has an extremely fast recovery from a stall. If you have an option to stall both yourself and the enemy with a maneuver it is highly recommended as you will recover first allowing you to get on their 6' o'clock.
- When firing your guns, it is recommended to fire your machine guns for ranging till you get a hit then fire your Cannons until you get used to the range. Distances 1,000 feet (300 meters) or less will have your cannons landings generally at the same place and time as your machine-guns. Distances further, this method is not recommended as the lower velocity of the cannons is noticeable and the shots will not land on target.
- The goal of every A6M5 pilot should be to drag the enemy to as low of an altitude as possible, and forcing them into a turn fight bleeding their energy.
- If an enemy is running away from you, climb at a 10 degree angle denying them their energy advantage. You cannot catch them, but you can keep at their altitude if they decide to run preventing more Boom and Zoom.
TLDR:
You turn faster at low altitudes and will recover lost speed faster than other aircraft.
Fights that are head-on or high elevation are discouraged.
Manual Engine Control
| MEC elements | ||||||
|---|---|---|---|---|---|---|
| Mixer | Pitch | Radiator | Supercharger | Turbocharger | ||
| Oil | Water | Type | ||||
| Controllable | Controllable Not auto controlled |
Controllable Not auto controlled |
Controllable Not auto controlled |
Separate | Controllable 2 gears |
Not controllable |
Modules
| Tier | Flight performance | Survivability | Weaponry | ||
|---|---|---|---|---|---|
| I | Fuselage repair | Radiator | Offensive 7 mm | ||
| II | Compressor | Airframe | New 7 mm MGs | 9 in (mod30) | |
| III | Wings repair | Engine | Offensive 20 mm | ||
| IV | Engine injection | Cover | New 20 mm cannons | 12 in (mod30) | |
As a premium aircraft, the A6M5 Ko comes with all modules unlocked.
Pros and cons
Summarise and briefly evaluate the vehicle in terms of its characteristics and combat effectiveness. Mark its pros and cons in the bulleted list. Try not to use more than 6 points for each of the characteristics. Avoid using categorical definitions such as "bad", "good" and the like - use substitutions with softer forms such as "inadequate" and "effective".
Pros:
Cons:
History
Describe the history of the creation and combat usage of the aircraft in more detail than in the introduction. If the historical reference turns out to be too long, take it to a separate article, taking a link to the article about the vehicle and adding a block "/ History" (example: https://wiki.warthunder.com/(Vehicle-name)/History) and add a link to it here using the main template. Be sure to reference text and sources by using <ref></ref>, as well as adding them at the end of the article with <references />. This section may also include the vehicle's dev blog entry (if applicable) and the in-game encyclopedia description (under === In-game description ===, also if applicable).
In-game description
Mitsubishi Type 0 Model 52 "Kou" (A6M5 Model 52a, reporting names: Zeke/Hamp/Zero) single-engine carrier-based fighter
In the middle of 1942, the Allies in the Pacific Ocean Theatre took the offensive, while the Japanese were more and more often on the defensive. In 1943, new types of high-speed fighters entered service with the USAAF and the USNAF, and they outperformed the Zeros in many respects. Low survivability, the main disadvantage of the Japanese aircraft, was made clear in the fierce air duels between the planes. The fighter's flight characteristics also required some improvement, and Mitsubishi Heavy Industries designers began to upgrade the A6M again in August 1943.
The Zero received a smaller-area wing (with a span of only 11 m) with rounded tips. The wing folding mechanism was removed. To increase the plane's allowable diving speed, its wing surface skin was reinforced.
Since more powerful engines were not yet available, the designers had to make the most of a Nakajima Sakae 21 engine. Every pair of cylinders was given an individual exhaust pipe instead of a common heavy exhaust manifold. This added exhaust gas thrust to the propeller thrust, which resulted in a higher aircraft speed. The fuselage skin had to be reinforced with steel sheets in the area of the pipes, since the hot exhaust gases quickly burned through thin duralumin.
The new version of the aircraft was designated Model 52 (A6M5 Model 52). The plane became slightly heavier, but its maximum speed at a height of 6,000 m reached 565 km/h. This was the speed limit for the Zero, since all further modifications made to the machine only increased its weight and, consequently, reduced its maximum speed.
The next stage in upgrading the Zero was the Model 52 "Kou" (A6M5a Model 52a). This improvement significantly reinforced the plane's armament by replacing the wing-mounted Type 99-2 Model 3 drum-fed cannons (with 100 rounds each) with Type 99-2 Model 4 belt-fed cannons (with 125 rounds). This added 25 rounds per cannon and slightly improved the plane's rate of fire. Now the fighter's armament consisted of two synchronous 7.7 mm Type 97 machine guns with 500 rounds each plus two wing-mounted 20 mm Type 99-2 Model 4 cannons with 125 rounds each.
The A6M5a fighter could carry bombs: two 60 kg (132 lb) bombs suspended under the wing and one weighing 250 kg (551 kb) under the fuselage.
In addition, the A6M5a's wing structure was reinforced yet again, which resulted in a maximum allowable diving speed of 740 km/h. However, this was still inferior to the diving speed of the American F4U fighter.
Mass production of the A6M5a variant began in March 1944. Mitsubishi Heavy Industries manufactured 391 machines. An additional unknown quantity of this variant was built by Nakajima Aircraft.
Media
Skin and Camouflages for the A6M5 Ko in War Thunder Live.
See also
- Related development
- Aircraft of comparable role, configuration and era
- Brewster F2A Buffalo
- Curtiss-Wright CW-21
- Fiat G.50
- Grumman F4F Wildcat
- Grumman F6F Hellcat
- IAR-81
- Macchi C.200
- Nakajima Ki-43 Oscar
- Supermarine Seafire
- Hawker Sea Hurricane
External links
| Mitsubishi Company (三菱商会) | |
|---|---|
| Fighters | A5M4 · Hagiri's A5M4 |
| A6M2 mod. 11 · A6M2 · A6M3 · A6M3 mod. 22 · A6M3 mod. 22Ko · A6M5 · A6M5 Ko · A6M5 otsu · A6M5 Hei · A6M6c | |
| A7M1 (NK9H) · A7M2 | |
| J2M2 · J2M3 · J2M4 Kai · J2M5 · J2M5 (30 mm) | |
| Hydroplanes | F1M2 |
| Interceptors | Ki-83 · Ki-109 |
| Bombers | G4M1 |
| Ki-21-Ia · Ki-21-I hei · Ki-67-I Ko · Ki-67-I otsu | |
| Jet Fighters | Ki-200 |
| Captured | ▃A6M2 · ␗A6M2 |
| See also | Mitsubishi Heavy Industries, Ltd. (Post-War) |
| Japan fighters | |
|---|---|
| Navy | |
| Carrier-based fighter | |
| A5M | A5M4 · Hagiri's A5M4 |
| A6M | A6M2 mod. 11 · A6M2 · A6M3 · A6M3 mod. 22 · A6M3 mod. 22Ko · A6M5 · A6M5 Ko · A6M5 otsu · A6M5 Hei · A6M6c |
| A7He | A7He1* |
| A7M | A7M1 (NK9H) · A7M2 |
| Land-based Fighter | |
| J2M | J2M2 · J2M3 · J2M4 Kai · J2M5 · J2M5 (30 mm) |
| J6K | J6K1 |
| J7W | J7W1 |
| N1K-J | N1K1-Ja · N1K2-J · N1K2-Ja |
| Fighter seaplane | |
| N1K | N1K1 |
| A6M-N | A6M2-N |
| Army | |
| Ki-10 | Ki-10-I · Ki-10-I C · Ki-10-II · Ki-10-II C |
| Ki-27 | Ki-27 otsu · Ki-27 otsu Tachiarai |
| Ki-43 | Ki-43-I · Ki-43-II · Ki-43-III otsu |
| Ki-44 | Ki-44-I · Ki-44-I 34 · Ki-44-II otsu · Ki-44-II hei |
| Ki-61 | Ki-61-I ko · Ki-61-I otsu · Ki-61-I hei · Tada's Ki-61-I hei · Ki-61-I tei · Ki-61-II Otsu Kai |
| Ki-84 | Ki-84 ko · Ki-84 otsu · Ki-84 hei |
| Ki-87 | Ki-87 |
| Ki-94 | Ki-94-II |
| Ki-100 | Ki-100 · Ki-100-II |
| Other countries | ▅F4U-1A · ▅P-51C-11-NT · ▅Bf 109 E-7 · ▅Fw 190 A-5 |
| *Imported designation of the He 112 (A6M was in development - A7M would take A7 designation after the cancelation of the A7He) | |
| Japan premium aircraft | |
|---|---|
| Fighters | Hagiri's A5M4 · A7He1 · Ki-27 otsu Tachiarai |
| Ki-44-II otsu · ▅Bf 109 E-7 · ▅F4U-1A · Ki-100-II · Ki-44-I 34 | |
| ▅Fw 190 A-5 · A7M1 (NK9H) · Tada's Ki-61-I hei · ▅P-51C-11-NT | |
| J2M4 Kai · A6M5 Ko · A6M6c · J2M5 · Ki-87 · J6K1 | |
| Twin-engine fighters | Ki-96 |
| Jet fighters | F-86F-40 JASDF▅ · T-2 Early · F-4EJ ADTW |
| Bombers | Ki-21-I hei · Ki-48-II otsu · H8K3 · B7A2 (Homare 23) · ▅B-17E |
