Difference between revisions of "Type 74 (F)"
(Created page) |
(Copy pasted mostly everything from the Type 74) |
||
| Line 10: | Line 10: | ||
=== Survivability and armour === | === Survivability and armour === | ||
<!-- ''Describe armour protection. Note the most well protected and key weak areas. Appreciate the layout of modules as well as the number and location of crew members. Is the level of armour protection sufficient, is the placement of modules helpful for survival in combat? If necessary use a visual template to indicate the most secure and weak zones of the armour.'' --> | <!-- ''Describe armour protection. Note the most well protected and key weak areas. Appreciate the layout of modules as well as the number and location of crew members. Is the level of armour protection sufficient, is the placement of modules helpful for survival in combat? If necessary use a visual template to indicate the most secure and weak zones of the armour.'' --> | ||
| − | '' | + | '''Armour type:''' |
| + | |||
| + | * Rolled homogeneous armour | ||
| + | * Cast homogeneous armour (Gun mantlet) | ||
{| class="wikitable" | {| class="wikitable" | ||
| Line 16: | Line 19: | ||
! Armour !! Front (Slope angle) !! Sides !! Rear !! Roof | ! Armour !! Front (Slope angle) !! Sides !! Rear !! Roof | ||
|- | |- | ||
| − | | Hull || | + | | Hull || 40 mm (74°), 80 mm (65°) ''Front glacis'' <br> 80 mm (57°) ''Lower glacis'' || 35 mm (44°) ''Top'' <br> 30 mm, 10 mm (55-56°) ''Bottom'' || 20 mm ''Top'' <br> 25 mm (47-48°) ''Bottom'' || 25 mm |
|- | |- | ||
| − | | Turret || | + | | Turret || 132 mm (27-53°) ''Turret front'' <br> 200 mm (34-73°) , 150 + 170 mm (0-44°) ''Gun mantlet'' || 132 mm (5-57°) ''Front'' <br> 67 mm (37-47°) ''Rear'' || 37 mm (17-39°) || 67 mm ''Front'' <br> 37 mm ''Rear'' |
|- | |- | ||
| − | | Cupola || | + | | Cupola || colspan="3" style="text-align:center" | 80 mm || 80 mm |
|- | |- | ||
|} | |} | ||
| − | '''Notes:''' | + | '''Notes:''' |
| − | + | ||
| + | * Suspension wheels and tracks are both 20 mm thick. | ||
| + | * Has additional 10 mm mounting plates scattered on the front hull | ||
| + | * The Type 74's hydropneumatic suspension means it could vary the sloped angle of its armour towards the enemy. | ||
| + | * Hull roof is rated to be 25 mm effective against HE. | ||
| + | |||
| + | As with most medium tanks of the rank, the hull of the {{PAGENAME}} is only capable of stopping some autocannon fire and has very vulnerable sides, however, the turret armour of the {{PAGENAME}} is closer to US and British turret armour level. While it's unlikely to stop most APFSDS, it is very likely to deflect stray APDS and APHE. Light tanks will likely have to get close and personal to penetrate it, as penetrating cupola even with APDS belt is a challenge due to its size. | ||
| + | |||
| + | The advantage can be kept even when creeping onto the enemy high ground by using hydropneumatic suspension before driving uphill to not allow the enemy to fire at the roof. In rare cases, the tank can "duck" behind cover to hide at least a portion of the turret from enemy fire. | ||
=== Mobility === | === Mobility === | ||
<!-- ''Write about the mobility of the ground vehicle. Estimate the specific power and manoeuvrability, as well as the maximum speed forwards and backwards.'' --> | <!-- ''Write about the mobility of the ground vehicle. Estimate the specific power and manoeuvrability, as well as the maximum speed forwards and backwards.'' --> | ||
| − | |||
| − | {{tankMobility}} | + | {{tankMobility|abMinHp= 1116|rbMinHp= 637}} |
== Armaments == | == Armaments == | ||
=== Main armament === | === Main armament === | ||
| − | <!-- ''Give the reader information about the characteristics of the main gun. Assess its effectiveness in a battle based on the reloading speed, ballistics and the power of shells. Do not forget about the flexibility of the fire, that is how quickly the cannon can be aimed at the target, open fire on it and aim at another enemy. Add a link to the main article on the gun: <code><nowiki> | + | <!-- ''Give the reader information about the characteristics of the main gun. Assess its effectiveness in a battle based on the reloading speed, ballistics and the power of shells. Do not forget about the flexibility of the fire, that is how quickly the cannon can be aimed at the target, open fire on it and aim at another enemy. Add a link to the main article on the gun: <code><nowiki>{main|Name of the weapon}</nowiki></code>. Describe in general terms the ammunition available for the main gun. Give advice on how to use them and how to fill the ammunition storage.'' --> |
{{main|L7A3 (105 mm)}} | {{main|L7A3 (105 mm)}} | ||
| − | |||
{| class="wikitable" style="text-align:center" width="100%" | {| class="wikitable" style="text-align:center" width="100%" | ||
| Line 48: | Line 57: | ||
|- | |- | ||
! ''Arcade'' | ! ''Arcade'' | ||
| − | | rowspan="2" | 50 || rowspan="2" | -6°/+9° || rowspan="2" | ±180° || rowspan="2" | Two-plane || | + | | rowspan="2" | 50 || rowspan="2" | -6°/+9° || rowspan="2" | ±180° || rowspan="2" | Two-plane || 22.8 || 38.1 || 38.4 || 42.5 || 45.18 || rowspan="2" | 8.7 || rowspan="2" | 7.7 || rowspan="2" | 7.1 || rowspan="2" | 6.7 |
|- | |- | ||
! ''Realistic'' | ! ''Realistic'' | ||
| − | | | + | | 14.3 || 20.3 || 20.4 || 22.6 || 24.0 |
|- | |- | ||
|} | |} | ||
| + | |||
| + | While the 105 mm gun is relatively equal to one of other nations, the ammunition and optics of the {{PAGENAME}} are exceptional. It has all the same shell types of NATO tanks. The {{PAGENAME}} also has a laser rangefinder, which makes it really easy to check aim in RB, compared to tanks it fights in down-tiers and sometimes even in up-tier. | ||
| + | The gun depression is the only real disadvantage, forcing operator to use hydropneumatic suspension. Main issue is that if chassis got damaged while tank was shifting, it will refuse to work and tank might get stuck in awkward pose, being unable to aim at opponents, however usually enemies aim to kill instead of just disabling the {{PAGENAME}}. | ||
==== Ammunition ==== | ==== Ammunition ==== | ||
| Line 65: | Line 77: | ||
! 10 m !! 100 m !! 500 m !! 1,000 m !! 1,500 m !! 2,000 m | ! 10 m !! 100 m !! 500 m !! 1,000 m !! 1,500 m !! 2,000 m | ||
|- | |- | ||
| − | | Type 91 || HEATFS || | + | | Type 91 || HEATFS || 400 || 400 || 400 || 400 || 400 || 400 |
| + | |- | ||
| + | | Type 75 || HESH || 127 || 127 || 127 || 127 || 127 || 127 | ||
|- | |- | ||
| − | | M735 || APFSDS || | + | | M735 || APFSDS || 353 || 350 || 342 || 333 || 322 || 312 |
|- | |- | ||
| − | | Type 93 || APFSDS || | + | | Type 93 || APFSDS || 405 || 403 || 396 || 388 || 378 || 370 |
|- | |- | ||
|} | |} | ||
| Line 86: | Line 100: | ||
! 0% !! 50% !! 100% | ! 0% !! 50% !! 100% | ||
|- | |- | ||
| − | | Type 91 || HEATFS || | + | | Type 91 || HEATFS || 1,150 || 10.5 || 0.0 || 0.1 || 1,270 || 65° || 72° || 75° |
| + | |- | ||
| + | | Type 75 || HESH || 760 || 10.8 || 0.4 || 0.1 || 2,700 || 73° || 77° || 80° | ||
|- | |- | ||
| − | | M735 || APFSDS || | + | | M735 || APFSDS || 1,501 || 3.7 || N/A || N/A || N/A || 76° || 77° || 78° |
|- | |- | ||
| − | | Type 93 || APFSDS || | + | | Type 93 || APFSDS || 1,501 || 3.4 || N/A || N/A || N/A || 78° || 80° || 81° |
|- | |- | ||
|} | |} | ||
| + | |||
{| class="wikitable" style="text-align:center" | {| class="wikitable" style="text-align:center" | ||
! colspan="7" | Smoke shell characteristics | ! colspan="7" | Smoke shell characteristics | ||
| Line 104: | Line 121: | ||
! Explosive Mass<br>(TNT equivalent) (g) | ! Explosive Mass<br>(TNT equivalent) (g) | ||
|- | |- | ||
| − | | M416 || | + | | M416 || 730 || 11.4 || 20 || 5 || 25 || 50 |
|- | |- | ||
|} | |} | ||
==== [[Ammo racks]] ==== | ==== [[Ammo racks]] ==== | ||
| − | + | [[File:Ammoracks_{{PAGENAME}}.png|right|thumb|x250px|[[Ammo racks]] of the {{PAGENAME}}]] | |
| − | |||
{| class="wikitable" style="text-align:center" | {| class="wikitable" style="text-align:center" | ||
|- | |- | ||
| Line 117: | Line 133: | ||
! 2nd<br>rack empty | ! 2nd<br>rack empty | ||
! 3rd<br>rack empty | ! 3rd<br>rack empty | ||
| − | |||
| − | |||
| − | |||
! Visual<br>discrepancy | ! Visual<br>discrepancy | ||
|- | |- | ||
| − | | '''50''' || | + | | '''50''' || 16 ''(+34)'' || 7 ''(+43)'' || 1 ''(+49)'' || No |
| + | |- | ||
| + | |} | ||
| + | |||
| + | * Racks 2 and 3 are first stage ammo racks. They total 15 shells and get filled first when loading up the tank. | ||
| + | * These racks are also emptied early: the rack depletion order at full capacity is: 3 - 2 - 1. | ||
| + | * To go into battle with the frontal ammo rack empty, pack 16 ''(+34)'' shells, the rack depletion order will then be 3 - 2. | ||
| + | |||
| + | ==== Optics and night vision ==== | ||
| + | {| class="wikitable" style="text-align:center" | ||
| + | ! colspan="7" | {{PAGENAME}} [[Optics]] | ||
| + | |- | ||
| + | ! rowspan="3" |Type of optic | ||
| + | ! rowspan="3" |Magnification | ||
| + | ! colspan="5" |[[Night Vision Devices]] | ||
| + | |- | ||
| + | ! colspan="3" |Image Intensifier | ||
| + | ! rowspan="2" |{{Annotation|Thermal Imager<br>Resolution|The higher the resolution the clearer and more detailed the image is}} | ||
| + | ! rowspan="2" |Notes | ||
| + | |- | ||
| + | ! {{Annotation|Resolution|The higher the resolution the clearer and more detailed the image is}} | ||
| + | ! {{Annotation|Light Mult|By how much the image intensifier amplifies the existing light, primarily useful for comparing image intensifiers}} | ||
| + | ! {{Annotation|Noise Level|How much noise is present in the image (how grainy the image is)}} | ||
| + | |- | ||
| + | ! Gunner's Sight | ||
| + | | X8 - X16 || 800X600 || 8.0 || High || Not Fitted || Image intensifier unlocked by "NVD" modification (tier 4) | ||
| + | |- | ||
| + | ! Commander's View | ||
| + | | X6 || 800X600 || 8.0 || High || Not Fitted || Image intensifier unlocked by "NVD" modification (tier 4) | ||
| + | |- | ||
| + | ! Driver's View | ||
| + | | X1 / 3PV || 800X600 || 5.0 || High || Not Fitted || Image intensifier unlocked by "NVD" modification (tier 4) | ||
|- | |- | ||
|} | |} | ||
| Line 129: | Line 173: | ||
<!-- ''Offensive and anti-aircraft machine guns not only allow you to fight some aircraft but also are effective against lightly armoured vehicles. Evaluate machine guns and give recommendations on its use.'' --> | <!-- ''Offensive and anti-aircraft machine guns not only allow you to fight some aircraft but also are effective against lightly armoured vehicles. Evaluate machine guns and give recommendations on its use.'' --> | ||
{{main|M2HB (12.7 mm)|Type 74 (7.62 mm)}} | {{main|M2HB (12.7 mm)|Type 74 (7.62 mm)}} | ||
| − | |||
| − | {| class="wikitable" style="text-align:center | + | {| class="wikitable" style="text-align:center" |
|- | |- | ||
! colspan="5" | [[M2HB (12.7 mm)|12.7 mm M2HB]] | ! colspan="5" | [[M2HB (12.7 mm)|12.7 mm M2HB]] | ||
|- | |- | ||
| − | ! Mount | + | ! Mount |
| + | ! Capacity<br>(Belt capacity) | ||
| + | ! Rate of fire<br>(shots/minute) | ||
| + | ! Vertical<br>guidance | ||
| + | ! Horizontal<br>guidance | ||
|- | |- | ||
| − | | || | + | | Pintle || 1,000 (200) || 576 || -10°/+40° || ±120° |
|- | |- | ||
|} | |} | ||
| − | {| class="wikitable" style="text-align:center | + | {| class="wikitable" style="text-align:center" |
|- | |- | ||
! colspan="5" | [[Type 74 (7.62 mm)|7.62 mm Type 74]] | ! colspan="5" | [[Type 74 (7.62 mm)|7.62 mm Type 74]] | ||
|- | |- | ||
| − | ! Mount | + | ! Mount |
| + | ! Capacity<br>(Belt capacity) | ||
| + | ! Rate of fire<br>(shots/minute) | ||
| + | ! Vertical<br>guidance | ||
| + | ! Horizontal<br>guidance | ||
|- | |- | ||
| − | | || | + | | Coaxial || 5,500 (250) || 500 || N/A || N/A |
|- | |- | ||
|} | |} | ||
| + | |||
| + | While it's not recommended, it's still possible to use 12.7 mm to fight light tanks like [[AUBL/74 HVG]] or [[Rooikat Mk.1D]] and most SPAA tanks at <100 m range. | ||
| + | |||
| + | Do not charge them with just the MG, especially at long range, as even poorly armored rank V light tanks can survive frontal MG fire long enough to disarm and explode Type 74 - let them come to you, hit them with the main gun and ensure they never move again by firing at their sides or flat parts, while hiding yours. | ||
| + | |||
| + | Any melee oriented light tanks like [[BMP-2]] or [[Warrior]] with add-on armour will have enough armour to absorb the MG fire and will greet Type 74 back with point blank ATGM attack, which machine guns will be unable to stop at such range. | ||
== Usage in battles == | == Usage in battles == | ||
| − | <!-- ''Describe the tactics of playing in the vehicle, the features of using vehicles in the team and advice on tactics. Refrain from creating a "guide" - do not impose a single point of view but instead give the reader food for thought. Describe the most dangerous enemies and give recommendations on fighting them. If necessary, note the specifics of the game in different modes (AB, RB, SB).'' --> | + | <!--''Describe the tactics of playing in the vehicle, the features of using vehicles in the team and advice on tactics. Refrain from creating a "guide" - do not impose a single point of view but instead give the reader food for thought. Describe the most dangerous enemies and give recommendations on fighting them. If necessary, note the specifics of the game in different modes (AB, RB, SB).''--> |
| − | + | ||
| + | As the Type 74 is very comparable to the [[Leopard 1 (Family)|Leopard 1 Series]], especially the [[Leopard A1A1]], it is recommended to play them in the same fashion as such. In a Hit & Run tactic. | ||
| + | |||
| + | The additional benefits of the Type 74 over the [[Leopard A1A1]] are: | ||
| + | |||
| + | * A top mounted .50 which can be used to deal with soft targets swiftly or damage gun barrels or track opponent tanks. | ||
| + | * Hydropneumatic suspension to: | ||
| + | ** Increase gun depression or elevation. | ||
| + | ** Improve traverse rate off- and on road. | ||
| + | ** Could vary the sloped angle of its armour towards the enemy. | ||
| + | * Stronger turret armor | ||
| + | * Night vision spotlight | ||
| + | * Stock APFSDS (M735) | ||
| + | ** Which in its own right is stronger than the leopard's APFSDS (DM23) | ||
| + | ** Strongest 105 mm APFSDS in-game (Type 93) | ||
| + | |||
| + | With all the additional benefits out of the way, it shouldn't be negated it's still a gen 2 MBT with barely any armor to rely upon other than the strong turret which still will be defeated by most rounds that the Type 74 will face. It is advised to make use of the terrain to your advantage in combination with the hydropneumatic suspension. The stabilizer also allows for the Type 74 to shoot on the move and due lower top speed compared to the Leopard, should be even easier to shoot on the move. | ||
| + | |||
| + | But even though armor isn't the strong suit of the Type 74, it gets an amazing choice of rounds to make use of. Even the strongest tanks should fear a stock Type 74 as it gets the M735 APFSDS, which is usually a tier IV modification for most [[L7A3 (105 mm)| 105 mm L7A3]] carrying tanks, this gives the Type 74 a lot of one shot potential on all its targets without the need to aim towards weak spots. | ||
| + | |||
| + | ''In a nutshell:'' Use the mobility with the cannon's perfection to flank and spank enemies (But if you have to resolve to a frontal attack, the APFSDS still allows for such a playstyle). Wait and hunt for the perfect positions and kill the enemy tanks one by one, while always maintaining a good situational awareness. Patience is the key to success. | ||
=== Modules === | === Modules === | ||
| Line 159: | Line 236: | ||
! colspan="2" | Mobility | ! colspan="2" | Mobility | ||
! Protection | ! Protection | ||
| − | ! colspan=" | + | ! colspan="3" | Firepower |
|- | |- | ||
| I | | I | ||
| + | | Tracks | ||
| | | | ||
| − | | | + | | Parts |
| − | | | + | | Horizontal Drive |
| − | | | + | | Type 75 |
| − | | | + | | M735 |
|- | |- | ||
| II | | II | ||
| − | | | + | | Suspension |
| − | | | + | | Brake System |
| − | | | + | | FPE |
| − | | | + | | Adjustment of Fire |
| + | | Laser rangefinder | ||
| | | | ||
|- | |- | ||
| III | | III | ||
| + | | Filters | ||
| | | | ||
| − | | | + | | Crew Replenishment |
| − | | | + | | Elevation Mechanism |
| − | | | + | | M416 |
| − | | | + | | Smoke grenade |
|- | |- | ||
| IV | | IV | ||
| + | | Transmission | ||
| + | | Engine | ||
| | | | ||
| − | | | + | | Artillery Support |
| − | | | + | | Type 93 |
| − | | | + | | NVD |
| − | |||
|- | |- | ||
|} | |} | ||
| Line 193: | Line 274: | ||
=== Pros and cons === | === Pros and cons === | ||
<!-- ''Summarise and briefly evaluate the vehicle in terms of its characteristics and combat effectiveness. Mark its pros and cons in a bulleted list. Try not to use more than 6 points for each of the characteristics. Avoid using categorical definitions such as "bad", "good" and the like - use substitutions with softer forms such as "inadequate" and "effective".'' --> | <!-- ''Summarise and briefly evaluate the vehicle in terms of its characteristics and combat effectiveness. Mark its pros and cons in a bulleted list. Try not to use more than 6 points for each of the characteristics. Avoid using categorical definitions such as "bad", "good" and the like - use substitutions with softer forms such as "inadequate" and "effective".'' --> | ||
| − | |||
'''Pros:''' | '''Pros:''' | ||
| − | * | + | |
| + | * Same gun and general ammo choices as the NATO tanks | ||
| + | * Gets improved Type 93 APFSDS, which can deal frontally with anything the tank will see from any range | ||
| + | * A little bit more agile than the [[Leopard A1A1]] | ||
| + | * .50 cal machine gun proves useful against SPAAGs, as well as strafing aircraft | ||
| + | * Better frontal armour overall than the Leopards, [[ZSU-57-2]] will have a much harder time defeating it from the front, can also bounce some medium tank APDS | ||
| + | * Hydropneumatic suspension system can give up to -12° of gun depression as well as more compatibility for terrain | ||
'''Cons:''' | '''Cons:''' | ||
| − | * | + | |
| + | * [[hydropneumatic suspension|Hydropneumatic suspension system]] takes time to deploy and undeploy | ||
| + | * Only -5° of gun depression without deploying the suspension | ||
| + | * 53 km/h top speed compared to [[Leopard A1A1]]'s 65 km/h (however, both tanks rarely reach this speed) | ||
== History == | == History == | ||
<!-- ''Describe the history of the creation and combat usage of the vehicle in more detail than in the introduction. If the historical reference turns out to be too long, take it to a separate article, taking a link to the article about the vehicle and adding a block "/History" (example: <nowiki>https://wiki.warthunder.com/(Vehicle-name)/History</nowiki>) and add a link to it here using the <code>main</code> template. Be sure to reference text and sources by using <code><nowiki><ref></ref></nowiki></code>, as well as adding them at the end of the article with <code><nowiki><references /></nowiki></code>. This section may also include the vehicle's dev blog entry (if applicable) and the in-game encyclopedia description (under <code><nowiki>=== In-game description ===</nowiki></code>, also if applicable).'' --> | <!-- ''Describe the history of the creation and combat usage of the vehicle in more detail than in the introduction. If the historical reference turns out to be too long, take it to a separate article, taking a link to the article about the vehicle and adding a block "/History" (example: <nowiki>https://wiki.warthunder.com/(Vehicle-name)/History</nowiki>) and add a link to it here using the <code>main</code> template. Be sure to reference text and sources by using <code><nowiki><ref></ref></nowiki></code>, as well as adding them at the end of the article with <code><nowiki><references /></nowiki></code>. This section may also include the vehicle's dev blog entry (if applicable) and the in-game encyclopedia description (under <code><nowiki>=== In-game description ===</nowiki></code>, also if applicable).'' --> | ||
| − | + | ===Development=== | |
| + | A year after the Japanese Ground Self-Defense Force (JGSDF) issued out their first post-war main battle tank, the [[Type 61]], development started on its successor, recognizing that the Type 61 was already becoming obsolete in terms of the new Soviet tanks being produced such as the [[T-62]]. Working alongside Mitsubishi once more, they looked for a new tank design incorporating many new features introduced in tank technology. This resulted in the tank having the hydropneumatic suspension system from the U.S.-German project MBT-70, a hull shape similar to Germany's [[Leopard I]], and the powerful [[L7A1 (105 mm)|105 mm L7 gun]] for its main armament. Other planned features for the tank was a rotatable commander's cupola and an autoloader system for the main gun. | ||
| + | |||
| + | The first prototype arrived for testing in 1968 as the ''[[STB-1]]''. Modifications to the design started in 1969, which saw the autoloader removed for being too complex and expensive, as well as the removal of a proposed remote-controlled anti-aircraft machine gun for the same reason. The turret design was also elongated for various design purposes. The modified prototype was labelled ''STB-3'' and was delivered in 1971. The final prototype, ''STB-6'', was then delivered in 1973. The tank was then accepted for service in 1974 as the '''Type 74''' tank. Production would start in September 1975 all the way to 1989, producing 893 tanks. | ||
| + | |||
| + | ===Service=== | ||
| + | Due to the defensive nature of the JSDF and the absence of any hostility rising out of the Cold War, the Type 74 spent its service life in the JGSDF with no battle service. During its service life however, it was upgraded with new hardware such as infra-red imagers for night fighting and a laser rangefinder for the commander. Despite all that, the Type 74 was generally outdated in terms of specifications even before entering service, as second-generation main battle tanks like the [[Chieftain Mk 3|Chieftain]] and [[T-72A|T-72]] outclass it and development for third-generation main battle tanks like the Leopard 2 and [[M1 Abrams]] were already underway. | ||
| + | |||
| + | The tank was to be replaced by the newer [[Type 90]] main battle tank, but the collapse of the Soviet Union and the official end of the Cold War caused the replacement program to be halted. Today, the Type 74 still sees limited service in Japan and it was reported that 700 units were still in use in 2006. | ||
== Media == | == Media == | ||
<!-- ''Excellent additions to the article would be video guides, screenshots from the game, and photos.'' --> | <!-- ''Excellent additions to the article would be video guides, screenshots from the game, and photos.'' --> | ||
| − | + | ||
| + | ;Skins | ||
| + | * [https://live.warthunder.com/feed/camouflages/?vehicleCountry=japan&vehicleType=tank&vehicleClass=medium_tank&vehicle=jp_type_74 Skins and camouflages for the {{PAGENAME}} from live.warthunder.com.] | ||
| + | |||
| + | ;Videos | ||
| + | {{Youtube-gallery|lFnDj29Pw6U|'''Type 74 MBT Super Unicorn Review''' - ''Many Miles Away''<br>(Coarse language present)|tmKtl0WGdxA|'''Type 74 tanks in a public demonstration - 2014''' - ''JP‑SWAT''|C1HCuRbl9lw|'''Real Sound Recording: Type 74 Edition''' - ''DMM GAMES Official Channel''|TZEt-V6V2WQ|'''JGSDF Type 74: 360° Video''' - ''DMM GAMES Official Channel''}} | ||
== See also == | == See also == | ||
| Line 213: | Line 315: | ||
* ''reference to the series of the vehicles;'' | * ''reference to the series of the vehicles;'' | ||
* ''links to approximate analogues of other nations and research trees.'' --> | * ''links to approximate analogues of other nations and research trees.'' --> | ||
| − | + | ||
| − | * | + | ;Related Development |
| − | * | + | |
| + | * [[STB-1]] - <small>(Prototype Stage)</small> | ||
| + | * [[Type 74]] | ||
| + | * [[Type 74G]] - <small>(Improved ({{Annotation|改|Kai}}) variant with thermal and armor skirts)</small> | ||
| + | |||
| + | ;Other vehicles of similar configuration and role | ||
| + | |||
| + | * [[Leopard A1A1]] | ||
| + | * [[AMX-30 Super]] | ||
== External links == | == External links == | ||
| − | |||
| − | |||
| − | |||
''Paste links to sources and external resources, such as:'' | ''Paste links to sources and external resources, such as:'' | ||
* ''topic on the official game forum;'' | * ''topic on the official game forum;'' | ||
| + | * ''encyclopedia page on the tank;'' | ||
* ''other literature.'' | * ''other literature.'' | ||
{{Japan medium tanks}} | {{Japan medium tanks}} | ||
Revision as of 17:48, 17 November 2020
Contents
Description
.jpg)
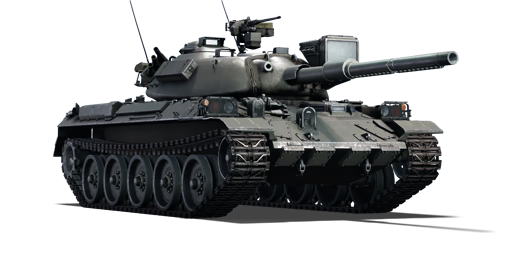
The Type 74 (F) is a rank VI Japanese medium tank
with a battle rating of 9.0 (AB/RB/SB). It was introduced in Update "New Power".
General info
Survivability and armour
Armour type:
- Rolled homogeneous armour
- Cast homogeneous armour (Gun mantlet)
| Armour | Front (Slope angle) | Sides | Rear | Roof |
|---|---|---|---|---|
| Hull | 40 mm (74°), 80 mm (65°) Front glacis 80 mm (57°) Lower glacis |
35 mm (44°) Top 30 mm, 10 mm (55-56°) Bottom |
20 mm Top 25 mm (47-48°) Bottom |
25 mm |
| Turret | 132 mm (27-53°) Turret front 200 mm (34-73°) , 150 + 170 mm (0-44°) Gun mantlet |
132 mm (5-57°) Front 67 mm (37-47°) Rear |
37 mm (17-39°) | 67 mm Front 37 mm Rear |
| Cupola | 80 mm | 80 mm | ||
Notes:
- Suspension wheels and tracks are both 20 mm thick.
- Has additional 10 mm mounting plates scattered on the front hull
- The Type 74's hydropneumatic suspension means it could vary the sloped angle of its armour towards the enemy.
- Hull roof is rated to be 25 mm effective against HE.
As with most medium tanks of the rank, the hull of the Type 74 (F) is only capable of stopping some autocannon fire and has very vulnerable sides, however, the turret armour of the Type 74 (F) is closer to US and British turret armour level. While it's unlikely to stop most APFSDS, it is very likely to deflect stray APDS and APHE. Light tanks will likely have to get close and personal to penetrate it, as penetrating cupola even with APDS belt is a challenge due to its size.
The advantage can be kept even when creeping onto the enemy high ground by using hydropneumatic suspension before driving uphill to not allow the enemy to fire at the roof. In rare cases, the tank can "duck" behind cover to hide at least a portion of the turret from enemy fire.
Mobility
| Game Mode | Max Speed (km/h) | Weight (tons) | Engine power (horsepower) | Power-to-weight ratio (hp/ton) | |||
|---|---|---|---|---|---|---|---|
| Forward | Reverse | Stock | Upgraded | Stock | Upgraded | ||
| Arcade | 59 | 9 | 38 | 1116 | 1,660 | 29.37 | 43.68 |
| Realistic | 54 | 8 | 637 | 870 | 16.76 | 22.89 | |
Armaments
Main armament
| 105 mm L7A3 | Turret rotation speed (°/s) | Reloading rate (seconds) | |||||||||||
|---|---|---|---|---|---|---|---|---|---|---|---|---|---|
| Mode | Capacity | Vertical | Horizontal | Stabilizer | Stock | Upgraded | Full | Expert | Aced | Stock | Full | Expert | Aced |
| Arcade | 50 | -6°/+9° | ±180° | Two-plane | 22.8 | 38.1 | 38.4 | 42.5 | 45.18 | 8.7 | 7.7 | 7.1 | 6.7 |
| Realistic | 14.3 | 20.3 | 20.4 | 22.6 | 24.0 | ||||||||
While the 105 mm gun is relatively equal to one of other nations, the ammunition and optics of the Type 74 (F) are exceptional. It has all the same shell types of NATO tanks. The Type 74 (F) also has a laser rangefinder, which makes it really easy to check aim in RB, compared to tanks it fights in down-tiers and sometimes even in up-tier. The gun depression is the only real disadvantage, forcing operator to use hydropneumatic suspension. Main issue is that if chassis got damaged while tank was shifting, it will refuse to work and tank might get stuck in awkward pose, being unable to aim at opponents, however usually enemies aim to kill instead of just disabling the Type 74 (F).
Ammunition
| Penetration statistics | |||||||
|---|---|---|---|---|---|---|---|
| Ammunition | Type of warhead |
Penetration @ 0° Angle of Attack (mm) | |||||
| 10 m | 100 m | 500 m | 1,000 m | 1,500 m | 2,000 m | ||
| Type 91 | HEATFS | 400 | 400 | 400 | 400 | 400 | 400 |
| Type 75 | HESH | 127 | 127 | 127 | 127 | 127 | 127 |
| M735 | APFSDS | 353 | 350 | 342 | 333 | 322 | 312 |
| Type 93 | APFSDS | 405 | 403 | 396 | 388 | 378 | 370 |
| Shell details | |||||||||
|---|---|---|---|---|---|---|---|---|---|
| Ammunition | Type of warhead |
Velocity (m/s) |
Projectile Mass (kg) |
Fuse delay (m) |
Fuse sensitivity (mm) |
Explosive Mass (TNT equivalent) (g) |
Ricochet | ||
| 0% | 50% | 100% | |||||||
| Type 91 | HEATFS | 1,150 | 10.5 | 0.0 | 0.1 | 1,270 | 65° | 72° | 75° |
| Type 75 | HESH | 760 | 10.8 | 0.4 | 0.1 | 2,700 | 73° | 77° | 80° |
| M735 | APFSDS | 1,501 | 3.7 | N/A | N/A | N/A | 76° | 77° | 78° |
| Type 93 | APFSDS | 1,501 | 3.4 | N/A | N/A | N/A | 78° | 80° | 81° |
| Smoke shell characteristics | ||||||
|---|---|---|---|---|---|---|
| Ammunition | Velocity (m/s) |
Projectile Mass (kg) |
Screen radius (m) |
Screen deploy time (s) |
Screen hold time (s) |
Explosive Mass (TNT equivalent) (g) |
| M416 | 730 | 11.4 | 20 | 5 | 25 | 50 |
Ammo racks
| Full ammo |
1st rack empty |
2nd rack empty |
3rd rack empty |
Visual discrepancy |
|---|---|---|---|---|
| 50 | 16 (+34) | 7 (+43) | 1 (+49) | No |
- Racks 2 and 3 are first stage ammo racks. They total 15 shells and get filled first when loading up the tank.
- These racks are also emptied early: the rack depletion order at full capacity is: 3 - 2 - 1.
- To go into battle with the frontal ammo rack empty, pack 16 (+34) shells, the rack depletion order will then be 3 - 2.
Optics and night vision
| Type 74 (F) Optics | ||||||
|---|---|---|---|---|---|---|
| Type of optic | Magnification | Night Vision Devices | ||||
| Image Intensifier | Thermal Imager Resolution |
Notes | ||||
| Resolution | Light Mult | Noise Level | ||||
| Gunner's Sight | X8 - X16 | 800X600 | 8.0 | High | Not Fitted | Image intensifier unlocked by "NVD" modification (tier 4) |
| Commander's View | X6 | 800X600 | 8.0 | High | Not Fitted | Image intensifier unlocked by "NVD" modification (tier 4) |
| Driver's View | X1 / 3PV | 800X600 | 5.0 | High | Not Fitted | Image intensifier unlocked by "NVD" modification (tier 4) |
Machine guns
| 12.7 mm M2HB | ||||
|---|---|---|---|---|
| Mount | Capacity (Belt capacity) |
Rate of fire (shots/minute) |
Vertical guidance |
Horizontal guidance |
| Pintle | 1,000 (200) | 576 | -10°/+40° | ±120° |
| 7.62 mm Type 74 | ||||
|---|---|---|---|---|
| Mount | Capacity (Belt capacity) |
Rate of fire (shots/minute) |
Vertical guidance |
Horizontal guidance |
| Coaxial | 5,500 (250) | 500 | N/A | N/A |
While it's not recommended, it's still possible to use 12.7 mm to fight light tanks like AUBL/74 HVG or Rooikat Mk.1D and most SPAA tanks at <100 m range.
Do not charge them with just the MG, especially at long range, as even poorly armored rank V light tanks can survive frontal MG fire long enough to disarm and explode Type 74 - let them come to you, hit them with the main gun and ensure they never move again by firing at their sides or flat parts, while hiding yours.
Any melee oriented light tanks like BMP-2 or Warrior with add-on armour will have enough armour to absorb the MG fire and will greet Type 74 back with point blank ATGM attack, which machine guns will be unable to stop at such range.
Usage in battles
As the Type 74 is very comparable to the Leopard 1 Series, especially the Leopard A1A1, it is recommended to play them in the same fashion as such. In a Hit & Run tactic.
The additional benefits of the Type 74 over the Leopard A1A1 are:
- A top mounted .50 which can be used to deal with soft targets swiftly or damage gun barrels or track opponent tanks.
- Hydropneumatic suspension to:
- Increase gun depression or elevation.
- Improve traverse rate off- and on road.
- Could vary the sloped angle of its armour towards the enemy.
- Stronger turret armor
- Night vision spotlight
- Stock APFSDS (M735)
- Which in its own right is stronger than the leopard's APFSDS (DM23)
- Strongest 105 mm APFSDS in-game (Type 93)
With all the additional benefits out of the way, it shouldn't be negated it's still a gen 2 MBT with barely any armor to rely upon other than the strong turret which still will be defeated by most rounds that the Type 74 will face. It is advised to make use of the terrain to your advantage in combination with the hydropneumatic suspension. The stabilizer also allows for the Type 74 to shoot on the move and due lower top speed compared to the Leopard, should be even easier to shoot on the move.
But even though armor isn't the strong suit of the Type 74, it gets an amazing choice of rounds to make use of. Even the strongest tanks should fear a stock Type 74 as it gets the M735 APFSDS, which is usually a tier IV modification for most 105 mm L7A3 carrying tanks, this gives the Type 74 a lot of one shot potential on all its targets without the need to aim towards weak spots.
In a nutshell: Use the mobility with the cannon's perfection to flank and spank enemies (But if you have to resolve to a frontal attack, the APFSDS still allows for such a playstyle). Wait and hunt for the perfect positions and kill the enemy tanks one by one, while always maintaining a good situational awareness. Patience is the key to success.
Modules
| Tier | Mobility | Protection | Firepower | |||
|---|---|---|---|---|---|---|
| I | Tracks | Parts | Horizontal Drive | Type 75 | M735 | |
| II | Suspension | Brake System | FPE | Adjustment of Fire | Laser rangefinder | |
| III | Filters | Crew Replenishment | Elevation Mechanism | M416 | Smoke grenade | |
| IV | Transmission | Engine | Artillery Support | Type 93 | NVD | |
Pros and cons
Pros:
- Same gun and general ammo choices as the NATO tanks
- Gets improved Type 93 APFSDS, which can deal frontally with anything the tank will see from any range
- A little bit more agile than the Leopard A1A1
- .50 cal machine gun proves useful against SPAAGs, as well as strafing aircraft
- Better frontal armour overall than the Leopards, ZSU-57-2 will have a much harder time defeating it from the front, can also bounce some medium tank APDS
- Hydropneumatic suspension system can give up to -12° of gun depression as well as more compatibility for terrain
Cons:
- Hydropneumatic suspension system takes time to deploy and undeploy
- Only -5° of gun depression without deploying the suspension
- 53 km/h top speed compared to Leopard A1A1's 65 km/h (however, both tanks rarely reach this speed)
History
Development
A year after the Japanese Ground Self-Defense Force (JGSDF) issued out their first post-war main battle tank, the Type 61, development started on its successor, recognizing that the Type 61 was already becoming obsolete in terms of the new Soviet tanks being produced such as the T-62. Working alongside Mitsubishi once more, they looked for a new tank design incorporating many new features introduced in tank technology. This resulted in the tank having the hydropneumatic suspension system from the U.S.-German project MBT-70, a hull shape similar to Germany's Leopard I, and the powerful 105 mm L7 gun for its main armament. Other planned features for the tank was a rotatable commander's cupola and an autoloader system for the main gun.
The first prototype arrived for testing in 1968 as the STB-1. Modifications to the design started in 1969, which saw the autoloader removed for being too complex and expensive, as well as the removal of a proposed remote-controlled anti-aircraft machine gun for the same reason. The turret design was also elongated for various design purposes. The modified prototype was labelled STB-3 and was delivered in 1971. The final prototype, STB-6, was then delivered in 1973. The tank was then accepted for service in 1974 as the Type 74 tank. Production would start in September 1975 all the way to 1989, producing 893 tanks.
Service
Due to the defensive nature of the JSDF and the absence of any hostility rising out of the Cold War, the Type 74 spent its service life in the JGSDF with no battle service. During its service life however, it was upgraded with new hardware such as infra-red imagers for night fighting and a laser rangefinder for the commander. Despite all that, the Type 74 was generally outdated in terms of specifications even before entering service, as second-generation main battle tanks like the Chieftain and T-72 outclass it and development for third-generation main battle tanks like the Leopard 2 and M1 Abrams were already underway.
The tank was to be replaced by the newer Type 90 main battle tank, but the collapse of the Soviet Union and the official end of the Cold War caused the replacement program to be halted. Today, the Type 74 still sees limited service in Japan and it was reported that 700 units were still in use in 2006.
Media
- Skins
- Videos
(Coarse language present)
See also
- Related Development
- Other vehicles of similar configuration and role
External links
Paste links to sources and external resources, such as:
- topic on the official game forum;
- encyclopedia page on the tank;
- other literature.
| Japan medium tanks | |
|---|---|
| Type 97 | Chi-Ha · Chi-Ha Kai · Chi-Ha Kai TD · Chi-Ha Short Gun |
| Type 1 | Chi-He · Chi-He (5th Regiment) · Ho-I |
| Type 3 | Chi-Nu · Chi-Nu II |
| Type 4 | Chi-To · Chi-To Late |
| Type 5 | Chi-Ri II |
| Type 61 MBT | ST-A1* · ST-A2* · ST-A3* · Type 61 |
| Type 74 MBT | ST-B2* · Type 74 (C) · Type 74 (E) · Type 74 (F) · Type 74 (G) |
| Type 90 MBT | Type 90 · Type 90 (B) · Type 90 (B) "Fuji" |
| Type 10 MBT | TKX (P)* · TKX* · Type 10 |
| Other | Ka-Chi |
| USA | ▅M4A3 (76) W · ▅M47 |
| *Prototype | |

.png)