Difference between revisions of "Type 87 RCV"
(Edits) (Tag: Visual edit) |
|||
| Line 12: | Line 12: | ||
{{Specs-Tank-Armour}} | {{Specs-Tank-Armour}} | ||
<!-- ''Describe armour protection. Note the most well protected and key weak areas. Appreciate the layout of modules as well as the number and location of crew members. Is the level of armour protection sufficient, is the placement of modules helpful for survival in combat? If necessary use a visual template to indicate the most secure and weak zones of the armour.'' The text within these arrows are not to be deleted --> | <!-- ''Describe armour protection. Note the most well protected and key weak areas. Appreciate the layout of modules as well as the number and location of crew members. Is the level of armour protection sufficient, is the placement of modules helpful for survival in combat? If necessary use a visual template to indicate the most secure and weak zones of the armour.'' The text within these arrows are not to be deleted --> | ||
| − | + | Most of the armour will be the lack of armour, most of the vehicle is covered by 10 mm with frontally having some plates at 20 mm protection. It will be easy to be penalized by machine gun fire if spotted but if the bullets / shells hit the in empty spots from the side the shells will go clean through without any damage to crew or components. | |
'''Armour type:''' <!-- The types of armour present on the vehicle and their general locations --> | '''Armour type:''' <!-- The types of armour present on the vehicle and their general locations --> | ||
| Line 22: | Line 22: | ||
! Armour !! Front (Slope angle) !! Sides !! Rear !! Roof | ! Armour !! Front (Slope angle) !! Sides !! Rear !! Roof | ||
|- | |- | ||
| − | | Hull || | + | | Hull || 10 mm (68°) ''Upper glacis'' |
| + | 20 mm (31-66°) ''Lower glacis'' | ||
| + | | 10 mm (10°) ''Top'' <br>10 mm (0°) ''Bottom'' || 10 mm (8°) || 10 mm | ||
|- | |- | ||
| − | | Turret || | + | | Turret || 20 mm || 10 mm || 4 + 10 mm || 10 mm |
|- | |- | ||
| − | | Cupola || | + | | Cupola || colspan="4" | 10 mm |
|- | |- | ||
|} | |} | ||
| Line 32: | Line 34: | ||
'''Notes:''' <!-- Any additional notes which the user needs to be aware of --> | '''Notes:''' <!-- Any additional notes which the user needs to be aware of --> | ||
<!-- Example: * Suspension wheels are 20 mm thick, tracks are 30 mm thick, and torsion bars are 60 mm thick. --> | <!-- Example: * Suspension wheels are 20 mm thick, tracks are 30 mm thick, and torsion bars are 60 mm thick. --> | ||
| + | * Wheels are 10 mm thick | ||
| + | * Has some external modules like fuel cans, mud flaps & optics all at 4 mm thick | ||
| + | * Radiators are 5 mm thick | ||
=== Mobility === | === Mobility === | ||
{{Specs-Tank-Mobility}} | {{Specs-Tank-Mobility}} | ||
<!-- ''Write about the mobility of the ground vehicle. Estimate the specific power and manoeuvrability, as well as the maximum speed forwards and backwards.'' The text within these arrows are not to be deleted --> | <!-- ''Write about the mobility of the ground vehicle. Estimate the specific power and manoeuvrability, as well as the maximum speed forwards and backwards.'' The text within these arrows are not to be deleted --> | ||
| − | + | As a wheeled recon vehicle it gets places rather fast especially when keeping on roads allowing for easy flanking and getting on vantage points to scout out the enemy team.{{tankMobility}} | |
| − | |||
| − | {{tankMobility}} | ||
=== Modifications and economy === | === Modifications and economy === | ||
| Line 48: | Line 51: | ||
{{Specs-Tank-Weapon|1}} | {{Specs-Tank-Weapon|1}} | ||
<!-- ''Give the reader information about the characteristics of the main gun. Assess its effectiveness in a battle based on the reloading speed, ballistics and the power of shells. Do not forget about the flexibility of the fire, that is how quickly the cannon can be aimed at the target, open fire on it and aim at another enemy. Add a link to the main article on the gun: <code><nowiki>{{main|Name of the weapon}}</nowiki></code>. Describe in general terms the ammunition available for the main gun. Give advice on how to use them and how to fill the ammunition storage.'' The text within these arrows are not to be deleted --> | <!-- ''Give the reader information about the characteristics of the main gun. Assess its effectiveness in a battle based on the reloading speed, ballistics and the power of shells. Do not forget about the flexibility of the fire, that is how quickly the cannon can be aimed at the target, open fire on it and aim at another enemy. Add a link to the main article on the gun: <code><nowiki>{{main|Name of the weapon}}</nowiki></code>. Describe in general terms the ammunition available for the main gun. Give advice on how to use them and how to fill the ammunition storage.'' The text within these arrows are not to be deleted --> | ||
| − | {{main|Oerlikon KBA B02 (25 mm)}} | + | {{main|Oerlikon KBA B02 (25 mm)}}With the armament the {{PAGENAME}}gets, its best suitable as a support vehicle that can deal with lightly armoured vehicles and low flying aircraft. Once the APFSDS belt has been unlocked it can deal with most MBTs it faces by shooting out critical components one by one as this subcalibre out a 25 mm will have barely any spalling effect. |
| − | |||
| − | |||
{| class="wikitable" style="text-align:center" width="100%" | {| class="wikitable" style="text-align:center" width="100%" | ||
| Line 61: | Line 62: | ||
|- | |- | ||
! ''Arcade'' | ! ''Arcade'' | ||
| − | | rowspan="2" | | + | | rowspan="2" | 400 (100) || rowspan="2" | 560 || rowspan="2" | -10°/45° || rowspan="2" | ±180° || rowspan="2" | No || 57.1 || __._ || __._ || __._ || __._ || rowspan="2" | 10.4 || rowspan="2" | _.__ || rowspan="2" | _.__ || rowspan="2" | _.__ |
|- | |- | ||
! ''Realistic'' | ! ''Realistic'' | ||
| − | | | + | | 35.7 || __._ || __._ || __._ || __._ |
|- | |- | ||
|} | |} | ||
==== Ammunition ==== | ==== Ammunition ==== | ||
| + | |||
| + | *'''Default:''' {{Annotation|APDS|Armor-Piercing Discarding Sabot}}{{-}}{{Annotation|HEI-T|High-explosive Incendiary Tracer}}{{-}}{{Annotation|HEI-T|High-explosive Incendiary Tracer}} - The standard belt that can fulfill both roles (anti-air and lightly armoured vehicles) but weaker against ground targets. | ||
| + | *'''M792:''' {{Annotation|HEI-T|High-explosive Incendiary Tracer}} - This belt is adapted for targeting aircraft with its high-explosive shells. | ||
| + | *'''M791:''' {{Annotation|APDS|Armor-Piercing Discarding Sabot}} - This belt is adapted for targeting lightly armoured vehicles with its armour-piercing rounds. | ||
| + | *'''PMB 09:''' {{Annotation|APFSDS|Armor-Piercing Fin-Stabilized Discarding Sabot}} - This belt is adapted for targeting medium armoured vehicles with its armour-piercing fin-stabilized rounds. | ||
| + | |||
{| class="wikitable sortable" style="text-align:center" width="100%" | {| class="wikitable sortable" style="text-align:center" width="100%" | ||
! colspan="7" | Penetration statistics | ! colspan="7" | Penetration statistics | ||
| Line 77: | Line 84: | ||
! 10 m !! 100 m !! 500 m !! 1,000 m !! 1,500 m !! 2,000 m | ! 10 m !! 100 m !! 500 m !! 1,000 m !! 1,500 m !! 2,000 m | ||
|- | |- | ||
| − | | | + | |Default |
| + | |80 | ||
| + | |79 | ||
| + | |73 | ||
| + | |67 | ||
| + | |61 | ||
| + | |55 | ||
| + | |- | ||
| + | | M792 || 3 || 3 || 3 || 3 || 3 || 3 | ||
| + | |- | ||
| + | |M791 | ||
| + | |80 | ||
| + | |79 | ||
| + | |73 | ||
| + | |67 | ||
| + | |61 | ||
| + | |55 | ||
| + | |- | ||
| + | |PMB 09 | ||
| + | |92 | ||
| + | |90 | ||
| + | |83 | ||
| + | |75 | ||
| + | |62 | ||
| + | |58 | ||
|- | |- | ||
|} | |} | ||
| Line 83: | Line 114: | ||
! colspan="10" | Belt details | ! colspan="10" | Belt details | ||
|- | |- | ||
| − | ! rowspan="2" data-sort-type="text" | | + | ! rowspan="2" data-sort-type="text" | Shell |
! rowspan="2" | Type of<br>warhead | ! rowspan="2" | Type of<br>warhead | ||
! rowspan="2" | Velocity<br>(m/s) | ! rowspan="2" | Velocity<br>(m/s) | ||
| Line 94: | Line 125: | ||
! 0% !! 50% !! 100% | ! 0% !! 50% !! 100% | ||
|- | |- | ||
| − | | | + | | M792 || HEI-T || 1100 || 0.19 || N/A || 0.1 || 54.4 || 79° || 80° || 81° |
| + | |- | ||
| + | |M791 | ||
| + | |APDS | ||
| + | |1335 | ||
| + | |0.13 | ||
| + | |N/A | ||
| + | |N/A | ||
| + | |N/A | ||
| + | |75° | ||
| + | |78° | ||
| + | |80° | ||
| + | |- | ||
| + | |PMB 09 | ||
| + | |APFSDS | ||
| + | |1385 | ||
| + | |0.1 | ||
| + | |N/A | ||
| + | |N/A | ||
| + | |N/A | ||
| + | |78° | ||
| + | |80° | ||
| + | |81° | ||
|- | |- | ||
|} | |} | ||
| Line 108: | Line 161: | ||
! 3rd<br>rack empty | ! 3rd<br>rack empty | ||
! 4th<br>rack empty | ! 4th<br>rack empty | ||
| − | |||
| − | |||
! Visual<br>discrepancy | ! Visual<br>discrepancy | ||
|- | |- | ||
| − | | ''' | + | | '''4''' || 4 ''(+0)'' || 3 ''(+1)'' || 2 ''(+2)'' || 1 ''(+3)'' || Yes |
|- | |- | ||
|} | |} | ||
| Line 120: | Line 171: | ||
<!-- ''Offensive and anti-aircraft machine guns not only allow you to fight some aircraft but also are effective against lightly armoured vehicles. Evaluate machine guns and give recommendations on its use.'' The text within these arrows are not to be deleted --> | <!-- ''Offensive and anti-aircraft machine guns not only allow you to fight some aircraft but also are effective against lightly armoured vehicles. Evaluate machine guns and give recommendations on its use.'' The text within these arrows are not to be deleted --> | ||
{{main|Type 74 (7.62 mm)}} | {{main|Type 74 (7.62 mm)}} | ||
| − | |||
| − | |||
{| class="wikitable" style="text-align:center" width="50%" | {| class="wikitable" style="text-align:center" width="50%" | ||
| Line 129: | Line 178: | ||
! Mount !! Capacity (Belt) !! Fire rate !! Vertical !! Horizontal | ! Mount !! Capacity (Belt) !! Fire rate !! Vertical !! Horizontal | ||
|- | |- | ||
| − | | | | + | | Coaxial |
| + | | 4000 (250) || 500 || N/A || N/A | ||
|- | |- | ||
|} | |} | ||
| Line 135: | Line 185: | ||
== Usage in battles == | == Usage in battles == | ||
<!-- ''Describe the tactics of playing in the vehicle, the features of using vehicles in the team and advice on tactics. Refrain from creating a "guide" - do not impose a single point of view but instead give the reader food for thought. Describe the most dangerous enemies and give recommendations on fighting them. If necessary, note the specifics of the game in different modes (AB, RB, SB).'' The text within these arrows are not to be deleted --> | <!-- ''Describe the tactics of playing in the vehicle, the features of using vehicles in the team and advice on tactics. Refrain from creating a "guide" - do not impose a single point of view but instead give the reader food for thought. Describe the most dangerous enemies and give recommendations on fighting them. If necessary, note the specifics of the game in different modes (AB, RB, SB).'' The text within these arrows are not to be deleted --> | ||
| − | ' | + | As a wheeled reconnaissance vehicle with only a 25 mm auto cannon to use, it's best played in its intended role, spotting the enemy team, using its fast manoeuvrability to flank and shoot down low flying aircraft. It is best compared to the [[R3 T20 FA-HS]] with the benefits that a light tank gets, scouting and reducing SP for aircraft spawns. |
=== Pros and cons === | === Pros and cons === | ||
| − | <!-- ''Summarise and briefly evaluate the vehicle in terms of its characteristics and combat effectiveness. Mark its pros and cons in a bulleted list. Try not to use more than 6 points for each of the characteristics. Avoid using categorical definitions such as "bad", "good" and the like - use substitutions with softer forms such as "inadequate" and "effective".'' The text within these arrows are not to be deleted --> | + | <!-- ''Summarise and briefly evaluate the vehicle in terms of its characteristics and combat effectiveness. Mark its pros and cons in a bulleted list. Try not to use more than 6 points for each of the characteristics. Avoid using categorical definitions such as "bad", "good" and the like - use substitutions with softer forms such as "inadequate" and "effective".'' The text within these arrows are not to be deleted -->'''Pros:''' |
| − | '' | + | |
| + | * From the side on: | ||
| + | ** Crew spaced out enough to not die in a single shot | ||
| + | ** Because of light armour able to take shells without much damage from spall | ||
| + | * Powerful PBM 09 APFSDS round | ||
| + | ** High penetration, enough to penetrate many vehicles up to 500 - 1000 m. | ||
| + | ** High muzzle velocity, requiring little lead and little shell drop for engaging targets at range. | ||
| + | ** Decent rate of fire | ||
| + | * Great mobility | ||
| + | ** Able to reach 100 km/h on roads with ease | ||
| + | ** Fast enough to reach 50 km/h off-road | ||
| − | |||
* | * | ||
'''Cons:''' | '''Cons:''' | ||
| + | |||
| + | * Relatively high profile for a recon vehicle | ||
| + | * High chance of getting once shot frontally | ||
| + | * Default belt leaves much to desire | ||
| + | * Very lightly armoured | ||
| + | * Only 2 reverse gears making it to -20 km/h | ||
| + | |||
* | * | ||
| Line 160: | Line 226: | ||
* ''links to approximate analogues of other nations and research trees.'' --> | * ''links to approximate analogues of other nations and research trees.'' --> | ||
''Links to the articles on the War Thunder Wiki that you think will be useful for the reader, for example:'' | ''Links to the articles on the War Thunder Wiki that you think will be useful for the reader, for example:'' | ||
| + | |||
* ''reference to the series of the vehicles;'' | * ''reference to the series of the vehicles;'' | ||
* ''links to approximate analogues of other nations and research trees.'' | * ''links to approximate analogues of other nations and research trees.'' | ||
| Line 168: | Line 235: | ||
* ''other literature.'' --> | * ''other literature.'' --> | ||
''Paste links to sources and external resources, such as:'' | ''Paste links to sources and external resources, such as:'' | ||
| + | |||
* ''topic on the official game forum;'' | * ''topic on the official game forum;'' | ||
* ''other literature.'' | * ''other literature.'' | ||
Revision as of 19:49, 9 September 2021


Contents
Description
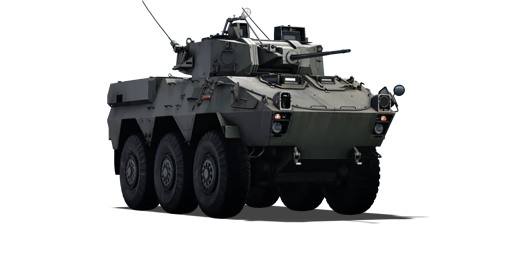
The Type 87 RCV is a rank VI Japanese light tank with a battle rating of 9.0 (AB/RB/SB). It was introduced in Update "Direct Hit".
General info
Survivability and armour
Most of the armour will be the lack of armour, most of the vehicle is covered by 10 mm with frontally having some plates at 20 mm protection. It will be easy to be penalized by machine gun fire if spotted but if the bullets / shells hit the in empty spots from the side the shells will go clean through without any damage to crew or components.
Armour type:
| Armour | Front (Slope angle) | Sides | Rear | Roof |
|---|---|---|---|---|
| Hull | 10 mm (68°) Upper glacis
20 mm (31-66°) Lower glacis |
10 mm (10°) Top 10 mm (0°) Bottom |
10 mm (8°) | 10 mm |
| Turret | 20 mm | 10 mm | 4 + 10 mm | 10 mm |
| Cupola | 10 mm | |||
Notes:
- Wheels are 10 mm thick
- Has some external modules like fuel cans, mud flaps & optics all at 4 mm thick
- Radiators are 5 mm thick
Mobility
As a wheeled recon vehicle it gets places rather fast especially when keeping on roads allowing for easy flanking and getting on vantage points to scout out the enemy team.
| Game Mode | Max Speed (km/h) | Weight (tons) | Engine power (horsepower) | Power-to-weight ratio (hp/ton) | |||
|---|---|---|---|---|---|---|---|
| Forward | Reverse | Stock | Upgraded | Stock | Upgraded | ||
| Arcade | 112 | 13 | 15 | _,___ | 582 | __.__ | 38.8 |
| Realistic | 101 | 12 | _,___ | 305 | __.__ | 20.33 | |
Modifications and economy
| Mobility | Protection | Firepower | ||||||||||||||||||||||||
|---|---|---|---|---|---|---|---|---|---|---|---|---|---|---|---|---|---|---|---|---|---|---|---|---|---|---|
|
|
|
Armaments
Main armament
| 25 mm Oerlikon KBA B02 | Turret rotation speed (°/s) | Reloading rate (seconds) | ||||||||||||
|---|---|---|---|---|---|---|---|---|---|---|---|---|---|---|
| Mode | Capacity (Belt) | Fire rate | Vertical | Horizontal | Stabilizer | Stock | Upgraded | Full | Expert | Aced | Stock | Full | Expert | Aced |
| Arcade | 400 (100) | 560 | -10°/45° | ±180° | No | 57.1 | __._ | __._ | __._ | __._ | 10.4 | _.__ | _.__ | _.__ |
| Realistic | 35.7 | __._ | __._ | __._ | __._ | |||||||||
Ammunition
- Default: APDS · HEI-T · HEI-T - The standard belt that can fulfill both roles (anti-air and lightly armoured vehicles) but weaker against ground targets.
- M792: HEI-T - This belt is adapted for targeting aircraft with its high-explosive shells.
- M791: APDS - This belt is adapted for targeting lightly armoured vehicles with its armour-piercing rounds.
- PMB 09: APFSDS - This belt is adapted for targeting medium armoured vehicles with its armour-piercing fin-stabilized rounds.
| Penetration statistics | ||||||
|---|---|---|---|---|---|---|
| Belt | Penetration @ 0° Angle of Attack (mm) | |||||
| 10 m | 100 m | 500 m | 1,000 m | 1,500 m | 2,000 m | |
| Default | 80 | 79 | 73 | 67 | 61 | 55 |
| M792 | 3 | 3 | 3 | 3 | 3 | 3 |
| M791 | 80 | 79 | 73 | 67 | 61 | 55 |
| PMB 09 | 92 | 90 | 83 | 75 | 62 | 58 |
| Belt details | |||||||||
|---|---|---|---|---|---|---|---|---|---|
| Shell | Type of warhead |
Velocity (m/s) |
Projectile Mass (kg) |
Fuse delay (m) |
Fuse sensitivity (mm) |
Explosive Mass (TNT equivalent) (g) |
Ricochet | ||
| 0% | 50% | 100% | |||||||
| M792 | HEI-T | 1100 | 0.19 | N/A | 0.1 | 54.4 | 79° | 80° | 81° |
| M791 | APDS | 1335 | 0.13 | N/A | N/A | N/A | 75° | 78° | 80° |
| PMB 09 | APFSDS | 1385 | 0.1 | N/A | N/A | N/A | 78° | 80° | 81° |
Ammo racks
| Full ammo |
1st rack empty |
2nd rack empty |
3rd rack empty |
4th rack empty |
Visual discrepancy |
|---|---|---|---|---|---|
| 4 | 4 (+0) | 3 (+1) | 2 (+2) | 1 (+3) | Yes |
Machine guns
| 7.62 mm Type 74 | ||||
|---|---|---|---|---|
| Mount | Capacity (Belt) | Fire rate | Vertical | Horizontal |
| Coaxial | 4000 (250) | 500 | N/A | N/A |
Usage in battles
As a wheeled reconnaissance vehicle with only a 25 mm auto cannon to use, it's best played in its intended role, spotting the enemy team, using its fast manoeuvrability to flank and shoot down low flying aircraft. It is best compared to the R3 T20 FA-HS with the benefits that a light tank gets, scouting and reducing SP for aircraft spawns.
Pros and cons
Pros:
- From the side on:
- Crew spaced out enough to not die in a single shot
- Because of light armour able to take shells without much damage from spall
- Powerful PBM 09 APFSDS round
- High penetration, enough to penetrate many vehicles up to 500 - 1000 m.
- High muzzle velocity, requiring little lead and little shell drop for engaging targets at range.
- Decent rate of fire
- Great mobility
- Able to reach 100 km/h on roads with ease
- Fast enough to reach 50 km/h off-road
Cons:
- Relatively high profile for a recon vehicle
- High chance of getting once shot frontally
- Default belt leaves much to desire
- Very lightly armoured
- Only 2 reverse gears making it to -20 km/h
History
Describe the history of the creation and combat usage of the vehicle in more detail than in the introduction. If the historical reference turns out to be too long, take it to a separate article, taking a link to the article about the vehicle and adding a block "/History" (example: https://wiki.warthunder.com/(Vehicle-name)/History) and add a link to it here using the main template. Be sure to reference text and sources by using <ref></ref>, as well as adding them at the end of the article with <references />. This section may also include the vehicle's dev blog entry (if applicable) and the in-game encyclopedia description (under === In-game description ===, also if applicable).
Media
Excellent additions to the article would be video guides, screenshots from the game, and photos.
See also
Links to the articles on the War Thunder Wiki that you think will be useful for the reader, for example:
- reference to the series of the vehicles;
- links to approximate analogues of other nations and research trees.
External links
Paste links to sources and external resources, such as:
- topic on the official game forum;
- other literature.
| Japan light tanks | |
|---|---|
| Type 89 | I-Go Ko |
| Type 95 | Ha-Go · Ha-Go Commander |
| Type 98 | Ke-Ni |
| Other | Ka-Mi |
| IFV | Type 89 |
| RCV | Type 87 RCV (P) · Type 87 RCV · CTWV RCV |
| MCV | Type 16 (P) · Type 16 (FPS) · Type 16 |
| USA | ▅M24 · ▅M41A1 |
