Difference between pages "Beaufort Mk VIII" and "Bf 109 B-1"
(→Pros and cons) |
(→Pros and cons: Edits) |
||
| Line 1: | Line 1: | ||
| − | {{Specs-Card|code= | + | {{Specs-Card|code=bf-109b_2}} |
| + | {{About | ||
| + | |about=aircraft '''{{PAGENAME}}''' | ||
| + | |usage=other uses | ||
| + | |link=Bf 109 (Family) | ||
| + | }} | ||
== Description == | == Description == | ||
| − | <!-- | + | <!--In the description, the first part should be about the history of and the creation and combat usage of the aircraft, as well as its key features. In the second part, tell the reader about the aircraft in the game. Insert a screenshot of the vehicle, so that if the novice player does not remember the vehicle by name, he will immediately understand what kind of vehicle the article is talking about.--> |
| − | [[File: | + | |
| + | [[File:GarageImage_Bf109B-1L.jpg|420px|thumb|left]] | ||
{{break}} | {{break}} | ||
| − | The '''{{Specs|name}}''' is a rank {{Specs|rank}} | + | The '''{{Specs|name}}''' is a rank {{Specs|rank}} German fighter {{Battle-rating}}. It was introduced in [[Update_1.49_"Weapons_of_Victory"|Update 1.49 (aka 1.70.1945) "Weapons of Victory"]]. The Bf 109 B-1 is the first of the fabled 109s that make up the bulk of the German fighter forces in War Thunder. Seeing combat in the Spanish Civil War, the B-1 allowed the Germans to acquire valuable combat experience and develop the 109s further. |
| − | |||
| − | |||
| − | |||
| − | |||
| − | |||
| − | |||
== General info == | == General info == | ||
| − | === Flight | + | === Flight Performance === |
''Describe how the aircraft behaves in the air. Speed, manoeuvrability, acceleration and allowable loads - these are the most important characteristics of the vehicle.'' | ''Describe how the aircraft behaves in the air. Speed, manoeuvrability, acceleration and allowable loads - these are the most important characteristics of the vehicle.'' | ||
| Line 23: | Line 23: | ||
! colspan="8" | ''Stock'' | ! colspan="8" | ''Stock'' | ||
|- | |- | ||
| − | ! colspan="2" | Max Speed<br>(km/h at | + | ! colspan="2" | Max Speed<br>(km/h at 4,000 m) |
! rowspan="2" | Max altitude<br>(meters) | ! rowspan="2" | Max altitude<br>(meters) | ||
! colspan="2" | Turn time<br>(seconds) | ! colspan="2" | Turn time<br>(seconds) | ||
! colspan="2" | Rate of climb<br>(meters/second) | ! colspan="2" | Rate of climb<br>(meters/second) | ||
| − | ! rowspan="2" | Take-off run<br>(meters) | + | ! rowspan="2" |Take-off run<br>(meters) |
|- | |- | ||
| − | ! AB | + | ! AB |
| + | ! RB | ||
| + | ! AB | ||
| + | ! RB | ||
| + | ! AB | ||
| + | ! RB | ||
|- | |- | ||
| − | | | + | | 438 || 432 || 9,000 || 23.5 || 24.0 || 5.8 || 7.4 || 210 |
|- | |- | ||
! colspan="8" | ''Upgraded'' | ! colspan="8" | ''Upgraded'' | ||
|- | |- | ||
| − | ! colspan="2" | Max Speed<br>(km/h at | + | ! colspan="2" | Max Speed<br>(km/h at 4,000 m) |
| − | ! rowspan="2" | Max altitude | + | ! rowspan="2" |Max altitude (meters) |
| − | ! colspan="2" | Turn time | + | ! colspan="2" | Turn time (seconds) |
! colspan="2" | Rate of climb<br>(meters/second) | ! colspan="2" | Rate of climb<br>(meters/second) | ||
| − | ! rowspan="2" | Take-off run | + | ! rowspan="2" |Take-off run (meters) |
|- | |- | ||
| − | ! AB | + | ! AB |
| + | ! RB | ||
| + | ! AB | ||
| + | ! RB | ||
| + | ! AB | ||
| + | ! RB | ||
|- | |- | ||
| − | | | + | | 491 || 465 || 9,000 || 20.6 || 22.0 || 16.2 || 10.2 || 210 |
|- | |- | ||
|} | |} | ||
| − | ==== Details ==== | + | ====Details==== |
{| class="wikitable" style="text-align:center" | {| class="wikitable" style="text-align:center" | ||
|- | |- | ||
! colspan="5" | Features | ! colspan="5" | Features | ||
|- | |- | ||
| − | ! Combat | + | ! Combat flap |
| + | ! Take-off flap | ||
| + | ! Landing flap | ||
| + | ! Air brakes | ||
| + | ! Arrestor gear | ||
|- | |- | ||
| ✓ || ✓ || ✓ || X || X <!-- ✓ --> | | ✓ || ✓ || ✓ || X || X <!-- ✓ --> | ||
| Line 64: | Line 78: | ||
! rowspan="2" | Wing-break speed<br>(km/h) | ! rowspan="2" | Wing-break speed<br>(km/h) | ||
! rowspan="2" | Gear limit<br>(km/h) | ! rowspan="2" | Gear limit<br>(km/h) | ||
| − | ! rowspan="2" | Combat | + | ! rowspan="2" | Combat flap<br> (km/h) |
! colspan="2" | Max Static G | ! colspan="2" | Max Static G | ||
|- | |- | ||
| − | ! + | + | ! + |
| + | ! - | ||
|- | |- | ||
| − | | | + | | 789 || 320 || 500 || ~27 || ~12 |
|- | |- | ||
|} | |} | ||
| Line 82: | Line 97: | ||
! Radiator<br>(km/h) | ! Radiator<br>(km/h) | ||
|- | |- | ||
| − | | < | + | | < 370 || < 370 || < 420 || > 250 |
|- | |- | ||
|} | |} | ||
| Line 96: | Line 111: | ||
! WEP Engine power | ! WEP Engine power | ||
|- | |- | ||
| − | | 1, | + | | 1,250 m || 670 hp || 704hp |
|- | |- | ||
! colspan="3" | Setting 2 | ! colspan="3" | Setting 2 | ||
| Line 104: | Line 119: | ||
! WEP Engine power | ! WEP Engine power | ||
|- | |- | ||
| − | | 3, | + | | 3,200 m || 600 hp || 660 hp |
| + | |- | ||
| + | <!--! colspan="3" | Setting 3 | ||
| + | |- | ||
| + | ! Optimal altitude | ||
| + | ! 100% Engine power | ||
| + | ! WEP Engine power | ||
|- | |- | ||
| + | | ?,??? m || ?,??? hp || ?,??? hp | ||
| + | |- --> | ||
|} | |} | ||
=== Survivability and armour === | === Survivability and armour === | ||
| − | + | ''Examine the survivability of the aircraft. Note how vulnerable the structure is and how secure the pilot is, whether the fuel tanks are armoured, etc. Describe the armour, if there is any, and also mention the vulnerability of other critical aircraft systems.'' | |
| − | |||
| − | |||
| − | |||
== Armaments == | == Armaments == | ||
| − | === | + | === Offensive armament === |
| − | <!-- | + | <!--Describe the offensive armament of the aircraft, if any. Describe how effective the cannons and machine guns are in a battle, and also what belts or drums are better to use. If there is no offensive weaponry, delete this subsection.'--> |
| − | {{main| | + | {{main|MG 17 (7.92 mm)}} |
| − | The | + | The Bf 109 B-1/L is armed with: |
| − | * | + | * 2 x 7.92 mm MG 17 machine gun, nose-mounted (500 rpg = 1,000 total) |
| − | |||
| − | |||
| − | == | + | == Usage in battles == |
| − | <!-- | + | <!--Describe the tactics of playing in an aircraft, the features of using vehicles in a team and advice on tactics. Refrain from creating a "guide" - do not impose a single point of view, but instead, give the reader food for thought. Examine the most dangerous enemies and give recommendations on fighting them. If necessary, note the specifics of the game in different modes (AB, RB, SB).--> |
| − | + | Against fighters that are able to tank quite a few 7.92 mm, the best option to quickly dispatch an enemy is to aim specifically for the pilot. | |
| − | + | Against bombers, the Bf 109 B-1 performs poorly. When engaging, aim for the engine or pilot. Due to its bigger hit box, the engine is the preferable of the two. This could cause an engine/fuel tank fire, making the task all the easier. Remember that propellers often take some time to 'stop spinning', so don't be misled into firing all you have into a single engine. A few good bursts will do the trick just nicely. Alternate to the second/third/fourth engine once you feel like the previous one had enough. Picking of the gunners might also allow you to stay behind the bomber, littering a certain area/ engine. However, this calls for some good shots and a loss of valuable time if you don't get them in your initial pass. | |
| − | + | ====Specific enemies worth noting==== | |
| − | + | <!--Some concerning vehicles to worry about if playing this plane. (i.e. Japanese fighters will out turn you)--> | |
| − | + | The current (''1.73'') [[Matchmaker]] and [[BR]] systems are unkind to this plane. The Bf 109 B-1 runs the risk of meeting [[Hurricane_(Family)|Hurricanes]], a plane introduced to the [[:Category:Britain_aircraft|RAF]] in 1935 that has a far heavier armament and shorter snap turns. Against better performing enemies, the Bf 109 B-1 is not hopeless, but it will be tough. It is not exactly sturdy and will be quickly stitched to death by heavily armed enemies. Here, maneuverability is key, allowing you to roll out of an incoming attack quickly, setting up overshoots to keep the enemy at bay. A surprising number of players will lose their patience in such moments, making mistakes and thus nullifying their performance advantage. Nearly all planes of superior performance turn worse than a B-1, so if you manage to bleed their speed and pull them to the deck, you will be able to win a turning engagement. However, keep a watchful eye for better turning enemies such as biplanes. | |
| − | == | ||
| − | <!-- | ||
| − | |||
| − | + | ====Counter-tactics==== | |
| + | <!--What to expect, if it would be in command of the enemy and how to counter it. (i.e. They will most likely BnZ, etc.)--> | ||
| + | The Bf 109 B-1 is going to be a rude awakening for those that flock to the 109s due to their historic reputation. While a capable pre-war fighter, it is severely lacking in firepower. Its two [[MG 17 (7.92 mm)|MG 17]]s 7.92 mm are just about adequate when engaging biplanes or [[I-16 type 5|I-16]]s, but lack punch against tougher opponents such as [[Hurricane Mk I/L|Hawker Hurricanes]]. Just about any enemy you might meet has either comparable or better armament. | ||
| − | + | What the plane lacks in firepower, it makes up in maneuverability, with the later trademark Bf 109 energy fighting capabilities displayed. A capable pilot can make this aircraft dance like any Messerschmitt, but it requires discipline, precision and effective use of the two MG 17’s. When engaging planes that are of the Spanish Civil War Era, the B-1 does best by using its speed and superior climb rate to place itself into an advantageous attack position, and then launching one concentrated attack after the other on its target. Remember to always recycle your speed into altitude and back as the fight progresses. Before zoom climbing back up from an attack, remember to extend a little bit to avoid getting picked off from a prop-hang. As you zoom up, check your surroundings to keep good situational awareness. | |
| − | === Manual Engine Control === | + | ===Manual Engine Control=== |
{| class="wikitable" style="text-align:center" | {| class="wikitable" style="text-align:center" | ||
|- | |- | ||
! colspan="7" | MEC elements | ! colspan="7" | MEC elements | ||
|- | |- | ||
| − | ! rowspan="2" | Mixer | + | ! rowspan="2" |Mixer |
| − | ! rowspan="2" | Pitch | + | ! rowspan="2" |Pitch |
| − | ! colspan="3" | Radiator | + | ! colspan="3" |Radiator |
| − | ! rowspan="2" | Supercharger | + | ! rowspan="2" |Supercharger |
| − | ! rowspan="2" | Turbocharger | + | ! rowspan="2" |Turbocharger |
|- | |- | ||
| − | ! Oil | + | ! Oil |
| + | ! Water | ||
| + | ! Type | ||
|- | |- | ||
| − | | Not controllable || | + | | Controllable || rowspan="2" | Not controllable || rowspan="2" | Not controllable || rowspan="2" | Not controllable || rowspan="2" | Separate || rowspan="2" | Not controllable || rowspan="2" | Not controllable |
|- | |- | ||
|} | |} | ||
| − | === Modules === | + | ===Modules=== |
{| class="wikitable" | {| class="wikitable" | ||
! Tier | ! Tier | ||
| − | ! | + | ! Flight performance |
! Survivability | ! Survivability | ||
| − | ! | + | ! Weaponry |
|- | |- | ||
| I | | I | ||
| − | | Fuselage | + | | Fuselage Repair, Radiator |
| − | + | | | |
| − | | | + | | Offensive 7 mm |
| − | | | ||
| − | |||
|- | |- | ||
| II | | II | ||
| − | |||
| Compressor | | Compressor | ||
| Airframe | | Airframe | ||
| − | | | + | | |
| − | |||
|- | |- | ||
| III | | III | ||
| − | | | + | | Wing Repair, Engine |
| − | + | | | |
| − | | | + | | New 7 mm MGs |
| − | | | ||
| − | |||
|- | |- | ||
| IV | | IV | ||
| − | + | | Engine Injection | |
| − | | Engine | ||
| Cover | | Cover | ||
| − | + | | | |
| − | | | ||
|- | |- | ||
|} | |} | ||
| − | |||
| − | |||
=== Pros and cons === | === Pros and cons === | ||
| − | <!-- | + | <!--Summarize and briefly evaluate the vehicle in terms of its characteristics and combat effectiveness. Mark its pros and cons in the bulleted list. Try not to use more than 6 points for each of the characteristics. Avoid using categorical definitions such as "bad", "good" and the like - use substitutions with softer forms such as "inadequate" and "effective".--> |
'''Pros:''' | '''Pros:''' | ||
| − | * | + | * Excellent agility, able to do very sharp turns |
| − | * | + | * Good energy conservation |
| − | * | + | * Very useful during dogfights since it is able to out manouver the oponent |
| − | + | * Has excellent control during slow speed | |
| − | * | ||
'''Cons:''' | '''Cons:''' | ||
| − | * | + | * Not the fastest option at its rank |
| − | + | * Considerably weak armament | |
| − | + | * May be too responsive for some players | |
| − | |||
| − | |||
| − | * | ||
| − | * | ||
== History == | == History == | ||
| − | + | <!--Describe the history of the creation and combat usage of the aircraft in more detail than in the introduction. If the historical reference turns out to be too big, take it to a separate article, taking a link to the article about the vehicle and adding a block "/ History" (example: <nowiki>https://wiki.warthunder.com/(Vehicle-name)/History</nowiki>) and add a link to it here using the <code>main</code> template. Be sure to reference text and sources by using <code><nowiki><ref></nowiki></code>, as well as adding them at the end of the article. This section may also include the vehicle's dev blog entry (if applicable) and the in-game encyclopedia description (under <code><nowiki>=== Encyclopedia Info ===</nowiki></code>, also if applicable).--> | |
| − | + | The Bf 109 B-1 came out of the prototype V series of the 109s to see combat in the Spanish Civil War. While the 109s faced various issues from engine performance/reliability to an obvious lack of 'punch', the experience proved to yield valuable data allowing for design improvement, ensuring the success of later Bf 109 models. | |
| − | |||
| − | The | ||
| − | |||
| − | |||
| − | |||
| − | |||
| − | |||
| − | |||
| − | |||
| − | |||
| − | + | While the B-1 was the only production model of the 109 carrying the 'Berta' designation, later models that saw improvements to the variable pitch carried the unofficial designation of B-2. A B-1/Late did not exist but might be used by War Thunder instead of B-2. | |
| − | + | A notable feature of the Bf 109 B-1 is its massive opening in the cowling. While production models carried a third MG 17 firing out of said cowling, this was nearly always removed after combat trials during the Spanish Civil War. Although the fixed gun was cooled by the air coming in through the hole, it proved unreliable and a detriment to the plane. The War Thunder Bf 109 B-1 does not have this MG 17. | |
== Media == | == Media == | ||
| − | + | ''Excellent additions to the article would be video guides, screenshots from the game, and photos.'' | |
| − | |||
== See also == | == See also == | ||
| − | ''Links to the articles on the War Thunder Wiki that you think will be useful for the reader, for example:'' | + | <!--''Links to the articles on the War Thunder Wiki that you think will be useful for the reader, for example:'' |
| + | * ''reference to the series of the aircraft;'' | ||
| + | * ''links to approximate analogues of other nations and research trees.''--> | ||
| − | * | + | ;Aircraft of comparable role, configuration and era |
| − | * | + | |
| + | * Mitsubishi [[A6M (Family)|A6M]] | ||
| + | * Bell [[P-39 (Family)|P-39]] Airacobra | ||
| + | * Curtiss [[P-36 (Family)|P-36]] | ||
| + | * Curtiss [[P-40 (Family)|P-40]] | ||
| + | * Dewoitine [[D.520]] | ||
| + | * Fiat [[G.55 serie 1|G.55]] | ||
| + | * Focke-Wulf [[Fw 190 (Family)|Fw 190]] | ||
| + | * Grumman [[F4F (Family)|F4F]] Wildcat | ||
| + | * Grumman [[F6F (Family)|F6F]] Hellcat | ||
| + | * Hawker [[Hurricane (Family)|Hurricane]] | ||
| + | * Heinkel [[He 112 (Family)|He 112]] | ||
| + | * [[IAR-81C|IAR-81]] | ||
| + | * Kawasaki [[Ki-61 (Family)|Ki-61]] | ||
| + | * Lavochkin [[LaGG-3 (Family)|LaGG-3]] | ||
| + | * Macchi [[C.202]] | ||
| + | * Macchi [[C.205 serie 1|C.205]] | ||
| + | * Mikoyan-Gurevich [[MiG-3 (Family)|MiG-3]] | ||
| + | * Morane-Saulnier [[M.S.406C1|MS.406]] | ||
| + | * Nakajima [[Ki-43 (Family)|Ki-43]] | ||
| + | * North American [[P-51 (Family)|P-51]] Mustang | ||
| + | * Polikarpov [[I-16 (Family)|I-16]] | ||
| + | * Supermarine [[Spitfire (Family)|Spitfire]] | ||
| + | * Yakovlev [[Yak-1]] | ||
| + | * Yakovlev [[Yak-9]] | ||
== External links == | == External links == | ||
| − | <!-- ''Paste links to sources and external resources, such as:'' | + | <!--''Paste links to sources and external resources, such as:'' |
* ''topic on the official game forum;'' | * ''topic on the official game forum;'' | ||
* ''encyclopedia page on the aircraft;'' | * ''encyclopedia page on the aircraft;'' | ||
| − | * ''other literature.'' --> | + | * ''other literature.''--> |
| − | * [[ | + | * [http://www.messerschmitt-bf109.de/web.php?lang=de&auth=e&name=bf109b&versionscategory=3 "Falcon's Messerschmitt Bf 109 Hangar" Bf 109B subpage] |
| + | * [[Wikipedia:Messerschmitt_Bf_109_variants#Bf_109_A.2FB.2FC.2FD|[Wikipedia<nowiki>]</nowiki> Messerschmitt Bf 109 variants – Bf 109 A/B/C/D]] | ||
| − | {{AirManufacturer | + | {{AirManufacturer BFW}} |
| − | {{ | + | {{Germany fighters}} |
Revision as of 08:13, 27 May 2020
Contents
| This page is about the aircraft Bf 109 B-1. For other uses, see Bf 109 (Family). |
Description

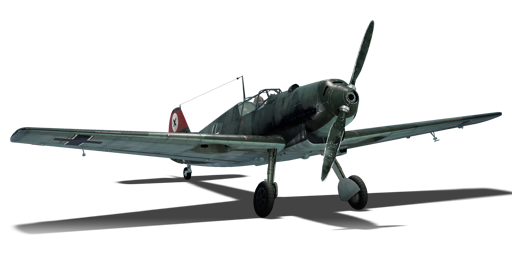
The Bf 109 B-1 Late is a rank I German fighter
with a battle rating of 1.7 (AB) and 1.3 (RB/SB). It was introduced in Update 1.49 (aka 1.70.1945) "Weapons of Victory". The Bf 109 B-1 is the first of the fabled 109s that make up the bulk of the German fighter forces in War Thunder. Seeing combat in the Spanish Civil War, the B-1 allowed the Germans to acquire valuable combat experience and develop the 109s further.
General info
Flight Performance
Describe how the aircraft behaves in the air. Speed, manoeuvrability, acceleration and allowable loads - these are the most important characteristics of the vehicle.
| Characteristics | |||||||
|---|---|---|---|---|---|---|---|
| Stock | |||||||
| Max Speed (km/h at 4,000 m) |
Max altitude (meters) |
Turn time (seconds) |
Rate of climb (meters/second) |
Take-off run (meters) | |||
| AB | RB | AB | RB | AB | RB | ||
| 438 | 432 | 9,000 | 23.5 | 24.0 | 5.8 | 7.4 | 210 |
| Upgraded | |||||||
| Max Speed (km/h at 4,000 m) |
Max altitude (meters) | Turn time (seconds) | Rate of climb (meters/second) |
Take-off run (meters) | |||
| AB | RB | AB | RB | AB | RB | ||
| 491 | 465 | 9,000 | 20.6 | 22.0 | 16.2 | 10.2 | 210 |
Details
| Features | ||||
|---|---|---|---|---|
| Combat flap | Take-off flap | Landing flap | Air brakes | Arrestor gear |
| ✓ | ✓ | ✓ | X | X |
| Limits | ||||
|---|---|---|---|---|
| Wing-break speed (km/h) |
Gear limit (km/h) |
Combat flap (km/h) |
Max Static G | |
| + | - | |||
| 789 | 320 | 500 | ~27 | ~12 |
| Optimal velocities | |||
|---|---|---|---|
| Ailerons (km/h) |
Rudder (km/h) |
Elevators (km/h) |
Radiator (km/h) |
| < 370 | < 370 | < 420 | > 250 |
| Compressor (RB/SB) | ||
|---|---|---|
| Setting 1 | ||
| Optimal altitude | 100% Engine power | WEP Engine power |
| 1,250 m | 670 hp | 704hp |
| Setting 2 | ||
| Optimal altitude | 100% Engine power | WEP Engine power |
| 3,200 m | 600 hp | 660 hp |
Survivability and armour
Examine the survivability of the aircraft. Note how vulnerable the structure is and how secure the pilot is, whether the fuel tanks are armoured, etc. Describe the armour, if there is any, and also mention the vulnerability of other critical aircraft systems.
Armaments
Offensive armament
The Bf 109 B-1/L is armed with:
- 2 x 7.92 mm MG 17 machine gun, nose-mounted (500 rpg = 1,000 total)
Usage in battles
Against fighters that are able to tank quite a few 7.92 mm, the best option to quickly dispatch an enemy is to aim specifically for the pilot.
Against bombers, the Bf 109 B-1 performs poorly. When engaging, aim for the engine or pilot. Due to its bigger hit box, the engine is the preferable of the two. This could cause an engine/fuel tank fire, making the task all the easier. Remember that propellers often take some time to 'stop spinning', so don't be misled into firing all you have into a single engine. A few good bursts will do the trick just nicely. Alternate to the second/third/fourth engine once you feel like the previous one had enough. Picking of the gunners might also allow you to stay behind the bomber, littering a certain area/ engine. However, this calls for some good shots and a loss of valuable time if you don't get them in your initial pass.
Specific enemies worth noting
The current (1.73) Matchmaker and BR systems are unkind to this plane. The Bf 109 B-1 runs the risk of meeting Hurricanes, a plane introduced to the RAF in 1935 that has a far heavier armament and shorter snap turns. Against better performing enemies, the Bf 109 B-1 is not hopeless, but it will be tough. It is not exactly sturdy and will be quickly stitched to death by heavily armed enemies. Here, maneuverability is key, allowing you to roll out of an incoming attack quickly, setting up overshoots to keep the enemy at bay. A surprising number of players will lose their patience in such moments, making mistakes and thus nullifying their performance advantage. Nearly all planes of superior performance turn worse than a B-1, so if you manage to bleed their speed and pull them to the deck, you will be able to win a turning engagement. However, keep a watchful eye for better turning enemies such as biplanes.
Counter-tactics
The Bf 109 B-1 is going to be a rude awakening for those that flock to the 109s due to their historic reputation. While a capable pre-war fighter, it is severely lacking in firepower. Its two MG 17s 7.92 mm are just about adequate when engaging biplanes or I-16s, but lack punch against tougher opponents such as Hawker Hurricanes. Just about any enemy you might meet has either comparable or better armament.
What the plane lacks in firepower, it makes up in maneuverability, with the later trademark Bf 109 energy fighting capabilities displayed. A capable pilot can make this aircraft dance like any Messerschmitt, but it requires discipline, precision and effective use of the two MG 17’s. When engaging planes that are of the Spanish Civil War Era, the B-1 does best by using its speed and superior climb rate to place itself into an advantageous attack position, and then launching one concentrated attack after the other on its target. Remember to always recycle your speed into altitude and back as the fight progresses. Before zoom climbing back up from an attack, remember to extend a little bit to avoid getting picked off from a prop-hang. As you zoom up, check your surroundings to keep good situational awareness.
Manual Engine Control
| MEC elements | ||||||
|---|---|---|---|---|---|---|
| Mixer | Pitch | Radiator | Supercharger | Turbocharger | ||
| Oil | Water | Type | ||||
| Controllable | Not controllable | Not controllable | Not controllable | Separate | Not controllable | Not controllable |
Modules
| Tier | Flight performance | Survivability | Weaponry |
|---|---|---|---|
| I | Fuselage Repair, Radiator | Offensive 7 mm | |
| II | Compressor | Airframe | |
| III | Wing Repair, Engine | New 7 mm MGs | |
| IV | Engine Injection | Cover |
Pros and cons
Pros:
- Excellent agility, able to do very sharp turns
- Good energy conservation
- Very useful during dogfights since it is able to out manouver the oponent
- Has excellent control during slow speed
Cons:
- Not the fastest option at its rank
- Considerably weak armament
- May be too responsive for some players
History
The Bf 109 B-1 came out of the prototype V series of the 109s to see combat in the Spanish Civil War. While the 109s faced various issues from engine performance/reliability to an obvious lack of 'punch', the experience proved to yield valuable data allowing for design improvement, ensuring the success of later Bf 109 models.
While the B-1 was the only production model of the 109 carrying the 'Berta' designation, later models that saw improvements to the variable pitch carried the unofficial designation of B-2. A B-1/Late did not exist but might be used by War Thunder instead of B-2.
A notable feature of the Bf 109 B-1 is its massive opening in the cowling. While production models carried a third MG 17 firing out of said cowling, this was nearly always removed after combat trials during the Spanish Civil War. Although the fixed gun was cooled by the air coming in through the hole, it proved unreliable and a detriment to the plane. The War Thunder Bf 109 B-1 does not have this MG 17.
Media
Excellent additions to the article would be video guides, screenshots from the game, and photos.
See also
- Aircraft of comparable role, configuration and era
- Mitsubishi A6M
- Bell P-39 Airacobra
- Curtiss P-36
- Curtiss P-40
- Dewoitine D.520
- Fiat G.55
- Focke-Wulf Fw 190
- Grumman F4F Wildcat
- Grumman F6F Hellcat
- Hawker Hurricane
- Heinkel He 112
- IAR-81
- Kawasaki Ki-61
- Lavochkin LaGG-3
- Macchi C.202
- Macchi C.205
- Mikoyan-Gurevich MiG-3
- Morane-Saulnier MS.406
- Nakajima Ki-43
- North American P-51 Mustang
- Polikarpov I-16
- Supermarine Spitfire
- Yakovlev Yak-1
- Yakovlev Yak-9
External links
- "Falcon's Messerschmitt Bf 109 Hangar" Bf 109B subpage
- [Wikipedia] Messerschmitt Bf 109 variants – Bf 109 A/B/C/D
| Germany fighters | |
|---|---|
| Heinkel | |
| He 51 | He 51 A-1 · He 51 B-1 · He 51 B-2/H · He 51 C-1 · He 51 C-1/L |
| He 100 | He 100 D-1 |
| He 112 | He 112 A-0 · He 112 B-0 · He 112 B-1/U2 · He 112 B-2/U2 · He 112 V-5 |
| Messerschmitt | |
| Bf 109 (Jumo) | Flegel's Bf 109 A · Bf 109 B-1 · Bf 109 C-1 |
| Bf 109 (DB-601) | Bf 109 E-1 · Bf 109 E-3 · Bf 109 E-4 · Bf 109 E-7/U2 · Bf 109 F-1 · Bf 109 F-2 · Bf 109 F-4 · Bf 109 F-4/trop |
| Bf 109 (DB-605) | Bf 109 G-2/trop · Bf 109 G-2 · Bf 109 G-6 · Bf 109 G-10 · Bf 109 G-14 · Bf 109 K-4 |
| Focke-Wulf | |
| Fw 190 (early) | Fw 190 A-1 · Fw 190 A-4 · Fw 190 A-5 · Fw 190 A-5 · Fw 190 A-5/U2 · Fw 190 A-5/U14 · Fw 190 A-8 · Fw 190 C |
| Fw 190 (late) | Fw 190 D-9 · Fw 190 D-12 · Fw 190 D-13 |
| Ta 152 | Ta 152 C-3 · Ta 152 H-1 |
| Blohm & Voss | |
| BV 155 | BV 155 B-1 |
| Foreign: | |
| USA | ▀P-47D-16-RE · ▀P-47D |
| USSR | ▀La-5FN · ▀Yak-1B |
| Britain | ▀Tempest Mk V |
| Italy | ▀CR.42 · ▀Marcolin's C.R.42 CN · ▀G.50 serie 2 · ▀G.50 AS serie 7 · ▀C. 200 serie 3 · ▀C. 200 serie 7 · ▀C. 202 |
| Finland | ▀Hawk H-75A-2 |
