Difference between pages "SF40 Heavy" and "M113A1 (TOW) (China)"
Colok76286 (talk | contribs) (→Usage in battles: Added modules) |
(→Usage in battles) (Tag: Visual edit) |
||
| Line 1: | Line 1: | ||
| − | {{Specs-Card|code= | + | {{Specs-Card|code=cn_m113a1_tow}} |
== Description == | == Description == | ||
| − | <!-- ''In the first part | + | <!-- ''In the description, the first part should be about the history of the creation and combat usage of the vehicle, as well as its key features. In the second part, tell the reader about the ground vehicle in the game. Insert a screenshot of the vehicle, so that if the novice player does not remember the vehicle by name, he will immediately understand what kind of vehicle the article is talking about.'' --> |
[[File:GarageImage_{{PAGENAME}}.jpg|420px|thumb|left]] | [[File:GarageImage_{{PAGENAME}}.jpg|420px|thumb|left]] | ||
| − | {{ | + | {{break}} |
| − | The '''{{Specs|name}}''' is a rank {{Specs|rank}} | + | The '''{{Specs|name}}''' is a rank {{Specs|rank}} Chinese tank destroyer {{Battle-rating}}. It was introduced in [[Update 1.91 "Night Vision"]]. |
== General info == | == General info == | ||
=== Survivability and armour === | === Survivability and armour === | ||
| − | <!-- | + | <!--Describe armour protection. Note the most well protected and key weak areas. Appreciate the layout of modules as well as the number and location of crew members. Is the level of armour protection sufficient, is the placement of modules helpful for survival in combat? If necessary use a visual template to indicate the most secure and weak zones of the armour.--> |
| − | + | The vehicle profile is a basic rectangle with a slightly sloped front which increases protection from machine gun fire. Front has a hatch, which works as HESH screen. The main areas of the vehicle to target when attacking is the missile launcher, machine gun to disable its attack capability or a main vehicle shot. | |
| − | + | The M1113A1 is meant to be a stand-off vehicle due to its role on the battlefield, and is not built to be on the front line. The aluminium alloy armour will not stand up to much and as is will barely stop 12 mm machine gun fire when angled or far away. Anything of higher calibre is almost guaranteed to penetrate. | |
| − | |||
| − | |||
| − | |||
| − | |||
| − | + | Try to hide as best as you can, or not only the gunner will suffer consequences, but the entirety of the crew as well. | |
| + | |||
| + | The gunner is exposed outside of the vehicle when directing the launcher and can be hit. Be aware, as the launcher's base and sometimes even the rangefinder, located next to the launcher, can trigger APHE fuse and cause it to explode infront of gunner's face, then the shrapnel flies back and shreds the virtually nonexistant roof armour, taking out everyone in the middle of the vehicle. Also, since the gunner stands within the opened roof hatch, if a chemical warhead hits rangefinder, then payload can enter vehicle through it and take out loader as well. | ||
| + | |||
| + | Since the vehicle's armour is very thin, it sometimes does not detonate shells so armour-ripping shells causes less than fatal damage. However, only '''very''' high calibre shells with fuses of about 20-22 mm won't detonate, which are very rare at BR 8.3 battles, as almost everyone use 15 mm fuses at this point. The main key here is to avoid being hit at all, as if your tank will be angled during attack, the fuses would detonate anyway. | ||
| + | |||
| + | Vehicle also seems to not have hull break, as example, when an ATGM hits the side of the vehicle in arcade mode, it will only set it on fire. The mentioned shield on front can stop HESH from doing any damage at all, but it's not very reliable. | ||
| + | |||
| + | All in all, it's best to just get out of the way of other tanks and sneak around; this is a vehicle of strategy, not brute force. | ||
=== Mobility === | === Mobility === | ||
| − | ''Write about the | + | <!-- ''Write about the mobility of the ground vehicle. Estimate the specific power and manoeuvrability, as well as the maximum speed forwards and backwards.'' --> |
| − | + | {{tankMobility|abMinHp= 305|rbMinHp= 190}} | |
| − | |||
| − | |||
| − | |||
| − | + | While the stats state the top speed of the M113A1 (TOW) is 64 km/h, in reality it is generally only able to accelerate up to around 30-40 km/h on flat terrain, which compared to other vehicles in its rank is rather slow. The turn rate of the vehicle also isn't that amazing, which can be a problem in an ambush or if an immediate change of direction is needed. | |
| − | === | + | == Armaments == |
| − | <!-- | + | === Main armament === |
| − | {{main| | + | <!--Give the reader information about the characteristics of the main gun. Assess its effectiveness in a battle based on the reloading speed, ballistics and the power of shells. Do not forget about the flexibility of the fire, that is how quickly the cannon can be aimed at the target, open fire on it and aim at another enemy. Add a link to the main article on the gun: <code><nowiki>{{main|Name of the weapon}}</nowiki></code>. Describe in general terms the ammunition available for the main gun. Advise about how to use them and how to fill the ammunition storage.--> |
| + | {{main|BGM-71B TOW}} | ||
| − | The | + | The M113A1 is a specialized vehicle which has a TOW missile launcher mounted onto the top of the vehicle. The firing tubes plus storage only contain 10 rockets to use before it needs to reload or resupply. |
| + | |||
| + | Anti-tank guided missiles (ATGM) loaded in TOW launcher have two purposes: be extremely fast and attack at range across the battlefield, much like artillery cannons. As such, of all ATGMs at its battle rating, the M113A1 is probably one of the fastest with both launch and a top speed of 300 m/s. Be aware, this vehicle can easily be beaten by hybrid tank ATGMs, however, they're typically found at battle rating 9.0 like the KPz-70. | ||
| + | |||
| + | When initially using the M113A1, the standard ATGM is available for use, which is a TOW which when fired can travel for approximately 3 km and has a 430 mm of penetration at 0 degrees or 214 mm of penetration at 60 degrees. | ||
| + | |||
| + | The first-tier ammunition upgrade unleashes the "I-TOW" which provides 630 mm of penetration at 0 degrees and 314 mm of penetration at 60 degrees with a range of approximately 3.75 km. The drawback to using this missile is that it does slightly less damage in realistic battle mode. | ||
| + | |||
| + | The placement of weapon is high enough to fire over cover, however, advantages also at times spawn disadvantages and in this case, with the vehicle gunner standing tall outside of the vehicle, he has no protection and can easily be hit, despite the rest of vehicle being concealed. | ||
| + | |||
| + | The launcher has a rather limited arc of fire - 45 degrees in either direction, which isn't compensated by missile's characteristics like in case of [[Swingfire]] or armour like in case of [[IT-1]]. If you want to fire over cover best bet is to stand far away from the enemy and cover, or right in front of the cover, however, this still probably won't protect the gunner. The gun depression, at 20 degrees, excels almost every other tank and allows the player to use many surprising positions to attack. Note that the depression is far less when the launch tube is above the MG. | ||
| + | |||
| + | === Machine guns === | ||
| + | <!--Offensive and anti-aircraft machine guns not only allow you to fight some aircraft but also are effective against lightly armoured vehicles. Evaluate machine guns and give recommendations on its use.--> | ||
| + | {{main|M2HB (12.7 mm)}} | ||
| + | |||
| + | The single 12.7 mm machine gun can be effective when fighting against open-topped vehicles or to cause some confusion/distraction to the enemy vehicles as the M113A1 reloads. | ||
| + | |||
| + | At this battle rating, this vehicle is limited to keeping helicopters from getting too comfy, since they too have thin to no armour, the rest of aircrafts should be left to the designated anti-air vehicles. As a last resort, the ATGM can be used. | ||
== Usage in battles == | == Usage in battles == | ||
| − | ''Describe the | + | ''Describe the tactics of playing in the vehicle, the features of using vehicles in the team and advice on tactics. Refrain from creating a "guide" - do not impose a single point of view but instead give the reader food for thought. Describe the most dangerous enemies and give recommendations on fighting them. If necessary, note the specifics of the game in different modes (AB, RB, SB).'' |
| − | + | '''Enemies worth noting:''' | |
| − | + | ||
| − | + | * [[Helicopters]] eg. AH-1, UH-1, etc: helicopters are always a great threat to you. Although at the start of the match they cannot equip ATGMs, they are still able to carry lots of deadly rockets, posing a great threat to the M113's weak hull. When an enemy helicopter is roaming nearby and showering the ground with rockets, the safest option is to stay in cover or be stationary, to make it harder for the helicopter to see you. Your only effective defensive weapon against them is the 12.7 mm MG (unless you are very skilled and can manually guide the ATGM to hit them). Only open fire when the helicopter is extremely near, for example within 400 m. Your MG can only damage light helicopters like the UH-1 but not armoured ones. Continuously spray bullets at it until it starts to turn towards you, and quickly retreat back into cover as any helicopter can easily destroy you with a few rockets. | |
| − | + | * M60A1 RISE, M60A3 TTS: these tanks are covered with ERA which are pretty much designed to counter chemical warheads like your TOW missiles. When the M113's TOW missile hits them, their ERA always detonate, leaving the tanks themselves unharmed, so it is not recommended to shoot them when their ERA are still present. If they are quite far away, you can choose to break their gun barrels or tracks to make them defenseless or immobile. If they are close enough you can use your 12.7mm MG to destroy their ERA first. Do not spray, fire in quick bursts and focus on a few ERA, as the bullets seem to spread out a lot in a continuous fire which will decrease the damage to the ERA you want to destroy. The MG is rather effective at destroying these modules. Once those ERA are gone use the TOW to hit the uncovered areas. The most straightforward method is to just fire a missile at them, destroying a bunch of ERA and fire another one at the uncovered area. However this method will give them more than 10 seconds of reaction time so make sure that you are well concealed and will not get spotted before the next missile. | |
| − | + | * M901: this is a similar vehicle based on the M113 hull, with an interesting and unique TOW launcher. The launcher has 360 degrees horizontal rotation and 30 degrees gun depression meaning it adapts terrains better than the M113A1 (TOW). Furthermore, its gunner is not exposed which increases its fighting capacity, so you must deal with the M901 carefully. In a battle, your M113A1 (TOW) and the M901 might be at similar spots which is kind of a sniper vs sniper scenario. Do not get hit by it, as your gunner / launcher will detonate its missile and the shrapnel will splash down, killing all the crew or cause a hull break. Try to fire first or hide until his attention shifts. | |
| − | |||
| − | |||
| − | |||
| − | |||
| − | |||
| − | |||
| − | |||
| − | |||
| − | |||
| − | |||
| − | |||
| − | |||
| − | |||
| − | |||
| − | |||
| − | |||
| − | |||
| − | |||
| − | |||
| − | |||
| − | |||
| − | |||
| − | |||
| − | |||
| − | |||
| − | |||
| − | |||
| − | |||
| − | |||
| − | |||
| − | |||
| − | |||
| − | |||
| − | |||
| − | |||
=== Pros and cons === | === Pros and cons === | ||
| − | <!-- | + | <!--Summarise and briefly evaluate the vehicle in terms of its characteristics and combat effectiveness. Mark its pros and cons in a bulleted list. Try not to use more than 6 points for each of the characteristics. Avoid using categorical definitions such as "bad", "good" and the like - use substitutions with softer forms such as "inadequate" and "effective".--> |
| − | |||
'''Pros:''' | '''Pros:''' | ||
| − | * | + | * Amazing 20 degrees depression adapts all rough terrains with ease |
| − | * | + | * Adequate mobility (64 km/h top speed) allows it to get to positions in time, not much slower than common MBTs like the T-54, M48, etc. |
| − | * | + | * Stock ATGM penetrates up to 430mm and can score kills at a very long range, up to 3 km |
| + | * Reseachable I-TOW ATGM improves penetration to 630mm, and range to 3.75 km | ||
| + | * Heavy MG can take out lightly armored vehicles and low-flying planes / helicopters | ||
'''Cons:''' | '''Cons:''' | ||
| − | * | + | * Fully exposed gunner is very vulnerable to everything |
| − | * | + | * Weak armor protection reduces survivability, especially against rapid-firing SPAAs like the Gepard, M163, Chieftain Marksman, etc |
| − | * | + | * While not so slow, it can still get out-ran by lots of opponents like the Leopard 1s, Centauros, etc. |
| − | * | + | * Is a big and soft target for ground pounders, even for WW2 planes |
| − | * | + | * Cannot fire ATGM on the move. Fatal in a close quarter sudden encounter |
| − | * | + | * Not so fast in a turn |
| − | * | + | * Gun depression is very limited above the MG |
== History == | == History == | ||
| − | + | ''Describe the history of the creation and combat usage of the vehicle in more detail than in the introduction. If the historical reference turns out to be too long, take it to a separate article, taking a link to the article about the vehicle and adding a block "/History" (example: <nowiki>https://wiki.warthunder.com/(Vehicle-name)/History</nowiki>) and add a link to it here using the <code>main</code> template. Be sure to reference text and sources by using <code><nowiki><ref></ref></nowiki></code>, as well as adding them at the end of the article with <code><nowiki><references /></nowiki></code>. This section may also include the vehicle's dev blog entry (if applicable) and the in-game encyclopedia description (under <code><nowiki>=== In-game description ===</nowiki></code>, also if applicable).'' | |
| − | |||
| − | |||
| − | |||
| − | |||
| − | |||
| − | |||
| − | |||
| − | |||
| − | |||
== Media == | == Media == | ||
| − | + | ''Excellent additions to the article would be video guides, screenshots from the game, and photos.'' | |
| − | |||
== See also == | == See also == | ||
| − | ''Links to articles on the War Thunder Wiki that you think will be useful for the reader, for example:'' | + | ''Links to the articles on the War Thunder Wiki that you think will be useful for the reader, for example:'' |
| − | * ''reference to the series of the | + | |
| + | * ''reference to the series of the vehicles;'' | ||
* ''links to approximate analogues of other nations and research trees.'' | * ''links to approximate analogues of other nations and research trees.'' | ||
== External links == | == External links == | ||
| − | + | ''Paste links to sources and external resources, such as:'' | |
| + | |||
* ''topic on the official game forum;'' | * ''topic on the official game forum;'' | ||
| − | * ''encyclopedia page on the | + | * ''encyclopedia page on the tank;'' |
| − | * ''other literature.'' | + | * ''other literature.'' |
| − | |||
| − | |||
| − | {{ | + | {{China tank destroyers}} |
| + | [[Category:ATGM vehicles]] | ||
Revision as of 03:37, 11 July 2020
Contents
Description
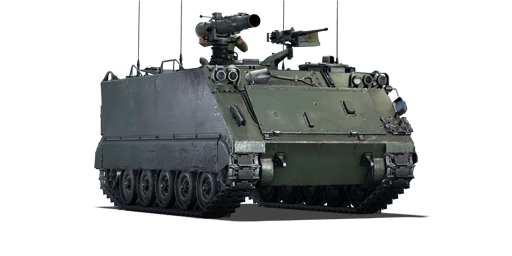
_(China).jpg)
The ␗M113A1 TOW is a rank V Chinese tank destroyer
with a battle rating of 8.3 (AB/RB/SB). It was introduced in Update 1.91 "Night Vision".
General info
Survivability and armour
The vehicle profile is a basic rectangle with a slightly sloped front which increases protection from machine gun fire. Front has a hatch, which works as HESH screen. The main areas of the vehicle to target when attacking is the missile launcher, machine gun to disable its attack capability or a main vehicle shot.
The M1113A1 is meant to be a stand-off vehicle due to its role on the battlefield, and is not built to be on the front line. The aluminium alloy armour will not stand up to much and as is will barely stop 12 mm machine gun fire when angled or far away. Anything of higher calibre is almost guaranteed to penetrate.
Try to hide as best as you can, or not only the gunner will suffer consequences, but the entirety of the crew as well.
The gunner is exposed outside of the vehicle when directing the launcher and can be hit. Be aware, as the launcher's base and sometimes even the rangefinder, located next to the launcher, can trigger APHE fuse and cause it to explode infront of gunner's face, then the shrapnel flies back and shreds the virtually nonexistant roof armour, taking out everyone in the middle of the vehicle. Also, since the gunner stands within the opened roof hatch, if a chemical warhead hits rangefinder, then payload can enter vehicle through it and take out loader as well.
Since the vehicle's armour is very thin, it sometimes does not detonate shells so armour-ripping shells causes less than fatal damage. However, only very high calibre shells with fuses of about 20-22 mm won't detonate, which are very rare at BR 8.3 battles, as almost everyone use 15 mm fuses at this point. The main key here is to avoid being hit at all, as if your tank will be angled during attack, the fuses would detonate anyway.
Vehicle also seems to not have hull break, as example, when an ATGM hits the side of the vehicle in arcade mode, it will only set it on fire. The mentioned shield on front can stop HESH from doing any damage at all, but it's not very reliable.
All in all, it's best to just get out of the way of other tanks and sneak around; this is a vehicle of strategy, not brute force.
Mobility
| Game Mode | Max Speed (km/h) | Weight (tons) | Engine power (horsepower) | Power-to-weight ratio (hp/ton) | |||
|---|---|---|---|---|---|---|---|
| Forward | Reverse | Stock | Upgraded | Stock | Upgraded | ||
| Arcade | 70 | 17 | 11.2 | 305 | 410 | 27.23 | 36.61 |
| Realistic | 65 | 15 | 190 | 215 | 16.96 | 19.2 | |
While the stats state the top speed of the M113A1 (TOW) is 64 km/h, in reality it is generally only able to accelerate up to around 30-40 km/h on flat terrain, which compared to other vehicles in its rank is rather slow. The turn rate of the vehicle also isn't that amazing, which can be a problem in an ambush or if an immediate change of direction is needed.
Armaments
Main armament
The M113A1 is a specialized vehicle which has a TOW missile launcher mounted onto the top of the vehicle. The firing tubes plus storage only contain 10 rockets to use before it needs to reload or resupply.
Anti-tank guided missiles (ATGM) loaded in TOW launcher have two purposes: be extremely fast and attack at range across the battlefield, much like artillery cannons. As such, of all ATGMs at its battle rating, the M113A1 is probably one of the fastest with both launch and a top speed of 300 m/s. Be aware, this vehicle can easily be beaten by hybrid tank ATGMs, however, they're typically found at battle rating 9.0 like the KPz-70.
When initially using the M113A1, the standard ATGM is available for use, which is a TOW which when fired can travel for approximately 3 km and has a 430 mm of penetration at 0 degrees or 214 mm of penetration at 60 degrees.
The first-tier ammunition upgrade unleashes the "I-TOW" which provides 630 mm of penetration at 0 degrees and 314 mm of penetration at 60 degrees with a range of approximately 3.75 km. The drawback to using this missile is that it does slightly less damage in realistic battle mode.
The placement of weapon is high enough to fire over cover, however, advantages also at times spawn disadvantages and in this case, with the vehicle gunner standing tall outside of the vehicle, he has no protection and can easily be hit, despite the rest of vehicle being concealed.
The launcher has a rather limited arc of fire - 45 degrees in either direction, which isn't compensated by missile's characteristics like in case of Swingfire or armour like in case of IT-1. If you want to fire over cover best bet is to stand far away from the enemy and cover, or right in front of the cover, however, this still probably won't protect the gunner. The gun depression, at 20 degrees, excels almost every other tank and allows the player to use many surprising positions to attack. Note that the depression is far less when the launch tube is above the MG.
Machine guns
The single 12.7 mm machine gun can be effective when fighting against open-topped vehicles or to cause some confusion/distraction to the enemy vehicles as the M113A1 reloads.
At this battle rating, this vehicle is limited to keeping helicopters from getting too comfy, since they too have thin to no armour, the rest of aircrafts should be left to the designated anti-air vehicles. As a last resort, the ATGM can be used.
Usage in battles
Describe the tactics of playing in the vehicle, the features of using vehicles in the team and advice on tactics. Refrain from creating a "guide" - do not impose a single point of view but instead give the reader food for thought. Describe the most dangerous enemies and give recommendations on fighting them. If necessary, note the specifics of the game in different modes (AB, RB, SB).
Enemies worth noting:
- Helicopters eg. AH-1, UH-1, etc: helicopters are always a great threat to you. Although at the start of the match they cannot equip ATGMs, they are still able to carry lots of deadly rockets, posing a great threat to the M113's weak hull. When an enemy helicopter is roaming nearby and showering the ground with rockets, the safest option is to stay in cover or be stationary, to make it harder for the helicopter to see you. Your only effective defensive weapon against them is the 12.7 mm MG (unless you are very skilled and can manually guide the ATGM to hit them). Only open fire when the helicopter is extremely near, for example within 400 m. Your MG can only damage light helicopters like the UH-1 but not armoured ones. Continuously spray bullets at it until it starts to turn towards you, and quickly retreat back into cover as any helicopter can easily destroy you with a few rockets.
- M60A1 RISE, M60A3 TTS: these tanks are covered with ERA which are pretty much designed to counter chemical warheads like your TOW missiles. When the M113's TOW missile hits them, their ERA always detonate, leaving the tanks themselves unharmed, so it is not recommended to shoot them when their ERA are still present. If they are quite far away, you can choose to break their gun barrels or tracks to make them defenseless or immobile. If they are close enough you can use your 12.7mm MG to destroy their ERA first. Do not spray, fire in quick bursts and focus on a few ERA, as the bullets seem to spread out a lot in a continuous fire which will decrease the damage to the ERA you want to destroy. The MG is rather effective at destroying these modules. Once those ERA are gone use the TOW to hit the uncovered areas. The most straightforward method is to just fire a missile at them, destroying a bunch of ERA and fire another one at the uncovered area. However this method will give them more than 10 seconds of reaction time so make sure that you are well concealed and will not get spotted before the next missile.
- M901: this is a similar vehicle based on the M113 hull, with an interesting and unique TOW launcher. The launcher has 360 degrees horizontal rotation and 30 degrees gun depression meaning it adapts terrains better than the M113A1 (TOW). Furthermore, its gunner is not exposed which increases its fighting capacity, so you must deal with the M901 carefully. In a battle, your M113A1 (TOW) and the M901 might be at similar spots which is kind of a sniper vs sniper scenario. Do not get hit by it, as your gunner / launcher will detonate its missile and the shrapnel will splash down, killing all the crew or cause a hull break. Try to fire first or hide until his attention shifts.
Pros and cons
Pros:
- Amazing 20 degrees depression adapts all rough terrains with ease
- Adequate mobility (64 km/h top speed) allows it to get to positions in time, not much slower than common MBTs like the T-54, M48, etc.
- Stock ATGM penetrates up to 430mm and can score kills at a very long range, up to 3 km
- Reseachable I-TOW ATGM improves penetration to 630mm, and range to 3.75 km
- Heavy MG can take out lightly armored vehicles and low-flying planes / helicopters
Cons:
- Fully exposed gunner is very vulnerable to everything
- Weak armor protection reduces survivability, especially against rapid-firing SPAAs like the Gepard, M163, Chieftain Marksman, etc
- While not so slow, it can still get out-ran by lots of opponents like the Leopard 1s, Centauros, etc.
- Is a big and soft target for ground pounders, even for WW2 planes
- Cannot fire ATGM on the move. Fatal in a close quarter sudden encounter
- Not so fast in a turn
- Gun depression is very limited above the MG
History
Describe the history of the creation and combat usage of the vehicle in more detail than in the introduction. If the historical reference turns out to be too long, take it to a separate article, taking a link to the article about the vehicle and adding a block "/History" (example: https://wiki.warthunder.com/(Vehicle-name)/History) and add a link to it here using the main template. Be sure to reference text and sources by using <ref></ref>, as well as adding them at the end of the article with <references />. This section may also include the vehicle's dev blog entry (if applicable) and the in-game encyclopedia description (under === In-game description ===, also if applicable).
Media
Excellent additions to the article would be video guides, screenshots from the game, and photos.
See also
Links to the articles on the War Thunder Wiki that you think will be useful for the reader, for example:
- reference to the series of the vehicles;
- links to approximate analogues of other nations and research trees.
External links
Paste links to sources and external resources, such as:
- topic on the official game forum;
- encyclopedia page on the tank;
- other literature.
| China tank destroyers | |
|---|---|
| PLA | |
| Gun vehicles | PLZ83 · PTZ89 |
| Missile vehicles | AFT09 |
| ROC | |
| Missile vehicles | CM25 |
| USA | |
| Gun vehicles | ␗M8 HMC · LVT(A)(4) (ZiS-2) · ␗M10 GMC · ␗M36 GMC |
| Missile vehicles | ␗M113A1 (TOW) |
| USSR | |
| Gun vehicles | ␗SU-76M · ␗ISU-152 · ␗ISU-122 · ␗SU-100 |
