Difference between pages "IJN Kako" and "BT-7"
(→Armament: links) |
Inceptor57 (talk | contribs) m (→Ammo racks) |
||
| Line 1: | Line 1: | ||
| − | {{Specs-Card|code= | + | {{Specs-Card|code=ussr_bt_7_1937}} |
== Description == | == Description == | ||
| − | <!--In the first part | + | <!--''In the description, the first part needs to be about the history of the creation and combat usage of the vehicle, as well as its key features. In the second part, tell the reader about the ground vehicle in the game. Insert the screenshot of the vehicle. If the novice player does not remember the vehicle by name, they will immediately understand what kind of vehicle it is talking about.''--> |
| − | [[File: | + | [[File:GarageImage_BT-7.jpg|420px|thumb|left]] |
| − | {{ | + | {{break}} |
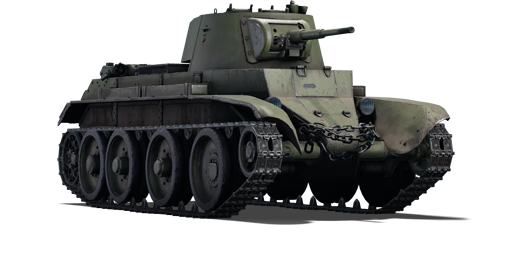
| − | The '''{{specs|name}}''' is a rank {{specs|rank}} | + | The '''{{specs|name}}''' is a rank {{specs|rank}} Soviet light tank {{Battle-rating}}. It was introduced during the Closed Beta Test for Ground Forces before Update 1.41. Like the [[BT-5]], but with improved front armour, it is fast and has an adequate 45 mm cannon able to destroy opposing tanks. |
| + | |||
| + | The BT-7 is a fast tank with relatively thin armour. It can be useful to flank and hit the side armour of enemy tanks, taking advantage of it's very high top speed. The armour is very well angled at certain points, however being as thin as it is, don't count on it to protect you very well; your speed can be your best defense, so move fast and try to zig-zag a bit to make yourself a more difficult target for tanks farther away (not too much though, or you'll bleed off too much speed). | ||
| + | |||
| + | The BT-7 surprises with its Christie suspension. Closer to a race-car than a tank, this lightning on tracks is fun to drive, but not particularly easy. With its high top speed and lightweight, this tank will drift in turns. For maximum control in turns, reduce throttle beforehand and the only tip/nudge the turn-keys. It needs some time to get used to, however, it does prepare you for the T-34s break-turns. | ||
| + | |||
| + | Off-road behaviour is good and the aforementioned drifts aren't as extreme as on city-roads. Top speed is not really reduced as well, making the BT-7 one of the fastest early tanks due to its very wide tracks, something both the ''[[M2A4|Light tank M2]]'' and [[Pz.II C|Panzer II]] miss. | ||
| + | |||
| + | The crew compartment is very small and only inhabited by the driver, commander and another crew member. The latter has to perform the tasks of the gunner and radio-man."Not getting shot at" is the best advice for the crew to survive. | ||
| + | |||
| + | The BT-7 was the last of the BT series of Soviet cavalry tanks that were produced in large numbers between 1935 and 1940. They were lightly armoured, but reasonably well-armed for their time, and had much better mobility than other contemporary tank designs. The BT tanks were known by the nickname Betka from the acronym, or it's diminutive, Betushka. | ||
| + | |||
| + | The BT-7 Tank's successor would be the famous T-34 medium tank, introduced in 1940, which would replace all of the Soviet fast tanks, infantry tanks, and medium tanks then in service. | ||
== General info == | == General info == | ||
=== Survivability and armour === | === Survivability and armour === | ||
| − | '' | + | <!--''Describe armour protection. Note the most well protected and key weak areas. Appreciate the layout of modules as well as the number and location of crew members. Is the level of armour protection sufficient, is the placement of modules helpful for survival in combat?'' |
| − | ''If necessary | + | ''If necessary use a visual template to indicate the most secure and weak zones of the armour.''--> |
| + | '''Armour type:''' | ||
| + | |||
| + | * Rolled homogeneous armour | ||
| + | |||
| + | {| class="wikitable" style="text-align:center" | ||
| + | |- | ||
| + | ! Armour !! Front !! Sides !! Rear !! Roof | ||
| + | |- | ||
| + | | Hull || 15 mm (62°) ''Front glacis'' <br /> 20 mm (19°) ''Driver's hatch'' <br> 20 mm (5-52°) ''Lower hull''|| 20 mm ''Front'' <br> 15 mm ''Rear'' || 10 mm (55°) ''Top'' <br /> 13 mm (16-58°) ''Bottom'' || 10 mm | ||
| + | |- | ||
| + | | Turret || 15 mm (7-53°) ''Gun mantlet'' <br> 15 mm (13-14°) ''Turret front'' || 15 mm (13°) ''Front'' <br> 13 mm (10°) ''Rear'' || 13 mm (15°) || 10 mm | ||
| + | |} | ||
| + | '''Notes''' | ||
| + | |||
| + | * Tracks and suspension wheel are both 15 mm thick. | ||
=== Mobility === | === Mobility === | ||
| − | ''Write about the | + | <!-- ''Write about the mobility of the ground vehicle. Estimate the specific power and manoeuvrability, as well as the maximum speed forwards and backwards.'' --> |
| − | == | + | {{tankMobility|abMinHp= 620|rbMinHp= 354|<!--AoAweight=(optional) -->}} |
| − | = | ||
| − | |||
| − | |||
| − | '' | + | == Armaments == |
| + | === Main armament === | ||
| + | <!--''Give the reader information about the characteristics of the main gun. Assess its effectiveness in a battle based on the reloading speed, ballistics and the power of shells. Do not forget about the flexibility of the fire, that is how quickly the cannon can be aimed at the target, open fire on it and aim at another enemy. Add a link to the main article on the gun: <code><nowiki>{{main|Name of the weapon}}</nowiki></code>. Describe in general terms the ammunition available for the main gun. Give advice on how to use them and how to fill the ammunition storage.''--> | ||
| + | {{main|20-K (45 mm)}} | ||
| − | === | + | {| class="wikitable" style="text-align:center" |
| − | + | |- | |
| − | '' | + | ! colspan="6" | [[20-K (45 mm)|45 mm 20-K]] |
| + | |- | ||
| + | ! colspan="3" rowspan="1" style="width:5em" |Capacity | ||
| + | ! rowspan="1" | Vertical <br> guidance | ||
| + | ! rowspan="1" | Horizontal <br> guidance | ||
| + | ! rowspan="1" | Stabilizer | ||
| + | |- | ||
| + | | colspan="3" | 188 || -6°/+25° || ±180° || N/A | ||
| + | |- | ||
| + | ! colspan="6" | Turret rotation speed (°/s) | ||
| + | |- | ||
| + | ! style="width:4em" |Mode | ||
| + | ! style="width:4em" |Stock | ||
| + | ! style="width:4em" |Upgraded | ||
| + | ! style="width:4em" |Prior + Full crew | ||
| + | ! style="width:4em" |Prior + Expert qualif. | ||
| + | ! style="width:4em" |Prior + Ace qualif. | ||
| + | |- | ||
| + | | ''Arcade'' || 9.50 || 13.20 || _.__ || _.__ || _.__ | ||
| + | |- | ||
| + | | ''Realistic'' || 9.50 || 11.20 || _.__ || _.__ || _.__ | ||
| + | |- | ||
| + | ! colspan="4" | Reloading rate (seconds) | ||
| + | |- | ||
| + | ! colspan="1" style="width:4em" |Stock | ||
| + | ! colspan="1" style="width:4em" |Prior + Full crew | ||
| + | ! colspan="1" style="width:4em" |Prior + Expert qualif. | ||
| + | ! colspan="1" style="width:4em" |Prior + Ace qualif. | ||
| + | |- | ||
| + | | 3.80 || _.__ || _.__ || _.__ | ||
| + | |- | ||
| + | |} | ||
| − | === | + | ===== Ammunition ===== |
| − | { | + | {| class="wikitable sortable" style="text-align:center" width="100%" |
| − | '' | + | ! colspan="8" | Penetration statistics |
| + | |- | ||
| + | ! rowspan="2" data-sort-type="text" | Ammunition | ||
| + | ! rowspan="2" class="unsortable" | Type of <br /> warhead | ||
| + | ! colspan="6" | '''Penetration''' '''''in mm''''' '''@ 90°''' | ||
| + | |- | ||
| + | ! 10m | ||
| + | ! 100m | ||
| + | ! 500m | ||
| + | ! 1000m | ||
| + | ! 1500m | ||
| + | ! 2000m | ||
| + | |- | ||
| + | | BR-240 || APHEBC ||70||68||59||50||42||35 | ||
| + | |- | ||
| + | | BR-240SP || AP || 73 ||71||62||52||44||37 | ||
| + | |- | ||
| + | |} | ||
| + | {| class="wikitable sortable" style="text-align:center" width="100%" | ||
| + | ! colspan="11" | Shell details | ||
| + | |- | ||
| + | ! rowspan="2" data-sort-type="text" | Ammunition | ||
| + | ! rowspan="2" class="unsortable" | Type of <br /> warhead | ||
| + | ! rowspan="2" |Velocity <br /> in m/s | ||
| + | ! rowspan="2" |Projectile<br />Mass in kg | ||
| + | ! rowspan="2" | ''Fuse delay'' | ||
| + | ''in m:'' | ||
| + | ! rowspan="2" | ''Fuse sensitivity'' | ||
| + | ''in mm:'' | ||
| + | ! rowspan="2" | ''Explosive Mass in g<br /> (TNT equivalent):'' | ||
| + | ! rowspan="2" | ''Normalization At 30° <br> from horizontal:'' | ||
| + | ! colspan="3" | ''Ricochet:'' | ||
| + | |- | ||
| + | ! 0% | ||
| + | ! 50% | ||
| + | ! 100% | ||
| + | |- | ||
| + | | BR-240 || APHEBC || 760 || 1.43 || 1.2 || 9 || 29.26 || +4° || 48° || 63° || 71° | ||
| + | |- | ||
| + | | BR-240SP || AP || 757 || 1.43 || N/A || N/A || N/A || -1° || 47° || 60° || 65° | ||
| + | |- | ||
| + | |} | ||
| − | === | + | ===== [[Ammo racks|Ammo racks]] ===== |
| − | + | [[File:Ammoracks_BT-7.png|right|thumbnail|x250px|[[Ammo racks|Ammo racks]] of the BT-7.]] | |
| − | |||
| − | == Usage in battles == | + | {| class="wikitable sortable" style="text-align:center" |
| − | ''Describe the | + | |- |
| + | ! class="wikitable unsortable" |Full<br /> ammo | ||
| + | ! class="wikitable unsortable" |1st<br /> rack empty | ||
| + | ! class="wikitable unsortable" |2nd<br /> rack empty | ||
| + | ! class="wikitable unsortable" |3rd<br /> rack empty | ||
| + | ! class="wikitable unsortable" |4th<br /> rack empty | ||
| + | ! class="wikitable unsortable" |5th<br /> rack empty | ||
| + | ! class="wikitable unsortable" |6th<br /> rack empty | ||
| + | !7th rack empty | ||
| + | !8th rack empty | ||
| + | !9th rack empty | ||
| + | !10th rack empty | ||
| + | !11th rack empty | ||
| + | !12th rack empty | ||
| + | !13th rack empty | ||
| + | ! class="wikitable unsortable" |Visual<br /> discrepancy | ||
| + | |- | ||
| + | || '''188''' || 174 ''(+14)''|| 162 ''(+24)'' || 147 ''(+41)'' || 135 ''(+53)'' || 123 ''(+65)''|| 108 ''(+80)''||89 ''(+99)''|| 73 ''(+115)'' || 57 ''(+131)'' || 41 ''(+147)'' || 25 ''(+163)'' || 13 ''(+175)'' || 1 ''(+187)''|| style="text-align:center" | No | ||
| + | |- | ||
| + | |} | ||
| + | |||
| + | Turret empty: 147 ''(+41);'' Side racks empty: 89 (+99) | ||
| + | |||
| + | === Machine guns === | ||
| + | <!--''Offensive and anti-aircraft machine guns not only allow you to fight some aircraft but also are effective against lightly armoured vehicles. Evaluate machine guns and give recommendations on its use.''--> | ||
| + | {{main|DT (7.62 mm)}} | ||
| + | |||
| + | {| class="wikitable" style="text-align:center" | ||
| + | |- | ||
| + | ! colspan="7" | [[DT (7.62 mm)|7.62 mm DT]] | ||
| + | |- | ||
| + | ! colspan="7" | ''Coaxial mount'' | ||
| + | |- | ||
| + | ! colspan="4" rowspan="1" style="width:5em" |Capacity (Belt capacity) | ||
| + | ! rowspan="1" | Fire rate <br> (shots/minute) | ||
| + | ! rowspan="1" | Vertical <br> guidance | ||
| + | ! rowspan="1" | Horizontal <br> guidance | ||
| + | |- | ||
| + | | colspan="4" | 1,890 (63) || 600 || N/A || N/A | ||
| + | |- | ||
| + | |} | ||
| + | |||
| + | == Usage in the battles == | ||
| + | <!--''Describe the tactics of playing in the vehicle, the features of using vehicles in the team and advice on tactics. Refrain from creating a "guide" - do not impose a single point of view but give the reader food for thought. Describe the most dangerous enemies and give recommendations on fighting them. If necessary, note the specifics of the game in different modes (AB, RB, SB).''--> | ||
| + | Best tactics are probably, however, to not charge right into the combat, but wait a while to see how the battle develops - observe where and how many enemy tanks go, maybe fire a few shots from the distance. Use your great mobility to get to the best positions. And then use its awesome speed to charge at lonely opponents, which at close range have no chance of keeping their guns pointed at you. Keep in mind that charging into more than 1 opponent is usually a quick end, as it is very hard to not get hit from either of them at the same time. There is basically paper armour on BT-7 to stop anything other than machine gun fire. Finally, try to avoid AA vehicles, as they will have no problem targeting and destroying you, even from the distance. | ||
=== Pros and cons === | === Pros and cons === | ||
| − | ''Summarize and briefly evaluate the vehicle in terms of its characteristics and combat effectiveness. Mark its pros and cons in | + | <!--''Summarize and briefly evaluate the vehicle in terms of its characteristics and combat effectiveness. Mark its pros and cons in a bulleted list. Do not use more than 6 points for each of the characteristics. Avoid using categorical definitions such as "bad", "good" and the like - they have a substitution in the form of softer "inadequate", "effective".''--> |
| − | |||
'''Pros:''' | '''Pros:''' | ||
| − | * | + | * Very fast and nimble |
| + | * Excellent offroad capability | ||
| + | * Powerful engine and wide tracks make the BT-7 a good climber | ||
| + | * Good cannon with a good rate of fire | ||
| + | * Often used as a rusher/scout in higher rank matches. It can get to capture points more quickly than most tanks | ||
'''Cons:''' | '''Cons:''' | ||
| − | * | + | * Exposed tracks and suspensions are prone to be damaged |
| + | * The whole tank is basically ammo rack and fuel tank on tracks | ||
| + | * Very large and difficult to hide | ||
| + | * Difficult to drive with precision - can slew on turns and bounces a lot after braking. | ||
| + | * Very weak armour all around, more flat un-angled areas than BT-5 | ||
| + | * Vulnerable to heavy machine gun fire | ||
| + | |||
| + | * Worse gun depression than BT-5 (below average now) | ||
| + | * Sometimes stalls on turns on soft terrain | ||
== History == | == History == | ||
| − | <!--''Describe the history of the creation and combat usage of the | + | <!--''Describe the history of the creation and combat usage of the ground vehicle in more detail than in the introduction. If the historical reference turns out to be too big, take it to a separate article, taking a link to an article about the vehicle and adding a block "/historical reference" (example: https://wiki.warthunder.com/Name-vehicles/historical reference) and add a link to it here using the <code>main</code> template. Be sure to include links to sources at the end of the article.''--> |
| + | ===Development=== | ||
| + | The success of the [[BT-5|BT light tanks]] in Soviet service prompted additional upgrades and other developmental projects done on the design to increase its service life. The development led to the final model of the BT light tank series, the '''BT-7'''. The tank differed from the older BT-5 tank with a welded hull, redesigned hull front, and a new engine in the Model 1935 version. The '''Model 1937''' version of the BT-7 added a redesigned turret that featured sloping armour. | ||
| + | |||
| + | The tank initially had a canted-ellipse shaped turret mounting the main gun and coaxial machine guns with the focus of allowing the tank to mount different tanks without changing the whole design, which led to the development of two main kinds of BT-7s, the normal variant with a 45 mm 20K gun for anti-armour and a artillery variant called the ''BT-7A'' which mounted a 76.2 mm KT-26 howitzer for anti-infantry. The tank was redesigned before it entered production by using the BT-5 turret instead with the main gun and coaxial machine gun still attached, though the concept of swapping to different guns was still in development for the tank. A radio was also installed on the turret as well. The tank had a three-man crew, the commander/gunner and loader in the turret, and the driver in the front. Production started in 1935 but was redesigned in 1937 with a new conical turret that allowed more ammunition to be stored and a machine gun on the rear of the turret. The BT-7 mod. 1937 also had improvements on the drive wheels, gearbox, and tracks by 1938. The BT-7 went on to be produced from 1935 to 1940 for a total unit production of between 2,700 to 5,300 tanks. | ||
| + | |||
| + | ===Combat usage=== | ||
| + | The BT-7 served alongside its older counterpart BT-5 tanks. The BT light tanks were meant to be a cavalry tank, and at the time of their introduction, they were considered some of the finest tanks against other countries' tanks. They had great mobility of all available tanks, and it's 45 mm gun could perform very well in combat. The only drawbacks of the design were its light armour and its gasoline engine, which caused the design to be rather flammable to improvised incendiary weapons. The BT-7's most notable combat service came against the Japanese at Khalkhin Gol. The tactics of Soviet Marshal Georgi Zhukov and the performance of his BT-5 and BT-7 tanks led to a decisive victory. It was during this battle that the BT tanks tendency to catch fire was found, but its performance was positive against the inferior Japanese armoured forces. | ||
| − | + | The BT-7 next combat use was during the opening stages of Operation Barbarossa when Nazi Germany invades the Soviet Union. The superior German tanks [[Pz.III F|Panzer III]] and [[Pz.IV F1|Panzer IV]] was able to easily take out these lightly armoured tanks. Reports note that about 2,000 BT-7 tanks were lost in the first 12 months alone against the German forces, with hundreds broken down from low maintenance and were abandoned. Despite their inferiority, the Soviets continued to produce and field them among armour and mechanized units to boost their operational capacity, though most were kept away from the front lines due to their inadequacy. The BT-7 would finally see its service again in Soviet invasion of Japanese-controlled Manchuria. The Soviets fielded the BT-7 and other tanks in its inventory against the inferior Japanese forces in Manchuria, where it proved very effective against the more lightly armoured Japanese tanks employed. The BT series were all retired after the end of World War II due to their obsolete design as an inter-war period tank design. | |
| − | + | ===Legacy=== | |
| + | Perhaps the most important impact the BT light tanks series was that it kick-started the development of the [[T-34 (1940)|T-34]] medium tank, which would go on as the most produced tank of World War II. A new design team was formed in 1937 at the KhPZ factory, where they built prototypes utilizing the more armour and a heavier gun onto the design, which was called the ''A-32'' and was approved for production as the T-34 tank. The BT tanks also serve as the basis of support vehicles such as the ''BT-7A'' artillery tan, ''BT-7TU'' command tank, ''OP-7'' flamethrower tank, and even the ''TT-BT-7'' remote-controlled tank. An attempt in 1940 also had the BT-7 up-armoured with hinged homogeneous armour, which added five tons to the design weight. These vehicles are not known to have seen service in combat units. | ||
| − | + | === In-game description === | |
| + | In the second half of 1937, the BT-7 tank was mass-produced with a conical turret, a three-speed gearbox and strengthened suspension. In comparison to the BT-7 Mod. 1935, the tank's weaponry became more powerful due to the inclusion of a DT machine gun in the turret. Its ammunition capacity was increased by 44 and totalled 188 rounds in the battle vehicles and 145 rounds in the command vehicles equipped with a radio set. Some of the tanks were equipped with an anti-aircraft gun. | ||
| + | |||
| + | The unit command vehicles were equipped with a 71-TK-1 radio set with a hand-rail antenna, and later with a rod antenna. To allow the vehicle to fire its cannon and coaxial machine gun at night, it was equipped with two special projector headlights. Over the course of its modernisation, the thickness of its frontal hull armour reached 22 mm. The turret's armour was also strengthened using vertically sloping armour plates. Its combat-loaded weight grew to 13,925 kg. Factory No. 183 alone manufactured 4,727 tanks of this series. | ||
| + | |||
| + | The BT-7 underwent its trial by fire in the Khalkhyn Gol river region as part of the 6th and 11th tank brigades. In the process, the latter undertook a hurried 500 km trek to the scene of the conflict. On the whole, the tanks gained a good reputation, but their drawbacks were noted as well: they were difficult to drive, which meant they required highly trained drivers, and they had insufficient armour and poor communication equipment. All these flaws were confirmed in the Poland Campaign of September 1939 and in the Winter War with Finland. | ||
| + | |||
| + | With appropriate tactics and a well-trained crew, the BT-7 could successfully oppose all types of German tanks at the beginning of the war, being inferior to them only in armour. | ||
| + | BT-7 tanks participated in combat operations on the Soviet-German front right up until 1944, and in 1945 they served in the war with Japan. A few captured tanks served in the Finnish army until the beginning of the 50s. | ||
== Media == | == Media == | ||
| − | + | [http://live.warthunder.com/feed/camouflages/?q=%23bt7 Skins and camouflages for the BT-7 from live.warthunder] | |
| − | == | + | == Read also == |
| − | ''Links to the articles on the War Thunder Wiki that you think will be useful for the reader, for example | + | ''Links to the articles on the War Thunder Wiki that you think will be useful for the reader, for example,'' |
| − | * ''reference to the series of the | + | * ''reference to the series of the vehicles;'' |
* ''links to approximate analogues of other nations and research trees.'' | * ''links to approximate analogues of other nations and research trees.'' | ||
| − | == | + | ''ETC.'' |
| + | |||
| + | == Sources == | ||
''Paste links to sources and external resources, such as:'' | ''Paste links to sources and external resources, such as:'' | ||
* ''topic on the official game forum;'' | * ''topic on the official game forum;'' | ||
| − | |||
* ''other literature.'' | * ''other literature.'' | ||
| − | {{ | + | {{USSR light tanks}} |
Revision as of 16:30, 23 March 2020
Contents
Description

The BT-7 mod. 1937 is a rank I Soviet light tank
with a battle rating of 1.3 (AB/RB/SB). It was introduced during the Closed Beta Test for Ground Forces before Update 1.41. Like the BT-5, but with improved front armour, it is fast and has an adequate 45 mm cannon able to destroy opposing tanks.
The BT-7 is a fast tank with relatively thin armour. It can be useful to flank and hit the side armour of enemy tanks, taking advantage of it's very high top speed. The armour is very well angled at certain points, however being as thin as it is, don't count on it to protect you very well; your speed can be your best defense, so move fast and try to zig-zag a bit to make yourself a more difficult target for tanks farther away (not too much though, or you'll bleed off too much speed).
The BT-7 surprises with its Christie suspension. Closer to a race-car than a tank, this lightning on tracks is fun to drive, but not particularly easy. With its high top speed and lightweight, this tank will drift in turns. For maximum control in turns, reduce throttle beforehand and the only tip/nudge the turn-keys. It needs some time to get used to, however, it does prepare you for the T-34s break-turns.
Off-road behaviour is good and the aforementioned drifts aren't as extreme as on city-roads. Top speed is not really reduced as well, making the BT-7 one of the fastest early tanks due to its very wide tracks, something both the Light tank M2 and Panzer II miss.
The crew compartment is very small and only inhabited by the driver, commander and another crew member. The latter has to perform the tasks of the gunner and radio-man."Not getting shot at" is the best advice for the crew to survive.
The BT-7 was the last of the BT series of Soviet cavalry tanks that were produced in large numbers between 1935 and 1940. They were lightly armoured, but reasonably well-armed for their time, and had much better mobility than other contemporary tank designs. The BT tanks were known by the nickname Betka from the acronym, or it's diminutive, Betushka.
The BT-7 Tank's successor would be the famous T-34 medium tank, introduced in 1940, which would replace all of the Soviet fast tanks, infantry tanks, and medium tanks then in service.
General info
Survivability and armour
Armour type:
- Rolled homogeneous armour
| Armour | Front | Sides | Rear | Roof |
|---|---|---|---|---|
| Hull | 15 mm (62°) Front glacis 20 mm (19°) Driver's hatch 20 mm (5-52°) Lower hull |
20 mm Front 15 mm Rear |
10 mm (55°) Top 13 mm (16-58°) Bottom |
10 mm |
| Turret | 15 mm (7-53°) Gun mantlet 15 mm (13-14°) Turret front |
15 mm (13°) Front 13 mm (10°) Rear |
13 mm (15°) | 10 mm |
Notes
- Tracks and suspension wheel are both 15 mm thick.
Mobility
| Game Mode | Max Speed (km/h) | Weight (tons) | Engine power (horsepower) | Power-to-weight ratio (hp/ton) | |||
|---|---|---|---|---|---|---|---|
| Forward | Reverse | Stock | Upgraded | Stock | Upgraded | ||
| Arcade | 55 | 11 | 13.7 | 620 | 763 | 45.26 | 55.69 |
| Realistic | 50 | 10 | 354 | 400 | 25.84 | 29.2 | |
Armaments
Main armament
| 45 mm 20-K | |||||
|---|---|---|---|---|---|
| Capacity | Vertical guidance |
Horizontal guidance |
Stabilizer | ||
| 188 | -6°/+25° | ±180° | N/A | ||
| Turret rotation speed (°/s) | |||||
| Mode | Stock | Upgraded | Prior + Full crew | Prior + Expert qualif. | Prior + Ace qualif. |
| Arcade | 9.50 | 13.20 | _.__ | _.__ | _.__ |
| Realistic | 9.50 | 11.20 | _.__ | _.__ | _.__ |
| Reloading rate (seconds) | |||||
| Stock | Prior + Full crew | Prior + Expert qualif. | Prior + Ace qualif. | ||
| 3.80 | _.__ | _.__ | _.__ | ||
Ammunition
| Penetration statistics | |||||||
|---|---|---|---|---|---|---|---|
| Ammunition | Type of warhead |
Penetration in mm @ 90° | |||||
| 10m | 100m | 500m | 1000m | 1500m | 2000m | ||
| BR-240 | APHEBC | 70 | 68 | 59 | 50 | 42 | 35 |
| BR-240SP | AP | 73 | 71 | 62 | 52 | 44 | 37 |
| Shell details | ||||||||||
|---|---|---|---|---|---|---|---|---|---|---|
| Ammunition | Type of warhead |
Velocity in m/s |
Projectile Mass in kg |
Fuse delay
in m: |
Fuse sensitivity
in mm: |
Explosive Mass in g (TNT equivalent): |
Normalization At 30° from horizontal: |
Ricochet: | ||
| 0% | 50% | 100% | ||||||||
| BR-240 | APHEBC | 760 | 1.43 | 1.2 | 9 | 29.26 | +4° | 48° | 63° | 71° |
| BR-240SP | AP | 757 | 1.43 | N/A | N/A | N/A | -1° | 47° | 60° | 65° |
Ammo racks

| Full ammo |
1st rack empty |
2nd rack empty |
3rd rack empty |
4th rack empty |
5th rack empty |
6th rack empty |
7th rack empty | 8th rack empty | 9th rack empty | 10th rack empty | 11th rack empty | 12th rack empty | 13th rack empty | Visual discrepancy |
|---|---|---|---|---|---|---|---|---|---|---|---|---|---|---|
| 188 | 174 (+14) | 162 (+24) | 147 (+41) | 135 (+53) | 123 (+65) | 108 (+80) | 89 (+99) | 73 (+115) | 57 (+131) | 41 (+147) | 25 (+163) | 13 (+175) | 1 (+187) | No |
Turret empty: 147 (+41); Side racks empty: 89 (+99)
Machine guns
| 7.62 mm DT | ||||||
|---|---|---|---|---|---|---|
| Coaxial mount | ||||||
| Capacity (Belt capacity) | Fire rate (shots/minute) |
Vertical guidance |
Horizontal guidance | |||
| 1,890 (63) | 600 | N/A | N/A | |||
Usage in the battles
Best tactics are probably, however, to not charge right into the combat, but wait a while to see how the battle develops - observe where and how many enemy tanks go, maybe fire a few shots from the distance. Use your great mobility to get to the best positions. And then use its awesome speed to charge at lonely opponents, which at close range have no chance of keeping their guns pointed at you. Keep in mind that charging into more than 1 opponent is usually a quick end, as it is very hard to not get hit from either of them at the same time. There is basically paper armour on BT-7 to stop anything other than machine gun fire. Finally, try to avoid AA vehicles, as they will have no problem targeting and destroying you, even from the distance.
Pros and cons
Pros:
- Very fast and nimble
- Excellent offroad capability
- Powerful engine and wide tracks make the BT-7 a good climber
- Good cannon with a good rate of fire
- Often used as a rusher/scout in higher rank matches. It can get to capture points more quickly than most tanks
Cons:
- Exposed tracks and suspensions are prone to be damaged
- The whole tank is basically ammo rack and fuel tank on tracks
- Very large and difficult to hide
- Difficult to drive with precision - can slew on turns and bounces a lot after braking.
- Very weak armour all around, more flat un-angled areas than BT-5
- Vulnerable to heavy machine gun fire
- Worse gun depression than BT-5 (below average now)
- Sometimes stalls on turns on soft terrain
History
Development
The success of the BT light tanks in Soviet service prompted additional upgrades and other developmental projects done on the design to increase its service life. The development led to the final model of the BT light tank series, the BT-7. The tank differed from the older BT-5 tank with a welded hull, redesigned hull front, and a new engine in the Model 1935 version. The Model 1937 version of the BT-7 added a redesigned turret that featured sloping armour.
The tank initially had a canted-ellipse shaped turret mounting the main gun and coaxial machine guns with the focus of allowing the tank to mount different tanks without changing the whole design, which led to the development of two main kinds of BT-7s, the normal variant with a 45 mm 20K gun for anti-armour and a artillery variant called the BT-7A which mounted a 76.2 mm KT-26 howitzer for anti-infantry. The tank was redesigned before it entered production by using the BT-5 turret instead with the main gun and coaxial machine gun still attached, though the concept of swapping to different guns was still in development for the tank. A radio was also installed on the turret as well. The tank had a three-man crew, the commander/gunner and loader in the turret, and the driver in the front. Production started in 1935 but was redesigned in 1937 with a new conical turret that allowed more ammunition to be stored and a machine gun on the rear of the turret. The BT-7 mod. 1937 also had improvements on the drive wheels, gearbox, and tracks by 1938. The BT-7 went on to be produced from 1935 to 1940 for a total unit production of between 2,700 to 5,300 tanks.
Combat usage
The BT-7 served alongside its older counterpart BT-5 tanks. The BT light tanks were meant to be a cavalry tank, and at the time of their introduction, they were considered some of the finest tanks against other countries' tanks. They had great mobility of all available tanks, and it's 45 mm gun could perform very well in combat. The only drawbacks of the design were its light armour and its gasoline engine, which caused the design to be rather flammable to improvised incendiary weapons. The BT-7's most notable combat service came against the Japanese at Khalkhin Gol. The tactics of Soviet Marshal Georgi Zhukov and the performance of his BT-5 and BT-7 tanks led to a decisive victory. It was during this battle that the BT tanks tendency to catch fire was found, but its performance was positive against the inferior Japanese armoured forces.
The BT-7 next combat use was during the opening stages of Operation Barbarossa when Nazi Germany invades the Soviet Union. The superior German tanks Panzer III and Panzer IV was able to easily take out these lightly armoured tanks. Reports note that about 2,000 BT-7 tanks were lost in the first 12 months alone against the German forces, with hundreds broken down from low maintenance and were abandoned. Despite their inferiority, the Soviets continued to produce and field them among armour and mechanized units to boost their operational capacity, though most were kept away from the front lines due to their inadequacy. The BT-7 would finally see its service again in Soviet invasion of Japanese-controlled Manchuria. The Soviets fielded the BT-7 and other tanks in its inventory against the inferior Japanese forces in Manchuria, where it proved very effective against the more lightly armoured Japanese tanks employed. The BT series were all retired after the end of World War II due to their obsolete design as an inter-war period tank design.
Legacy
Perhaps the most important impact the BT light tanks series was that it kick-started the development of the T-34 medium tank, which would go on as the most produced tank of World War II. A new design team was formed in 1937 at the KhPZ factory, where they built prototypes utilizing the more armour and a heavier gun onto the design, which was called the A-32 and was approved for production as the T-34 tank. The BT tanks also serve as the basis of support vehicles such as the BT-7A artillery tan, BT-7TU command tank, OP-7 flamethrower tank, and even the TT-BT-7 remote-controlled tank. An attempt in 1940 also had the BT-7 up-armoured with hinged homogeneous armour, which added five tons to the design weight. These vehicles are not known to have seen service in combat units.
In-game description
In the second half of 1937, the BT-7 tank was mass-produced with a conical turret, a three-speed gearbox and strengthened suspension. In comparison to the BT-7 Mod. 1935, the tank's weaponry became more powerful due to the inclusion of a DT machine gun in the turret. Its ammunition capacity was increased by 44 and totalled 188 rounds in the battle vehicles and 145 rounds in the command vehicles equipped with a radio set. Some of the tanks were equipped with an anti-aircraft gun.
The unit command vehicles were equipped with a 71-TK-1 radio set with a hand-rail antenna, and later with a rod antenna. To allow the vehicle to fire its cannon and coaxial machine gun at night, it was equipped with two special projector headlights. Over the course of its modernisation, the thickness of its frontal hull armour reached 22 mm. The turret's armour was also strengthened using vertically sloping armour plates. Its combat-loaded weight grew to 13,925 kg. Factory No. 183 alone manufactured 4,727 tanks of this series.
The BT-7 underwent its trial by fire in the Khalkhyn Gol river region as part of the 6th and 11th tank brigades. In the process, the latter undertook a hurried 500 km trek to the scene of the conflict. On the whole, the tanks gained a good reputation, but their drawbacks were noted as well: they were difficult to drive, which meant they required highly trained drivers, and they had insufficient armour and poor communication equipment. All these flaws were confirmed in the Poland Campaign of September 1939 and in the Winter War with Finland.
With appropriate tactics and a well-trained crew, the BT-7 could successfully oppose all types of German tanks at the beginning of the war, being inferior to them only in armour. BT-7 tanks participated in combat operations on the Soviet-German front right up until 1944, and in 1945 they served in the war with Japan. A few captured tanks served in the Finnish army until the beginning of the 50s.
Media
Skins and camouflages for the BT-7 from live.warthunder
Read also
Links to the articles on the War Thunder Wiki that you think will be useful for the reader, for example,
- reference to the series of the vehicles;
- links to approximate analogues of other nations and research trees.
ETC.
Sources
Paste links to sources and external resources, such as:
- topic on the official game forum;
- other literature.
| USSR light tanks | |
|---|---|
| T-26 | T-26 · T-26 (1st Gv.T.Br.) · T-26-4 · T-26E |
| BT | BT-5 · RBT-5 · BT-7 · BT-7 TD · BT-7M · BT-7A (F-32) |
| T-50 | T-126 · T-50 |
| T-70 | T-70 · T-80 |
| PT-76 | PT-76B · PT-76-57 · Object 906 |
| BMP | BMP-1 · BMP-2 · BMP-2M · BMP-3 |
| BMD | BMD-4 |
| 2S25 | 2S25 · 2S25M |
| Wheeled | BA-11 · BTR-80A |
| Other | T-60 · Object 685 · 2S38 |
| China | ▂Type 62 |
