Difference between pages "Type 90" and "D2"
m |
Colok76286 (talk | contribs) (→Survivability and armour: Updated and completed) |
||
| Line 1: | Line 1: | ||
| − | {{Specs-Card|code= | + | {{Specs-Card|code=fr_renault_d2}} |
| − | |||
| − | |||
| − | |||
| − | |||
| − | |||
| − | |||
| − | |||
| − | }} | ||
== Description == | == Description == | ||
| Line 13: | Line 5: | ||
[[File:GarageImage_{{PAGENAME}}.jpg|420px|thumb|left]] | [[File:GarageImage_{{PAGENAME}}.jpg|420px|thumb|left]] | ||
{{Break}} | {{Break}} | ||
| − | The '''{{Specs|name}}''' is a rank {{Specs|rank}} | + | The '''{{Specs|name}}''' is a rank {{Specs|rank}} French medium tank {{Battle-rating}}. It was introduced in [[Update "Starfighters"]]. The D2 can be considered the brother of the [[S.35]], sporting similar thick all-around armour, the same 47 mm SA35 gun, and a 3-man crew in the same configuration. The primary differences are the D2 is ''significantly'' slower - with nearly half the top speed and a lower power-to-weight ratio - while having a flatter, boxier hull shape, allowing the D2 to angle its armour more reliably. |
| − | |||
| − | The | ||
== General info == | == General info == | ||
=== Survivability and armour === | === Survivability and armour === | ||
<!-- ''Describe armour protection. Note the most well protected and key weak areas. Appreciate the layout of modules as well as the number and location of crew members. Is the level of armour protection sufficient, is the placement of modules helpful for survival in combat? If necessary use a visual template to indicate the most secure and weak zones of the armour.'' --> | <!-- ''Describe armour protection. Note the most well protected and key weak areas. Appreciate the layout of modules as well as the number and location of crew members. Is the level of armour protection sufficient, is the placement of modules helpful for survival in combat? If necessary use a visual template to indicate the most secure and weak zones of the armour.'' --> | ||
| − | + | Sporting 40 mm of rolled armour on all sides of a boxy hull, the D2 can be angled at a perfect 45 degree angle for a consistent effective thickness of at least 60 mm, presenting no obvious weak points save for the turret ring. The turret is of the same general style as used by the S.35 and [[B1 bis]], with a small, strong 56 mm turret face reinforced by two gun mantlets and strongly angled 45 mm sides, making it very effective in hull-down positions. Still beware of enemies behind you and even strafing aircraft, as the low, sloped engine deck has two grilles with a mere 5 mm of protection that even SPAAs and heavy machine guns can penetrate. | |
| − | + | ||
| + | The D2's ammo racks are located deep in the bottom of the hull, nestled behind the D2's extra suspension armour and the suspension itself, making them fairly well-protected. | ||
| + | |||
| + | '''Armour types:''' | ||
| − | + | * Rolled homogeneous armour (hull, sideskirts, turret ring, turret roof) | |
| + | * Cast homogeneous armour (turret sides, gun mantlet, turret cupola) | ||
| + | |||
| + | {| class="wikitable" | ||
| + | |- | ||
| + | ! Armour !! Front (Slope angle) !! Sides !! Rear !! Roof | ||
| + | |- | ||
| + | | Hull || 40 mm (17°) ''Front glacis - upper part'' <br> 40 mm (40°) ''Front glacis - lower part'' <br> 40 mm (53°) ''Lower glacis'' | ||
| + | | 40 mm ''Top'' <br> 40 mm + 10 mm ''Bottom'' || 20 mm (72°) ''Upper plate (roof)'' <br> 5 mm (72°) ''Engine vent (roof)'' <br> 40 mm ''Centre plate'' <br> 20 mm (58°) ''Lower plate'' || 20 mm ''Front part'' <br> 5 mm ''Engine vent - front part'' <br> 20 mm (18°) ''Rear part'' <br> 5 mm (18°) ''Engine vent - rear part'' | ||
| + | |- | ||
| + | | Turret || 56 mm ''Turret front'' <br> 45 mm ''Gun mantlet'' <br> 45 mm ''Machine gun port'' <br> 40 mm ''Turret ring'' || colspan="2" style="text-align:center" | 45 mm (20°) || 30 mm (25°) ''Front part'' <br> 30 mm ''Rear part'' | ||
| + | |- | ||
| + | | Cupola || 40 mm || 40 mm (26°) || 40 mm (9°) || 30 mm | ||
| + | |- | ||
| + | |} | ||
| + | |||
| + | '''Notes:''' | ||
| + | |||
| + | * Suspension wheels are 15 mm thick, bogies are 10 mm thick and tracks are 20 mm thick | ||
| + | * Lower and upper turret ring armour are both 40 mm thick, and overlap slightly | ||
=== Mobility === | === Mobility === | ||
<!-- ''Write about the mobility of the ground vehicle. Estimate the specific power and manoeuvrability, as well as the maximum speed forwards and backwards.'' --> | <!-- ''Write about the mobility of the ground vehicle. Estimate the specific power and manoeuvrability, as well as the maximum speed forwards and backwards.'' --> | ||
| − | {{tankMobility|abMinHp= | + | {{tankMobility|abMinHp= 232|rbMinHp= 133}} |
| − | + | With a top speed of 23 km/h (RB) and a low power-to-weight ratio, the D2 isn't going anywhere fast. Its one saving grace in the mobility department is its reverse speed of -12 km/h! | |
| − | |||
| − | |||
== Armaments == | == Armaments == | ||
=== Main armament === | === Main armament === | ||
| − | <!-- ''Give the reader information about the characteristics of the main gun. Assess its effectiveness in a battle based on the reloading speed, ballistics and the power of shells. Do not forget about the flexibility of the fire, that is how quickly the cannon can be aimed at the target, open fire on it and aim at another enemy. Add a link to the main article on the gun: <code><nowiki>{main|Name of the weapon}</nowiki></code>. Describe in general terms the ammunition available for the main gun. Give advice on how to use them and how to fill the ammunition storage.'' --> | + | <!-- ''Give the reader information about the characteristics of the main gun. Assess its effectiveness in a battle based on the reloading speed, ballistics and the power of shells. Do not forget about the flexibility of the fire, that is how quickly the cannon can be aimed at the target, open fire on it and aim at another enemy. Add a link to the main article on the gun: <code><nowiki>{{main|Name of the weapon}}</nowiki></code>. Describe in general terms the ammunition available for the main gun. Give advice on how to use them and how to fill the ammunition storage.'' --> |
| − | {{main| | + | {{main|SA35 L/32 (47 mm)}} |
| − | |||
| − | |||
{| class="wikitable" style="text-align:center" width="100%" | {| class="wikitable" style="text-align:center" width="100%" | ||
|- | |- | ||
| − | ! colspan="5" | [[ | + | ! colspan="5" | [[SA35 L/32 (47 mm)|47 mm SA35 L/32]] || colspan="5" | Turret rotation speed (°/s) || colspan="4" | Reloading rate (seconds) |
|- | |- | ||
! Mode !! Capacity !! Vertical !! Horizontal !! Stabilizer | ! Mode !! Capacity !! Vertical !! Horizontal !! Stabilizer | ||
| Line 50: | Line 58: | ||
|- | |- | ||
! ''Arcade'' | ! ''Arcade'' | ||
| − | | rowspan="2" | | + | | rowspan="2" | 108 || rowspan="2" | ±18° || rowspan="2" | ±180° || rowspan="2" | Vertical || 9.5 || 13.1 || __.__ || __.__ || 18.8 || rowspan="2" | 5.2 || rowspan="2" | _.__ || rowspan="2" | _.__ || rowspan="2" | 4.0 |
|- | |- | ||
! ''Realistic'' | ! ''Realistic'' | ||
| − | | | + | | 6.0 || 7.0 || __.__ || __.__ || 10.0 |
|- | |- | ||
|} | |} | ||
==== Ammunition ==== | ==== Ammunition ==== | ||
| + | The {{PAGENAME}} has a limited choice of ammunition: | ||
| + | * '''Mle1935''': APC; a solid shot with average penetration and no explosive filler. Make sure to target modules and crew positions to maximise the damage. Knowledge of enemy vehicle layouts is essential with this type of ammunition. | ||
| + | * '''Mle1935 HE''': HE; useful for destroying open and very lightly armoured vehicles. | ||
| + | |||
{| class="wikitable sortable" style="text-align:center" width="100%" | {| class="wikitable sortable" style="text-align:center" width="100%" | ||
! colspan="8" | Penetration statistics | ! colspan="8" | Penetration statistics | ||
| Line 67: | Line 79: | ||
! 10 m !! 100 m !! 500 m !! 1,000 m !! 1,500 m !! 2,000 m | ! 10 m !! 100 m !! 500 m !! 1,000 m !! 1,500 m !! 2,000 m | ||
|- | |- | ||
| − | | | + | | Mle1935 || APC || 62 || 59 || 47 || 36 || 27 || 20 |
|- | |- | ||
| − | | | + | | Mle1935 HE || HE || 4 || 4 || 4 || 4 || 4 || 4 |
|- | |- | ||
|} | |} | ||
{| class="wikitable sortable" style="text-align:center" width="100%" | {| class="wikitable sortable" style="text-align:center" width="100%" | ||
| − | ! colspan=" | + | ! colspan="10" | Shell details |
|- | |- | ||
! rowspan="2" data-sort-type="text" | Ammunition | ! rowspan="2" data-sort-type="text" | Ammunition | ||
| Line 82: | Line 94: | ||
! rowspan="2" | Fuse sensitivity<br>(mm) | ! rowspan="2" | Fuse sensitivity<br>(mm) | ||
! rowspan="2" | Explosive Mass<br>(TNT equivalent) (g) | ! rowspan="2" | Explosive Mass<br>(TNT equivalent) (g) | ||
| − | |||
! colspan="3" | Ricochet | ! colspan="3" | Ricochet | ||
|- | |- | ||
! 0% !! 50% !! 100% | ! 0% !! 50% !! 100% | ||
|- | |- | ||
| − | | | + | | Mle1935 || APC || 660 || 1.6 || N/A || N/A || N/A || 48° || 63° || 71° |
|- | |- | ||
| − | | | + | | Mle1935 HE || HE || 590 || 1.4 || 0.4 || 0.1 || 143 || 79° || 80° |
| + | |81° | ||
|- | |- | ||
|} | |} | ||
| Line 101: | Line 113: | ||
! 2nd<br>rack empty | ! 2nd<br>rack empty | ||
! 3rd<br>rack empty | ! 3rd<br>rack empty | ||
| − | ! | + | ! 4th<br>rack empty |
| + | ! 5th<br>rack empty | ||
| + | ! 6th<br>rack empty | ||
! Visual<br>discrepancy | ! Visual<br>discrepancy | ||
|- | |- | ||
| − | | ''' | + | | '''108''' || 91 ''(+17)'' || 73 ''(+35)'' || 55 ''(+53)'' || 37 ''(+71)'' || 19 ''(+89)'' || 1 ''(+107)'' || No |
|- | |- | ||
|} | |} | ||
| + | Notes: | ||
| − | + | * As they are modeled by sets of 3, shells disappear from the rack only after you've fired all shells in the set. | |
| − | + | * Packing 25 ''(+83)'' shells is a good compromise to have enough shells at your disposal while reducing drastically the risk of ammo rack detonation. | |
| − | |||
| − | |||
| − | |||
| − | |||
| − | |||
| − | |||
| − | |||
| − | |||
| − | |||
| − | |||
| − | |||
| − | |||
| − | |||
| − | |||
| − | |||
| − | |||
| − | |||
| − | |||
| − | |||
| − | |||
| − | |||
| − | |||
| − | |||
| − | |||
| − | |||
=== Machine guns === | === Machine guns === | ||
<!-- ''Offensive and anti-aircraft machine guns not only allow you to fight some aircraft but also are effective against lightly armoured vehicles. Evaluate machine guns and give recommendations on its use.'' --> | <!-- ''Offensive and anti-aircraft machine guns not only allow you to fight some aircraft but also are effective against lightly armoured vehicles. Evaluate machine guns and give recommendations on its use.'' --> | ||
| − | |||
| − | + | {{main|MAC 31 (7.5 mm)}} | |
| − | {| class="wikitable" style="text-align:center" | + | {| class="wikitable" style="text-align:center" width="50%" |
| − | |||
| − | |||
| − | |||
| − | |||
| − | |||
| − | |||
| − | |||
| − | |||
| − | |||
| − | |||
| − | |||
| − | |||
| − | |||
|- | |- | ||
| − | ! colspan="5" | [[ | + | ! colspan="5" | [[MAC 31 (7.5 mm)|7.5 mm MAC 31]] |
|- | |- | ||
! Mount | ! Mount | ||
| − | ! Capacity | + | ! Capacity (Belt) |
| − | ! Fire rate | + | ! Fire rate |
| − | ! Vertical | + | ! Vertical |
| − | ! Horizontal | + | ! Horizontal |
|- | |- | ||
| − | | Coaxial || | + | | Coaxial || 3250 (150) || 1350 || N/A || N/A |
|- | |- | ||
|} | |} | ||
| + | The small caliber of the MAC 31 machine gun makes it largely ineffective against all armoured vehicles but the ones with an open compartment. It still can be used to ping targets as a rangefinding help. | ||
== Usage in battles == | == Usage in battles == | ||
<!-- ''Describe the tactics of playing in the vehicle, the features of using vehicles in the team and advice on tactics. Refrain from creating a "guide" - do not impose a single point of view but instead give the reader food for thought. Describe the most dangerous enemies and give recommendations on fighting them. If necessary, note the specifics of the game in different modes (AB, RB, SB).'' --> | <!-- ''Describe the tactics of playing in the vehicle, the features of using vehicles in the team and advice on tactics. Refrain from creating a "guide" - do not impose a single point of view but instead give the reader food for thought. Describe the most dangerous enemies and give recommendations on fighting them. If necessary, note the specifics of the game in different modes (AB, RB, SB).'' --> | ||
| − | + | As the D2 plays in most regards like a slower, slightly more reliably armoured S.35, utilize them side-by side, prioritizing the D2 in down-tiers and the S.35 in up-tiers, as the D2's hull armour will not save it at BR 2.3. When it's top tier, with a competent driver, it can even be played like a pocket heavy tank, or like a mini B1 bis without the hull cannon. Angle strongly, side-scrape, and utilize hull-down positions to make maximum use of your armour advantage. Pick what route you take when you spawn carefully; if you end up in the wrong place, your speed won't allow you to correct in a timely manner. | |
| − | |||
| − | |||
| − | |||
| − | |||
| − | |||
| − | |||
| − | |||
| − | |||
| − | |||
| − | ' | ||
| − | |||
| − | |||
| − | |||
| − | |||
| − | |||
| − | |||
| − | |||
| − | |||
=== Modules === | === Modules === | ||
| Line 196: | Line 155: | ||
! colspan="2" | Mobility | ! colspan="2" | Mobility | ||
! Protection | ! Protection | ||
| − | ! | + | ! Firepower |
|- | |- | ||
| I | | I | ||
| − | | Tracks | + | |Tracks |
| − | |||
| − | |||
| − | |||
| − | |||
| | | | ||
| + | |Parts | ||
| + | |Horizontal Drive | ||
|- | |- | ||
| II | | II | ||
| − | | Suspension | + | |Suspension |
| − | | Brake System | + | |Brake System |
| − | | FPE | + | |FPE |
| − | | Adjustment of Fire | + | |Adjustment of Fire |
| − | |||
| − | |||
|- | |- | ||
| III | | III | ||
| − | | Filters | + | |Filters |
| | | | ||
| − | | Crew Replenishment | + | |Crew Replenishment |
| − | | Elevation Mechanism | + | |Elevation Mechanism |
| − | |||
| − | |||
|- | |- | ||
| IV | | IV | ||
| − | | Transmission | + | |Transmission |
| − | | Engine | + | |Engine |
| | | | ||
| − | | Artillery Support | + | |Artillery Support |
| − | |||
| − | |||
|- | |- | ||
|} | |} | ||
=== Pros and cons === | === Pros and cons === | ||
| − | <!-- ''Summarise and briefly evaluate the vehicle in terms of its characteristics and combat effectiveness. Mark its pros and cons in a bulleted list. Try not to use more than 6 points for each of the characteristics. Avoid using categorical definitions such as "bad", "good" and the like - use substitutions with softer forms such as "inadequate" and "effective".'' --> | + | <!-- ''Summarise and briefly evaluate the vehicle in terms of its characteristics and combat effectiveness. Mark its pros and cons in a bulleted list. Try not to use more than 6 points for each of the characteristics. Avoid using categorical definitions such as "bad", "good" and the like - use substitutions with softer forms such as "inadequate" and "effective".'' -->'''Pros:''' |
| − | |||
| − | '''Pros:''' | ||
| − | * | + | * Thick all-around armour, able to be heavily angled |
| − | * | + | * Decent gun |
| − | * | + | * Stabilization mechanic |
| − | * | + | * Good MAC 31 coaxial MG |
| − | * | + | * 3 crew members; the "machine gunner" can be lost with minimal detriment |
| − | * | + | * ''Fantastic'' reverse speed; -12 km/h! |
| + | * Neutral steering | ||
'''Cons:''' | '''Cons:''' | ||
| − | * | + | * Very low top speed |
| − | * | + | * No explosive filler for its AP shells |
| − | + | * Longer reload than most peers | |
| − | * | ||
== History == | == History == | ||
<!-- ''Describe the history of the creation and combat usage of the vehicle in more detail than in the introduction. If the historical reference turns out to be too long, take it to a separate article, taking a link to the article about the vehicle and adding a block "/History" (example: <nowiki>https://wiki.warthunder.com/(Vehicle-name)/History</nowiki>) and add a link to it here using the <code>main</code> template. Be sure to reference text and sources by using <code><nowiki><ref></ref></nowiki></code>, as well as adding them at the end of the article with <code><nowiki><references /></nowiki></code>. This section may also include the vehicle's dev blog entry (if applicable) and the in-game encyclopedia description (under <code><nowiki>=== In-game description ===</nowiki></code>, also if applicable).'' --> | <!-- ''Describe the history of the creation and combat usage of the vehicle in more detail than in the introduction. If the historical reference turns out to be too long, take it to a separate article, taking a link to the article about the vehicle and adding a block "/History" (example: <nowiki>https://wiki.warthunder.com/(Vehicle-name)/History</nowiki>) and add a link to it here using the <code>main</code> template. Be sure to reference text and sources by using <code><nowiki><ref></ref></nowiki></code>, as well as adding them at the end of the article with <code><nowiki><references /></nowiki></code>. This section may also include the vehicle's dev blog entry (if applicable) and the in-game encyclopedia description (under <code><nowiki>=== In-game description ===</nowiki></code>, also if applicable).'' --> | ||
| − | + | ''Describe the history of the creation and combat usage of the vehicle in more detail than in the introduction. If the historical reference turns out to be too long, take it to a separate article, taking a link to the article about the vehicle and adding a block "/History" (example: <nowiki>https://wiki.warthunder.com/(Vehicle-name)/History</nowiki>) and add a link to it here using the <code>main</code> template. Be sure to reference text and sources by using <code><nowiki><ref></ref></nowiki></code>, as well as adding them at the end of the article with <code><nowiki><references /></nowiki></code>. This section may also include the vehicle's dev blog entry (if applicable) and the in-game encyclopedia description (under <code><nowiki>=== In-game description ===</nowiki></code>, also if applicable).'' | |
| − | |||
| − | |||
| − | |||
| − | |||
== Media == | == Media == | ||
| − | <!--Excellent additions to the article would be video guides, screenshots from the game, and photos.--> | + | <!-- ''Excellent additions to the article would be video guides, screenshots from the game, and photos.'' --> |
| − | * [ | + | ;Skins |
| + | * [http://live.warthunder.com/feed/camouflages/?q=%23d2 Skins and camouflages for the {{PAGENAME}} from live.warthunder.com.] | ||
;Videos | ;Videos | ||
| − | {{Youtube-gallery| | + | {{Youtube-gallery|xNNx857AvG0|'''Spade Review: Char D2. Slow But Strong''' - ''Joseph 2000''}} |
== See also == | == See also == | ||
| − | ''Links to the articles on the War Thunder Wiki that you think will be useful for the reader, for example:'' | + | <!-- ''Links to the articles on the War Thunder Wiki that you think will be useful for the reader, for example:'' |
| + | * ''reference to the series of the vehicles;'' | ||
| + | * ''links to approximate analogues of other nations and research trees.'' --> | ||
| − | * | + | ;Vehicles equipped with the same gun and turret |
| − | * | + | * [[S.35]] |
| + | * [[B1 bis]] / [[B1 ter]] | ||
| + | |||
| + | ;Other vehicles of similar configuration and role | ||
| + | * [[I-Go Ko]] | ||
== External links == | == External links == | ||
| Line 279: | Line 231: | ||
* ''other literature.'' --> | * ''other literature.'' --> | ||
| − | * [[wt:en/news/ | + | * [[wt:en/news/6709-development-char-d2-slow-advance-en|[Devblog] Char D2: Slow Advance]] |
| + | * [[wikipedia:Char_D2|[Wikipedia] Char D2]] | ||
| + | * [https://www.tanks-encyclopedia.com/ww2/france/Char_Renault_D2.php <nowiki>[Tanks Encyclopedia]</nowiki> Char Renault D2] | ||
| − | {{ | + | {{France medium tanks}} |
Revision as of 14:53, 9 August 2020
Contents
Description

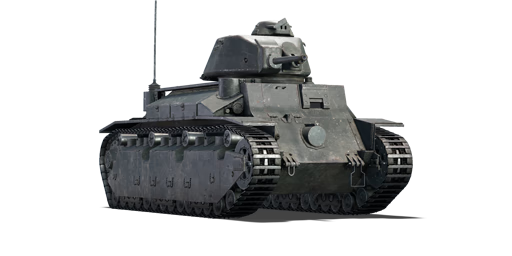
The Char D2 is a rank I French medium tank
with a battle rating of 1.3 (AB/RB/SB). It was introduced in Update "Starfighters". The D2 can be considered the brother of the S.35, sporting similar thick all-around armour, the same 47 mm SA35 gun, and a 3-man crew in the same configuration. The primary differences are the D2 is significantly slower - with nearly half the top speed and a lower power-to-weight ratio - while having a flatter, boxier hull shape, allowing the D2 to angle its armour more reliably.
General info
Survivability and armour
Sporting 40 mm of rolled armour on all sides of a boxy hull, the D2 can be angled at a perfect 45 degree angle for a consistent effective thickness of at least 60 mm, presenting no obvious weak points save for the turret ring. The turret is of the same general style as used by the S.35 and B1 bis, with a small, strong 56 mm turret face reinforced by two gun mantlets and strongly angled 45 mm sides, making it very effective in hull-down positions. Still beware of enemies behind you and even strafing aircraft, as the low, sloped engine deck has two grilles with a mere 5 mm of protection that even SPAAs and heavy machine guns can penetrate.
The D2's ammo racks are located deep in the bottom of the hull, nestled behind the D2's extra suspension armour and the suspension itself, making them fairly well-protected.
Armour types:
- Rolled homogeneous armour (hull, sideskirts, turret ring, turret roof)
- Cast homogeneous armour (turret sides, gun mantlet, turret cupola)
| Armour | Front (Slope angle) | Sides | Rear | Roof |
|---|---|---|---|---|
| Hull | 40 mm (17°) Front glacis - upper part 40 mm (40°) Front glacis - lower part 40 mm (53°) Lower glacis |
40 mm Top 40 mm + 10 mm Bottom |
20 mm (72°) Upper plate (roof) 5 mm (72°) Engine vent (roof) 40 mm Centre plate 20 mm (58°) Lower plate |
20 mm Front part 5 mm Engine vent - front part 20 mm (18°) Rear part 5 mm (18°) Engine vent - rear part |
| Turret | 56 mm Turret front 45 mm Gun mantlet 45 mm Machine gun port 40 mm Turret ring |
45 mm (20°) | 30 mm (25°) Front part 30 mm Rear part | |
| Cupola | 40 mm | 40 mm (26°) | 40 mm (9°) | 30 mm |
Notes:
- Suspension wheels are 15 mm thick, bogies are 10 mm thick and tracks are 20 mm thick
- Lower and upper turret ring armour are both 40 mm thick, and overlap slightly
Mobility
| Game Mode | Max Speed (km/h) | Weight (tons) | Engine power (horsepower) | Power-to-weight ratio (hp/ton) | |||
|---|---|---|---|---|---|---|---|
| Forward | Reverse | Stock | Upgraded | Stock | Upgraded | ||
| Arcade | 26 | 6 | 19.5 | 232 | 286 | 11.9 | 14.67 |
| Realistic | 23 | 6 | 133 | 150 | 6.82 | 7.69 | |
With a top speed of 23 km/h (RB) and a low power-to-weight ratio, the D2 isn't going anywhere fast. Its one saving grace in the mobility department is its reverse speed of -12 km/h!
Armaments
Main armament
| 47 mm SA35 L/32 | Turret rotation speed (°/s) | Reloading rate (seconds) | |||||||||||
|---|---|---|---|---|---|---|---|---|---|---|---|---|---|
| Mode | Capacity | Vertical | Horizontal | Stabilizer | Stock | Upgraded | Full | Expert | Aced | Stock | Full | Expert | Aced |
| Arcade | 108 | ±18° | ±180° | Vertical | 9.5 | 13.1 | __.__ | __.__ | 18.8 | 5.2 | _.__ | _.__ | 4.0 |
| Realistic | 6.0 | 7.0 | __.__ | __.__ | 10.0 | ||||||||
Ammunition
The D2 has a limited choice of ammunition:
- Mle1935: APC; a solid shot with average penetration and no explosive filler. Make sure to target modules and crew positions to maximise the damage. Knowledge of enemy vehicle layouts is essential with this type of ammunition.
- Mle1935 HE: HE; useful for destroying open and very lightly armoured vehicles.
| Penetration statistics | |||||||
|---|---|---|---|---|---|---|---|
| Ammunition | Type of warhead |
Penetration @ 0° Angle of Attack (mm) | |||||
| 10 m | 100 m | 500 m | 1,000 m | 1,500 m | 2,000 m | ||
| Mle1935 | APC | 62 | 59 | 47 | 36 | 27 | 20 |
| Mle1935 HE | HE | 4 | 4 | 4 | 4 | 4 | 4 |
| Shell details | |||||||||
|---|---|---|---|---|---|---|---|---|---|
| Ammunition | Type of warhead |
Velocity (m/s) |
Projectile Mass (kg) |
Fuse delay (m) |
Fuse sensitivity (mm) |
Explosive Mass (TNT equivalent) (g) |
Ricochet | ||
| 0% | 50% | 100% | |||||||
| Mle1935 | APC | 660 | 1.6 | N/A | N/A | N/A | 48° | 63° | 71° |
| Mle1935 HE | HE | 590 | 1.4 | 0.4 | 0.1 | 143 | 79° | 80° | 81° |
Ammo racks

| Full ammo |
1st rack empty |
2nd rack empty |
3rd rack empty |
4th rack empty |
5th rack empty |
6th rack empty |
Visual discrepancy |
|---|---|---|---|---|---|---|---|
| 108 | 91 (+17) | 73 (+35) | 55 (+53) | 37 (+71) | 19 (+89) | 1 (+107) | No |
Notes:
- As they are modeled by sets of 3, shells disappear from the rack only after you've fired all shells in the set.
- Packing 25 (+83) shells is a good compromise to have enough shells at your disposal while reducing drastically the risk of ammo rack detonation.
Machine guns
| 7.5 mm MAC 31 | ||||
|---|---|---|---|---|
| Mount | Capacity (Belt) | Fire rate | Vertical | Horizontal |
| Coaxial | 3250 (150) | 1350 | N/A | N/A |
The small caliber of the MAC 31 machine gun makes it largely ineffective against all armoured vehicles but the ones with an open compartment. It still can be used to ping targets as a rangefinding help.
Usage in battles
As the D2 plays in most regards like a slower, slightly more reliably armoured S.35, utilize them side-by side, prioritizing the D2 in down-tiers and the S.35 in up-tiers, as the D2's hull armour will not save it at BR 2.3. When it's top tier, with a competent driver, it can even be played like a pocket heavy tank, or like a mini B1 bis without the hull cannon. Angle strongly, side-scrape, and utilize hull-down positions to make maximum use of your armour advantage. Pick what route you take when you spawn carefully; if you end up in the wrong place, your speed won't allow you to correct in a timely manner.
Modules
| Tier | Mobility | Protection | Firepower | |
|---|---|---|---|---|
| I | Tracks | Parts | Horizontal Drive | |
| II | Suspension | Brake System | FPE | Adjustment of Fire |
| III | Filters | Crew Replenishment | Elevation Mechanism | |
| IV | Transmission | Engine | Artillery Support | |
Pros and cons
Pros:
- Thick all-around armour, able to be heavily angled
- Decent gun
- Stabilization mechanic
- Good MAC 31 coaxial MG
- 3 crew members; the "machine gunner" can be lost with minimal detriment
- Fantastic reverse speed; -12 km/h!
- Neutral steering
Cons:
- Very low top speed
- No explosive filler for its AP shells
- Longer reload than most peers
History
Describe the history of the creation and combat usage of the vehicle in more detail than in the introduction. If the historical reference turns out to be too long, take it to a separate article, taking a link to the article about the vehicle and adding a block "/History" (example: https://wiki.warthunder.com/(Vehicle-name)/History) and add a link to it here using the main template. Be sure to reference text and sources by using <ref></ref>, as well as adding them at the end of the article with <references />. This section may also include the vehicle's dev blog entry (if applicable) and the in-game encyclopedia description (under === In-game description ===, also if applicable).
Media
- Skins
- Videos
See also
- Vehicles equipped with the same gun and turret
- Other vehicles of similar configuration and role
External links
| France medium tanks | |
|---|---|
| M4 Derivatives | M4A1 (FL10) · M4A4 (SA50) |
| AMX-50 | AMX M4 · AMX-50 (TOA100) · AMX-50 (TO90/930) |
| AMX-30 | AMX-30 · AMX-30 (1972) · AMX-30B2 · AMX-30B2 BRENUS · AMX-30 ACRA · AMX-30 Super |
| AMX-32/40 | AMX-32 · AMX-32 (105) · AMX-40 |
| Leclerc | Leclerc · Leclerc S2 · Leclerc SXXI · Leclerc AZUR |
| Other | D2 · S.35 · Lorraine 40t |
| Germany | Panther "Dauphiné" |
| USA | ▄M4A1 · ▄M4A3 (105) · ▄M4A4 · ▄M26 |
