Difference between pages "SU-76M" and "T-34 (1942)"
Inceptor57 (talk | contribs) (Fixed up page) |
Inceptor57 (talk | contribs) (Fixed up page) |
||
| Line 1: | Line 1: | ||
| − | {{Specs-Card|code= | + | {{Specs-Card|code=ussr_t_34_1942}} |
== Description == | == Description == | ||
<!--''In the description, the first part needs to be about the history of the creation and combat usage of the vehicle, as well as its key features. In the second part, tell the reader about the ground vehicle in the game. Insert the screenshot of the vehicle. If the novice player does not remember the vehicle by name, they will immediately understand what kind of vehicle it is talking about.''--> | <!--''In the description, the first part needs to be about the history of the creation and combat usage of the vehicle, as well as its key features. In the second part, tell the reader about the ground vehicle in the game. Insert the screenshot of the vehicle. If the novice player does not remember the vehicle by name, they will immediately understand what kind of vehicle it is talking about.''--> | ||
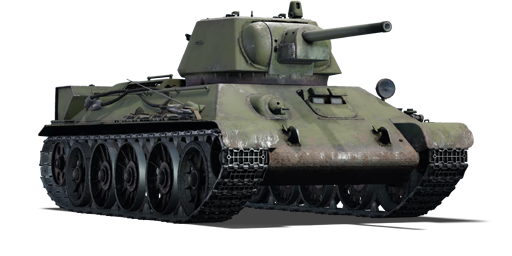
| − | [[File: | + | [[File:GarageImage_T-34(1942).jpg|420px|thumb|left]] |
{{break}} | {{break}} | ||
| − | The ''' | + | The '''T-34 1942''' is a Rank II Soviet medium tank with a battle rating of 3.7. It was introduced in during the Closed Beta Test for Ground Forces before Update 1.41. Compared to its predecessors, it has an improved turret armour protection all-around. The T-34 also introduces the APCR into the ammo loadout. |
| − | + | Playing the T-34 1942 should be in a similar style with the predecessors [[T-34 (1940)]] and the [[T-34 (1941)]], however the tank has access to a much more protected turret and APCR shells that improve its firepower. | |
| − | + | Unfortunately, with a BR of 3.7 the 1942 variant is put in a very awkward BR position. When uptiered, it can face Jumbos and Churchill MK.VIIs, and when downtiered, it can and will face Pz.IIIs/Matildas. Therefore, there are battles where the T-34 1942 is extremely effective, or simply cannon fodder. | |
| − | |||
| − | |||
== General info == | == General info == | ||
| Line 19: | Line 17: | ||
''If necessary use a visual template to indicate the most secure and weak zones of the armour.''--> | ''If necessary use a visual template to indicate the most secure and weak zones of the armour.''--> | ||
'''Armour type:''' | '''Armour type:''' | ||
| − | * Rolled homogeneous armour | + | * Rolled homogeneous armour (Hull, Turret roof) |
| + | * Cast homogeneous armour (Turret, Driver's port, Machine gun port) | ||
{| class="wikitable" | {| class="wikitable" | ||
|- | |- | ||
! Armour !! Front !! Sides !! Rear !! Roof | ! Armour !! Front !! Sides !! Rear !! Roof | ||
|- | |- | ||
| − | | Hull || | + | | Hull || 45 mm (61°) ''Front glacis'' <br> 99 mm (5-35°) ''Welded joint'' <br> 45 mm (52°) ''Lower glacis'' <br> 60 mm (1-73°) ''Machine gun port'' <br> 75 mm (60°) ''Driver port'' || 40 mm (40°) ''Top'' <br> 45 mm (0°) ''Lower'' || 40 mm (47-49°) ''Top'' <br> 40 mm (47°) ''Bottom'' || 16 mm |
| + | |- | ||
| + | | Turret || 53 mm (3-58°) ''Turret front'' <br> 45 mm (2-78°) ''Gun mantlet'' || 53 mm (21-22°) || 53 mm (18-20°) || 15 mm | ||
|- | |- | ||
| − | |||
|} | |} | ||
'''Notes:''' | '''Notes:''' | ||
| − | * | + | * Suspensions wheels and tracks are 20 mm thick. |
| − | * | + | * Parts of the front armour have increased armour such as the machine gun port (60 mm) and driver's hatch (75 mm) |
| − | + | ||
| − | + | The T-34 1942 is not too different from the predecessors, however the most prominent weakness of the T-34, the turret "cheeks", are somewhat less of an exposed target. Thus, the best way to destroy these tanks now is to penetrate through the frontal hull, which is hard as is due to the heavy sloping nature of the armour. You can expect some of the more aggressive opponents to be more reckless and take advantage of situation more often due to their increased armour, but the turret still has weaknesses, albeit much smaller ones. The frontal turret has small flat areas on the lower corners of that can be taken advantage of by even the 5 cm cannons on the [[Pz.III L|Panzer III's]]. | |
=== Mobility === | === Mobility === | ||
| Line 44: | Line 44: | ||
!colspan="1" | Max speed (km/h) | !colspan="1" | Max speed (km/h) | ||
|- | |- | ||
| − | |rowspan="2" | | + | |rowspan="2" | 30.0 || colspan="1" rowspan="2" | N/A || colspan="1" | 54 (AB) |
|- | |- | ||
| − | | | + | |49 (RB/SB) |
|- | |- | ||
!colspan="3" | Engine power (horsepower) | !colspan="3" | Engine power (horsepower) | ||
| Line 55: | Line 55: | ||
|- | |- | ||
|''Arcade'' | |''Arcade'' | ||
| − | | | + | |775 |
| − | | | + | |954 |
|- | |- | ||
|''Realistic/Simulator'' | |''Realistic/Simulator'' | ||
| − | | | + | |442 |
| − | | | + | |500 |
|- | |- | ||
!colspan="3" | Power-to-weight ratio (hp/ton) | !colspan="3" | Power-to-weight ratio (hp/ton) | ||
| Line 69: | Line 69: | ||
|- | |- | ||
|''Arcade'' | |''Arcade'' | ||
| − | | | + | |25.83 |
| − | | | + | |31.80 |
|- | |- | ||
|''Realistic/Simulator'' | |''Realistic/Simulator'' | ||
| − | | | + | |14.73 |
| − | | | + | |16.67 |
|- | |- | ||
|} | |} | ||
== Armaments == | == Armaments == | ||
| + | === Main armament === | ||
<!--''Give the reader information about the characteristics of the main gun. Assess its effectiveness in a battle based on the reloading speed, ballistics and the power of shells. Do not forget about the flexibilty of the fire, that is how quickly the cannon can be aimed at the target, open fire on it and aim at another enemy. Add a link to the main article on the gun: <code><nowiki>{{main|Name of the weapon}}</nowiki></code>. Describe in general terms the ammunition available for the main gun. Give advice on how to use them and how to fill the ammunition storage.''--> | <!--''Give the reader information about the characteristics of the main gun. Assess its effectiveness in a battle based on the reloading speed, ballistics and the power of shells. Do not forget about the flexibilty of the fire, that is how quickly the cannon can be aimed at the target, open fire on it and aim at another enemy. Add a link to the main article on the gun: <code><nowiki>{{main|Name of the weapon}}</nowiki></code>. Describe in general terms the ammunition available for the main gun. Give advice on how to use them and how to fill the ammunition storage.''--> | ||
| − | {{main| | + | {{main|F-34 (76 mm)}} |
{| class="wikitable" style="text-align:center" | {| class="wikitable" style="text-align:center" | ||
|- | |- | ||
| − | ! colspan="6" | [[ | + | ! colspan="6" | [[F-34 (76 mm)|76 mm F-34]] |
|- | |- | ||
! colspan="3" rowspan="1" style="width:5em" |Capacity | ! colspan="3" rowspan="1" style="width:5em" |Capacity | ||
| Line 91: | Line 92: | ||
! rowspan="1" | Stabilizer | ! rowspan="1" | Stabilizer | ||
|- | |- | ||
| − | | colspan="3" | | + | | colspan="3" | 100 || -5°/+28° || ±180° || N/A |
|- | |- | ||
! colspan="6" | Turret rotation speed (°/s) | ! colspan="6" | Turret rotation speed (°/s) | ||
| Line 102: | Line 103: | ||
! style="width:4em" |Prior + Ace qualif. | ! style="width:4em" |Prior + Ace qualif. | ||
|- | |- | ||
| − | | ''Arcade'' || | + | | ''Arcade'' || 14.90 || 20.60 || _.__ || _.__ || _.__ |
|- | |- | ||
| − | | ''Realistic'' || | + | | ''Realistic'' || 14.90 || 17.50 || _.__ || _.__ || _.__ |
|- | |- | ||
! colspan="4" | Reloading rate (seconds) | ! colspan="4" | Reloading rate (seconds) | ||
| Line 113: | Line 114: | ||
! colspan="1" style="width:4em" |Prior + Ace qualif. | ! colspan="1" style="width:4em" |Prior + Ace qualif. | ||
|- | |- | ||
| − | | | + | | 8.40 || _.__ || _.__ || _.__ |
|- | |- | ||
|} | |} | ||
| − | |||
===== Ammunition ===== | ===== Ammunition ===== | ||
| Line 135: | Line 135: | ||
| BR-350A || APHEBC || 80 || 78 || 71 || 63 || 56 || 50 | | BR-350A || APHEBC || 80 || 78 || 71 || 63 || 56 || 50 | ||
|- | |- | ||
| − | | | + | | OF-350M || HE || 9 || 9 || 9 || 9 || 9 || 9 |
| + | |- | ||
| + | | Sh-354T || Shrapnel || 37 || 35 || 29 || 25 || 20 || 17 | ||
|- | |- | ||
| − | | BR- | + | | BR-350SP || APBC ||105 || 104 || 85 || 69 || 57 || 46 |
|- | |- | ||
| − | |||
| − | |||
| BR-350B || APHEBC || 98 || 95 || 87 || 77 || 68 || 60 | | BR-350B || APHEBC || 98 || 95 || 87 || 77 || 68 || 60 | ||
|- | |- | ||
| − | | | + | | BR-350P || APCR || 135 || 130 || 92 || 60 || 39 || 26 |
| + | |- | ||
| + | | BP-350A || HEAT || 80 || 80 || 80 || 80 || 80 || 80 | ||
|- | |- | ||
| − | |||
| − | |||
|} | |} | ||
{| class="wikitable sortable" style="text-align:center" width="100%" | {| class="wikitable sortable" style="text-align:center" width="100%" | ||
| Line 168: | Line 168: | ||
|- | |- | ||
| BR-350A || APHEBC || 665 || 6.3 || 0.15 || 10.0 || 150 || +4° || 48° || 63° || 71° | | BR-350A || APHEBC || 665 || 6.3 || 0.15 || 10.0 || 150 || +4° || 48° || 63° || 71° | ||
| + | |- | ||
| + | | OF-350M || HE || 680 || 6.2 || 0.05 || 0.1 || 621 || +0° || 79° || 80° || 81° | ||
| + | |- | ||
| + | | Sh-354T || Shrapnel || 680 || 6.2 || 0.5 || 8.0 || 85 || +0° || 62° || 69° || 73° | ||
|- | |- | ||
| BR-350SP || APBC || 680 || 6.8 || N/A || N/A || N/A || +4° || 48° || 63° || 71° | | BR-350SP || APBC || 680 || 6.8 || N/A || N/A || N/A || +4° || 48° || 63° || 71° | ||
| + | |- | ||
| + | | BR-350B || APHEBC || 680 || 6.3 || 0.9 || 15.0 || 108.8 || +4° || 48° || 63° || 71° | ||
|- | |- | ||
| BR-350P || APCR || 950 || 3.0 || N/A || N/A || N/A || +1.5° || 66° || 70° || 72° | | BR-350P || APCR || 950 || 3.0 || N/A || N/A || N/A || +1.5° || 66° || 70° || 72° | ||
| Line 175: | Line 181: | ||
| BP-350A || HEAT || 355 || 5.3 || 0.1 || 0.1 || 1,060 || +0° || 62° || 69° || 73° | | BP-350A || HEAT || 355 || 5.3 || 0.1 || 0.1 || 1,060 || +0° || 62° || 69° || 73° | ||
|- | |- | ||
| − | |||
| − | |||
| − | |||
| − | |||
| − | |||
| − | |||
|} | |} | ||
{| class="wikitable sortable" style="text-align:center" | {| class="wikitable sortable" style="text-align:center" | ||
| Line 198: | Line 198: | ||
===== [[Ammo racks|Ammo racks]] ===== | ===== [[Ammo racks|Ammo racks]] ===== | ||
| − | [[File: | + | [[File:Ammoracks_T-34(1942).png|right|thumbnail|x250px|[[Ammo racks|Ammo racks]] of T-34 1942.]] |
{| class="wikitable sortable" style="text-align:center" | {| class="wikitable sortable" style="text-align:center" | ||
|- | |- | ||
| − | ! class="wikitable unsortable" |Full<br />ammo | + | ! class="wikitable unsortable" |Full<br /> ammo |
| − | ! class="wikitable unsortable" |1st<br />rack empty | + | ! class="wikitable unsortable" |1st<br /> rack empty |
| − | ! class="wikitable unsortable" |2nd<br />rack empty | + | ! class="wikitable unsortable" |2nd<br /> rack empty |
| − | ! class="wikitable unsortable" |3rd<br />rack empty | + | ! class="wikitable unsortable" |3rd<br /> rack empty |
| − | ! class="wikitable unsortable" |4th<br />rack empty | + | ! class="wikitable unsortable" |4th<br /> rack empty |
| − | ! class="wikitable unsortable" |Visual<br />discrepancy | + | ! class="wikitable unsortable" |Visual<br /> discrepancy |
| + | |- | ||
| + | || '''100''' || 97 ''(+3)'' || 93 ''(+7)'' || 89 ''(+11)'' || 1 ''(+99)'' || style="text-align:left" | no | ||
| + | |- | ||
| + | |} | ||
| + | |||
| + | Turret empty: 89 (+11) | ||
| + | |||
| + | === Machine guns === | ||
| + | <!--''Offensive and anti-aircraft machine guns not only allow you to fight some aircraft, but also are effective against lightly armoured vehicles. Evaluate machine guns and give recommendations on its use.''--> | ||
| + | {{main|DT (7.62 mm)}} | ||
| + | |||
| + | {| class="wikitable" style="text-align:center" | ||
| + | |- | ||
| + | ! colspan="7" | [[DT (7.62 mm)|7.62 mm DT]] | ||
| + | |- | ||
| + | ! colspan="7" | ''Coaxial mount'' | ||
| + | |- | ||
| + | ! colspan="4" rowspan="1" style="width:5em" |Capacity (Belt capacity) | ||
| + | ! rowspan="1" | Fire rate <br> (shots/minute) | ||
| + | ! rowspan="1" | Vertical <br> guidance | ||
| + | ! rowspan="1" | Horizontal <br> guidance | ||
| + | |- | ||
| + | | colspan="4" | 1,890 (63) || 600 || N/A || N/A | ||
|- | |- | ||
| − | |||
|} | |} | ||
== Usage in the battles == | == Usage in the battles == | ||
<!--''Describe the tactics of playing in the vehicle, the features of using vehicles in the team and advice on tactics. Refrain from creating a "guide" - do not impose a single point of view but give the reader food for thought. Describe the most dangerous enemies and give recommendations on fighting them. If necessary, note the specifics of the game in different modes (AB, RB, SB).''--> | <!--''Describe the tactics of playing in the vehicle, the features of using vehicles in the team and advice on tactics. Refrain from creating a "guide" - do not impose a single point of view but give the reader food for thought. Describe the most dangerous enemies and give recommendations on fighting them. If necessary, note the specifics of the game in different modes (AB, RB, SB).''--> | ||
| − | + | The T-34 should be played in an offensive role, charging into the battlefield and maximize combat effectiveness by closing the distance for better ammo penetration. The great speed of the T-34 should be taken advantage by flanking the targets across the cross-country terrain, especially on maps like [[Mozdok (Ground Forces)|Mozdok]], thus you can target the weaker areas of enemy armour and maximize the beyond-armour damage of your APHEBC rounds. | |
| + | |||
| + | The 76 mm APHEBC shell has very good HE filler which can OHK most opponents from the side. For some frontal engagements and emergencies, the APCR shell can be used. However, given the nature of APCR, the APCR shell tends to bounce and do little damage against opponents with any sort of sloped armour. | ||
| + | |||
| + | With a battle rating of 3.7, this means that (assuming the T-34 1942 is the highest rating in your line-up) the worst enemies will be maxed at the 4.7 range. This means that, at worst, the T-34 will face [[M4A3E2|M4A3E2 Jumbos]], [[Churchill Mk VII|Churchill VIIs]], and at best, it will face early Pz.IIIs. | ||
| − | + | M4 Shermans and long-barreled Axis tanks are your most common, and dangerous, opponents. '''The T-34 cannot penetrate Shermans reliably from the front'''. Flanking is primarily recommended- however, if your T-34 is stuck between a rock and hard place, aim to the right or left of the Sherman's gun mantlet where the slope is somewhat flat- penetration is almost guaranteed with the APCR shell- and, with a little luck, the APHE shell will penetrate fairly effectively. Another weak spot of the Shermans exists just below the side armour - the flat armour between the tracks/bogies. Depending on the variant, the 76mm APHE shell from the T-34 will easily OHK any Sherman or critically disable it due to the floor-located ammunition. | |
| − | Unfortunately, the | + | Unfortunately, Shermans can penetrate the T-34's turret cheeks and disable them with its 75mm AP shells. Avoid prolonged frontal confrontations with Shermans at all costs. |
| − | + | If you come across an M4A3E2 Jumbo, the best thing to do is retreat and use your superior maneuverability to try and engage it from the side. If it has you cornered, you can try and hit the hull mounted machine gun port. A penetration will usually result in a penetration, and a destroyed Jumbo if you are using APHEBC. This, however, is unreliable and a difficult shot to make, especially at range. You can also try and disable the tracks and/or gun to make your escape easier. Generally, it is best to completely avoid frontal engagements. | |
| + | |||
| + | The same goes for Churchill tanks. The [[Churchill_Mk I|Mk I]] is an easy target. It has a gun which will struggle to penetrate you, meaning you can get close and exploit its weak points. The [[Churchill Mk III|Mk III]] is slightly more dangerous, as its [[Ordnance QF 6-pounder Mk.V (57 mm)|57 mm gun]] can easily penetrate your turret and is quite damaging for a British solid shot gun. However, it is easy to outmaneuver and can be an easy win from the side. Most dangerous is the Churchill VII. It has 152 mm of frontal armour, making it almost impenetrable from the front. The side armour is also thick at 95 mm, making APHEBC shells only effective below 100 m. Even then, even slight angling will prevent your rounds from penetrating, and side shots will often get eaten up by the Churchills huge tracks. All this, plus the fact that the 75 mm gun on the Churchill can penetrate your turret mean that you should avoid this tank unless you are sure that you can get a penetration. | ||
| + | |||
| + | When facing Pz. IVs/Chi-Nus, the T-34 excels as the 76mm APHE shell can easily penetrate and generally OHK the flat armour of these Axis types. | ||
=== Pros and cons === | === Pros and cons === | ||
<!--''Summarize and briefly evaluate the vehicle in terms of its characteristics and combat effectiveness. Mark its pros and cons in a bulleted list. Do not use more than 6 points for each of the characteristics. Avoid using categorical definitions such as "bad", "good" and the like - they have a substitution in the form of softer "inadequate", "effective".''--> | <!--''Summarize and briefly evaluate the vehicle in terms of its characteristics and combat effectiveness. Mark its pros and cons in a bulleted list. Do not use more than 6 points for each of the characteristics. Avoid using categorical definitions such as "bad", "good" and the like - they have a substitution in the form of softer "inadequate", "effective".''--> | ||
'''Pros:''' | '''Pros:''' | ||
| − | * | + | * Like it's predecessors it has a good reload time and great maneuverability, making it suitable for short range engagements. |
| − | * | + | * BR-350P APCR shells possess decent penetrative values which allow somewhat decent short-medium range engagement. |
| − | * | + | * The driver's hatch is uparmoured and results in 150 mm of line of sight steel. |
| − | * | + | * Armour angling gives the tank very good armour ratings in nearly all sides. |
| − | * | + | * The 76mm F34 gun has a range of different shells for use against different targets. The explosive power of the BR-350B alongside 98mm penetration is a great all rounder and can deal with most light and medium tanks at its rank. APCR should be saved for heavier tanks. |
| − | + | * Excellent maneuverability and good speed means that you can escape from a bad situation. | |
| − | * | ||
'''Cons:''' | '''Cons:''' | ||
| − | * | + | * The armour isn't reliable when directly facing an enemy. Angle your tank or take cover to maximize survivability. |
| − | * | + | * Cannot effectively penetrate Shermans from the front. |
| − | * | + | * The upgraded turret has a thicker but less angled armour and also increases the tank silhouette, allowing German long range tanks to penetrate that area. |
| − | + | * It has significant difficulties when fighting against enemy mediums on long ranges due to the poor initial ammo selection. Fights at short distances are preferred. | |
| − | * | + | * 4 man crew, meaning only 1 extra crew member if one goes down. |
| − | * | + | * Very constraint interior for crew members, a hit to one crew member is likely to knock out one or two other. |
| + | * Large fuel tanks running along the entire upper hull sides. | ||
== History == | == History == | ||
<!--''Describe the history of the creation and combat usage of the ground vehicle in more detail than in the introduction. If the historical reference turns out to be too big, take it to a separate article, taking a link to an article about the vehicle and adding a block "/historical reference" (example: https://wiki.warthunder.com/Name-vehicles/historical reference) and add a link to it here using the <code>main</code> template. Be sure to include links to sources at the end of the article.''--> | <!--''Describe the history of the creation and combat usage of the ground vehicle in more detail than in the introduction. If the historical reference turns out to be too big, take it to a separate article, taking a link to an article about the vehicle and adding a block "/historical reference" (example: https://wiki.warthunder.com/Name-vehicles/historical reference) and add a link to it here using the <code>main</code> template. Be sure to include links to sources at the end of the article.''--> | ||
===Development=== | ===Development=== | ||
| − | + | By 1939, the most numerous tank models in the Red Army were the [[T-26|T-26]] and the [[BT-7|BT-series]] light tanks. Though adequate on the days they were introduced, they are now outdated by this time due to the changing technology in anti-tank warfare. Back in 1937, a new tank project was already taking place under engineer Mikhail Koshkin, who was assigned to lead a design team at the Kharkiv Locomotive Factory (KhPZ) for a replacement for the BT light tanks as a new "cavalry tank" to engage in maneuver warfare. The first prototype was designated the ''A-20'' with 20 mm of armour, a 45 mm gun, and a diesel engine in a V-12 configuration. The Christie suspension is taken from the BT, even the conversion to drive track-less on roads. But gradually, the new track designs available made this conversion redundant and was excluded in further models. The A-20 also showed the effective research done into sloping armour on previous prototype designs, utilizing an all-round sloping armour on the design. | |
| − | The | + | It was during this design process that the Russo-Japanese border wars took place and showed the deficiency of the T-26 and BT models. Koshkin then appealed for the initiation of a much better tank concept, the "universal tank" to completely replace the T-26 and BT tanks. The second prototype was the ''A-32'' and has an increased 32 mm of frontal armour with a 76.2 mm L-10 gun. The heavier prototype was still just as mobile as the A-20, and further development into the design increased the frontal armour thickness to 45 mm thick and a newer 76.2 mm L-11 gun attached instead. This model was approved for production and designated the '''T-34''' after the year 1934, when Koshkin believed was when he formulated the idea for the T-34. Koshkin, however, never saw his tanks in action as he succumbed to pneumonia in September 1940 after trials with the T-34 in the cold winter. Thus, the drivetrain developer Alexander Morozov was appointed as the next Chief Designer. The T-34 tank would go on to become the most produced World War II tank, with 84,070 tanks produced in the production span between 1940 to 1958. |
| + | |||
| + | ===Design=== | ||
| + | The T-34 took all of the Soviet's experiences with tanks and incorporated into the design. The tank had great sloping armour, a powerful engine, wide tracks, and a large gun. At its introduction, the armour of the T-34 was one of the best in the world, by sloping the 45 mm thick armour plate by 60 degrees, the effective thickness was now 90 mm thick. The armour was welded into place instead of riveted as rivets tend to "spall" and cause damage inside the tank even if the armour was not penetrated. The 76.2 mm gun was a major advantage compared to those on its adversaries, as it could be used as a multi-purpose weapon against infantry and tanks, unlike the Germans who had tanks split for two different roles such as the [[Pz.III E|Panzer III for anti-tank]] and the [[Pz.IV F1|Panzer IV for infantry support]]. The engine, a Model V-2-34 V12 diesel engine, was adequately powerful for the Christie suspension tank design and allowed the T-34 to reach a maximum of 53 km/h (33 mph). The powerful engine, added with the wide tracks that gave it lower ground pressure, allowed the T-34 to travel across cross-country terrain with relative freedom without risk of bogging down. | ||
| + | |||
| + | However, the T-34 is not without its fault and its quality is very questionable in some cases. Two [[T-34 (1941)]] models were sent to United States in late 1942 for evaluations. The evaluations found the armour quality to be rather insufficient, with improper welding in places that can allow leaks and improper alloys that made armour weaker in some places than others, the T-34 cast turret was even found to use softer armour than the hull that render it vulnerable to even 37 mm shells. The gun sights for the 76.2 mm cannon was also quite poor in comparison to the Axis and other Allies. The tank reliability was also troubled by various mechanical issues, especially in the earlier models. Low quality air filters and insufficient air flow could impede the engine capabilities and the turret drive had poor reliability that could easily jam up. The vision devices was also poor, the crew are unable to see outside the tank with enough situational awareness, even the tank commander couldn't see well out of the tank. Also, the lack of radios on the first few years of T-34s forced the tank commanders to communicate via flags, with only company commanders tanks fitted with the radios. Ergonomics inside the tanks was unsatisfactory and was very cramped inside, with no turret basket the loader has to struggle when the turret rotates and accessing ammunition on the floor boxes makes it a hard and dangerous job for the loader. The commander's hatch on the turret was also one-piece, making even a "heads-up" view for the commander impossible on these large one-piece hatches. Finally, the two-person turret suffered from not only a very cramped compartment, but an overworked commander who has to act as a gunner as well. | ||
| + | |||
| + | ===T-34 Mod. 1942=== | ||
| + | The '''T-34 Mod. 1942''' was an improved variant of the T-34 that also presented some fixes to general issues with the T-34. The Model 1942 was still mounted with a 76.2 mm cannon, making it a T-34/76 still, and the design featured additional armour and many simplified parts and components. The tank's road wheels, track pattern, driver's hatch, and transmission access cover on the rear were redesigned. Some of the designs also had a headlight moved to the left of the hull. However, at the same time, the '''Model 1943''' (released in 1942) was also introduced into the circulation, which feature the more radical changes in the T-34 tank compared to the Mod. 1942. The T-34 Mod. 1943 was most prominent with the hexagonal turret, more armour, increased fuel capacity, and more ammo stowage. The hatches on this new turret came in two, one for loader and the commander and opens in a way that the Germans nicknamed it the "Mickey Mouse" tank due to the round hatches forming a shape similar to the circular ears when both are opened. Later Mod. 1943 production tanks were given a commander's cupola that provided a decent view for the commander, much better compared to a lone periscope, which was the only vision device for the commander when "button-upped" beforehand. To increase confusion, the Mod. 1943 were called the Model 1942 by the Soviets; regardless this vehicle is the most prominent by the hexagonal turret, which is seen in-game. Though it is unsure about the specific number of the model was produced, it made up part of the 35,120 T-34/76 created in its production life. | ||
===Combat usage=== | ===Combat usage=== | ||
| − | + | The newer T-34 models saw action in most operations in 1942, most notably during the Battle of Stalingrad, where T-34s made the main striking force of Operation Uranus to encircle the German Sixth Army and trap them inside Stalingrad. During the battle, T-34s were still being made in the Stalingrad Tractor Factory, churning out tanks that were immediately sent to the front-lines once finished that sometimes went without paint finish and crewed by the workers that were involved building the tank in the factory. After Stalingrad, the Soviet Army continued to push the Germans back in various of offensives, with the T-34 as the main tank in the armoured force. The T-34 mod. 1943 were also given to Polish and Czech units that escaped to Soviet Union to continue fighting against the Germans. Like the Soviets, these units received little training with the T-34 and so casualties remain high in T-34 crew members. | |
| − | The | + | The T-34 also became the most numerous tank in Soviet usage by the time Germany launched the 1943 Summer offensive Operation Citadel, or the "Battle of Kursk". This battle was the debut of the [[Panther D|Panthers]] and saw a very large concentration in [[Tiger H1|Tiger I]]s and [[Ferdinand|Ferdinand tank destroyers]]. Other units supplementing these heavier tanks were the [[Pz.IV H|Panzer IVs]], [[StuG III G|StuG IIIs]], and the [[Pz.III M|Panzer III]]s. The introduction of these newer and more powerful tanks and tank destroyers and improved German tanks in the largest tank battle in history caused high casualties in the T-34 ranks, and the entire Soviet armoured forces in a whole. The Tiger's 88 mm cannon is able to destroy the T-34 from a range of 1,500 meters while the 76.2 mm cannon on the T-34 must get very close in order to penetrate. In order to engage these tanks, the T-34 forces try to maximize their massive quantity of units to overwhelm German tank units and getting to "point-blank" ranges to the point of ramming in order to negate either of the tank's range advantages and blast away at each other. |
| − | + | The T-34's growing deficiency in performance in the war was due to the Soviet high command decision's to keep with one design in production to minimize costs and keep manufacturing rate high. This meant that upgrades to the tank were not the highest priority for the tank. While this ideal was very sufficient in the first two years since Operation Barbarossa, it now made the T-34 lacking compared to the improved German tanks. Attempts to fix this decision was to mount stronger guns onto the T-34, the first attempt was the mounting of the [[T-34-57|57 mm ZiS-4 cannon]] to make the T-34 a "tank hunter", but the 57 mm gun lacked a decent HE shell, thus was not an efficient tank gun and was pulled. Then, it was decided to mount a 85 mm anti-aircraft gun onto the tank, though requiring a much larger turret to take in the bigger gun. This tank with the 85 mm gun was called the [[T-34-85 (D-5T)|T-34-85]]. | |
| − | == | + | == Media == |
| − | + | ''An excellent addition to the article will be video guides, as well as screenshots from the game and photos.'' | |
| − | == | + | ==References== |
| − | + | <references /> | |
== Read also == | == Read also == | ||
| − | * [https://warthunder.com/en/news/ | + | <!--''Links to the articles on the War Thunder Wiki that you think will be useful for the reader, for example,'' |
| + | * ''reference to the series of the vehicles;'' | ||
| + | * ''links to approximate analogues of other nations and research trees.'' | ||
| + | ''ETC.''--> | ||
| + | [https://warthunder.com/en/news/3662-profile-t-34-model-1942-a-tough-nut-to-crack-en [Vehicle Profile<nowiki>]</nowiki> T-34 Model 1942 - A Tough Nut to Crack] | ||
== Sources == | == Sources == | ||
| Line 267: | Line 309: | ||
* ''other literature.'' | * ''other literature.'' | ||
| − | {{USSR | + | {{USSR medium tanks}} |
Revision as of 17:39, 13 January 2019
Contents
Description
.jpg)
The T-34 1942 is a Rank II Soviet medium tank with a battle rating of 3.7. It was introduced in during the Closed Beta Test for Ground Forces before Update 1.41. Compared to its predecessors, it has an improved turret armour protection all-around. The T-34 also introduces the APCR into the ammo loadout.
Playing the T-34 1942 should be in a similar style with the predecessors T-34 (1940) and the T-34 (1941), however the tank has access to a much more protected turret and APCR shells that improve its firepower.
Unfortunately, with a BR of 3.7 the 1942 variant is put in a very awkward BR position. When uptiered, it can face Jumbos and Churchill MK.VIIs, and when downtiered, it can and will face Pz.IIIs/Matildas. Therefore, there are battles where the T-34 1942 is extremely effective, or simply cannon fodder.
General info
Survivability and armour
Armour type:
- Rolled homogeneous armour (Hull, Turret roof)
- Cast homogeneous armour (Turret, Driver's port, Machine gun port)
| Armour | Front | Sides | Rear | Roof |
|---|---|---|---|---|
| Hull | 45 mm (61°) Front glacis 99 mm (5-35°) Welded joint 45 mm (52°) Lower glacis 60 mm (1-73°) Machine gun port 75 mm (60°) Driver port |
40 mm (40°) Top 45 mm (0°) Lower |
40 mm (47-49°) Top 40 mm (47°) Bottom |
16 mm |
| Turret | 53 mm (3-58°) Turret front 45 mm (2-78°) Gun mantlet |
53 mm (21-22°) | 53 mm (18-20°) | 15 mm |
Notes:
- Suspensions wheels and tracks are 20 mm thick.
- Parts of the front armour have increased armour such as the machine gun port (60 mm) and driver's hatch (75 mm)
The T-34 1942 is not too different from the predecessors, however the most prominent weakness of the T-34, the turret "cheeks", are somewhat less of an exposed target. Thus, the best way to destroy these tanks now is to penetrate through the frontal hull, which is hard as is due to the heavy sloping nature of the armour. You can expect some of the more aggressive opponents to be more reckless and take advantage of situation more often due to their increased armour, but the turret still has weaknesses, albeit much smaller ones. The frontal turret has small flat areas on the lower corners of that can be taken advantage of by even the 5 cm cannons on the Panzer III's.
Mobility
| Mobility characteristic | ||
|---|---|---|
| Weight (tons) | Add-on Armor weight (tons) |
Max speed (km/h) |
| 30.0 | N/A | 54 (AB) |
| 49 (RB/SB) | ||
| Engine power (horsepower) | ||
| Mode | Stock | Upgraded |
| Arcade | 775 | 954 |
| Realistic/Simulator | 442 | 500 |
| Power-to-weight ratio (hp/ton) | ||
| Mode | Stock | Upgraded |
| Arcade | 25.83 | 31.80 |
| Realistic/Simulator | 14.73 | 16.67 |
Armaments
Main armament
| 76 mm F-34 | |||||
|---|---|---|---|---|---|
| Capacity | Vertical guidance |
Horizontal guidance |
Stabilizer | ||
| 100 | -5°/+28° | ±180° | N/A | ||
| Turret rotation speed (°/s) | |||||
| Mode | Stock | Upgraded | Prior + Full crew | Prior + Expert qualif. | Prior + Ace qualif. |
| Arcade | 14.90 | 20.60 | _.__ | _.__ | _.__ |
| Realistic | 14.90 | 17.50 | _.__ | _.__ | _.__ |
| Reloading rate (seconds) | |||||
| Stock | Prior + Full crew | Prior + Expert qualif. | Prior + Ace qualif. | ||
| 8.40 | _.__ | _.__ | _.__ | ||
Ammunition
| Penetration statistics | |||||||
|---|---|---|---|---|---|---|---|
| Ammunition | Type of warhead |
Penetration in mm @ 90° | |||||
| 10m | 100m | 500m | 1000m | 1500m | 2000m | ||
| BR-350A | APHEBC | 80 | 78 | 71 | 63 | 56 | 50 |
| OF-350M | HE | 9 | 9 | 9 | 9 | 9 | 9 |
| Sh-354T | Shrapnel | 37 | 35 | 29 | 25 | 20 | 17 |
| BR-350SP | APBC | 105 | 104 | 85 | 69 | 57 | 46 |
| BR-350B | APHEBC | 98 | 95 | 87 | 77 | 68 | 60 |
| BR-350P | APCR | 135 | 130 | 92 | 60 | 39 | 26 |
| BP-350A | HEAT | 80 | 80 | 80 | 80 | 80 | 80 |
| Shell details | ||||||||||
|---|---|---|---|---|---|---|---|---|---|---|
| Ammunition | Type of warhead |
Velocity in m/s |
Projectile Mass in kg |
Fuse delay
in m: |
Fuse sensitivity
in mm: |
Explosive Mass in g (TNT equivalent): |
Normalization At 30° from horizontal: |
Ricochet: | ||
| 0% | 50% | 100% | ||||||||
| BR-350A | APHEBC | 665 | 6.3 | 0.15 | 10.0 | 150 | +4° | 48° | 63° | 71° |
| OF-350M | HE | 680 | 6.2 | 0.05 | 0.1 | 621 | +0° | 79° | 80° | 81° |
| Sh-354T | Shrapnel | 680 | 6.2 | 0.5 | 8.0 | 85 | +0° | 62° | 69° | 73° |
| BR-350SP | APBC | 680 | 6.8 | N/A | N/A | N/A | +4° | 48° | 63° | 71° |
| BR-350B | APHEBC | 680 | 6.3 | 0.9 | 15.0 | 108.8 | +4° | 48° | 63° | 71° |
| BR-350P | APCR | 950 | 3.0 | N/A | N/A | N/A | +1.5° | 66° | 70° | 72° |
| BP-350A | HEAT | 355 | 5.3 | 0.1 | 0.1 | 1,060 | +0° | 62° | 69° | 73° |
| Smoke characteristic | ||||||
|---|---|---|---|---|---|---|
| Ammunition | Velocity in m/s |
Projectile Mass in kg |
Screen radius in m |
Screen time in s |
Screen hold time in s: |
Explosive Mass in g (TNT equivalent): |
| D-350A | 680 | 6.5 | 13 | 5 | 20 | 50 |
Ammo racks
.png)
| Full ammo |
1st rack empty |
2nd rack empty |
3rd rack empty |
4th rack empty |
Visual discrepancy |
|---|---|---|---|---|---|
| 100 | 97 (+3) | 93 (+7) | 89 (+11) | 1 (+99) | no |
Turret empty: 89 (+11)
Machine guns
| 7.62 mm DT | ||||||
|---|---|---|---|---|---|---|
| Coaxial mount | ||||||
| Capacity (Belt capacity) | Fire rate (shots/minute) |
Vertical guidance |
Horizontal guidance | |||
| 1,890 (63) | 600 | N/A | N/A | |||
Usage in the battles
The T-34 should be played in an offensive role, charging into the battlefield and maximize combat effectiveness by closing the distance for better ammo penetration. The great speed of the T-34 should be taken advantage by flanking the targets across the cross-country terrain, especially on maps like Mozdok, thus you can target the weaker areas of enemy armour and maximize the beyond-armour damage of your APHEBC rounds.
The 76 mm APHEBC shell has very good HE filler which can OHK most opponents from the side. For some frontal engagements and emergencies, the APCR shell can be used. However, given the nature of APCR, the APCR shell tends to bounce and do little damage against opponents with any sort of sloped armour.
With a battle rating of 3.7, this means that (assuming the T-34 1942 is the highest rating in your line-up) the worst enemies will be maxed at the 4.7 range. This means that, at worst, the T-34 will face M4A3E2 Jumbos, Churchill VIIs, and at best, it will face early Pz.IIIs.
M4 Shermans and long-barreled Axis tanks are your most common, and dangerous, opponents. The T-34 cannot penetrate Shermans reliably from the front. Flanking is primarily recommended- however, if your T-34 is stuck between a rock and hard place, aim to the right or left of the Sherman's gun mantlet where the slope is somewhat flat- penetration is almost guaranteed with the APCR shell- and, with a little luck, the APHE shell will penetrate fairly effectively. Another weak spot of the Shermans exists just below the side armour - the flat armour between the tracks/bogies. Depending on the variant, the 76mm APHE shell from the T-34 will easily OHK any Sherman or critically disable it due to the floor-located ammunition.
Unfortunately, Shermans can penetrate the T-34's turret cheeks and disable them with its 75mm AP shells. Avoid prolonged frontal confrontations with Shermans at all costs.
If you come across an M4A3E2 Jumbo, the best thing to do is retreat and use your superior maneuverability to try and engage it from the side. If it has you cornered, you can try and hit the hull mounted machine gun port. A penetration will usually result in a penetration, and a destroyed Jumbo if you are using APHEBC. This, however, is unreliable and a difficult shot to make, especially at range. You can also try and disable the tracks and/or gun to make your escape easier. Generally, it is best to completely avoid frontal engagements.
The same goes for Churchill tanks. The Mk I is an easy target. It has a gun which will struggle to penetrate you, meaning you can get close and exploit its weak points. The Mk III is slightly more dangerous, as its 57 mm gun can easily penetrate your turret and is quite damaging for a British solid shot gun. However, it is easy to outmaneuver and can be an easy win from the side. Most dangerous is the Churchill VII. It has 152 mm of frontal armour, making it almost impenetrable from the front. The side armour is also thick at 95 mm, making APHEBC shells only effective below 100 m. Even then, even slight angling will prevent your rounds from penetrating, and side shots will often get eaten up by the Churchills huge tracks. All this, plus the fact that the 75 mm gun on the Churchill can penetrate your turret mean that you should avoid this tank unless you are sure that you can get a penetration.
When facing Pz. IVs/Chi-Nus, the T-34 excels as the 76mm APHE shell can easily penetrate and generally OHK the flat armour of these Axis types.
Pros and cons
Pros:
- Like it's predecessors it has a good reload time and great maneuverability, making it suitable for short range engagements.
- BR-350P APCR shells possess decent penetrative values which allow somewhat decent short-medium range engagement.
- The driver's hatch is uparmoured and results in 150 mm of line of sight steel.
- Armour angling gives the tank very good armour ratings in nearly all sides.
- The 76mm F34 gun has a range of different shells for use against different targets. The explosive power of the BR-350B alongside 98mm penetration is a great all rounder and can deal with most light and medium tanks at its rank. APCR should be saved for heavier tanks.
- Excellent maneuverability and good speed means that you can escape from a bad situation.
Cons:
- The armour isn't reliable when directly facing an enemy. Angle your tank or take cover to maximize survivability.
- Cannot effectively penetrate Shermans from the front.
- The upgraded turret has a thicker but less angled armour and also increases the tank silhouette, allowing German long range tanks to penetrate that area.
- It has significant difficulties when fighting against enemy mediums on long ranges due to the poor initial ammo selection. Fights at short distances are preferred.
- 4 man crew, meaning only 1 extra crew member if one goes down.
- Very constraint interior for crew members, a hit to one crew member is likely to knock out one or two other.
- Large fuel tanks running along the entire upper hull sides.
History
Development
By 1939, the most numerous tank models in the Red Army were the T-26 and the BT-series light tanks. Though adequate on the days they were introduced, they are now outdated by this time due to the changing technology in anti-tank warfare. Back in 1937, a new tank project was already taking place under engineer Mikhail Koshkin, who was assigned to lead a design team at the Kharkiv Locomotive Factory (KhPZ) for a replacement for the BT light tanks as a new "cavalry tank" to engage in maneuver warfare. The first prototype was designated the A-20 with 20 mm of armour, a 45 mm gun, and a diesel engine in a V-12 configuration. The Christie suspension is taken from the BT, even the conversion to drive track-less on roads. But gradually, the new track designs available made this conversion redundant and was excluded in further models. The A-20 also showed the effective research done into sloping armour on previous prototype designs, utilizing an all-round sloping armour on the design.
It was during this design process that the Russo-Japanese border wars took place and showed the deficiency of the T-26 and BT models. Koshkin then appealed for the initiation of a much better tank concept, the "universal tank" to completely replace the T-26 and BT tanks. The second prototype was the A-32 and has an increased 32 mm of frontal armour with a 76.2 mm L-10 gun. The heavier prototype was still just as mobile as the A-20, and further development into the design increased the frontal armour thickness to 45 mm thick and a newer 76.2 mm L-11 gun attached instead. This model was approved for production and designated the T-34 after the year 1934, when Koshkin believed was when he formulated the idea for the T-34. Koshkin, however, never saw his tanks in action as he succumbed to pneumonia in September 1940 after trials with the T-34 in the cold winter. Thus, the drivetrain developer Alexander Morozov was appointed as the next Chief Designer. The T-34 tank would go on to become the most produced World War II tank, with 84,070 tanks produced in the production span between 1940 to 1958.
Design
The T-34 took all of the Soviet's experiences with tanks and incorporated into the design. The tank had great sloping armour, a powerful engine, wide tracks, and a large gun. At its introduction, the armour of the T-34 was one of the best in the world, by sloping the 45 mm thick armour plate by 60 degrees, the effective thickness was now 90 mm thick. The armour was welded into place instead of riveted as rivets tend to "spall" and cause damage inside the tank even if the armour was not penetrated. The 76.2 mm gun was a major advantage compared to those on its adversaries, as it could be used as a multi-purpose weapon against infantry and tanks, unlike the Germans who had tanks split for two different roles such as the Panzer III for anti-tank and the Panzer IV for infantry support. The engine, a Model V-2-34 V12 diesel engine, was adequately powerful for the Christie suspension tank design and allowed the T-34 to reach a maximum of 53 km/h (33 mph). The powerful engine, added with the wide tracks that gave it lower ground pressure, allowed the T-34 to travel across cross-country terrain with relative freedom without risk of bogging down.
However, the T-34 is not without its fault and its quality is very questionable in some cases. Two T-34 (1941) models were sent to United States in late 1942 for evaluations. The evaluations found the armour quality to be rather insufficient, with improper welding in places that can allow leaks and improper alloys that made armour weaker in some places than others, the T-34 cast turret was even found to use softer armour than the hull that render it vulnerable to even 37 mm shells. The gun sights for the 76.2 mm cannon was also quite poor in comparison to the Axis and other Allies. The tank reliability was also troubled by various mechanical issues, especially in the earlier models. Low quality air filters and insufficient air flow could impede the engine capabilities and the turret drive had poor reliability that could easily jam up. The vision devices was also poor, the crew are unable to see outside the tank with enough situational awareness, even the tank commander couldn't see well out of the tank. Also, the lack of radios on the first few years of T-34s forced the tank commanders to communicate via flags, with only company commanders tanks fitted with the radios. Ergonomics inside the tanks was unsatisfactory and was very cramped inside, with no turret basket the loader has to struggle when the turret rotates and accessing ammunition on the floor boxes makes it a hard and dangerous job for the loader. The commander's hatch on the turret was also one-piece, making even a "heads-up" view for the commander impossible on these large one-piece hatches. Finally, the two-person turret suffered from not only a very cramped compartment, but an overworked commander who has to act as a gunner as well.
T-34 Mod. 1942
The T-34 Mod. 1942 was an improved variant of the T-34 that also presented some fixes to general issues with the T-34. The Model 1942 was still mounted with a 76.2 mm cannon, making it a T-34/76 still, and the design featured additional armour and many simplified parts and components. The tank's road wheels, track pattern, driver's hatch, and transmission access cover on the rear were redesigned. Some of the designs also had a headlight moved to the left of the hull. However, at the same time, the Model 1943 (released in 1942) was also introduced into the circulation, which feature the more radical changes in the T-34 tank compared to the Mod. 1942. The T-34 Mod. 1943 was most prominent with the hexagonal turret, more armour, increased fuel capacity, and more ammo stowage. The hatches on this new turret came in two, one for loader and the commander and opens in a way that the Germans nicknamed it the "Mickey Mouse" tank due to the round hatches forming a shape similar to the circular ears when both are opened. Later Mod. 1943 production tanks were given a commander's cupola that provided a decent view for the commander, much better compared to a lone periscope, which was the only vision device for the commander when "button-upped" beforehand. To increase confusion, the Mod. 1943 were called the Model 1942 by the Soviets; regardless this vehicle is the most prominent by the hexagonal turret, which is seen in-game. Though it is unsure about the specific number of the model was produced, it made up part of the 35,120 T-34/76 created in its production life.
Combat usage
The newer T-34 models saw action in most operations in 1942, most notably during the Battle of Stalingrad, where T-34s made the main striking force of Operation Uranus to encircle the German Sixth Army and trap them inside Stalingrad. During the battle, T-34s were still being made in the Stalingrad Tractor Factory, churning out tanks that were immediately sent to the front-lines once finished that sometimes went without paint finish and crewed by the workers that were involved building the tank in the factory. After Stalingrad, the Soviet Army continued to push the Germans back in various of offensives, with the T-34 as the main tank in the armoured force. The T-34 mod. 1943 were also given to Polish and Czech units that escaped to Soviet Union to continue fighting against the Germans. Like the Soviets, these units received little training with the T-34 and so casualties remain high in T-34 crew members.
The T-34 also became the most numerous tank in Soviet usage by the time Germany launched the 1943 Summer offensive Operation Citadel, or the "Battle of Kursk". This battle was the debut of the Panthers and saw a very large concentration in Tiger Is and Ferdinand tank destroyers. Other units supplementing these heavier tanks were the Panzer IVs, StuG IIIs, and the Panzer IIIs. The introduction of these newer and more powerful tanks and tank destroyers and improved German tanks in the largest tank battle in history caused high casualties in the T-34 ranks, and the entire Soviet armoured forces in a whole. The Tiger's 88 mm cannon is able to destroy the T-34 from a range of 1,500 meters while the 76.2 mm cannon on the T-34 must get very close in order to penetrate. In order to engage these tanks, the T-34 forces try to maximize their massive quantity of units to overwhelm German tank units and getting to "point-blank" ranges to the point of ramming in order to negate either of the tank's range advantages and blast away at each other.
The T-34's growing deficiency in performance in the war was due to the Soviet high command decision's to keep with one design in production to minimize costs and keep manufacturing rate high. This meant that upgrades to the tank were not the highest priority for the tank. While this ideal was very sufficient in the first two years since Operation Barbarossa, it now made the T-34 lacking compared to the improved German tanks. Attempts to fix this decision was to mount stronger guns onto the T-34, the first attempt was the mounting of the 57 mm ZiS-4 cannon to make the T-34 a "tank hunter", but the 57 mm gun lacked a decent HE shell, thus was not an efficient tank gun and was pulled. Then, it was decided to mount a 85 mm anti-aircraft gun onto the tank, though requiring a much larger turret to take in the bigger gun. This tank with the 85 mm gun was called the T-34-85.
Media
An excellent addition to the article will be video guides, as well as screenshots from the game and photos.
References
Read also
[Vehicle Profile] T-34 Model 1942 - A Tough Nut to Crack
Sources
Paste links to sources and external resources, such as:
- topic on the official game forum;
- other literature.
| USSR medium tanks | |
|---|---|
| T-28 | T-28 (1938) · T-28 · T-28E |
| T-34-76 | T-34 (Prototype) · T-34 (1940) · T-34 (1941) · T-34 (1st Gv.T.Br.) · T-34 (1942) · T-34E STZ · T-34E |
| T-34-57 | T-34-57 · T-34-57 (1943) |
| T-34-85 | T-34-85 (D-5T) · T-34-85 · T-34-85E |
| T-34-100 | T-34-100 |
| T-44 | T-44 · T-44-100 · T-44-122 |
| T-54 | T-54 (1947) · T-54 (1949) · T-54 (1951) |
| T-55 | TO-55 · T-55A · T-55AM-1 · T-55AMD-1 |
| T-62 | T-62 · T-62M-1 |
| T-64 | Object 435 · T-64A (1971) · T-64B |
| T-72 | T-72A · T-72AV (TURMS-T) · T-72B · T-72B (1989) · T-72B3 · T-72M2 Moderna |
| T-80 | T-80B · T-80U · T-80UD · T-80UK · T-80UM2 · T-80BVM · Object 292 |
| T-90 | Т-90А · T-90M |
| Trophies/Lend-Lease | |
| Germany | ▂T-III · ▂T-V |
| Great Britain | ▂МК-IX "Valentine" |
| USA | ▂M3 Medium · ▂M4A2 |
