File list
This special page shows all uploaded files.
| Date | Name | Thumbnail | Size | Description | Versions |
|---|---|---|---|---|---|
| 18:12, 1 June 2019 | 105 mm hesh hullbreaks through addon armour.jpg (file) |  |
652 KB | Self explanatory. | 1 |
| 18:12, 1 June 2019 | 75 mm HE hullbreaks warrior by hitting the track.jpg (file) |  |
600 KB | Self explanatory. Shot was made in such way that only the track is hit. | 1 |
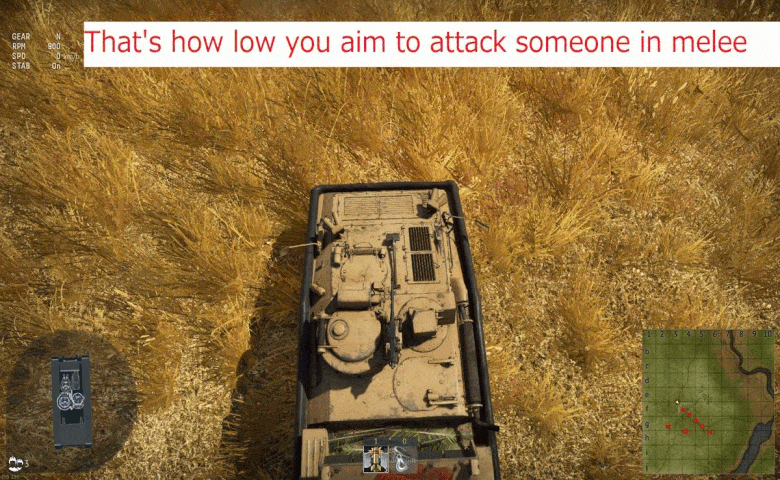
| 21:55, 25 May 2019 | AB indirect melee range L-R shot correction.jpg (file) |  |
468 KB | Screenshot to be used in combo with setup screenshot. In addiion to setup, type 60 ATM operator drags targeting reticle to the right, forcing missile to obey manual input and not only go straight into T64 hull, but also hitting it into weakspot (avoidi... | 1 |
| 21:52, 25 May 2019 | AB indirect melee range L-R shot setup.jpg (file) |  |
510 KB | Combat footage of type 60 ATM trying to nuke T64 with indirect attack. Range is ~30 m. L-R shot. Screenshot shows how operator initially aims at the enemy tank behind wall. The hull placement is also very important. | 1 |
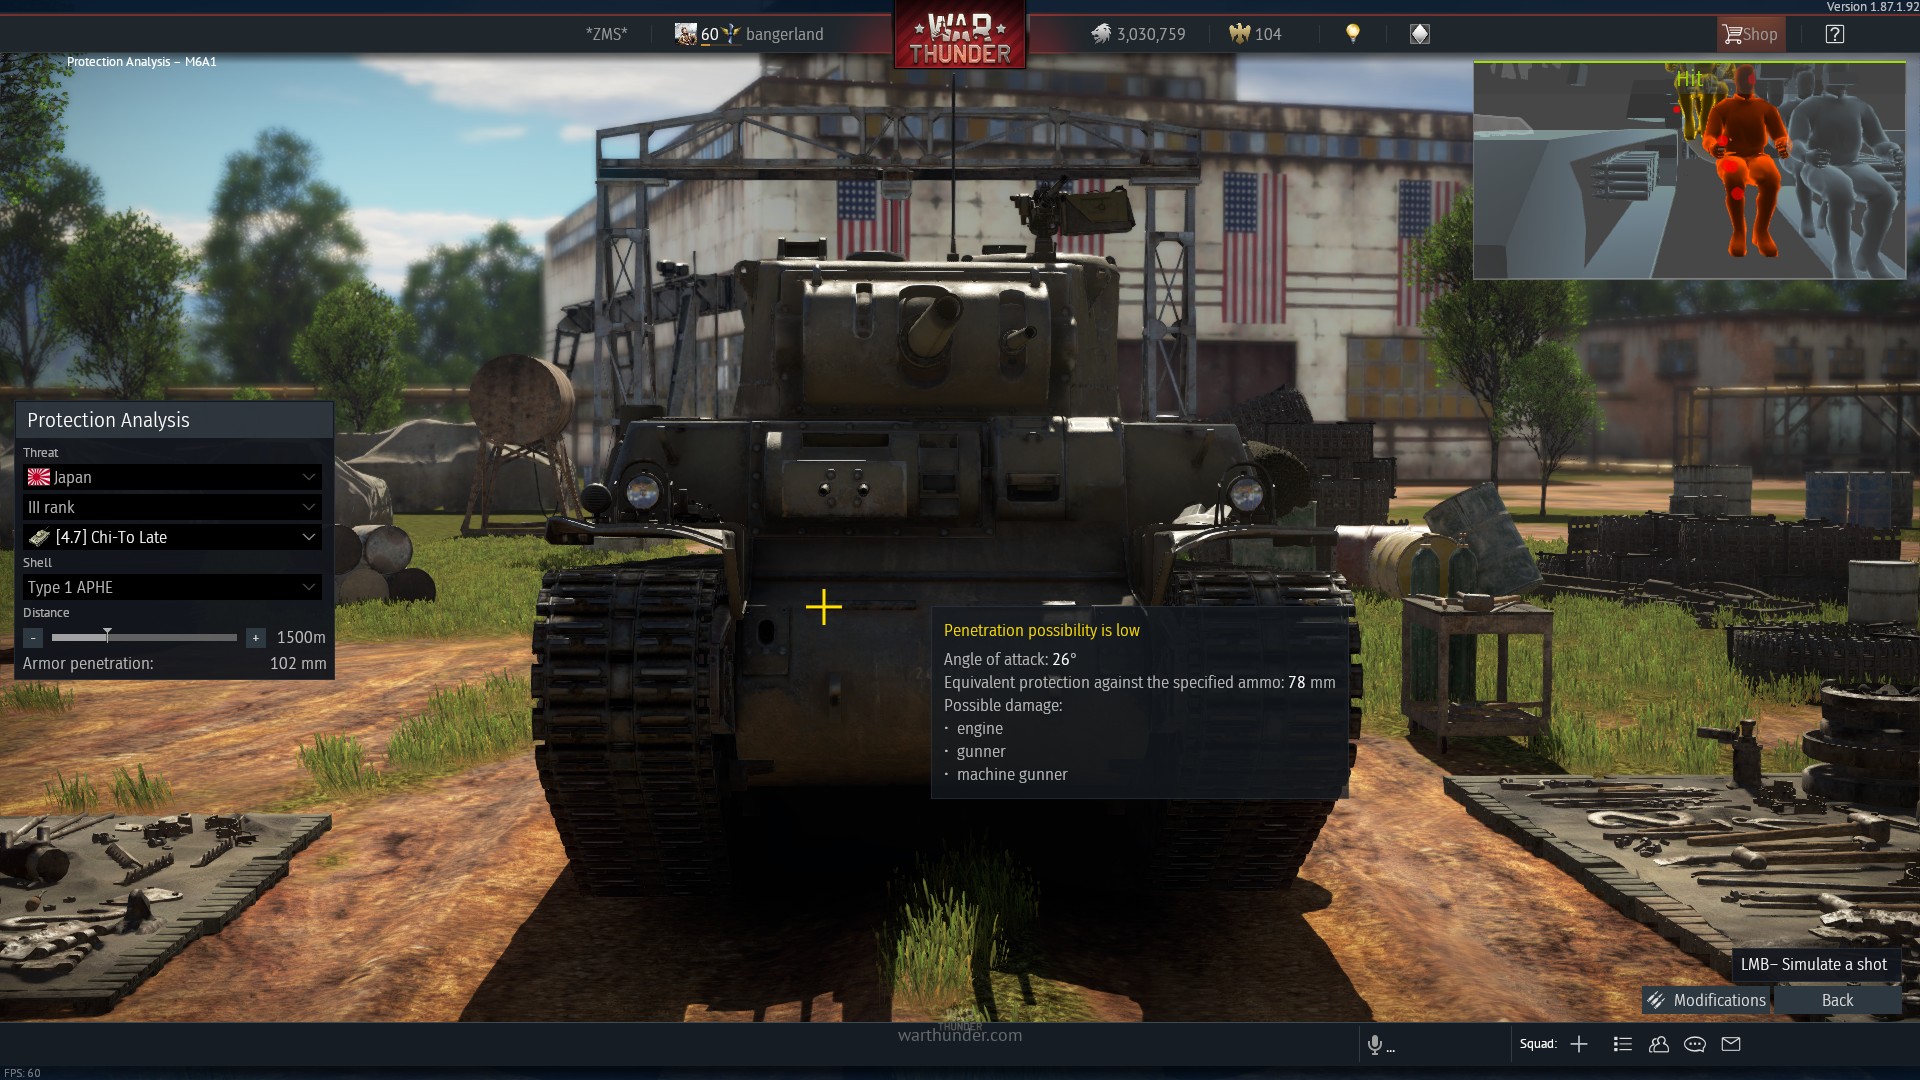
| 20:27, 6 May 2019 | APHE Fails to penetrate M6A1 front in analysis .jpg (file) |  |
479 KB | A weird spot on M6A1 armour which confuses the scope in AB? | 1 |
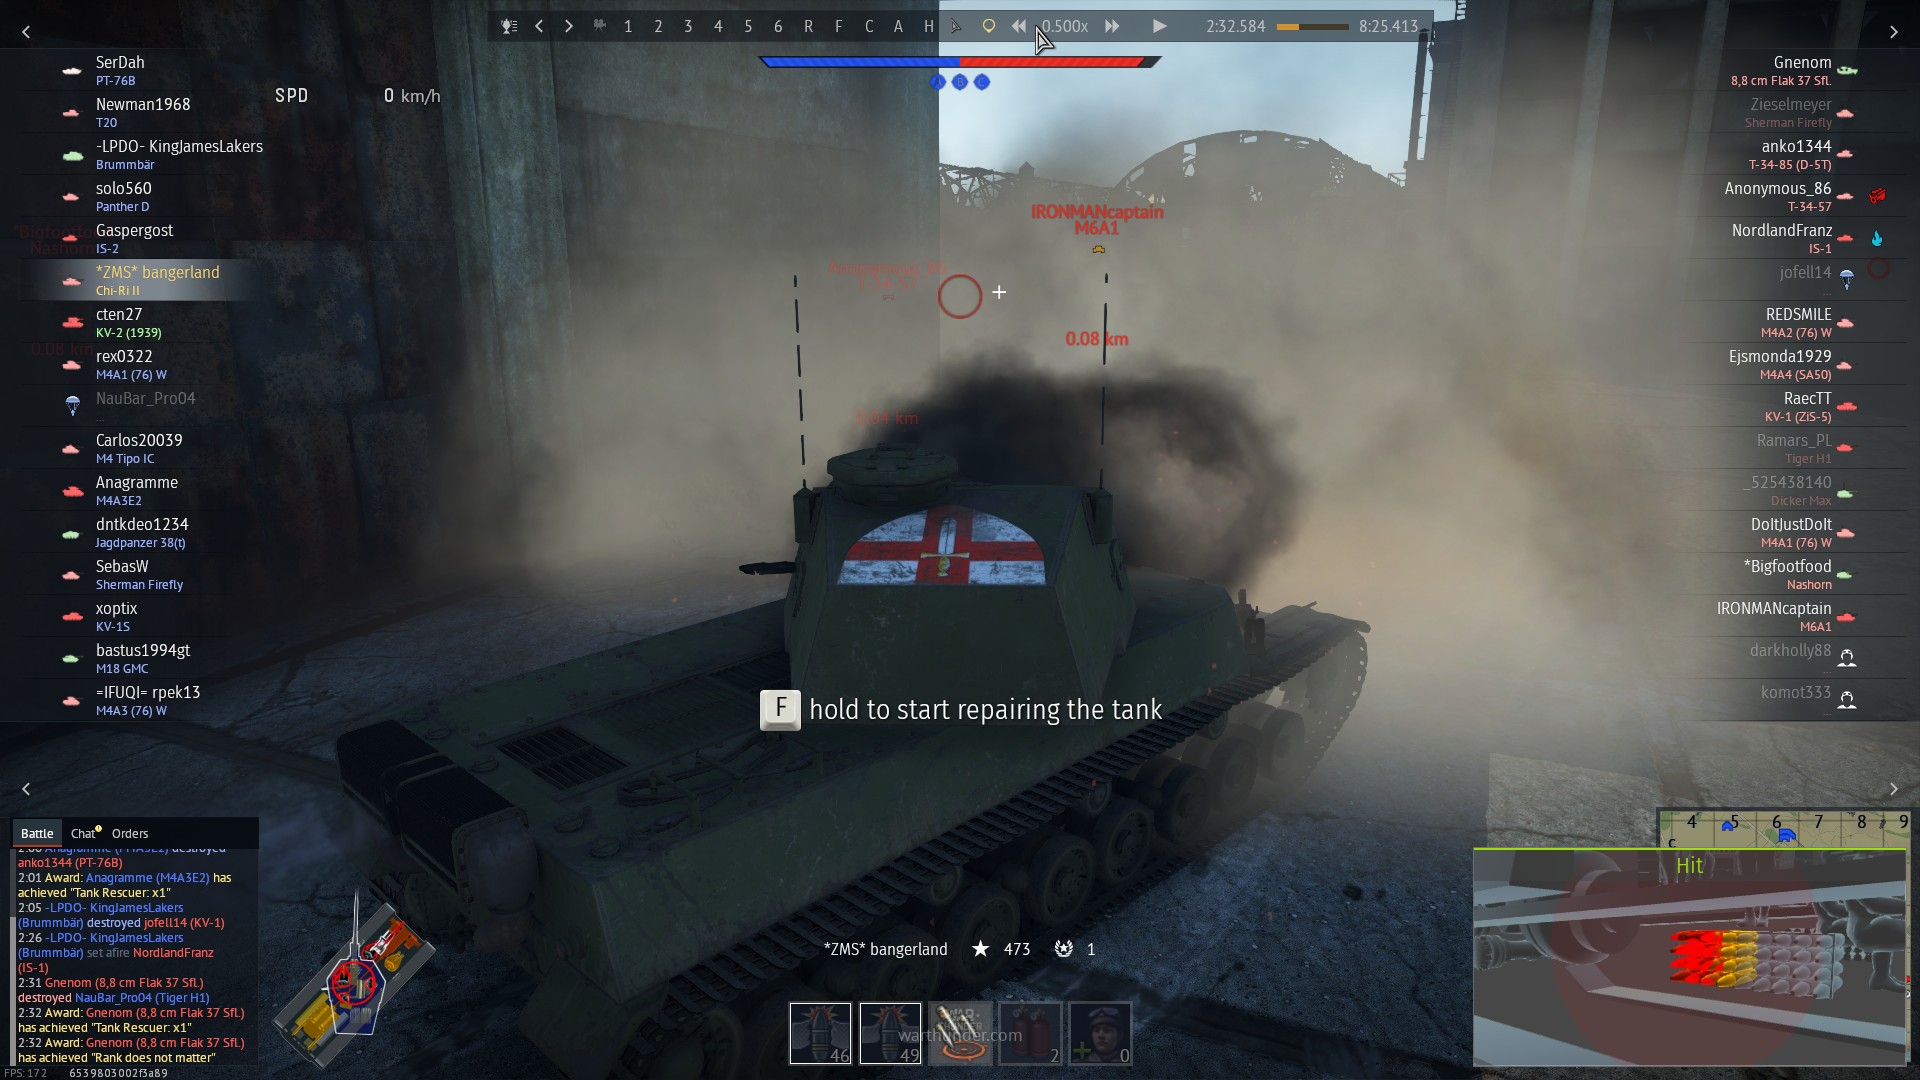
| 19:40, 6 May 2019 | APHE fails to penetrate M6A1.jpg (file) |  |
352 KB | Chiri II versus M6A1 sideskirt. Perfect ammorack shot with type 1 APHE. | 1 |
| 12:05, 17 May 2019 | A visual bug in italian section.png (file) |  |
68 KB | 1 | |
| 18:07, 23 April 2019 | Alternative ground radar indicator.jpg (file) |  |
36 KB | Alternative radar display. Activated via "switch radar indicator type" keybinding. | 1 |
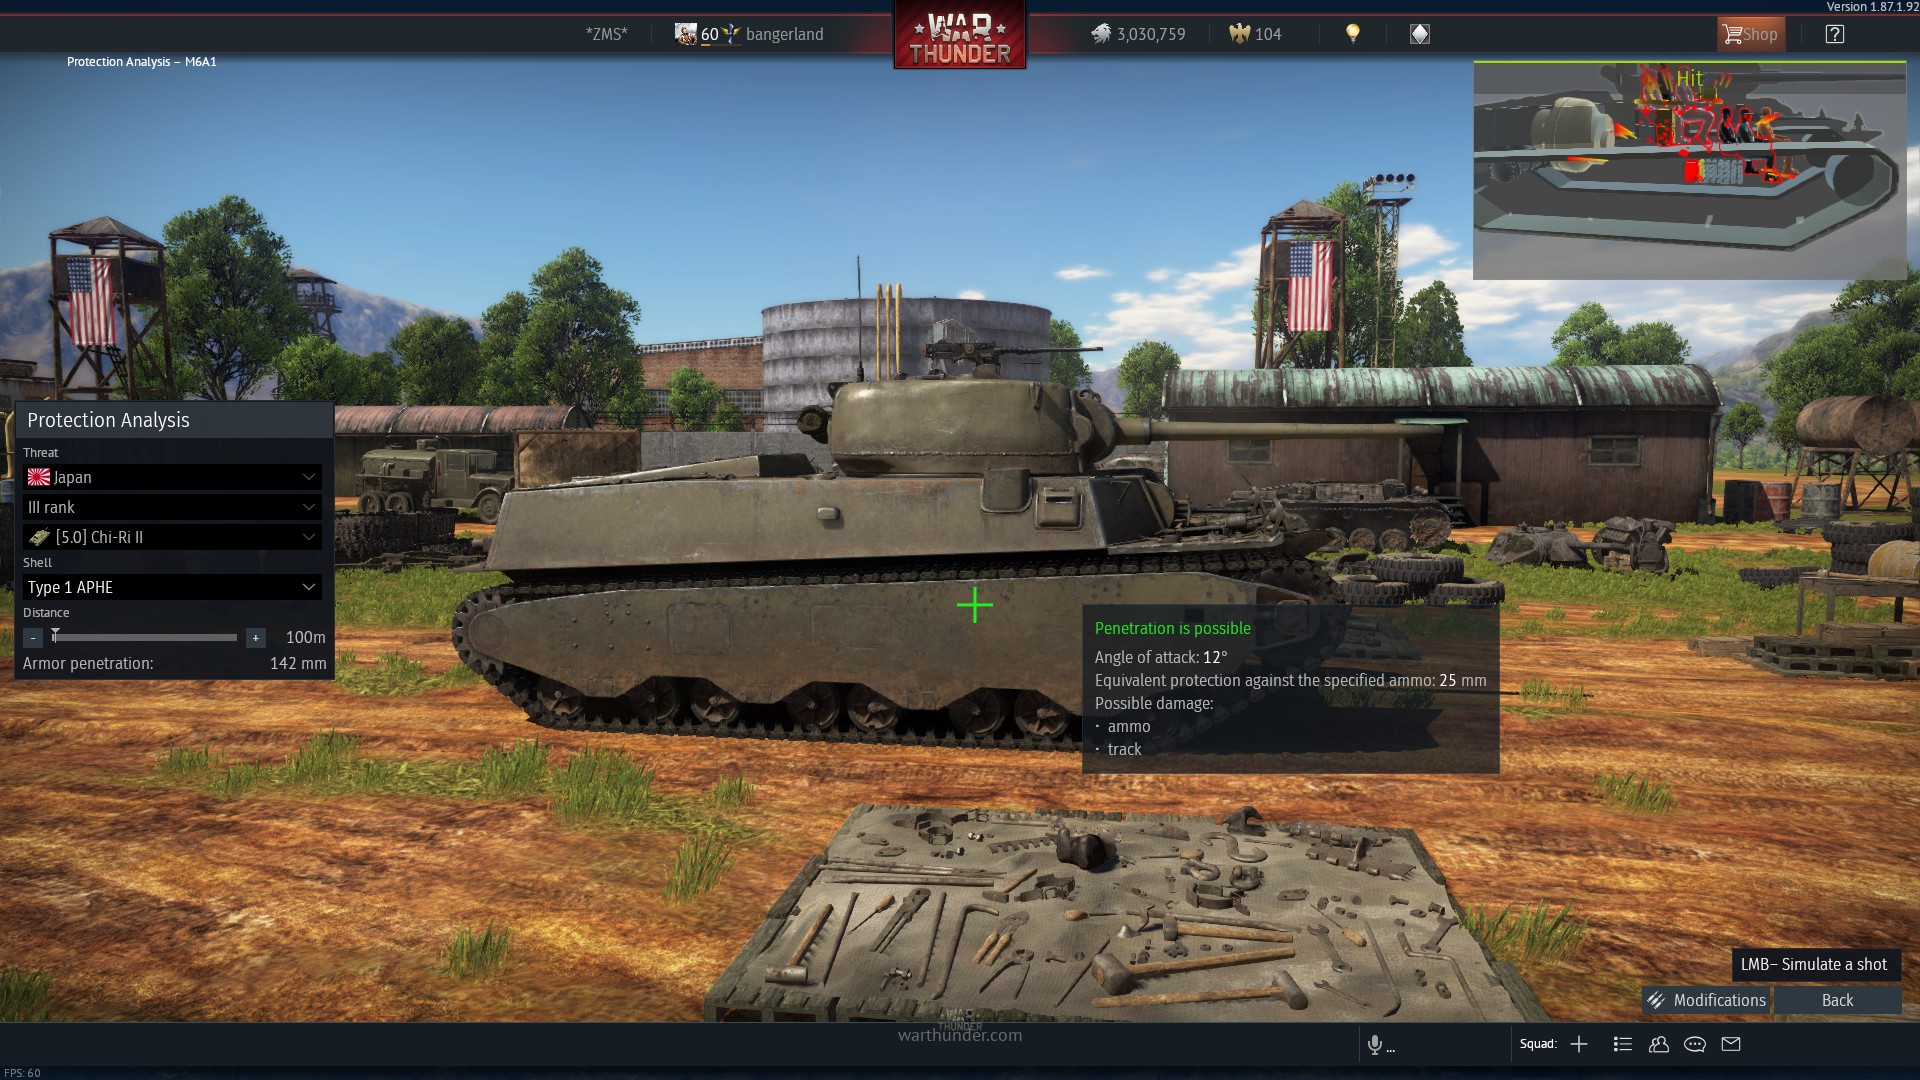
| 19:43, 6 May 2019 | Aphe M6A1 protection analysis.jpg (file) |  |
558 KB | What type 1 APHE is supposed to do against M6A1 (supposedly). | 1 |
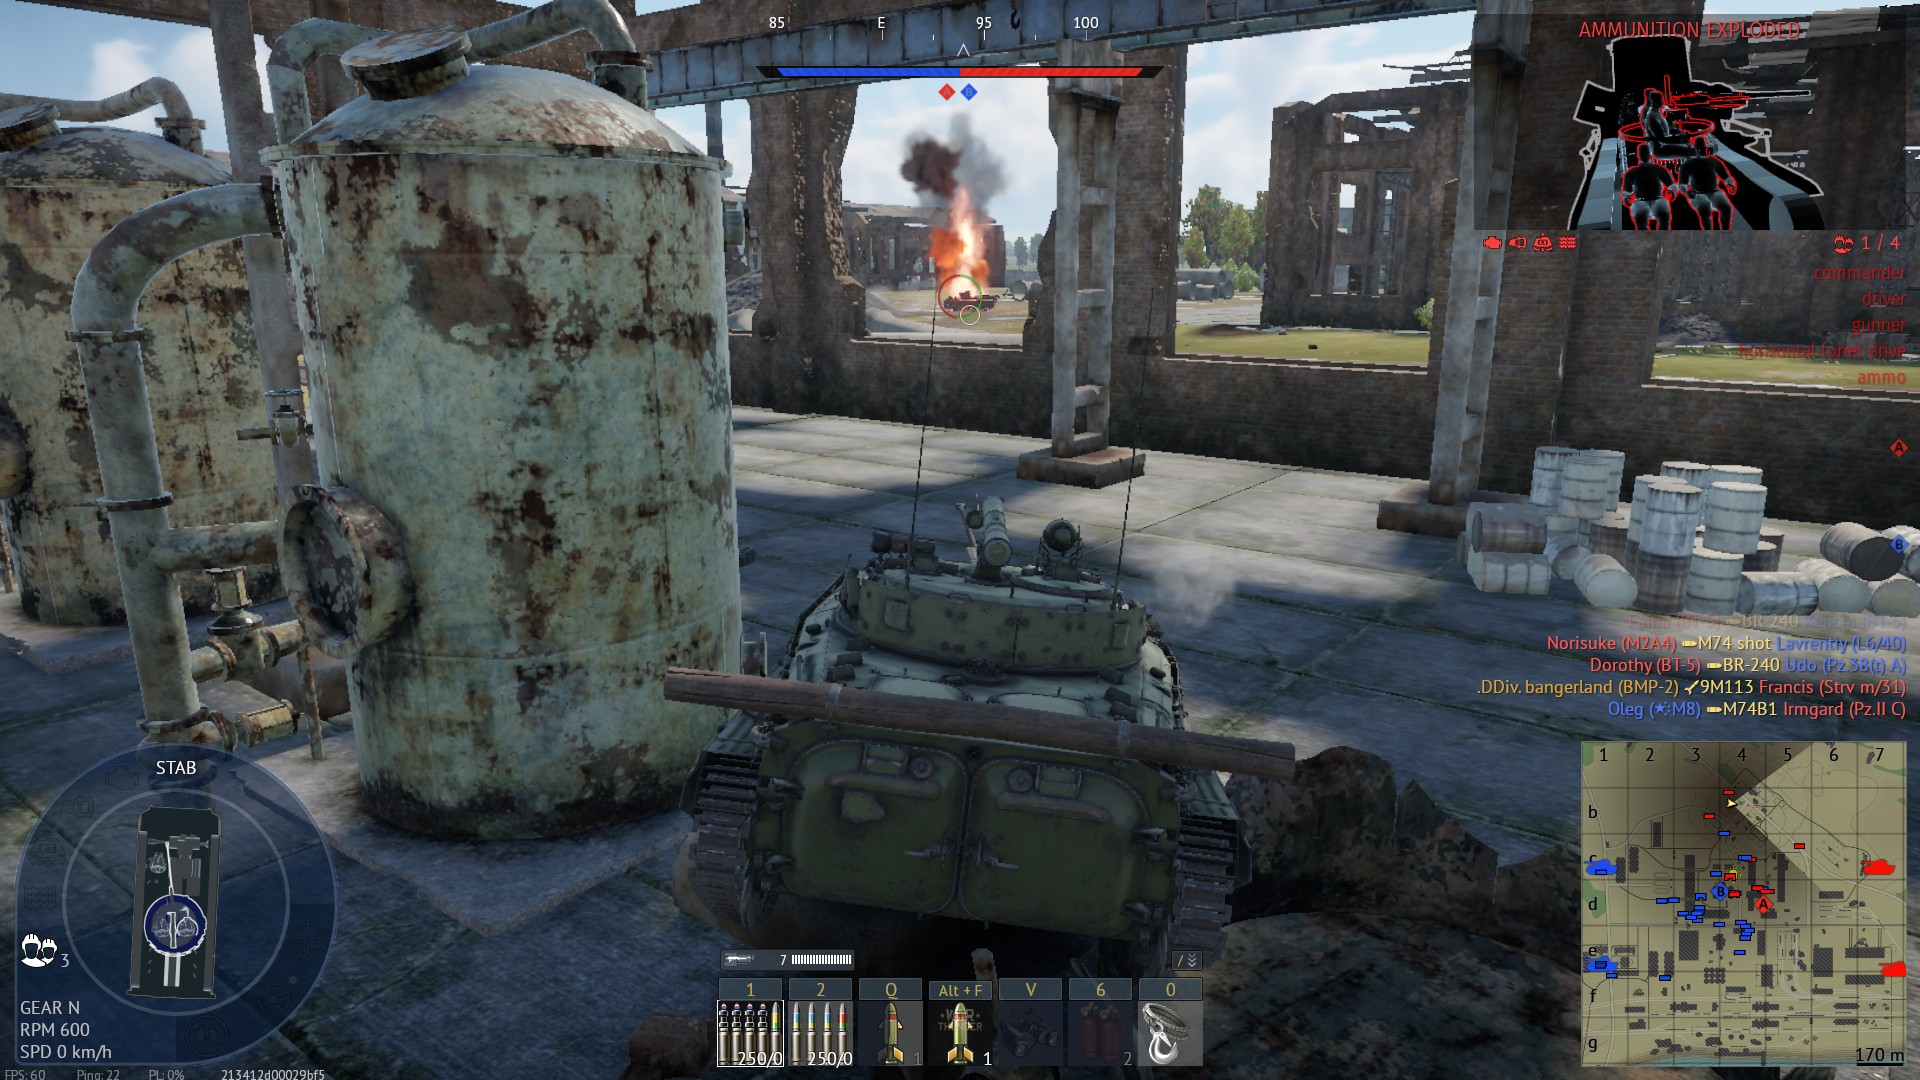
| 21:18, 21 January 2022 | Autoloader safety Bkan 1C.jpg (file) |  |
447 KB | Demonstration of how the gun must be angled on this artillery tank as to avoid being ammo racked. Category:In-game screenshots | 1 |
| 00:49, 6 July 2019 | Average keen vision example.jpg (file) |  |
684 KB | Screenshot shows, that tank should be visibly exposed to get marked by people with no keen vision. In reality, there is a lot of trees and trash in between two tanks, but for convenience screenshot was taken from another angle. [[Category:In-game scre... | 1 |
| 12:00, 17 December 2023 | BMP-2 firing atgm over a wall atgm scope.jpg (file) |  |
301 KB | By leaning on a decoration, using atgm scope directly and aiming at where the tank presumably is, BMP-2 can achieve a hit with ATGM at short range even over a wall that technically shouldn't be an attack vector for it. Category:In-game screenshots | 1 |
| 10:08, 19 February 2024 | BTR back flank.jpg (file) |  |
500 KB | BTR flanked enemy team and shot them all in the back. Enemy must be really complacent for that to work. Category:In-game screenshots | 1 |
| 10:09, 19 February 2024 | BTR side ambush.jpg (file) |  |
536 KB | BTR ambushes Jpanther from the side. Achieved by hiding away from enemy sight long enough in AB. Category:In-game screenshots | 1 |
| 18:58, 3 October 2022 | Bkan works as a bait.jpg (file) |  |
408 KB | Empty Bkan wastes enemy time by being a martyr. by assuming this stance when the autoloader is empty, the SPG makes it very difficult to hit the gunner tower, and the enemies very rarely bothers firing at the driver (which could also be hidden behind t... | 1 |
| 19:33, 16 April 2019 | CameraAdjustments ATGM (Striker).gif (file) | .gif) |
1.48 MB | Gif shows the difference between normal gameplay, and gameplay with camera adjustments. This gif version has much faster timing, as requested. | 2 |
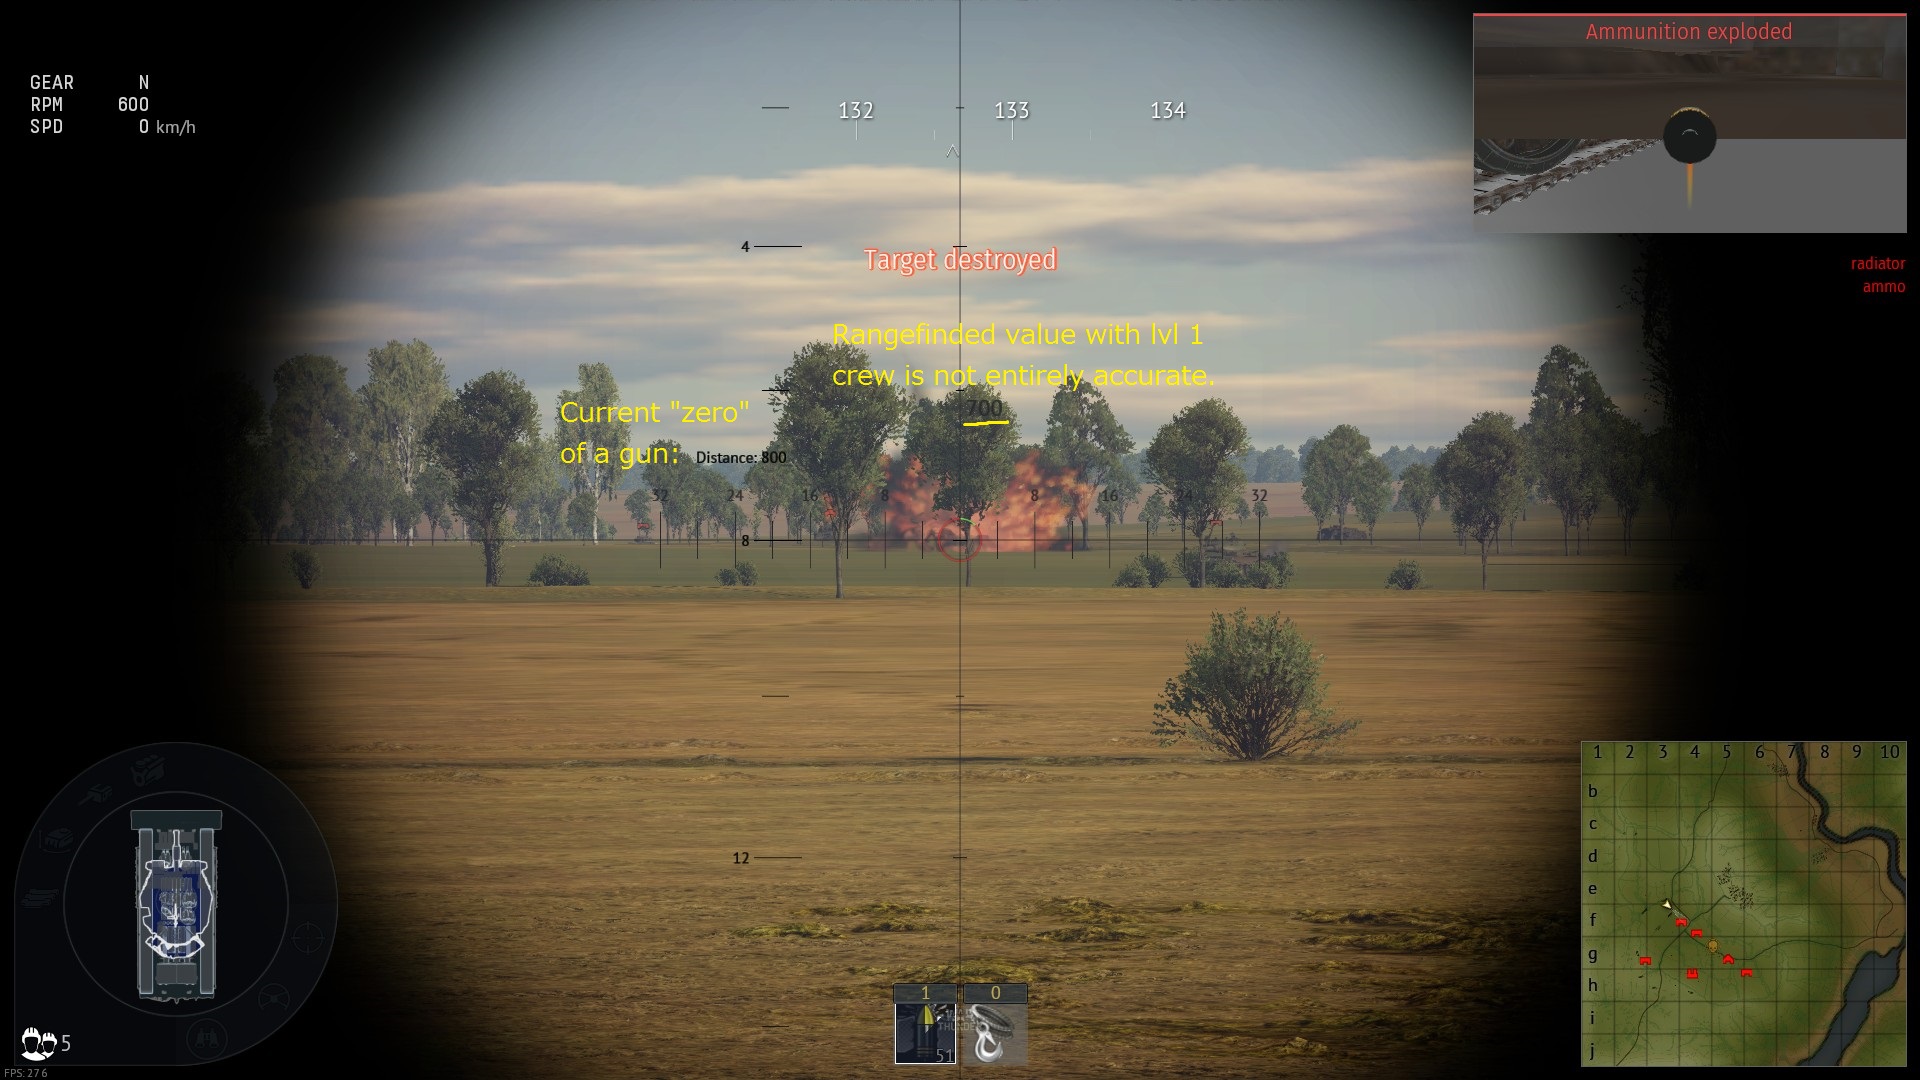
| 17:28, 25 October 2019 | Centurion AVRE Compensating for excessive gun zero-in.jpg (file) |  |
421 KB | Screenshot displays, that if player adjusts the gun too hard they will have to aim in reverse ways to hit the target. Category:In-game screenshots | 1 |
| 17:28, 25 October 2019 | Centurion AVRE cannot aim at the tank.jpg (file) |  |
216 KB | Screenshot used as an example to show that sniper scope on AVRE can become useless without zero-in of a gun. AB mode targeting displays that the tank won't be hit. Category:In-game screenshots | 1 |
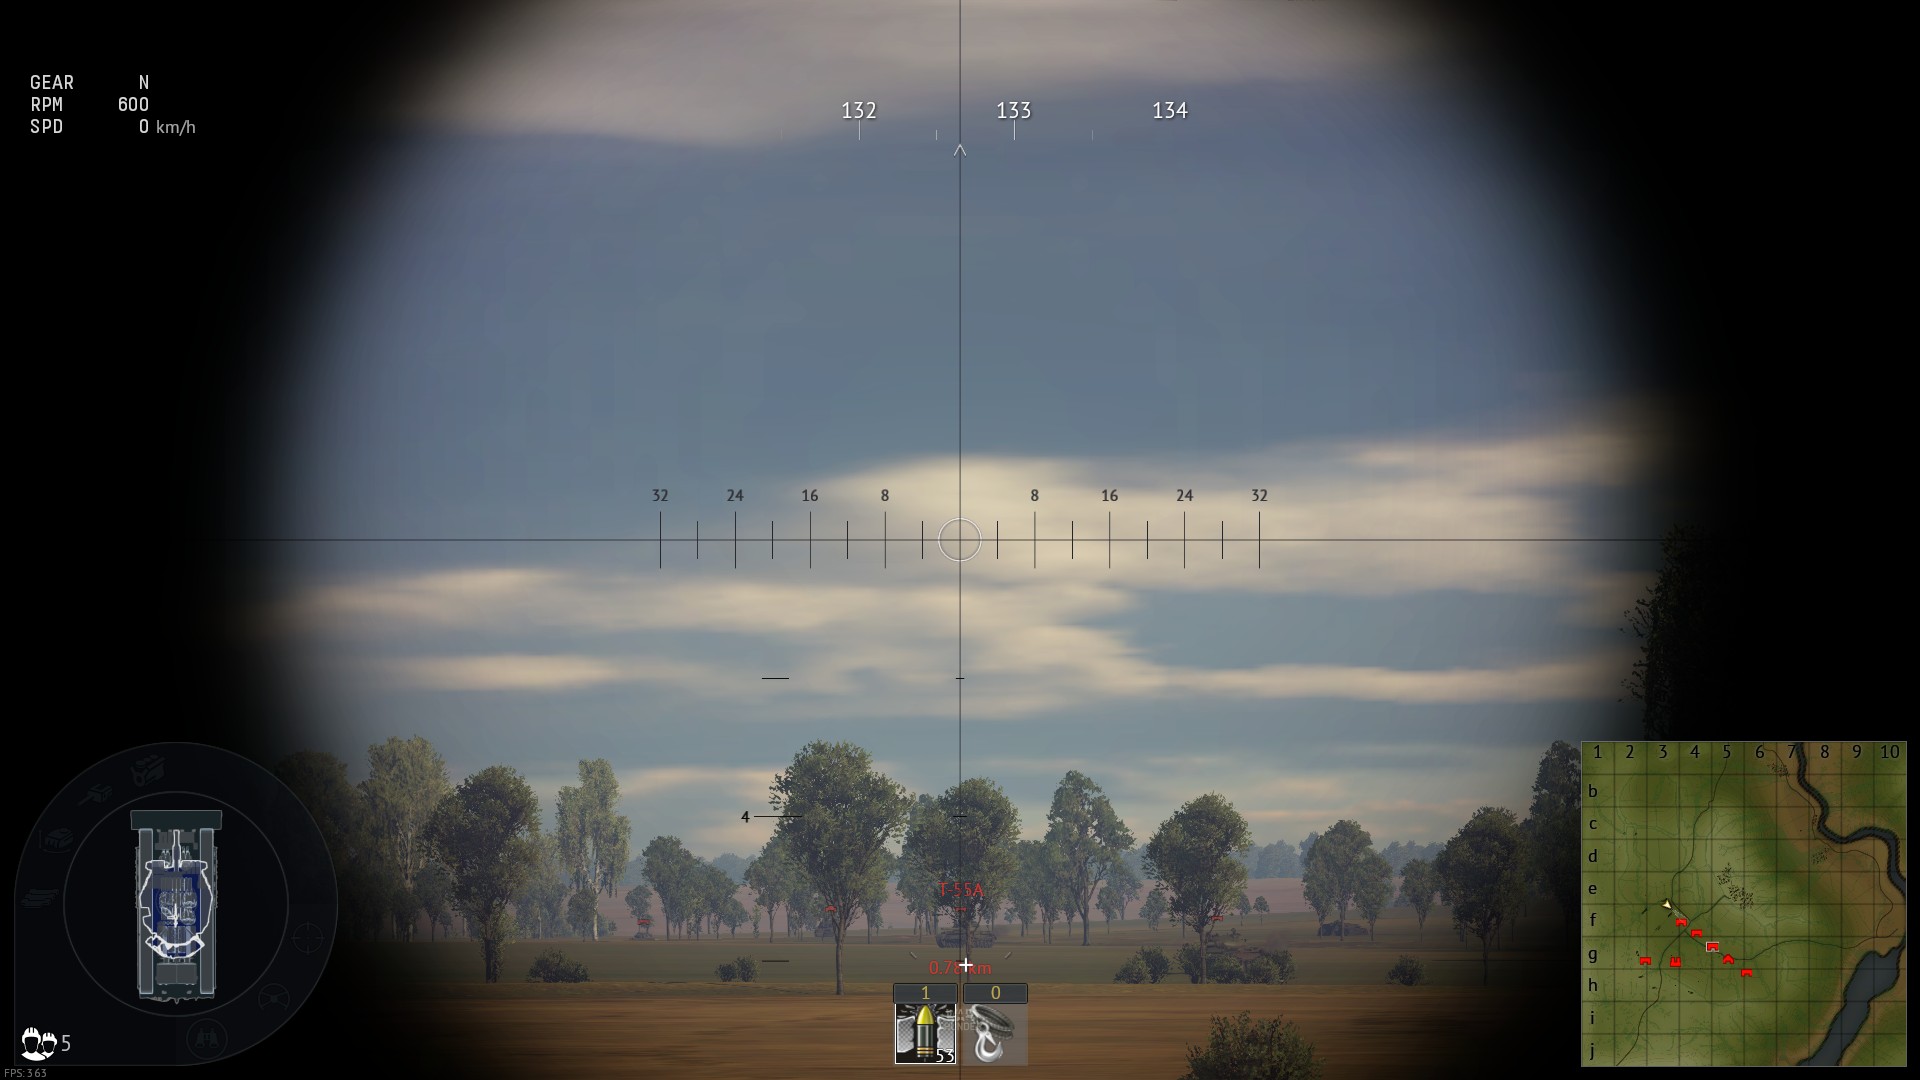
| 17:28, 25 October 2019 | Centurion AVRE gun zero in for Realistic mode.jpg (file) |  |
448 KB | Screenshot displays player using gun adjustment to be able to aim directly at hostile tank and attack it.Category:In-game screenshots | 1 |
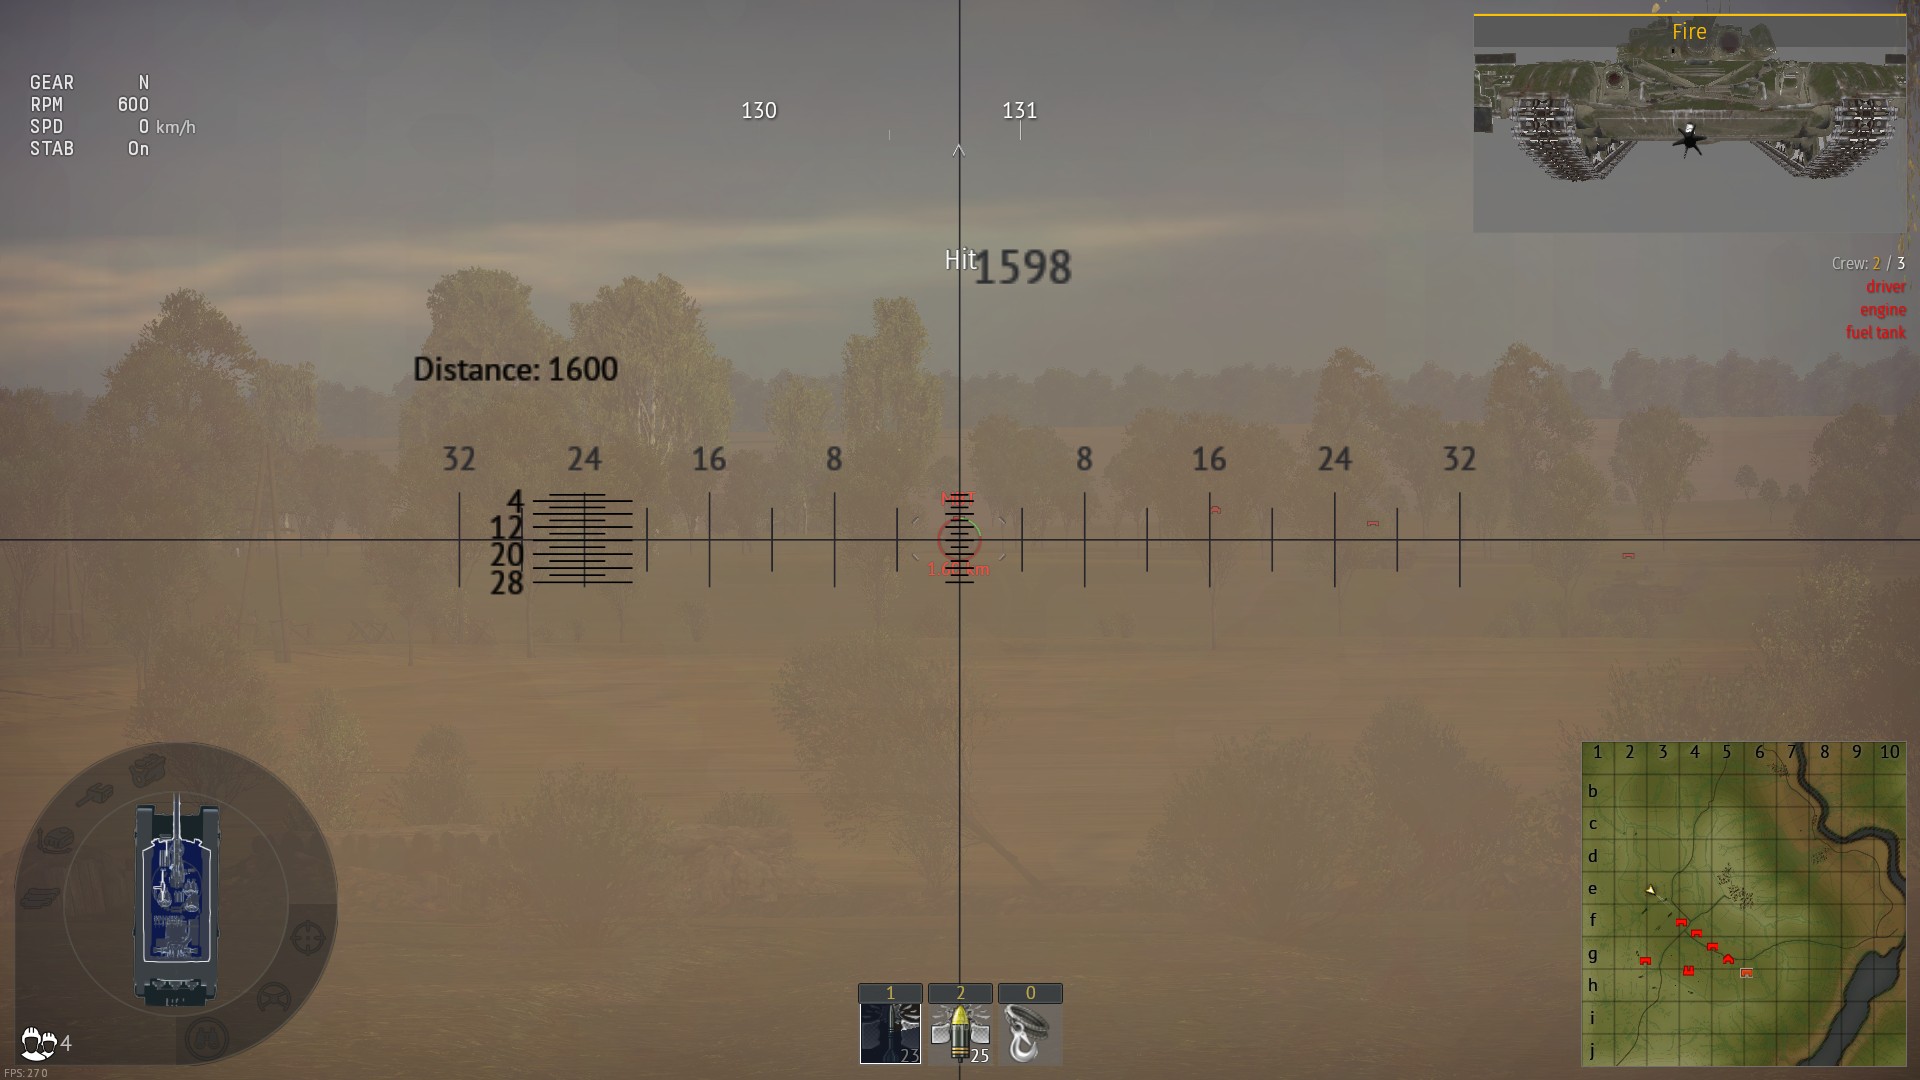
| 17:28, 25 October 2019 | Challenger 2 scope zero in for arcade mode.jpg (file) |  |
257 KB | Screenshot used to display the convenience of manual gun adjustment in Arcade battle. There is no AB hit marker past 1 KM, so challenger 2 would still have to aim manually. Category:In-game screenshots | 1 |
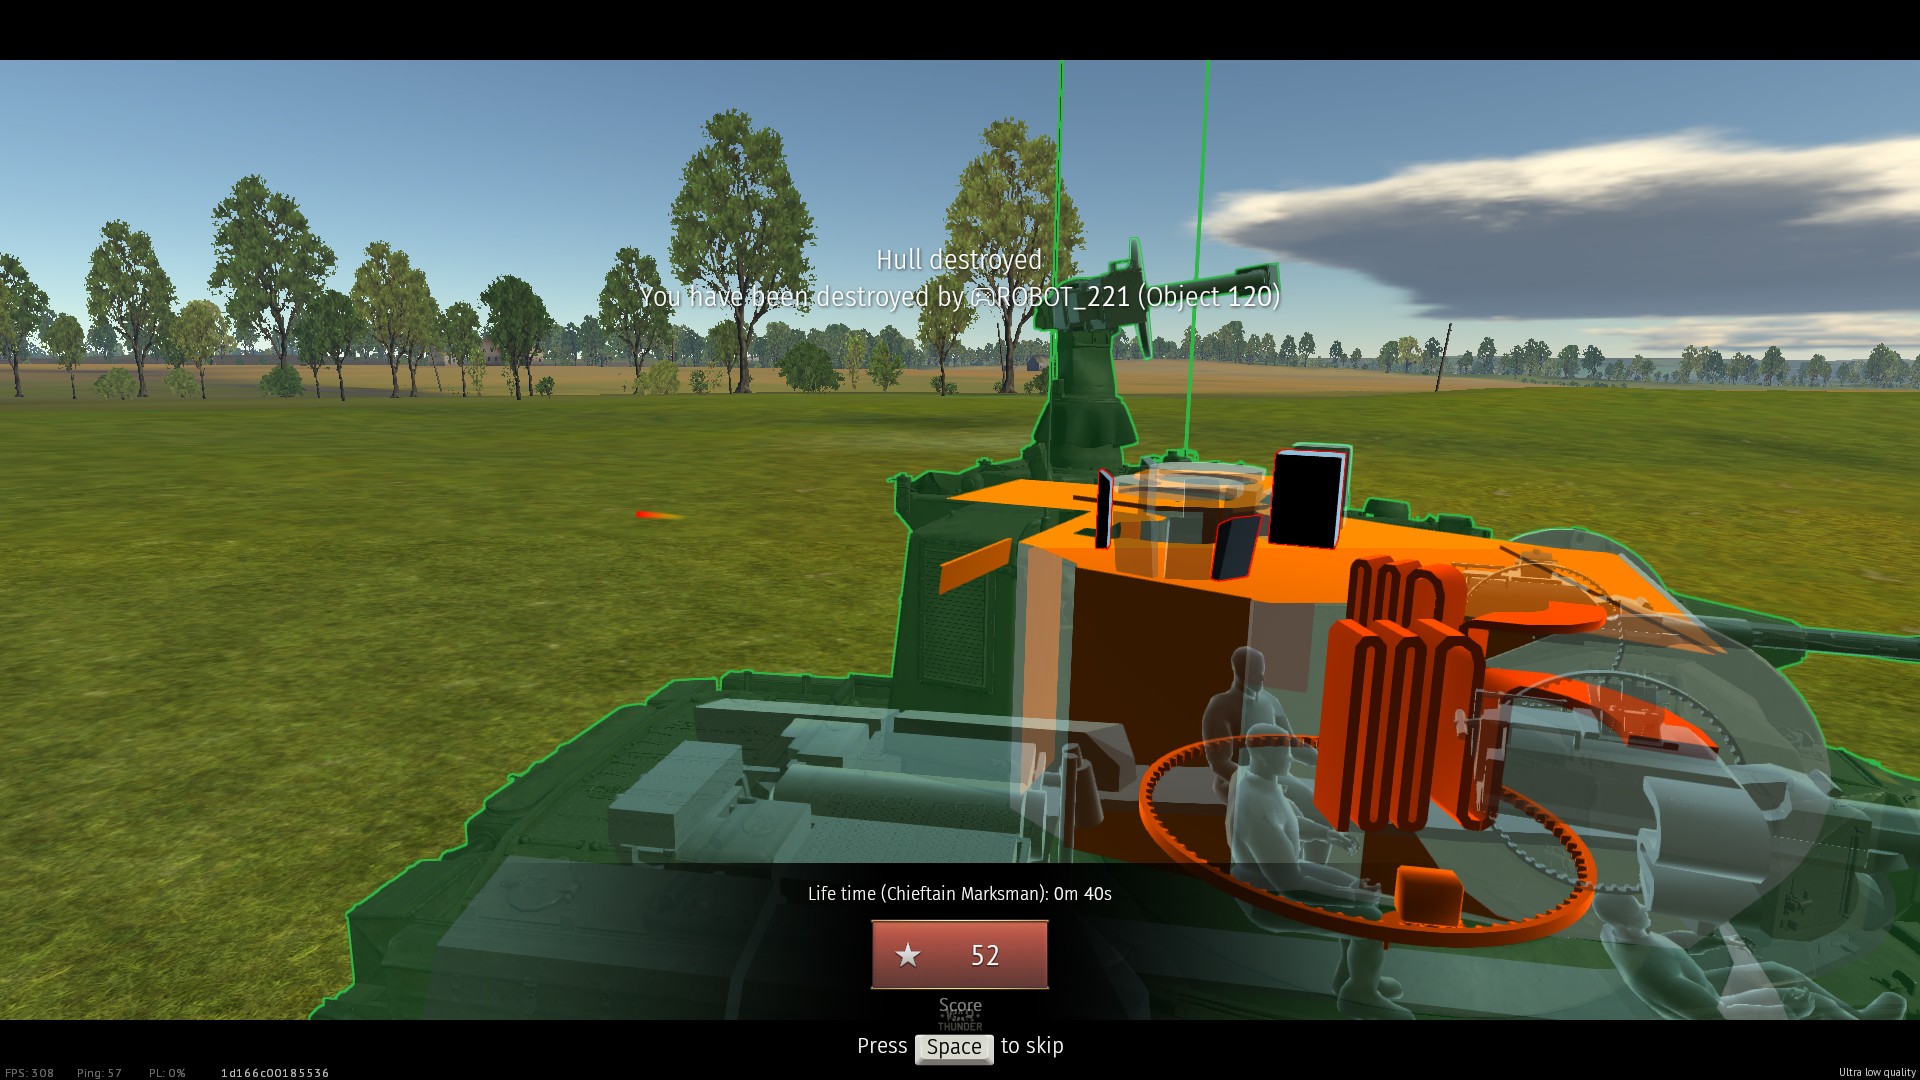
| 00:53, 12 September 2020 | Chieftain marksman hullbreak.jpg (file) |  |
400 KB | Object 120 hullbreaks Chieftain Marksman. No fatal damage was done to any components, which means, that hullbreak was triggered by just doing damage to turret. Seems to be a "feature" of update "raining fire". Category:In-game screenshots | 1 |
| 11:02, 17 April 2019 | Circular view radar.JPG (file) |  |
42 KB | Clean screenshot of circular radar dish. | 1 |
| 18:42, 24 August 2021 | Demonstration of Shturm-S launcher aim usefulness for AB.jpg (file) |  |
576 KB | Shturm-S is hidden behind a rock (left portion of a screen is the rock) with no way to reply to a heavy tank camping just outside of it's camera reach. Launcher aim abuse allows it to destroy the camping tank. Category:In-game screenshots | 1 |
| 16:39, 3 February 2019 | Direct assault Striker Fulda.jpg (file) |  |
733 KB | 1 | |
| 16:33, 3 February 2019 | Direct intercept striker mozdok.jpg (file) |  |
651 KB | 1 | |
| 16:49, 3 February 2019 | Eastern europe direct assault by Striker.jpg (file) |  |
947 KB | 1 | |
| 12:01, 17 December 2023 | Example of bmp-2 leaning to fire over a wall 3PV.jpg (file) |  |
496 KB | Demonstration of BMP-2 leaning to see over wall for ATGM attack. Category:In-game screenshots | 1 |
| 16:52, 3 February 2024 | FIAT attacks enemy spawn while camping A point.jpg (file) |  |
570 KB | Japan map. Due to the absurdly high speed FIAT can arrive to A sniping point before enemy tanks can even leave spawn tunnel. This leads enemy artillery to dying instantly and tanks on A being widely exposed to fire. Artillery on B can stop FIAT, but i... | 1 |
| 17:06, 3 February 2024 | FIAT attacks enemy tank through a window.jpg (file) |  |
359 KB | A low profile allows FIAT to fire shells through a window. Very obscure vantage point. Category:In-game screenshots | 1 |
| 16:41, 3 February 2024 | FIAT hiding in a bomb hole.jpg (file) |  |
609 KB | Self explanatory. Position is used to intercept light tanks trying to capture B point, while exposed, it is effective. Category:In-game screenshots | 1 |
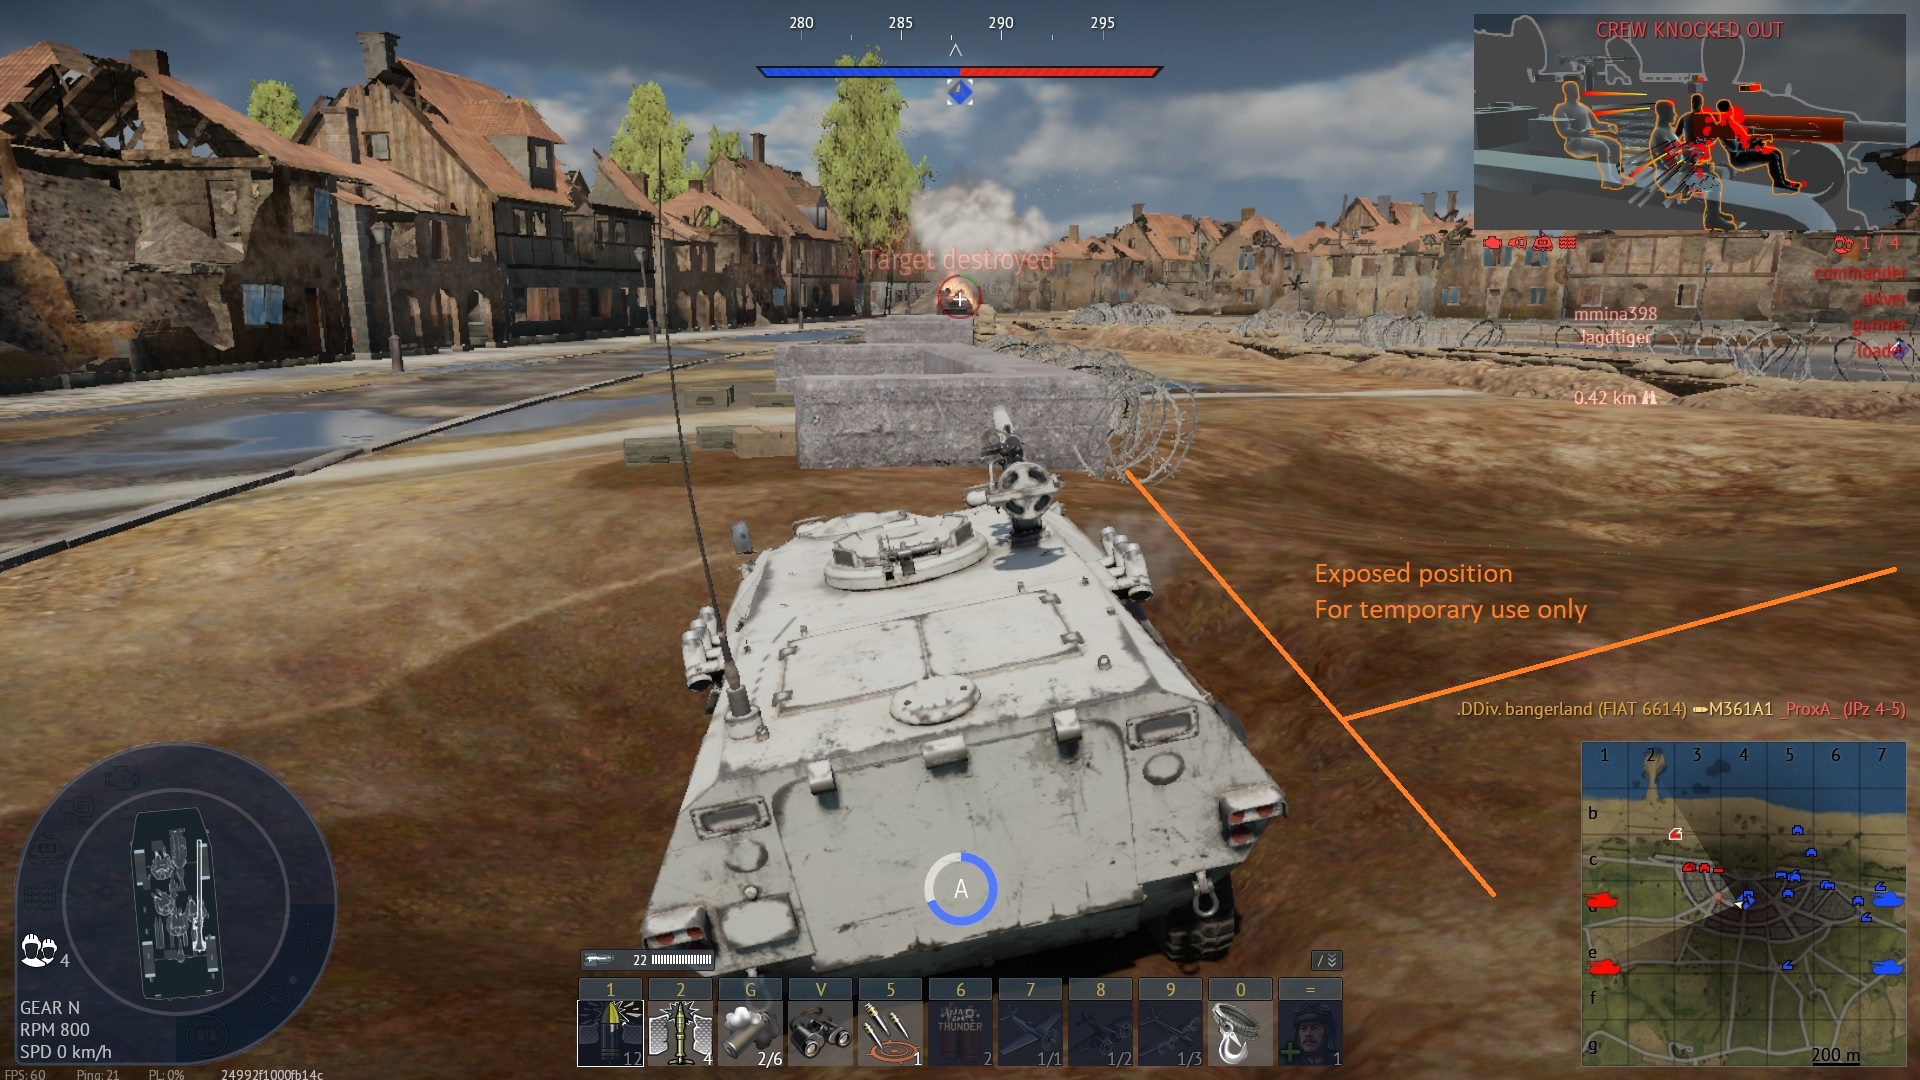
| 16:44, 3 February 2024 | FIAT parking on a rock on a capture point.jpg (file) |  |
598 KB | Self explanatory. Extremely safe position involving a rock. Category:In-game screenshots | 1 |
| 16:54, 3 February 2024 | FIAT rushes mountain top next to enemy spawn.jpg (file) |  |
507 KB | Since FIAT is extremely fast it can reach positions that are untargetable by enemies, such as this mountain above their tunnel to B. Needless to say it is extremely unfunny for enemy team, as FIAT can bombard them from above. [[Category:In-game screens... | 1 |
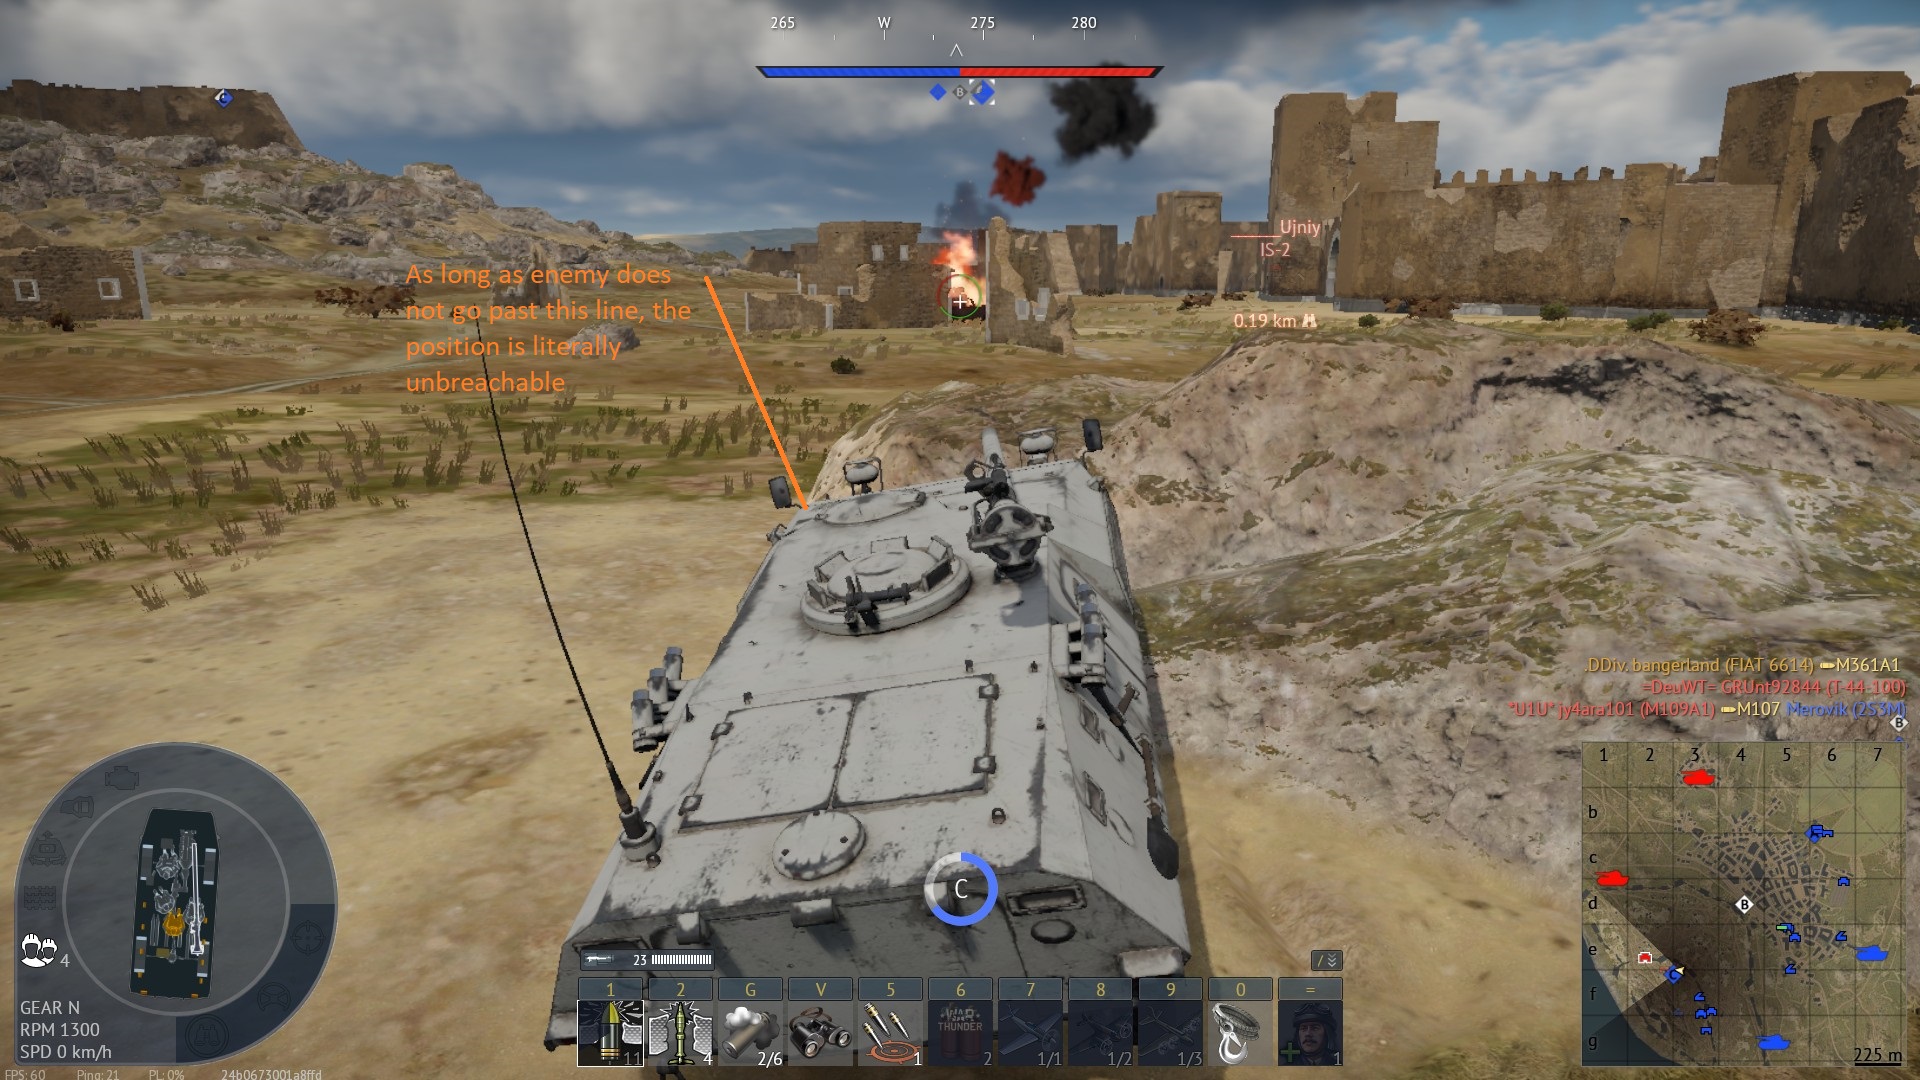
| 16:48, 3 February 2024 | FIAT uses shallow hill to protect a point.jpg (file) |  |
523 KB | Self-explanatory. The spot is impossible to breach unless enemy comes through the broken bridge on the right, though FIAT can still escape and retaliate with minimal effort. Category:In-game screenshots | 1 |
| 16:50, 3 February 2024 | FIAT uses terrain elevation to camp infront of the enemy.jpg (file) |  |
425 KB | Self-explanatory. To be safe, only enemy turrets should be visible. Category:In-game screenshots | 1 |
| 10:43, 28 April 2024 | Fox attacks soviet tank weakspot.jpg (file) |  |
471 KB | Self explanatory. APHE belt is used to deal fatal damage in one hit. Category:In-game screenshots | 1 |
| 18:31, 3 February 2019 | Fulda castle Striker failure.jpg (file) |  |
665 KB | 1 | |
| 17:26, 12 July 2019 | General flanking example - Far flank example.jpg (file) |  |
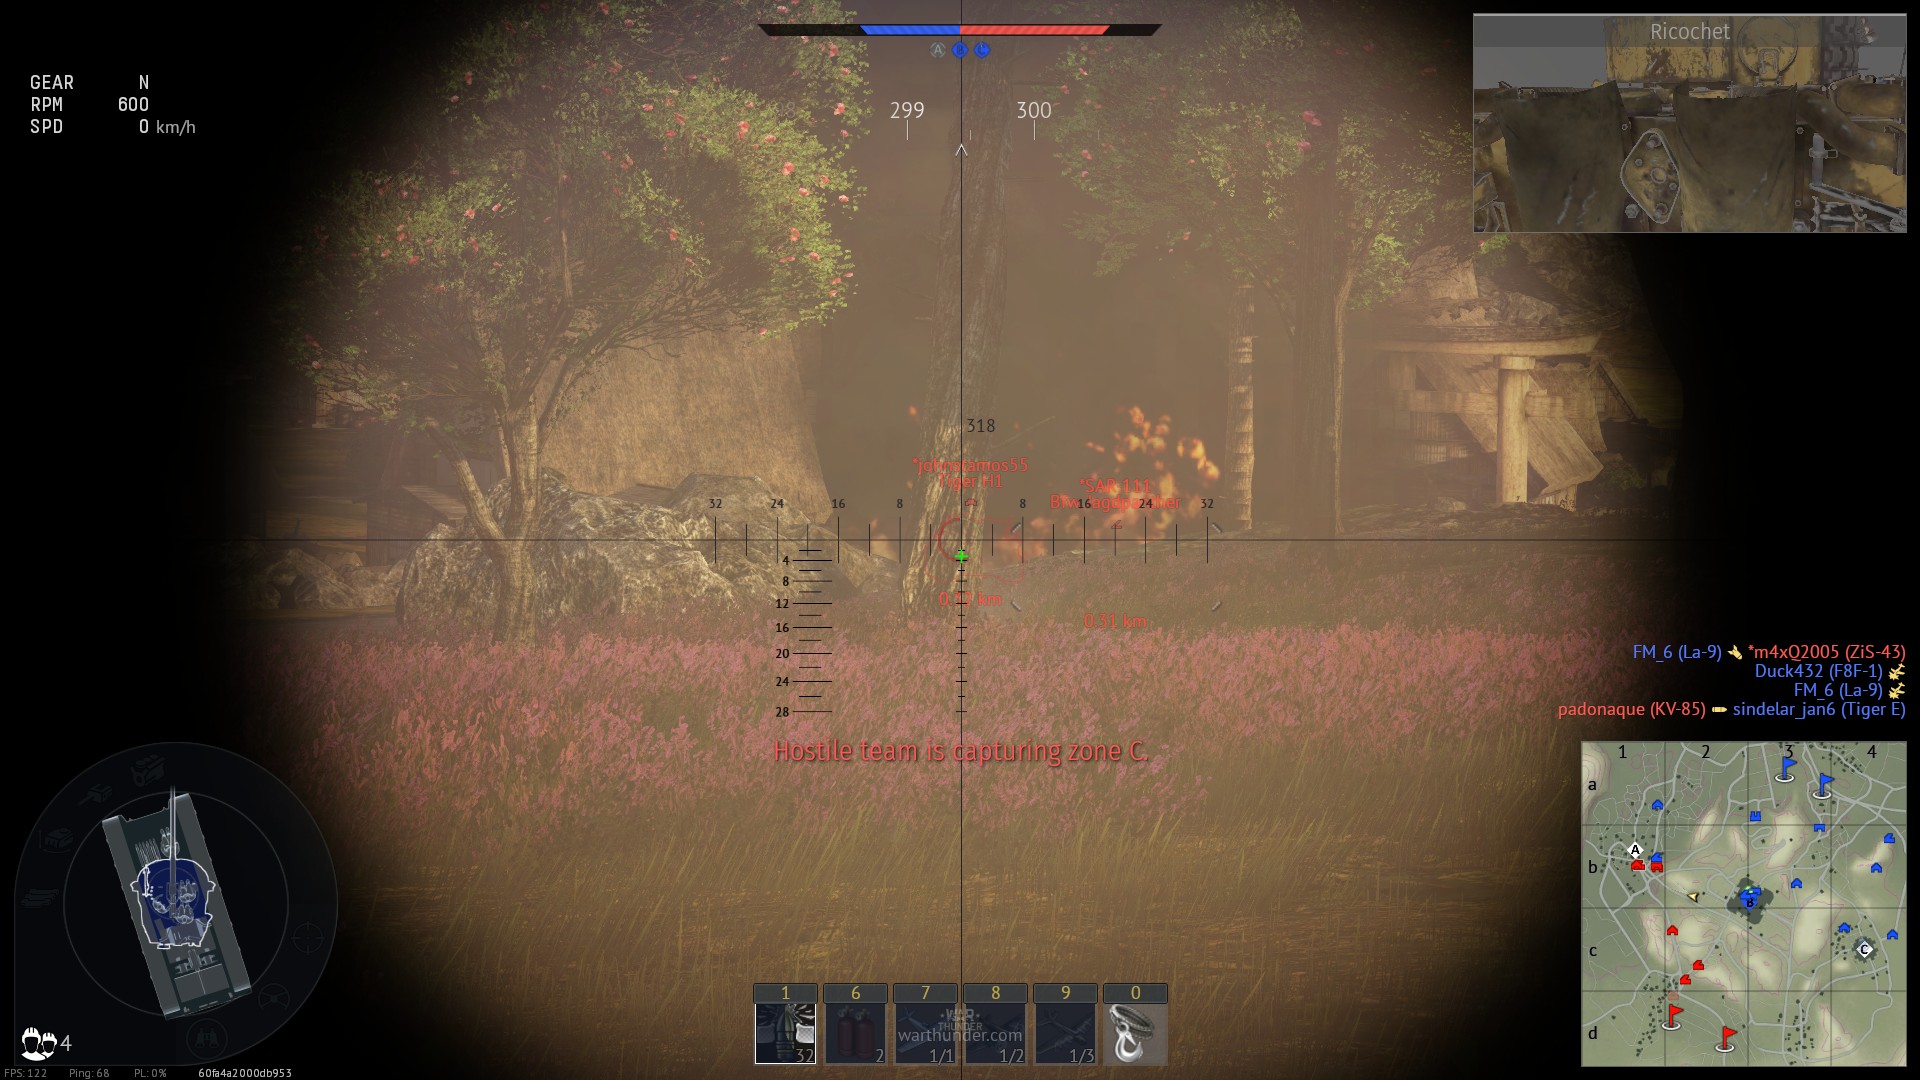
638 KB | Screenshot shows a flank attack directly from behind of an enemy. Minimap tells general player movement (green = us, yellow = enemy flank team, red = enemy main push) Category:In-game screenshots | 1 |
| 23:28, 1 July 2019 | General flanking example - Flank another capture point.jpg (file) |  |
522 KB | Screenshot used in combination with other 2 to show, how oblivious enemy can sometimes be to cross-map flanking. Category:In-game screenshots | 1 |
| 23:26, 1 July 2019 | General flanking example - Observation.jpg (file) |  |
580 KB | Screenshot shows the importance of looking around, when player has the time. In this case player noticed an easy target on other capture point. Category:In-game screenshots | 1 |
| 12:34, 14 July 2019 | General flanking example - attack from enemy own base.jpg (file) |  |
692 KB | Screenshot shows justified use of spawncamping spot on vietnam. Begleitpanzer 57 hides in such a spot nobody in their mind would ever look at. Because of this, it can take out everyone on A point and let his team win. Category:In-game screenshots | 1 |
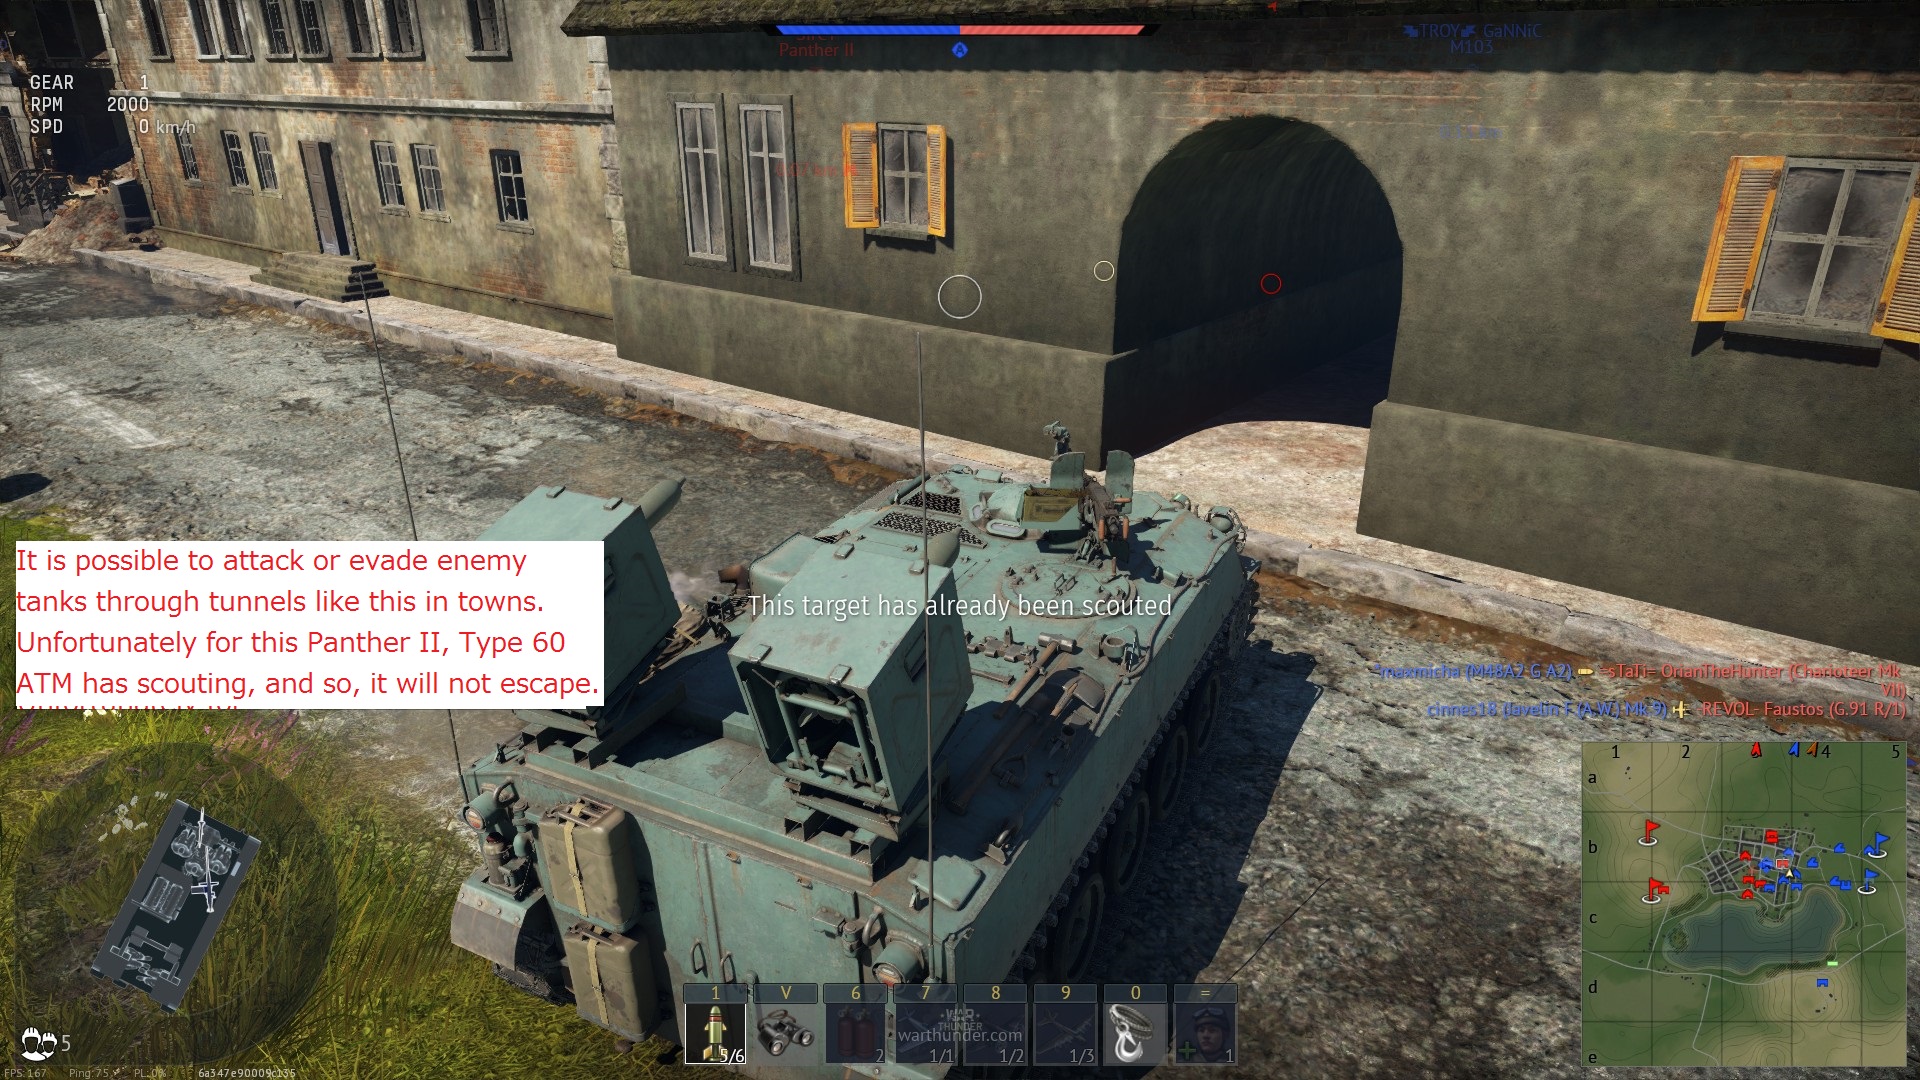
| 02:01, 6 July 2019 | General flanking example - avoiding threats.jpg (file) |  |
823 KB | Screenshot shows Panther II, which managed to avoid entire enemy team for a long time using tunnels and smart movement. Their game is finally over, when the scout tank notices them. Category:In-game screenshots | 1 |
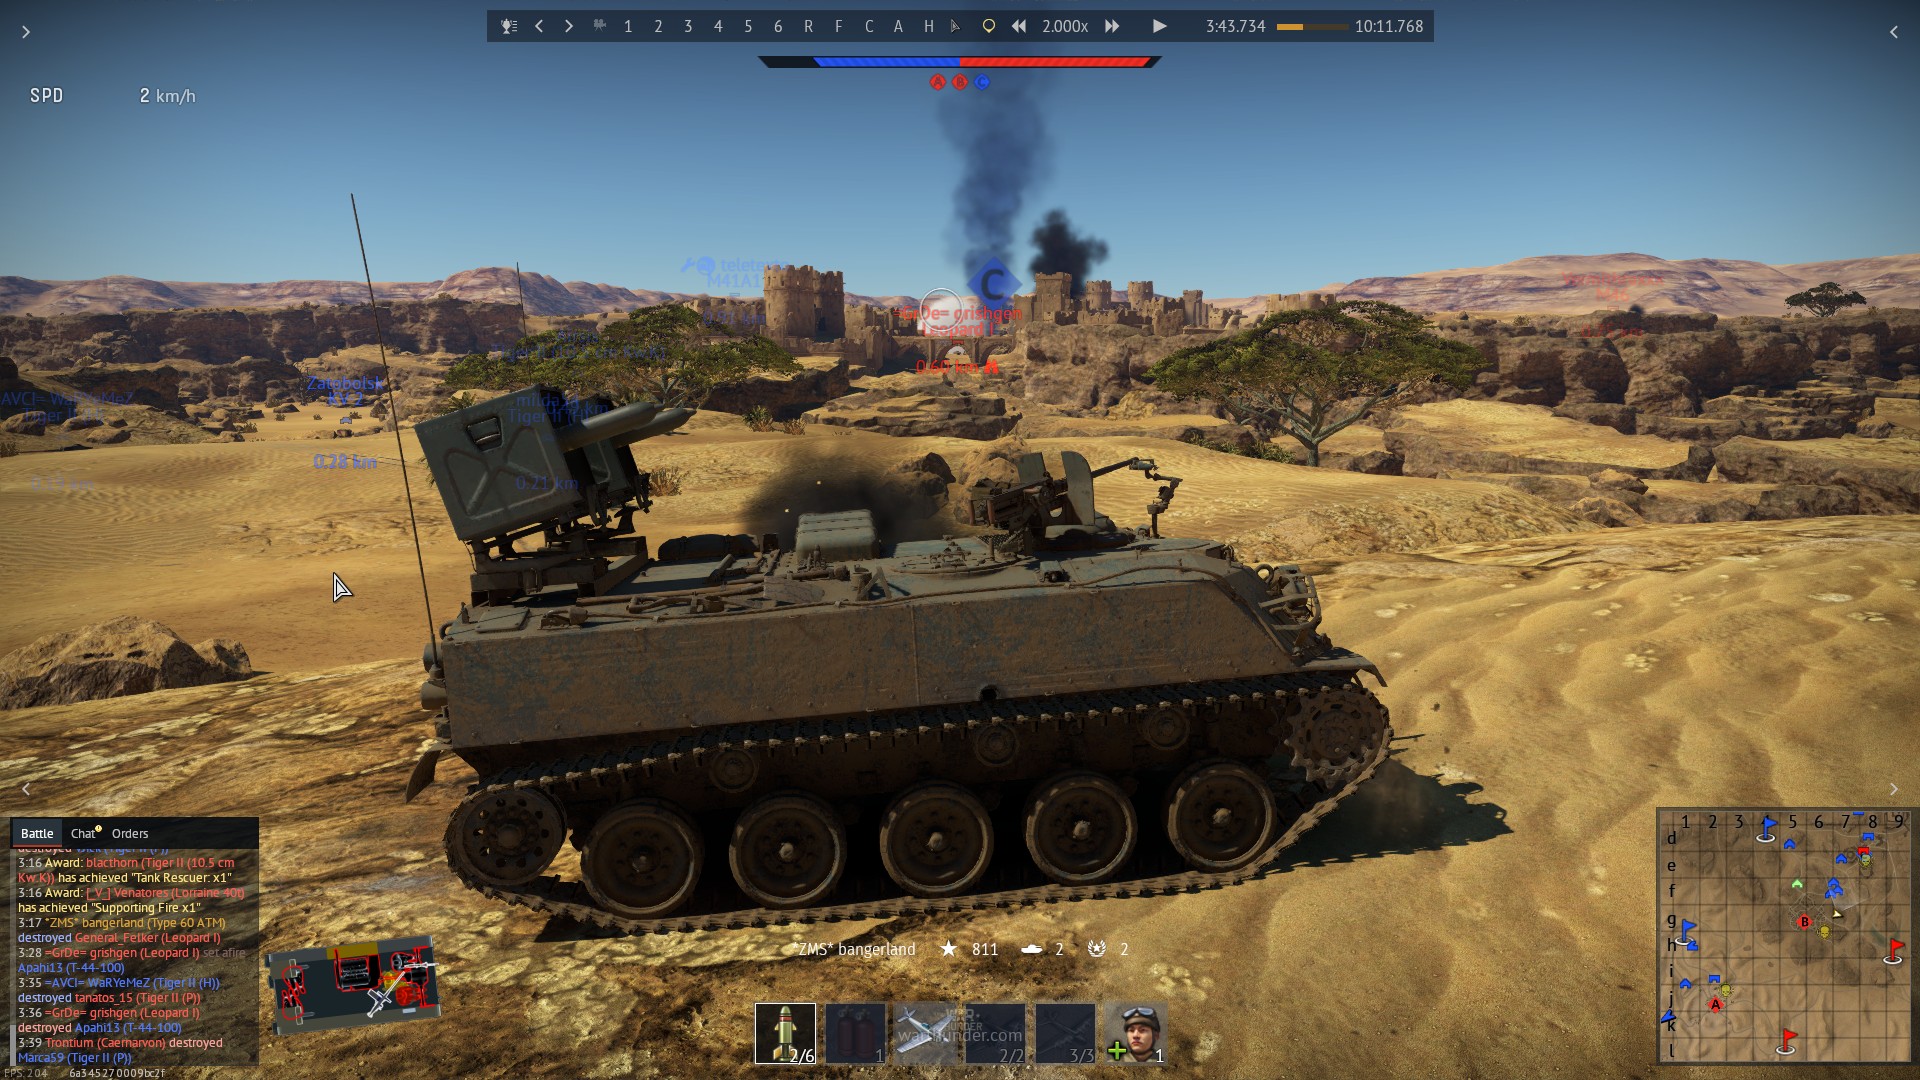
| 23:33, 1 July 2019 | General flanking example - end of the flank.jpg (file) |  |
757 KB | Screenshot shows overall success of initial flank attack during showcased mission. Type 60 ATM is heavily damaged, but managed to completely ruin a 4 tank attack on B point and even do damage on C. Category:In-game screenshots | 1 |
| 00:36, 6 July 2019 | General flanking example - enemy overlooks flanker.jpg (file) |  |
611 KB | Enemy tank fails to notice tank destroyer and drives pas it, oblivious to it's demise. Category:In-game screenshots | 1 |
| 00:37, 6 July 2019 | General flanking example - flanker overlooks enemy.jpg (file) |  |
602 KB | In this screenshot, flanking tank destroyer fails to notice enemy tank, which stumbled upon it. File:General flanking example - enemy overlooks flanker.jpg | 1 |
| 01:41, 6 July 2019 | General flanking example - getting to the capture point.jpg (file) |  |
807 KB | Self explanatory. Screenshot is supposed to help notice some important details of maps, when you are playing "flanker" Category:In-game screenshots | 1 |
| 01:59, 6 July 2019 | General flanking example - late game flank.jpg (file) |  |
738 KB | Screenshot showcases Swingfire using radio communication to freely flank enemy medium tank. Category:In-game screenshots | 1 |
| 18:22, 12 July 2019 | General flanking example - late game flank low rank.jpg (file) | 411 KB | Screenshot shows a flank attack using "radio communication" via aircraft support and situational awareness in low rank. We are helping the cornered tank destroyer by doing this. Category:In-game screenshots | 1 | |
| 23:00, 1 July 2019 | General flanking example - map explanation.jpg (file) |  |
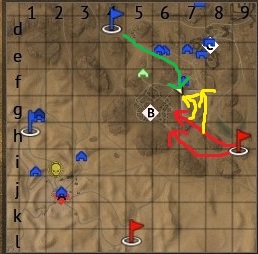
36 KB | Flanking explanation for "second battle of of El Alamein" map. Green arrow represents flank route, red arrows represent enemy main push force, yellow arrows represent enemy flank force. Category:In-game screenshots | 1 |
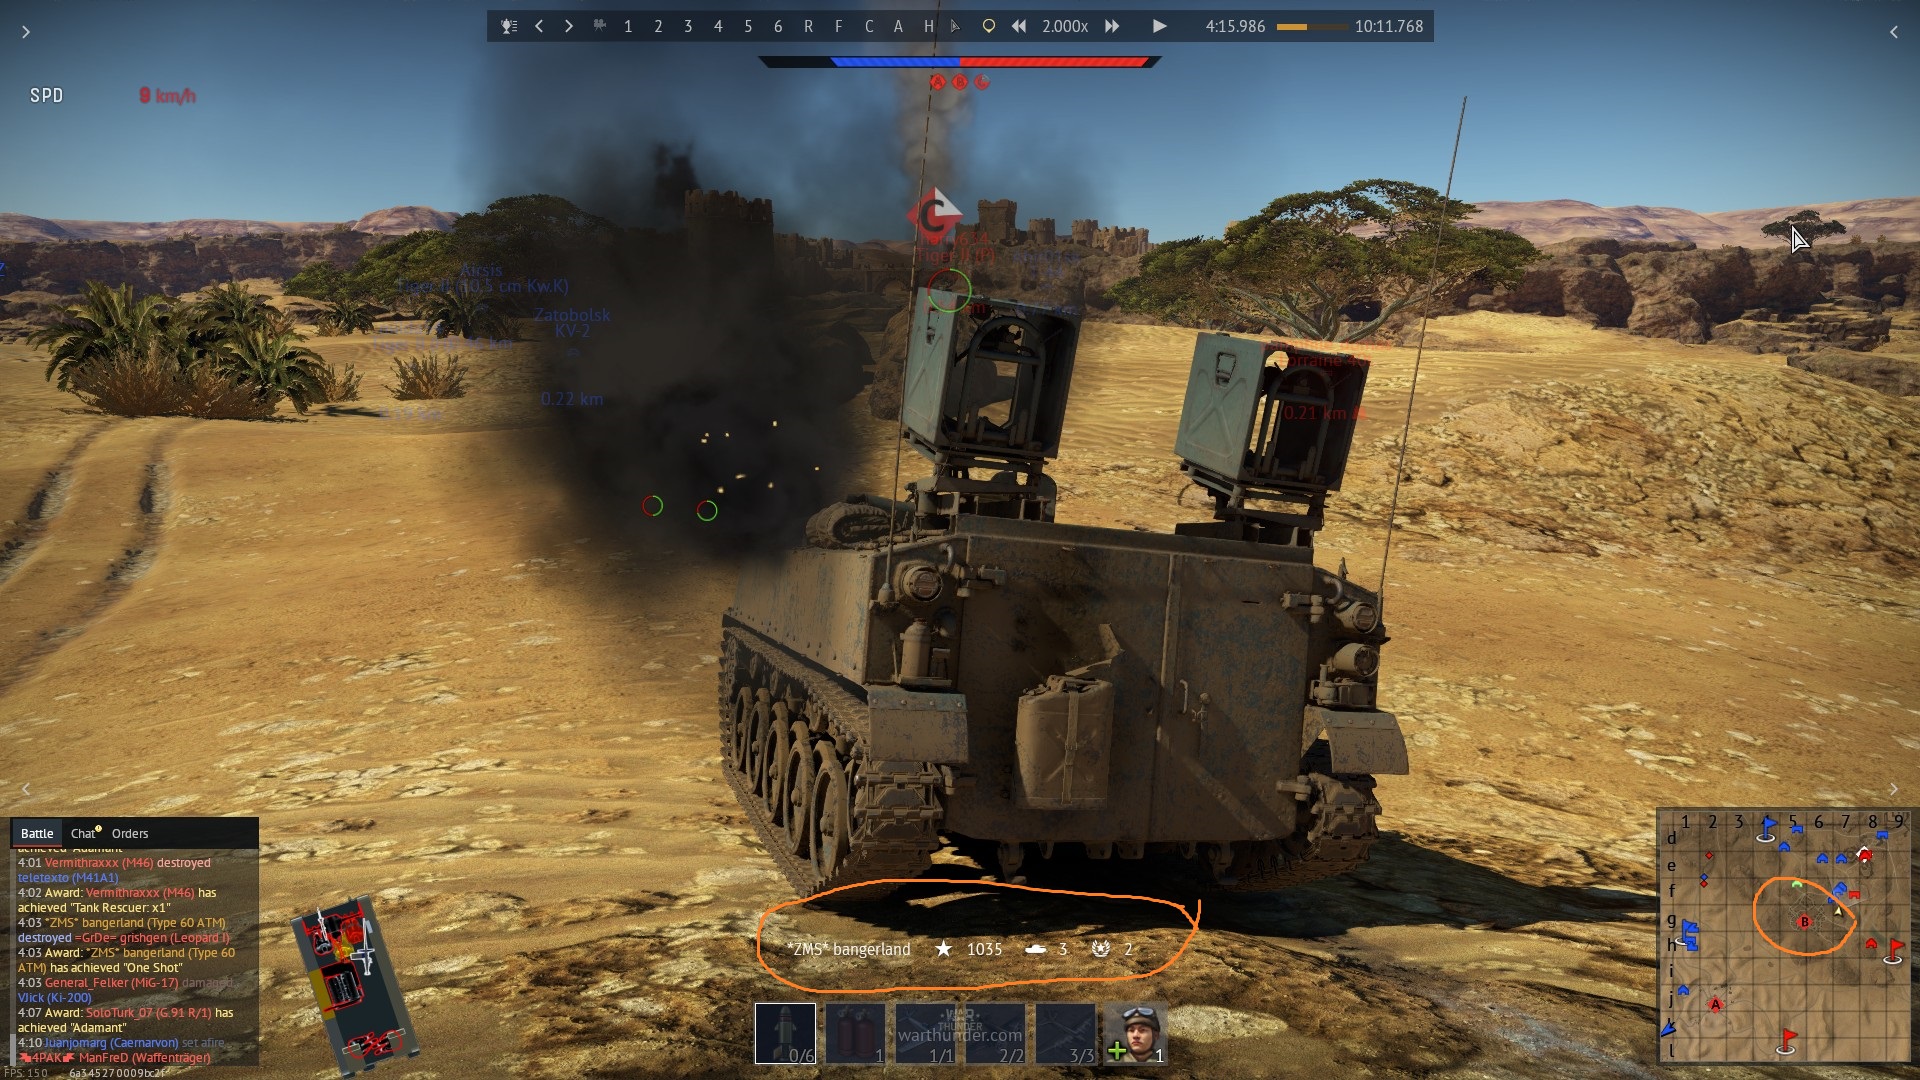
| 23:11, 1 July 2019 | General flanking example - opening.jpg (file) |  |
590 KB | Type 60 ATM stealth-climbed on top of enemy plateau and unleashed an attack on unsuspecting enemy party. To increase morale damage and to remove risk of being scouted, light tank was targeted first. Category:In-game screenshots | 1 |
| 23:17, 1 July 2019 | General flanking example - reason for picking up special tanks.jpg (file) |  |
568 KB | Screenshot shows that while flanking opponents, you will sometimes meet adequate resistance, and thus specialized tanks should be chosen for flanking instead of just using average vehicles. Category:In-game screenshots | 1 |
