Difference between pages "Black Prince" and "User:U44629479"
(Difference between pages)
Colok76286 (talk | contribs) (→Mobility: Updated to new, sleek profile table) |
Colok76286 (talk | contribs) (→Multi-turreted tanks: Added Youtube gallery) |
||
| Line 1: | Line 1: | ||
| − | + | Personal memo. Feel free to add/correct info. | |
| + | = Signature = | ||
| + | Add <code><nowiki>--~~~~</nowiki></code> to sign your messages in Discussion pages. | ||
| − | = | + | = Personal mobility checklist for a ground vehicle = |
| − | + | * What are the vehicle's top forward speeds (AB/RB) and reverse speeds (also for water if amphibious). | |
| − | + | * Does the tank accelerate quickly? Brake quickly? | |
| − | + | * What is the handling of the tank at low speed? At high speed? When braking? On flat terrain? On uneven ground? | |
| − | + | * How well does the tank turn? When moving? When idling? Does it have neutral steering? | |
| + | * How big is the turn radius? How much place does it need to do a 180°? | ||
| + | * Does it lose speed quickly when climbing uphill? When fording? When driving through obstacles? (trees, barriers, fences, walls, barricades, lampposts, etc.) | ||
| + | * How does the tank compare to similar vehicles? (of the same class: Light, Medium, Heavy, TD or of the same BR) | ||
| − | + | = Missing values in [[WSP Table Templates]] = | |
| + | * Use the underscore/underdash: ___ for missing values in tables. | ||
| + | * Do not use question marks or blanks because they can't be indexed in the search engine. | ||
| − | + | = Overview of all torpedo-carrying vehicles = | |
| + | For the naval players, an overview of all vehicles (planes and ships) equipped with torpedoes is missing. | ||
| + | Some pages exist ([[:Category:Torpedo_bombers]] or [[:Category:Suspended armaments]], subsection Torpedoes) but do not encompass all vehicles or offer the desired overview. | ||
| − | + | == Torpedo-carrying aircraft == | |
| + | As an addition to the category [[:Category:Torpedo_bombers]], here is an overview of torpedo-carrying planes: | ||
| − | + | {{Tree-Start|5|without header}} | |
| − | + | {{Tree-Line|}} | |
| − | |||
| − | + | |style="border-left: solid 1px #cccccc;"| | |
| − | + | <center>[[File:USA flag.png|70px|link=Category:USA aircraft]]</center> | |
| + | {{Tree-Skip|10px}} | ||
| − | + | |style="border-left: solid 1px #cccccc;"| | |
| − | + | <center>[[File:Germany flag.png|70px|link=Category:Germany aircraft]]</center> | |
| + | {{Tree-Skip|10px}} | ||
| − | + | |style="border-left: solid 1px #cccccc;"| | |
| + | <center>[[File:USSR flag.png|70px|link=Category:USSR aircraft]]</center> | ||
| + | {{Tree-Skip|10px}} | ||
| − | + | |style="border-left: solid 1px #cccccc;"| | |
| + | <center>[[File:Britain flag.png|70px|link=Category:Britain aircraft]]</center> | ||
| + | {{Tree-Skip|10px}} | ||
| − | + | |style="border-left: solid 1px #cccccc;"| | |
| − | + | <center>[[File:Japan flag.png|70px|link=Category:Japan aircraft]]</center> | |
| − | + | {{Tree-Skip|10px}} | |
| − | | | ||
| − | |||
| − | |||
| − | |||
| − | |||
| − | |||
| − | |||
| − | |||
| − | |||
| − | |||
| − | |||
| − | |||
| − | |} | ||
| − | |||
| − | + | |style="border-left: solid 1px #cccccc;"| | |
| − | + | <center>[[File:China flag.png|70px|link=Category:China aircraft]]</center> | |
| − | + | {{Tree-Skip|10px}} | |
| − | |||
| − | = | + | |style="border-left: solid 1px #cccccc;"| |
| − | < | + | <center>[[File:Italy flag.png|70px|link=Category:Italy aircraft]]</center> |
| + | {{Tree-Skip|10px}} | ||
| − | + | |style="border-left: solid 1px #cccccc;"| | |
| + | <center>[[File:France flag.png|70px|link=Category:France aircraft]]</center> | ||
| + | {{Tree-Skip|10px}} | ||
| − | + | |style="border-left: solid 1px #cccccc;"| | |
| + | <center>[[File:Sweden flag.png|70px|link=Category:Sweden aircraft]]</center> | ||
| + | {{Tree-Skip|10px}} | ||
| − | + | {{Tree-Line|I Rank}} | |
| − | = | + | |style="border-left: solid 1px #cccccc;"| |
| − | + | {{Tree-Skip|5px}} | |
| − | |||
| − | {{ | ||
| − | + | |style="border-left: solid 1px #cccccc;"| | |
| + | {{Tree-Skip|5px}} | ||
| − | + | |style="border-left: solid 1px #cccccc;"| | |
| − | | | + | {{Tree-Skip|5px}} |
| − | |||
| − | |||
| − | |||
| − | |||
| − | |||
| − | |||
| − | |||
| − | |||
| − | |||
| − | |||
| − | |||
| − | |||
| − | |||
| − | |||
| − | |||
| − | |||
| − | |||
| − | |||
| − | |||
| − | |||
| − | |||
| − | |||
| − | |||
| − | |||
| − | |||
| − | |||
| − | |||
| − | |||
| − | |||
| − | |||
| − | |||
| − | |} | ||
| − | + | |style="border-left: solid 1px #cccccc;"| | |
| − | + | {{Tree-Skip|5px}} | |
| − | |||
| − | |||
| − | |||
| − | |||
| − | |||
| − | |||
| − | |||
| − | |||
| − | |||
| − | |||
| − | |||
| − | |||
| − | |||
| − | |||
| − | |||
| − | |||
| − | |||
| − | |||
| − | |||
| − | |||
| − | |||
| − | |||
| − | |||
| − | |||
| − | { | ||
| − | |||
| − | |||
| − | |||
| − | |||
| − | |||
| − | |||
| − | |||
| − | |||
| − | |||
| − | |||
| − | |||
| − | |||
| − | |||
| − | |||
| − | |||
| − | |||
| − | |||
| − | |||
| − | |||
| − | |||
| − | |||
| − | |||
| − | |||
| − | |||
| − | |||
| − | |||
| − | |||
| − | |||
| − | |} | ||
| − | |||
| − | |||
| − | |||
| − | |||
| − | |||
| − | |||
| − | |||
| − | |||
| − | |||
| − | |||
| − | |||
| − | |||
| − | |||
| − | |||
| − | = | + | |style="border-left: solid 1px #cccccc;"| |
| − | + | {{Tree-Skip|5px}} | |
| − | + | |style="border-left: solid 1px #cccccc;"| | |
| − | | | + | {{Tree-Skip|5px}} |
| − | |||
| − | |||
| − | |||
| − | |||
| − | |||
| − | |||
| − | |||
| − | |||
| − | |||
| − | |||
| − | |||
| − | |||
| − | |} | ||
| − | + | |style="border-left: solid 1px #cccccc;"| | |
| − | + | {{Tree-Skip|5px}} | |
| − | |||
| − | |||
| − | |||
| − | |||
| − | |||
| − | |||
| − | |||
| − | |||
| − | |||
| − | |} | ||
| − | = | + | |style="border-left: solid 1px #cccccc;"| |
| + | {{Tree-Skip|5px}} | ||
| − | + | |style="border-left: solid 1px #cccccc;"| | |
| + | {{Tree-Unit|saab_b3c}} | ||
| + | {{Tree-Skip|5px}} | ||
| − | + | {{Tree-Line|II Rank}} | |
| − | { | + | |style="border-left: solid 1px #cccccc;"| |
| − | + | {{Tree-Unit|f6f-3}} | |
| − | + | {{Tree-Skip|5px}} | |
| − | |||
| − | |||
| − | |||
| − | |||
| − | |||
| − | |||
| − | |||
| − | |||
| − | | | ||
| − | |- | ||
| − | |} | ||
| − | + | |style="border-left: solid 1px #cccccc;"| | |
| + | {{Tree-Skip|5px}} | ||
| − | + | |style="border-left: solid 1px #cccccc;"| | |
| + | {{Tree-Skip|5px}} | ||
| − | = | + | |style="border-left: solid 1px #cccccc;"| |
| − | + | {{Tree-Skip|5px}} | |
| − | {{ | ||
| − | + | |style="border-left: solid 1px #cccccc;"| | |
| − | | | + | {{Tree-Skip|5px}} |
| − | |||
| − | |||
| − | |||
| − | |||
| − | |||
| − | |||
| − | |||
| − | |||
| − | |||
| − | |||
| − | |||
| − | |} | ||
| − | = | + | |style="border-left: solid 1px #cccccc;"| |
| − | + | {{Tree-Skip|5px}} | |
| − | |||
| − | + | |style="border-left: solid 1px #cccccc;"| | |
| + | {{Tree-Skip|5px}} | ||
| − | + | |style="border-left: solid 1px #cccccc;"| | |
| + | {{Tree-Skip|5px}} | ||
| − | + | |style="border-left: solid 1px #cccccc;"| | |
| + | {{Tree-Skip|5px}} | ||
| − | + | {{Tree-Line|III Rank}} | |
| + | |style="border-left: solid 1px #cccccc;"| | ||
| + | {{Tree-Unit|f6f-5n}} | ||
| + | {{Tree-Skip|5px}} | ||
| − | + | |style="border-left: solid 1px #cccccc;"| | |
| + | {{Tree-Skip|5px}} | ||
| − | + | |style="border-left: solid 1px #cccccc;"| | |
| + | {{Tree-Skip|5px}} | ||
| − | + | |style="border-left: solid 1px #cccccc;"| | |
| + | {{Tree-Unit-Prem|hellcat_fmk1}} | ||
| + | {{Tree-Skip|5px}} | ||
| + | {{Tree-Unit-Squad|b_48_firecrest}} | ||
| + | {{Tree-Skip|5px}} | ||
| + | {{Tree-Unit|firebrand_tf4}} | ||
| + | {{Tree-Skip|5px}} | ||
| − | + | |style="border-left: solid 1px #cccccc;"| | |
| + | {{Tree-Unit|ki_67_1_ko}} | ||
| + | {{Tree-Skip|5px}} | ||
| + | {{Tree-Unit|ki_67_1_otsu}} | ||
| + | {{Tree-Skip|5px}} | ||
| − | = | + | |style="border-left: solid 1px #cccccc;"| |
| − | + | {{Tree-Skip|5px}} | |
| − | + | |style="border-left: solid 1px #cccccc;"| | |
| + | {{Tree-Skip|5px}} | ||
| − | + | |style="border-left: solid 1px #cccccc;"| | |
| − | + | {{Tree-Unit|f6f-5_france}} | |
| − | + | {{Tree-Skip|5px}} | |
| − | + | {{Tree-Unit|f6f-5n_france}} | |
| − | + | {{Tree-Skip|5px}} | |
| − | |||
| − | |||
| − | |||
| − | + | |style="border-left: solid 1px #cccccc;"| | |
| + | {{Tree-Skip|5px}} | ||
| − | + | {{Tree-Line|IV Rank}} | |
| − | + | |style="border-left: solid 1px #cccccc;"| | |
| − | + | {{Tree-Unit|am_1_mauler}} | |
| − | + | {{Tree-Skip|5px}} | |
| − | + | {{Tree-Unit|douglas_ad_2}} | |
| − | + | {{Tree-Skip|5px}} | |
| − | + | {{Tree-Unit|douglas_ad_4}} | |
| − | + | {{Tree-Skip|5px}} | |
| − | + | {{Tree-Unit-Prem|a2d}} | |
| − | + | {{Tree-Skip|5px}} | |
| − | |||
| − | = | + | |style="border-left: solid 1px #cccccc;"| |
| − | + | {{Tree-Skip|5px}} | |
| − | = | + | |style="border-left: solid 1px #cccccc;"| |
| − | + | {{Tree-Skip|5px}} | |
| − | + | |style="border-left: solid 1px #cccccc;"| | |
| + | {{Tree-Skip|5px}} | ||
| − | = | + | |style="border-left: solid 1px #cccccc;"| |
| − | + | {{Tree-Skip|5px}} | |
| − | = | + | |style="border-left: solid 1px #cccccc;"| |
| − | + | {{Tree-Skip|5px}} | |
| − | |||
| − | + | |style="border-left: solid 1px #cccccc;"| | |
| − | + | {{Tree-Unit-Prem|g_55s}} | |
| − | {{ | + | {{Tree-Skip|5px}} |
| + | {{Tree-Unit|p_108b_serie1}} | ||
| + | {{Tree-Skip|5px}} | ||
| + | {{Tree-Unit|p_108b_serie2}} | ||
| + | {{Tree-Skip|5px}} | ||
| − | = | + | |style="border-left: solid 1px #cccccc;"| |
| − | + | {{Tree-Unit|douglas_ad_4_france}} | |
| + | {{Tree-Skip|5px}} | ||
| − | + | |style="border-left: solid 1px #cccccc;"| | |
| − | + | {{Tree-Unit|saab_t18b_1}} | |
| + | {{Tree-Skip|5px}} | ||
| − | = | + | {{Tree-Line|V Rank}} |
| − | + | |style="border-left: solid 1px #cccccc;"| | |
| + | {{Tree-Skip|5px}} | ||
| − | + | |style="border-left: solid 1px #cccccc;"| | |
| − | + | {{Tree-Skip|5px}} | |
| − | |||
| − | |||
| − | {{Britain | + | |style="border-left: solid 1px #cccccc;"| |
| − | {{Britain | + | {{Tree-Skip|5px}} |
| + | |||
| + | |style="border-left: solid 1px #cccccc;"| | ||
| + | {{Tree-Skip|5px}} | ||
| + | |||
| + | |style="border-left: solid 1px #cccccc;"| | ||
| + | {{Tree-Skip|5px}} | ||
| + | |||
| + | |style="border-left: solid 1px #cccccc;"| | ||
| + | {{Tree-Skip|5px}} | ||
| + | |||
| + | |style="border-left: solid 1px #cccccc;"| | ||
| + | {{Tree-Skip|5px}} | ||
| + | |||
| + | |style="border-left: solid 1px #cccccc;"| | ||
| + | {{Tree-Skip|5px}} | ||
| + | |||
| + | |style="border-left: solid 1px #cccccc;"| | ||
| + | {{Tree-Skip|5px}} | ||
| + | |||
| + | {{Tree-End}} | ||
| + | |||
| + | = Multi-turreted tanks = | ||
| + | Just like [[:Category:ATGM vehicles|ATGM vehicles]], I wish to create the category "Multi-turreted tanks" for tanks with several turrets. | ||
| + | |||
| + | We will distinguish between 3 configurations: | ||
| + | * 2 turrets or more equipped with cannons, | ||
| + | * 1 turret equipped with a cannon and the other turrets equipped with machine guns. | ||
| + | * 1 turret equipped with a cannon and 1 or more rotating cupolas on the turret equipped with an MG. | ||
| + | |||
| + | ==Both turrets with cannons== | ||
| + | {{Tree-Start|6|without header}} | ||
| + | {{Tree-Line|}} | ||
| + | |||
| + | |style="border-left: solid 1px #cccccc;"| | ||
| + | <center>[[File:USA flag.png|70px|link=Category:USA ground vehicles]]</center> | ||
| + | {{Tree-Skip|10px}} | ||
| + | |||
| + | |style="border-left: solid 1px #cccccc;"| | ||
| + | <center>[[File:Germany flag.png|70px|link=Category:Germany ground vehicles]]</center> | ||
| + | {{Tree-Skip|10px}} | ||
| + | |||
| + | |style="border-left: solid 1px #cccccc;"| | ||
| + | <center>[[File:USSR flag.png|70px|link=Category:USSR ground vehicles]]</center> | ||
| + | {{Tree-Skip|10px}} | ||
| + | |||
| + | |style="border-left: solid 1px #cccccc;"| | ||
| + | <center>[[File:Britain flag.png|70px|link=Category:Britain ground vehicles]]</center> | ||
| + | {{Tree-Skip|10px}} | ||
| + | |||
| + | |style="border-left: solid 1px #cccccc;"| | ||
| + | <center>[[File:Japan flag.png|70px|link=Category:Japan ground vehicles]]</center> | ||
| + | {{Tree-Skip|10px}} | ||
| + | |||
| + | |style="border-left: solid 1px #cccccc;"| | ||
| + | <center>[[File:China flag.png|70px|link=Category:China ground vehicles]]</center> | ||
| + | {{Tree-Skip|10px}} | ||
| + | |||
| + | |style="border-left: solid 1px #cccccc;"| | ||
| + | <center>[[File:Italy flag.png|70px|link=Category:Italy ground vehicles]]</center> | ||
| + | {{Tree-Skip|10px}} | ||
| + | |||
| + | |style="border-left: solid 1px #cccccc;"| | ||
| + | <center>[[File:France flag.png|70px|link=Category:France ground vehicles]]</center> | ||
| + | {{Tree-Skip|10px}} | ||
| + | |||
| + | |style="border-left: solid 1px #cccccc;"| | ||
| + | <center>[[File:Sweden flag.png|70px|link=Category:Sweden ground vehicles]]</center> | ||
| + | {{Tree-Skip|10px}} | ||
| + | |||
| + | {{Tree-Line|I Rank}} | ||
| + | |||
| + | |style="border-left: solid 1px #cccccc;"| | ||
| + | {{Tree-Skip|5px}} | ||
| + | |||
| + | |style="border-left: solid 1px #cccccc;"| | ||
| + | {{Tree-Skip|5px}} | ||
| + | |||
| + | |style="border-left: solid 1px #cccccc;"| | ||
| + | {{Tree-Unit-Prem|ussr_t_35}} | ||
| + | {{Tree-Skip|5px}} | ||
| + | {{Tree-Unit-Prem|ussr_m3c}} | ||
| + | {{Tree-Skip|5px}} | ||
| + | |||
| + | |style="border-left: solid 1px #cccccc;"| | ||
| + | {{Tree-Skip|5px}} | ||
| + | |||
| + | |style="border-left: solid 1px #cccccc;"| | ||
| + | {{Tree-Unit-Prem|jp_type_95_heavy}} | ||
| + | {{Tree-Skip|5px}} | ||
| + | |||
| + | |style="border-left: solid 1px #cccccc;"| | ||
| + | {{Tree-Skip|5px}} | ||
| + | |||
| + | |style="border-left: solid 1px #cccccc;"| | ||
| + | {{Tree-Skip|5px}} | ||
| + | |||
| + | |style="border-left: solid 1px #cccccc;"| | ||
| + | {{Tree-Skip|5px}} | ||
| + | |||
| + | |style="border-left: solid 1px #cccccc;"| | ||
| + | {{Tree-Skip|5px}} | ||
| + | |||
| + | {{Tree-Line|II Rank}} | ||
| + | |||
| + | |style="border-left: solid 1px #cccccc;"| | ||
| + | {{Tree-Unit|us_m3_lee}} | ||
| + | {{Tree-Skip|5px}} | ||
| + | {{Tree-Unit-Prem|us_mk1_grant}} | ||
| + | {{Tree-Skip|5px}} | ||
| + | |||
| + | |style="border-left: solid 1px #cccccc;"| | ||
| + | {{Tree-Skip|5px}} | ||
| + | |||
| + | |style="border-left: solid 1px #cccccc;"| | ||
| + | {{Tree-Unit-Prem|ussr_smk}} | ||
| + | {{Tree-Skip|5px}} | ||
| + | |||
| + | |style="border-left: solid 1px #cccccc;"| | ||
| + | {{Tree-Unit-Prem|uk_mk1_grant}} | ||
| + | {{Tree-Skip|5px}} | ||
| + | |||
| + | |style="border-left: solid 1px #cccccc;"| | ||
| + | {{Tree-Skip|5px}} | ||
| + | |||
| + | |style="border-left: solid 1px #cccccc;"| | ||
| + | {{Tree-Skip|5px}} | ||
| + | |||
| + | |style="border-left: solid 1px #cccccc;"| | ||
| + | {{Tree-Skip|5px}} | ||
| + | |||
| + | |style="border-left: solid 1px #cccccc;"| | ||
| + | {{Tree-Skip|5px}} | ||
| + | |||
| + | |style="border-left: solid 1px #cccccc;"| | ||
| + | {{Tree-Skip|5px}} | ||
| + | |||
| + | {{Tree-End}} | ||
| + | |||
| + | |||
| + | ==Turret with 1 cannon and MG(s) or MGs only== | ||
| + | |||
| + | {{Tree-Start|6|without header}} | ||
| + | {{Tree-Line|}} | ||
| + | |||
| + | |style="border-left: solid 1px #cccccc;"| | ||
| + | <center>[[File:USA flag.png|70px|link=Category:USA ground vehicles]]</center> | ||
| + | {{Tree-Skip|10px}} | ||
| + | |||
| + | |style="border-left: solid 1px #cccccc;"| | ||
| + | <center>[[File:Germany flag.png|70px|link=Category:Germany ground vehicles]]</center> | ||
| + | {{Tree-Skip|10px}} | ||
| + | |||
| + | |style="border-left: solid 1px #cccccc;"| | ||
| + | <center>[[File:USSR flag.png|70px|link=Category:USSR ground vehicles]]</center> | ||
| + | {{Tree-Skip|10px}} | ||
| + | |||
| + | |style="border-left: solid 1px #cccccc;"| | ||
| + | <center>[[File:Britain flag.png|70px|link=Category:Britain ground vehicles]]</center> | ||
| + | {{Tree-Skip|10px}} | ||
| + | |||
| + | |style="border-left: solid 1px #cccccc;"| | ||
| + | <center>[[File:Japan flag.png|70px|link=Category:Japan ground vehicles]]</center> | ||
| + | {{Tree-Skip|10px}} | ||
| + | |||
| + | |style="border-left: solid 1px #cccccc;"| | ||
| + | <center>[[File:China flag.png|70px|link=Category:China ground vehicles]]</center> | ||
| + | {{Tree-Skip|10px}} | ||
| + | |||
| + | |style="border-left: solid 1px #cccccc;"| | ||
| + | <center>[[File:Italy flag.png|70px|link=Category:Italy ground vehicles]]</center> | ||
| + | {{Tree-Skip|10px}} | ||
| + | |||
| + | |style="border-left: solid 1px #cccccc;"| | ||
| + | <center>[[File:France flag.png|70px|link=Category:France ground vehicles]]</center> | ||
| + | {{Tree-Skip|10px}} | ||
| + | |||
| + | |style="border-left: solid 1px #cccccc;"| | ||
| + | <center>[[File:Sweden flag.png|70px|link=Category:Sweden ground vehicles]]</center> | ||
| + | {{Tree-Skip|10px}} | ||
| + | |||
| + | {{Tree-Line|I Rank}} | ||
| + | |||
| + | |style="border-left: solid 1px #cccccc;"| | ||
| + | {{Tree-Unit|us_m2a2}} | ||
| + | {{Tree-Skip|5px}} | ||
| + | {{Tree-Unit|us_m2_medium}} | ||
| + | {{Tree-Skip|5px}} | ||
| + | |||
| + | |style="border-left: solid 1px #cccccc;"| | ||
| + | {{Tree-Unit-Prem|germ_nbfz_VI}} | ||
| + | {{Tree-Skip|5px}} | ||
| + | |||
| + | |style="border-left: solid 1px #cccccc;"| | ||
| + | {{Tree-Skip|5px}} | ||
| + | |||
| + | |style="border-left: solid 1px #cccccc;"| | ||
| + | {{Tree-Unit-Prem|uk_a1e1_independent}} | ||
| + | {{Tree-Skip|5px}} | ||
| + | |||
| + | |style="border-left: solid 1px #cccccc;"| | ||
| + | {{Tree-Skip|5px}} | ||
| + | |||
| + | |style="border-left: solid 1px #cccccc;"| | ||
| + | {{Tree-Skip|5px}} | ||
| + | |||
| + | |style="border-left: solid 1px #cccccc;"| | ||
| + | {{Tree-Skip|5px}} | ||
| + | |||
| + | |style="border-left: solid 1px #cccccc;"| | ||
| + | {{Tree-Skip|5px}} | ||
| + | |||
| + | |style="border-left: solid 1px #cccccc;"| | ||
| + | {{Tree-Skip|5px}} | ||
| + | |||
| + | {{Tree-Line|II Rank}} | ||
| + | |||
| + | |style="border-left: solid 1px #cccccc;"| | ||
| + | {{Tree-Unit-Prem|us_m4a5_ram_2}} | ||
| + | {{Tree-Skip|5px}} | ||
| + | |||
| + | |style="border-left: solid 1px #cccccc;"| | ||
| + | {{Tree-Skip|5px}} | ||
| + | |||
| + | |style="border-left: solid 1px #cccccc;"| | ||
| + | {{Tree-Unit|ussr_t_28}} | ||
| + | {{Tree-Skip|5px}} | ||
| + | {{Tree-Unit|ussr_t_28E}} | ||
| + | {{Tree-Skip|5px}} | ||
| + | |||
| + | |style="border-left: solid 1px #cccccc;"| | ||
| + | {{Tree-Skip|5px}} | ||
| + | |||
| + | |style="border-left: solid 1px #cccccc;"| | ||
| + | {{Tree-Skip|5px}} | ||
| + | |||
| + | |style="border-left: solid 1px #cccccc;"| | ||
| + | {{Tree-Skip|5px}} | ||
| + | |||
| + | |style="border-left: solid 1px #cccccc;"| | ||
| + | {{Tree-Skip|5px}} | ||
| + | |||
| + | |style="border-left: solid 1px #cccccc;"| | ||
| + | {{Tree-Skip|5px}} | ||
| + | |||
| + | |style="border-left: solid 1px #cccccc;"| | ||
| + | {{Tree-Skip|5px}} | ||
| + | |||
| + | {{Tree-End}} | ||
| + | |||
| + | |||
| + | ==Turret with cannon and rotating MG cupola(s) on the turret== | ||
| + | |||
| + | {{Tree-Start|6|without header}} | ||
| + | {{Tree-Line|}} | ||
| + | |||
| + | |style="border-left: solid 1px #cccccc;"| | ||
| + | <center>[[File:USA flag.png|70px|link=Category:USA ground vehicles]]</center> | ||
| + | {{Tree-Skip|10px}} | ||
| + | |||
| + | |style="border-left: solid 1px #cccccc;"| | ||
| + | <center>[[File:Germany flag.png|70px|link=Category:Germany ground vehicles]]</center> | ||
| + | {{Tree-Skip|10px}} | ||
| + | |||
| + | |style="border-left: solid 1px #cccccc;"| | ||
| + | <center>[[File:USSR flag.png|70px|link=Category:USSR ground vehicles]]</center> | ||
| + | {{Tree-Skip|10px}} | ||
| + | |||
| + | |style="border-left: solid 1px #cccccc;"| | ||
| + | <center>[[File:Britain flag.png|70px|link=Category:Britain ground vehicles]]</center> | ||
| + | {{Tree-Skip|10px}} | ||
| + | |||
| + | |style="border-left: solid 1px #cccccc;"| | ||
| + | <center>[[File:Japan flag.png|70px|link=Category:Japan ground vehicles]]</center> | ||
| + | {{Tree-Skip|10px}} | ||
| + | |||
| + | |style="border-left: solid 1px #cccccc;"| | ||
| + | <center>[[File:China flag.png|70px|link=Category:China ground vehicles]]</center> | ||
| + | {{Tree-Skip|10px}} | ||
| + | |||
| + | |style="border-left: solid 1px #cccccc;"| | ||
| + | <center>[[File:Italy flag.png|70px|link=Category:Italy ground vehicles]]</center> | ||
| + | {{Tree-Skip|10px}} | ||
| + | |||
| + | |style="border-left: solid 1px #cccccc;"| | ||
| + | <center>[[File:France flag.png|70px|link=Category:France ground vehicles]]</center> | ||
| + | {{Tree-Skip|10px}} | ||
| + | |||
| + | |style="border-left: solid 1px #cccccc;"| | ||
| + | <center>[[File:Sweden flag.png|70px|link=Category:Sweden ground vehicles]]</center> | ||
| + | {{Tree-Skip|10px}} | ||
| + | |||
| + | {{Tree-Line|III Rank}} | ||
| + | |||
| + | |style="border-left: solid 1px #cccccc;"| | ||
| + | {{Tree-Skip|5px}} | ||
| + | |||
| + | |style="border-left: solid 1px #cccccc;"| | ||
| + | {{Tree-Skip|5px}} | ||
| + | |||
| + | |style="border-left: solid 1px #cccccc;"| | ||
| + | {{Tree-Unit-Prem|ussr_kv_220}} | ||
| + | {{Tree-Skip|5px}} | ||
| + | |||
| + | |style="border-left: solid 1px #cccccc;"| | ||
| + | {{Tree-Skip|5px}} | ||
| + | |||
| + | |style="border-left: solid 1px #cccccc;"| | ||
| + | {{Tree-Skip|5px}} | ||
| + | |||
| + | |style="border-left: solid 1px #cccccc;"| | ||
| + | {{Tree-Skip|5px}} | ||
| + | |||
| + | |style="border-left: solid 1px #cccccc;"| | ||
| + | {{Tree-Skip|5px}} | ||
| + | |||
| + | |style="border-left: solid 1px #cccccc;"| | ||
| + | {{Tree-Skip|5px}} | ||
| + | |||
| + | |style="border-left: solid 1px #cccccc;"| | ||
| + | {{Tree-Skip|5px}} | ||
| + | |||
| + | {{Tree-Line|IV Rank}} | ||
| + | |||
| + | |style="border-left: solid 1px #cccccc;"| | ||
| + | {{Tree-Unit|us_t92}} | ||
| + | {{Tree-Skip|5px}} | ||
| + | |||
| + | |style="border-left: solid 1px #cccccc;"| | ||
| + | {{Tree-Skip|5px}} | ||
| + | |||
| + | |style="border-left: solid 1px #cccccc;"| | ||
| + | {{Tree-Skip|5px}} | ||
| + | |||
| + | |style="border-left: solid 1px #cccccc;"| | ||
| + | {{Tree-Skip|5px}} | ||
| + | |||
| + | |style="border-left: solid 1px #cccccc;"| | ||
| + | {{Tree-Skip|5px}} | ||
| + | |||
| + | |style="border-left: solid 1px #cccccc;"| | ||
| + | {{Tree-Skip|5px}} | ||
| + | |||
| + | |style="border-left: solid 1px #cccccc;"| | ||
| + | {{Tree-Skip|5px}} | ||
| + | |||
| + | |style="border-left: solid 1px #cccccc;"| | ||
| + | {{Tree-Skip|5px}} | ||
| + | |||
| + | |style="border-left: solid 1px #cccccc;"| | ||
| + | {{Tree-Skip|5px}} | ||
| + | |||
| + | {{Tree-Line|V Rank}} | ||
| + | |||
| + | |style="border-left: solid 1px #cccccc;"| | ||
| + | {{Tree-Unit|us_m48a1_patton_III}} | ||
| + | {{Tree-Skip|5px}} | ||
| + | {{Tree-Unit|us_m60}} | ||
| + | {{Tree-Skip|5px}} | ||
| + | {{Tree-Unit-Prem|us_magach_3}} | ||
| + | {{Tree-Skip|5px}} | ||
| + | |||
| + | |style="border-left: solid 1px #cccccc;"| | ||
| + | {{Tree-Unit|germ_mkpz_m48a2c}} | ||
| + | {{Tree-Skip|5px}} | ||
| + | |||
| + | |style="border-left: solid 1px #cccccc;"| | ||
| + | {{Tree-Skip|5px}} | ||
| + | |||
| + | |style="border-left: solid 1px #cccccc;"| | ||
| + | {{Tree-Skip|5px}} | ||
| + | |||
| + | |style="border-left: solid 1px #cccccc;"| | ||
| + | {{Tree-Skip|5px}} | ||
| + | |||
| + | |style="border-left: solid 1px #cccccc;"| | ||
| + | {{Tree-Unit|cn_m48a1_patton_III}} | ||
| + | {{Tree-Skip|5px}} | ||
| + | |||
| + | |style="border-left: solid 1px #cccccc;"| | ||
| + | {{Tree-Skip|5px}} | ||
| + | |||
| + | |style="border-left: solid 1px #cccccc;"| | ||
| + | {{Tree-Unit|fr_amx_30_1972}} | ||
| + | {{Tree-Skip|5px}} | ||
| + | {{Tree-Unit-Prem|fr_amx_30}} | ||
| + | {{Tree-Skip|5px}} | ||
| + | |||
| + | |style="border-left: solid 1px #cccccc;"| | ||
| + | {{Tree-Skip|5px}} | ||
| + | |||
| + | {{Tree-Line|VI Rank}} | ||
| + | |||
| + | |style="border-left: solid 1px #cccccc;"| | ||
| + | {{Tree-Unit|us_m60a1}} | ||
| + | {{Tree-Skip|5px}} | ||
| + | {{Tree-Unit|us_m60a2}} | ||
| + | {{Tree-Skip|5px}} | ||
| + | {{Tree-Unit|us_m60a1_rise_passive_era}} | ||
| + | {{Tree-Skip|5px}} | ||
| + | {{Tree-Unit|us_m60a3_tts}} | ||
| + | {{Tree-Skip|5px}} | ||
| + | {{Tree-Unit-Prem|us_xm1_gm}} | ||
| + | {{Tree-Skip|5px}} | ||
| + | |||
| + | |style="border-left: solid 1px #cccccc;"| | ||
| + | {{Tree-Skip|5px}} | ||
| + | |||
| + | |style="border-left: solid 1px #cccccc;"| | ||
| + | {{Tree-Skip|5px}} | ||
| + | |||
| + | |style="border-left: solid 1px #cccccc;"| | ||
| + | {{Tree-Unit-Prem|uk_centurion_shot_kal_d}} | ||
| + | {{Tree-Skip|5px}} | ||
| + | {{Tree-Unit|uk_chieftain_mk_3}} | ||
| + | {{Tree-Skip|5px}} | ||
| + | {{Tree-Unit|uk_chieftain_mk_5}} | ||
| + | {{Tree-Skip|5px}} | ||
| + | {{Tree-Unit|uk_chieftain_mk_10}} | ||
| + | {{Tree-Skip|5px}} | ||
| + | |||
| + | |style="border-left: solid 1px #cccccc;"| | ||
| + | {{Tree-Skip|5px}} | ||
| + | |||
| + | |style="border-left: solid 1px #cccccc;"| | ||
| + | {{Tree-Unit|cn_m60a3_tts}} | ||
| + | {{Tree-Skip|5px}} | ||
| + | |||
| + | |style="border-left: solid 1px #cccccc;"| | ||
| + | {{Tree-Skip|5px}} | ||
| + | |||
| + | |style="border-left: solid 1px #cccccc;"| | ||
| + | {{Tree-Unit|fr_amx_30_ACRA}} | ||
| + | {{Tree-Skip|5px}} | ||
| + | {{Tree-Unit|fr_amx_30_b2}} | ||
| + | {{Tree-Skip|5px}} | ||
| + | {{Tree-Unit|fr_amx_30_b2_brenus}} | ||
| + | {{Tree-Skip|5px}} | ||
| + | |||
| + | |style="border-left: solid 1px #cccccc;"| | ||
| + | {{Tree-Skip|5px}} | ||
| + | |||
| + | {{Tree-End}} | ||
| + | |||
| + | ==Video== | ||
| + | {{Youtube-gallery|RyA5KcS2hAw|Multi-turreted Tanks}} | ||
Revision as of 11:59, 13 March 2020
Personal memo. Feel free to add/correct info.
Contents
Signature
Add --~~~~ to sign your messages in Discussion pages.
Personal mobility checklist for a ground vehicle
- What are the vehicle's top forward speeds (AB/RB) and reverse speeds (also for water if amphibious).
- Does the tank accelerate quickly? Brake quickly?
- What is the handling of the tank at low speed? At high speed? When braking? On flat terrain? On uneven ground?
- How well does the tank turn? When moving? When idling? Does it have neutral steering?
- How big is the turn radius? How much place does it need to do a 180°?
- Does it lose speed quickly when climbing uphill? When fording? When driving through obstacles? (trees, barriers, fences, walls, barricades, lampposts, etc.)
- How does the tank compare to similar vehicles? (of the same class: Light, Medium, Heavy, TD or of the same BR)
Missing values in WSP Table Templates
- Use the underscore/underdash: ___ for missing values in tables.
- Do not use question marks or blanks because they can't be indexed in the search engine.
Overview of all torpedo-carrying vehicles
For the naval players, an overview of all vehicles (planes and ships) equipped with torpedoes is missing. Some pages exist (Category:Torpedo_bombers or Category:Suspended armaments, subsection Torpedoes) but do not encompass all vehicles or offer the desired overview.
Torpedo-carrying aircraft
As an addition to the category Category:Torpedo_bombers, here is an overview of torpedo-carrying planes:
|
|
|
|
|
|
|
|
|
| |
I Rank
|
B3C 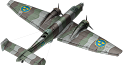 | ||||||||
II Rank
|
F6F-5  |
||||||||
III Rank
|
F6F-5N  |
▄Hellcat Mk II  Firecrest  Firebrand TF Mk IV 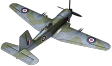 |
Ki-67-I Ko 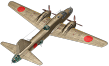 Ki-67-I otsu 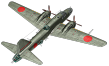 |
▄F6F-5  ▄F6F-5N  |
|||||
IV Rank
|
AM-1 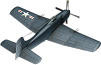 AD-2 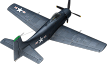 AD-4 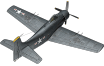 A2D-1 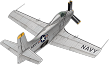 |
G.55S  P.108B serie 1 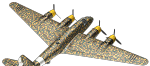 P.108B serie 2 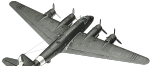 |
▄AD-4 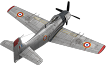 |
T18B 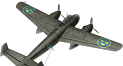 | |||||
V Rank
|
Multi-turreted tanks
Just like ATGM vehicles, I wish to create the category "Multi-turreted tanks" for tanks with several turrets.
We will distinguish between 3 configurations:
- 2 turrets or more equipped with cannons,
- 1 turret equipped with a cannon and the other turrets equipped with machine guns.
- 1 turret equipped with a cannon and 1 or more rotating cupolas on the turret equipped with an MG.
Both turrets with cannons
|
|
|
|
|
|
|
|
|
| |
I Rank
|
T-35  ▂M3 Medium  |
Ro-Go  |
|||||||
II Rank
|
M3 Lee  ▃Grant I  |
SMK  |
Grant I  |
Turret with 1 cannon and MG(s) or MGs only
|
|
|
|
|
|
|
|
|
| |
I Rank
|
M2A2  M2  |
Nb.Fz.  |
Independent  |
||||||
II Rank
|
M4A5  |
T-28  T-28E  |
Turret with cannon and rotating MG cupola(s) on the turret
|
|
|
|
|
|
|
|
|
| |
III Rank
|
KV-220  |
||||||||
IV Rank
|
T92  |
||||||||
V Rank
|
M48A1  M60  ▃Magach 3 (ERA)  |
M48A2 C  |
␗M48A1  |
AMX-30 (1972)  AMX-30  |
|||||
VI Rank
|
M60A1 (AOS)  M60A2  M60A1 RISE (P)  M60A3 TTS  XM1 (GM)  |
▄Sho't Kal Dalet  Chieftain Mk 3  Chieftain Mk 5  Chieftain Mk 10  |
␗M60A3 TTS  |
AMX-30 ACRA  AMX-30B2  AMX-30B2 BRENUS  |
Video
Multi-turreted Tanks
