Difference between pages "RakJPz 2" and "Black Prince"
Colok76286 (talk | contribs) (→Mobility: Updated to new, sleek profile table) |
Colok76286 (talk | contribs) (→Mobility: Updated to new, sleek profile table) |
||
| Line 1: | Line 1: | ||
| − | {{Specs-Card|code= | + | {{Specs-Card|code=uk_a_43_black_prince}} |
== Description == | == Description == | ||
<!--''In the description, the first part needs to be about the history of the creation and combat usage of the vehicle, as well as its key features. In the second part, tell the reader about the ground vehicle in the game. Insert the screenshot of the vehicle. If the novice player does not remember the vehicle by name, they will immediately understand what kind of vehicle it is talking about.''--> | <!--''In the description, the first part needs to be about the history of the creation and combat usage of the vehicle, as well as its key features. In the second part, tell the reader about the ground vehicle in the game. Insert the screenshot of the vehicle. If the novice player does not remember the vehicle by name, they will immediately understand what kind of vehicle it is talking about.''--> | ||
| − | [[File: | + | [[File:GarageImage_Black Prince.jpg|420px|thumb|left]] |
{{break}} | {{break}} | ||
| − | The ''' | + | The '''A.43 Black Prince''' is a Rank IV gift British infantry tank with a battle rating of 6.0. The tank was added in [[Update_1.53_"Firestorm"|Update 1.53 "Firestorm"]] and is one of the first British tanks to be introduced into the game. It was initially available as a pre-order pack from the Gaijin store, but was discontinued after the [[wt:en/news/5232-shop-winter-sales-special-bundle-and-gift-certificates-en|2017 Winter sales]]. |
| + | |||
| + | The A43 Black Prince is a modified Churchill tank equipped with the legendary OQF-17 Pounder cannon; a weapon made famous by the '''[[Sherman Firefly|Sherman Firefly]]''', '''[[Achilles|M10 Achilles]]''' and its ability to destroy the German 8.8 cm heavy tanks such as the [[Tiger_H1|Tiger tank]] It also features a single 7.62 mm BESA machine gun, which works great for destroying light tanks and SPAA vehicles. | ||
| + | |||
| + | The A43 Black prince makes enemy players retreat in fear, as it offers one of the most powerful guns available in the game, capable of destroying a [[Ferdinand|Ferdinand]], [[IS-2]] and other tanks from over 1 km away. The reloading time is great for its rank, at a mere 7.6s and when coupled with the tank's heavy armour, can stand as quite a lethal opponent. | ||
| + | |||
| + | However, the Black Prince does have some negatives. The extra armour adds extra weight to the vehicle, which makes it extremely slow with a top speed of 10MPH and only -1MPH reverse speed. With the tank's low profile, it makes it difficult to see over foreign obstacles such as debris, hills and walls. | ||
== General info == | == General info == | ||
=== Survivability and armour === | === Survivability and armour === | ||
| − | <!-- | + | <!--Describe armour protection. Note the most well protected and key weak areas. Appreciate the layout of modules as well as the number and location of crew members. Is the level of armour protection sufficient, is the placement of modules helpful for survival in combat? |
| − | + | If necessary use a visual template to indicate the most secure and weak zones of the armour.--> | |
'''Armour type:''' | '''Armour type:''' | ||
* Rolled homogeneous armour | * Rolled homogeneous armour | ||
| + | * Cast homogeneous armour (Turret front, Turret sides, Cupola) | ||
| + | |||
| + | Its vulnerable to HE rounds, which will often bounce and enter through the roof. The ammunition is located along the sides of the vehicle, making these a primary weak spot for enemy players to target. | ||
| + | |||
| + | The A43 Black Prince has one of the thickest armour installations of any tanks. The front is able to be continuously hit by larger and more powerful calibre tanks at close range without taking much, if any damage. However, if you come up against a tank shooting HEAT or HE rounds they will likely penetrate the armour with ease. Do not expose the sides to the enemy player, as it is one of the weakest parts of the tank, seconded only to the lower front part of the turret. Not only that, the sides contain the location of the ammunition; If it is hit, it is likely to detonate. If the ammunition does not detonate, the vehicle's crew will be incapacitated. | ||
| − | {| class="wikitable" | + | It lacks a top-mounted machine gun, which is normally a deterrent against low flying aircraft, making the vehicle more vulnerable to be attacks by a planes, and an easy target for bombers. The turret's slow traverse speed also makes the use of the internal machine gun useless against aircraft attacks. |
| + | Due to the low profile of this tank, being hit in the lower front turret is a rare occurrence. You still need to be careful of HEAT and HE rounds, as the low profile design will allow the enemy rounds to enter the turret's machine gun port and either knock out the loader: if using an APCR or solid shot round, OR, if using other rounds such as APCBC, APBC and HEAT, it is very likely that all the turret crew will be eliminated. | ||
| + | {| class="wikitable" style="text-align:center" | ||
| + | | colspan="6" align="center" | '''Tank Armour Table''' | ||
|- | |- | ||
! Armour !! Front !! Sides !! Rear !! Roof | ! Armour !! Front !! Sides !! Rear !! Roof | ||
|- | |- | ||
| − | | Hull || | + | | Hull || 152 mm ''Front plate'' <br> 57 mm (70°) ''Front glacis'' <br> 139 mm (20-60°) ''Lower glacis'' || 82 mm ''Top'' <br> 95 mm ''Bottom'' || 51 mm (20°) ''Top'' <br> 25 mm (60°) ''Bottom'' || 25 mm ''Front'' <br> 18 mm ''Engine deck'' |
| + | |- | ||
| + | | Turret || 152 mm (6-83°) ''Turret front'' <br> 152 mm (0-25°) ''Gun mantlet'' || 95 mm || 101 + 4 mm || 38 mm (73°) ''Front'' <br> 18 mm ''Bottom'' | ||
| + | |- | ||
| + | ! Armour !! Sides !! Roof | ||
| + | |- | ||
| + | | Cupola || 100 mm || 38 mm | ||
|- | |- | ||
|} | |} | ||
'''Notes:''' | '''Notes:''' | ||
| − | * Suspension wheels are | + | * Suspension wheels and chassis construction are 20 mm thick while tracks are 30 mm thick. |
| − | * Belly armour is | + | * Belly armour is 18-25 mm thick. |
| + | * There is a 19 mm thick plate separating the engine compartment to the crew's. | ||
| + | * A 50 mm turret ring shield is present on the front of the turret. | ||
=== Mobility === | === Mobility === | ||
<!-- ''Write about the mobility of the ground vehicle. Estimate the specific power and manoeuvrability, as well as the maximum speed forwards and backwards.'' --> | <!-- ''Write about the mobility of the ground vehicle. Estimate the specific power and manoeuvrability, as well as the maximum speed forwards and backwards.'' --> | ||
| − | {{tankMobility|abMinHp= | + | {{tankMobility|abMinHp= 452|rbMinHp= 310}} |
| + | |||
| + | When playing the {{PAGENAME}} you will immediately notice the speed and length: it is not a fast tank. You will also notice that it can sometimes struggle to get up hills and small embankments. It is recommended to stay on flat terrain and to make small sharp turns. This will keep more momentum than a single big turn which will lose most of your much needed momentum. | ||
| + | |||
| + | The A43 is a rather long tank making it almost impossible to get wedged between ditches, but the vehicle lacks sufficient engine power required to pull itself over the obstacles and often gets stuck when climbing over them. | ||
== Armaments == | == Armaments == | ||
=== Main armament === | === Main armament === | ||
| − | <!-- | + | <!--Give the reader information about the characteristics of the main gun. Assess its effectiveness in a battle based on the reloading speed, ballistics and the power of shells. Do not forget about the flexibility of the fire, that is how quickly the cannon can be aimed at the target, open fire on it and aim at another enemy. Add a link to the main article on the gun: <code><nowiki>{{main|Name of the weapon}}</nowiki></code>. Describe in general terms the ammunition available for the main gun. Give advice on how to use them and how to fill the ammunition storage.--> |
| + | {{main|Ordnance QF 17-pounder (76 mm)}} | ||
| + | |||
| + | However, the A43 Black Prince does have one of the most powerful cannons in the game, and is capable of destroying tiger tanks and other heavily armoured vehicles from short to long distances, and is equipped with many different ammunition types which are viable for different situations. The APDS is the recommended choice for giving the gun the full potential of being capable of destroying more heavily armoured targets at longer ranges. | ||
| + | |||
{| class="wikitable" style="text-align:center" | {| class="wikitable" style="text-align:center" | ||
|- | |- | ||
| − | ! colspan="6" | | + | ! colspan="6" | [[Ordnance QF 17-pounder (76 mm)|76 mm OQF 17-pounder]] |
|- | |- | ||
| − | ! colspan=" | + | ! colspan="3" rowspan="1" style="width:5em" |Capacity |
| − | |||
! rowspan="1" | Vertical <br> guidance | ! rowspan="1" | Vertical <br> guidance | ||
! rowspan="1" | Horizontal <br> guidance | ! rowspan="1" | Horizontal <br> guidance | ||
! rowspan="1" | Stabilizer | ! rowspan="1" | Stabilizer | ||
|- | |- | ||
| − | | colspan=" | + | | colspan="3" | 89 || -10°/+20° || ±180° || N/A |
|- | |- | ||
! colspan="6" | Turret rotation speed (°/s) | ! colspan="6" | Turret rotation speed (°/s) | ||
| Line 57: | Line 86: | ||
! style="width:4em" |Prior + Ace qualif. | ! style="width:4em" |Prior + Ace qualif. | ||
|- | |- | ||
| − | | ''Arcade'' || | + | | ''Arcade'' || 10.1 || 14.0 || _._ || _._ || _._ |
|- | |- | ||
| − | | ''Realistic'' || | + | | ''Realistic'' || 10.1 || 11.9 || _._ || _._ || _._ |
|- | |- | ||
! colspan="4" | Reloading rate (seconds) | ! colspan="4" | Reloading rate (seconds) | ||
| Line 68: | Line 97: | ||
! colspan="1" style="width:4em" |Prior + Ace qualif. | ! colspan="1" style="width:4em" |Prior + Ace qualif. | ||
|- | |- | ||
| − | | | + | | 7.6 || _._ || _._ || _._ |
|- | |- | ||
|} | |} | ||
| Line 87: | Line 116: | ||
! 2000m | ! 2000m | ||
|- | |- | ||
| − | | | + | | Shot Mk.6 || AP || 171 || 168 || 155 || 139 || 126 || 113 |
| + | |- | ||
| + | | Shell Mk.1 || HE || 9 || 9 || 9 || 9 || 9 || 9 | ||
| + | |- | ||
| + | | Shot Mk.4 || APC || 171 || 168 || 155 || 139 || 126 || 113 | ||
| + | |- | ||
| + | | Shot Mk.8 || APCBC || 190 || 187 || 172 || 155 || 140 || 126 | ||
| + | |- | ||
| + | | Shot SV Mk.1 || APDS || 228 || 226 || 207 || 189 || 159 || 134 | ||
|- | |- | ||
|} | |} | ||
{| class="wikitable sortable" style="text-align:center" width="100%" | {| class="wikitable sortable" style="text-align:center" width="100%" | ||
| − | ! colspan=" | + | ! colspan="11" | Shell details |
|- | |- | ||
! rowspan="2" data-sort-type="text" | Ammunition | ! rowspan="2" data-sort-type="text" | Ammunition | ||
! rowspan="2" class="unsortable" | Type of <br /> warhead | ! rowspan="2" class="unsortable" | Type of <br /> warhead | ||
| − | ! rowspan="2" | | + | ! rowspan="2" |Velocity <br /> in m/s |
! rowspan="2" |Projectile<br />Mass in kg | ! rowspan="2" |Projectile<br />Mass in kg | ||
| − | |||
! rowspan="2" | ''Fuse delay'' | ! rowspan="2" | ''Fuse delay'' | ||
''in m:'' | ''in m:'' | ||
| Line 110: | Line 146: | ||
! 100% | ! 100% | ||
|- | |- | ||
| − | | | + | | Shot Mk.6 || AP || 883 || 7.7 || N/A || N/A || N/A || -1° || 47° || 60° || 65° |
| + | |- | ||
| + | | Shell Mk.1 || HE || 883 || 7.0 || 0.4 || 0.5 || 883 || +0° || 79° || 80° || 81° | ||
| + | |- | ||
| + | | Shot Mk.4 || APC || 883 || 7.7 || N/A || N/A || N/A || -1° || 48° || 63° || 71° | ||
| + | |- | ||
| + | | Shot Mk.8 || APCBC || 883 || 7.7 || N/A || N/A || N/A || +4° || 48° || 63° || 71° | ||
| + | |- | ||
| + | | Shot SV Mk.1 || APDS || 1203 || 1.7 || N/A || N/A || N/A || +1.5° || 75° || 78° || 80° | ||
| + | |- | ||
| + | |} | ||
| + | {| class="wikitable sortable" style="text-align:center" | ||
| + | ! colspan="7" | Smoke characteristic | ||
| + | |- | ||
| + | ! Ammunition | ||
| + | ! Velocity <br /> in m/s | ||
| + | ! Projectile<br />Mass in kg | ||
| + | ! ''Screen radius <br /> in m'' | ||
| + | ! ''Screen time <br /> in s'' | ||
| + | ! ''Screen hold time <br /> in s:'' | ||
| + | ! ''Explosive Mass in g<br /> (TNT equivalent):'' | ||
| + | |- | ||
| + | | 17pdr Shell SS Mk.1 || 754 || 8.4 || 13 || 5 || 20 || 50 | ||
| + | |- | ||
| + | |} | ||
| + | |||
| + | ===== Shell types ===== | ||
| + | The Black Prince is equipped with some of the most lethal ammunition types in the game. It can carry a combination of different type or just a single type of projectiles. | ||
| + | |||
| + | {| class="wikitable" | ||
| + | |- | ||
| + | ! Round !! Shell composition !! Combat usage | ||
| + | |- | ||
| + | | Shell Mk.1 || '''HE''' - '''H'''igh '''E'''xplosive ('''HE''') || It is ideal for destroying SPAA and Lightly armoured tanks | ||
| + | |- | ||
| + | | Shot Mk.4 || '''APC''' - '''A'''rmor '''P'''iercing '''C'''ap || Standard round / Medium shrapnel spalling damage , Medium tanks | ||
| + | |- | ||
| + | | Shot Mk.6 || '''AP''' - '''A'''rmour '''P'''iercing || Standard round / Low shrapnel spalling damage, medium , light tanks | ||
| + | |- | ||
| + | | Shot Mk.8 || '''APCBC''' - '''A'''rmour '''P'''iercing '''C'''apped '''B'''allistic '''C'''ap || Deadliest round/ High shrapnel spalling damage , Most of the tanks of WW2 era | ||
| + | |- | ||
| + | | Shot SV Mk.1 || '''APDS''' - '''A'''rmour '''P'''iercing '''D'''iscarding '''S'''abot || Most piercing round but less damage than APCBC (Low spalling), good to use when post WW2 era | ||
|- | |- | ||
|} | |} | ||
| Line 121: | Line 198: | ||
! class="wikitable unsortable" |2nd<br /> rack empty | ! class="wikitable unsortable" |2nd<br /> rack empty | ||
! class="wikitable unsortable" |3rd<br /> rack empty | ! class="wikitable unsortable" |3rd<br /> rack empty | ||
| − | |||
| − | |||
| − | |||
! class="wikitable unsortable" |Visual<br /> discrepancy | ! class="wikitable unsortable" |Visual<br /> discrepancy | ||
|- | |- | ||
| − | || ''' | + | || '''XX''' || XX ''(+XX)'' || XX ''(+XX)'' || XX ''(+XX)'' || style="text-align:center" | No |
| + | |- | ||
| + | |} | ||
| + | |||
| + | ===== Optics ===== | ||
| + | |||
| + | <!--''Explain how the optic's status can affect the tank's gameplay in any unique or meaningful way. A comparison to rival tanks of the rank is welcome.'' | ||
| + | |||
| + | ''If you are having problems with it, refer to the [[Optics|optics gallery]] page for examples.''--> | ||
| + | {| class="wikitable" style="text-align:center" width="50%" | ||
| + | ! colspan="3" | {{PAGENAME}} [[Optics]] | ||
| + | |- | ||
| + | ! Which ones | ||
| + | ! Default magnification | ||
| + | ! Maximum magnification | ||
| + | |- | ||
| + | ! Main Gun optics | ||
| + | | x1.85 || x3.5 <!--Sometimes the actual value may not be known and here it should be referenced if the optic values are an estimate such as with an "X8.3 (estimated)" notation or something else that way the user will then be able to look to the comparable optics section and see a referenced optic which will have actual in-game data to back up the claim.--> | ||
| + | |- | ||
| + | ! Comparable optics | ||
| + | | colspan="2;" style="text-align:center;" | [[Churchill Mk I]] | ||
|- | |- | ||
|} | |} | ||
| + | |||
| + | This tank is using outdated X3.5 scope like early British tanks, attempts to outsnipe SPG of rank IV with the mobility of Black Prince will likely end in a disaster. | ||
| + | |||
| + | Use APDS or smoke shells to make tanks 800+ m away from Black Prince to leave it alone, as discerning enemy tank weak spots and targeting them using normal AP from that far away with this sight becomes a problem. When choosing directions, go with ones which are not easy to exploit by hostile sniper tanks. | ||
=== Machine guns === | === Machine guns === | ||
| − | <!-- | + | <!--Offensive and anti-aircraft machine guns not only allow you to fight some aircraft but also are effective against lightly armoured vehicles. Evaluate machine guns and give recommendations on its use.--> |
| − | {{main| | + | {{main|BESA (7.92 mm)}} |
{| class="wikitable" style="text-align:center" | {| class="wikitable" style="text-align:center" | ||
|- | |- | ||
| − | ! colspan="7" | [[ | + | ! colspan="7" | [[BESA (7.92 mm)|7.92 mm BESA]] |
|- | |- | ||
| − | ! colspan="7" | '' | + | ! colspan="7" | ''Coaxial mount'' |
|- | |- | ||
! colspan="4" rowspan="1" style="width:5em" |Capacity (Belt capacity) | ! colspan="4" rowspan="1" style="width:5em" |Capacity (Belt capacity) | ||
| Line 145: | Line 243: | ||
! rowspan="1" | Horizontal <br> guidance | ! rowspan="1" | Horizontal <br> guidance | ||
|- | |- | ||
| − | | colspan="4" | | + | | colspan="4" | 8,100 (225) || 600 || N/A || N/A |
|- | |- | ||
|} | |} | ||
| − | == Usage in | + | == Usage in battles == |
| − | + | <!--Describe the tactics of playing in the vehicle, the features of using vehicles in the team and advice on tactics. Refrain from creating a "guide" - do not impose a single point of view but instead give the reader food for thought. Describe the most dangerous enemies and give recommendations on fighting them. If necessary, note the specifics of the game in different modes (AB, RB, SB).--> | |
| + | When engaged in combat with heavier and more lethal vehicles, using the APDS rounds will allow you to cause major/critical damage. In-order to get the most protection for the tank and crew, do not expose the sides or allow enemies to get to the rear of the vehicle. Instead, turn the front of tank towards the enemy player but give it a slight angle. The enemy rounds will have a higher chance of ricocheting off of the frontal plate, however, if the enemy tank uses HE ammunition, there is a high chance that the round may bounce and enter the vehicle's roof. | ||
| + | |||
| + | If engaged in close quarters combat, do not allow the other tank to circle and flank you, instead aim for the vehicle's tracks and destroy them and move away, then finish it off. Most importantly, do not allow them to get the rear of the tank, as you will be unable to effectively hit the enemy due to the twin radiators on the back of the vehicle, and the turret's slow traverse. | ||
| + | |||
| + | In terms of tactics: | ||
| + | |||
| + | '''Offensive''' | ||
| + | |||
| + | Keep your distance from enemy tanks, as the cannon is capable of destroying most tanks from long distances with relative ease. Combined with the slow speed of the vehicle, you'll find yourself being capable of firing on the move despite the lack of a stabiliser. The tank's low profile makes it difficult to see over terrain and obstacles, so it is often best to remain on level ground. | ||
| + | |||
| + | Avoid letting the enemy flank you at all costs, as the sides of the Black Prince are the softest weak points, containing the ammunition storage. If the sides of the vehicle are penetrated by enemy rounds, the ammunition will likely detonate, or the crew will be knocked out/critically injured, making you an easy target. | ||
| + | |||
| + | It's best to avoid letting enemy players flank you from behind, as the turret's traverse will prevent you from being able to hit them quick enough, and the twin radiators on the back of the vehicle will prevent the turret from rotating all the way. | ||
| + | |||
| + | <br>'''Defensive''' | ||
| + | |||
| + | When playing the Black Prince, it is often best to find a well-protected and concealed place, I.E. an ally tank, dense woodland or between rubble. Make sure the front of the tank is facing the enemy with a slight angle in order to get the most out of the vehicle's armour, whilst the cannon will allow you to destroy the enemy tanks from long distances. However don’t expose the sides or the rear due to weakness and some vulnerability in the design of the tank. | ||
=== Pros and cons === | === Pros and cons === | ||
| − | <!-- | + | <!--Summarise and briefly evaluate the vehicle in terms of its characteristics and combat effectiveness. Mark its pros and cons in a bulleted list. Try not to use more than 6 points for each of the characteristics. Avoid using categorical definitions such as "bad", "good" and the like - use substitutions with softer forms such as "inadequate" and "effective".--> |
| + | |||
'''Pros:''' | '''Pros:''' | ||
| − | * | + | ** Ammunition is not stored in the turret |
| − | * | + | ** APDS is able to penetrate and cause major damage to enemies from long distances, and is capable of destroying most tanks in a single shot at close ranges. (As long as you know where to hit) |
| − | * | + | ** Good reloading speed of 7.6s with stock crew, with further crew skills and qualifications, it becomes one of the fastest in the rank |
| − | * | + | ** Great armour |
| − | * | + | ** Effective at long ranges |
| − | * | + | ** The lower front of the turret has an additional 50 mm of armour |
| − | * | + | ** With advancement on crew skills and qualifications, the tank can be a lethal opponent |
| − | * | + | ** Being a premium vehicle,high Silver Lion and Research Point reward |
| − | * | ||
| − | |||
| − | * | ||
| − | * | ||
| − | |||
'''Cons:''' | '''Cons:''' | ||
| − | * | + | ** It struggles to climb hills without losing significant speed |
| − | * | + | ** Max speed 10 Mph (16 Kph) |
| − | * | + | ** Max reverse speed of -1 Mph (-1.6 Kph) |
| − | * | + | ** The vehicle can often not be able to climb steep hills |
| − | * | + | ** The length of the vehicle |
| − | * | + | ** Ammunition is stored in the sides of the tank, making it easy to hit |
| − | + | ** The vehicle's side armour is weak, allowing it to be easily damaged from the sides | |
| − | * | + | ** The turret's traverse is slow compared to others at only 10.5/s |
| − | * | + | ** The low profile can make shooting over obstacles hard |
| − | * | + | ** The turret machine gun port is only 10 mm thick, and can be penetrated easily |
| − | * | + | ** Lacks any form of top-mounted anti-aircraft weaponry |
| − | * | ||
== History == | == History == | ||
| − | <!-- | + | <!--Describe the history of the creation and combat usage of the ground vehicle in more detail than in the introduction. If the historical reference turns out to be too long, take it to a separate article, taking a link to the article about the vehicle and adding a block "/ History" (example: <nowiki>https://wiki.warthunder.com/(Vehicle-name)/History</nowiki>) and add a link to it here using the <code>main</code> template. Be sure to reference text and sources by using <code><nowiki><ref></nowiki></code>, as well as adding them at the end of the article. This section may also include the vehicle's dev blog entry (if applicable) and the in-game encyclopedia description (under <code><nowiki>=== In-game description ===</nowiki></code>, also if applicable).--> |
| + | |||
===Development=== | ===Development=== | ||
| − | + | The '''Black Prince''' is an experimental design that was to use the British Infantry tank, the [[Churchill Mk VII|Churchill]], as the basis with much more armour and a better gun. The name originates from Edward of Woodstock, otherwise known as the “Black Prince”, a 14th century military leader. The Churchill and its branch of infantry tanks, in the course of World War II, was becoming slightly obsolete in the highly mobile style of warfare the cruiser tanks proved much better at. The infantry tanks were originally made for heavy, breakthrough style of warfare with infantry, so they were kept around in a style of “heavy tanks”, but the Axis’ gradually increasing anti-tank capacity caused the armour of the infantry tanks to be considered insufficient. | |
| − | + | To keep the infantry tanks relevant in the course of World War II, the Churchill was upgraded in armour and armament to better compete against the changing anti-tank warfare, starting in 1943. The original Churchill tank in the later part of World War II had the QF 75 mm cannon (British-produced 75 mm from the Americans) and about 102 mm of armour average, and weighed about 38 tons. The Black Prince upgraded the armour to 152 mm thick, widened the tracks by 10 inches, modified the suspensions for the new weight. The 75 mm gun was instead replaced by the QF 17-pounder cannon, which was one of the best Allied anti-tank guns in service. The larger gun required a larger turret and a larger turret ring on the hull. All these modifications increased the tank weight by ten tons, but kept the engine used in the regular Churchill, so the tank was considered under-powered, only able to reach up to 10 mph on roads and this limited the tank’s operational radius. The tank was designated the '''Tank, Infantry, Black Prince (A43)''' and the A43 model was for a Staff Specification number issued in 1943 for an interim tank that could be made until the development of a “Universal Tank”. | |
| − | |||
| − | === | + | ===Deployment=== |
| − | + | However, by the time the Black Prince was ready in May 1945; it was too late for it to see service in World War II. Even if it had, many more tank designs such as the [[Sherman Firefly|Sherman Firefly]] and the [[Comet I|Comet]] are much more mobile and effective, yet have the same 17-pounder gun available. Also, a new tank about to be introduced, the [[Centurion Mk 1|Centurion]], has the same protection level as the Black Prince, yet with the same gun and is way more mobile than the Black Prince. This caused the Black Prince to fall into obsolescence and the project, along with the entire line of the infantry tank concept in British tank doctrine, was abandoned in favor of a concept of more mobile tanks with great firepower and protection, which would eventually form the idea of the main battle tanks. | |
== Media == | == Media == | ||
| − | + | <!--Excellent additions to the article would be video guides, screenshots from the game, and photos.--> | |
| + | '''Skins''' and camouflages for the Black Prince from http://live.warthunder.com: | ||
| + | |||
| + | *[http://live.warthunder.com/feed/camouflages/?q=%23A43 '''#A43''' Keyword] | ||
| + | *[http://live.warthunder.com/feed/camouflages/?q=%23black_prince '''#black_prince''' Keyword] (more choses) | ||
| + | {{Youtube-gallery|OPzYg0Ely_Y|Review<br />War Thunder Black Prince Gameplay & Review<br />by ''DigitalDigging''|jAIrKnD83YY|Review<br />War Thunder Black Prince Spotlight<br />by ''Minoxen''}} | ||
| − | == | + | == See also == |
| − | + | ''Links to the articles on the War Thunder Wiki that you think will be useful for the reader, for example:'' | |
| − | * | + | * ''reference to the series of the vehicles;'' |
| + | * ''links to approximate analogues of other nations and research trees.'' | ||
| − | == | + | == External links == |
''Paste links to sources and external resources, such as:'' | ''Paste links to sources and external resources, such as:'' | ||
* ''topic on the official game forum;'' | * ''topic on the official game forum;'' | ||
| + | * ''encyclopedia page on the tank;'' | ||
* ''other literature.'' | * ''other literature.'' | ||
| + | * [[wt:en/devblog/current/827/|[Devblog<nowiki>]</nowiki> Pioneering British Tanks in War Thunder with developer's answers]] | ||
| − | {{ | + | {{Britain heavy tanks}} |
| + | {{Britain premium ground vehicles}} | ||
Revision as of 21:55, 12 March 2020
Contents
Description

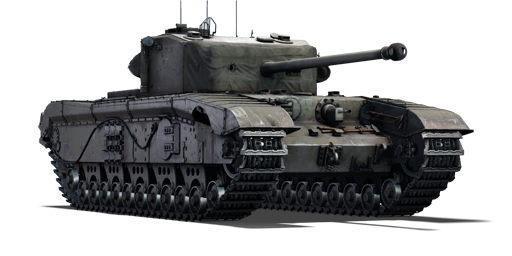
The A.43 Black Prince is a Rank IV gift British infantry tank with a battle rating of 6.0. The tank was added in Update 1.53 "Firestorm" and is one of the first British tanks to be introduced into the game. It was initially available as a pre-order pack from the Gaijin store, but was discontinued after the 2017 Winter sales.
The A43 Black Prince is a modified Churchill tank equipped with the legendary OQF-17 Pounder cannon; a weapon made famous by the Sherman Firefly, M10 Achilles and its ability to destroy the German 8.8 cm heavy tanks such as the Tiger tank It also features a single 7.62 mm BESA machine gun, which works great for destroying light tanks and SPAA vehicles.
The A43 Black prince makes enemy players retreat in fear, as it offers one of the most powerful guns available in the game, capable of destroying a Ferdinand, IS-2 and other tanks from over 1 km away. The reloading time is great for its rank, at a mere 7.6s and when coupled with the tank's heavy armour, can stand as quite a lethal opponent.
However, the Black Prince does have some negatives. The extra armour adds extra weight to the vehicle, which makes it extremely slow with a top speed of 10MPH and only -1MPH reverse speed. With the tank's low profile, it makes it difficult to see over foreign obstacles such as debris, hills and walls.
General info
Survivability and armour
Armour type:
- Rolled homogeneous armour
- Cast homogeneous armour (Turret front, Turret sides, Cupola)
Its vulnerable to HE rounds, which will often bounce and enter through the roof. The ammunition is located along the sides of the vehicle, making these a primary weak spot for enemy players to target.
The A43 Black Prince has one of the thickest armour installations of any tanks. The front is able to be continuously hit by larger and more powerful calibre tanks at close range without taking much, if any damage. However, if you come up against a tank shooting HEAT or HE rounds they will likely penetrate the armour with ease. Do not expose the sides to the enemy player, as it is one of the weakest parts of the tank, seconded only to the lower front part of the turret. Not only that, the sides contain the location of the ammunition; If it is hit, it is likely to detonate. If the ammunition does not detonate, the vehicle's crew will be incapacitated.
It lacks a top-mounted machine gun, which is normally a deterrent against low flying aircraft, making the vehicle more vulnerable to be attacks by a planes, and an easy target for bombers. The turret's slow traverse speed also makes the use of the internal machine gun useless against aircraft attacks. Due to the low profile of this tank, being hit in the lower front turret is a rare occurrence. You still need to be careful of HEAT and HE rounds, as the low profile design will allow the enemy rounds to enter the turret's machine gun port and either knock out the loader: if using an APCR or solid shot round, OR, if using other rounds such as APCBC, APBC and HEAT, it is very likely that all the turret crew will be eliminated.
| Tank Armour Table | |||||
| Armour | Front | Sides | Rear | Roof | |
|---|---|---|---|---|---|
| Hull | 152 mm Front plate 57 mm (70°) Front glacis 139 mm (20-60°) Lower glacis |
82 mm Top 95 mm Bottom |
51 mm (20°) Top 25 mm (60°) Bottom |
25 mm Front 18 mm Engine deck | |
| Turret | 152 mm (6-83°) Turret front 152 mm (0-25°) Gun mantlet |
95 mm | 101 + 4 mm | 38 mm (73°) Front 18 mm Bottom | |
| Armour | Sides | Roof | |||
| Cupola | 100 mm | 38 mm | |||
Notes:
- Suspension wheels and chassis construction are 20 mm thick while tracks are 30 mm thick.
- Belly armour is 18-25 mm thick.
- There is a 19 mm thick plate separating the engine compartment to the crew's.
- A 50 mm turret ring shield is present on the front of the turret.
Mobility
| Game Mode | Max Speed (km/h) | Weight (tons) | Engine power (horsepower) | Power-to-weight ratio (hp/ton) | |||
|---|---|---|---|---|---|---|---|
| Forward | Reverse | Stock | Upgraded | Stock | Upgraded | ||
| Arcade | 19 | 3 | 50 | 452 | 668 | 9.04 | 13.36 |
| Realistic | 18 | 3 | 310 | 350 | 6.2 | 7 | |
When playing the Black Prince you will immediately notice the speed and length: it is not a fast tank. You will also notice that it can sometimes struggle to get up hills and small embankments. It is recommended to stay on flat terrain and to make small sharp turns. This will keep more momentum than a single big turn which will lose most of your much needed momentum.
The A43 is a rather long tank making it almost impossible to get wedged between ditches, but the vehicle lacks sufficient engine power required to pull itself over the obstacles and often gets stuck when climbing over them.
Armaments
Main armament
However, the A43 Black Prince does have one of the most powerful cannons in the game, and is capable of destroying tiger tanks and other heavily armoured vehicles from short to long distances, and is equipped with many different ammunition types which are viable for different situations. The APDS is the recommended choice for giving the gun the full potential of being capable of destroying more heavily armoured targets at longer ranges.
| 76 mm OQF 17-pounder | |||||
|---|---|---|---|---|---|
| Capacity | Vertical guidance |
Horizontal guidance |
Stabilizer | ||
| 89 | -10°/+20° | ±180° | N/A | ||
| Turret rotation speed (°/s) | |||||
| Mode | Stock | Upgraded | Prior + Full crew | Prior + Expert qualif. | Prior + Ace qualif. |
| Arcade | 10.1 | 14.0 | _._ | _._ | _._ |
| Realistic | 10.1 | 11.9 | _._ | _._ | _._ |
| Reloading rate (seconds) | |||||
| Stock | Prior + Full crew | Prior + Expert qualif. | Prior + Ace qualif. | ||
| 7.6 | _._ | _._ | _._ | ||
Ammunition
| Penetration statistics | |||||||
|---|---|---|---|---|---|---|---|
| Ammunition | Type of warhead |
Penetration in mm @ 90° | |||||
| 10m | 100m | 500m | 1000m | 1500m | 2000m | ||
| Shot Mk.6 | AP | 171 | 168 | 155 | 139 | 126 | 113 |
| Shell Mk.1 | HE | 9 | 9 | 9 | 9 | 9 | 9 |
| Shot Mk.4 | APC | 171 | 168 | 155 | 139 | 126 | 113 |
| Shot Mk.8 | APCBC | 190 | 187 | 172 | 155 | 140 | 126 |
| Shot SV Mk.1 | APDS | 228 | 226 | 207 | 189 | 159 | 134 |
| Shell details | ||||||||||
|---|---|---|---|---|---|---|---|---|---|---|
| Ammunition | Type of warhead |
Velocity in m/s |
Projectile Mass in kg |
Fuse delay
in m: |
Fuse sensitivity
in mm: |
Explosive Mass in g (TNT equivalent): |
Normalization At 30° from horizontal: |
Ricochet: | ||
| 0% | 50% | 100% | ||||||||
| Shot Mk.6 | AP | 883 | 7.7 | N/A | N/A | N/A | -1° | 47° | 60° | 65° |
| Shell Mk.1 | HE | 883 | 7.0 | 0.4 | 0.5 | 883 | +0° | 79° | 80° | 81° |
| Shot Mk.4 | APC | 883 | 7.7 | N/A | N/A | N/A | -1° | 48° | 63° | 71° |
| Shot Mk.8 | APCBC | 883 | 7.7 | N/A | N/A | N/A | +4° | 48° | 63° | 71° |
| Shot SV Mk.1 | APDS | 1203 | 1.7 | N/A | N/A | N/A | +1.5° | 75° | 78° | 80° |
| Smoke characteristic | ||||||
|---|---|---|---|---|---|---|
| Ammunition | Velocity in m/s |
Projectile Mass in kg |
Screen radius in m |
Screen time in s |
Screen hold time in s: |
Explosive Mass in g (TNT equivalent): |
| 17pdr Shell SS Mk.1 | 754 | 8.4 | 13 | 5 | 20 | 50 |
Shell types
The Black Prince is equipped with some of the most lethal ammunition types in the game. It can carry a combination of different type or just a single type of projectiles.
| Round | Shell composition | Combat usage |
|---|---|---|
| Shell Mk.1 | HE - High Explosive (HE) | It is ideal for destroying SPAA and Lightly armoured tanks |
| Shot Mk.4 | APC - Armor Piercing Cap | Standard round / Medium shrapnel spalling damage , Medium tanks |
| Shot Mk.6 | AP - Armour Piercing | Standard round / Low shrapnel spalling damage, medium , light tanks |
| Shot Mk.8 | APCBC - Armour Piercing Capped Ballistic Cap | Deadliest round/ High shrapnel spalling damage , Most of the tanks of WW2 era |
| Shot SV Mk.1 | APDS - Armour Piercing Discarding Sabot | Most piercing round but less damage than APCBC (Low spalling), good to use when post WW2 era |
Ammo racks
| Full ammo |
1st rack empty |
2nd rack empty |
3rd rack empty |
Visual discrepancy |
|---|---|---|---|---|
| XX | XX (+XX) | XX (+XX) | XX (+XX) | No |
Optics
| Black Prince Optics | ||
|---|---|---|
| Which ones | Default magnification | Maximum magnification |
| Main Gun optics | x1.85 | x3.5 |
| Comparable optics | Churchill Mk I | |
This tank is using outdated X3.5 scope like early British tanks, attempts to outsnipe SPG of rank IV with the mobility of Black Prince will likely end in a disaster.
Use APDS or smoke shells to make tanks 800+ m away from Black Prince to leave it alone, as discerning enemy tank weak spots and targeting them using normal AP from that far away with this sight becomes a problem. When choosing directions, go with ones which are not easy to exploit by hostile sniper tanks.
Machine guns
| 7.92 mm BESA | ||||||
|---|---|---|---|---|---|---|
| Coaxial mount | ||||||
| Capacity (Belt capacity) | Fire rate (shots/minute) |
Vertical guidance |
Horizontal guidance | |||
| 8,100 (225) | 600 | N/A | N/A | |||
Usage in battles
When engaged in combat with heavier and more lethal vehicles, using the APDS rounds will allow you to cause major/critical damage. In-order to get the most protection for the tank and crew, do not expose the sides or allow enemies to get to the rear of the vehicle. Instead, turn the front of tank towards the enemy player but give it a slight angle. The enemy rounds will have a higher chance of ricocheting off of the frontal plate, however, if the enemy tank uses HE ammunition, there is a high chance that the round may bounce and enter the vehicle's roof.
If engaged in close quarters combat, do not allow the other tank to circle and flank you, instead aim for the vehicle's tracks and destroy them and move away, then finish it off. Most importantly, do not allow them to get the rear of the tank, as you will be unable to effectively hit the enemy due to the twin radiators on the back of the vehicle, and the turret's slow traverse.
In terms of tactics:
Offensive
Keep your distance from enemy tanks, as the cannon is capable of destroying most tanks from long distances with relative ease. Combined with the slow speed of the vehicle, you'll find yourself being capable of firing on the move despite the lack of a stabiliser. The tank's low profile makes it difficult to see over terrain and obstacles, so it is often best to remain on level ground.
Avoid letting the enemy flank you at all costs, as the sides of the Black Prince are the softest weak points, containing the ammunition storage. If the sides of the vehicle are penetrated by enemy rounds, the ammunition will likely detonate, or the crew will be knocked out/critically injured, making you an easy target.
It's best to avoid letting enemy players flank you from behind, as the turret's traverse will prevent you from being able to hit them quick enough, and the twin radiators on the back of the vehicle will prevent the turret from rotating all the way.
Defensive
When playing the Black Prince, it is often best to find a well-protected and concealed place, I.E. an ally tank, dense woodland or between rubble. Make sure the front of the tank is facing the enemy with a slight angle in order to get the most out of the vehicle's armour, whilst the cannon will allow you to destroy the enemy tanks from long distances. However don’t expose the sides or the rear due to weakness and some vulnerability in the design of the tank.
Pros and cons
Pros:
- Ammunition is not stored in the turret
- APDS is able to penetrate and cause major damage to enemies from long distances, and is capable of destroying most tanks in a single shot at close ranges. (As long as you know where to hit)
- Good reloading speed of 7.6s with stock crew, with further crew skills and qualifications, it becomes one of the fastest in the rank
- Great armour
- Effective at long ranges
- The lower front of the turret has an additional 50 mm of armour
- With advancement on crew skills and qualifications, the tank can be a lethal opponent
- Being a premium vehicle,high Silver Lion and Research Point reward
Cons:
- It struggles to climb hills without losing significant speed
- Max speed 10 Mph (16 Kph)
- Max reverse speed of -1 Mph (-1.6 Kph)
- The vehicle can often not be able to climb steep hills
- The length of the vehicle
- Ammunition is stored in the sides of the tank, making it easy to hit
- The vehicle's side armour is weak, allowing it to be easily damaged from the sides
- The turret's traverse is slow compared to others at only 10.5/s
- The low profile can make shooting over obstacles hard
- The turret machine gun port is only 10 mm thick, and can be penetrated easily
- Lacks any form of top-mounted anti-aircraft weaponry
History
Development
The Black Prince is an experimental design that was to use the British Infantry tank, the Churchill, as the basis with much more armour and a better gun. The name originates from Edward of Woodstock, otherwise known as the “Black Prince”, a 14th century military leader. The Churchill and its branch of infantry tanks, in the course of World War II, was becoming slightly obsolete in the highly mobile style of warfare the cruiser tanks proved much better at. The infantry tanks were originally made for heavy, breakthrough style of warfare with infantry, so they were kept around in a style of “heavy tanks”, but the Axis’ gradually increasing anti-tank capacity caused the armour of the infantry tanks to be considered insufficient.
To keep the infantry tanks relevant in the course of World War II, the Churchill was upgraded in armour and armament to better compete against the changing anti-tank warfare, starting in 1943. The original Churchill tank in the later part of World War II had the QF 75 mm cannon (British-produced 75 mm from the Americans) and about 102 mm of armour average, and weighed about 38 tons. The Black Prince upgraded the armour to 152 mm thick, widened the tracks by 10 inches, modified the suspensions for the new weight. The 75 mm gun was instead replaced by the QF 17-pounder cannon, which was one of the best Allied anti-tank guns in service. The larger gun required a larger turret and a larger turret ring on the hull. All these modifications increased the tank weight by ten tons, but kept the engine used in the regular Churchill, so the tank was considered under-powered, only able to reach up to 10 mph on roads and this limited the tank’s operational radius. The tank was designated the Tank, Infantry, Black Prince (A43) and the A43 model was for a Staff Specification number issued in 1943 for an interim tank that could be made until the development of a “Universal Tank”.
Deployment
However, by the time the Black Prince was ready in May 1945; it was too late for it to see service in World War II. Even if it had, many more tank designs such as the Sherman Firefly and the Comet are much more mobile and effective, yet have the same 17-pounder gun available. Also, a new tank about to be introduced, the Centurion, has the same protection level as the Black Prince, yet with the same gun and is way more mobile than the Black Prince. This caused the Black Prince to fall into obsolescence and the project, along with the entire line of the infantry tank concept in British tank doctrine, was abandoned in favor of a concept of more mobile tanks with great firepower and protection, which would eventually form the idea of the main battle tanks.
Media
Skins and camouflages for the Black Prince from http://live.warthunder.com:
- #A43 Keyword
- #black_prince Keyword (more choses)
War Thunder Black Prince Gameplay & Review
by DigitalDigging
War Thunder Black Prince Spotlight
by Minoxen
See also
Links to the articles on the War Thunder Wiki that you think will be useful for the reader, for example:
- reference to the series of the vehicles;
- links to approximate analogues of other nations and research trees.
External links
Paste links to sources and external resources, such as:
- topic on the official game forum;
- encyclopedia page on the tank;
- other literature.
- [Devblog] Pioneering British Tanks in War Thunder with developer's answers
| Britain heavy tanks | |
|---|---|
| Matilda | Matilda III · Matilda Hedgehog |
| Churchill | Churchill I · Churchill III · Churchill VII · Churchill Crocodile · Churchill NA75 · Black Prince |
| Post-war | Caernarvon · Conqueror |
| Other | Independent · Excelsior · TOG II |
| Britain premium ground vehicles | |
|---|---|
| Light tanks | A13 Mk I (3rd R.T.R.) · A13 Mk II 1939 · AEC Mk II · Crusader "The Saint" · Rooikat 105 |
| Medium tanks | A.C.I · Grant I · Cromwell V (RP-3) · Sherman IC "Trzyniec" · A.C.IV · Comet I "Iron Duke IV" |
| Centurion Mk.2 · ▄Strv 81 (RB 52) · Centurion Mk.5 AVRE · Centurion Mk.5/1 · ▄Sho't Kal Dalet · Centurion Action X | |
| Vijayanta · Khalid · Challenger DS · Challenger 2 OES | |
| Heavy tanks | Independent · Matilda Hedgehog · Excelsior · TOG II · Churchill Crocodile · Black Prince |
| Tank destroyers | Alecto I · Achilles (65 Rg.) · QF 3.7 Ram |
