Difference between pages "Object 120" and "AH-64D"
m (→History) (Tag: Visual edit) |
(→Usage in battles: will make a further edit for MP4) (Tag: Visual edit) |
||
| Line 1: | Line 1: | ||
| − | {{Specs-Card | + | {{Specs-Card|code=ah_64d}} |
| − | |code = | ||
| − | |||
| − | }} | ||
== Description == | == Description == | ||
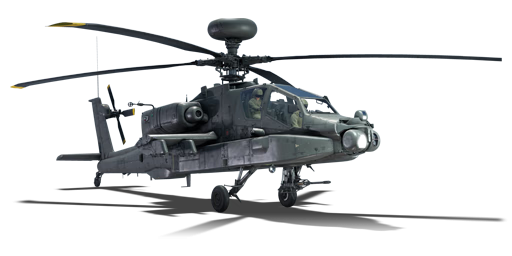
| − | <!--In the description, the first part should be about the history of the creation and combat usage of the | + | <!-- ''In the description, the first part should be about the history of and the creation and combat usage of the helicopter, as well as its key features. In the second part, tell the reader about the helicopter in the game. Insert a screenshot of the vehicle, so that if the novice player does not remember the vehicle by name, he will immediately understand what kind of vehicle the article is talking about.'' --> |
| − | [[File: | + | [[File:GarageImage_{{PAGENAME}}.jpg|420px|thumb|left]] |
{{break}} | {{break}} | ||
| − | The '''{{ | + | The '''{{Specs|name}}''' is a rank {{Specs|rank}} American attack helicopter {{Battle-rating}}. It was introduced in [[Update 1.97 "Viking Fury"]]. |
== General info == | == General info == | ||
| − | === | + | === Flight performance === |
| − | + | ''Describe how the helicopter behaves in the air. Speed, manoeuvrability, acceleration and allowable loads - these are the most important characteristics of the vehicle.'' | |
| − | |||
| − | |||
| − | |||
| − | |||
| − | |||
| − | |||
| − | |||
| − | |||
| − | |||
| − | |||
| − | |||
| − | |||
| − | |||
| − | |||
| − | |||
| − | |||
| − | |||
| − | |||
| − | |||
| − | |||
| − | |||
| − | |||
| − | |||
| − | |||
| − | |||
| − | |||
| − | |||
| − | |||
{| class="wikitable" style="text-align:center" | {| class="wikitable" style="text-align:center" | ||
|- | |- | ||
| − | ! colspan="3" | | + | ! colspan="3" | Characteristics |
| − | |||
| − | |||
| − | |||
| − | |||
| − | |||
| − | |||
| − | |||
| − | |||
|- | |- | ||
| − | ! colspan="3" | | + | ! colspan="3" | ''Stock'' |
|- | |- | ||
| − | ! colspan=" | + | ! colspan="2" | Max Speed<br>(km/h at 1,000 m) |
| − | ! | + | ! rowspan="2" | Max altitude<br>(metres) |
| − | |||
|- | |- | ||
| − | + | ! AB !! RB | |
| − | |||
| − | |||
|- | |- | ||
| − | | | + | | ___ || ___ || {{Specs|ceiling}} |
| − | | | ||
| − | | | ||
|- | |- | ||
| − | ! colspan="3" | | + | ! colspan="3" | ''Upgraded'' |
|- | |- | ||
| − | ! colspan=" | + | ! colspan="2" | Max Speed<br>(km/h at 1,000 m) |
| − | ! | + | ! rowspan="2" | Max altitude<br>(metres) |
| − | |||
|- | |- | ||
| − | + | ! AB !! RB | |
| − | |||
| − | |||
|- | |- | ||
| − | | | + | | ___ || ___ || {{Specs|ceiling}} |
| − | | | ||
| − | | | ||
|- | |- | ||
|} | |} | ||
| + | |||
| + | === Survivability and armour === | ||
| + | ''Examine the survivability of the helicopter. Note how vulnerable the structure is and how secure the pilot is, whether the fuel tanks are armoured, etc. Describe the armour, if there is any, and also mention the vulnerability of other critical systems.'' | ||
== Armaments == | == Armaments == | ||
| − | === | + | === Offensive armament === |
| − | <!-- | + | ''Describe the offensive armament of the aircraft, if any. Describe how effective the cannons and machine guns are in a battle, and also what belts or drums are better to use. If there is no offensive weaponry, delete this subsection.'' |
| − | + | ||
| + | === Suspended armament === | ||
| + | ''Describe the aircraft's suspended armament: additional cannons under the wings, bombs, rockets and torpedoes. This section is especially important for bombers and attackers. If there is no suspended weaponry remove this subsection.'' | ||
| + | |||
| + | === Defensive armament === | ||
| + | ''Defensive armament with turret machine guns or cannons, crewed by gunners. Examine the number of gunners and what belts or drums are better to use. If defensive weaponry is not available, remove this subsection.'' | ||
| + | |||
| + | == Usage in battles == | ||
| + | ''<!--Describe the tactics of playing in a helicopter, the features of using helicopter in a team and advice on tactics. Refrain from creating a "guide" - do not impose a single point of view, but instead, give the reader food for thought. Examine the most dangerous enemies and give recommendations on fighting them. If necessary, note the specifics of the game in different modes (AB, RB, SB).-->'' | ||
| + | |||
| + | '''Overview:''' | ||
| + | |||
| + | The AH.64D is very similar to the AH.64A Apache. The differences are the lack of an option to carry Aim-9L missiles, the new Longbow radar, improved Hellfires, and an improved ECM package. The Apache is an excellent helicopter for attacking ground targets, and can also hold its own against many enemy aircraft. Through adequate use of cover, teamwork, and game sense, the Apache can easily dismantle enemy teams. An Apache pilot must understand all of the tools at their disposal. | ||
| + | |||
| + | The Apache has an arsenal of weapons. The most effective anti-tank weapon in the Apache’s arsenal is the AGM114 Hellfire, which uses a top attack trajectory to destroy ground vehicles. There is functionally very little difference between the AGM114B and K variants, used on early and late Apaches respectively. | ||
| + | |||
| + | '''Staying Alive:''' | ||
| + | |||
| + | Flying the Apache effectively can be more difficult than most players would imagine, processing information from optical sights, radar displays, and the radar warning receiver all at once can lead to information overload. If distracted by irrelevant information, a pilot can quickly lose situational awareness. Being successful in the Apache requires above all else situational awareness. Due to the fragility of the helicopter, any blindspot can lead to a quick and sudden death. Additionally, the mobility of the Apache is adequate but not impressive, so evasive maneuvers are not always effective. | ||
| + | |||
| + | Using cover is a very important part of staying alive in the Apache. Always stay behind a hill or building in ground battles. When exposing yourself in order to fire on the enemy, be mindful to not gain too much altitude. Most importantly, ''Always listen to your RWR and MAW. ''If you hear an alarm, take evasive action immediately. | ||
| + | |||
| + | The biggest improvement of the later Apache variants is the ability to mount the Longbow radar system. This system, if used properly, will help maintain situational awareness. | ||
| + | |||
| + | Additionally, it is important to know when to use flares. Flares are extremely effective against heat-seeking missiles, but useless against any other missiles. It is the responsibility of the Apache pilot to recognize the threat and decide whether to use flares or not. For Apaches with MAW (missile alert warning), there is an option for flares to be dispensed automatically. | ||
| + | |||
| + | '''Using the Longbow Radar:''' | ||
| + | |||
| + | The radar of the Apache should be used as a secondary tool when engaging ground targets. As of update 1.99.1.45 when this article was written, the radar is not effective in obtaining target lock for ground vehicles. The AGM114L radar guided hellfire is not in the game, so guidance of hellfires should be done by using the FLIR thermal imaging camera to lase targets. However, the radar is still useful in detecting enemy aircraft. By using the multi-function menu to switch radar mode, the radar will begin to search for air rather than ground targets. Keeping track of enemy aircraft is vital to survival in the Apache, as any plane can make quick work of the Apache if the helicopter is unprepared. | ||
| + | |||
| + | '''Air to Air (Stinger and Gun):''' | ||
| + | |||
| + | The Apache is surprisingly potent in air to air combat. Engagements should be conducted primarily through the use of the stinger missile. The stinger is a simple but effective air to air missile. It has an excellent seeker head and can obtain all aspect lock on almost any air target within 3-5km (even propellor aircraft with a low heat signature). However, the stinger can be easily fooled by flares or outmaneuvered by a fast enemy aircraft. The best way to use the stinger against enemy aircraft is when they are heading directly towards you. If fired at the right second, most enemies will struggle to dodge a stinger. | ||
| + | |||
| + | If the enemy gets close, the 30mm autocannon can be extremely effective. The gun will automatically aim with optical lock, so Apache pilots can aim accurately while taking evasive maneuvers. | ||
| + | |||
| + | '''Close Range Air to Ground (Gun and Rockets):''' | ||
| − | + | At close range, the Apache has excellent offensive capability. The 30mm autocannon is incredibly accurate even at surprisingly far distances. This cannon uses a High Explosive Dual Purpose round that can engage lightly armored targets. Rocket pods can also be used, with the CCIP computer helping maintain accuracy even at further distances. Be careful when trying to use the Hellfire missile at close range. It can do a direct attack at closer ranges (rather than it’s usual top attack) but if fired at an odd angle, it may not have time to maneuver onto the target if fired at closer ranges. | |
| − | |||
| − | |||
| − | |||
| − | |||
| − | |||
| − | |||
| − | |||
| − | |||
| − | |||
| − | |||
| − | |||
| − | |||
| − | |||
| − | |||
| − | |||
| − | |||
| − | |||
| − | |||
| − | |||
| − | |||
| − | |||
| − | |||
| − | |||
| − | |||
| − | |||
| − | |||
| − | |||
| − | |||
| − | |||
| − | |||
| − | |||
| − | |||
| − | |||
| − | + | The problem with trying to engage at close range is that doing so will put the Apache in huge amounts of danger. Enemy tanks will be able to quickly destroy the Apache with their main guns or anti-aircraft machineguns. | |
| − | |||
| − | |||
| − | |||
| − | |||
| − | |||
| − | |||
| − | |||
| − | |||
| − | |||
| − | |||
| − | |||
| − | |||
| − | |||
| − | |||
| − | |||
| − | |||
| − | |||
| − | |||
| − | |||
| − | |||
| − | |||
| − | |||
| − | |||
| − | |||
| − | |||
| − | |||
| − | |||
| − | |||
| − | |||
| − | |||
| − | |||
| − | |||
| − | |||
| − | |||
| − | |||
| − | |||
| − | |||
| − | |||
| − | |||
| − | |||
| − | |||
| − | |||
| − | |||
| − | |||
| − | |||
| − | |||
| − | |||
| − | + | '''Long Range Air to Ground (Hellfire): ''' | |
| − | [[File: | + | [[File:HellfireTrajectory.png|thumb]] |
| − | + | [[File:HellfireSequenceDemonstration.mp4|left|thumb]] | |
| − | + | At longer ranges, the Hellfire missile can be used to full effect. The hellfire will guide on its target as shown in the attached diagram. This is known as top attack. Being that it takes this path to the enemy target, the hellfire can take upward of 30 seconds to reach its target at longer ranges. Do not fire at enemies that are about to move to cover, and make sure to fire multiple missiles at once in order to deal maximum damage. Because the hellfire is laser guided, multiple missiles can be fired at once. They should be fired at intervals of 5-10 seconds, where between missiles the Apache can switch to a new ground target. This will allow for the quick destruction of multiple enemies. This tactic can be incredibly effective. Although the time to target for the most recently fired hellfire is available on the HUD, pilots will have to keep track of all the missiles they have fired by memory and quick calculations. | |
| − | |||
| − | |||
| − | |||
| − | |||
| − | |||
| − | |||
| − | |||
| − | |||
| − | |||
| − | |||
| − | + | Combatting enemy anti aircraft vehicles can be a challenge. Always remain in cover and move unpredictably in combat. Use the radar warning receiver to obtain the general direction of enemy AA, and then attack with a Hellfire. An effective strategy is to fire a hellfire, break optical lock to gain cover and avoid counterfire, and then pop back up and get lock again several seconds before the Hellfire hits. This strategy if applied correctly will result in a hit, as the Hellfire is smart enough to begin following the laser designator again once the Apache re-obtains its lock. | |
| − | |||
=== Pros and cons === | === Pros and cons === | ||
| − | <!--Summarise and briefly evaluate the vehicle in terms of its characteristics and combat effectiveness. Mark its pros and cons in | + | <!-- ''Summarise and briefly evaluate the vehicle in terms of its characteristics and combat effectiveness. Mark its pros and cons in the bulleted list. Try not to use more than 6 points for each of the characteristics. Avoid using categorical definitions such as "bad", "good" and the like - use substitutions with softer forms such as "inadequate" and "effective".'' --> |
'''Pros:''' | '''Pros:''' | ||
| − | * | + | * Hellfire missile is a great ground attack ATGM |
| − | * | + | * Good top speed and manoeuvrable |
| − | * | + | * Amazing 30 mm cannon; if ballistic computer is on, you can easily get kills on jets or helicopters from 2 km range |
| − | + | ||
| − | |||
'''Cons:''' | '''Cons:''' | ||
| − | * | + | * Hellfire missiles are very difficult to use against moving aerial targets |
| − | |||
| − | |||
| − | |||
== History == | == History == | ||
| − | + | ''Describe the history of the creation and combat usage of the helicopter in more detail than in the introduction. If the historical reference turns out to be too long, take it to a separate article, taking a link to the article about the vehicle and adding a block "/History" (example: <nowiki>https://wiki.warthunder.com/(Vehicle-name)/History</nowiki>) and add a link to it here using the <code>main</code> template. Be sure to reference text and sources by using <code><nowiki><ref></ref></nowiki></code>, as well as adding them at the end of the article with <code><nowiki><references /></nowiki></code>. This section may also include the vehicle's dev blog entry (if applicable) and the in-game encyclopedia description (under <code><nowiki>=== In-game description ===</nowiki></code>, also if applicable).'' | |
| − | |||
| − | + | == Media == | |
| + | ''Excellent additions to the article would be video guides, screenshots from the game, and photos.'' | ||
== See also == | == See also == | ||
''Links to the articles on the War Thunder Wiki that you think will be useful for the reader, for example:'' | ''Links to the articles on the War Thunder Wiki that you think will be useful for the reader, for example:'' | ||
| − | * ''reference to the series of the | + | * ''reference to the series of the helicopter;'' |
* ''links to approximate analogues of other nations and research trees.'' | * ''links to approximate analogues of other nations and research trees.'' | ||
| Line 224: | Line 119: | ||
<!--Paste links to sources and external resources, such as: | <!--Paste links to sources and external resources, such as: | ||
* ''topic on the official game forum;'' | * ''topic on the official game forum;'' | ||
| − | * ''encyclopedia page on the | + | * ''encyclopedia page on the helicopter;'' |
* ''other literature.''--> | * ''other literature.''--> | ||
| − | * [[wt:en/news/ | + | * [[wt:en/news/6638-development-ah-64-apache-the-rotary-chieftain-en|[Devblog] AH-64 Apache: The Rotary Chieftain]] |
| − | {{ | + | {{AirManufacturer Boeing}} |
| − | {{ | + | {{USA helicopters}} |
Revision as of 07:05, 25 July 2020
Contents
Description

The AH-64D is a rank VII American attack helicopter
with a battle rating of 10.7 (AB/SB) and 11.7 (RB). It was introduced in Update 1.97 "Viking Fury".
General info
Flight performance
Describe how the helicopter behaves in the air. Speed, manoeuvrability, acceleration and allowable loads - these are the most important characteristics of the vehicle.
| Characteristics | ||
|---|---|---|
| Stock | ||
| Max Speed (km/h at 1,000 m) |
Max altitude (metres) | |
| AB | RB | |
| ___ | ___ | 5400 |
| Upgraded | ||
| Max Speed (km/h at 1,000 m) |
Max altitude (metres) | |
| AB | RB | |
| ___ | ___ | 5400 |
Survivability and armour
Examine the survivability of the helicopter. Note how vulnerable the structure is and how secure the pilot is, whether the fuel tanks are armoured, etc. Describe the armour, if there is any, and also mention the vulnerability of other critical systems.
Armaments
Offensive armament
Describe the offensive armament of the aircraft, if any. Describe how effective the cannons and machine guns are in a battle, and also what belts or drums are better to use. If there is no offensive weaponry, delete this subsection.
Suspended armament
Describe the aircraft's suspended armament: additional cannons under the wings, bombs, rockets and torpedoes. This section is especially important for bombers and attackers. If there is no suspended weaponry remove this subsection.
Defensive armament
Defensive armament with turret machine guns or cannons, crewed by gunners. Examine the number of gunners and what belts or drums are better to use. If defensive weaponry is not available, remove this subsection.
Usage in battles
'
Overview:
The AH.64D is very similar to the AH.64A Apache. The differences are the lack of an option to carry Aim-9L missiles, the new Longbow radar, improved Hellfires, and an improved ECM package. The Apache is an excellent helicopter for attacking ground targets, and can also hold its own against many enemy aircraft. Through adequate use of cover, teamwork, and game sense, the Apache can easily dismantle enemy teams. An Apache pilot must understand all of the tools at their disposal.
The Apache has an arsenal of weapons. The most effective anti-tank weapon in the Apache’s arsenal is the AGM114 Hellfire, which uses a top attack trajectory to destroy ground vehicles. There is functionally very little difference between the AGM114B and K variants, used on early and late Apaches respectively.
Staying Alive:
Flying the Apache effectively can be more difficult than most players would imagine, processing information from optical sights, radar displays, and the radar warning receiver all at once can lead to information overload. If distracted by irrelevant information, a pilot can quickly lose situational awareness. Being successful in the Apache requires above all else situational awareness. Due to the fragility of the helicopter, any blindspot can lead to a quick and sudden death. Additionally, the mobility of the Apache is adequate but not impressive, so evasive maneuvers are not always effective.
Using cover is a very important part of staying alive in the Apache. Always stay behind a hill or building in ground battles. When exposing yourself in order to fire on the enemy, be mindful to not gain too much altitude. Most importantly, Always listen to your RWR and MAW. If you hear an alarm, take evasive action immediately.
The biggest improvement of the later Apache variants is the ability to mount the Longbow radar system. This system, if used properly, will help maintain situational awareness.
Additionally, it is important to know when to use flares. Flares are extremely effective against heat-seeking missiles, but useless against any other missiles. It is the responsibility of the Apache pilot to recognize the threat and decide whether to use flares or not. For Apaches with MAW (missile alert warning), there is an option for flares to be dispensed automatically.
Using the Longbow Radar:
The radar of the Apache should be used as a secondary tool when engaging ground targets. As of update 1.99.1.45 when this article was written, the radar is not effective in obtaining target lock for ground vehicles. The AGM114L radar guided hellfire is not in the game, so guidance of hellfires should be done by using the FLIR thermal imaging camera to lase targets. However, the radar is still useful in detecting enemy aircraft. By using the multi-function menu to switch radar mode, the radar will begin to search for air rather than ground targets. Keeping track of enemy aircraft is vital to survival in the Apache, as any plane can make quick work of the Apache if the helicopter is unprepared.
Air to Air (Stinger and Gun):
The Apache is surprisingly potent in air to air combat. Engagements should be conducted primarily through the use of the stinger missile. The stinger is a simple but effective air to air missile. It has an excellent seeker head and can obtain all aspect lock on almost any air target within 3-5km (even propellor aircraft with a low heat signature). However, the stinger can be easily fooled by flares or outmaneuvered by a fast enemy aircraft. The best way to use the stinger against enemy aircraft is when they are heading directly towards you. If fired at the right second, most enemies will struggle to dodge a stinger.
If the enemy gets close, the 30mm autocannon can be extremely effective. The gun will automatically aim with optical lock, so Apache pilots can aim accurately while taking evasive maneuvers.
Close Range Air to Ground (Gun and Rockets):
At close range, the Apache has excellent offensive capability. The 30mm autocannon is incredibly accurate even at surprisingly far distances. This cannon uses a High Explosive Dual Purpose round that can engage lightly armored targets. Rocket pods can also be used, with the CCIP computer helping maintain accuracy even at further distances. Be careful when trying to use the Hellfire missile at close range. It can do a direct attack at closer ranges (rather than it’s usual top attack) but if fired at an odd angle, it may not have time to maneuver onto the target if fired at closer ranges.
The problem with trying to engage at close range is that doing so will put the Apache in huge amounts of danger. Enemy tanks will be able to quickly destroy the Apache with their main guns or anti-aircraft machineguns.
Long Range Air to Ground (Hellfire):

At longer ranges, the Hellfire missile can be used to full effect. The hellfire will guide on its target as shown in the attached diagram. This is known as top attack. Being that it takes this path to the enemy target, the hellfire can take upward of 30 seconds to reach its target at longer ranges. Do not fire at enemies that are about to move to cover, and make sure to fire multiple missiles at once in order to deal maximum damage. Because the hellfire is laser guided, multiple missiles can be fired at once. They should be fired at intervals of 5-10 seconds, where between missiles the Apache can switch to a new ground target. This will allow for the quick destruction of multiple enemies. This tactic can be incredibly effective. Although the time to target for the most recently fired hellfire is available on the HUD, pilots will have to keep track of all the missiles they have fired by memory and quick calculations.
Combatting enemy anti aircraft vehicles can be a challenge. Always remain in cover and move unpredictably in combat. Use the radar warning receiver to obtain the general direction of enemy AA, and then attack with a Hellfire. An effective strategy is to fire a hellfire, break optical lock to gain cover and avoid counterfire, and then pop back up and get lock again several seconds before the Hellfire hits. This strategy if applied correctly will result in a hit, as the Hellfire is smart enough to begin following the laser designator again once the Apache re-obtains its lock.
Pros and cons
Pros:
- Hellfire missile is a great ground attack ATGM
- Good top speed and manoeuvrable
- Amazing 30 mm cannon; if ballistic computer is on, you can easily get kills on jets or helicopters from 2 km range
Cons:
- Hellfire missiles are very difficult to use against moving aerial targets
History
Describe the history of the creation and combat usage of the helicopter in more detail than in the introduction. If the historical reference turns out to be too long, take it to a separate article, taking a link to the article about the vehicle and adding a block "/History" (example: https://wiki.warthunder.com/(Vehicle-name)/History) and add a link to it here using the main template. Be sure to reference text and sources by using <ref></ref>, as well as adding them at the end of the article with <references />. This section may also include the vehicle's dev blog entry (if applicable) and the in-game encyclopedia description (under === In-game description ===, also if applicable).
Media
Excellent additions to the article would be video guides, screenshots from the game, and photos.
See also
Links to the articles on the War Thunder Wiki that you think will be useful for the reader, for example:
- reference to the series of the helicopter;
- links to approximate analogues of other nations and research trees.
External links
| Boeing Aircraft | |
|---|---|
| Aircraft | |
| Fighters | P-26A-33 · P-26A-34 M2 · P-26B-35 |
| Bombers | B-17E · B-17E/L · B-17G-60-VE |
| B-29A-BN | |
| Export | P-26A-34 · B-17G |
| Captured | ▅B-17E |
| Helicopters | |
| Attack | AH-64A · AH-64D |
| Export / Licensed | AH-64A (GR) · ▃AH-64A Peten · AH-64A Peten · ▅AH-64DJP · ▄AH Mk.1 · AHS |
| See Also | Tupolev Design Bureau · Westland Helicopters · Fuji Heavy Industries |
| For Boeing-built ships, see Boeing Marine Branch | |
| USA helicopters | |
|---|---|
| Attack | |
| Black Hawk | MH-60L DAP |
| Choctaw | H-34 |
| Cobra | AH-1F · AH-1G · AH-1Z |
| SuperCobra | AH-1W |
| Kiowa | OH-58D |
| Little Bird | AH-6M |
| Apache | YAH-64 · AH-64A · ▃AH-64A Peten · AH-64A (GR) · AH-64D |
| Utility | |
| Huey | UH-1B · UH-1C · UH-1C XM-30 |
