Difference between pages "AMR.35 ZT3" and "He 111 H-6"
Colok76286 (talk | contribs) (→Mobility: Updated to new, sleek profile table) |
Inceptor57 (talk | contribs) |
||
| Line 1: | Line 1: | ||
| − | {{Specs-Card|code= | + | {{Specs-Card|code=he-111h-6}} |
| + | {{About | ||
| + | | about = German bomber '''{{PAGENAME}}''' | ||
| + | | usage = other uses | ||
| + | | link = He 111 (Family) | ||
| + | }} | ||
== Description == | == Description == | ||
| − | <!--''In the description, the first part | + | <!--''In the description, the first part needs to be about the history of and the creation and combat usage of the aircraft, as well as its key features. In the second part, tell the reader about the aircraft in the game. Insert a screenshot of the vehicle. If the novice player does not remember the vehicle by name, he will immediately understand what kind of vehicle it is talking about.''--> |
| − | [[File: | + | |
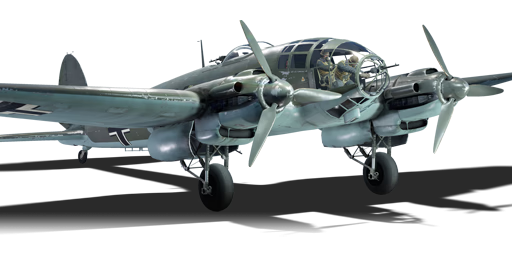
| + | [[File:GarageImage_He111H6.jpg|420px|thumb|left]] | ||
{{break}} | {{break}} | ||
| − | The '''{{ | + | The '''{{Specs|name}}''' is a rank {{Specs|rank}} German bomber {{Battle-rating}}. This bomber has been in the game since the start of the Open Beta Test prior to Update 1.29. |
| + | |||
| + | A medium bomber which is surprisingly versatile as it can carry over 30 small bombs or up to 2 x 1,000 kg and a 250 kg, which are capable of destroying a base. It can also carry a Fritz X guided bomb. This plane rips easily and should not be used to dive bomb as previous German bombers have. Its gunners are underpowered and should not be trusted to defend against fighters. It is best to avoid contact with fighters, while fast firing, the guns are very inaccurate. | ||
== General info == | == General info == | ||
| − | === | + | === Flight Performance === |
| − | <!--''Describe | + | <!--''Describe how the aircraft behaves in the air. Maximum speed, maneuverability, speed and allowable loads - these are the most important characteristics of the vehicle.''--> |
| − | + | {| class="wikitable" style="text-align:center" | |
| − | + | |- | |
| − | + | ! colspan="8" | Characteristics | |
| − | + | |- | |
| − | + | ! colspan="8" | ''Stock'' | |
| − | + | |- | |
| − | + | ! colspan="2" | Max Speed<br>(km/h at 5,700 m) | |
| − | + | ! rowspan="2" | Max altitude<br>(meters) | |
| − | + | ! colspan="2" | Turn time<br>(seconds) | |
| − | + | ! colspan="2" | Rate of climb<br>(meters/second) | |
| − | + | ! rowspan="2" |Take-off run<br>(meters) | |
| + | |- | ||
| + | ! AB | ||
| + | ! RB | ||
| + | ! AB | ||
| + | ! RB | ||
| + | ! AB | ||
| + | ! RB | ||
|- | |- | ||
| − | + | | 410 || 398 || 8,500 || 32.2 || 33.7 || 0.2 || 1.4 || 510 | |
|- | |- | ||
| − | | | + | ! colspan="8" | ''Upgraded'' |
|- | |- | ||
| − | | | + | ! colspan="2" | Max Speed<br>(km/h at 5,700 m) |
| + | ! rowspan="2" |Max altitude (meters) | ||
| + | ! colspan="2" | Turn time (seconds) | ||
| + | ! colspan="2" | Rate of climb<br>(meters/second) | ||
| + | ! rowspan="2" |Take-off run (meters) | ||
|- | |- | ||
| − | ! | + | ! AB |
| + | ! RB | ||
| + | ! AB | ||
| + | ! RB | ||
| + | ! AB | ||
| + | ! RB | ||
|- | |- | ||
| − | | | + | | 456 || 430 || 8,500 || 30.8 || 32.0 || 9.6 || 4.0 || 510 |
|- | |- | ||
|} | |} | ||
| − | |||
| − | |||
| − | |||
| − | |||
| − | |||
| − | |||
| − | |||
| − | |||
| − | |||
| − | |||
| − | |||
| − | |||
| − | |||
| − | |||
| − | |||
| − | |||
| − | |||
| − | |||
| − | |||
| + | ====Details==== | ||
{| class="wikitable" style="text-align:center" | {| class="wikitable" style="text-align:center" | ||
|- | |- | ||
| − | ! colspan=" | + | ! colspan="5" | Features |
| + | |- | ||
| + | ! Combat flap | ||
| + | ! Take-off flap | ||
| + | ! Landing flap | ||
| + | ! Air brakes | ||
| + | ! Arrestor gear | ||
| + | |- | ||
| + | | ✓ || ✓ || ✓ || X || X <!-- ✓ --> | ||
|- | |- | ||
| − | + | |} | |
| − | + | ||
| − | + | {| class="wikitable" style="text-align:center" | |
| − | |||
|- | |- | ||
| − | + | ! colspan="5" | Limits | |
|- | |- | ||
| − | ! | + | ! rowspan="2" | Wing-break speed<br>(km/h) |
| + | ! rowspan="2" | Gear limit<br>(km/h) | ||
| + | ! rowspan="2" | Combat flap<br> (km/h) | ||
| + | ! colspan="2" | Max Static G | ||
|- | |- | ||
| − | ! | + | ! + |
| − | + | ! - | |
| − | |||
| − | |||
| − | ! | ||
| − | |||
|- | |- | ||
| − | | | + | | 480 || 350 || 420 || ~2 || ~1 |
|- | |- | ||
| − | | | + | |} |
| + | |||
| + | {| class="wikitable" style="text-align:center" | ||
|- | |- | ||
| − | ! colspan="4" | | + | ! colspan="4" | Optimal velocities |
|- | |- | ||
| − | ! | + | ! Ailerons<br>(km/h) |
| − | ! | + | ! Rudder<br>(km/h) |
| − | ! | + | ! Elevators<br>(km/h) |
| − | ! | + | ! Radiator<br>(km/h) |
|- | |- | ||
| − | | | + | | < 310 || < 300 || < 270 || > 190 |
|- | |- | ||
|} | |} | ||
| − | + | {| class="wikitable" style="text-align:center" | |
| − | {| class="wikitable | + | |- |
| − | ! colspan=" | + | ! colspan="3" | Compressor (RB/SB) |
| + | |- | ||
| + | ! colspan="3" | Setting 1 | ||
|- | |- | ||
| − | ! | + | ! Optimal altitude |
| − | ! | + | ! 100% Engine power |
| − | ! | + | ! WEP Engine power |
|- | |- | ||
| − | + | | 5,600 m || 2,120 hp || 2,497 hp | |
| − | |||
| − | |||
| − | |||
| − | |||
| − | |||
|- | |- | ||
| − | | | + | <!--! colspan="3" | Setting 2 |
|- | |- | ||
| − | + | ! Optimal altitude | |
| − | + | ! 100% Engine power | |
| − | ! | + | ! WEP Engine power |
|- | |- | ||
| − | + | | ?,??? m || ?,??? hp || ?,??? hp | |
| − | |||
| − | |||
| − | |||
| − | |||
| − | |||
| − | |||
| − | |||
| − | |||
| − | |||
| − | |||
|- | |- | ||
| − | ! | + | ! colspan="3" | Setting 3 |
| − | |||
| − | |||
|- | |- | ||
| − | + | ! Optimal altitude | |
| + | ! 100% Engine power | ||
| + | ! WEP Engine power | ||
|- | |- | ||
| + | | ?,??? m || ?,??? hp || ?,??? hp | ||
| + | |- --> | ||
|} | |} | ||
| − | ===== | + | === Survivability and armour === |
| − | + | <!--''Examine the survivability of the aircraft. Note how vulnerable the structure is and how secure the pilot is, whether the fuel tanks are armoured. Describe the armour, if there is any, also mention the vulnerability of other critical aircraft systems.''--> | |
| − | {| class="wikitable | + | |
| + | * 5 mm Steel plate under nose gunner | ||
| + | * 10 mm Steel plate behind the pilot | ||
| + | * 8 mm Steel plate in front of the dorsal gunner | ||
| + | * 6 mm Steel plate under ventral gunner | ||
| + | * 8-8.5 mm Steel plates around beam gunner | ||
| + | |||
| + | == Armaments == | ||
| + | <!--=== Offensive armament === | ||
| + | <!--''Describe the offensive armament of the aircraft, if any. Describe how effective the cannons and machine guns are in a battle, and also what belts or drums are better to use. If there is no offensive weaponry, delete this subsection.''--> | ||
| + | |||
| + | === Suspended armament === | ||
| + | <!--''Describe the aircraft's suspended armament: additional cannons under the wings, bombs, rockets and torpedoes. This section is especially important for bombers and attackers. If there is no suspended weaponry remove this subsection.''--> | ||
| + | {{main|:Category:Suspended armaments|l1=Suspended armaments}} | ||
| + | |||
| + | The '''''{{PAGENAME}}''''' can carry the following ordinance: | ||
| + | |||
| + | * 32 x 50 kg SC50JA bombs (1,600 kg total) | ||
| + | * 8 x 250 kg SC250JA bombs (2,000 kg total) | ||
| + | * 2 x 1000 kg SC1000L2 bombs (2,000 kg total) | ||
| + | * 2 x 1000 kg SC1000L2 bombs + 250 kg SC250JA bomb (2,250 kg total) | ||
| + | * 2 x 936 kg F5W torpedoes (1,872 kg total) | ||
| + | * 1 x 1400 kg PC 1400 X (Fritz X) bomb (1,400 kg total) | ||
| + | |||
| + | === Defensive armament === | ||
| + | <!--''Defensive armament with turret machine guns or cannons, crewed by gunners. Examine the number of gunners and what belts or drums are better to use. If defensive weaponry is not available remove this subsection.''--> | ||
| + | {{main|MG 15 (7.92 mm)|MG 17 (7.92 mm)}} | ||
| + | |||
| + | The '''''{{PAGENAME}}''''' can defend itself with: | ||
| + | |||
| + | * 1 x 7.92 mm MG 15 machine gun, nose turret (1,000 rpg) | ||
| + | * 1 x 7.92 mm MG 15 machine gun, dorsal turret (1,000 rpg) | ||
| + | * 1 x 7.92 mm MG 15 machine gun, ventral turret (1,000 rpg) | ||
| + | * 1 x 7.92 mm MG 15 machine gun, left beam turret (1,000 rpg) | ||
| + | * 1 x 7.92 mm MG 15 machine gun, right beam turret (1,000 rpg) | ||
| + | * 1 x 7.92 mm MG 17 machine gun, tail turret (1,000 rpg) | ||
| + | |||
| + | == Usage in the battles == | ||
| + | <!--''Describe the tactics of playing in an aircraft, the features of using vehicles in a team and advice on tactics. Refrain from creating a "guide" - do not impose a single point of view but give the reader food for thought. Examine the most dangerous enemies and give recommendations on fighting them. If necessary, note the specifics of the game in different modes (AB, RB, SB).''--> | ||
| + | The second of the He 111 series in the German aviation tree, the He 111 H-6 compares to its predecessor, the He 111 H-3, with new Jumo 211F engines which gives a substantial improvement in horsepower. Another improvement is in defensive armament in ammo load and positions. The overall aircraft now holds a total 6,375 rounds of available rounds for all seven machine guns, with the majority of the machine guns holding more rounds per load. Defensive gun arcs are improved with the addition of a tail turret to ward off trailing enemies. | ||
| + | |||
| + | Using the 1,400 kg Fritz X bomb could allow for the deliverance of a single heavy payload onto a target with precision, with the cost of only allowing the He 111 H-6 to carry only one bomb for this purpose. | ||
| + | |||
| + | One thing that will be noticed upon equipping the Fritz X is the change in the bombing sights. Instead of a simple cross-hair for the bombing, two additional markings will be present in both cross-hairs of third-person view and the bombsight. Through the third-person view, the typically dotted cross-hair have a smaller vertical-dashed circle inside the cross-hair. Through the bomb-sight, it has transformed into a simple white cross-hair interrupting lines on all axis. These two additions indicate the borders that the Fritz X bomb can be guided into, indicating that the target only needs to be inside these inner boundaries to be able to attack the target. | ||
| + | |||
| + | Delivering the Fritz X is just like any other bomb release, fly over the target, align the cross-hair, and then drop the payload. However, unlike regular bombing, the player does not need to strictly have the target kept in the centre of the cross-hair to have the chance of hitting the target. Once the target is led to be inside the inner boundaries of the cross-hair increments, the bomb can be released and further guided into the target. | ||
| + | |||
| + | To guide the Fritz X after release, the default keys to control the guidance are [ALT] + W,S,A,D. To indicate this function is working, a white text on the bottom left of the corner should pop up reading "Vertical/Horizontal Guidance" following the percentage that the sight is deviating from the centre. With these controls, keep the cross-hair right onto the target as the bomb drops, which will eventually fall right into the target which is marked. | ||
| + | |||
| + | Contrary to some beliefs, the release of the Fritz X does not leave the plane completely vulnerable as the player has to focus on guiding the bomb. One could leave the bombsight, manoeuvre the plane however they like, then return to the bombsight that is still locked onto the original release location and continue guiding the bomb onto the target. Guidance can even be done while in third-person view, pilot view, and even gunner view, with varying degrees of success in being able to track the bomb towards the target. As such, there is a level of freedom the player still has when flying the He 111 H-6 after dropping the Fritz X to before its detonation onto the target, use these moments to quickly create some breather room for fine adjustments of the bomb on its way down. | ||
| + | |||
| + | ====Counter-tactics==== | ||
| + | <!--What to expect, if it would be in command of the enemy and how to counter it. (i.e. They will most likely BnZ, etc.)--> | ||
| + | The He 111 H-6 is a particularly large plane with weak defensive armaments consisting of only 7.92 mm machine guns. However, the machine guns cover decent arcs on the front and rear, plus have huge ammo reserves to be able to walk tracers into fighters that are not flying evasively. The best way to take one of these bombers down is to aim for the large elliptical wings that make up most of the surface area. Breaking one of these wings off with cannon fire will do quick work. Another way is to target the engines as the He 111 only has two and the loss of one will ensure it can't get very far for a fighter to line up an attack to finish it off. | ||
| + | |||
| + | ===Manual Engine Control=== | ||
| + | {| class="wikitable" style="text-align:center" | ||
| + | |- | ||
| + | ! colspan="7" | MEC elements | ||
| + | |- | ||
| + | ! rowspan="2" |Mixer | ||
| + | ! rowspan="2" |Pitch | ||
| + | ! colspan="3" |Radiator | ||
| + | ! rowspan="2" |Supercharger | ||
| + | ! rowspan="2" |Turbocharger | ||
|- | |- | ||
| − | ! | + | ! Oil |
| − | ! | + | ! Water |
| − | ! | + | ! Type |
| − | |||
| − | |||
|- | |- | ||
| − | || | + | | Controllable || rowspan="2" | Not controllable || rowspan="2" | Not controllable || rowspan="2" | Not controllable || rowspan="2" | Separate || rowspan="2" | Not ontrollable || rowspan="2" | Not controllable |
|- | |- | ||
|} | |} | ||
| − | === | + | ===Modules=== |
| − | + | {| class="wikitable" | |
| − | + | ! Tier | |
| − | + | ! Flight performance | |
| − | {| class="wikitable" | + | ! Survivability |
| + | ! Weaponry | ||
|- | |- | ||
| − | + | | I | |
| + | | Fuselage Repair, Radiator | ||
| + | | | ||
| + | | Turret 7 mm, PVC 1006B | ||
|- | |- | ||
| − | + | | II | |
| + | | Compressor | ||
| + | | Airframe | ||
| + | | ETC PVC I | ||
|- | |- | ||
| − | + | | III | |
| − | + | | Wing Repair, Engine | |
| − | + | | | |
| − | + | | New 7 mm MGs (Turret), ETC PVC II | |
|- | |- | ||
| − | | | + | | IV |
| + | | Engine Injection | ||
| + | | Cover | ||
| + | | FX 1400 | ||
|- | |- | ||
|} | |} | ||
| − | |||
| − | |||
| − | |||
| − | |||
| − | |||
| − | |||
| − | |||
| − | |||
| − | |||
| − | |||
| − | |||
| − | |||
| − | |||
=== Pros and cons === | === Pros and cons === | ||
| − | <!--''Summarize and briefly evaluate the vehicle in terms of its characteristics and combat effectiveness. Mark its pros and cons in | + | <!--''Summarize and briefly evaluate the vehicle in terms of its characteristics and combat effectiveness. Mark its pros and cons in the bulleted list. Do not use more than 6 points for each of the characteristics. Avoid using categorical definitions such as "bad", "good" and the like - they have a substitution in the form of softer "inadequate", "effective".''--> |
'''Pros:''' | '''Pros:''' | ||
| − | * | + | * Has the most versatile payload of all He 111 models, with a nice total payload of 2,250 kg with 2 x SC1000L2s and 1 x SC250JA bombs |
| − | + | * Quite easy to fly | |
| − | * | + | * Very good turn rate for a bomber |
| − | * | + | * Resilient to small calibre machine gun fire |
| − | * | + | * Decent defensive armament, and with trained gunners can prevent enemy fighters from ripping it apart |
| − | * | + | * Can equip the "Fritz X" manually guided bomb |
| − | * | + | * Team effort with a group of He 111 H-6s can destroy a lot of moving naval targets such as destroyers and carriers |
| − | |||
| − | |||
| − | |||
| − | |||
'''Cons:''' | '''Cons:''' | ||
| − | * | + | * Defensive armament is practically useless against tougher foes |
| − | * | + | * Tail control is easily damaged |
| − | * | + | * Incredibly low climb rate when stock (RB) |
| − | * | + | * Cockpit is a weak spot |
| − | * | + | * Enemy 20 mm cannon rounds will rip it to shreds |
| − | * | + | * Some payload options will be mounted externally, which slows the bomber down |
| − | * | + | * Torpedo plane camouflage requires you to destroy 200 enemy ships |
| + | * Easy target for SPAA players when flying low | ||
== History == | == History == | ||
| − | + | ''Describe the history of the creation and combat usage of the aircraft in more detail than in the introduction. If the historical reference turns out to be too big, take it to a separate article, taking a link to an article about the vehicle and adding a block "/ historical reference" (example: https://wiki.warthunder.com/Name-vehicles/historical reference) and add a link to it here using the <code>main</code> template. Be sure to include links to sources at the end of the article.'' | |
| + | |||
| + | === In-game description === | ||
| + | "The Heinkel He 111 was a German monoplane medium bomber (also torpedo bomber and attack bomber). The Hе 111 H-6 quickly became one of the most widely used variants of the Heinkel bomber. It saw action on all European fronts. Popular with aircrews, easy to fly and with excellent maneuverability, the bomber was widely used in a large number of roles. | ||
| − | + | In early 1942, the Luftwaffe planned to replace the He 111 with the new He 177 A heavy bomber and the Ju 288 medium bomber, but a large number of problems with the new designs meant that the He 111 remained in production despite becoming increasingly obsolete. The aircraft was easy to mass-produce, required comparatively little expense and was easy to maintain. It remained quite adequate on the Eastern Front, where anti-bomber opposition was relatively weak, even though the Heinkel’s short range did not allow it to reach strategic targets deep in the Soviet rear." | |
== Media == | == Media == | ||
| − | + | ''An excellent addition to the article will be video guides, as well as screenshots from the game and photos.'' | |
| − | |||
== See also == | == See also == | ||
| − | ''Links to the articles on the War Thunder Wiki that you think will be useful for the reader, for example:'' | + | <!--''Links to the articles on the War Thunder Wiki that you think will be useful for the reader, for example:'' |
| + | * ''reference to the series of the aircraft;'' | ||
| + | * ''links to approximate analogues of other nations and research trees.''--> | ||
| + | ;Aircraft of comparable role, configuration and era | ||
| + | * Tupolev [[SB 2M (Family)|SB]] | ||
| + | * Martin [[Martin 167-A3|167]] Maryland | ||
| + | * Mitsubishi [[Ki-21-Ia|Ki-21]] | ||
| + | * Martin [[B-10B|B-10]] | ||
| + | * Martin [[Martin 139WC|139WC]] | ||
| + | * Fiat [[BR.20 DR|BR.20]] | ||
| − | + | == Sources == | |
| − | + | ''Paste links to sources and external resources, such as:'' | |
| − | |||
| − | |||
* ''topic on the official game forum;'' | * ''topic on the official game forum;'' | ||
| − | * '' | + | * ''page on aircraft encyclopedia;'' |
| − | * ''other literature.'' | + | * ''other literature.'' |
| − | |||
| − | |||
| − | {{ | + | {{AirManufacturer Heinkel}} |
| + | {{Germany bombers}} | ||
Revision as of 15:53, 23 March 2020
Contents
| This page is about the German bomber He 111 H-6. For other uses, see He 111 (Family). |
Description

The He 111 H-6 is a rank II German bomber
with a battle rating of 2.7 (AB/RB/SB). This bomber has been in the game since the start of the Open Beta Test prior to Update 1.29.
A medium bomber which is surprisingly versatile as it can carry over 30 small bombs or up to 2 x 1,000 kg and a 250 kg, which are capable of destroying a base. It can also carry a Fritz X guided bomb. This plane rips easily and should not be used to dive bomb as previous German bombers have. Its gunners are underpowered and should not be trusted to defend against fighters. It is best to avoid contact with fighters, while fast firing, the guns are very inaccurate.
General info
Flight Performance
| Characteristics | |||||||
|---|---|---|---|---|---|---|---|
| Stock | |||||||
| Max Speed (km/h at 5,700 m) |
Max altitude (meters) |
Turn time (seconds) |
Rate of climb (meters/second) |
Take-off run (meters) | |||
| AB | RB | AB | RB | AB | RB | ||
| 410 | 398 | 8,500 | 32.2 | 33.7 | 0.2 | 1.4 | 510 |
| Upgraded | |||||||
| Max Speed (km/h at 5,700 m) |
Max altitude (meters) | Turn time (seconds) | Rate of climb (meters/second) |
Take-off run (meters) | |||
| AB | RB | AB | RB | AB | RB | ||
| 456 | 430 | 8,500 | 30.8 | 32.0 | 9.6 | 4.0 | 510 |
Details
| Features | ||||
|---|---|---|---|---|
| Combat flap | Take-off flap | Landing flap | Air brakes | Arrestor gear |
| ✓ | ✓ | ✓ | X | X |
| Limits | ||||
|---|---|---|---|---|
| Wing-break speed (km/h) |
Gear limit (km/h) |
Combat flap (km/h) |
Max Static G | |
| + | - | |||
| 480 | 350 | 420 | ~2 | ~1 |
| Optimal velocities | |||
|---|---|---|---|
| Ailerons (km/h) |
Rudder (km/h) |
Elevators (km/h) |
Radiator (km/h) |
| < 310 | < 300 | < 270 | > 190 |
| Compressor (RB/SB) | ||
|---|---|---|
| Setting 1 | ||
| Optimal altitude | 100% Engine power | WEP Engine power |
| 5,600 m | 2,120 hp | 2,497 hp |
Survivability and armour
- 5 mm Steel plate under nose gunner
- 10 mm Steel plate behind the pilot
- 8 mm Steel plate in front of the dorsal gunner
- 6 mm Steel plate under ventral gunner
- 8-8.5 mm Steel plates around beam gunner
Armaments
Suspended armament
The He 111 H-6 can carry the following ordinance:
- 32 x 50 kg SC50JA bombs (1,600 kg total)
- 8 x 250 kg SC250JA bombs (2,000 kg total)
- 2 x 1000 kg SC1000L2 bombs (2,000 kg total)
- 2 x 1000 kg SC1000L2 bombs + 250 kg SC250JA bomb (2,250 kg total)
- 2 x 936 kg F5W torpedoes (1,872 kg total)
- 1 x 1400 kg PC 1400 X (Fritz X) bomb (1,400 kg total)
Defensive armament
The He 111 H-6 can defend itself with:
- 1 x 7.92 mm MG 15 machine gun, nose turret (1,000 rpg)
- 1 x 7.92 mm MG 15 machine gun, dorsal turret (1,000 rpg)
- 1 x 7.92 mm MG 15 machine gun, ventral turret (1,000 rpg)
- 1 x 7.92 mm MG 15 machine gun, left beam turret (1,000 rpg)
- 1 x 7.92 mm MG 15 machine gun, right beam turret (1,000 rpg)
- 1 x 7.92 mm MG 17 machine gun, tail turret (1,000 rpg)
Usage in the battles
The second of the He 111 series in the German aviation tree, the He 111 H-6 compares to its predecessor, the He 111 H-3, with new Jumo 211F engines which gives a substantial improvement in horsepower. Another improvement is in defensive armament in ammo load and positions. The overall aircraft now holds a total 6,375 rounds of available rounds for all seven machine guns, with the majority of the machine guns holding more rounds per load. Defensive gun arcs are improved with the addition of a tail turret to ward off trailing enemies.
Using the 1,400 kg Fritz X bomb could allow for the deliverance of a single heavy payload onto a target with precision, with the cost of only allowing the He 111 H-6 to carry only one bomb for this purpose.
One thing that will be noticed upon equipping the Fritz X is the change in the bombing sights. Instead of a simple cross-hair for the bombing, two additional markings will be present in both cross-hairs of third-person view and the bombsight. Through the third-person view, the typically dotted cross-hair have a smaller vertical-dashed circle inside the cross-hair. Through the bomb-sight, it has transformed into a simple white cross-hair interrupting lines on all axis. These two additions indicate the borders that the Fritz X bomb can be guided into, indicating that the target only needs to be inside these inner boundaries to be able to attack the target.
Delivering the Fritz X is just like any other bomb release, fly over the target, align the cross-hair, and then drop the payload. However, unlike regular bombing, the player does not need to strictly have the target kept in the centre of the cross-hair to have the chance of hitting the target. Once the target is led to be inside the inner boundaries of the cross-hair increments, the bomb can be released and further guided into the target.
To guide the Fritz X after release, the default keys to control the guidance are [ALT] + W,S,A,D. To indicate this function is working, a white text on the bottom left of the corner should pop up reading "Vertical/Horizontal Guidance" following the percentage that the sight is deviating from the centre. With these controls, keep the cross-hair right onto the target as the bomb drops, which will eventually fall right into the target which is marked.
Contrary to some beliefs, the release of the Fritz X does not leave the plane completely vulnerable as the player has to focus on guiding the bomb. One could leave the bombsight, manoeuvre the plane however they like, then return to the bombsight that is still locked onto the original release location and continue guiding the bomb onto the target. Guidance can even be done while in third-person view, pilot view, and even gunner view, with varying degrees of success in being able to track the bomb towards the target. As such, there is a level of freedom the player still has when flying the He 111 H-6 after dropping the Fritz X to before its detonation onto the target, use these moments to quickly create some breather room for fine adjustments of the bomb on its way down.
Counter-tactics
The He 111 H-6 is a particularly large plane with weak defensive armaments consisting of only 7.92 mm machine guns. However, the machine guns cover decent arcs on the front and rear, plus have huge ammo reserves to be able to walk tracers into fighters that are not flying evasively. The best way to take one of these bombers down is to aim for the large elliptical wings that make up most of the surface area. Breaking one of these wings off with cannon fire will do quick work. Another way is to target the engines as the He 111 only has two and the loss of one will ensure it can't get very far for a fighter to line up an attack to finish it off.
Manual Engine Control
| MEC elements | ||||||
|---|---|---|---|---|---|---|
| Mixer | Pitch | Radiator | Supercharger | Turbocharger | ||
| Oil | Water | Type | ||||
| Controllable | Not controllable | Not controllable | Not controllable | Separate | Not ontrollable | Not controllable |
Modules
| Tier | Flight performance | Survivability | Weaponry |
|---|---|---|---|
| I | Fuselage Repair, Radiator | Turret 7 mm, PVC 1006B | |
| II | Compressor | Airframe | ETC PVC I |
| III | Wing Repair, Engine | New 7 mm MGs (Turret), ETC PVC II | |
| IV | Engine Injection | Cover | FX 1400 |
Pros and cons
Pros:
- Has the most versatile payload of all He 111 models, with a nice total payload of 2,250 kg with 2 x SC1000L2s and 1 x SC250JA bombs
- Quite easy to fly
- Very good turn rate for a bomber
- Resilient to small calibre machine gun fire
- Decent defensive armament, and with trained gunners can prevent enemy fighters from ripping it apart
- Can equip the "Fritz X" manually guided bomb
- Team effort with a group of He 111 H-6s can destroy a lot of moving naval targets such as destroyers and carriers
Cons:
- Defensive armament is practically useless against tougher foes
- Tail control is easily damaged
- Incredibly low climb rate when stock (RB)
- Cockpit is a weak spot
- Enemy 20 mm cannon rounds will rip it to shreds
- Some payload options will be mounted externally, which slows the bomber down
- Torpedo plane camouflage requires you to destroy 200 enemy ships
- Easy target for SPAA players when flying low
History
Describe the history of the creation and combat usage of the aircraft in more detail than in the introduction. If the historical reference turns out to be too big, take it to a separate article, taking a link to an article about the vehicle and adding a block "/ historical reference" (example: https://wiki.warthunder.com/Name-vehicles/historical reference) and add a link to it here using the main template. Be sure to include links to sources at the end of the article.
In-game description
"The Heinkel He 111 was a German monoplane medium bomber (also torpedo bomber and attack bomber). The Hе 111 H-6 quickly became one of the most widely used variants of the Heinkel bomber. It saw action on all European fronts. Popular with aircrews, easy to fly and with excellent maneuverability, the bomber was widely used in a large number of roles.
In early 1942, the Luftwaffe planned to replace the He 111 with the new He 177 A heavy bomber and the Ju 288 medium bomber, but a large number of problems with the new designs meant that the He 111 remained in production despite becoming increasingly obsolete. The aircraft was easy to mass-produce, required comparatively little expense and was easy to maintain. It remained quite adequate on the Eastern Front, where anti-bomber opposition was relatively weak, even though the Heinkel’s short range did not allow it to reach strategic targets deep in the Soviet rear."
Media
An excellent addition to the article will be video guides, as well as screenshots from the game and photos.
See also
- Aircraft of comparable role, configuration and era
Sources
Paste links to sources and external resources, such as:
- topic on the official game forum;
- page on aircraft encyclopedia;
- other literature.
| Heinkel Aircraft Company (Heinkel Flugzeugwerke) | |
|---|---|
| Fighters | He 51 A-1 · He 51 B-1 · He 51 B-2/H · He 51 C-1 · He 51 C-1/L |
| He 100 D-1 | |
| He 112 A-0 · He 112 B-0 · He 112 V-5 | |
| Jet fighters | He 162 A-1 · He 162 A-2 |
| Twin-engine fighters | He 219 A-7 |
| Bombers | He 111 H-3 · He 111 H-6 · He 111 H-16 |
| He 115 C-1 | |
| He 177 A-5 | |
| Export | He 112 B-1/U2(Hungary) · He 112 B-1/U2(Romania) · He 112 B-2/U2 · A7He1 |
| T 2 | |
| Germany bombers | |
|---|---|
| Arado | Ar 196 A-3 |
| Blohm & Voss | BV 138 C-1 · BV 238 |
| Dornier | Do 17 E-1 · Do 17 Z-2 · Do 217 E-2 · Do 217 E-4 · Do 217 K-1 · Do 217 M-1 |
| Focke-Wulf | Fw 189 A-1 · Fw 200 C-1 |
| Henschel | Hs 123 A-1 |
| Heinkel | He 111 H-3 · He 111 H-6 · He 111 H-16 · He 115 C-1 · He 177 A-5 |
| Junkers | Ju 87 B-2 · Ju 87 R-2 · Ju 87 R-2 Libya · Ju 87 D-3 · Ju 87 D-5 · Ju 88 A-1 · Ju 88 A-4 · Ju 188 A-2 · Ju 288 C |
| Messerschmitt | Me 264 |
| Savoia-Marchetti | ▀S.M.79 serie 1 · ▀S.M.79 B · ▀S.M.79 serie 4 · ▀S.M.79 serie 8 |
| ▀S.M.79 AS · ▀S.M.79 bis/N · ▀S.M.79 bis/T.M | |
| Trophies | ▀Wellington Mk Ic |
