Difference between pages "Nashorn" and "T-64B"
Colok76286 (talk | contribs) (→Description: Added description) |
(→Machine guns: Updated) |
||
| Line 1: | Line 1: | ||
| − | {{Specs-Card|code= | + | {{Specs-Card|code=ussr_t_64_b_1984}} |
== Description == | == Description == | ||
| − | <!--In the description, the first part should be about the history of the creation and combat usage of the vehicle, as well as its key features. In the second part, tell the reader about the ground vehicle in the game. Insert a screenshot of the vehicle, so that if the novice player does not remember the vehicle by name, he will immediately understand what kind of vehicle the article is talking about.--> | + | <!-- ''In the description, the first part should be about the history of the creation and combat usage of the vehicle, as well as its key features. In the second part, tell the reader about the ground vehicle in the game. Insert a screenshot of the vehicle, so that if the novice player does not remember the vehicle by name, he will immediately understand what kind of vehicle the article is talking about.'' --> |
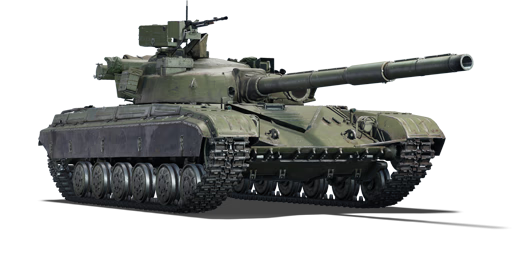
[[File:GarageImage_{{PAGENAME}}.jpg|420px|thumb|left]] | [[File:GarageImage_{{PAGENAME}}.jpg|420px|thumb|left]] | ||
| − | {{ | + | {{Break}} |
| − | The '''{{Specs|name}}''' | + | The '''{{Specs|name}}''' is a rank {{Specs|rank}} Soviet medium tank {{Battle-rating}}. It was introduced in [[Update 1.77 "Advancing Storm"]]. In [[Update 1.79 "Project X"]], the vehicle gained the modification to equip "Kontakt-1" ERA blocks, transforming the variant into a '''T-64BV'''. |
| + | |||
| + | The T-64 "Bravo" is a fearsome opponent on the battlefield that improves on the infamy of its older brother, the T-64 "Alpha". Its triple-layer composite armour is capable of shrugging off hits from most of the other top rank cannons, however its lacklustre engine power can prove a little underwhelming in the face of the turbine engines and hugely powerful turbo diesels the vehicles it competes against sport. The 125mm 2A46M-1 "Sprut" cannon comes with ammunition perfectly capable of perforating almost all forms of armour on the battlefield, regardless of operating range. The low profile of the Bravo allows it to avoid detection and utilize forms of cover that other tanks cannot hide behind. The T-64B can be differentiated from the T-64A by the lack of the side extrusion panels, however is visually extremely similar to the T-80B and it's often hard to differentiate, especially when the armour package is applied. The T-64B gains a pintle-mounted machine gun which can prove useful as a deterrent against CAS and some light vehicles. | ||
| + | |||
| + | With the "Kontakt-1" ERA upgrade, the tank's appearance drastically changes. The ERA is fitted in a "pike" or triangular prism shape. The hull is also different as its covered with ERA and thee distinctive triangle at the front is gone. There is also an extra armour plate on the lower plate. | ||
== General info == | == General info == | ||
=== Survivability and armour === | === Survivability and armour === | ||
| − | <!-- ''Describe armour protection. Note the most well protected and key weak areas. Appreciate the layout of modules as well as the number and location of crew members. Is the level of armour protection sufficient, is the placement of modules helpful for survival in combat? If necessary use a visual template to indicate the most secure and weak zones of the armour.'' | + | <!-- ''Describe armour protection. Note the most well protected and key weak areas. Appreciate the layout of modules as well as the number and location of crew members. Is the level of armour protection sufficient, is the placement of modules helpful for survival in combat? If necessary use a visual template to indicate the most secure and weak zones of the armour.'' --> |
| + | '''Armour type:''' | ||
| + | |||
| + | * Composite armour (Hull front, Turret front) | ||
| + | * Cast homogeneous armour (Turret) | ||
| + | * Rolled homogeneous armour (Hull, Turret roof) | ||
| + | * Armour radiation material (Roof) | ||
| + | |||
{| class="wikitable" | {| class="wikitable" | ||
|- | |- | ||
! Armour !! Front (Slope angle) !! Sides !! Rear !! Roof | ! Armour !! Front (Slope angle) !! Sides !! Rear !! Roof | ||
|- | |- | ||
| − | | Hull || | + | | Hull || 60* mm (68°) ''Front glacis'' <br> 80 mm (62°) ''Lower glacis'' || 85 mm ''Front'' <br> 70 mm ''Rear'' <br. 20 mm (33°) ''Bottom'' || 20 mm (4-54°) ''Top'' <br> 45 mm ''Center'' <br> 20 mm (21-57°) ''Bottom'' || 30 + 30 mm ''Front'' <br> 20 mm ''Engine deck'' |
|- | |- | ||
| − | | Turret || | + | | Turret || 50-330 mm (0-80°) || 65-140* mm (12-29°) || 65 + 30 mm (0-65°) || 45-140 + 30 mm |
|- | |- | ||
| − | | Cupola || | + | ! Armour !! Sides !! Roof |
| + | |- | ||
| + | | Cupola || 45 mm || 40 + 30 mm | ||
| + | |- | ||
| + | ! Composite armour* !! Front !! Sides !! Rear !! Roof | ||
| + | |- | ||
| + | | Hull || 403 mm ''Kinetic'' <br> 476 mm ''Chemical'' || N/A || N/A || N/A | ||
| + | |- | ||
| + | | Turret || ''Angles +0-0°:''<br>440 mm ''Kinetic'' <br> 500 mm ''Chemical''<br> ''Angles +30-30°:''<br> 400 mm ''Kinetic'' <br> 450 mm ''Chemical'' || 200 mm ''Kinetic'' <br> 220 mm ''Chemical'' || N/A || N/A | ||
|- | |- | ||
|} | |} | ||
| + | '''Notes:''' | ||
| − | + | * Suspension wheels are 20 mm thick, torsion bars are 10 mm thick, and tracks are 30 mm thick. | |
| − | + | * Belly armour is 20 mm thick. | |
| + | * A 5 mm RHA plate separates the engine from the crew compartment | ||
| + | * A log providing 100 mm thickness in wood is mounted on the rear. | ||
| + | * The snorkel tube on the turret rear provide 4 mm of structural steel. | ||
| + | * Hull composite armour configuration is 60 mm RHA + 35 mm Textolite + 30 mm RHA + 35 mm Textolite + 45 mm RHA. | ||
| + | * Turret composite armour configuration is 130-140 mm CHA + 150 mm Ultra porcelain + 100-110 mm CHA. | ||
| + | * Turret side composite armour configuration is 90 mm CHA + 80 mm Ultra porcelain + 60 mm CHA. | ||
| − | + | To fight the T-64B: | |
| − | The | + | * Disable the gun. Gun mantle is very weak against top tier shells so it will be destroyed. Even if a shell can penetrate the composite armour, make sure the T-64B can not hit you back as it will penetrate most vehicles it can face. |
| − | + | * The drivers port does not contain composite armour. Rounds with 200 mm of penetration can penetrate effectively, almost guaranteed kill. However at long ranges this is a very small target so try and hit the T-64B's gun. | |
| − | + | * Lower plate is a very big weak spot as there is no composite armour there. Any top tier shell will penetrate at close to medium range. However at long ranges the lower plate is a very small target so try and disable the T-64B's gun. | |
| + | * Vehicles such as the Type-90 or Ariete C1 are capable of punching straight through the hull composite armour. | ||
| + | * Fighting the T-64BV (T-64B with "Kontakt-1" ERA) is a different situation. With the ERA, protection against chemical is 850mm and above meaning it can stop the HOT missile and DM12 HEAT-FS. If you have an auto-cannon fire at the ERA to destroy it. Once it is gone you the value will drop to 500mm against chemical rounds. In some cases, a if a projectile with lots of explosive hits the breech or the ERA on turret, some shrapnel will deflect downwards into the ammunition, destroying the tank even though the projectile was stopped. However, the provides minimal protection against kinetic rounds | ||
=== Mobility === | === Mobility === | ||
<!-- ''Write about the mobility of the ground vehicle. Estimate the specific power and manoeuvrability, as well as the maximum speed forwards and backwards.'' --> | <!-- ''Write about the mobility of the ground vehicle. Estimate the specific power and manoeuvrability, as well as the maximum speed forwards and backwards.'' --> | ||
| − | {{tankMobility|abMinHp= | + | {{tankMobility|abMinHp=1,085|rbMinHp=619|AoAweight=1.1}} |
== Armaments == | == Armaments == | ||
=== Main armament === | === Main armament === | ||
<!-- ''Give the reader information about the characteristics of the main gun. Assess its effectiveness in a battle based on the reloading speed, ballistics and the power of shells. Do not forget about the flexibility of the fire, that is how quickly the cannon can be aimed at the target, open fire on it and aim at another enemy. Add a link to the main article on the gun: <code><nowiki>{{main|Name of the weapon}}</nowiki></code>. Describe in general terms the ammunition available for the main gun. Give advice on how to use them and how to fill the ammunition storage.'' --> | <!-- ''Give the reader information about the characteristics of the main gun. Assess its effectiveness in a battle based on the reloading speed, ballistics and the power of shells. Do not forget about the flexibility of the fire, that is how quickly the cannon can be aimed at the target, open fire on it and aim at another enemy. Add a link to the main article on the gun: <code><nowiki>{{main|Name of the weapon}}</nowiki></code>. Describe in general terms the ammunition available for the main gun. Give advice on how to use them and how to fill the ammunition storage.'' --> | ||
| − | {{main| | + | {{main|2A46M-1 (125 mm)}} |
| + | |||
{| class="wikitable" style="text-align:center" width="100%" | {| class="wikitable" style="text-align:center" width="100%" | ||
|- | |- | ||
| − | ! colspan="5" | [[ | + | ! colspan="5" | [[2A46M-1 (125 mm)|125 mm 2A46M-1]] || colspan="5" | Turret rotation speed (°/s) || colspan="4" | Reloading rate (seconds) |
|- | |- | ||
! Mode !! Capacity !! Vertical !! Horizontal !! Stabilizer | ! Mode !! Capacity !! Vertical !! Horizontal !! Stabilizer | ||
| Line 49: | Line 78: | ||
|- | |- | ||
! ''Arcade'' | ! ''Arcade'' | ||
| − | | rowspan="2" | | + | | rowspan="2" | 36 || rowspan="2" | -6°/+14° || rowspan="2" | ±180° || rowspan="2" | Two-plane || 22.8 || __.__ ||38.4||42.5||45.2|| rowspan="2" | 7.1 || rowspan="2" | 7.1 || rowspan="2" | 7.1 || rowspan="2" | 7.1 |
|- | |- | ||
! ''Realistic'' | ! ''Realistic'' | ||
| − | | | + | | 14.2 || __.__ ||20.4||22.6||24.0 |
|- | |- | ||
|} | |} | ||
| − | |||
==== Ammunition ==== | ==== Ammunition ==== | ||
{| class="wikitable sortable" style="text-align:center" width="100%" | {| class="wikitable sortable" style="text-align:center" width="100%" | ||
| Line 67: | Line 95: | ||
! 10 m !! 100 m !! 500 m !! 1,000 m !! 1,500 m !! 2,000 m | ! 10 m !! 100 m !! 500 m !! 1,000 m !! 1,500 m !! 2,000 m | ||
|- | |- | ||
| − | | | + | | 3BM22 || APFSDS || 425 || 420 || 415 || 405 || 393 || 380 |
| + | |- | ||
| + | | 3BM42 || APFSDS || 479 || 477 || 470 || 462 || 453 || 445 | ||
| + | |- | ||
| + | | 3BK18M || HEATFS || 550 || 550 || 550 || 550 || 550 || 550 | ||
| + | |- | ||
| + | | 3OF26 || HE || 47 || 47 || 47 || 47 || 47 || 47 | ||
| + | |- | ||
| + | | 9M112 || ATGM || 650 || 650 || 650 || 650 || 650 || 650 | ||
|- | |- | ||
|} | |} | ||
| Line 84: | Line 120: | ||
! 0% !! 50% !! 100% | ! 0% !! 50% !! 100% | ||
|- | |- | ||
| − | | | + | | 3BM22 || APFSDS || 1,760 || 4.83 || N/A || N/A || N/A || 76° || 77° || 80° |
| + | |- | ||
| + | | 3BM42 || APFSDS || 1,700 || 4.85 || N/A || N/A || N/A || 78° || 80° || 81° | ||
| + | |- | ||
| + | | 3BK18M || HEATFS || 905 || 19.00 || N/A || 0.1 || 2,790 || 65° || 72° || 77° | ||
| + | |- | ||
| + | | 3OF26 || HE || 850 || 23.00 || 0.1 || 0.1 || 5,240 || 79° || 80° || 81° | ||
| + | |- | ||
| + | | 9M112 || ATGM || 400 || 27.50 || N/A || 0.1 || 3,600 || 80° || 82° || 90° | ||
|- | |- | ||
|} | |} | ||
| Line 96: | Line 140: | ||
! 2nd<br>rack empty | ! 2nd<br>rack empty | ||
! 3rd<br>rack empty | ! 3rd<br>rack empty | ||
| − | |||
| − | |||
| − | |||
! Visual<br>discrepancy | ! Visual<br>discrepancy | ||
|- | |- | ||
| − | | ''' | + | | '''36''' || 35 ''(+1)'' || 28 ''(+8)'' || 1 ''(+35)'' || No |
|- | |- | ||
|} | |} | ||
=== Machine guns === | === Machine guns === | ||
| − | <!-- ''Offensive and anti-aircraft machine guns not only allow you to fight some aircraft but also are effective against lightly armoured vehicles. Evaluate machine guns and give recommendations on its use.'' | + | <!-- ''Offensive and anti-aircraft machine guns not only allow you to fight some aircraft but also are effective against lightly armoured vehicles. Evaluate machine guns and give recommendations on its use.'' --> |
| − | {{main| | + | {{main|NSVT (12.7 mm)|PKT (7.62 mm)}} |
{| class="wikitable" style="text-align:center" width="50%" | {| class="wikitable" style="text-align:center" width="50%" | ||
|- | |- | ||
| − | ! colspan="5" | [[ | + | ! colspan="5" | [[NSVT (12.7 mm)|12.7 mm NSVT]] |
|- | |- | ||
| − | ! Mount | + | ! Mount !! Capacity (Belt) !! Fire rate !! Vertical !! Horizontal |
| − | ! Capacity (Belt) | ||
| − | ! Fire rate | ||
| − | ! Vertical | ||
| − | ! Horizontal | ||
|- | |- | ||
| − | | | + | | Pintle || 300 (150) || 700 || -5°/+70° || ±180° |
|- | |- | ||
| − | | | + | |} |
| + | {| class="wikitable" style="text-align:center" width="50%" | ||
| + | |- | ||
| + | ! colspan="5" | [[PKT (7.62 mm)|7.62 mm PKT]] | ||
| + | |- | ||
| + | ! Mount !! Capacity (Belt) !! Fire rate !! Vertical !! Horizontal | ||
| + | |- | ||
| + | | Coaxial || 1,250 (250) || 700 || N/A || N/A | ||
|- | |- | ||
|} | |} | ||
| − | |||
| − | |||
== Usage in battles == | == Usage in battles == | ||
<!-- ''Describe the tactics of playing in the vehicle, the features of using vehicles in the team and advice on tactics. Refrain from creating a "guide" - do not impose a single point of view but instead give the reader food for thought. Describe the most dangerous enemies and give recommendations on fighting them. If necessary, note the specifics of the game in different modes (AB, RB, SB).'' --> | <!-- ''Describe the tactics of playing in the vehicle, the features of using vehicles in the team and advice on tactics. Refrain from creating a "guide" - do not impose a single point of view but instead give the reader food for thought. Describe the most dangerous enemies and give recommendations on fighting them. If necessary, note the specifics of the game in different modes (AB, RB, SB).'' --> | ||
| + | The T-64B performs optimally as a sniper or support tank, utilising the low profile and long-range weapon performance. While the armour of the T-64B was good for it's time, many later vehicles can fairly reliably penetrate the UFP, even through the composite armour. The gun performs well, with a good variety of ammunition, an autoloader for reliable reload times (even when a crew member is knocked, or putting out fires) and extremely high round velocity for long-range ease of use. | ||
| + | |||
| + | The T-64B can be used as a brawling tank but positioning is key - wherever possible, the LFP should not be exposed, and due to the abysmally low reverse speed, there's usually no escape from a sticky situation. Play carefully in close quarters environments, letting targets move into your gunsights rather than vice versa. | ||
| + | |||
| + | Keep in mind that the vehicle is relatively slow, so you'll often be one of the last into battle. This gives you an opportunity to exploit known intel - where your teammates have been shot/destroyed from, primarily - which can be used to position, ready for pushing enemy tanks. | ||
| − | + | '''T-64BV''' | |
| − | + | One of the later upgrades available to the T-64B is the 'additional protection' upgrade, which covers the frontal hull and turret with "Kontakt-1" ERA. This adds a huge amount of protection to the vehicle specifically against chemical rounds. While it's uncommon to see top rank MBTs use HEAT rounds, it can prove useful when facing IFVs/ATGM carriers, or in many cases, helicopters with ATGMs. The weight increase is often well worth the benefits of the BV upgrade. | |
| + | |||
| + | '''Top-rank Adversaries''' | ||
| + | |||
| + | * '''[[M1 Abrams (Family)|M1/IPM1/M1A1 Abrams]]:''' The Abrams series of vehicles are significantly faster than the T-64B, and will almost always get into position before you're able to. The best way to combat them is to catch them while they're pushing. Be careful with shot placement, however, because of the nature of the Abrams vehicles it's often very hard to guarantee a one-shot vehicle knockout - if necessary, disable the vehicle's gunner/weapon first. ''Protip: When you have a clear shot on the back of an Abrams' turret, try to place it through the ammunition - this often results in ammo detonation and the vehicle's destruction.'' | ||
| + | |||
| + | * '''[[Leopard 2K]]:''' The Leopard 2K has negligible armour and can often be destroyed with a well placed shot almost anywhere - beware the highly angled surfaces, however, which will bounce shots you may not expect it to. Watch out for the Leo's mobility, though - it can flank quickly and the L/44 120mm can be deadly. | ||
| + | |||
| + | * '''[[Leopard 2A4]]/[[Leopard 2A5|2A5]]:''' The Leopard 2A4/2A5 are similar vehicles to face, although the 2A5 can prove significantly harder to kill. Both vehicles are reasonably mobile, especially compared to the T-64. The best option for both vehicles is to try to get a side shot - but if this isn't possible, try for a round through the lower plate. Where this isn't possible, try destroy the gun directly or place a shot through the turret ring - but avoid the turret cheeks on these vehicles, as they're near impenetrable. | ||
| + | |||
| + | * '''[[Challenger Mk.2]]/[[Challenger Mk.3|Mk.3]]/[[Challenger 2|2]]:''' These vehicles can be extremely hard to destroy when they're in a hull-down position - their turret cheeks are extremely well protected and the mantlet is small and hard to place a round through. If you're forced to engage one at long range, it's best to try your best to land a shot in the mantlet or the lower half of the turret cheeks, which are slightly weaker. When a Challenger is exposed, however, simply place a shell through the massive LFP and reap the rewards. | ||
| + | |||
| + | * '''[[Leclerc]]:''' The Leclerc isn't anything special - the easiest way to disable it is through the huge gun mantlet, and from there putting shots into the LFP/turret ring/mantlet as necessary. | ||
| + | |||
| + | * '''[[Ariete]]/[[Ariete PSO|PSO]]:''' The Ariete is reasonably easy to destroy - it has a reasonably vulnerable hull, although the turret can be slightly harder to deal with. However, it has the highest-penetration kinetic round available in the game, and can penetrate almost anywhere on your vehicle. Avoid being a target, because due to the compact nature of the T-64 and spread out ammunition, if an Ariete penetrates you, there's a pretty good chance you're a goner. | ||
=== Modules === | === Modules === | ||
| Line 138: | Line 199: | ||
! Tier | ! Tier | ||
! colspan="2" | Mobility | ! colspan="2" | Mobility | ||
| − | ! Protection | + | ! colspan="2" | Protection |
! colspan="2" | Firepower | ! colspan="2" | Firepower | ||
|- | |- | ||
| I | | I | ||
| Tracks | | Tracks | ||
| − | | | + | | |
| Parts | | Parts | ||
| + | | | ||
| Horizontal Drive | | Horizontal Drive | ||
| − | | | + | | 3BK18M |
|- | |- | ||
| II | | II | ||
| Line 152: | Line 214: | ||
| Brake System | | Brake System | ||
| FPE | | FPE | ||
| + | | Smoke grenade | ||
| Adjustment of Fire | | Adjustment of Fire | ||
| − | | | + | | Laser rangefinder |
|- | |- | ||
| III | | III | ||
| Line 159: | Line 222: | ||
| | | | ||
| Crew Replenishment | | Crew Replenishment | ||
| + | | NVD | ||
| Elevation Mechanism | | Elevation Mechanism | ||
| − | | | + | | 9M112 |
|- | |- | ||
| IV | | IV | ||
| Transmission | | Transmission | ||
| Engine | | Engine | ||
| − | | | + | | ESS |
| − | | | + | | T-64BV |
| − | | | + | | Artillery Support |
| + | | 3BM42 | ||
|- | |- | ||
|} | |} | ||
| Line 176: | Line 241: | ||
'''Pros:''' | '''Pros:''' | ||
| − | * | + | * Stock-friendly grind, with a very good stock APFSDS shell |
| − | * | + | * Ability to mount the Kontakt-1 Explosive Reactive Armour package which enhances first-hit protection against chemical munitions |
| − | * | + | * Very strong turret armor combined with a bad but usable -6° gun depression can allow it to hull down relatively well in some instances |
| − | * | + | * Upgraded armour allows it to shrug off hits from many top-rank cannons |
| − | * The | + | * Lower profile compared to other MBTs, allows the user to utilize cover and tactics that other players cannot use |
| + | * Upgraded 125 mm cannon inherited from the previous model | ||
| + | * More diverse ammunition choices gives it a great deal of flexibility and allows it to engage at any distance and adapt to different situations and playstyle | ||
| + | * 9M112 "Kobra" ATGM capable of penetrating 650 mm of armour, also fastest ATGM in the game | ||
| + | * Replaces the "oil barrel" smoke grenades with two sets of four-barrelled 81 mm smoke grenade launchers | ||
| + | * The high muzzle velocity on the T-64B's APFSDS rounds make it an excellent sniper | ||
'''Cons:''' | '''Cons:''' | ||
| − | * | + | * Bad gun depression compared to its adversaries |
| − | * | + | * Horrible reverse speed (-4 km/h) |
| − | * | + | * HEAT-FS shell requires skill against its contemporaries' armour, simply pointing and firing it will not guarantee a penetration |
| − | * | + | * If the tank's hull is penetrated from almost any angle there is a high risk of ammunition detonation thanks to the spread-out nature of the autoloader |
| − | * | + | * Angling the tank causes the weak side armour to be exposed |
| − | * | + | * Maximum of five 9M112 "Kobra" ATGMs allowed in tank |
| + | * Gun elevation/depression speed is very slow compared to other MBT's (2.5 degrees per second) | ||
| + | * Hull armour can be extremely easily penetrated by a variety of enemy vehicles | ||
== History == | == History == | ||
<!-- ''Describe the history of the creation and combat usage of the vehicle in more detail than in the introduction. If the historical reference turns out to be too long, take it to a separate article, taking a link to the article about the vehicle and adding a block "/History" (example: <nowiki>https://wiki.warthunder.com/(Vehicle-name)/History</nowiki>) and add a link to it here using the <code>main</code> template. Be sure to reference text and sources by using <code><nowiki><ref></ref></nowiki></code>, as well as adding them at the end of the article with <code><nowiki><references /></nowiki></code>. This section may also include the vehicle's dev blog entry (if applicable) and the in-game encyclopedia description (under <code><nowiki>=== In-game description ===</nowiki></code>, also if applicable).'' --> | <!-- ''Describe the history of the creation and combat usage of the vehicle in more detail than in the introduction. If the historical reference turns out to be too long, take it to a separate article, taking a link to the article about the vehicle and adding a block "/History" (example: <nowiki>https://wiki.warthunder.com/(Vehicle-name)/History</nowiki>) and add a link to it here using the <code>main</code> template. Be sure to reference text and sources by using <code><nowiki><ref></ref></nowiki></code>, as well as adding them at the end of the article with <code><nowiki><references /></nowiki></code>. This section may also include the vehicle's dev blog entry (if applicable) and the in-game encyclopedia description (under <code><nowiki>=== In-game description ===</nowiki></code>, also if applicable).'' --> | ||
| + | ===Development=== | ||
| + | The '''T-64B''' or ''Object 447'' was an improvement to the currently existing T-64A and T-72A. The T-64B model was now fitted with a better laser range finder along with improved fire control systems. In addition, it had the 2A46M-1 cannon (aka the D-81TM gun) with a 2E26M stabilizer, 6ETs40 autoloader, 1A33 FCS (fire control system) comprising a ballistic calculator, and a sight with laser telemetry and cross-wind sensor. The ATGMs were eight 9M112 "Kobra" (radio-guided, NATO "AT-8 Songster"). The turret armour had a new design consisting of ceramic balls designed to absorb or reduce chemical munitions. However the T-64B still had the unreliable and complicated 5TDF engine. Designers added a more powerful engine which led to the T-72B and T-80 series. | ||
| − | + | ===Combat usage=== | |
| + | Although there is no hard evidence, some sources saw the T-64B saw action in Afghanistan in the 80's. This could have been for testing but there are no official records. Russia had 4,000 T-64Bs, but 2,000 were put out of service in 2000 and used for scrap. The T-64B and BV-1 model is currently used by The Democratic Republic of Congo. 50 were purchased from Ukraine in 2014. The T-64B saw heavy action in the 2014 Ukraine Civil War and Invasion of Crimea. 17 confirmed T-64B's were destroyed, including the "Bulat" model. Ukraine is now upgrading there there fleet of T-64B's to a more modernized version called the T-64BM "Bulat" | ||
== Media == | == Media == | ||
<!-- ''Excellent additions to the article would be video guides, screenshots from the game, and photos.'' --> | <!-- ''Excellent additions to the article would be video guides, screenshots from the game, and photos.'' --> | ||
| − | ; | + | |
| − | + | ;Images | |
| + | <div><ul> | ||
| + | <li style="display: inline-block;"> [[File:T-64B Snow.JPG|250px|thumb|none|The T-64B (1984) in War Thunder with Winter Camoflage]] </li> | ||
| + | <li style="display: inline-block;"> [[File:GarageImage T-64BV.jpg|250px|thumb|none|The T-64BV with the "Kontakt-1" ERA in the garage.]] </li> | ||
| + | </ul></div> | ||
| + | |||
;Videos | ;Videos | ||
| − | {{Youtube-gallery| | + | {{Youtube-gallery|P6SfZC-n-U4|'''Т-64B vs M1 Abrams''' - ''War Thunder Official Channel''|9VBAWLdfLcw|'''The Shooting Range #90''' - ''Metal Beasts'' section at 00:26 discusses the T-64B.}} |
== See also == | == See also == | ||
| − | + | ''Links to the articles on the War Thunder Wiki that you think will be useful for the reader, for example:'' | |
| + | |||
* ''reference to the series of the vehicles;'' | * ''reference to the series of the vehicles;'' | ||
| − | * ''links to approximate analogues of other nations and research trees.'' | + | * ''links to approximate analogues of other nations and research trees.'' |
| − | |||
| − | |||
| − | |||
| − | |||
| − | |||
| − | |||
== External links == | == External links == | ||
| Line 220: | Line 295: | ||
* ''other literature.'' --> | * ''other literature.'' --> | ||
| − | * [[wt:en/ | + | * [[wt:en/news/5351-development-t-64b-when-good-is-not-good-enough-en|[Devblog] T-64B: When Good Is Not Good Enough]] |
| − | * [[ | + | * [[wt:en/news/5503-development-t-64bv-defence-reaction-en|[Devblog] T-64BV: Defence Reaction]] |
| − | + | ||
| + | {{USSR medium tanks}} | ||
| − | + | [[Category:ATGM vehicles]] | |
Revision as of 15:16, 31 July 2020
Contents
Description

The T-64B is a rank VI Soviet medium tank
with a battle rating of 9.7 (AB/RB/SB). It was introduced in Update 1.77 "Advancing Storm". In Update 1.79 "Project X", the vehicle gained the modification to equip "Kontakt-1" ERA blocks, transforming the variant into a T-64BV.
The T-64 "Bravo" is a fearsome opponent on the battlefield that improves on the infamy of its older brother, the T-64 "Alpha". Its triple-layer composite armour is capable of shrugging off hits from most of the other top rank cannons, however its lacklustre engine power can prove a little underwhelming in the face of the turbine engines and hugely powerful turbo diesels the vehicles it competes against sport. The 125mm 2A46M-1 "Sprut" cannon comes with ammunition perfectly capable of perforating almost all forms of armour on the battlefield, regardless of operating range. The low profile of the Bravo allows it to avoid detection and utilize forms of cover that other tanks cannot hide behind. The T-64B can be differentiated from the T-64A by the lack of the side extrusion panels, however is visually extremely similar to the T-80B and it's often hard to differentiate, especially when the armour package is applied. The T-64B gains a pintle-mounted machine gun which can prove useful as a deterrent against CAS and some light vehicles.
With the "Kontakt-1" ERA upgrade, the tank's appearance drastically changes. The ERA is fitted in a "pike" or triangular prism shape. The hull is also different as its covered with ERA and thee distinctive triangle at the front is gone. There is also an extra armour plate on the lower plate.
General info
Survivability and armour
Armour type:
- Composite armour (Hull front, Turret front)
- Cast homogeneous armour (Turret)
- Rolled homogeneous armour (Hull, Turret roof)
- Armour radiation material (Roof)
| Armour | Front (Slope angle) | Sides | Rear | Roof |
|---|---|---|---|---|
| Hull | 60* mm (68°) Front glacis 80 mm (62°) Lower glacis |
85 mm Front 70 mm Rear <br. 20 mm (33°) Bottom |
20 mm (4-54°) Top 45 mm Center 20 mm (21-57°) Bottom |
30 + 30 mm Front 20 mm Engine deck |
| Turret | 50-330 mm (0-80°) | 65-140* mm (12-29°) | 65 + 30 mm (0-65°) | 45-140 + 30 mm |
| Armour | Sides | Roof | ||
| Cupola | 45 mm | 40 + 30 mm | ||
| Composite armour* | Front | Sides | Rear | Roof |
| Hull | 403 mm Kinetic 476 mm Chemical |
N/A | N/A | N/A |
| Turret | Angles +0-0°: 440 mm Kinetic 500 mm Chemical Angles +30-30°: 400 mm Kinetic 450 mm Chemical |
200 mm Kinetic 220 mm Chemical |
N/A | N/A |
Notes:
- Suspension wheels are 20 mm thick, torsion bars are 10 mm thick, and tracks are 30 mm thick.
- Belly armour is 20 mm thick.
- A 5 mm RHA plate separates the engine from the crew compartment
- A log providing 100 mm thickness in wood is mounted on the rear.
- The snorkel tube on the turret rear provide 4 mm of structural steel.
- Hull composite armour configuration is 60 mm RHA + 35 mm Textolite + 30 mm RHA + 35 mm Textolite + 45 mm RHA.
- Turret composite armour configuration is 130-140 mm CHA + 150 mm Ultra porcelain + 100-110 mm CHA.
- Turret side composite armour configuration is 90 mm CHA + 80 mm Ultra porcelain + 60 mm CHA.
To fight the T-64B:
- Disable the gun. Gun mantle is very weak against top tier shells so it will be destroyed. Even if a shell can penetrate the composite armour, make sure the T-64B can not hit you back as it will penetrate most vehicles it can face.
- The drivers port does not contain composite armour. Rounds with 200 mm of penetration can penetrate effectively, almost guaranteed kill. However at long ranges this is a very small target so try and hit the T-64B's gun.
- Lower plate is a very big weak spot as there is no composite armour there. Any top tier shell will penetrate at close to medium range. However at long ranges the lower plate is a very small target so try and disable the T-64B's gun.
- Vehicles such as the Type-90 or Ariete C1 are capable of punching straight through the hull composite armour.
- Fighting the T-64BV (T-64B with "Kontakt-1" ERA) is a different situation. With the ERA, protection against chemical is 850mm and above meaning it can stop the HOT missile and DM12 HEAT-FS. If you have an auto-cannon fire at the ERA to destroy it. Once it is gone you the value will drop to 500mm against chemical rounds. In some cases, a if a projectile with lots of explosive hits the breech or the ERA on turret, some shrapnel will deflect downwards into the ammunition, destroying the tank even though the projectile was stopped. However, the provides minimal protection against kinetic rounds
Mobility
| Game Mode | Max Speed (km/h) | Weight (tons) | Engine power (horsepower) | Power-to-weight ratio (hp/ton) | ||||
|---|---|---|---|---|---|---|---|---|
| Forward | Reverse | Stock | AoA | Stock | Upgraded | Stock | Upgraded | |
| Arcade | 68 | 5 | 39 | 1.1 | 1,085 | 1,336 | 27.82 | 33.32 |
| Realistic | 61 | 5 | 619 | 700 | 15.87 | 17.46 | ||
Armaments
Main armament
| 125 mm 2A46M-1 | Turret rotation speed (°/s) | Reloading rate (seconds) | |||||||||||
|---|---|---|---|---|---|---|---|---|---|---|---|---|---|
| Mode | Capacity | Vertical | Horizontal | Stabilizer | Stock | Upgraded | Full | Expert | Aced | Stock | Full | Expert | Aced |
| Arcade | 36 | -6°/+14° | ±180° | Two-plane | 22.8 | __.__ | 38.4 | 42.5 | 45.2 | 7.1 | 7.1 | 7.1 | 7.1 |
| Realistic | 14.2 | __.__ | 20.4 | 22.6 | 24.0 | ||||||||
Ammunition
| Penetration statistics | |||||||
|---|---|---|---|---|---|---|---|
| Ammunition | Type of warhead |
Penetration @ 0° Angle of Attack (mm) | |||||
| 10 m | 100 m | 500 m | 1,000 m | 1,500 m | 2,000 m | ||
| 3BM22 | APFSDS | 425 | 420 | 415 | 405 | 393 | 380 |
| 3BM42 | APFSDS | 479 | 477 | 470 | 462 | 453 | 445 |
| 3BK18M | HEATFS | 550 | 550 | 550 | 550 | 550 | 550 |
| 3OF26 | HE | 47 | 47 | 47 | 47 | 47 | 47 |
| 9M112 | ATGM | 650 | 650 | 650 | 650 | 650 | 650 |
| Shell details | |||||||||
|---|---|---|---|---|---|---|---|---|---|
| Ammunition | Type of warhead |
Velocity (m/s) |
Projectile Mass (kg) |
Fuse delay (m) |
Fuse sensitivity (mm) |
Explosive Mass (TNT equivalent) (g) |
Ricochet | ||
| 0% | 50% | 100% | |||||||
| 3BM22 | APFSDS | 1,760 | 4.83 | N/A | N/A | N/A | 76° | 77° | 80° |
| 3BM42 | APFSDS | 1,700 | 4.85 | N/A | N/A | N/A | 78° | 80° | 81° |
| 3BK18M | HEATFS | 905 | 19.00 | N/A | 0.1 | 2,790 | 65° | 72° | 77° |
| 3OF26 | HE | 850 | 23.00 | 0.1 | 0.1 | 5,240 | 79° | 80° | 81° |
| 9M112 | ATGM | 400 | 27.50 | N/A | 0.1 | 3,600 | 80° | 82° | 90° |
Ammo racks
| Full ammo |
1st rack empty |
2nd rack empty |
3rd rack empty |
Visual discrepancy |
|---|---|---|---|---|
| 36 | 35 (+1) | 28 (+8) | 1 (+35) | No |
Machine guns
| 12.7 mm NSVT | ||||
|---|---|---|---|---|
| Mount | Capacity (Belt) | Fire rate | Vertical | Horizontal |
| Pintle | 300 (150) | 700 | -5°/+70° | ±180° |
| 7.62 mm PKT | ||||
|---|---|---|---|---|
| Mount | Capacity (Belt) | Fire rate | Vertical | Horizontal |
| Coaxial | 1,250 (250) | 700 | N/A | N/A |
Usage in battles
The T-64B performs optimally as a sniper or support tank, utilising the low profile and long-range weapon performance. While the armour of the T-64B was good for it's time, many later vehicles can fairly reliably penetrate the UFP, even through the composite armour. The gun performs well, with a good variety of ammunition, an autoloader for reliable reload times (even when a crew member is knocked, or putting out fires) and extremely high round velocity for long-range ease of use.
The T-64B can be used as a brawling tank but positioning is key - wherever possible, the LFP should not be exposed, and due to the abysmally low reverse speed, there's usually no escape from a sticky situation. Play carefully in close quarters environments, letting targets move into your gunsights rather than vice versa.
Keep in mind that the vehicle is relatively slow, so you'll often be one of the last into battle. This gives you an opportunity to exploit known intel - where your teammates have been shot/destroyed from, primarily - which can be used to position, ready for pushing enemy tanks.
T-64BV
One of the later upgrades available to the T-64B is the 'additional protection' upgrade, which covers the frontal hull and turret with "Kontakt-1" ERA. This adds a huge amount of protection to the vehicle specifically against chemical rounds. While it's uncommon to see top rank MBTs use HEAT rounds, it can prove useful when facing IFVs/ATGM carriers, or in many cases, helicopters with ATGMs. The weight increase is often well worth the benefits of the BV upgrade.
Top-rank Adversaries
- M1/IPM1/M1A1 Abrams: The Abrams series of vehicles are significantly faster than the T-64B, and will almost always get into position before you're able to. The best way to combat them is to catch them while they're pushing. Be careful with shot placement, however, because of the nature of the Abrams vehicles it's often very hard to guarantee a one-shot vehicle knockout - if necessary, disable the vehicle's gunner/weapon first. Protip: When you have a clear shot on the back of an Abrams' turret, try to place it through the ammunition - this often results in ammo detonation and the vehicle's destruction.
- Leopard 2K: The Leopard 2K has negligible armour and can often be destroyed with a well placed shot almost anywhere - beware the highly angled surfaces, however, which will bounce shots you may not expect it to. Watch out for the Leo's mobility, though - it can flank quickly and the L/44 120mm can be deadly.
- Leopard 2A4/2A5: The Leopard 2A4/2A5 are similar vehicles to face, although the 2A5 can prove significantly harder to kill. Both vehicles are reasonably mobile, especially compared to the T-64. The best option for both vehicles is to try to get a side shot - but if this isn't possible, try for a round through the lower plate. Where this isn't possible, try destroy the gun directly or place a shot through the turret ring - but avoid the turret cheeks on these vehicles, as they're near impenetrable.
- Challenger Mk.2/Mk.3/2: These vehicles can be extremely hard to destroy when they're in a hull-down position - their turret cheeks are extremely well protected and the mantlet is small and hard to place a round through. If you're forced to engage one at long range, it's best to try your best to land a shot in the mantlet or the lower half of the turret cheeks, which are slightly weaker. When a Challenger is exposed, however, simply place a shell through the massive LFP and reap the rewards.
- Leclerc: The Leclerc isn't anything special - the easiest way to disable it is through the huge gun mantlet, and from there putting shots into the LFP/turret ring/mantlet as necessary.
- Ariete/PSO: The Ariete is reasonably easy to destroy - it has a reasonably vulnerable hull, although the turret can be slightly harder to deal with. However, it has the highest-penetration kinetic round available in the game, and can penetrate almost anywhere on your vehicle. Avoid being a target, because due to the compact nature of the T-64 and spread out ammunition, if an Ariete penetrates you, there's a pretty good chance you're a goner.
Modules
| Tier | Mobility | Protection | Firepower | |||
|---|---|---|---|---|---|---|
| I | Tracks | Parts | Horizontal Drive | 3BK18M | ||
| II | Suspension | Brake System | FPE | Smoke grenade | Adjustment of Fire | Laser rangefinder |
| III | Filters | Crew Replenishment | NVD | Elevation Mechanism | 9M112 | |
| IV | Transmission | Engine | ESS | T-64BV | Artillery Support | 3BM42 |
Pros and cons
Pros:
- Stock-friendly grind, with a very good stock APFSDS shell
- Ability to mount the Kontakt-1 Explosive Reactive Armour package which enhances first-hit protection against chemical munitions
- Very strong turret armor combined with a bad but usable -6° gun depression can allow it to hull down relatively well in some instances
- Upgraded armour allows it to shrug off hits from many top-rank cannons
- Lower profile compared to other MBTs, allows the user to utilize cover and tactics that other players cannot use
- Upgraded 125 mm cannon inherited from the previous model
- More diverse ammunition choices gives it a great deal of flexibility and allows it to engage at any distance and adapt to different situations and playstyle
- 9M112 "Kobra" ATGM capable of penetrating 650 mm of armour, also fastest ATGM in the game
- Replaces the "oil barrel" smoke grenades with two sets of four-barrelled 81 mm smoke grenade launchers
- The high muzzle velocity on the T-64B's APFSDS rounds make it an excellent sniper
Cons:
- Bad gun depression compared to its adversaries
- Horrible reverse speed (-4 km/h)
- HEAT-FS shell requires skill against its contemporaries' armour, simply pointing and firing it will not guarantee a penetration
- If the tank's hull is penetrated from almost any angle there is a high risk of ammunition detonation thanks to the spread-out nature of the autoloader
- Angling the tank causes the weak side armour to be exposed
- Maximum of five 9M112 "Kobra" ATGMs allowed in tank
- Gun elevation/depression speed is very slow compared to other MBT's (2.5 degrees per second)
- Hull armour can be extremely easily penetrated by a variety of enemy vehicles
History
Development
The T-64B or Object 447 was an improvement to the currently existing T-64A and T-72A. The T-64B model was now fitted with a better laser range finder along with improved fire control systems. In addition, it had the 2A46M-1 cannon (aka the D-81TM gun) with a 2E26M stabilizer, 6ETs40 autoloader, 1A33 FCS (fire control system) comprising a ballistic calculator, and a sight with laser telemetry and cross-wind sensor. The ATGMs were eight 9M112 "Kobra" (radio-guided, NATO "AT-8 Songster"). The turret armour had a new design consisting of ceramic balls designed to absorb or reduce chemical munitions. However the T-64B still had the unreliable and complicated 5TDF engine. Designers added a more powerful engine which led to the T-72B and T-80 series.
Combat usage
Although there is no hard evidence, some sources saw the T-64B saw action in Afghanistan in the 80's. This could have been for testing but there are no official records. Russia had 4,000 T-64Bs, but 2,000 were put out of service in 2000 and used for scrap. The T-64B and BV-1 model is currently used by The Democratic Republic of Congo. 50 were purchased from Ukraine in 2014. The T-64B saw heavy action in the 2014 Ukraine Civil War and Invasion of Crimea. 17 confirmed T-64B's were destroyed, including the "Bulat" model. Ukraine is now upgrading there there fleet of T-64B's to a more modernized version called the T-64BM "Bulat"
Media
- Images


- Videos
See also
Links to the articles on the War Thunder Wiki that you think will be useful for the reader, for example:
- reference to the series of the vehicles;
- links to approximate analogues of other nations and research trees.
External links
| USSR medium tanks | |
|---|---|
| T-28 | T-28 (1938) · T-28 · T-28E |
| T-34-76 | T-34 (Prototype) · T-34 (1940) · T-34 (1941) · T-34 (1st Gv.T.Br.) · T-34 (1942) · T-34E STZ · T-34E |
| T-34-57 | T-34-57 · T-34-57 (1943) |
| T-34-85 | T-34-85 (D-5T) · T-34-85 · T-34-85E |
| T-34-100 | T-34-100 |
| T-44 | T-44 · T-44-100 · T-44-122 |
| T-54 | T-54 (1947) · T-54 (1949) · T-54 (1951) |
| T-55 | TO-55 · T-55A · T-55AM-1 · T-55AMD-1 |
| T-62 | T-62 · T-62M-1 |
| T-64 | Object 435 · T-64A (1971) · T-64B |
| T-72 | T-72A · T-72AV (TURMS-T) · T-72B · T-72B (1989) · T-72B3 · T-72M2 Moderna |
| T-80 | T-80B · T-80U · T-80UD · T-80UK · T-80UM2 · T-80BVM · Object 292 |
| T-90 | Т-90А · T-90M |
| Trophies/Lend-Lease | |
| Germany | ▂T-III · ▂T-V |
| Great Britain | ▂МК-IX "Valentine" |
| USA | ▂M3 Medium · ▂M4A2 |
