|
|
| Line 1: |
Line 1: |
| − | {{DISPLAYTITLE:Night Vision Devices}} | + | {{Specs-Card|code=he51a1}} |
| | + | {{About |
| | + | | about = German biplane '''{{PAGENAME}}''' |
| | + | | usage = other uses |
| | + | | link = He 51 (Family) |
| | + | }} |
| | | | |
| − | ==Introduction== | + | == Description == |
| | + | <!-- ''In the description, the first part should be about the history of and the creation and combat usage of the aircraft, as well as its key features. In the second part, tell the reader about the aircraft in the game. Insert a screenshot of the vehicle, so that if the novice player does not remember the vehicle by name, he will immediately understand what kind of vehicle the article is talking about.'' --> |
| | + | [[File:GarageImage_{{PAGENAME}}.jpg|420px|thumb|left]] |
| | + | {{break}} |
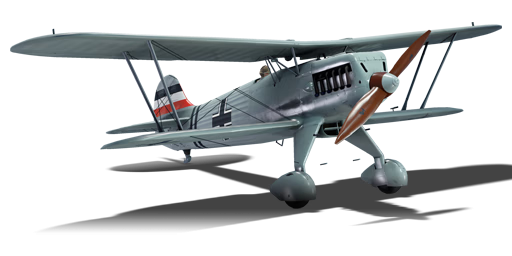
| | + | The '''{{Specs|name}}''' is a rank {{Specs|rank}} German fighter {{Battle-rating}}. This fighter has been in the game since the start of the Open Beta Test prior to Update 1.27. |
| | | | |
| − | [[Update 1.91 "Night Vision"]] added Night Vision Devices (NVDs) to a number of high tier tanks and helicopters. These devices provide a significant advantage in the now more common night battles. Two types of night vision devices were added, image intensifiers and thermal imaging systems. In addition infrared (IR) searchlights were added to tanks which historically had them.
| + | The Heinkel H 51 was one of the first aircraft which the German Luftwaffe (still operating in secrecy) tasked to be built. Brothers and talented aircraft designers Walter and Seigfried Günter were working for Heinkel Flugzeugwerke in 1931 when they developed the design for an advanced trainer biplane which was designated He 49. Though touted as a trainer, the aircraft had been designed as a fighter and with a few minor conversions, could be an operational fighter aircraft. After several iterations, the Luftwaffe ordered this aircraft into production as the He 51 in 1933. |
| | | | |
| − | Night vision devices are usually unlocked as tier 3 - 4 modifications, however, some tanks or helicopters have them access to them at tier 1 - 2. In addition, some tanks have the option to upgrade their image intensifier to a thermal imager, by unlocking a second modification (on some tanks the thermal imager is included with the original modification).
| + | Currently in service with Germany was the older Arado Ar 65 biplane which the He 51 was slated to replace, unfortunately by the time the He 51 A rolled off the production lines, it was already outdated, however, it wasn’t until after 150 were built that important modifications were made which resulted in the upgraded He 51 B. Of the 450 B variants built, 46 of them were modified by replacing the fixed landing gear with floats to allow the fighter to land on water. Later another 100 were built as the He 51 C variant which was configured as a light ground-attack aircraft. |
| | | | |
| − | Tanks and helicopters can have different night vision devices for different crew members, for example, the gunners' sight may have a thermal imager, while the commander's (or in the case of helicopters the pilot's) view may have image intensifiers, and the driver's view a less powerful image intensifier. They can only be used from their designated views, for example, the tank commander's night vision system can only be used in binoculars, the driver's night vision is only used from driver seat or third person view and gunner view is only used from sniper seat.
| + | Used initially in the Spanish Civil War, the He 51 showed to dominate over older biplanes, however, the advantage was short-lived as modern Soviet fighters and bombers arrived and the He 51 could no longer keep up with them. Operations for the He 51 converted to night fighting, however not long after that it was designated solely for ground attack operations. Though not seen as a fantastic aircraft, behind the scenes it had set the stage for the Luftwaffe years later when close support tactics were developed by Field Marshal Wolfram von Richthofen while flying a He 51. |
| | | | |
| − | ===Controls=== | + | When paired up against other reserve fighters in the game, the He 51 can hold its own, though it will not win any speed records, nor will its machine guns out fire some of the early Soviet fighters, however, there is a place for the {{PAGENAME}}. Diving straight into a cluster of fighters rolling around with each other is not the best tactic, it is better to pick a target and go after it, however, if cornered, the slower speed and manoeuvrability of the He 51 can get it out of tight spaces and potentially down a few enemy aircraft in the process. With two 7 mm machine guns, tracer rounds work best against early aircraft, especially those which are fabric covered and have non-sealing fuel tanks. Though the pilot may find themselves up-tiered against mono-wing aircraft of faster speeds, the {{PAGENAME}} can quickly turn the tables and put the faster enemy fighter on the receiving end of a stream of bullets, and only a few hits are enough to hobble the enemy aircraft allowing the Heinkel to catch up and finish the job. |
| | + | |
| | + | == General info == |
| | + | === Flight Performance === |
| | + | <!-- ''Describe how the aircraft behaves in the air. Speed, manoeuvrability, acceleration and allowable loads - these are the most important characteristics of the vehicle.'' --> |
| | | | |
| | {| class="wikitable" style="text-align:center" | | {| class="wikitable" style="text-align:center" |
| − | ! colspan="3" | Night Vision Controls
| |
| − | |-
| |
| − | ! Control name
| |
| − | ! Default Keybind<br />(PC keyboard & mouse)
| |
| − | ! Description
| |
| − | |-
| |
| − | | Night Vision Mode || ??? || Toggles between standard view and image intensifier / thermal view
| |
| − | |-
| |
| − | | IR Spotlight || ??? || Toggles the IR searchlight on and off
| |
| − | |-
| |
| − | | Changing the colour scheme of the thermal sight || ??? || Toggles the thermal sight between White Hot and Black Hot modes
| |
| − | |-
| |
| − | |}
| |
| − |
| |
| − | {{Notice|Images in this article were created at night with the weather set to "Blind" so represent the operation of Night Vision devices under worst-case conditions (or close to it).}}
| |
| − |
| |
| − | ==Image Intensifiers==
| |
| − | The most basic type of night vision device is an image intensifier. These devices work by amplifying the light which enters the sensor, as well as converting some light from the infrared spectrum into visible light. When image intensifiers are activated the screen picks up a green hue and you are generally able to see much further. Image intensifiers suffer from noise interference; this appears as a form of TV static over the screen; it is quite noticeable on early image intensifiers however more advanced systems (generally found on newer tanks) are less susceptible and the effect is much less noticeable, leading to them proving much clearer images.
| |
| − |
| |
| − | {{Notice|Image intensifiers can only be used a night.|!}}
| |
| − |
| |
| − | ==Factors affecting performance==
| |
| − |
| |
| − | There are a number of characteristics which affect the performance of image intensifiers, these are the resolution, the light multiplication factor, and the susceptibility to noise. While individually some of these elements may have only a small impact on image quality, newer image intensifiers will have improvements to most or all of them, providing much better image quality.
| |
| − |
| |
| − | ===Resolution===
| |
| − | Different image intensifiers are capable of producing images at different resolutions. The higher the resolution that an image intensifier is capable of outputting, the clearer the final image will be. The image intensifiers on tanks in-game typically have a resolution of 800 x 600 or 1600 x 1200, the difference between these resolutions is minimal and is often only noticeable when looking at long-range targets.
| |
| − |
| |
| − | Below is an example of looking at a T-80U, located approximately 1.25 km away from the player, using an 800 x 600 intensifier and a 1600 x 1200 intensifier (all other stats are equal). Notice how the distant tank is slightly clearer and the barrel is visible with the higher resolution image intensifier.
| |
| − |
| |
| − | {{Notice|Click on an image to open it in full screen and get a better view}}
| |
| − |
| |
| − | <gallery mode="packed" heights=200>
| |
| − | File:NightVision Low Res.jpg|A [[T-80U]] seen through an 800 x 600 image intensifier.
| |
| − | File:NightVision High Res.jpg|A [[T-80U]] seen through an 1600 x 1200 image intensifier.
| |
| − | </gallery>
| |
| − |
| |
| − | ===Light Multiplier===
| |
| − | The light multiplier of an image intensifier determines by how much it will amplify the available light. Image intensifiers with a higher multiplier will produce a brighter image with more details visible. At present there is not a massive difference between the most and least powerful image intensifiers on tanks, however, it is noticeable, more so when an IR searchlight is in use.
| |
| − |
| |
| − | The images below show the view of a target from a [[T-80U]] through the main gunsight (light multiplier of 9.0) and the driver's periscope (light multiplier 5.0), the target is being illuminated with an IR searchlight. Notice how the image through the gunsight is generally brighter and details like the grass and bushes are much more visible (there is obviously a zoom difference, but you can see that more is visible regardless).
| |
| − |
| |
| − | {{Notice|Click on an image to open it in full screen and get a better view}}
| |
| − |
| |
| − | <gallery mode="packed" heights=200>
| |
| − | File:NightVision 5.0 Mult.jpg|A [[Maus]] seen through an image intensifier with a 5.0 multiplier.
| |
| − | File:NightVision 9.0 Mult.jpg|A [[Maus]] seen through an image intensifier with a 9.0 multiplier.
| |
| − | </gallery>
| |
| − |
| |
| − | ===Noise===
| |
| − | In-game image intensifiers are subject to noise. This presents itself as something resembling TV static covering the screen. Due to a difference in optics, sensors and associated circuitry, more advanced image intensifiers suffer much less from this issue and provide a much clearer image, whereas older and more rudimentary electronics are more susceptible to injecting noise on the final image. The images below show the same view when using an image intensifier with a high noise level and a low noise level (all other stats are equal). Notice how the high noise level sight looks slightly fuzzy and has a sort of static effect over the image, while the low noise one is relatively clear.
| |
| − |
| |
| − | {{Notice|Click on an image to open it in full screen and get a better view}}
| |
| − |
| |
| − | <gallery mode="packed" heights=200>
| |
| − | File:NightVision high noise.jpg|A [[Maus]] seen through an image intensifier with a high amount of noise.
| |
| − | File:NightVision low noise.jpg|A [[Maus]] seen through an image intensifier with a low amount of noise.
| |
| − | </gallery>
| |
| − |
| |
| − | ==Infrared Spotlights==
| |
| − | [[File:IR Searchlight OnOff Compare.jpg|thumb|500px|right|The effect of turning on an IR searchlight on visibility]]
| |
| − | In addition to image intensifiers, some tanks are fitted with Infrared searchlights. Infrared (IR) searchlights are like regular searchlights, but they emit light on the infrared spectrum instead of the visible light spectrum; this means that the light they produce cannot normally be seen. However, as image intensifiers use light from the infrared spectrum and convert it to visible light, so IR searchlights can be seen through image intensifiers.
| |
| − |
| |
| − | When activated an IR search not be visible unless you are looking through an image intensifier. If you are looking through an image intensifier then the area where the light is pointing will be brightly illuminated. The effect of an IR searchlight can be seen in the image to the right.
| |
| − |
| |
| − | While IR searchlights obviously make seeing targets a lot easier in poor conditions their use does have a major drawback: any other players using image intensifiers can also see the light from your searchlight. As seen in the images below, by activating your IR searchlight you will immediately give your position away to any enemy players who are using an image intensifier. Other players on the ground will see the area where your light is pointing lit up, and the light itself will appear as a bright spot on the screen. Likewise, a helicopter will see the area lit up, and even though they may not be in a position to see the light itself, due the spread of the beam the lit-up area will form a sort of triangle with the tip pointing towards the source.
| |
| − |
| |
| − | <gallery mode="packed" heights=200>
| |
| − | File:Tank with IR light off.jpg|A tank is hiding in the bushes, without it's light on it can not be seen.
| |
| − | File:Tank with IR light on.jpg|The same tank has now turned it's IR searchlight on, it's position is now fairly obvious.
| |
| − | File:Tank with IR ligh on from air.jpg|The same tank viewed from the air (as if by a helicopter), again it's position is obvious.
| |
| − | </gallery>
| |
| − |
| |
| − | ===Factors affecting performance===
| |
| − | The main differentiating characteristics between different IR searchlights is their maximum range, and how wide the beam is. The maximum range is the furthest distance at which the IR searchlight can still illuminate objects. The beamwidth is measured in degrees and determines how wide the beam is, it can be seen in the image below.
| |
| − |
| |
| − | Some IR searchlights are also slightly more or less powerful (brighter) than others, but at present, the difference between those currently in-game is so small it is not worth talking about.
| |
| − |
| |
| − | [[File:IR Searchlight Beam.jpg|thumb|800px|left|A top-down view of a tank with its IR searchlight on, showing the beam width.]]{{Break}}
| |
| − |
| |
| − | ==Thermal Imagers==
| |
| − | Thermal imagers are more advanced than image intensifiers; they use the infrared radiation emitted by objects to produce images showing temperature. Anything which is warmer than the background will stand out clearly on thermal imaging cameras. In game thermal imagers are usually only available for the gunner's sight. When a thermal sight is activated the colour scheme of the screen will change significantly to one of the two thermal imagining modes available, white hot and black hot. In white hot mode the terrain will appear as dark grey and thermal signatures (vehicles, fires, projectiles, etc.) will appear somewhere between lighter grey and bright white, depending on their temperature. In black hot mode the terrain will be be light grey and thermal signatures will show as between darker grey and black depending on temperature. Thermal imagers allow for targets to easily be spotted at very long range.
| |
| − |
| |
| − | The two thermal modes can be seen in the images below. Notice how the engine compartment of the Abrams is much hotter than the rest of the tank. Also notice how a tank hiding in the bushes, which would normally be hard to see can easily be seen with thermal imaging.
| |
| − |
| |
| − | {{Notice|Thermal imagers, can be used both at night and in the day to improve visibility.|!}}
| |
| − |
| |
| − | <gallery mode="packed" heights=200>
| |
| − | File:Thermal Vision White Hot.jpg|White hot thermal imaging.
| |
| − | File:Thermal Vision Black Hot.jpg|Black hot thermal imaging.
| |
| − | </gallery>
| |
| − |
| |
| − | ===Factors affecting performance===
| |
| − | Like image intensifiers, thermal imagers can only produce an output of a certain resolution, this resolution is the main differentiating factor between thermal sights on different vehicles. Most thermal imagers in game have a fairly low resolution leading to somewhat blurry and less detailed images, however some have higher resolutions, proving clearer images.
| |
| − |
| |
| − | The images below show the same view through a 500 x 300 thermal imager (the lowest resolution in game) and a 1200 x 800 thermal imager (the highest resolution in game). Notice how the higher resolution imager produce a noticeably less blurry and more detailed image. This effect is more pronounced at longer ranges.
| |
| − |
| |
| − | {{Notice|Click on an image to open it in full screen and get a better view}}
| |
| − | <gallery mode="packed" heights=200>
| |
| − | File:Thermal Vision Low Res.jpg|A [[T-80U]] seen through an 500 x 300 thermal imager.
| |
| − | File:Thermal Vision High Res.jpg|A [[T-80U]] seen through an 1200 x 800 thermal imager.
| |
| − | </gallery>
| |
| − |
| |
| − | ==List of vehicles with Night Vision Devices==
| |
| − | ''As of v.1.99.1.39''
| |
| − | ===Ground vehicles===
| |
| − | {| class="wikitable sortable" style="text-align:center"
| |
| | |- | | |- |
| − | ! rowspan="2" | Vehicle !! rowspan="2" | Country !! colspan="2" | Commander !! colspan="2" | Gunner !! colspan="2" | Driver !! rowspan="2" | Infrared<br>Searchlight
| + | ! colspan="8" | Characteristics |
| | |- | | |- |
| − | ! Infrared !! Thermal !! Infrared !! Thermal !! Infrared !! Thermal | + | ! colspan="8" | ''Stock'' |
| | |- | | |- |
| − | | {{Specs-Link|us_adats_bradley}} || [[File:USA_flag.png|40px|link=]] || [[File:Icon GreenCheckmark.png|link=]] || [[File:Icon RedXCross.png|link=]] || [[File:Icon RedXCross.png|link=]] || [[File:Icon GreenCheckmark.png|link=]] || [[File:Icon GreenCheckmark.png|link=]] || [[File:Icon RedXCross.png|link=]] || [[File:Icon RedXCross.png|link=]]
| + | ! colspan="2" | Max Speed<br>(km/h at 4,000 m) |
| | + | ! rowspan="2" | Max altitude<br>(meters) |
| | + | ! colspan="2" | Turn time<br>(seconds) |
| | + | ! colspan="2" | Rate of climb<br>(meters/second) |
| | + | ! rowspan="2" | Take-off run<br>(meters) |
| | |- | | |- |
| − | | {{Specs-Link|fr_amx_10rc}} || [[File:France_flag.png|40px|link=]] || [[File:Icon GreenCheckmark.png|link=]] || [[File:Icon RedXCross.png|link=]] || [[File:Icon RedXCross.png|link=]] || [[File:Icon GreenCheckmark.png|link=]] || [[File:Icon GreenCheckmark.png|link=]] || [[File:Icon RedXCross.png|link=]] || [[File:Icon RedXCross.png|link=]]
| + | ! AB |
| | + | ! RB |
| | + | ! AB |
| | + | ! RB |
| | + | ! AB |
| | + | ! RB |
| | |- | | |- |
| − | | {{Specs-Link|fr_amx_30}} || [[File:France_flag.png|40px|link=]] || [[File:Icon GreenCheckmark.png|link=]] || [[File:Icon RedXCross.png|link=]] || [[File:Icon GreenCheckmark.png|link=]] || [[File:Icon RedXCross.png|link=]] || [[File:Icon GreenCheckmark.png|link=]] || [[File:Icon RedXCross.png|link=]] || [[File:Icon RedXCross.png|link=]] | + | | 291 || 282 || {{Specs|ceiling}} || 13.8 || 14.7 || 10.4 || 10.4 || 294 |
| | |- | | |- |
| − | | {{Specs-Link|fr_amx_30_1972}} || [[File:France_flag.png|40px|link=]] || [[File:Icon GreenCheckmark.png|link=]] || [[File:Icon RedXCross.png|link=]] || [[File:Icon GreenCheckmark.png|link=]] || [[File:Icon RedXCross.png|link=]] || [[File:Icon GreenCheckmark.png|link=]] || [[File:Icon RedXCross.png|link=]] || [[File:Icon RedXCross.png|link=]]
| + | ! colspan="8" | ''Upgraded'' |
| | |- | | |- |
| − | | {{Specs-Link|fr_amx_30_ACRA}} || [[File:France_flag.png|40px|link=]] || [[File:Icon GreenCheckmark.png|link=]] || [[File:Icon RedXCross.png|link=]] || [[File:Icon GreenCheckmark.png|link=]] || [[File:Icon RedXCross.png|link=]] || [[File:Icon GreenCheckmark.png|link=]] || [[File:Icon RedXCross.png|link=]] || [[File:Icon RedXCross.png|link=]]
| + | ! colspan="2" | Max Speed<br>(km/h at 4,000 m) |
| | + | ! rowspan="2" | Max altitude<br>(meters) |
| | + | ! colspan="2" | Turn time<br>(seconds) |
| | + | ! colspan="2" | Rate of climb<br>(meters/second) |
| | + | ! rowspan="2" | Take-off run<br>(meters) |
| | |- | | |- |
| − | | {{Specs-Link|fr_amx_30_super}} || [[File:France_flag.png|40px|link=]] || [[File:Icon GreenCheckmark.png|link=]] || [[File:Icon RedXCross.png|link=]] || [[File:Icon RedXCross.png|link=]] || [[File:Icon GreenCheckmark.png|link=]] || [[File:Icon GreenCheckmark.png|link=]] || [[File:Icon RedXCross.png|link=]] || [[File:Icon RedXCross.png|link=]]
| + | ! AB |
| | + | ! RB |
| | + | ! AB |
| | + | ! RB |
| | + | ! AB |
| | + | ! RB |
| | |- | | |- |
| − | | {{Specs-Link|fr_amx_30_b2}} || [[File:France_flag.png|40px|link=]] || [[File:Icon GreenCheckmark.png|link=]] || [[File:Icon RedXCross.png|link=]] || [[File:Icon RedXCross.png|link=]] || [[File:Icon GreenCheckmark.png|link=]] || [[File:Icon GreenCheckmark.png|link=]] || [[File:Icon RedXCross.png|link=]] || [[File:Icon RedXCross.png|link=]] | + | | 316 || 305 || {{Specs|ceiling}} || 13.6 || 13.7 || 16.7 || 13 || 294 |
| | |- | | |- |
| − | | {{Specs-Link|fr_amx_30_b2_brenus}} || [[File:France_flag.png|40px|link=]] || [[File:Icon GreenCheckmark.png|link=]] || [[File:Icon RedXCross.png|link=]] || [[File:Icon RedXCross.png|link=]] || [[File:Icon GreenCheckmark.png|link=]] || [[File:Icon GreenCheckmark.png|link=]] || [[File:Icon RedXCross.png|link=]] || [[File:Icon RedXCross.png|link=]] | + | |} |
| | + | |
| | + | ==== Details ==== |
| | + | {| class="wikitable" style="text-align:center" |
| | |- | | |- |
| − | | {{Specs-Link|fr_amx_32}} || [[File:France_flag.png|40px|link=]] || [[File:Icon GreenCheckmark.png|link=]] || [[File:Icon RedXCross.png|link=]] || [[File:Icon RedXCross.png|link=]] || [[File:Icon GreenCheckmark.png|link=]] || [[File:Icon GreenCheckmark.png|link=]] || [[File:Icon RedXCross.png|link=]] || [[File:Icon RedXCross.png|link=]]
| + | ! colspan="5" | Features |
| | |- | | |- |
| − | | {{Specs-Link|fr_amx_40}} || [[File:France_flag.png|40px|link=]] || [[File:Icon GreenCheckmark.png|link=]] || [[File:Icon RedXCross.png|link=]] || [[File:Icon RedXCross.png|link=]] || [[File:Icon GreenCheckmark.png|link=]] || [[File:Icon GreenCheckmark.png|link=]] || [[File:Icon RedXCross.png|link=]] || [[File:Icon RedXCross.png|link=]]
| + | ! Combat flaps |
| | + | ! Take-off flaps |
| | + | ! Landing flaps |
| | + | ! Air brakes |
| | + | ! Arrestor gear |
| | |- | | |- |
| − | | {{Specs-Link|it_c1_ariete}} || [[File:Italy_flag.png|40px|link=]] || [[File:Icon RedXCross.png|link=]] || [[File:Icon GreenCheckmark.png|link=]] || [[File:Icon RedXCross.png|link=]] || [[File:Icon GreenCheckmark.png|link=]] || [[File:Icon GreenCheckmark.png|link=]] || [[File:Icon RedXCross.png|link=]] || [[File:Icon RedXCross.png|link=]] | + | | ✓ || ✓ || ✓ || X || ✓ <!-- ✓ --> |
| | |- | | |- |
| − | | {{Specs-Link|it_c1_ariete_preserie}} || [[File:Italy_flag.png|40px|link=]] || [[File:Icon GreenCheckmark.png|link=]] || [[File:Icon RedXCross.png|link=]] || [[File:Icon RedXCross.png|link=]] || [[File:Icon GreenCheckmark.png|link=]] || [[File:Icon GreenCheckmark.png|link=]] || [[File:Icon RedXCross.png|link=]] || [[File:Icon RedXCross.png|link=]] | + | |} |
| | + | |
| | + | {| class="wikitable" style="text-align:center" |
| | |- | | |- |
| − | | {{Specs-Link|it_c1_ariete_pso}} || [[File:Italy_flag.png|40px|link=]] || [[File:Icon RedXCross.png|link=]] || [[File:Icon GreenCheckmark.png|link=]] || [[File:Icon RedXCross.png|link=]] || [[File:Icon GreenCheckmark.png|link=]] || [[File:Icon GreenCheckmark.png|link=]] || [[File:Icon RedXCross.png|link=]] || [[File:Icon RedXCross.png|link=]]
| + | ! colspan="5" | Limits |
| | |- | | |- |
| − | | {{Specs-Link|ussr_asu_57}} || [[File:USSR_flag.png|40px|link=]] || [[File:Icon RedXCross.png|link=]] || [[File:Icon RedXCross.png|link=]] || [[File:Icon RedXCross.png|link=]] || [[File:Icon RedXCross.png|link=]] || [[File:Icon GreenCheckmark.png|link=]] || [[File:Icon RedXCross.png|link=]] || [[File:Icon RedXCross.png|link=]] | + | ! rowspan="2" | Wing-break speed<br>(km/h) |
| | + | ! rowspan="2" | Gear limit<br>(km/h) |
| | + | ! rowspan="2" | Combat flaps<br>(km/h) |
| | + | ! colspan="2" | Max Static G |
| | |- | | |- |
| − | | {{Specs-Link|ussr_asu_85}} || [[File:USSR_flag.png|40px|link=]] || [[File:Icon GreenCheckmark.png|link=]] || [[File:Icon RedXCross.png|link=]] || [[File:Icon GreenCheckmark.png|link=]] || [[File:Icon RedXCross.png|link=]] || [[File:Icon GreenCheckmark.png|link=]] || [[File:Icon RedXCross.png|link=]] || [[File:Icon GreenCheckmark.png|link=]]
| + | ! + |
| | + | ! - |
| | |- | | |- |
| − | | {{Specs-Link|it_fiat_6616_cockerill}} || [[File:Italy_flag.png|40px|link=]] || [[File:Icon RedXCross.png|link=]] || [[File:Icon RedXCross.png|link=]] || [[File:Icon GreenCheckmark.png|link=]] || [[File:Icon RedXCross.png|link=]] || [[File:Icon RedXCross.png|link=]] || [[File:Icon RedXCross.png|link=]] || [[File:Icon RedXCross.png|link=]] | + | |{{Specs|destruction|body}}||{{Specs|destruction|gear}}|| 520 || ~11 || ~5 |
| | |- | | |- |
| − | | {{Specs-Link|it_aubl_74_60_70m}} || [[File:Italy_flag.png|40px|link=]] || [[File:Icon RedXCross.png|link=]] || [[File:Icon RedXCross.png|link=]] || [[File:Icon GreenCheckmark.png|link=]] || [[File:Icon RedXCross.png|link=]] || [[File:Icon RedXCross.png|link=]] || [[File:Icon RedXCross.png|link=]] || [[File:Icon RedXCross.png|link=]] | + | |} |
| | + | |
| | + | {| class="wikitable" style="text-align:center" |
| | |- | | |- |
| − | | {{Specs-Link|germ_begleitpanzer_57}} || [[File:Germany_flag.png|40px|link=]] || [[File:Icon GreenCheckmark.png|link=]] || [[File:Icon RedXCross.png|link=]] || [[File:Icon RedXCross.png|link=]] || [[File:Icon GreenCheckmark.png|link=]] || [[File:Icon GreenCheckmark.png|link=]] || [[File:Icon RedXCross.png|link=]] || [[File:Icon RedXCross.png|link=]]
| + | ! colspan="4" | Optimal velocities |
| | |- | | |- |
| − | | {{Specs-Link|ussr_bmp_1}} || [[File:USSR_flag.png|40px|link=]] || [[File:Icon GreenCheckmark.png|link=]] || [[File:Icon RedXCross.png|link=]] || [[File:Icon GreenCheckmark.png|link=]] || [[File:Icon RedXCross.png|link=]] || [[File:Icon GreenCheckmark.png|link=]] || [[File:Icon RedXCross.png|link=]] || [[File:Icon GreenCheckmark.png|link=]]
| + | ! Ailerons<br>(km/h) |
| | + | ! Rudder<br>(km/h) |
| | + | ! Elevators<br>(km/h) |
| | + | ! Radiator<br>(km/h) |
| | |- | | |- |
| − | | {{Specs-Link|ussr_bmp_2}} || [[File:USSR_flag.png|40px|link=]] || [[File:Icon GreenCheckmark.png|link=]] || [[File:Icon RedXCross.png|link=]] || [[File:Icon GreenCheckmark.png|link=]] || [[File:Icon RedXCross.png|link=]] || [[File:Icon GreenCheckmark.png|link=]] || [[File:Icon RedXCross.png|link=]] || [[File:Icon GreenCheckmark.png|link=]] | + | | < 180 || < 300 || < 300 || > 190 |
| | |- | | |- |
| − | | {{Specs-Link|ussr_bmp_2m}} || [[File:USSR_flag.png|40px|link=]] || [[File:Icon GreenCheckmark.png|link=]] || [[File:Icon RedXCross.png|link=]] || [[File:Icon RedXCross.png|link=]] || [[File:Icon GreenCheckmark.png|link=]] || [[File:Icon GreenCheckmark.png|link=]] || [[File:Icon RedXCross.png|link=]] || [[File:Icon GreenCheckmark.png|link=]] | + | |} |
| | + | |
| | + | {| class="wikitable" style="text-align:center" |
| | |- | | |- |
| − | | {{Specs-Link|ussr_bmp_3}} || [[File:USSR_flag.png|40px|link=]] || [[File:Icon GreenCheckmark.png|link=]] || [[File:Icon GreenCheckmark.png|link=]] || [[File:Icon GreenCheckmark.png|link=]] || [[File:Icon GreenCheckmark.png|link=]] || [[File:Icon GreenCheckmark.png|link=]] || [[File:Icon RedXCross.png|link=]] || [[File:Icon GreenCheckmark.png|link=]]
| + | ! colspan="3" | Compressor (RB/SB) |
| | |- | | |- |
| − | | {{Specs-Link|it_b1_centauro}} || [[File:Italy_flag.png|40px|link=]] || [[File:Icon GreenCheckmark.png|link=]] || [[File:Icon RedXCross.png|link=]] || [[File:Icon RedXCross.png|link=]] || [[File:Icon GreenCheckmark.png|link=]] || [[File:Icon GreenCheckmark.png|link=]] || [[File:Icon RedXCross.png|link=]] || [[File:Icon RedXCross.png|link=]]
| + | ! colspan="3" | Setting 1 |
| | |- | | |- |
| − | | {{Specs-Link|it_centauro_mgs_120}} || [[File:Italy_flag.png|40px|link=]] || [[File:Icon RedXCross.png|link=]] || [[File:Icon GreenCheckmark.png|link=]] || [[File:Icon RedXCross.png|link=]] || [[File:Icon GreenCheckmark.png|link=]] || [[File:Icon GreenCheckmark.png|link=]] || [[File:Icon RedXCross.png|link=]] || [[File:Icon RedXCross.png|link=]]
| + | ! Optimal altitude |
| | + | ! 100% Engine power |
| | + | ! WEP Engine power |
| | |- | | |- |
| − | | {{Specs-Link|it_b1_centauro_romor}} || [[File:Italy_flag.png|40px|link=]] || [[File:Icon GreenCheckmark.png|link=]] || [[File:Icon RedXCross.png|link=]] || [[File:Icon RedXCross.png|link=]] || [[File:Icon GreenCheckmark.png|link=]] || [[File:Icon GreenCheckmark.png|link=]] || [[File:Icon RedXCross.png|link=]] || [[File:Icon RedXCross.png|link=]] | + | | 0 m || 750 hp || N/A |
| | |- | | |- |
| − | | {{Specs-Link|uk_centurion_mk_10}} || [[File:Britain_flag.png|40px|link=]] || [[File:Icon GreenCheckmark.png|link=]] || [[File:Icon RedXCross.png|link=]] || [[File:Icon GreenCheckmark.png|link=]] || [[File:Icon RedXCross.png|link=]] || [[File:Icon GreenCheckmark.png|link=]] || [[File:Icon RedXCross.png|link=]] || [[File:Icon RedXCross.png|link=]] | + | |} |
| − | |-
| + | |
| − | | {{Specs-Link|uk_challenger_II}} || [[File:Britain_flag.png|40px|link=]] || [[File:Icon GreenCheckmark.png|link=]] || [[File:Icon RedXCross.png|link=]] || [[File:Icon RedXCross.png|link=]] || [[File:Icon GreenCheckmark.png|link=]] || [[File:Icon GreenCheckmark.png|link=]] || [[File:Icon RedXCross.png|link=]] || [[File:Icon RedXCross.png|link=]]
| + | === Survivability and armour === |
| − | |-
| + | <!--''Examine the survivability of the aircraft. Note how vulnerable the structure is and how secure the pilot is, whether the fuel tanks are armoured, etc. Describe the armour, if there is any, and also mention the vulnerability of other critical aircraft systems.''--> |
| − | | {{Specs-Link|uk_challenger_2_dorchester}} || [[File:Britain_flag.png|40px|link=]] || [[File:Icon GreenCheckmark.png|link=]] || [[File:Icon RedXCross.png|link=]] || [[File:Icon RedXCross.png|link=]] || [[File:Icon GreenCheckmark.png|link=]] || [[File:Icon GreenCheckmark.png|link=]] || [[File:Icon RedXCross.png|link=]] || [[File:Icon RedXCross.png|link=]]
| + | |
| − | |-
| + | * No armour plating |
| − | | {{Specs-Link|uk_challenger_1}} || [[File:Britain_flag.png|40px|link=]] || [[File:Icon GreenCheckmark.png|link=]] || [[File:Icon RedXCross.png|link=]] || [[File:Icon RedXCross.png|link=]] || [[File:Icon GreenCheckmark.png|link=]] || [[File:Icon GreenCheckmark.png|link=]] || [[File:Icon RedXCross.png|link=]] || [[File:Icon RedXCross.png|link=]]
| + | * No armour glazing |
| − | |-
| + | * All critical components located in front of aircraft (fuel, pilot, engine, controls) |
| − | | {{Specs-Link|uk_challenger_mk_3}} || [[File:Britain_flag.png|40px|link=]] || [[File:Icon GreenCheckmark.png|link=]] || [[File:Icon RedXCross.png|link=]] || [[File:Icon RedXCross.png|link=]] || [[File:Icon GreenCheckmark.png|link=]] || [[File:Icon GreenCheckmark.png|link=]] || [[File:Icon RedXCross.png|link=]] || [[File:Icon RedXCross.png|link=]]
| + | |
| − | |-
| + | Like many biplanes before and contemporaries of the {{PAGENAME}}, armour was not an option, survival was based on the pilot’s grit. Armour added weight, weight the early biplanes could not afford to carry and still be a viable fighter. Flying in open cockpit and fabric-covered aircraft, the only protection the pilot had was to place his engine between him and his enemy, otherwise, the pilot was vulnerable. Typically aircraft like this have the engine at the nose of the aircraft, followed by the fuel tank and then the cockpit, all three critical components relatively crammed together. The pilot’s toolbox had to contain situational awareness as he needed to know where the enemy was around him. Tracer rounds could easily ignite the fabric-covered aircraft or large fuel tanks, so it was imperative the pilot was the attacker, not the one being attacked and knowing where the enemies are at can help avoid getting shot at. |
| − | | {{Specs-Link|uk_chieftain_marksman}} || [[File:Britain_flag.png|40px|link=]] || [[File:Icon RedXCross.png|link=]] || [[File:Icon RedXCross.png|link=]] || [[File:Icon RedXCross.png|link=]] || [[File:Icon RedXCross.png|link=]] || [[File:Icon GreenCheckmark.png|link=]] || [[File:Icon RedXCross.png|link=]] || [[File:Icon RedXCross.png|link=]]
| + | |
| − | |-
| + | == Armaments == |
| − | | {{Specs-Link|uk_chieftain_mk_3}} || [[File:Britain_flag.png|40px|link=]] || [[File:Icon GreenCheckmark.png|link=]] || [[File:Icon RedXCross.png|link=]] || [[File:Icon GreenCheckmark.png|link=]] || [[File:Icon RedXCross.png|link=]] || [[File:Icon GreenCheckmark.png|link=]] || [[File:Icon RedXCross.png|link=]] || [[File:Icon GreenCheckmark.png|link=]]
| + | === Offensive armament === |
| − | |-
| + | <!-- ''Describe the offensive armament of the aircraft, if any. Describe how effective the cannons and machine guns are in a battle, and also what belts or drums are better to use. If there is no offensive weaponry, delete this subsection.'' --> |
| − | | {{Specs-Link|uk_chieftain_mk_5}} || [[File:Britain_flag.png|40px|link=]] || [[File:Icon GreenCheckmark.png|link=]] || [[File:Icon RedXCross.png|link=]] || [[File:Icon GreenCheckmark.png|link=]] || [[File:Icon RedXCross.png|link=]] || [[File:Icon GreenCheckmark.png|link=]] || [[File:Icon RedXCross.png|link=]] || [[File:Icon GreenCheckmark.png|link=]]
| + | {{main|MG 17 (7.92 mm)}} |
| − | |-
| + | |
| − | | {{Specs-Link|uk_chieftain_mk_10}} || [[File:Britain_flag.png|40px|link=]] || [[File:Icon GreenCheckmark.png|link=]] || [[File:Icon RedXCross.png|link=]] || [[File:Icon GreenCheckmark.png|link=]] || [[File:Icon RedXCross.png|link=]] || [[File:Icon GreenCheckmark.png|link=]] || [[File:Icon RedXCross.png|link=]] || [[File:Icon GreenCheckmark.png|link=]]
| + | The '''''{{PAGENAME}}''''' is armed with: |
| − | |-
| + | |
| − | | {{Specs-Link|cn_cm11}} || [[File:China_flag.png|40px|link=]] || [[File:Icon GreenCheckmark.png|link=]] || [[File:Icon RedXCross.png|link=]] || [[File:Icon RedXCross.png|link=]] || [[File:Icon GreenCheckmark.png|link=]] || [[File:Icon GreenCheckmark.png|link=]] || [[File:Icon RedXCross.png|link=]] || [[File:Icon RedXCross.png|link=]]
| + | * 2 x 7.92 mm MG 17 machine guns, nose-mounted (500 rpg = 1,000 total) |
| − | |-
| + | |
| − | | {{Specs-Link|sw_cv_90105_tml}} || [[File:Sweden_flag.png|40px|link=]] || [[File:Icon RedXCross.png|link=]] || [[File:Icon GreenCheckmark.png|link=]] || [[File:Icon RedXCross.png|link=]] || [[File:Icon GreenCheckmark.png|link=]] || [[File:Icon GreenCheckmark.png|link=]] || [[File:Icon RedXCross.png|link=]] || [[File:Icon RedXCross.png|link=]]
| + | When comparing offensive armament between reserve aircraft, the {{PAGENAME}} is on par with most nations, however, it lacks when compared to aircraft from France, Great Britain or the Soviet Union and to some extent the United States and their use of a heavy machine gun. The He 51 found itself between two great wars and to some extent was a fossil in regards to its armament. For a light biplane fighter, the {{PAGENAME}} only sported two 7.92 mm machine guns with a few options of ammunition types available for use. |
| − | |-
| + | |
| − | | {{Specs-Link|sw_cv_90120}} || [[File:Sweden_flag.png|40px|link=]] || [[File:Icon RedXCross.png|link=]] || [[File:Icon GreenCheckmark.png|link=]] || [[File:Icon RedXCross.png|link=]] || [[File:Icon GreenCheckmark.png|link=]] || [[File:Icon GreenCheckmark.png|link=]] || [[File:Icon RedXCross.png|link=]] || [[File:Icon RedXCross.png|link=]]
| + | Some of the reserve aircraft the {{PAGENAME}} will face utilise a heavy machine gun, up to 4 x 7 mm machine guns and a couple of premium versions even pack on a massive (massive for a reserve aircraft) 20 mm autocannon. Though coming in at a severe weapons disadvantage in some instances, the {{PAGENAME}} can still dominate a match and come out the king of the hill. While the two 7.92 mm MG 17 machine guns may seem insufficient, they do a job and they do it well, though it may take a bit of practice to land the bullets where they will do the most damage. |
| − | |-
| + | |
| − | | {{Specs-Link|uk_falcon}} || [[File:Britain_flag.png|40px|link=]] || [[File:Icon RedXCross.png|link=]] || [[File:Icon RedXCross.png|link=]] || [[File:Icon RedXCross.png|link=]] || [[File:Icon RedXCross.png|link=]] || [[File:Icon GreenCheckmark.png|link=]] || [[File:Icon RedXCross.png|link=]] || [[File:Icon RedXCross.png|link=]]
| + | Default ammunition what every pilot starts out with, though not the best it will cause critical hits and down enemy aircraft, though it may take a bit more patience and a few more rounds. When available to upgrade the ammunition belt modules, two other choices come into play which will allow the pilot to change tactics and fight more on their terms. Tracer ammunition is a fantastic choice for use against early biplane and monoplane fighters, especially since most of these aircraft are covered in fabric (as opposed to later aircraft covered in metal skin) and most if not all of the early fuel tanks are not self-sealing or do not vent exhaust gasses into the fuel tanks to stave off potential fireballs. |
| − | |-
| + | |
| − | | {{Specs-Link|us_hstv_l}} || [[File:USA_flag.png|40px|link=]] || [[File:Icon RedXCross.png|link=]] || [[File:Icon GreenCheckmark.png|link=]] || [[File:Icon RedXCross.png|link=]] || [[File:Icon GreenCheckmark.png|link=]] || [[File:Icon GreenCheckmark.png|link=]] || [[File:Icon RedXCross.png|link=]] || [[File:Icon RedXCross.png|link=]]
| + | Tracer rounds, though do little impact damage, their powerful punch comes from igniting aircraft on fire causing the enemy to fall to the earth in a flaming heap. One huge disadvantage to the tracer rounds is that it lets everyone know where you are with the bright coloured rounds flying through the air. To combat this, some pilots will switch stealth rounds, which just means that this belt is without any tracer rounds. Two advantages here are first, the removal of the tracer round adds in another damage round and secondly, there are no tracer rounds to give away your position, especially if your first shots don’t land where you want them to, enemy pilots will need to spend precious seconds looking around to find where the shots came from before reacting or they may react blindly and to your advantage. One challenge with stealth rounds is they are more difficult to tell where they are landing especially with distance shots and will take practice to know where they are hitting, though when used in close, they are easier to track and pack in a surprise for the enemy pilot they may not be able to recover from. |
| − | |-
| + | |
| − | | {{Specs-Link|us_m1_ip_abrams}} || [[File:USA_flag.png|40px|link=]] || [[File:Icon GreenCheckmark.png|link=]] || [[File:Icon RedXCross.png|link=]] || [[File:Icon RedXCross.png|link=]] || [[File:Icon GreenCheckmark.png|link=]] || [[File:Icon GreenCheckmark.png|link=]] || [[File:Icon RedXCross.png|link=]] || [[File:Icon RedXCross.png|link=]]
| + | == Usage in battles == |
| − | |-
| + | <!-- ''Describe the tactics of playing in an aircraft, the features of using vehicles in a team and advice on tactics. Refrain from creating a "guide" - do not impose a single point of view, but instead, give the reader food for thought. Examine the most dangerous enemies and give recommendations on fighting them. If necessary, note the specifics of the game in different modes (AB, RB, SB).'' --> |
| − | | {{Specs-Link|ussr_it_1}} || [[File:USSR_flag.png|40px|link=]] || [[File:Icon GreenCheckmark.png|link=]] || [[File:Icon RedXCross.png|link=]] || [[File:Icon GreenCheckmark.png|link=]] || [[File:Icon RedXCross.png|link=]] || [[File:Icon GreenCheckmark.png|link=]] || [[File:Icon RedXCross.png|link=]] || [[File:Icon GreenCheckmark.png|link=]]
| + | As a bi-plane, the cockpit view offers only a restricted panorama and it is difficult to anticipate targets with a wing in your face. As with all bi-planes, this characteristic tends to dissuade its use in SB. That said the He 51 has a singularly good rate of climb in comparison to most other equivalent battle rating aircraft allowing it to play the energy tactic well. This is good because the He 51 is a slow bird and has trouble catching virtually any other plane in level flight. However, given its slow speed, it also sports an exceptional turn radius allowing it to turn a death-spiral into a turkey shoot. |
| − | |-
| + | |
| − | | {{Specs-Link|germ_kanonenjagdpanzer}} || [[File:Germany_flag.png|40px|link=]] || [[File:Icon GreenCheckmark.png|link=]] || [[File:Icon RedXCross.png|link=]] || [[File:Icon GreenCheckmark.png|link=]] || [[File:Icon RedXCross.png|link=]] || [[File:Icon GreenCheckmark.png|link=]] || [[File:Icon RedXCross.png|link=]] || [[File:Icon RedXCross.png|link=]]
| + | === Manual Engine Control === |
| − | |-
| + | {| class="wikitable" style="text-align:center" |
| − | | {{Specs-Link|ussr_9p157}} || [[File:USSR_flag.png|40px|link=]] || [[File:Icon RedXCross.png|link=]] || [[File:Icon GreenCheckmark.png|link=]] || [[File:Icon RedXCross.png|link=]] || [[File:Icon GreenCheckmark.png|link=]] || [[File:Icon GreenCheckmark.png|link=]] || [[File:Icon RedXCross.png|link=]] || [[File:Icon RedXCross.png|link=]]
| |
| − | |-
| |
| − | | {{Specs-Link|germ_kpz_70}} || [[File:Germany_flag.png|40px|link=]] || [[File:Icon GreenCheckmark.png|link=]] || [[File:Icon RedXCross.png|link=]] || [[File:Icon GreenCheckmark.png|link=]] || [[File:Icon RedXCross.png|link=]] || [[File:Icon GreenCheckmark.png|link=]] || [[File:Icon RedXCross.png|link=]] || [[File:Icon GreenCheckmark.png|link=]]
| |
| − | |-
| |
| − | | {{Specs-Link|fr_leclerc_s1}} || [[File:France_flag.png|40px|link=]] || [[File:Icon RedXCross.png|link=]] || [[File:Icon GreenCheckmark.png|link=]] || [[File:Icon RedXCross.png|link=]] || [[File:Icon GreenCheckmark.png|link=]] || [[File:Icon GreenCheckmark.png|link=]] || [[File:Icon RedXCross.png|link=]] || [[File:Icon RedXCross.png|link=]]
| |
| − | |-
| |
| − | | {{Specs-Link|germ_le_kpz_m41}} || [[File:Germany_flag.png|40px|link=]] || [[File:Icon RedXCross.png|link=]] || [[File:Icon RedXCross.png|link=]] || [[File:Icon RedXCross.png|link=]] || [[File:Icon RedXCross.png|link=]] || [[File:Icon GreenCheckmark.png|link=]] || [[File:Icon RedXCross.png|link=]] || [[File:Icon RedXCross.png|link=]]
| |
| − | |-
| |
| − | | {{Specs-Link|germ_leopard_2a4}} || [[File:Germany_flag.png|40px|link=]] || [[File:Icon GreenCheckmark.png|link=]] || [[File:Icon RedXCross.png|link=]] || [[File:Icon RedXCross.png|link=]] || [[File:Icon GreenCheckmark.png|link=]] || [[File:Icon GreenCheckmark.png|link=]] || [[File:Icon RedXCross.png|link=]] || [[File:Icon RedXCross.png|link=]]
| |
| − | |-
| |
| − | | {{Specs-Link|germ_leopard_2a5}} || [[File:Germany_flag.png|40px|link=]] || [[File:Icon RedXCross.png|link=]] || [[File:Icon GreenCheckmark.png|link=]] || [[File:Icon RedXCross.png|link=]] || [[File:Icon GreenCheckmark.png|link=]] || [[File:Icon GreenCheckmark.png|link=]] || [[File:Icon RedXCross.png|link=]] || [[File:Icon RedXCross.png|link=]]
| |
| − | |-
| |
| − | | {{Specs-Link|germ_leopard_2k}} || [[File:Germany_flag.png|40px|link=]] || [[File:Icon GreenCheckmark.png|link=]] || [[File:Icon RedXCross.png|link=]] || [[File:Icon GreenCheckmark.png|link=]] || [[File:Icon RedXCross.png|link=]] || [[File:Icon GreenCheckmark.png|link=]] || [[File:Icon RedXCross.png|link=]] || [[File:Icon RedXCross.png|link=]]
| |
| − | |-
| |
| − | | {{Specs-Link|germ_leopard_I_a1}} || [[File:Germany_flag.png|40px|link=]] || [[File:Icon GreenCheckmark.png|link=]] || [[File:Icon RedXCross.png|link=]] || [[File:Icon GreenCheckmark.png|link=]] || [[File:Icon RedXCross.png|link=]] || [[File:Icon GreenCheckmark.png|link=]] || [[File:Icon RedXCross.png|link=]] || [[File:Icon RedXCross.png|link=]]
| |
| − | |-
| |
| − | | {{Specs-Link|germ_leopard_a1a1_120}} || [[File:Germany_flag.png|40px|link=]] || [[File:Icon GreenCheckmark.png|link=]] || [[File:Icon RedXCross.png|link=]] || [[File:Icon RedXCross.png|link=]] || [[File:Icon GreenCheckmark.png|link=]] || [[File:Icon GreenCheckmark.png|link=]] || [[File:Icon RedXCross.png|link=]] || [[File:Icon RedXCross.png|link=]]
| |
| − | |-
| |
| − | | {{Specs-Link|germ_leopard_I}} || [[File:Germany_flag.png|40px|link=]] || [[File:Icon GreenCheckmark.png|link=]] || [[File:Icon RedXCross.png|link=]] || [[File:Icon GreenCheckmark.png|link=]] || [[File:Icon RedXCross.png|link=]] || [[File:Icon GreenCheckmark.png|link=]] || [[File:Icon RedXCross.png|link=]] || [[File:Icon GreenCheckmark.png|link=]]
| |
| − | |-
| |
| − | | {{Specs-Link|sw_lvkv_90c}} || [[File:Sweden_flag.png|40px|link=]] || [[File:Icon GreenCheckmark.png|link=]] || [[File:Icon RedXCross.png|link=]] || [[File:Icon RedXCross.png|link=]] || [[File:Icon GreenCheckmark.png|link=]] || [[File:Icon GreenCheckmark.png|link=]] || [[File:Icon RedXCross.png|link=]] || [[File:Icon RedXCross.png|link=]]
| |
| − | |-
| |
| − | | {{Specs-Link|us_m1_abrams}} || [[File:USA_flag.png|40px|link=]] || [[File:Icon GreenCheckmark.png|link=]] || [[File:Icon RedXCross.png|link=]] || [[File:Icon RedXCross.png|link=]] || [[File:Icon GreenCheckmark.png|link=]] || [[File:Icon GreenCheckmark.png|link=]] || [[File:Icon RedXCross.png|link=]] || [[File:Icon RedXCross.png|link=]]
| |
| − | |-
| |
| − | | {{Specs-Link|us_m1a1_abrams}} || [[File:USA_flag.png|40px|link=]] || [[File:Icon GreenCheckmark.png|link=]] || [[File:Icon RedXCross.png|link=]] || [[File:Icon RedXCross.png|link=]] || [[File:Icon GreenCheckmark.png|link=]] || [[File:Icon GreenCheckmark.png|link=]] || [[File:Icon RedXCross.png|link=]] || [[File:Icon RedXCross.png|link=]]
| |
| − | |-
| |
| − | | {{Specs-Link|us_m1a2_abrams}} || [[File:USA_flag.png|40px|link=]] || [[File:Icon RedXCross.png|link=]] || [[File:Icon GreenCheckmark.png|link=]] || [[File:Icon RedXCross.png|link=]] || [[File:Icon GreenCheckmark.png|link=]] || [[File:Icon GreenCheckmark.png|link=]] || [[File:Icon RedXCross.png|link=]] || [[File:Icon RedXCross.png|link=]]
| |
| − | |-
| |
| − | | {{Specs-Link|us_m3_bradley}} || [[File:USA_flag.png|40px|link=]] || [[File:Icon GreenCheckmark.png|link=]] || [[File:Icon RedXCross.png|link=]] || [[File:Icon RedXCross.png|link=]] || [[File:Icon GreenCheckmark.png|link=]] || [[File:Icon GreenCheckmark.png|link=]] || [[File:Icon RedXCross.png|link=]] || [[File:Icon RedXCross.png|link=]]
| |
| − | |-
| |
| − | | {{Specs-Link|us_m41_walker_bulldog}} || [[File:USA_flag.png|40px|link=]] || [[File:Icon RedXCross.png|link=]] || [[File:Icon RedXCross.png|link=]] || [[File:Icon RedXCross.png|link=]] || [[File:Icon RedXCross.png|link=]] || [[File:Icon GreenCheckmark.png|link=]] || [[File:Icon RedXCross.png|link=]] || [[File:Icon RedXCross.png|link=]]
| |
| − | |-
| |
| − | | {{Specs-Link|jp_m41_walker_bulldog}} || [[File:Japan_flag.png|40px|link=]] || [[File:Icon RedXCross.png|link=]] || [[File:Icon RedXCross.png|link=]] || [[File:Icon RedXCross.png|link=]] || [[File:Icon RedXCross.png|link=]] || [[File:Icon GreenCheckmark.png|link=]] || [[File:Icon RedXCross.png|link=]] || [[File:Icon RedXCross.png|link=]]
| |
| − | |-
| |
| − | | {{Specs-Link|us_m42_duster}} || [[File:USA_flag.png|40px|link=]] || [[File:Icon RedXCross.png|link=]] || [[File:Icon RedXCross.png|link=]] || [[File:Icon RedXCross.png|link=]] || [[File:Icon RedXCross.png|link=]] || [[File:Icon GreenCheckmark.png|link=]] || [[File:Icon RedXCross.png|link=]] || [[File:Icon RedXCross.png|link=]]
| |
| − | |-
| |
| − | | {{Specs-Link|cn_m42_duster}} || [[File:China_flag.png|40px|link=]] || [[File:Icon RedXCross.png|link=]] || [[File:Icon RedXCross.png|link=]] || [[File:Icon RedXCross.png|link=]] || [[File:Icon RedXCross.png|link=]] || [[File:Icon GreenCheckmark.png|link=]] || [[File:Icon RedXCross.png|link=]] || [[File:Icon RedXCross.png|link=]]
| |
| − | |-
| |
| − | | {{Specs-Link|jp_m42_duster}} || [[File:Japan_flag.png|40px|link=]] || [[File:Icon RedXCross.png|link=]] || [[File:Icon RedXCross.png|link=]] || [[File:Icon RedXCross.png|link=]] || [[File:Icon RedXCross.png|link=]] || [[File:Icon GreenCheckmark.png|link=]] || [[File:Icon RedXCross.png|link=]] || [[File:Icon RedXCross.png|link=]]
| |
| | |- | | |- |
| − | | {{Specs-Link|us_m47_patton_II}} || [[File:USA_flag.png|40px|link=]] || [[File:Icon RedXCross.png|link=]] || [[File:Icon RedXCross.png|link=]] || [[File:Icon RedXCross.png|link=]] || [[File:Icon RedXCross.png|link=]] || [[File:Icon GreenCheckmark.png|link=]] || [[File:Icon RedXCross.png|link=]] || [[File:Icon RedXCross.png|link=]]
| + | ! colspan="7" | MEC elements |
| | |- | | |- |
| − | | {{Specs-Link|it_m47_105}} || [[File:Italy_flag.png|40px|link=]] || [[File:Icon RedXCross.png|link=]] || [[File:Icon RedXCross.png|link=]] || [[File:Icon RedXCross.png|link=]] || [[File:Icon RedXCross.png|link=]] || [[File:Icon GreenCheckmark.png|link=]] || [[File:Icon RedXCross.png|link=]] || [[File:Icon RedXCross.png|link=]]
| + | ! rowspan="2" | Mixer |
| | + | ! rowspan="2" | Pitch |
| | + | ! colspan="3" | Radiator |
| | + | ! rowspan="2" | Supercharger |
| | + | ! rowspan="2" | Turbocharger |
| | |- | | |- |
| − | | {{Specs-Link|germ_mkpz_super_m48}} || [[File:Germany_flag.png|40px|link=]] || [[File:Icon RedXCross.png|link=]] || [[File:Icon GreenCheckmark.png|link=]] || [[File:Icon RedXCross.png|link=]] || [[File:Icon GreenCheckmark.png|link=]] || [[File:Icon GreenCheckmark.png|link=]] || [[File:Icon RedXCross.png|link=]] || [[File:Icon GreenCheckmark.png|link=]]
| + | ! Oil |
| | + | ! Water |
| | + | ! Type |
| | |- | | |- |
| − | | {{Specs-Link|us_m48a1_patton_III}} || [[File:USA_flag.png|40px|link=]] || [[File:Icon RedXCross.png|link=]] || [[File:Icon RedXCross.png|link=]] || [[File:Icon RedXCross.png|link=]] || [[File:Icon RedXCross.png|link=]] || [[File:Icon GreenCheckmark.png|link=]] || [[File:Icon RedXCross.png|link=]] || [[File:Icon RedXCross.png|link=]] | + | | Controllable || rowspan="2" | Not controllable<br>Not auto controlled || rowspan="2" | Not controllable<br>Not auto controlled || rowspan="2" | Controllable<br>Not auto controlled || rowspan="2" | Combined || rowspan="2" | Not controllable<br>1 gear || rowspan="2" | Not controllable |
| − | |-
| |
| − | | {{Specs-Link|cn_m48a1_patton_III}} || [[File:China_flag.png|40px|link=]] || [[File:Icon RedXCross.png|link=]] || [[File:Icon RedXCross.png|link=]] || [[File:Icon RedXCross.png|link=]] || [[File:Icon RedXCross.png|link=]] || [[File:Icon GreenCheckmark.png|link=]] || [[File:Icon RedXCross.png|link=]] || [[File:Icon RedXCross.png|link=]]
| |
| − | |-
| |
| − | | {{Specs-Link|germ_mkpz_m48a2c}} || [[File:Germany_flag.png|40px|link=]] || [[File:Icon GreenCheckmark.png|link=]] || [[File:Icon RedXCross.png|link=]] || [[File:Icon GreenCheckmark.png|link=]] || [[File:Icon RedXCross.png|link=]] || [[File:Icon GreenCheckmark.png|link=]] || [[File:Icon RedXCross.png|link=]] || [[File:Icon GreenCheckmark.png|link=]]
| |
| − | |-
| |
| − | | {{Specs-Link|germ_mkpz_m48a2ga2}} || [[File:Germany_flag.png|40px|link=]] || [[File:Icon GreenCheckmark.png|link=]] || [[File:Icon RedXCross.png|link=]] || [[File:Icon GreenCheckmark.png|link=]] || [[File:Icon RedXCross.png|link=]] || [[File:Icon GreenCheckmark.png|link=]] || [[File:Icon RedXCross.png|link=]] || [[File:Icon GreenCheckmark.png|link=]]
| |
| − | |-
| |
| − | | {{Specs-Link|us_m60}} || [[File:USA_flag.png|40px|link=]] || [[File:Icon GreenCheckmark.png|link=]] || [[File:Icon RedXCross.png|link=]] || [[File:Icon GreenCheckmark.png|link=]] || [[File:Icon RedXCross.png|link=]] || [[File:Icon GreenCheckmark.png|link=]] || [[File:Icon RedXCross.png|link=]] || [[File:Icon RedXCross.png|link=]]
| |
| − | |-
| |
| − | | {{Specs-Link|us_m60a3_slep}} || [[File:USA_flag.png|40px|link=]] || [[File:Icon GreenCheckmark.png|link=]] || [[File:Icon RedXCross.png|link=]] || [[File:Icon RedXCross.png|link=]] || [[File:Icon GreenCheckmark.png|link=]] || [[File:Icon GreenCheckmark.png|link=]] || [[File:Icon RedXCross.png|link=]] || [[File:Icon RedXCross.png|link=]]
| |
| − | |-
| |
| − | | {{Specs-Link|us_m60a1}} || [[File:USA_flag.png|40px|link=]] || [[File:Icon GreenCheckmark.png|link=]] || [[File:Icon RedXCross.png|link=]] || [[File:Icon GreenCheckmark.png|link=]] || [[File:Icon RedXCross.png|link=]] || [[File:Icon GreenCheckmark.png|link=]] || [[File:Icon RedXCross.png|link=]] || [[File:Icon RedXCross.png|link=]]
| |
| − | |-
| |
| − | | {{Specs-Link|it_m60a1_ariete}} || [[File:Italy_flag.png|40px|link=]] || [[File:Icon GreenCheckmark.png|link=]] || [[File:Icon RedXCross.png|link=]] || [[File:Icon GreenCheckmark.png|link=]] || [[File:Icon RedXCross.png|link=]] || [[File:Icon GreenCheckmark.png|link=]] || [[File:Icon RedXCross.png|link=]] || [[File:Icon RedXCross.png|link=]]
| |
| − | |-
| |
| − | | {{Specs-Link|us_m60a1_rise_passive_era}} || [[File:USA_flag.png|40px|link=]] || [[File:Icon GreenCheckmark.png|link=]] || [[File:Icon RedXCross.png|link=]] || [[File:Icon GreenCheckmark.png|link=]] || [[File:Icon RedXCross.png|link=]] || [[File:Icon GreenCheckmark.png|link=]] || [[File:Icon RedXCross.png|link=]] || [[File:Icon RedXCross.png|link=]]
| |
| − | |-
| |
| − | | {{Specs-Link|us_m60a2}} || [[File:USA_flag.png|40px|link=]] || [[File:Icon GreenCheckmark.png|link=]] || [[File:Icon RedXCross.png|link=]] || [[File:Icon GreenCheckmark.png|link=]] || [[File:Icon RedXCross.png|link=]] || [[File:Icon GreenCheckmark.png|link=]] || [[File:Icon RedXCross.png|link=]] || [[File:Icon GreenCheckmark.png|link=]]
| |
| − | |-
| |
| − | | {{Specs-Link|us_m60a3_tts}} || [[File:USA_flag.png|40px|link=]] || [[File:Icon GreenCheckmark.png|link=]] || [[File:Icon RedXCross.png|link=]] || [[File:Icon RedXCross.png|link=]] || [[File:Icon GreenCheckmark.png|link=]] || [[File:Icon GreenCheckmark.png|link=]] || [[File:Icon RedXCross.png|link=]] || [[File:Icon RedXCross.png|link=]]
| |
| − | |-
| |
| − | | {{Specs-Link|cn_m60a3_tts}} || [[File:China_flag.png|40px|link=]] || [[File:Icon GreenCheckmark.png|link=]] || [[File:Icon RedXCross.png|link=]] || [[File:Icon RedXCross.png|link=]] || [[File:Icon GreenCheckmark.png|link=]] || [[File:Icon GreenCheckmark.png|link=]] || [[File:Icon RedXCross.png|link=]] || [[File:Icon RedXCross.png|link=]]
| |
| − | |-
| |
| − | | {{Specs-Link|us_m103}} || [[File:USA_flag.png|40px|link=]] || [[File:Icon RedXCross.png|link=]] || [[File:Icon RedXCross.png|link=]] || [[File:Icon RedXCross.png|link=]] || [[File:Icon RedXCross.png|link=]] || [[File:Icon GreenCheckmark.png|link=]] || [[File:Icon RedXCross.png|link=]] || [[File:Icon RedXCross.png|link=]]
| |
| − | |-
| |
| − | | {{Specs-Link|it_m113a1_tow}} || [[File:Italy_flag.png|40px|link=]] || [[File:Icon GreenCheckmark.png|link=]] || [[File:Icon RedXCross.png|link=]] || [[File:Icon GreenCheckmark.png|link=]] || [[File:Icon RedXCross.png|link=]] || [[File:Icon GreenCheckmark.png|link=]] || [[File:Icon RedXCross.png|link=]] || [[File:Icon RedXCross.png|link=]]
| |
| − | |-
| |
| − | | {{Specs-Link|cn_m113a1_tow}} || [[File:China_flag.png|40px|link=]] || [[File:Icon GreenCheckmark.png|link=]] || [[File:Icon RedXCross.png|link=]] || [[File:Icon GreenCheckmark.png|link=]] || [[File:Icon RedXCross.png|link=]] || [[File:Icon GreenCheckmark.png|link=]] || [[File:Icon RedXCross.png|link=]] || [[File:Icon RedXCross.png|link=]]
| |
| − | |-
| |
| − | | {{Specs-Link|us_m163_vulcan}} || [[File:USA_flag.png|40px|link=]] || [[File:Icon RedXCross.png|link=]] || [[File:Icon RedXCross.png|link=]] || [[File:Icon GreenCheckmark.png|link=]] || [[File:Icon RedXCross.png|link=]] || [[File:Icon GreenCheckmark.png|link=]] || [[File:Icon RedXCross.png|link=]] || [[File:Icon RedXCross.png|link=]]
| |
| − | |-
| |
| − | | {{Specs-Link|us_m247}} || [[File:USA_flag.png|40px|link=]] || [[File:Icon GreenCheckmark.png|link=]] || [[File:Icon RedXCross.png|link=]] || [[File:Icon GreenCheckmark.png|link=]] || [[File:Icon RedXCross.png|link=]] || [[File:Icon GreenCheckmark.png|link=]] || [[File:Icon RedXCross.png|link=]] || [[File:Icon RedXCross.png|link=]]
| |
| − | |-
| |
| − | | {{Specs-Link|us_m551}} || [[File:USA_flag.png|40px|link=]] || [[File:Icon GreenCheckmark.png|link=]] || [[File:Icon RedXCross.png|link=]] || [[File:Icon GreenCheckmark.png|link=]] || [[File:Icon RedXCross.png|link=]] || [[File:Icon GreenCheckmark.png|link=]] || [[File:Icon RedXCross.png|link=]] || [[File:Icon RedXCross.png|link=]]
| |
| − | |-
| |
| − | | {{Specs-Link|us_m901_itv}} || [[File:USA_flag.png|40px|link=]] || [[File:Icon GreenCheckmark.png|link=]] || [[File:Icon RedXCross.png|link=]] || [[File:Icon RedXCross.png|link=]] || [[File:Icon GreenCheckmark.png|link=]] || [[File:Icon GreenCheckmark.png|link=]] || [[File:Icon RedXCross.png|link=]] || [[File:Icon RedXCross.png|link=]]
| |
| − | |-
| |
| − | | {{Specs-Link|us_magach_3}} || [[File:USA_flag.png|40px|link=]] || [[File:Icon RedXCross.png|link=]] || [[File:Icon RedXCross.png|link=]] || [[File:Icon RedXCross.png|link=]] || [[File:Icon RedXCross.png|link=]] || [[File:Icon GreenCheckmark.png|link=]] || [[File:Icon RedXCross.png|link=]] || [[File:Icon RedXCross.png|link=]]
| |
| − | |-
| |
| − | | {{Specs-Link|us_mbt_70}} || [[File:USA_flag.png|40px|link=]] || [[File:Icon GreenCheckmark.png|link=]] || [[File:Icon RedXCross.png|link=]] || [[File:Icon GreenCheckmark.png|link=]] || [[File:Icon RedXCross.png|link=]] || [[File:Icon GreenCheckmark.png|link=]] || [[File:Icon RedXCross.png|link=]] || [[File:Icon GreenCheckmark.png|link=]]
| |
| − | |-
| |
| − | | {{Specs-Link|us_merkava_mk_1}} || [[File:USA_flag.png|40px|link=]] || [[File:Icon GreenCheckmark.png|link=]] || [[File:Icon RedXCross.png|link=]] || [[File:Icon GreenCheckmark.png|link=]] || [[File:Icon RedXCross.png|link=]] || [[File:Icon GreenCheckmark.png|link=]] || [[File:Icon RedXCross.png|link=]] || [[File:Icon RedXCross.png|link=]]
| |
| − | |-
| |
| − | | {{Specs-Link|us_merkava_mk_2b_late}} || [[File:USA_flag.png|40px|link=]] || [[File:Icon GreenCheckmark.png|link=]] || [[File:Icon RedXCross.png|link=]] || [[File:Icon RedXCross.png|link=]] || [[File:Icon GreenCheckmark.png|link=]] || [[File:Icon GreenCheckmark.png|link=]] || [[File:Icon RedXCross.png|link=]] || [[File:Icon RedXCross.png|link=]]
| |
| − | |-
| |
| − | | {{Specs-Link|germ_mkpz_m47}} || [[File:Germany_flag.png|40px|link=]] || [[File:Icon RedXCross.png|link=]] || [[File:Icon RedXCross.png|link=]] || [[File:Icon RedXCross.png|link=]] || [[File:Icon RedXCross.png|link=]] || [[File:Icon GreenCheckmark.png|link=]] || [[File:Icon RedXCross.png|link=]] || [[File:Icon RedXCross.png|link=]]
| |
| − | |-
| |
| − | | {{Specs-Link|ussr_object_120}} || [[File:USSR_flag.png|40px|link=]] || [[File:Icon GreenCheckmark.png|link=]] || [[File:Icon RedXCross.png|link=]] || [[File:Icon GreenCheckmark.png|link=]] || [[File:Icon RedXCross.png|link=]] || [[File:Icon GreenCheckmark.png|link=]] || [[File:Icon RedXCross.png|link=]] || [[File:Icon GreenCheckmark.png|link=]]
| |
| − | |-
| |
| − | | {{Specs-Link|ussr_object_279}} || [[File:USSR_flag.png|40px|link=]] || [[File:Icon GreenCheckmark.png|link=]] || [[File:Icon RedXCross.png|link=]] || [[File:Icon GreenCheckmark.png|link=]] || [[File:Icon RedXCross.png|link=]] || [[File:Icon GreenCheckmark.png|link=]] || [[File:Icon RedXCross.png|link=]] || [[File:Icon GreenCheckmark.png|link=]]
| |
| − | |-
| |
| − | | {{Specs-Link|ussr_object_685}} || [[File:USSR_flag.png|40px|link=]] || [[File:Icon GreenCheckmark.png|link=]] || [[File:Icon RedXCross.png|link=]] || [[File:Icon GreenCheckmark.png|link=]] || [[File:Icon RedXCross.png|link=]] || [[File:Icon GreenCheckmark.png|link=]] || [[File:Icon RedXCross.png|link=]] || [[File:Icon GreenCheckmark.png|link=]]
| |
| − | |-
| |
| − | | {{Specs-Link|ussr_object_906}} || [[File:USSR_flag.png|40px|link=]] || [[File:Icon GreenCheckmark.png|link=]] || [[File:Icon RedXCross.png|link=]] || [[File:Icon GreenCheckmark.png|link=]] || [[File:Icon RedXCross.png|link=]] || [[File:Icon GreenCheckmark.png|link=]] || [[File:Icon RedXCross.png|link=]] || [[File:Icon GreenCheckmark.png|link=]]
| |
| − | |-
| |
| − | | {{Specs-Link|it_of_40_mk_1}} || [[File:Italy_flag.png|40px|link=]] || [[File:Icon GreenCheckmark.png|link=]] || [[File:Icon RedXCross.png|link=]] || [[File:Icon GreenCheckmark.png|link=]] || [[File:Icon RedXCross.png|link=]] || [[File:Icon GreenCheckmark.png|link=]] || [[File:Icon RedXCross.png|link=]] || [[File:Icon RedXCross.png|link=]]
| |
| − | |-
| |
| − | | {{Specs-Link|it_of_40_mk_2a}} || [[File:Italy_flag.png|40px|link=]] || [[File:Icon GreenCheckmark.png|link=]] || [[File:Icon RedXCross.png|link=]] || [[File:Icon GreenCheckmark.png|link=]] || [[File:Icon RedXCross.png|link=]] || [[File:Icon GreenCheckmark.png|link=]] || [[File:Icon RedXCross.png|link=]] || [[File:Icon RedXCross.png|link=]]
| |
| − | |-
| |
| − | | {{Specs-Link|it_of_40_mtca}} || [[File:Italy_flag.png|40px|link=]] || [[File:Icon GreenCheckmark.png|link=]] || [[File:Icon RedXCross.png|link=]] || [[File:Icon GreenCheckmark.png|link=]] || [[File:Icon RedXCross.png|link=]] || [[File:Icon GreenCheckmark.png|link=]] || [[File:Icon RedXCross.png|link=]] || [[File:Icon RedXCross.png|link=]]
| |
| − | |-
| |
| − | | {{Specs-Link|it_otomatic}} || [[File:Italy_flag.png|40px|link=]] || [[File:Icon GreenCheckmark.png|link=]] || [[File:Icon RedXCross.png|link=]] || [[File:Icon RedXCross.png|link=]] || [[File:Icon GreenCheckmark.png|link=]] || [[File:Icon GreenCheckmark.png|link=]] || [[File:Icon RedXCross.png|link=]] || [[File:Icon RedXCross.png|link=]]
| |
| − | |-
| |
| − | | {{Specs-Link|germ_panther_II}} || [[File:Germany_flag.png|40px|link=]] || [[File:Icon GreenCheckmark.png|link=]] || [[File:Icon RedXCross.png|link=]] || [[File:Icon RedXCross.png|link=]] || [[File:Icon RedXCross.png|link=]] || [[File:Icon GreenCheckmark.png|link=]] || [[File:Icon RedXCross.png|link=]] || [[File:Icon GreenCheckmark.png|link=]]
| |
| − | |-
| |
| − | | {{Specs-Link|cn_pt_76}} || [[File:China_flag.png|40px|link=]] || [[File:Icon RedXCross.png|link=]] || [[File:Icon RedXCross.png|link=]] || [[File:Icon RedXCross.png|link=]] || [[File:Icon RedXCross.png|link=]] || [[File:Icon GreenCheckmark.png|link=]] || [[File:Icon RedXCross.png|link=]] || [[File:Icon RedXCross.png|link=]]
| |
| − | |-
| |
| − | | {{Specs-Link|ussr_pt_76b}} || [[File:USSR_flag.png|40px|link=]] || [[File:Icon RedXCross.png|link=]] || [[File:Icon RedXCross.png|link=]] || [[File:Icon RedXCross.png|link=]] || [[File:Icon RedXCross.png|link=]] || [[File:Icon GreenCheckmark.png|link=]] || [[File:Icon RedXCross.png|link=]] || [[File:Icon RedXCross.png|link=]]
| |
| − | |-
| |
| − | | {{Specs-Link|sw_pvrbv_551}} || [[File:Sweden_flag.png|40px|link=]] || [[File:Icon GreenCheckmark.png|link=]] || [[File:Icon RedXCross.png|link=]] || [[File:Icon GreenCheckmark.png|link=]] || [[File:Icon RedXCross.png|link=]] || [[File:Icon GreenCheckmark.png|link=]] || [[File:Icon RedXCross.png|link=]] || [[File:Icon RedXCross.png|link=]]
| |
| − | |-
| |
| − | | {{Specs-Link|germ_radpanzer_90}} || [[File:Germany_flag.png|40px|link=]] || [[File:Icon GreenCheckmark.png|link=]] || [[File:Icon RedXCross.png|link=]] || [[File:Icon GreenCheckmark.png|link=]] || [[File:Icon RedXCross.png|link=]] || [[File:Icon GreenCheckmark.png|link=]] || [[File:Icon RedXCross.png|link=]] || [[File:Icon RedXCross.png|link=]]
| |
| − | |-
| |
| − | | {{Specs-Link|germ_raketenjagdpanzer_2_hot}} || [[File:Germany_flag.png|40px|link=]] || [[File:Icon GreenCheckmark.png|link=]] || [[File:Icon RedXCross.png|link=]] || [[File:Icon GreenCheckmark.png|link=]] || [[File:Icon RedXCross.png|link=]] || [[File:Icon GreenCheckmark.png|link=]] || [[File:Icon RedXCross.png|link=]] || [[File:Icon RedXCross.png|link=]]
| |
| − | |-
| |
| − | | {{Specs-Link|uk_rooikat_105_td}} || [[File:Britain_flag.png|40px|link=]] || [[File:Icon GreenCheckmark.png|link=]] || [[File:Icon RedXCross.png|link=]] || [[File:Icon RedXCross.png|link=]] || [[File:Icon GreenCheckmark.png|link=]] || [[File:Icon GreenCheckmark.png|link=]] || [[File:Icon RedXCross.png|link=]] || [[File:Icon RedXCross.png|link=]]
| |
| − | |-
| |
| − | | {{Specs-Link|uk_rooikat_76}} || [[File:Britain_flag.png|40px|link=]] || [[File:Icon GreenCheckmark.png|link=]] || [[File:Icon RedXCross.png|link=]] || [[File:Icon GreenCheckmark.png|link=]] || [[File:Icon RedXCross.png|link=]] || [[File:Icon GreenCheckmark.png|link=]] || [[File:Icon RedXCross.png|link=]] || [[File:Icon RedXCross.png|link=]]
| |
| − | |-
| |
| − | | {{Specs-Link|uk_centurion_shot_kal_d}} || [[File:Britain_flag.png|40px|link=]] || [[File:Icon RedXCross.png|link=]] || [[File:Icon RedXCross.png|link=]] || [[File:Icon RedXCross.png|link=]] || [[File:Icon RedXCross.png|link=]] || [[File:Icon GreenCheckmark.png|link=]] || [[File:Icon RedXCross.png|link=]] || [[File:Icon RedXCross.png|link=]]
| |
| − | |-
| |
| − | | {{Specs-Link|ussr_9p149}} || [[File:USSR_flag.png|40px|link=]] || [[File:Icon GreenCheckmark.png|link=]] || [[File:Icon RedXCross.png|link=]] || [[File:Icon RedXCross.png|link=]] || [[File:Icon GreenCheckmark.png|link=]] || [[File:Icon GreenCheckmark.png|link=]] || [[File:Icon RedXCross.png|link=]] || [[File:Icon RedXCross.png|link=]]
| |
| − | |-
| |
| − | | {{Specs-Link|germ_bmp_1_ddr}} || [[File:Germany_flag.png|40px|link=]] || [[File:Icon GreenCheckmark.png|link=]] || [[File:Icon RedXCross.png|link=]] || [[File:Icon GreenCheckmark.png|link=]] || [[File:Icon RedXCross.png|link=]] || [[File:Icon GreenCheckmark.png|link=]] || [[File:Icon RedXCross.png|link=]] || [[File:Icon GreenCheckmark.png|link=]]
| |
| − | |-
| |
| − | | {{Specs-Link|uk_stormer_hvm}} || [[File:Britain_flag.png|40px|link=]] || [[File:Icon GreenCheckmark.png|link=]] || [[File:Icon RedXCross.png|link=]] || [[File:Icon RedXCross.png|link=]] || [[File:Icon GreenCheckmark.png|link=]] || [[File:Icon GreenCheckmark.png|link=]] || [[File:Icon RedXCross.png|link=]] || [[File:Icon RedXCross.png|link=]]
| |
| − | |-
| |
| − | | {{Specs-Link|sw_strf_90c}} || [[File:Sweden_flag.png|40px|link=]] || [[File:Icon GreenCheckmark.png|link=]] || [[File:Icon RedXCross.png|link=]] || [[File:Icon RedXCross.png|link=]] || [[File:Icon GreenCheckmark.png|link=]] || [[File:Icon GreenCheckmark.png|link=]] || [[File:Icon RedXCross.png|link=]] || [[File:Icon RedXCross.png|link=]]
| |
| − | |-
| |
| − | | {{Specs-Link|sw_strf_9056}} || [[File:Sweden_flag.png|40px|link=]] || [[File:Icon RedXCross.png|link=]] || [[File:Icon GreenCheckmark.png|link=]] || [[File:Icon RedXCross.png|link=]] || [[File:Icon GreenCheckmark.png|link=]] || [[File:Icon GreenCheckmark.png|link=]] || [[File:Icon RedXCross.png|link=]] || [[File:Icon RedXCross.png|link=]]
| |
| − | |-
| |
| − | | {{Specs-Link|uk_fv102_striker}} || [[File:Britain_flag.png|40px|link=]] || [[File:Icon GreenCheckmark.png|link=]] || [[File:Icon RedXCross.png|link=]] || [[File:Icon RedXCross.png|link=]] || [[File:Icon GreenCheckmark.png|link=]] || [[File:Icon GreenCheckmark.png|link=]] || [[File:Icon RedXCross.png|link=]] || [[File:Icon RedXCross.png|link=]]
| |
| − | |-
| |
| − | | {{Specs-Link|sw_strv_101}} || [[File:Sweden_flag.png|40px|link=]] || [[File:Icon GreenCheckmark.png|link=]] || [[File:Icon RedXCross.png|link=]] || [[File:Icon GreenCheckmark.png|link=]] || [[File:Icon RedXCross.png|link=]] || [[File:Icon GreenCheckmark.png|link=]] || [[File:Icon RedXCross.png|link=]] || [[File:Icon RedXCross.png|link=]]
| |
| − | |-
| |
| − | | {{Specs-Link|sw_strv_103a}} || [[File:Sweden_flag.png|40px|link=]] || [[File:Icon GreenCheckmark.png|link=]] || [[File:Icon RedXCross.png|link=]] || [[File:Icon GreenCheckmark.png|link=]] || [[File:Icon RedXCross.png|link=]] || [[File:Icon GreenCheckmark.png|link=]] || [[File:Icon RedXCross.png|link=]] || [[File:Icon RedXCross.png|link=]]
| |
| − | |-
| |
| − | | {{Specs-Link|sw_strv_103c}} || [[File:Sweden_flag.png|40px|link=]] || [[File:Icon GreenCheckmark.png|link=]] || [[File:Icon RedXCross.png|link=]] || [[File:Icon GreenCheckmark.png|link=]] || [[File:Icon RedXCross.png|link=]] || [[File:Icon GreenCheckmark.png|link=]] || [[File:Icon RedXCross.png|link=]] || [[File:Icon RedXCross.png|link=]]
| |
| − | |-
| |
| − | | {{Specs-Link|sw_strv_121}} || [[File:Sweden_flag.png|40px|link=]] || [[File:Icon GreenCheckmark.png|link=]] || [[File:Icon RedXCross.png|link=]] || [[File:Icon RedXCross.png|link=]] || [[File:Icon GreenCheckmark.png|link=]] || [[File:Icon GreenCheckmark.png|link=]] || [[File:Icon RedXCross.png|link=]] || [[File:Icon RedXCross.png|link=]]
| |
| − | |-
| |
| − | | {{Specs-Link|sw_strv_122}} || [[File:Sweden_flag.png|40px|link=]] || [[File:Icon RedXCross.png|link=]] || [[File:Icon GreenCheckmark.png|link=]] || [[File:Icon RedXCross.png|link=]] || [[File:Icon GreenCheckmark.png|link=]] || [[File:Icon GreenCheckmark.png|link=]] || [[File:Icon RedXCross.png|link=]] || [[File:Icon RedXCross.png|link=]]
| |
| − | |-
| |
| − | | {{Specs-Link|sw_strv_103_0}} || [[File:Sweden_flag.png|40px|link=]] || [[File:Icon GreenCheckmark.png|link=]] || [[File:Icon RedXCross.png|link=]] || [[File:Icon GreenCheckmark.png|link=]] || [[File:Icon RedXCross.png|link=]] || [[File:Icon GreenCheckmark.png|link=]] || [[File:Icon RedXCross.png|link=]] || [[File:Icon RedXCross.png|link=]]
| |
| − | |-
| |
| − | | {{Specs-Link|ussr_su_122_54}} || [[File:USSR_flag.png|40px|link=]] || [[File:Icon RedXCross.png|link=]] || [[File:Icon RedXCross.png|link=]] || [[File:Icon RedXCross.png|link=]] || [[File:Icon RedXCross.png|link=]] || [[File:Icon GreenCheckmark.png|link=]] || [[File:Icon RedXCross.png|link=]] || [[File:Icon RedXCross.png|link=]]
| |
| − | |-
| |
| − | | {{Specs-Link|uk_fv438_swingfire}} || [[File:Britain_flag.png|40px|link=]] || [[File:Icon RedXCross.png|link=]] || [[File:Icon RedXCross.png|link=]] || [[File:Icon RedXCross.png|link=]] || [[File:Icon RedXCross.png|link=]] || [[File:Icon GreenCheckmark.png|link=]] || [[File:Icon RedXCross.png|link=]] || [[File:Icon RedXCross.png|link=]]
| |
| − | |-
| |
| − | | {{Specs-Link|ussr_t_10m}} || [[File:USSR_flag.png|40px|link=]] || [[File:Icon GreenCheckmark.png|link=]] || [[File:Icon RedXCross.png|link=]] || [[File:Icon GreenCheckmark.png|link=]] || [[File:Icon RedXCross.png|link=]] || [[File:Icon GreenCheckmark.png|link=]] || [[File:Icon RedXCross.png|link=]] || [[File:Icon GreenCheckmark.png|link=]]
| |
| − | |-
| |
| − | | {{Specs-Link|us_t54e1}} || [[File:USA_flag.png|40px|link=]] || [[File:Icon RedXCross.png|link=]] || [[File:Icon RedXCross.png|link=]] || [[File:Icon RedXCross.png|link=]] || [[File:Icon RedXCross.png|link=]] || [[File:Icon GreenCheckmark.png|link=]] || [[File:Icon RedXCross.png|link=]] || [[File:Icon RedXCross.png|link=]]
| |
| − | |-
| |
| − | | {{Specs-Link|ussr_t_55a}} || [[File:USSR_flag.png|40px|link=]] || [[File:Icon GreenCheckmark.png|link=]] || [[File:Icon RedXCross.png|link=]] || [[File:Icon GreenCheckmark.png|link=]] || [[File:Icon RedXCross.png|link=]] || [[File:Icon GreenCheckmark.png|link=]] || [[File:Icon RedXCross.png|link=]] || [[File:Icon GreenCheckmark.png|link=]]
| |
| − | |-
| |
| − | | {{Specs-Link|ussr_t_55_am}} || [[File:USSR_flag.png|40px|link=]] || [[File:Icon GreenCheckmark.png|link=]] || [[File:Icon RedXCross.png|link=]] || [[File:Icon GreenCheckmark.png|link=]] || [[File:Icon RedXCross.png|link=]] || [[File:Icon GreenCheckmark.png|link=]] || [[File:Icon RedXCross.png|link=]] || [[File:Icon GreenCheckmark.png|link=]]
| |
| − | |-
| |
| − | | {{Specs-Link|ussr_t_62}} || [[File:USSR_flag.png|40px|link=]] || [[File:Icon GreenCheckmark.png|link=]] || [[File:Icon RedXCross.png|link=]] || [[File:Icon GreenCheckmark.png|link=]] || [[File:Icon RedXCross.png|link=]] || [[File:Icon GreenCheckmark.png|link=]] || [[File:Icon RedXCross.png|link=]] || [[File:Icon GreenCheckmark.png|link=]]
| |
| − | |-
| |
| − | | {{Specs-Link|cn_t_62}} || [[File:China_flag.png|40px|link=]] || [[File:Icon GreenCheckmark.png|link=]] || [[File:Icon RedXCross.png|link=]] || [[File:Icon GreenCheckmark.png|link=]] || [[File:Icon RedXCross.png|link=]] || [[File:Icon GreenCheckmark.png|link=]] || [[File:Icon RedXCross.png|link=]] || [[File:Icon GreenCheckmark.png|link=]]
| |
| − | |-
| |
| − | | {{Specs-Link|ussr_t_62m1}} || [[File:USSR_flag.png|40px|link=]] || [[File:Icon GreenCheckmark.png|link=]] || [[File:Icon RedXCross.png|link=]] || [[File:Icon GreenCheckmark.png|link=]] || [[File:Icon RedXCross.png|link=]] || [[File:Icon GreenCheckmark.png|link=]] || [[File:Icon RedXCross.png|link=]] || [[File:Icon GreenCheckmark.png|link=]]
| |
| − | |-
| |
| − | | {{Specs-Link|ussr_t_64a_1971}} || [[File:USSR_flag.png|40px|link=]] || [[File:Icon GreenCheckmark.png|link=]] || [[File:Icon RedXCross.png|link=]] || [[File:Icon GreenCheckmark.png|link=]] || [[File:Icon RedXCross.png|link=]] || [[File:Icon GreenCheckmark.png|link=]] || [[File:Icon RedXCross.png|link=]] || [[File:Icon GreenCheckmark.png|link=]]
| |
| − | |-
| |
| − | | {{Specs-Link|ussr_t_64_b_1984}} || [[File:USSR_flag.png|40px|link=]] || [[File:Icon GreenCheckmark.png|link=]] || [[File:Icon RedXCross.png|link=]] || [[File:Icon GreenCheckmark.png|link=]] || [[File:Icon RedXCross.png|link=]] || [[File:Icon GreenCheckmark.png|link=]] || [[File:Icon RedXCross.png|link=]] || [[File:Icon GreenCheckmark.png|link=]]
| |
| − | |-
| |
| − | | {{Specs-Link|cn_type_69_2g}} || [[File:China_flag.png|40px|link=]] || [[File:Icon GreenCheckmark.png|link=]] || [[File:Icon RedXCross.png|link=]] || [[File:Icon GreenCheckmark.png|link=]] || [[File:Icon RedXCross.png|link=]] || [[File:Icon GreenCheckmark.png|link=]] || [[File:Icon RedXCross.png|link=]] || [[File:Icon RedXCross.png|link=]]
| |
| − | |-
| |
| − | | {{Specs-Link|ussr_t_72a}} || [[File:USSR_flag.png|40px|link=]] || [[File:Icon GreenCheckmark.png|link=]] || [[File:Icon RedXCross.png|link=]] || [[File:Icon GreenCheckmark.png|link=]] || [[File:Icon RedXCross.png|link=]] || [[File:Icon GreenCheckmark.png|link=]] || [[File:Icon RedXCross.png|link=]] || [[File:Icon GreenCheckmark.png|link=]]
| |
| − | |-
| |
| − | | {{Specs-Link|ussr_t_72b}} || [[File:USSR_flag.png|40px|link=]] || [[File:Icon GreenCheckmark.png|link=]] || [[File:Icon RedXCross.png|link=]] || [[File:Icon GreenCheckmark.png|link=]] || [[File:Icon RedXCross.png|link=]] || [[File:Icon GreenCheckmark.png|link=]] || [[File:Icon RedXCross.png|link=]] || [[File:Icon GreenCheckmark.png|link=]]
| |
| − | |-
| |
| − | | {{Specs-Link|ussr_t_80b}} || [[File:USSR_flag.png|40px|link=]] || [[File:Icon GreenCheckmark.png|link=]] || [[File:Icon RedXCross.png|link=]] || [[File:Icon GreenCheckmark.png|link=]] || [[File:Icon GreenCheckmark.png|link=]] || [[File:Icon GreenCheckmark.png|link=]] || [[File:Icon RedXCross.png|link=]] || [[File:Icon GreenCheckmark.png|link=]]
| |
| − | |-
| |
| − | | {{Specs-Link|ussr_t_80u}} || [[File:USSR_flag.png|40px|link=]] || [[File:Icon GreenCheckmark.png|link=]] || [[File:Icon RedXCross.png|link=]] || [[File:Icon GreenCheckmark.png|link=]] || [[File:Icon GreenCheckmark.png|link=]] || [[File:Icon GreenCheckmark.png|link=]] || [[File:Icon RedXCross.png|link=]] || [[File:Icon GreenCheckmark.png|link=]]
| |
| − | |-
| |
| − | | {{Specs-Link|us_t92}} || [[File:USA_flag.png|40px|link=]] || [[File:Icon RedXCross.png|link=]] || [[File:Icon RedXCross.png|link=]] || [[File:Icon RedXCross.png|link=]] || [[File:Icon RedXCross.png|link=]] || [[File:Icon GreenCheckmark.png|link=]] || [[File:Icon RedXCross.png|link=]] || [[File:Icon RedXCross.png|link=]]
| |
| − | |-
| |
| − | | {{Specs-Link|us_t95e1}} || [[File:USA_flag.png|40px|link=]] || [[File:Icon RedXCross.png|link=]] || [[File:Icon RedXCross.png|link=]] || [[File:Icon RedXCross.png|link=]] || [[File:Icon RedXCross.png|link=]] || [[File:Icon GreenCheckmark.png|link=]] || [[File:Icon RedXCross.png|link=]] || [[File:Icon RedXCross.png|link=]]
| |
| − | |-
| |
| − | | {{Specs-Link|germ_thyssen_henschel_tam}} || [[File:Germany_flag.png|40px|link=]] || [[File:Icon RedXCross.png|link=]] || [[File:Icon RedXCross.png|link=]] || [[File:Icon RedXCross.png|link=]] || [[File:Icon RedXCross.png|link=]] || [[File:Icon GreenCheckmark.png|link=]] || [[File:Icon RedXCross.png|link=]] || [[File:Icon RedXCross.png|link=]]
| |
| − | |-
| |
| − | | {{Specs-Link|jp_type_16}} || [[File:Japan_flag.png|40px|link=]] || [[File:Icon RedXCross.png|link=]] || [[File:Icon GreenCheckmark.png|link=]] || [[File:Icon RedXCross.png|link=]] || [[File:Icon GreenCheckmark.png|link=]] || [[File:Icon GreenCheckmark.png|link=]] || [[File:Icon RedXCross.png|link=]] || [[File:Icon RedXCross.png|link=]]
| |
| − | |-
| |
| − | | {{Specs-Link|jp_type_61}} || [[File:Japan_flag.png|40px|link=]] || [[File:Icon RedXCross.png|link=]] || [[File:Icon RedXCross.png|link=]] || [[File:Icon RedXCross.png|link=]] || [[File:Icon RedXCross.png|link=]] || [[File:Icon GreenCheckmark.png|link=]] || [[File:Icon RedXCross.png|link=]] || [[File:Icon RedXCross.png|link=]]
| |
| − | |-
| |
| − | | {{Specs-Link|cn_type_69}} || [[File:China_flag.png|40px|link=]] || [[File:Icon GreenCheckmark.png|link=]] || [[File:Icon RedXCross.png|link=]] || [[File:Icon GreenCheckmark.png|link=]] || [[File:Icon RedXCross.png|link=]] || [[File:Icon GreenCheckmark.png|link=]] || [[File:Icon RedXCross.png|link=]] || [[File:Icon GreenCheckmark.png|link=]]
| |
| − | |-
| |
| − | | {{Specs-Link|jp_type_74}} || [[File:Japan_flag.png|40px|link=]] || [[File:Icon GreenCheckmark.png|link=]] || [[File:Icon RedXCross.png|link=]] || [[File:Icon GreenCheckmark.png|link=]] || [[File:Icon RedXCross.png|link=]] || [[File:Icon GreenCheckmark.png|link=]] || [[File:Icon RedXCross.png|link=]] || [[File:Icon GreenCheckmark.png|link=]]
| |
| − | |-
| |
| − | | {{Specs-Link|jp_type_74_mod_g_kai}} || [[File:Japan_flag.png|40px|link=]] || [[File:Icon GreenCheckmark.png|link=]] || [[File:Icon RedXCross.png|link=]] || [[File:Icon RedXCross.png|link=]] || [[File:Icon GreenCheckmark.png|link=]] || [[File:Icon GreenCheckmark.png|link=]] || [[File:Icon RedXCross.png|link=]] || [[File:Icon RedXCross.png|link=]]
| |
| − | |-
| |
| − | | {{Specs-Link|jp_type_75_mlrs}} || [[File:Japan_flag.png|40px|link=]] || [[File:Icon RedXCross.png|link=]] || [[File:Icon RedXCross.png|link=]] || [[File:Icon RedXCross.png|link=]] || [[File:Icon RedXCross.png|link=]] || [[File:Icon GreenCheckmark.png|link=]] || [[File:Icon RedXCross.png|link=]] || [[File:Icon RedXCross.png|link=]]
| |
| − | |-
| |
| − | | {{Specs-Link|jp_type_75}} || [[File:Japan_flag.png|40px|link=]] || [[File:Icon RedXCross.png|link=]] || [[File:Icon RedXCross.png|link=]] || [[File:Icon RedXCross.png|link=]] || [[File:Icon RedXCross.png|link=]] || [[File:Icon GreenCheckmark.png|link=]] || [[File:Icon RedXCross.png|link=]] || [[File:Icon RedXCross.png|link=]]
| |
| − | |-
| |
| − | | {{Specs-Link|jp_type_87}} || [[File:Japan_flag.png|40px|link=]] || [[File:Icon RedXCross.png|link=]] || [[File:Icon RedXCross.png|link=]] || [[File:Icon RedXCross.png|link=]] || [[File:Icon RedXCross.png|link=]] || [[File:Icon GreenCheckmark.png|link=]] || [[File:Icon RedXCross.png|link=]] || [[File:Icon GreenCheckmark.png|link=]]
| |
| − | |-
| |
| − | | {{Specs-Link|jp_type_89}} || [[File:Japan_flag.png|40px|link=]] || [[File:Icon GreenCheckmark.png|link=]] || [[File:Icon RedXCross.png|link=]] || [[File:Icon RedXCross.png|link=]] || [[File:Icon GreenCheckmark.png|link=]] || [[File:Icon GreenCheckmark.png|link=]] || [[File:Icon RedXCross.png|link=]] || [[File:Icon RedXCross.png|link=]]
| |
| − | |-
| |
| − | | {{Specs-Link|jp_type_90}} || [[File:Japan_flag.png|40px|link=]] || [[File:Icon GreenCheckmark.png|link=]] || [[File:Icon RedXCross.png|link=]] || [[File:Icon RedXCross.png|link=]] || [[File:Icon GreenCheckmark.png|link=]] || [[File:Icon GreenCheckmark.png|link=]] || [[File:Icon RedXCross.png|link=]] || [[File:Icon RedXCross.png|link=]]
| |
| − | |-
| |
| − | | {{Specs-Link|jp_type_90b}} || [[File:Japan_flag.png|40px|link=]] || [[File:Icon GreenCheckmark.png|link=]] || [[File:Icon RedXCross.png|link=]] || [[File:Icon RedXCross.png|link=]] || [[File:Icon GreenCheckmark.png|link=]] || [[File:Icon GreenCheckmark.png|link=]] || [[File:Icon RedXCross.png|link=]] || [[File:Icon RedXCross.png|link=]]
| |
| − | |-
| |
| − | | {{Specs-Link|jp_type_93}} || [[File:Japan_flag.png|40px|link=]] || [[File:Icon RedXCross.png|link=]] || [[File:Icon GreenCheckmark.png|link=]] || [[File:Icon RedXCross.png|link=]] || [[File:Icon GreenCheckmark.png|link=]] || [[File:Icon GreenCheckmark.png|link=]] || [[File:Icon RedXCross.png|link=]] || [[File:Icon RedXCross.png|link=]]
| |
| − | |-
| |
| − | | {{Specs-Link|sw_udes_33}} || [[File:Sweden_flag.png|40px|link=]] || [[File:Icon GreenCheckmark.png|link=]] || [[File:Icon RedXCross.png|link=]] || [[File:Icon GreenCheckmark.png|link=]] || [[File:Icon RedXCross.png|link=]] || [[File:Icon GreenCheckmark.png|link=]] || [[File:Icon RedXCross.png|link=]] || [[File:Icon RedXCross.png|link=]]
| |
| − | |-
| |
| − | | {{Specs-Link|uk_vickers_mbt_mk_1}} || [[File:Britain_flag.png|40px|link=]] || [[File:Icon RedXCross.png|link=]] || [[File:Icon RedXCross.png|link=]] || [[File:Icon RedXCross.png|link=]] || [[File:Icon RedXCross.png|link=]] || [[File:Icon GreenCheckmark.png|link=]] || [[File:Icon RedXCross.png|link=]] || [[File:Icon RedXCross.png|link=]]
| |
| − | |-
| |
| − | | {{Specs-Link|uk_vickers_mk7}} || [[File:Britain_flag.png|40px|link=]] || [[File:Icon GreenCheckmark.png|link=]] || [[File:Icon RedXCross.png|link=]] || [[File:Icon RedXCross.png|link=]] || [[File:Icon GreenCheckmark.png|link=]] || [[File:Icon GreenCheckmark.png|link=]] || [[File:Icon RedXCross.png|link=]] || [[File:Icon RedXCross.png|link=]]
| |
| − | |-
| |
| − | | {{Specs-Link|germ_vt_1_2}} || [[File:Germany_flag.png|40px|link=]] || [[File:Icon GreenCheckmark.png|link=]] || [[File:Icon RedXCross.png|link=]] || [[File:Icon GreenCheckmark.png|link=]] || [[File:Icon RedXCross.png|link=]] || [[File:Icon GreenCheckmark.png|link=]] || [[File:Icon RedXCross.png|link=]] || [[File:Icon RedXCross.png|link=]]
| |
| − | |-
| |
| − | | {{Specs-Link|uk_fv510_isv}} || [[File:Britain_flag.png|40px|link=]] || [[File:Icon GreenCheckmark.png|link=]] || [[File:Icon RedXCross.png|link=]] || [[File:Icon RedXCross.png|link=]] || [[File:Icon GreenCheckmark.png|link=]] || [[File:Icon GreenCheckmark.png|link=]] || [[File:Icon RedXCross.png|link=]] || [[File:Icon RedXCross.png|link=]]
| |
| − | |-
| |
| − | | {{Specs-Link|us_xm1_chrysler}} || [[File:USA_flag.png|40px|link=]] || [[File:Icon GreenCheckmark.png|link=]] || [[File:Icon RedXCross.png|link=]] || [[File:Icon RedXCross.png|link=]] || [[File:Icon GreenCheckmark.png|link=]] || [[File:Icon GreenCheckmark.png|link=]] || [[File:Icon RedXCross.png|link=]] || [[File:Icon RedXCross.png|link=]]
| |
| − | |-
| |
| − | | {{Specs-Link|us_xm1_gm}} || [[File:USA_flag.png|40px|link=]] || [[File:Icon GreenCheckmark.png|link=]] || [[File:Icon RedXCross.png|link=]] || [[File:Icon RedXCross.png|link=]] || [[File:Icon GreenCheckmark.png|link=]] || [[File:Icon GreenCheckmark.png|link=]] || [[File:Icon RedXCross.png|link=]] || [[File:Icon RedXCross.png|link=]]
| |
| − | |-
| |
| − | | {{Specs-Link|us_xm_803}} || [[File:USA_flag.png|40px|link=]] || [[File:Icon GreenCheckmark.png|link=]] || [[File:Icon RedXCross.png|link=]] || [[File:Icon GreenCheckmark.png|link=]] || [[File:Icon RedXCross.png|link=]] || [[File:Icon GreenCheckmark.png|link=]] || [[File:Icon RedXCross.png|link=]] || [[File:Icon GreenCheckmark.png|link=]]
| |
| − | |-
| |
| − | | {{Specs-Link|cn_type_86}} || [[File:China_flag.png|40px|link=]] || [[File:Icon GreenCheckmark.png|link=]] || [[File:Icon RedXCross.png|link=]] || [[File:Icon GreenCheckmark.png|link=]] || [[File:Icon RedXCross.png|link=]] || [[File:Icon GreenCheckmark.png|link=]] || [[File:Icon RedXCross.png|link=]] || [[File:Icon GreenCheckmark.png|link=]]
| |
| − | |-
| |
| − | | {{Specs-Link|ussr_zprk_2s6}} || [[File:USSR_flag.png|40px|link=]] || [[File:Icon GreenCheckmark.png|link=]] || [[File:Icon RedXCross.png|link=]] || [[File:Icon RedXCross.png|link=]] || [[File:Icon GreenCheckmark.png|link=]] || [[File:Icon GreenCheckmark.png|link=]] || [[File:Icon RedXCross.png|link=]] || [[File:Icon GreenCheckmark.png|link=]]
| |
| − | |-
| |
| − | | {{Specs-Link|ussr_zsu_23_4}} || [[File:USSR_flag.png|40px|link=]] || [[File:Icon GreenCheckmark.png|link=]] || [[File:Icon RedXCross.png|link=]] || [[File:Icon RedXCross.png|link=]] || [[File:Icon RedXCross.png|link=]] || [[File:Icon GreenCheckmark.png|link=]] || [[File:Icon RedXCross.png|link=]] || [[File:Icon GreenCheckmark.png|link=]]
| |
| − | |-
| |
| − | | {{Specs-Link|cn_type_59d}} || [[File:China_flag.png|40px|link=]] || [[File:Icon GreenCheckmark.png|link=]] || [[File:Icon RedXCross.png|link=]] || [[File:Icon RedXCross.png|link=]] || [[File:Icon GreenCheckmark.png|link=]] || [[File:Icon GreenCheckmark.png|link=]] || [[File:Icon RedXCross.png|link=]] || [[File:Icon RedXCross.png|link=]]
| |
| − | |-
| |
| − | | {{Specs-Link|cn_ztz_96}} || [[File:China_flag.png|40px|link=]] || [[File:Icon GreenCheckmark.png|link=]] || [[File:Icon RedXCross.png|link=]] || [[File:Icon GreenCheckmark.png|link=]] || [[File:Icon RedXCross.png|link=]] || [[File:Icon GreenCheckmark.png|link=]] || [[File:Icon RedXCross.png|link=]] || [[File:Icon RedXCross.png|link=]]
| |
| − | |-
| |
| − | | {{Specs-Link|cn_ztz_96a}} || [[File:China_flag.png|40px|link=]] || [[File:Icon GreenCheckmark.png|link=]] || [[File:Icon RedXCross.png|link=]] || [[File:Icon RedXCross.png|link=]] || [[File:Icon GreenCheckmark.png|link=]] || [[File:Icon GreenCheckmark.png|link=]] || [[File:Icon RedXCross.png|link=]] || [[File:Icon RedXCross.png|link=]]
| |
| | |- | | |- |
| | |} | | |} |
| | | | |
| − | ===Helicopters=== | + | === Modules === |
| − | {| class="wikitable sortable" style="text-align:center" | + | {| class="wikitable" |
| | + | ! colspan="1" | Tier |
| | + | ! colspan="2" | Flight performance |
| | + | ! colspan="1" | Survivability |
| | + | ! colspan="1" | Weaponry |
| | |- | | |- |
| − | ! rowspan="2" | Vehicle !! rowspan="2" | Country !! Pilot !! Gunner !! colspan="2" | Gunsight
| + | | I |
| | + | | Fuselage repair |
| | + | | Radiator |
| | + | | |
| | + | | Offensive 7 mm |
| | |- | | |- |
| − | ! Infrared !! Infrared !! Infrared !! Thermal
| + | | II |
| | + | | |
| | + | | Compressor |
| | + | | |
| | + | | |
| | |- | | |- |
| − | | {{Specs-Link|a_129_a}} || [[File:{{#unit:a_129_a|country}}_flag.png|40px|link=]] || [[File:Icon GreenCheckmark.png|link=]] || [[File:Icon GreenCheckmark.png|link=]] || [[File:Icon RedXCross.png|link=]] || [[File:Icon GreenCheckmark.png|link=]] | + | | III |
| | + | | Wings repair |
| | + | | Engine |
| | + | | Airframe |
| | + | | New 7 mm MGs |
| | |- | | |- |
| − | | {{Specs-Link|ah_1f}} || [[File:{{#unit:ah_1f|country}}_flag.png|40px|link=]] || [[File:Icon GreenCheckmark.png|link=]] || [[File:Icon GreenCheckmark.png|link=]] || [[File:Icon RedXCross.png|link=]] || [[File:Icon GreenCheckmark.png|link=]] | + | | IV |
| − | |-
| + | | |
| − | | {{Specs-Link|ah_1g}} || [[File:{{#unit:ah_1g|country}}_flag.png|40px|link=]] || [[File:Icon GreenCheckmark.png|link=]] || [[File:Icon GreenCheckmark.png|link=]] || [[File:Icon RedXCross.png|link=]] || [[File:Icon RedXCross.png|link=]]
| + | | |
| − | |-
| + | | Cover |
| − | | {{Specs-Link|ah_1s_late}} || [[File:{{#unit:ah_1s_late|country}}_flag.png|40px|link=]] || [[File:Icon GreenCheckmark.png|link=]] || [[File:Icon GreenCheckmark.png|link=]] || [[File:Icon RedXCross.png|link=]] || [[File:Icon GreenCheckmark.png|link=]]
| + | | |
| − | |-
| |
| − | | {{Specs-Link|ah_1s_early}} || [[File:{{#unit:ah_1s_early|country}}_flag.png|40px|link=]] || [[File:Icon GreenCheckmark.png|link=]] || [[File:Icon GreenCheckmark.png|link=]] || [[File:Icon RedXCross.png|link=]] || [[File:Icon RedXCross.png|link=]]
| |
| − | |-
| |
| − | | {{Specs-Link|ah_1s}} || [[File:{{#unit:ah_1s|country}}_flag.png|40px|link=]] || [[File:Icon GreenCheckmark.png|link=]] || [[File:Icon GreenCheckmark.png|link=]] || [[File:Icon RedXCross.png|link=]] || [[File:Icon GreenCheckmark.png|link=]]
| |
| − | |-
| |
| − | | {{Specs-Link|ah_1z}} || [[File:{{#unit:ah_1z|country}}_flag.png|40px|link=]] || [[File:Icon GreenCheckmark.png|link=]] || [[File:Icon GreenCheckmark.png|link=]] || [[File:Icon RedXCross.png|link=]] || [[File:Icon GreenCheckmark.png|link=]]
| |
| − | |-
| |
| − | | {{Specs-Link|ah_64a}} || [[File:{{#unit:ah_64a|country}}_flag.png|40px|link=]] || [[File:Icon GreenCheckmark.png|link=]] || [[File:Icon GreenCheckmark.png|link=]] || [[File:Icon GreenCheckmark.png|link=]] || [[File:Icon GreenCheckmark.png|link=]]
| |
| − | |-
| |
| − | | {{Specs-Link|ah_64a_peten}} || [[File:{{#unit:ah_64a_peten|country}}_flag.png|40px|link=]] || [[File:Icon GreenCheckmark.png|link=]] || [[File:Icon GreenCheckmark.png|link=]] || [[File:Icon GreenCheckmark.png|link=]] || [[File:Icon GreenCheckmark.png|link=]]
| |
| − | |-
| |
| − | | {{Specs-Link|ah_64d}} || [[File:{{#unit:ah_64d|country}}_flag.png|40px|link=]] || [[File:Icon GreenCheckmark.png|link=]] || [[File:Icon GreenCheckmark.png|link=]] || [[File:Icon GreenCheckmark.png|link=]] || [[File:Icon GreenCheckmark.png|link=]]
| |
| − | |-
| |
| − | | {{Specs-Link|ah_64d_japan}} || [[File:{{#unit:ah_64d_japan|country}}_flag.png|40px|link=]] || [[File:Icon GreenCheckmark.png|link=]] || [[File:Icon GreenCheckmark.png|link=]] || [[File:Icon GreenCheckmark.png|link=]] || [[File:Icon GreenCheckmark.png|link=]]
| |
| − | |-
| |
| − | | {{Specs-Link|ah_mk1}} || [[File:{{#unit:ah_mk1|country}}_flag.png|40px|link=]] || [[File:Icon GreenCheckmark.png|link=]] || [[File:Icon GreenCheckmark.png|link=]] || [[File:Icon GreenCheckmark.png|link=]] || [[File:Icon GreenCheckmark.png|link=]]
| |
| − | |-
| |
| − | | {{Specs-Link|bo_105cb2}} || [[File:{{#unit:bo_105cb2|country}}_flag.png|40px|link=]] || [[File:Icon GreenCheckmark.png|link=]] || [[File:Icon GreenCheckmark.png|link=]] || [[File:Icon RedXCross.png|link=]] || [[File:Icon RedXCross.png|link=]]
| |
| − | |-
| |
| − | | {{Specs-Link|bo_105pah1}} || [[File:{{#unit:bo_105pah1|country}}_flag.png|40px|link=]] || [[File:Icon GreenCheckmark.png|link=]] || [[File:Icon GreenCheckmark.png|link=]] || [[File:Icon RedXCross.png|link=]] || [[File:Icon RedXCross.png|link=]]
| |
| − | |-
| |
| − | | {{Specs-Link|bo_105pah1_a1}} || [[File:{{#unit:bo_105pah1_a1|country}}_flag.png|40px|link=]] || [[File:Icon GreenCheckmark.png|link=]] || [[File:Icon GreenCheckmark.png|link=]] || [[File:Icon RedXCross.png|link=]] || [[File:Icon RedXCross.png|link=]]
| |
| − | |-
| |
| − | | {{Specs-Link|tiger_had_france}} || [[File:{{#unit:tiger_had_france|country}}_flag.png|40px|link=]] || [[File:Icon GreenCheckmark.png|link=]] || [[File:Icon GreenCheckmark.png|link=]] || [[File:Icon GreenCheckmark.png|link=]] || [[File:Icon GreenCheckmark.png|link=]]
| |
| − | |-
| |
| − | | {{Specs-Link|tiger_hap_france}} || [[File:{{#unit:tiger_hap_france|country}}_flag.png|40px|link=]] || [[File:Icon GreenCheckmark.png|link=]] || [[File:Icon GreenCheckmark.png|link=]] || [[File:Icon GreenCheckmark.png|link=]] || [[File:Icon GreenCheckmark.png|link=]]
| |
| − | |-
| |
| − | | {{Specs-Link|tiger_uht}} || [[File:{{#unit:tiger_uht|country}}_flag.png|40px|link=]] || [[File:Icon GreenCheckmark.png|link=]] || [[File:Icon GreenCheckmark.png|link=]] || [[File:Icon GreenCheckmark.png|link=]] || [[File:Icon GreenCheckmark.png|link=]]
| |
| − | |-
| |
| − | | {{Specs-Link|g_lynx}} || [[File:{{#unit:g_lynx|country}}_flag.png|40px|link=]] || [[File:Icon GreenCheckmark.png|link=]] || [[File:Icon GreenCheckmark.png|link=]] || [[File:Icon RedXCross.png|link=]] || [[File:Icon GreenCheckmark.png|link=]]
| |
| − | |-
| |
| − | | {{Specs-Link|h_34}} || [[File:{{#unit:h_34|country}}_flag.png|40px|link=]] || [[File:Icon GreenCheckmark.png|link=]] || [[File:Icon GreenCheckmark.png|link=]] || [[File:Icon RedXCross.png|link=]] || [[File:Icon RedXCross.png|link=]]
| |
| − | |-
| |
| − | | {{Specs-Link|h_34_france}} || [[File:{{#unit:h_34_france|country}}_flag.png|40px|link=]] || [[File:Icon GreenCheckmark.png|link=]] || [[File:Icon GreenCheckmark.png|link=]] || [[File:Icon RedXCross.png|link=]] || [[File:Icon RedXCross.png|link=]]
| |
| − | |-
| |
| − | | {{Specs-Link|iar_316b}} || [[File:{{#unit:iar_316b|country}}_flag.png|40px|link=]] || [[File:Icon GreenCheckmark.png|link=]] || [[File:Icon GreenCheckmark.png|link=]] || [[File:Icon RedXCross.png|link=]] || [[File:Icon RedXCross.png|link=]]
| |
| − | |-
| |
| − | | {{Specs-Link|ka_29}} || [[File:{{#unit:ka_29|country}}_flag.png|40px|link=]] || [[File:Icon GreenCheckmark.png|link=]] || [[File:Icon GreenCheckmark.png|link=]] || [[File:Icon RedXCross.png|link=]] || [[File:Icon RedXCross.png|link=]]
| |
| − | |-
| |
| − | | {{Specs-Link|ka_50}} || [[File:{{#unit:ka_50|country}}_flag.png|40px|link=]] || [[File:Icon GreenCheckmark.png|link=]] || [[File:Icon GreenCheckmark.png|link=]] || [[File:Icon RedXCross.png|link=]] || [[File:Icon RedXCross.png|link=]]
| |
| − | |-
| |
| − | | {{Specs-Link|ka_52}} || [[File:{{#unit:ka_52|country}}_flag.png|40px|link=]] || [[File:Icon GreenCheckmark.png|link=]] || [[File:Icon GreenCheckmark.png|link=]] || [[File:Icon RedXCross.png|link=]] || [[File:Icon GreenCheckmark.png|link=]]
| |
| − | |-
| |
| − | | {{Specs-Link|lynx_ah_mk1}} || [[File:{{#unit:lynx_ah_mk1|country}}_flag.png|40px|link=]] || [[File:Icon GreenCheckmark.png|link=]] || [[File:Icon GreenCheckmark.png|link=]] || [[File:Icon RedXCross.png|link=]] || [[File:Icon GreenCheckmark.png|link=]]
| |
| − | |-
| |
| − | | {{Specs-Link|mi_4av}} || [[File:{{#unit:mi_4av|country}}_flag.png|40px|link=]] || [[File:Icon GreenCheckmark.png|link=]] || [[File:Icon GreenCheckmark.png|link=]] || [[File:Icon RedXCross.png|link=]] || [[File:Icon RedXCross.png|link=]]
| |
| − | |-
| |
| − | | {{Specs-Link|mi_24a}} || [[File:{{#unit:mi_24a|country}}_flag.png|40px|link=]] || [[File:Icon GreenCheckmark.png|link=]] || [[File:Icon GreenCheckmark.png|link=]] || [[File:Icon RedXCross.png|link=]] || [[File:Icon RedXCross.png|link=]]
| |
| − | |-
| |
| − | | {{Specs-Link|mi_24d}} || [[File:{{#unit:mi_24d|country}}_flag.png|40px|link=]] || [[File:Icon GreenCheckmark.png|link=]] || [[File:Icon GreenCheckmark.png|link=]] || [[File:Icon RedXCross.png|link=]] || [[File:Icon RedXCross.png|link=]]
| |
| − | |-
| |
| − | | {{Specs-Link|mi_24p}} || [[File:{{#unit:mi_24p|country}}_flag.png|40px|link=]] || [[File:Icon GreenCheckmark.png|link=]] || [[File:Icon GreenCheckmark.png|link=]] || [[File:Icon RedXCross.png|link=]] || [[File:Icon RedXCross.png|link=]]
| |
| − | |-
| |
| − | | {{Specs-Link|mi_24p_german}} || [[File:{{#unit:mi_24p_german|country}}_flag.png|40px|link=]] || [[File:Icon GreenCheckmark.png|link=]] || [[File:Icon GreenCheckmark.png|link=]] || [[File:Icon RedXCross.png|link=]] || [[File:Icon RedXCross.png|link=]]
| |
| − | |-
| |
| − | | {{Specs-Link|mi_24p_german_hfs80}} || [[File:{{#unit:mi_24p_german_hfs80|country}}_flag.png|40px|link=]] || [[File:Icon GreenCheckmark.png|link=]] || [[File:Icon GreenCheckmark.png|link=]] || [[File:Icon RedXCross.png|link=]] || [[File:Icon RedXCross.png|link=]]
| |
| − | |-
| |
| − | | {{Specs-Link|mi_24v}} || [[File:{{#unit:mi_24v|country}}_flag.png|40px|link=]] || [[File:Icon GreenCheckmark.png|link=]] || [[File:Icon GreenCheckmark.png|link=]] || [[File:Icon RedXCross.png|link=]] || [[File:Icon RedXCross.png|link=]]
| |
| − | |-
| |
| − | | {{Specs-Link|mi_28n}} || [[File:{{#unit:mi_28n|country}}_flag.png|40px|link=]] || [[File:Icon GreenCheckmark.png|link=]] || [[File:Icon GreenCheckmark.png|link=]] || [[File:Icon RedXCross.png|link=]] || [[File:Icon GreenCheckmark.png|link=]]
| |
| − | |-
| |
| − | | {{Specs-Link|mi_35m}} || [[File:{{#unit:mi_35m|country}}_flag.png|40px|link=]] || [[File:Icon GreenCheckmark.png|link=]] || [[File:Icon GreenCheckmark.png|link=]] || [[File:Icon RedXCross.png|link=]] || [[File:Icon GreenCheckmark.png|link=]]
| |
| − | |-
| |
| − | | {{Specs-Link|sa_313b_france}} || [[File:{{#unit:sa_313b_france|country}}_flag.png|40px|link=]] || [[File:Icon GreenCheckmark.png|link=]] || [[File:Icon GreenCheckmark.png|link=]] || [[File:Icon RedXCross.png|link=]] || [[File:Icon RedXCross.png|link=]]
| |
| − | |-
| |
| − | | {{Specs-Link|sa_313b}} || [[File:{{#unit:sa_313b|country}}_flag.png|40px|link=]] || [[File:Icon GreenCheckmark.png|link=]] || [[File:Icon GreenCheckmark.png|link=]] || [[File:Icon RedXCross.png|link=]] || [[File:Icon RedXCross.png|link=]]
| |
| − | |-
| |
| − | | {{Specs-Link|sa_316b}} || [[File:{{#unit:sa_316b|country}}_flag.png|40px|link=]] || [[File:Icon GreenCheckmark.png|link=]] || [[File:Icon GreenCheckmark.png|link=]] || [[File:Icon RedXCross.png|link=]] || [[File:Icon RedXCross.png|link=]]
| |
| − | |-
| |
| − | | {{Specs-Link|sa_341f}} || [[File:{{#unit:sa_341f|country}}_flag.png|40px|link=]] || [[File:Icon GreenCheckmark.png|link=]] || [[File:Icon GreenCheckmark.png|link=]] || [[File:Icon RedXCross.png|link=]] || [[File:Icon GreenCheckmark.png|link=]]
| |
| − | |-
| |
| − | | {{Specs-Link|sa_342m}} || [[File:{{#unit:sa_342m|country}}_flag.png|40px|link=]] || [[File:Icon GreenCheckmark.png|link=]] || [[File:Icon GreenCheckmark.png|link=]] || [[File:Icon RedXCross.png|link=]] || [[File:Icon GreenCheckmark.png|link=]]
| |
| − | |-
| |
| − | | {{Specs-Link|scout_ah_mk1}} || [[File:{{#unit:scout_ah_mk1|country}}_flag.png|40px|link=]] || [[File:Icon GreenCheckmark.png|link=]] || [[File:Icon GreenCheckmark.png|link=]] || [[File:Icon RedXCross.png|link=]] || [[File:Icon RedXCross.png|link=]]
| |
| − | |- | |
| − | | {{Specs-Link|uh_1b}} || [[File:{{#unit:uh_1b|country}}_flag.png|40px|link=]] || [[File:Icon GreenCheckmark.png|link=]] || [[File:Icon GreenCheckmark.png|link=]] || [[File:Icon RedXCross.png|link=]] || [[File:Icon RedXCross.png|link=]] | |
| − | |- | |
| − | | {{Specs-Link|uh_1b_japan}} || [[File:{{#unit:uh_1b_japan|country}}_flag.png|40px|link=]] || [[File:Icon GreenCheckmark.png|link=]] || [[File:Icon GreenCheckmark.png|link=]] || [[File:Icon RedXCross.png|link=]] || [[File:Icon RedXCross.png|link=]] | |
| − | |-
| |
| − | | {{Specs-Link|uh_1c}} || [[File:{{#unit:uh_1c|country}}_flag.png|40px|link=]] || [[File:Icon GreenCheckmark.png|link=]] || [[File:Icon GreenCheckmark.png|link=]] || [[File:Icon RedXCross.png|link=]] || [[File:Icon RedXCross.png|link=]]
| |
| − | |-
| |
| − | | {{Specs-Link|uh_1c_xm_30}} || [[File:{{#unit:uh_1c_xm_30|country}}_flag.png|40px|link=]] || [[File:Icon GreenCheckmark.png|link=]] || [[File:Icon GreenCheckmark.png|link=]] || [[File:Icon RedXCross.png|link=]] || [[File:Icon RedXCross.png|link=]]
| |
| − | |-
| |
| − | | {{Specs-Link|uh_1d}} || [[File:{{#unit:uh_1d|country}}_flag.png|40px|link=]] || [[File:Icon GreenCheckmark.png|link=]] || [[File:Icon GreenCheckmark.png|link=]] || [[File:Icon RedXCross.png|link=]] || [[File:Icon RedXCross.png|link=]]
| |
| − | |-
| |
| − | | {{Specs-Link|wasp_has_mk1}} || [[File:{{#unit:wasp_has_mk1|country}}_flag.png|40px|link=]] || [[File:Icon GreenCheckmark.png|link=]] || [[File:Icon GreenCheckmark.png|link=]] || [[File:Icon RedXCross.png|link=]] || [[File:Icon RedXCross.png|link=]]
| |
| | |- | | |- |
| | |} | | |} |
| | + | |
| | + | === Pros and cons === |
| | + | <!-- ''Summarise and briefly evaluate the vehicle in terms of its characteristics and combat effectiveness. Mark its pros and cons in the bulleted list. Try not to use more than 6 points for each of the characteristics. Avoid using categorical definitions such as "bad", "good" and the like - use substitutions with softer forms such as "inadequate" and "effective".'' --> |
| | + | |
| | + | '''Pros:''' |
| | + | |
| | + | * Very manoeuvrable |
| | + | * Weaponry is good enough for most uses |
| | + | * Often underestimated by enemy pilots, allowing you to take them by surprise |
| | + | * Improved fuel capacity over predecessors |
| | + | * Good speed by biplane standards |
| | + | |
| | + | '''Cons:''' |
| | + | |
| | + | * Susceptible to tracer fire, fabric-covered and non-sealing fuel tanks |
| | + | * Slow in comparison to other reserve aircraft |
| | + | * No armour or protection at all |
| | + | * Open exposed cockpit |
| | + | * Smallest calibre machine guns to work with |
| | + | * Poor forward visibility (simulator battles) |
| | + | |
| | + | == History == |
| | + | <!--''Describe the history of the creation and combat usage of the aircraft in more detail than in the introduction. If the historical reference turns out to be too long, take it to a separate article, taking a link to the article about the vehicle and adding a block "/History" (example: <nowiki>https://wiki.warthunder.com/(Vehicle-name)/History</nowiki>) and add a link to it here using the <code>main</code> template. Be sure to reference text and sources by using <code><nowiki><ref></ref></nowiki></code>, as well as adding them at the end of the article with <code><nowiki><references /></nowiki></code>. This section may also include the vehicle's dev blog entry (if applicable) and the in-game encyclopedia description (under <code><nowiki>=== In-game description ===</nowiki></code>, also if applicable).''--> |
| | + | === History and development === |
| | + | |
| | + | In the early 1930s, the most advanced biplane aircraft in Germany was the Arado Ar 65, though it was quickly becoming obsolete. The German Luftwaffe, operating in secrecy against resolutions set after World War I, did not want to fall behind in technology. Though military aircraft and vehicles could not be built, trainer and transport aircraft were designed and built but had a hidden dual purpose which would allow them to easily be converted into fighters and bombers. Heinkel Flugzeugwerke was one such aircraft manufacturer which was designing what was to be the Ar 65’s replacement. Günter brothers, Walter and Seigfried were the lead designers on a new biplane design in 1931 which labelled as an "advanced trainer", would easily be converted into a fighter when necessary. Early prototypes were designated He 49 with several variants resultant of modifications and upgrades performed to address shortcomings found during testing. |
| | + | |
| | + | In 1933, the Luftwaffe ordered the He 49 (now designated He 51) into pre-production. The design of the aircraft is relatively simple, all-metal frame construction with a fabric covering. Like many early aircraft, it was powered by a v-12 engine, this one a glycol-cooled (ram air radiator) BMW VI engine and two 7.92 mm machine guns mounted in the upper fuselage/cowl of the aircraft allowing the pilot to point the aircraft where he wanted to shoot and then fire without having to make any considerations for convergence, with the exception of bullet drop over longer distances, however, when fired up close, the guns did considerable damage. |
| | + | |
| | + | By the time the aircraft was rolling off the production lines in 1935, the He 51 A was already considered outdated which goes to show how fast technology was developing during these years. Modifications were made to the aircraft and the next in line production variant the He 51 B was produced in greater numbers and enjoyed early air superiority in the Spanish Civil War, only until modern Soviet fighters and bombers showed up. |
| | + | |
| | + | Seeing that the He 51 B was no longer a capable fighter even as a short stint as a night fighter, it was quickly modified and the final production variant, the He 51 C rolled out as a dedicated ground-attack variant. The He 51 C was a very capable ground-attack fighter, coupled with its extreme manoeuvrability and slow loiter speed, the aircraft could attack a ground target and within a few seconds could have the plane turned around and be attacking again before any ground defences had the chance to regroup and retaliate. Towards the end of the Spanish Civil War, losses of the He 51 were starting to mount up as anti-air technology was catching up and more and more of the slower biplane were picked off from ground weapons. |
| | + | |
| | + | It was during this time when World War I ace pilot Wolfram von Richthofen flew the He 51 in a ground attack role, through this process, he refined and honed his skills as a close support fighter. The tactics he learned through trial and error became invaluable later on during World War II when as a Field Marshal, he passed on these tactics and how to effectively dive bomb with aircraft. Though only 55 aircraft survived front-line service through 1938, they continued to be of use through the first few years of World War II as the aircraft they were originally designed to be, advanced trainers. |
| | + | |
| | + | === In-game description === |
| | + | A single-seat biplane of composite structure with fixed landing gear. This aircraft was designed by Heinkel Flugzeugwerke AG under the guidance of the brothers Siegfried and Walter Günter. The He 51 fighter was a serious upgrade of the single-seat He 49 fighter, which had flown for the first time in November 1932. |
| | + | |
| | + | The He 49 was a single-strut biplane of composite structure with a BMW liquid-cooled engine. Among German planes of that period, it was set apart by its fuselage, which had extremely clean aerodynamic contours and a retractable radiator. |
| | + | |
| | + | The designers themselves were not very satisfied with their creation, believing that its characteristics could be significantly improved. A fourth prototype was built, with a new designation: He 51a. |
| | + | |
| | + | The dimensions and the design of the aircraft remained almost unchanged, but the He 51a was noticeably different from its predecessor in various details. The vertical empennage was completely redesigned. The retractable radiator was replaced with a ducted one. The new ailerons had balance and trim tabs, and the wing pylon's parallel struts were replaced with N-type struts. The pyramidal landing gear with a common axle was replaced with individual V struts featuring hydromechanical shock-absorbers. The struts and the wheels now had fairings, and a tail skid was used instead of a tail wheel. As a whole, the He 51 turned out to be noticeably more elegant, which significantly improved its flight characteristics. |
| | + | |
| | + | The plane's power unit was a 500 hp Bayerische Motoren Werke BMW VI twelve-cylinder liquid-cooled engine that could provide a power of up to 750 hp during short-term uprating. |
| | + | |
| | + | The He 51 was armed with two fuselage-mounted synchronous 7.92 mm Rheinmetall-Borsig MG 17 machine guns with 500 rounds each. |
| | + | |
| | + | The leadership of the German Ministry of Aviation saw the He 51 as an aircraft of extreme importance for the reviving Luftwaffe. In April 1935, the production of He 51 A-1 fighters began. The production aircraft differed from the prototype: it had a cut-down fuselage spine fairing behind the cockpit, a slightly changed tail skid design, and extended engine exhaust pipes. |
| | | | |
| | == Media == | | == Media == |
| − | <!--Excellent additions to the article would be video guides, screenshots from the game, and photos.-->
| + | ''Excellent additions to the article would be video guides, screenshots from the game, and photos.'' |
| − | {{Youtube-gallery|E941IRtmZdE|'''The Shooting Range #165''' - ''Pages of History'' section at 05:30 discusses the development of night vision systems.|aFj2LOWdj5o|'''The Shooting Range #165''' - ''Tactics & Strategy'' section at 09:00 discusses the night battles.}}
| + | |
| | + | == See also == |
| | + | <!--''Links to the articles on the War Thunder Wiki that you think will be useful for the reader, for example:'' |
| | + | * ''reference to the series of the aircraft;'' |
| | + | * ''links to approximate analogues of other nations and research trees.''--> |
| | + | |
| | + | ;Aircraft of comparable role, configuration and era |
| | + | |
| | + | * Fiat [[CR.32 (Family)|CR.32]] |
| | + | * Gloster [[Gladiator (Family)|Gladiator]] |
| | + | * Polikarpov [[I-15 (Family)|I-15]] |
| | + | * Kawasaki [[Ki-10 (Family)|Ki-10]] |
| | | | |
| − | ==External Links== | + | == External links == |
| | + | ''Paste links to sources and external resources, such as:'' |
| | | | |
| − | * [https://warthunder.com/en/news/6336-development-night-vision-devices-and-thermal-sights-en [Devblog<nowiki>]</nowiki> Night Vision Devices and Thermal Sights] | + | * ''topic on the official game forum;'' |
| | + | * ''encyclopedia page on the aircraft;'' |
| | + | * ''other literature.'' |
| | | | |
| − | [[Category:Game mechanics]]
| + | {{AirManufacturer Heinkel}} |
| | + | {{Germany fighters}} |
He 51 A-1
Research:Free
Purchase:Free
| This page is about the German biplane He 51 A-1. For other uses, see He 51 (Family).
|
Description
The He 51 A-1 is a rank I German fighter
with a battle rating of 1.0 (AB/RB/SB). This fighter has been in the game since the start of the Open Beta Test prior to Update 1.27.
The Heinkel H 51 was one of the first aircraft which the German Luftwaffe (still operating in secrecy) tasked to be built. Brothers and talented aircraft designers Walter and Seigfried Günter were working for Heinkel Flugzeugwerke in 1931 when they developed the design for an advanced trainer biplane which was designated He 49. Though touted as a trainer, the aircraft had been designed as a fighter and with a few minor conversions, could be an operational fighter aircraft. After several iterations, the Luftwaffe ordered this aircraft into production as the He 51 in 1933.
Currently in service with Germany was the older Arado Ar 65 biplane which the He 51 was slated to replace, unfortunately by the time the He 51 A rolled off the production lines, it was already outdated, however, it wasn’t until after 150 were built that important modifications were made which resulted in the upgraded He 51 B. Of the 450 B variants built, 46 of them were modified by replacing the fixed landing gear with floats to allow the fighter to land on water. Later another 100 were built as the He 51 C variant which was configured as a light ground-attack aircraft.
Used initially in the Spanish Civil War, the He 51 showed to dominate over older biplanes, however, the advantage was short-lived as modern Soviet fighters and bombers arrived and the He 51 could no longer keep up with them. Operations for the He 51 converted to night fighting, however not long after that it was designated solely for ground attack operations. Though not seen as a fantastic aircraft, behind the scenes it had set the stage for the Luftwaffe years later when close support tactics were developed by Field Marshal Wolfram von Richthofen while flying a He 51.
When paired up against other reserve fighters in the game, the He 51 can hold its own, though it will not win any speed records, nor will its machine guns out fire some of the early Soviet fighters, however, there is a place for the He 51 A-1. Diving straight into a cluster of fighters rolling around with each other is not the best tactic, it is better to pick a target and go after it, however, if cornered, the slower speed and manoeuvrability of the He 51 can get it out of tight spaces and potentially down a few enemy aircraft in the process. With two 7 mm machine guns, tracer rounds work best against early aircraft, especially those which are fabric covered and have non-sealing fuel tanks. Though the pilot may find themselves up-tiered against mono-wing aircraft of faster speeds, the He 51 A-1 can quickly turn the tables and put the faster enemy fighter on the receiving end of a stream of bullets, and only a few hits are enough to hobble the enemy aircraft allowing the Heinkel to catch up and finish the job.
General info
Flight Performance
| Characteristics
|
| Stock
|
Max Speed
(km/h at 4,000 m)
|
Max altitude
(meters)
|
Turn time
(seconds)
|
Rate of climb
(meters/second)
|
Take-off run
(meters)
|
| AB
|
RB
|
AB
|
RB
|
AB
|
RB
|
| 291 |
282 |
7700 |
13.8 |
14.7 |
10.4 |
10.4 |
294
|
| Upgraded
|
Max Speed
(km/h at 4,000 m)
|
Max altitude
(meters)
|
Turn time
(seconds)
|
Rate of climb
(meters/second)
|
Take-off run
(meters)
|
| AB
|
RB
|
AB
|
RB
|
AB
|
RB
|
| 316 |
305 |
7700 |
13.6 |
13.7 |
16.7 |
13 |
294
|
Details
| Features
|
| Combat flaps
|
Take-off flaps
|
Landing flaps
|
Air brakes
|
Arrestor gear
|
| ✓ |
✓ |
✓ |
X |
✓
|
| Limits
|
Wing-break speed
(km/h)
|
Gear limit
(km/h)
|
Combat flaps
(km/h)
|
Max Static G
|
| +
|
-
|
| 500 |
500 |
520 |
~11 |
~5
|
| Optimal velocities
|
Ailerons
(km/h)
|
Rudder
(km/h)
|
Elevators
(km/h)
|
Radiator
(km/h)
|
| < 180 |
< 300 |
< 300 |
> 190
|
| Compressor (RB/SB)
|
| Setting 1
|
| Optimal altitude
|
100% Engine power
|
WEP Engine power
|
| 0 m |
750 hp |
N/A
|
Survivability and armour
- No armour plating
- No armour glazing
- All critical components located in front of aircraft (fuel, pilot, engine, controls)
Like many biplanes before and contemporaries of the He 51 A-1, armour was not an option, survival was based on the pilot’s grit. Armour added weight, weight the early biplanes could not afford to carry and still be a viable fighter. Flying in open cockpit and fabric-covered aircraft, the only protection the pilot had was to place his engine between him and his enemy, otherwise, the pilot was vulnerable. Typically aircraft like this have the engine at the nose of the aircraft, followed by the fuel tank and then the cockpit, all three critical components relatively crammed together. The pilot’s toolbox had to contain situational awareness as he needed to know where the enemy was around him. Tracer rounds could easily ignite the fabric-covered aircraft or large fuel tanks, so it was imperative the pilot was the attacker, not the one being attacked and knowing where the enemies are at can help avoid getting shot at.
Armaments
Offensive armament
The He 51 A-1 is armed with:
- 2 x 7.92 mm MG 17 machine guns, nose-mounted (500 rpg = 1,000 total)
When comparing offensive armament between reserve aircraft, the He 51 A-1 is on par with most nations, however, it lacks when compared to aircraft from France, Great Britain or the Soviet Union and to some extent the United States and their use of a heavy machine gun. The He 51 found itself between two great wars and to some extent was a fossil in regards to its armament. For a light biplane fighter, the He 51 A-1 only sported two 7.92 mm machine guns with a few options of ammunition types available for use.
Some of the reserve aircraft the He 51 A-1 will face utilise a heavy machine gun, up to 4 x 7 mm machine guns and a couple of premium versions even pack on a massive (massive for a reserve aircraft) 20 mm autocannon. Though coming in at a severe weapons disadvantage in some instances, the He 51 A-1 can still dominate a match and come out the king of the hill. While the two 7.92 mm MG 17 machine guns may seem insufficient, they do a job and they do it well, though it may take a bit of practice to land the bullets where they will do the most damage.
Default ammunition what every pilot starts out with, though not the best it will cause critical hits and down enemy aircraft, though it may take a bit more patience and a few more rounds. When available to upgrade the ammunition belt modules, two other choices come into play which will allow the pilot to change tactics and fight more on their terms. Tracer ammunition is a fantastic choice for use against early biplane and monoplane fighters, especially since most of these aircraft are covered in fabric (as opposed to later aircraft covered in metal skin) and most if not all of the early fuel tanks are not self-sealing or do not vent exhaust gasses into the fuel tanks to stave off potential fireballs.
Tracer rounds, though do little impact damage, their powerful punch comes from igniting aircraft on fire causing the enemy to fall to the earth in a flaming heap. One huge disadvantage to the tracer rounds is that it lets everyone know where you are with the bright coloured rounds flying through the air. To combat this, some pilots will switch stealth rounds, which just means that this belt is without any tracer rounds. Two advantages here are first, the removal of the tracer round adds in another damage round and secondly, there are no tracer rounds to give away your position, especially if your first shots don’t land where you want them to, enemy pilots will need to spend precious seconds looking around to find where the shots came from before reacting or they may react blindly and to your advantage. One challenge with stealth rounds is they are more difficult to tell where they are landing especially with distance shots and will take practice to know where they are hitting, though when used in close, they are easier to track and pack in a surprise for the enemy pilot they may not be able to recover from.
Usage in battles
As a bi-plane, the cockpit view offers only a restricted panorama and it is difficult to anticipate targets with a wing in your face. As with all bi-planes, this characteristic tends to dissuade its use in SB. That said the He 51 has a singularly good rate of climb in comparison to most other equivalent battle rating aircraft allowing it to play the energy tactic well. This is good because the He 51 is a slow bird and has trouble catching virtually any other plane in level flight. However, given its slow speed, it also sports an exceptional turn radius allowing it to turn a death-spiral into a turkey shoot.
Manual Engine Control
| MEC elements
|
| Mixer
|
Pitch
|
Radiator
|
Supercharger
|
Turbocharger
|
| Oil
|
Water
|
Type
|
| Controllable |
Not controllable
Not auto controlled |
Not controllable
Not auto controlled |
Controllable
Not auto controlled |
Combined |
Not controllable
1 gear |
Not controllable
|
Modules
| Tier
|
Flight performance
|
Survivability
|
Weaponry
|
| I
|
Fuselage repair
|
Radiator
|
|
Offensive 7 mm
|
| II
|
|
Compressor
|
|
|
| III
|
Wings repair
|
Engine
|
Airframe
|
New 7 mm MGs
|
| IV
|
|
|
Cover
|
|
Pros and cons
Pros:
- Very manoeuvrable
- Weaponry is good enough for most uses
- Often underestimated by enemy pilots, allowing you to take them by surprise
- Improved fuel capacity over predecessors
- Good speed by biplane standards
Cons:
- Susceptible to tracer fire, fabric-covered and non-sealing fuel tanks
- Slow in comparison to other reserve aircraft
- No armour or protection at all
- Open exposed cockpit
- Smallest calibre machine guns to work with
- Poor forward visibility (simulator battles)
History
History and development
In the early 1930s, the most advanced biplane aircraft in Germany was the Arado Ar 65, though it was quickly becoming obsolete. The German Luftwaffe, operating in secrecy against resolutions set after World War I, did not want to fall behind in technology. Though military aircraft and vehicles could not be built, trainer and transport aircraft were designed and built but had a hidden dual purpose which would allow them to easily be converted into fighters and bombers. Heinkel Flugzeugwerke was one such aircraft manufacturer which was designing what was to be the Ar 65’s replacement. Günter brothers, Walter and Seigfried were the lead designers on a new biplane design in 1931 which labelled as an "advanced trainer", would easily be converted into a fighter when necessary. Early prototypes were designated He 49 with several variants resultant of modifications and upgrades performed to address shortcomings found during testing.
In 1933, the Luftwaffe ordered the He 49 (now designated He 51) into pre-production. The design of the aircraft is relatively simple, all-metal frame construction with a fabric covering. Like many early aircraft, it was powered by a v-12 engine, this one a glycol-cooled (ram air radiator) BMW VI engine and two 7.92 mm machine guns mounted in the upper fuselage/cowl of the aircraft allowing the pilot to point the aircraft where he wanted to shoot and then fire without having to make any considerations for convergence, with the exception of bullet drop over longer distances, however, when fired up close, the guns did considerable damage.
By the time the aircraft was rolling off the production lines in 1935, the He 51 A was already considered outdated which goes to show how fast technology was developing during these years. Modifications were made to the aircraft and the next in line production variant the He 51 B was produced in greater numbers and enjoyed early air superiority in the Spanish Civil War, only until modern Soviet fighters and bombers showed up.
Seeing that the He 51 B was no longer a capable fighter even as a short stint as a night fighter, it was quickly modified and the final production variant, the He 51 C rolled out as a dedicated ground-attack variant. The He 51 C was a very capable ground-attack fighter, coupled with its extreme manoeuvrability and slow loiter speed, the aircraft could attack a ground target and within a few seconds could have the plane turned around and be attacking again before any ground defences had the chance to regroup and retaliate. Towards the end of the Spanish Civil War, losses of the He 51 were starting to mount up as anti-air technology was catching up and more and more of the slower biplane were picked off from ground weapons.
It was during this time when World War I ace pilot Wolfram von Richthofen flew the He 51 in a ground attack role, through this process, he refined and honed his skills as a close support fighter. The tactics he learned through trial and error became invaluable later on during World War II when as a Field Marshal, he passed on these tactics and how to effectively dive bomb with aircraft. Though only 55 aircraft survived front-line service through 1938, they continued to be of use through the first few years of World War II as the aircraft they were originally designed to be, advanced trainers.
In-game description
A single-seat biplane of composite structure with fixed landing gear. This aircraft was designed by Heinkel Flugzeugwerke AG under the guidance of the brothers Siegfried and Walter Günter. The He 51 fighter was a serious upgrade of the single-seat He 49 fighter, which had flown for the first time in November 1932.
The He 49 was a single-strut biplane of composite structure with a BMW liquid-cooled engine. Among German planes of that period, it was set apart by its fuselage, which had extremely clean aerodynamic contours and a retractable radiator.
The designers themselves were not very satisfied with their creation, believing that its characteristics could be significantly improved. A fourth prototype was built, with a new designation: He 51a.
The dimensions and the design of the aircraft remained almost unchanged, but the He 51a was noticeably different from its predecessor in various details. The vertical empennage was completely redesigned. The retractable radiator was replaced with a ducted one. The new ailerons had balance and trim tabs, and the wing pylon's parallel struts were replaced with N-type struts. The pyramidal landing gear with a common axle was replaced with individual V struts featuring hydromechanical shock-absorbers. The struts and the wheels now had fairings, and a tail skid was used instead of a tail wheel. As a whole, the He 51 turned out to be noticeably more elegant, which significantly improved its flight characteristics.
The plane's power unit was a 500 hp Bayerische Motoren Werke BMW VI twelve-cylinder liquid-cooled engine that could provide a power of up to 750 hp during short-term uprating.
The He 51 was armed with two fuselage-mounted synchronous 7.92 mm Rheinmetall-Borsig MG 17 machine guns with 500 rounds each.
The leadership of the German Ministry of Aviation saw the He 51 as an aircraft of extreme importance for the reviving Luftwaffe. In April 1935, the production of He 51 A-1 fighters began. The production aircraft differed from the prototype: it had a cut-down fuselage spine fairing behind the cockpit, a slightly changed tail skid design, and extended engine exhaust pipes.
Media
Excellent additions to the article would be video guides, screenshots from the game, and photos.
See also
- Aircraft of comparable role, configuration and era
External links
Paste links to sources and external resources, such as:
- topic on the official game forum;
- encyclopedia page on the aircraft;
- other literature.