Difference between pages "T-34-85 Gai" and "F7F-1"
Colok76286 (talk | contribs) (→Media: Added video) |
Colok76286 (talk | contribs) (→Media: Added skin + video) |
||
| Line 1: | Line 1: | ||
| − | {{Specs-Card|code= | + | {{Specs-Card |
| + | |code=f7f1 | ||
| + | |cockpit=cockpit_f7f1.jpg | ||
| + | }} | ||
{{About | {{About | ||
| − | | about = | + | | about = American twin-engine fighter '''{{PAGENAME}}''' |
| − | | usage = | + | | usage = the gift version |
| − | | link = | + | | link = F7F-3 |
}} | }} | ||
== Description == | == Description == | ||
| − | <!-- ''In the description, the first part should be about the history of the creation and combat usage of the | + | <!-- ''In the description, the first part should be about the history of and the creation and combat usage of the aircraft, as well as its key features. In the second part, tell the reader about the aircraft in the game. Insert a screenshot of the vehicle, so that if the novice player does not remember the vehicle by name, he will immediately understand what kind of vehicle the article is talking about.'' --> |
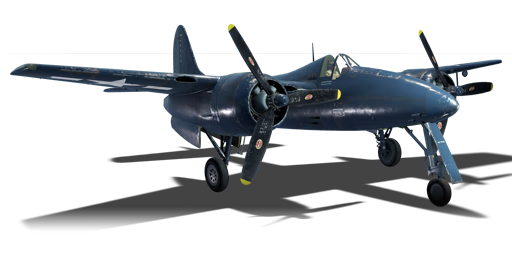
[[File:GarageImage_{{PAGENAME}}.jpg|420px|thumb|left]] | [[File:GarageImage_{{PAGENAME}}.jpg|420px|thumb|left]] | ||
| − | {{ | + | {{Break}} |
| − | The '''{{Specs|name}}''' is a rank {{Specs|rank}} | + | The '''{{Specs|name}}''' is a rank {{Specs|rank}} American twin-engine fighter {{Battle-rating}}. It was introduced in [[Update 1.43]]. |
| − | + | The Tigercat performs decently at medium to low altitudes. It has good firepower and performs well in a dive and can achieve high speeds. At sea level, it has a decent climb but at 3 km the climb rate drops substantially making fighting high altitude fighters in its battle range difficult. It is recommended to side-climb to 5 km and accelerate to a high speed before engaging the enemy. At its battle rating, it will be out-climbed by just about every fighter. The best defensive manoeuvre is attempting to outrun your opponent and engage in head-on engagements. For opponents, you cannot outrun the only hope is to lure them low in a dive where the plane performs better, but you will only be able to make a few turns before you run out of energy so make them count. | |
| + | |||
| + | WEP on this plane is limited and does not add considerable power until supercharger gear 2 is activated so it is advised not to waste it until you reach about 2,500 m altitudes. At certain low altitudes, WEP actually reduces the engine power. The automatic engine controls will overheat the plane at 100% throttle necessitating the need for manual engine controls to open the radiators. The F7F-1 is difficult to manage and likely contains several oversights in the game that have yet to be addressed. | ||
== General info == | == General info == | ||
| − | === | + | === Flight performance === |
| − | + | ''Describe how the aircraft behaves in the air. Speed, manoeuvrability, acceleration and allowable loads - these are the most important characteristics of the vehicle.'' | |
| − | |||
| − | |||
| − | |||
| − | |||
| − | |||
| − | {| class="wikitable" | + | {| class="wikitable" style="text-align:center" width="70%" |
| + | ! rowspan="2" | Characteristics | ||
| + | ! colspan="2" | Max Speed<br>(km/h at 5,182 m) | ||
| + | ! rowspan="2" | Max altitude<br>(metres) | ||
| + | ! colspan="2" | Turn time<br>(seconds) | ||
| + | ! colspan="2" | Rate of climb<br>(metres/second) | ||
| + | ! rowspan="2" | Take-off run<br>(metres) | ||
|- | |- | ||
| − | ! | + | ! AB !! RB !! AB !! RB !! AB !! RB |
|- | |- | ||
| − | | | + | ! Stock |
| + | | 659 || 641 || rowspan="2" | {{Specs|ceiling}} || 26.3 || 27.1 || 20.0 || 20.0 || rowspan="2" | 444 | ||
|- | |- | ||
| − | | | + | ! Upgraded |
| + | | ___ || 688 || __._ || 25.0 || __._ || 25.0 | ||
|- | |- | ||
| − | |||
| − | |||
| − | |||
|} | |} | ||
| − | |||
| − | |||
| − | |||
| − | |||
| − | |||
| − | |||
| − | |||
| − | |||
| − | |||
| − | |||
| − | |||
| − | |||
| − | |||
| − | |||
| − | |||
| − | |||
| − | |||
| − | |||
| − | |||
| − | |||
| − | + | ==== Details ==== | |
| − | + | {| class="wikitable" style="text-align:center" width="50%" | |
| − | |||
| − | |||
| − | {| class="wikitable" style="text-align:center" | ||
| − | |||
| − | |||
| − | |||
| − | |||
| − | |||
| − | |||
| − | |||
| − | |||
| − | |||
| − | |||
| − | |||
| − | |||
| − | |||
| − | |||
| − | |||
| − | |||
| − | |||
| − | |||
|- | |- | ||
| − | | | + | ! colspan="5" | Features |
|- | |- | ||
| − | + | ! Combat flaps !! Take-off flaps !! Landing flaps !! Air brakes !! Arrestor gear | |
| − | |||
| − | ! | ||
| − | |||
| − | ! | ||
| − | ! | ||
| − | ! | ||
| − | ! | ||
|- | |- | ||
| − | | | + | | ✓ || ✓ || ✓ || X || ✓ <!-- ✓ --> |
|- | |- | ||
|} | |} | ||
| − | + | {| class="wikitable" style="text-align:center" width="50%" | |
| − | {| class="wikitable | ||
| − | |||
| − | |||
| − | |||
| − | |||
| − | |||
| − | |||
| − | |||
| − | |||
| − | |||
| − | |||
| − | |||
| − | |||
| − | |||
| − | |||
| − | |||
| − | |||
| − | |||
| − | |||
| − | |||
| − | |||
| − | |||
| − | |||
| − | |||
| − | |||
| − | |||
| − | |||
| − | |||
| − | |||
| − | |||
| − | |||
| − | |||
| − | |||
| − | |||
|- | |- | ||
| − | | | + | ! colspan="7" | Limits |
|- | |- | ||
| − | | | + | ! rowspan="2" | Wings (km/h) |
| − | + | ! rowspan="2" | Gear (km/h) | |
| − | + | ! colspan="3" | Flaps (km/h) | |
| − | + | ! colspan="2" | Max Static G | |
| − | |||
| − | |||
| − | |||
| − | |||
| − | |||
|- | |- | ||
| − | ! | + | ! Combat !! Take-off !! Landing !! + !! - |
| − | ! | ||
| − | ! | ||
| − | ! | ||
| − | ! | ||
| − | ! | ||
| − | ! | ||
| − | ! | ||
|- | |- | ||
| − | | | + | | {{Specs|destruction|body}} || {{Specs|destruction|gear}} || 478 || 478 || 278 || ~10 || ~8 |
|- | |- | ||
|} | |} | ||
| − | |||
{| class="wikitable" style="text-align:center" | {| class="wikitable" style="text-align:center" | ||
| − | |||
|- | |- | ||
| − | ! | + | ! colspan="4" | Optimal velocities (km/h) |
| − | |||
| − | |||
|- | |- | ||
| − | ! | + | ! Ailerons !! Rudder !! Elevators !! Radiator |
| − | |||
|- | |- | ||
| − | + | | < 467 || < 450 || < 555 || > 317 | |
| − | | | ||
|- | |- | ||
|} | |} | ||
| − | |||
| − | |||
| − | |||
| − | |||
{| class="wikitable" style="text-align:center" | {| class="wikitable" style="text-align:center" | ||
|- | |- | ||
| − | ! colspan=" | + | ! colspan="3" | Compressor (RB/SB) |
|- | |- | ||
| − | ! colspan=" | + | ! colspan="3" | Setting 1 |
|- | |- | ||
| − | ! | + | ! Optimal altitude |
| − | ! | + | ! 100% Engine power |
| − | ! | + | ! WEP Engine power |
| − | |||
| − | |||
| − | |||
| − | |||
| − | |||
| − | |||
|- | |- | ||
| − | + | | 850 m || 2,100 hp || 2,468 hp | |
|- | |- | ||
| − | ! colspan=" | + | ! colspan="3" | Setting 2 |
|- | |- | ||
| − | ! | + | ! Optimal altitude |
| − | ! | + | ! 100% Engine power |
| − | ! | + | ! WEP Engine power |
| − | |||
|- | |- | ||
| − | | | + | | 5,337 m || 1,600 hp || 1,880 hp |
|- | |- | ||
|} | |} | ||
| − | == | + | === Survivability and armour === |
| − | + | ''Examine the survivability of the aircraft. Note how vulnerable the structure is and how secure the pilot is, whether the fuel tanks are armoured, etc. Describe the armour, if there is any, and also mention the vulnerability of other critical aircraft systems.'' | |
| − | + | == Armaments == | |
| + | === Offensive armament === | ||
| + | <!-- ''Describe the offensive armament of the aircraft, if any. Describe how effective the cannons and machine guns are in a battle, and also what belts or drums are better to use. If there is no offensive weaponry, delete this subsection.'' --> | ||
| + | {{main|M3 (20 mm)|M2 Browning (12.7 mm)}} | ||
| − | + | The '''''{{PAGENAME}}''''' is armed with: | |
| + | * 4 x 20 mm M3 cannons, wing-mounted (200 rpg = 800 total) | ||
| + | * 4 x 12.7 mm M2 Browning machine guns, chin-mounted (400 rpg = 1,600 total) | ||
| − | + | === Suspended armament === | |
| + | <!-- ''Describe the aircraft's suspended armament: additional cannons under the wings, bombs, rockets and torpedoes. This section is especially important for bombers and attackers. If there is no suspended weaponry remove this subsection.'' --> | ||
| + | {{main|AN-M64A1 (500 lb)|AN-M65A1 (1,000 lb)}} | ||
| − | + | The '''''{{PAGENAME}}''''' can be outfitted with the following ordnance: | |
| + | * Without load | ||
| + | * 2 x 500 lb AN-M64A1 bombs (1,000 lb total) | ||
| + | * 1 x 1,000 lb AN-M65A1 bomb (1,000 lb total) | ||
| + | * 1 x 1,000 lb AN-M65A1 bomb + 2 x 500 lb AN-M64A1 bombs (2,000 lb total) | ||
| − | '' | + | == Usage in battles == |
| + | <!-- ''Describe the tactics of playing in the aircraft, the features of using aircraft in a team and advice on tactics. Refrain from creating a "guide" - do not impose a single point of view, but instead, give the reader food for thought. Examine the most dangerous enemies and give recommendations on fighting them. If necessary, note the specifics of the game in different modes (AB, RB, SB).'' --> | ||
| + | The main armament is extremely powerful. Equipped with 4 x 20 mm cannon and M2 Brownings in the nose, expect to knock planes out of the skies frequently. Unlike many other planes that have more spread out armament, the Tigercat packs a massive punch. If one cannon shell hits, the rest will as well. Do not waste time researching additional ammo belts for the 20 mm; the Default has the most HE shells of any other belt except for Stealth. However, it is recommended you research "New 20 mm Cannons" and "12.7 mm Ammo Belts", as the Cannon jam quite quickly and the stealth ammo for the 12.7 mm is far more effective than the Default. | ||
| − | + | Use the armament wisely- do not use the cannon until you are about .5-.6 km from your target. However, the 12.7 mm is great for harassing targets out to more than 1 km. A good hit to the wings of any plane will bring it down, while 2-3 bursts to the fuselage will grind a plane to pieces. The Tigercat's devastating armament is also perfect for hunting down troublesome German bombers like the Ju 288 C. | |
| − | The | + | The F7F-1 also has great late game potential due to its armament. If you aim well, you can take down light pillboxes with short, controlled bursts. Lightly armoured vehicles normally only need 1 or 2 taps. Unlike its event vehicle variant which has vastly better ordnance options, the F7F-1 is average at best in this department. With the maximum load being 2 x 500 lb and 1 x 1,000 lb bomb, don't really expect to take down many hard targets before going back to rearm. The secondary weapons are not recommended for use, as they will reduce performance considerably- also, due to the high BR, jets will exist and will intercept you before you are halfway to your bombing target due to their speed. |
| − | + | Performance-wise, the Tigercat has a maximum speed of 668 km/h (415 mph) at an altitude of 5,190 meters (17,028 feet), or 695 km/h (431 mph) at the same altitude with WEP. At sea level, the maximum speed is 619 km/h (384.6 mph), or 638 km/h (396.4 mph) with WEP. The Tigercat can climb to an altitude of 3,000 meters (9,843 feet) in 155 seconds (135 seconds with WEP), giving it an average climb rate of 19.3 meters (63.3 feet) per second (22.2 meters or 72.8 feet per second with WEP). It can perform a full horizontal turn at 3,000 meters in 24 seconds at a speed of 500 km/h (310.6 mph), as well as perform a full vertical turn at the same altitude and speed, which it completes in 27 seconds. | |
| − | + | === Manual Engine Control === | |
| − | + | {| class="wikitable" style="text-align:center" | |
| − | + | |- | |
| − | + | ! colspan="7" | MEC elements | |
| − | + | |- | |
| − | + | ! rowspan="2" | Mixer | |
| − | + | ! rowspan="2" | Pitch | |
| − | + | ! colspan="3" | Radiator | |
| − | + | ! rowspan="2" | Supercharger | |
| − | + | ! rowspan="2" | Turbocharger | |
| − | + | |- | |
| − | + | ! Oil !! Water !! Type | |
| − | + | |- | |
| − | + | | Controllable || Controllable<br>Auto control available || Controllable<br>Auto control available || Controllable<br>Auto control available || Separate || Controllable<br>2 gears || Not controllable | |
| − | + | |- | |
| + | |} | ||
=== Modules === | === Modules === | ||
{| class="wikitable" | {| class="wikitable" | ||
! Tier | ! Tier | ||
| − | ! colspan="2" | | + | ! colspan="2" | Flight performance |
| − | ! | + | ! Survivability |
| − | ! colspan="2" | | + | ! colspan="2" | Weaponry |
|- | |- | ||
| I | | I | ||
| − | | | + | | Fuselage repair |
| + | | Radiator | ||
| + | | | ||
| + | | Offensive 12 mm | ||
| | | | ||
| − | |||
| − | |||
| − | |||
|- | |- | ||
| II | | II | ||
| − | |||
| − | |||
| − | |||
| − | |||
| | | | ||
| + | | Compressor | ||
| + | | Airframe | ||
| + | | New 12 mm MGs | ||
| + | | FMBC mk.1 | ||
|- | |- | ||
| III | | III | ||
| − | | | + | | Wings repair |
| + | | Engine | ||
| + | | | ||
| + | | Offensive 20 mm | ||
| | | | ||
| − | |||
| − | |||
| − | |||
|- | |- | ||
| IV | | IV | ||
| − | |||
| − | |||
| − | |||
| − | |||
| | | | ||
| + | | Engine injection | ||
| + | | Cover | ||
| + | | New 20 mm cannons | ||
| + | | FLBC mk.1 | ||
|- | |- | ||
|} | |} | ||
=== Pros and cons === | === Pros and cons === | ||
| − | <!-- ''Summarise and briefly evaluate the vehicle in terms of its characteristics and combat effectiveness. Mark its pros and cons in | + | <!-- ''Summarise and briefly evaluate the vehicle in terms of its characteristics and combat effectiveness. Mark its pros and cons in the bulleted list. Try not to use more than 6 points for each of the characteristics. Avoid using categorical definitions such as "bad", "good" and the like - use substitutions with softer forms such as "inadequate" and "effective".'' --> |
'''Pros:''' | '''Pros:''' | ||
| − | * | + | * Punishing armament |
| − | * | + | * 12.7 mm guns are mounted on the nose and the 20mm AN/M3's are mounted very close to the fuselage, resulting in very little convergence |
| − | * | + | * Reasonable turn rate |
| − | * | + | * Excellent energy retention |
| − | * | + | * Excellent ammunition capacity |
| − | + | * Very high speed in dive and at level flight | |
| − | * | + | * Very good cockpit visibility |
| − | * | + | * Very fast at low to medium altitudes, especially with WEP |
| − | |||
'''Cons:''' | '''Cons:''' | ||
| − | * | + | * Engine starts to lose power above 5,000 meters |
| − | * | + | * Mediocre roll rate |
| − | * | + | * Large target |
| − | * | + | * Durability is average |
| + | * Locks up quickly | ||
| + | * Engines overheat quickly, needs manual engine control to remedy | ||
| + | * Tends to have pilot knocked out due to bubble canopy | ||
| + | * Lack of solo potential, needs a good team or squad in order to perform well | ||
| + | * WEP is time-limited | ||
== History == | == History == | ||
| − | <!-- ''Describe the history of the creation and combat usage of the | + | <!-- ''Describe the history of the creation and combat usage of the aircraft in more detail than in the introduction. If the historical reference turns out to be too long, take it to a separate article, taking a link to the article about the vehicle and adding a block "/History" (example: <nowiki>https://wiki.warthunder.com/(Vehicle-name)/History</nowiki>) and add a link to it here using the <code>main</code> template. Be sure to reference text and sources by using <code><nowiki><ref></ref></nowiki></code>, as well as adding them at the end of the article with <code><nowiki><references /></nowiki></code>. This section may also include the vehicle's dev blog entry (if applicable) and the in-game encyclopedia description (under <code><nowiki>=== In-game description ===</nowiki></code>, also if applicable).'' --> |
| − | The | + | By around 1938, the U.S. Navy started investigating into the possibilities of a twin-engine carrier-borne fighter. The contract to develop such a fighter was awarded to Grumman. Quickly thereafter the [[XF5F]] was designed. The compact aircraft was to include a 23 mm Madsen cannon, two .50 calibre machine guns, and two .30 calibre machine guns. The Skyrocket test results were not very satisfactory and in 1941 the U.S. Navy moved onto to a new aircraft. The new goal was to create a heavy fighter for its upcoming Midway-class aircraft carriers. This next design was to incorporate two R-2800 engines, four 20 mm cannons, four .50 calibre machine guns, and the ability to carry bombs, rockets, and torpedoes. |
| + | |||
| + | The XF7F-1 Tigercat prototype made its original flight on December 2, 1943. The F7F-1 aircraft went into production in April of 1944, but the Midway-class carriers had not yet been completed, so the first Tigercats were given to the U.S. Marine Corp. Only 35 of these aircraft were built until production switched to the two-seat night fighter variant. These were built in limited numbers as well. | ||
| + | |||
| + | The Tigercat came too late to see any action in World War II. Late-model Tigercats did eventually see action in Korea with the Marines. The aircraft was eventually retired from U.S. service in 1954. | ||
| + | |||
| + | === [[wt:en/news/3033/current/|Vehicle Profile]] === | ||
| + | In 1942, after an unsuccessful XF5F Skyrocket (and XP-50, its land-based modified variant) project, Grumman Aircraft Engineering Corporation began work on an improved aircraft using the same twin-engine concept as the Skyrocket, which they named the XP-65. It was only a year later, however, that this project was cancelled, and Grumman began work on an entirely new plane based on the XF5F concept. This plane was intended to be operated from new, large Midway-class carriers (the first vessel being the USS Midway, which was commissioned in 1945) and Grumman had two main goals in sight – the plane would have ground attack capabilities, and it would be able to outperform and outgun any other fighter of that time. The maiden flight of the prototype, titled XF7F-1, occurred in December 1943, and was rushed into production in 1944 under the name F7F-1 Tigercat, continuing the Grumman's tradition of giving planes "cat" names. | ||
| − | + | The Tigercat was designed for two things – speed and firepower. The first of these was achieved by the combination of its sleek hull and two massive 18-cylinder Pratt & Whitney R-2800-22W Double Wasp radial engines, producing 2100 horsepower each. With these power plants, the Tigercat was able to achieve a maximum speed of 700 kph (435 mph) at an altitude of 6706 meters (22 000 feet), and had climb rate of more than 1372 meters (4500 feet) per minute. It was nearly 114 kph (71 mph) faster than the F6F Hellcat, and Captain Fred M. Trapnell, one of the US Navy's best test pilots, was quoted saying: "It's the best damn fighter I've ever flown!" The Tigercat's firepower was no less impressing. The Tigercat was armed with four 20 mm M2 cannons in the wing roots, and four .50 M2 nose-mounted machine guns. Additionally, it could carry up to two 454 kg (1000 lb) bombs on under wing racks, or one torpedo under the fuselage. It was also the first US Navy twin-engine fighter ever accepted into service, and the first US Navy fighter ever to use a tricycle landing gear configuration. | |
| − | The | + | However, air tests and trials proved that the Tigercat was simply too overpowered for Midway-class carriers. Its landing speed was too high and it suffered instability in single-engine flight. The arrestor hook design was also proven to be unreliable. As a result of these multiple issues, the Tigercat was then assigned to be used as a land-based fighter in the US Marine Corps service. Deliveries started in April 1944, but problems with carrier operations clearance and changes in its operational requirements caused significant delays. As a result, the Tigercat was too late to participate in World War 2, and only 34 aircraft of initial F7F-1 versions were made. Tigercats eventually saw combat at last, but no sooner than during the initial stages of the Korean War, where F7F's managed to shoot down two North Korean Polikarpov Po-2 biplanes. Subsequently, due to the development of jet fighters, Tigercats were phased out of service, with the last of them retiring in 1954. |
== Media == | == Media == | ||
<!-- ''Excellent additions to the article would be video guides, screenshots from the game, and photos.'' --> | <!-- ''Excellent additions to the article would be video guides, screenshots from the game, and photos.'' --> | ||
| + | |||
| + | ;Skins | ||
| + | * [https://live.warthunder.com/feed/camouflages/?q=%23f7f1 Skins and camouflages for the {{PAGENAME}} from live.warthunder.com.] | ||
;Videos | ;Videos | ||
| − | {{Youtube-gallery| | + | {{Youtube-gallery|t3xD7JpnHeI|'''Best aircraft for Boom & Zoom''' discusses the {{PAGENAME}} at 4:38 - ''War Thunder Official Channel''|d5k2T9FP0bQ|'''Avoid them in frontal attack!''' discusses the {{PAGENAME}} at 1:06 - ''War Thunder Official Channel''}} |
== See also == | == See also == | ||
''Links to the articles on the War Thunder Wiki that you think will be useful for the reader, for example:'' | ''Links to the articles on the War Thunder Wiki that you think will be useful for the reader, for example:'' | ||
| − | + | * ''reference to the series of the aircraft;'' | |
| − | * ''reference to the series of the | ||
* ''links to approximate analogues of other nations and research trees.'' | * ''links to approximate analogues of other nations and research trees.'' | ||
== External links == | == External links == | ||
| − | ''Paste links to sources and external resources, such as:'' | + | <!-- ''Paste links to sources and external resources, such as:'' |
| + | * ''topic on the official game forum;'' | ||
| + | * ''encyclopedia page on the aircraft;'' | ||
| + | * ''other literature.'' --> | ||
| − | * | + | * [[wt:en/devblog/current/642/|[Devblog] F7F-1 Tigercat]] |
| − | * | + | * [[wt:en/news/3033/current/|[Vehicle Profile] Grumman F7F-1 Tigercat [Decal included]]] |
| − | |||
| − | {{ | + | {{AirManufacturer Grumman}} |
| + | {{USA twin-engine fighters}} | ||
Revision as of 16:41, 15 August 2020
Contents
| This page is about the American twin-engine fighter F7F-1. For the gift version, see F7F-3. |
Description

The F7F-1 Tigercat is a rank IV American twin-engine fighter
with a battle rating of 6.7 (AB) and 6.3 (RB/SB). It was introduced in Update 1.43.
The Tigercat performs decently at medium to low altitudes. It has good firepower and performs well in a dive and can achieve high speeds. At sea level, it has a decent climb but at 3 km the climb rate drops substantially making fighting high altitude fighters in its battle range difficult. It is recommended to side-climb to 5 km and accelerate to a high speed before engaging the enemy. At its battle rating, it will be out-climbed by just about every fighter. The best defensive manoeuvre is attempting to outrun your opponent and engage in head-on engagements. For opponents, you cannot outrun the only hope is to lure them low in a dive where the plane performs better, but you will only be able to make a few turns before you run out of energy so make them count.
WEP on this plane is limited and does not add considerable power until supercharger gear 2 is activated so it is advised not to waste it until you reach about 2,500 m altitudes. At certain low altitudes, WEP actually reduces the engine power. The automatic engine controls will overheat the plane at 100% throttle necessitating the need for manual engine controls to open the radiators. The F7F-1 is difficult to manage and likely contains several oversights in the game that have yet to be addressed.
General info
Flight performance
Describe how the aircraft behaves in the air. Speed, manoeuvrability, acceleration and allowable loads - these are the most important characteristics of the vehicle.
| Characteristics | Max Speed (km/h at 5,182 m) |
Max altitude (metres) |
Turn time (seconds) |
Rate of climb (metres/second) |
Take-off run (metres) | |||
|---|---|---|---|---|---|---|---|---|
| AB | RB | AB | RB | AB | RB | |||
| Stock | 659 | 641 | 12300 | 26.3 | 27.1 | 20.0 | 20.0 | 444 |
| Upgraded | ___ | 688 | __._ | 25.0 | __._ | 25.0 | ||
Details
| Features | ||||
|---|---|---|---|---|
| Combat flaps | Take-off flaps | Landing flaps | Air brakes | Arrestor gear |
| ✓ | ✓ | ✓ | X | ✓ |
| Limits | ||||||
|---|---|---|---|---|---|---|
| Wings (km/h) | Gear (km/h) | Flaps (km/h) | Max Static G | |||
| Combat | Take-off | Landing | + | - | ||
| 835.14 | 463 | 478 | 478 | 278 | ~10 | ~8 |
| Optimal velocities (km/h) | |||
|---|---|---|---|
| Ailerons | Rudder | Elevators | Radiator |
| < 467 | < 450 | < 555 | > 317 |
| Compressor (RB/SB) | ||
|---|---|---|
| Setting 1 | ||
| Optimal altitude | 100% Engine power | WEP Engine power |
| 850 m | 2,100 hp | 2,468 hp |
| Setting 2 | ||
| Optimal altitude | 100% Engine power | WEP Engine power |
| 5,337 m | 1,600 hp | 1,880 hp |
Survivability and armour
Examine the survivability of the aircraft. Note how vulnerable the structure is and how secure the pilot is, whether the fuel tanks are armoured, etc. Describe the armour, if there is any, and also mention the vulnerability of other critical aircraft systems.
Armaments
Offensive armament
The F7F-1 is armed with:
- 4 x 20 mm M3 cannons, wing-mounted (200 rpg = 800 total)
- 4 x 12.7 mm M2 Browning machine guns, chin-mounted (400 rpg = 1,600 total)
Suspended armament
The F7F-1 can be outfitted with the following ordnance:
- Without load
- 2 x 500 lb AN-M64A1 bombs (1,000 lb total)
- 1 x 1,000 lb AN-M65A1 bomb (1,000 lb total)
- 1 x 1,000 lb AN-M65A1 bomb + 2 x 500 lb AN-M64A1 bombs (2,000 lb total)
Usage in battles
The main armament is extremely powerful. Equipped with 4 x 20 mm cannon and M2 Brownings in the nose, expect to knock planes out of the skies frequently. Unlike many other planes that have more spread out armament, the Tigercat packs a massive punch. If one cannon shell hits, the rest will as well. Do not waste time researching additional ammo belts for the 20 mm; the Default has the most HE shells of any other belt except for Stealth. However, it is recommended you research "New 20 mm Cannons" and "12.7 mm Ammo Belts", as the Cannon jam quite quickly and the stealth ammo for the 12.7 mm is far more effective than the Default.
Use the armament wisely- do not use the cannon until you are about .5-.6 km from your target. However, the 12.7 mm is great for harassing targets out to more than 1 km. A good hit to the wings of any plane will bring it down, while 2-3 bursts to the fuselage will grind a plane to pieces. The Tigercat's devastating armament is also perfect for hunting down troublesome German bombers like the Ju 288 C.
The F7F-1 also has great late game potential due to its armament. If you aim well, you can take down light pillboxes with short, controlled bursts. Lightly armoured vehicles normally only need 1 or 2 taps. Unlike its event vehicle variant which has vastly better ordnance options, the F7F-1 is average at best in this department. With the maximum load being 2 x 500 lb and 1 x 1,000 lb bomb, don't really expect to take down many hard targets before going back to rearm. The secondary weapons are not recommended for use, as they will reduce performance considerably- also, due to the high BR, jets will exist and will intercept you before you are halfway to your bombing target due to their speed.
Performance-wise, the Tigercat has a maximum speed of 668 km/h (415 mph) at an altitude of 5,190 meters (17,028 feet), or 695 km/h (431 mph) at the same altitude with WEP. At sea level, the maximum speed is 619 km/h (384.6 mph), or 638 km/h (396.4 mph) with WEP. The Tigercat can climb to an altitude of 3,000 meters (9,843 feet) in 155 seconds (135 seconds with WEP), giving it an average climb rate of 19.3 meters (63.3 feet) per second (22.2 meters or 72.8 feet per second with WEP). It can perform a full horizontal turn at 3,000 meters in 24 seconds at a speed of 500 km/h (310.6 mph), as well as perform a full vertical turn at the same altitude and speed, which it completes in 27 seconds.
Manual Engine Control
| MEC elements | ||||||
|---|---|---|---|---|---|---|
| Mixer | Pitch | Radiator | Supercharger | Turbocharger | ||
| Oil | Water | Type | ||||
| Controllable | Controllable Auto control available |
Controllable Auto control available |
Controllable Auto control available |
Separate | Controllable 2 gears |
Not controllable |
Modules
| Tier | Flight performance | Survivability | Weaponry | ||
|---|---|---|---|---|---|
| I | Fuselage repair | Radiator | Offensive 12 mm | ||
| II | Compressor | Airframe | New 12 mm MGs | FMBC mk.1 | |
| III | Wings repair | Engine | Offensive 20 mm | ||
| IV | Engine injection | Cover | New 20 mm cannons | FLBC mk.1 | |
Pros and cons
Pros:
- Punishing armament
- 12.7 mm guns are mounted on the nose and the 20mm AN/M3's are mounted very close to the fuselage, resulting in very little convergence
- Reasonable turn rate
- Excellent energy retention
- Excellent ammunition capacity
- Very high speed in dive and at level flight
- Very good cockpit visibility
- Very fast at low to medium altitudes, especially with WEP
Cons:
- Engine starts to lose power above 5,000 meters
- Mediocre roll rate
- Large target
- Durability is average
- Locks up quickly
- Engines overheat quickly, needs manual engine control to remedy
- Tends to have pilot knocked out due to bubble canopy
- Lack of solo potential, needs a good team or squad in order to perform well
- WEP is time-limited
History
By around 1938, the U.S. Navy started investigating into the possibilities of a twin-engine carrier-borne fighter. The contract to develop such a fighter was awarded to Grumman. Quickly thereafter the XF5F was designed. The compact aircraft was to include a 23 mm Madsen cannon, two .50 calibre machine guns, and two .30 calibre machine guns. The Skyrocket test results were not very satisfactory and in 1941 the U.S. Navy moved onto to a new aircraft. The new goal was to create a heavy fighter for its upcoming Midway-class aircraft carriers. This next design was to incorporate two R-2800 engines, four 20 mm cannons, four .50 calibre machine guns, and the ability to carry bombs, rockets, and torpedoes.
The XF7F-1 Tigercat prototype made its original flight on December 2, 1943. The F7F-1 aircraft went into production in April of 1944, but the Midway-class carriers had not yet been completed, so the first Tigercats were given to the U.S. Marine Corp. Only 35 of these aircraft were built until production switched to the two-seat night fighter variant. These were built in limited numbers as well.
The Tigercat came too late to see any action in World War II. Late-model Tigercats did eventually see action in Korea with the Marines. The aircraft was eventually retired from U.S. service in 1954.
Vehicle Profile
In 1942, after an unsuccessful XF5F Skyrocket (and XP-50, its land-based modified variant) project, Grumman Aircraft Engineering Corporation began work on an improved aircraft using the same twin-engine concept as the Skyrocket, which they named the XP-65. It was only a year later, however, that this project was cancelled, and Grumman began work on an entirely new plane based on the XF5F concept. This plane was intended to be operated from new, large Midway-class carriers (the first vessel being the USS Midway, which was commissioned in 1945) and Grumman had two main goals in sight – the plane would have ground attack capabilities, and it would be able to outperform and outgun any other fighter of that time. The maiden flight of the prototype, titled XF7F-1, occurred in December 1943, and was rushed into production in 1944 under the name F7F-1 Tigercat, continuing the Grumman's tradition of giving planes "cat" names.
The Tigercat was designed for two things – speed and firepower. The first of these was achieved by the combination of its sleek hull and two massive 18-cylinder Pratt & Whitney R-2800-22W Double Wasp radial engines, producing 2100 horsepower each. With these power plants, the Tigercat was able to achieve a maximum speed of 700 kph (435 mph) at an altitude of 6706 meters (22 000 feet), and had climb rate of more than 1372 meters (4500 feet) per minute. It was nearly 114 kph (71 mph) faster than the F6F Hellcat, and Captain Fred M. Trapnell, one of the US Navy's best test pilots, was quoted saying: "It's the best damn fighter I've ever flown!" The Tigercat's firepower was no less impressing. The Tigercat was armed with four 20 mm M2 cannons in the wing roots, and four .50 M2 nose-mounted machine guns. Additionally, it could carry up to two 454 kg (1000 lb) bombs on under wing racks, or one torpedo under the fuselage. It was also the first US Navy twin-engine fighter ever accepted into service, and the first US Navy fighter ever to use a tricycle landing gear configuration.
However, air tests and trials proved that the Tigercat was simply too overpowered for Midway-class carriers. Its landing speed was too high and it suffered instability in single-engine flight. The arrestor hook design was also proven to be unreliable. As a result of these multiple issues, the Tigercat was then assigned to be used as a land-based fighter in the US Marine Corps service. Deliveries started in April 1944, but problems with carrier operations clearance and changes in its operational requirements caused significant delays. As a result, the Tigercat was too late to participate in World War 2, and only 34 aircraft of initial F7F-1 versions were made. Tigercats eventually saw combat at last, but no sooner than during the initial stages of the Korean War, where F7F's managed to shoot down two North Korean Polikarpov Po-2 biplanes. Subsequently, due to the development of jet fighters, Tigercats were phased out of service, with the last of them retiring in 1954.
Media
- Skins
- Videos
See also
Links to the articles on the War Thunder Wiki that you think will be useful for the reader, for example:
- reference to the series of the aircraft;
- links to approximate analogues of other nations and research trees.
External links
| Grumman Aircraft Engineering Corporation | |
|---|---|
| Fighters | |
| F3F | F3F-2 · Galer's F3F-2 |
| F4F Wildcat | F4F-3 · F4F-4 |
| XF5F Skyrocket | XF5F · XP-50 |
| F6F Hellcat | F6F-5 · F6F-5N |
| F7F Tigercat | F7F-1 · F7F-3 |
| F8F Bearcat | F8F-1 · F8F-1B |
| Jet Fighters | |
| F9F Panther/Cougar | F9F-2 · F9F-5 · F9F-8 |
| F-11 Tiger | F11F-1 |
| F-14 Tomcat | F-14A Early · F-14B |
| Jet Strike Aircraft | |
| A-6 Intruder | A-6E TRAM |
| Bombers | TBF-1C |
| Export | ▄Martlet Mk IV · ▄F6F-5 · ▄F6F-5N · ▄F8F-1B · ▄Avenger Mk II · ▄Hellcat Mk II |
| USA twin-engine fighters | |
|---|---|
| P-38 | XP-38G · P-38E · P-38G-1 · P-38J-15 · Bong's P-38J-15 · P-38L-5-LO · P-38K · YP-38 |
| P-61 | P-61A-11 · P-61C-1 |
| F7F | F7F-1 · F7F-3 |
| Other | XF5F · XP-50 · F-82E |
