Difference between pages "Chieftain Mk 10" and "Ki-49-IIb"
(Edits.) |
Inceptor57 (talk | contribs) (Updated template w/ new design) |
||
| Line 1: | Line 1: | ||
| − | {{Specs-Card|code= | + | {{Specs-Card|code=ki-49_2b}} |
{{About | {{About | ||
| − | | about = | + | | about = Japanese medium bomber '''{{PAGENAME}}''' |
| usage = other uses | | usage = other uses | ||
| − | | link = | + | | link = Ki-49 (Family) |
}} | }} | ||
== Description == | == Description == | ||
| − | <!-- | + | <!--In the description, the first part should be about the history of and the creation and combat usage of the aircraft, as well as its key features. In the second part, tell the reader about the aircraft in the game. Insert a screenshot of the vehicle, so that if the novice player does not remember the vehicle by name, he will immediately understand what kind of vehicle the article is talking about.--> |
| − | [[File: | + | |
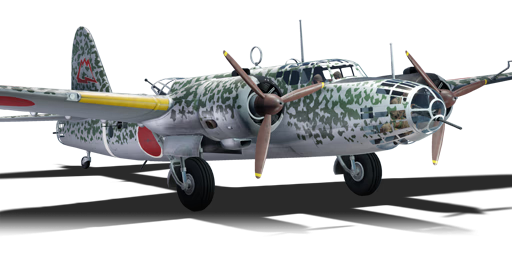
| + | [[File:GarageImage_{{PAGENAME}}.jpg|420px|thumb|left]] | ||
{{break}} | {{break}} | ||
| − | The '''{{ | + | The '''{{Specs|name}}''' is a Rank {{Specs|rank}} Japanese medium bomber {{Battle-rating}}. This bomber has been in the game since the start of the Open Beta Test prior to Update 1.29. |
| + | |||
| + | The Ki-49's role is a low-altitude medium bomber capable of destroying ground targets such as pillboxes and tanks. Although hindered by a low total bomb capacity, this aircraft is renowned for its impressive maneuverability. This being said, it is very easy for the Ki-49 to hover above an area and drop all of its payload rather quickly. Heavy bombers such as the G8N1 Renzan have a harder time due to their sheer size and slow rate of turn. Make sure to select either of the 4 x 250 kg bomb load outs if attacking targets like tanks, pillboxes, bases or smaller ships or use the 1 x 800 kg Navy Type Number 80 Model 1 bomb to attack large vessels (Aircraft carriers, battleships or heavy cruisers). | ||
== General info == | == General info == | ||
| − | === | + | === Flight Performance === |
| − | + | ''Describe how the aircraft behaves in the air. Speed, manoeuvrability, acceleration and allowable loads - these are the most important characteristics of the vehicle.'' | |
| − | + | {| class="wikitable" style="text-align:center" | |
| − | + | |- | |
| − | + | ! colspan="8" | Characteristics | |
| − | |||
| − | |||
| − | |||
| − | |||
| − | |||
| − | |||
| − | |||
| − | |||
| − | |||
| − | |||
|- | |- | ||
| − | ! | + | ! colspan="8" | ''Stock'' |
|- | |- | ||
| − | | | + | ! colspan="2" | Max Speed<br>(km/h at 5,150 m) |
| + | ! rowspan="2" | Max altitude<br>(meters) | ||
| + | ! colspan="2" | Turn time<br>(seconds) | ||
| + | ! colspan="2" | Rate of climb<br>(meters/second) | ||
| + | ! rowspan="2" |Take-off run<br>(meters) | ||
|- | |- | ||
| − | + | ! AB | |
| + | ! RB | ||
| + | ! AB | ||
| + | ! RB | ||
| + | ! AB | ||
| + | ! RB | ||
|- | |- | ||
| − | + | | 480 || 467 || {{Specs|ceiling}} || 31.4 || 31.9 || 8.1 || 9.7 || 650 | |
|- | |- | ||
| − | | | + | ! colspan="8" | ''Upgraded'' |
|- | |- | ||
| − | ! | + | ! colspan="2" | Max Speed<br>(km/h at 5,150 m) |
| + | ! rowspan="2" |Max altitude (meters) | ||
| + | ! colspan="2" | Turn time (seconds) | ||
| + | ! colspan="2" | Rate of climb<br>(meters/second) | ||
| + | ! rowspan="2" |Take-off run (meters) | ||
|- | |- | ||
| − | + | ! AB | |
| + | ! RB | ||
| + | ! AB | ||
| + | ! RB | ||
| + | ! AB | ||
| + | ! RB | ||
|- | |- | ||
| − | | | + | | 502 || 502 || {{Specs|ceiling}} || 30.0 || 30.0 || 18.7 || 12.5 || 650 |
|- | |- | ||
|} | |} | ||
| − | |||
| − | |||
| − | |||
| − | |||
| − | |||
| − | |||
| − | === | + | ====Details==== |
| − | |||
{| class="wikitable" style="text-align:center" | {| class="wikitable" style="text-align:center" | ||
|- | |- | ||
| − | ! colspan=" | + | ! colspan="5" | Features |
|- | |- | ||
| − | ! | + | ! Combat flap |
| − | ! | + | ! Take-off flap |
| − | ! | + | ! Landing flap |
| + | ! Air brakes | ||
| + | ! Arrestor gear | ||
|- | |- | ||
| − | | | + | | X || ✓ || ✓ || X || X <!-- ✓ --> |
|- | |- | ||
| − | | | + | |} |
| − | | | + | |
| − | + | {| class="wikitable" style="text-align:center" | |
| − | |||
| − | |||
| − | |||
| − | |||
| − | |||
| − | |||
| − | |||
| − | |||
| − | |||
| − | |||
| − | |||
| − | |||
|- | |- | ||
| − | ! colspan=" | + | ! colspan="5" | Limits |
|- | |- | ||
| − | ! | + | ! rowspan="2" | Wing-break speed<br>(km/h) |
| − | ! | + | ! rowspan="2" | Gear limit<br>(km/h) |
| − | ! | + | <!--! rowspan="2" | Combat flap<br> (km/h)--> |
| + | ! colspan="2" | Max Static G | ||
|- | |- | ||
| − | + | ! + | |
| − | + | ! - | |
| − | |||
|- | |- | ||
| − | | | + | | {{Specs|разрушение|конструкции}} || {{Specs|разрушение|шасси}} <!--|| ??? --?|| ~3 || ~2 |
| − | | | ||
| − | |??? | ||
|- | |- | ||
|} | |} | ||
| − | |||
| − | |||
| − | |||
| − | |||
{| class="wikitable" style="text-align:center" | {| class="wikitable" style="text-align:center" | ||
|- | |- | ||
| − | ! colspan=" | + | ! colspan="4" | Optimal velocities |
|- | |- | ||
| − | ! | + | ! Ailerons<br>(km/h) |
| − | ! | + | ! Rudder<br>(km/h) |
| − | ! | + | ! Elevators<br>(km/h) |
| − | ! | + | ! Radiator<br>(km/h) |
|- | |- | ||
| − | | | + | | < 360|| < 360 || < 403 || > 250 |
| − | |||
| − | |||
| − | |||
| − | |||
| − | |||
| − | |||
| − | |||
| − | |||
| − | |||
| − | |||
| − | |||
| − | |||
| − | |||
| − | |||
| − | |||
| − | |||
| − | |||
| − | |||
| − | |||
| − | |||
| − | |||
| − | |||
|- | |- | ||
|} | |} | ||
| − | + | {| class="wikitable" style="text-align:center" | |
| − | {| class="wikitable | ||
| − | |||
| − | |||
| − | |||
| − | |||
| − | |||
| − | |||
| − | |||
| − | |||
| − | |||
| − | |||
| − | |||
| − | |||
|- | |- | ||
| − | | | + | ! colspan="3" | Compressor (RB/SB) |
|- | |- | ||
| − | | | + | ! colspan="3" | Setting 1 |
|- | |- | ||
| − | + | ! Optimal altitude | |
| + | ! 100% Engine power | ||
| + | ! WEP Engine power | ||
|- | |- | ||
| − | | | + | | 1,147 m || 2,855 hp || 3,217 hp |
| − | |||
| − | |||
|- | |- | ||
| − | + | ! colspan="3" | Setting 2 | |
| − | |||
| − | |||
| − | |||
| − | |||
| − | |||
| − | |||
| − | |||
| − | |||
| − | |||
| − | ! colspan="3" | | ||
|- | |- | ||
| − | ! | + | ! Optimal altitude |
| − | ! | + | ! 100% Engine power |
| − | ! | + | ! WEP Engine power |
|- | |- | ||
| − | | | + | | 4,850 m || 2,616 hp || 2,949 hp |
|- | |- | ||
| − | | | + | <!--! colspan="3" | Setting 3 |
|- | |- | ||
| − | + | ! Optimal altitude | |
| − | + | ! 100% Engine power | |
| − | + | ! WEP Engine power | |
| − | |||
| − | ! | ||
| − | |||
| − | ! | ||
| − | ! | ||
| − | |||
| − | |||
| − | |||
| − | |||
| − | |||
| − | |||
| − | |||
|- | |- | ||
| + | | ?,??? m || ?,??? hp || ?,??? hp | ||
| + | |- --> | ||
|} | |} | ||
| − | ===== | + | === Survivability and armour === |
| − | <!-- | + | <!--Examine the survivability of the aircraft. Note how vulnerable the structure is and how secure the pilot is, whether the fuel tanks are armoured, etc. Describe the armour, if there is any, and also mention the vulnerability of other critical aircraft systems.--> |
| − | {| | + | |
| − | + | * 68 mm Bulletproof glass in front of the pilot | |
| − | + | * 12.5 mm Steel plate in front of the pilot | |
| − | + | * 16.5 mm Steel plate behind the pilots | |
| − | ! | + | * 12.5 mm Steel plate behind the dorsal gunner |
| − | + | * 12.5 mm Steel plates surrounding the dorsal gunner | |
| − | |- | + | * 12.5 mm Steel plates in front of the tail gunner |
| − | + | ||
| − | + | == Armaments == | |
| − | + | === Suspended armament === | |
| + | <!--Describe the aircraft's suspended armament: additional cannons under the wings, bombs, rockets and torpedoes. This section is especially important for bombers and attackers. If there is no suspended weaponry remove this subsection.--> | ||
| + | {{main|Army Type 94 GPHE (50 kg)|Army Type 92 GPHE (250 kg)|Army Type 92 GPHE (500 kg)}} | ||
| + | |||
| + | The '''''{{PAGENAME}}''''' can be outfitted with the following ordnance: | ||
| + | |||
| + | * 12 x 50 kg Army Type 94 GPHE bombs (600 kg total) | ||
| + | * 4 x 250 kg Army Type 92 GPHE bombs (1,000 kg total) | ||
| + | * 1 x 500 kg Army Type 92 GPHE bomb (500 kg total) | ||
| + | |||
| + | === Defensive armament === | ||
| + | <!--Defensive armament with turret machine guns or cannons, crewed by gunners. Examine the number of gunners and what belts or drums are better to use. If defensive weaponry is not available, remove this subsection.--> | ||
| + | {{main|Ho-1 army (20 mm)|Ho-104 army (12.7 mm)|Type 89 (7.7 mm)}} | ||
| + | |||
| + | The '''''{{PAGENAME}}''''' is defended by: | ||
| + | |||
| + | * 1 x 20 mm Ho-1 cannon, dorsal turret (180 rpg) | ||
| + | * 1 x 12.7 mm Ho-104 machine gun, nose turret (250 rpg) | ||
| + | * 1 x 12.7 mm Ho-104 machine gun, ventral turret (250 rpg) | ||
| + | * 1 x 12.7 mm Ho-104 machine gun, tail turret (250 rpg) | ||
| + | * 1 x 7.7 mm Type 89 machine guns, 2 x beam turrets (414 rpg = 828 total) | ||
| + | |||
| + | == Usage in battles == | ||
| + | <!--Describe the tactics of playing in an aircraft, the features of using vehicles in a team and advice on tactics. Refrain from creating a "guide" - do not impose a single point of view, but instead, give the reader food for thought. Examine the most dangerous enemies and give recommendations on fighting them. If necessary, note the specifics of the game in different modes (AB, RB, SB).--> | ||
| + | |||
| + | If attacked by fighters, it is important to remember and recognize the Ki-49's turning capabilities. It is actually possible to win lateral turn fights against fighters with this aircraft. Try not to act like a "sitting duck" because the Ki-49 features little armour protection and has limited defensive capabilities as far as weapons go. If found in a sticky situation, the hard-hitting 20mm dorsal cannon is deadly. The only problem is that it isn't located directly on the tail. If an enemy is directly behind or below the Ki-49, the 20mm tail gunner's arc will not reach it. Therefore, one may need to change altitude in order to have the enemy plane both above and behind you. Pulling hard manoeuvres will throw the enemy off and allow you to set up for more defensive fire. | ||
| + | |||
| + | This aircraft has the ability to hold up to 1000 kg of bombs in several different variations. 12 x 50 kg bombs, 2 versions of 4 x 250 kg bombs, 1 x 500 kg bomb, and 2 versions of 1 x 800 kg bomb. Use the 12 x 50 kg bombs to attack light tanks and light pillboxes. They are not viable against bigger targets since direct hits are needed to destroy. This loadout is particularly useful on maps like Zhengzhou where there is an abundance on non-moving targets (light pillboxes). Use either of the 4 x 250 kg bomb versions to destroy heavier targets such as medium tanks, pillboxes, destroyers, and cargo ships. Although different in real life, both kinds of 250 kg and 800 kg bomb seem to do the exact same thing. It is purely up to choose which variation to use. It is not recommended to use the 500 kg bomb simply because one can opt for the 800 kg bomb with only a slight performance decrease. In any case, use either of these bombs to destroy targets like carriers or mini bases. | ||
| + | |||
| + | In arcade battles, this aircraft is particularly proficient at bombing bases, especially with a maxed reload crew skill. Since the Ki-49 can virtually turn on a dime, instead of having to line up longer bombing runs like heavy bombers you can "hover" over the base or airfield and attempt dive attacks. The 800 kg bomb is useful here because you only have to drop one bomb instead of spamming multiple. It's also possible to use this same tactic against pillboxes or tanks. With fighter cover, a good reload time skill and good aim it's possible to destroy dozens of ground units. | ||
| + | |||
| + | Although unconventional, this aircraft is a fantastic weapon if you want to bait the enemy. Ideally, you would want to attract a higher flying enemy down to you and to get into a turn fight. This way, depending on the enemy aircraft you can out manoeuvre and distract him while teammates fly down to finish him off. Also if the enemy aircraft attacks from above, the 20mm Ho-1 cannon can do a lot of damage. | ||
| + | |||
| + | Specific aircraft to watch out for: | ||
| + | * North American Aviation B-25J Mitchel (This is due to the firepower the B-25J has with its nose mounted machine guns and its air spawn). | ||
| + | * Bristol Beaufighter (This heavy fighter has 4 x 20 mm cannons and can destroy the Ki-49-IIb with relative ease). | ||
| + | * Northrop P-61 Black Widow (This heavy fighter has 4 x 20 mm cannons and 4 machine guns. This level of firepower can destroy the Ki-49-IIb with relative ease). | ||
| + | * Any planes with big guns (Bell P-39 Airacobra, Bell P-63 King Cobra....) this is because the Ki-49-IIb does not react well to damage. | ||
| − | + | When dealing with the Ki-49-IIb, be careful of its defensive armament. It may not be strong, however, do not underestimate it. To attack this bomber while taking minimal damage, attack it from the front of the plane or attack from below. Do not attack from above the rear of the Ki-49-IIb as the 20 mm cannon will cripple your plane if not outright destroy it. | |
| − | |||
| − | |||
| − | |||
| − | |||
| + | ===Manual Engine Control=== | ||
{| class="wikitable" style="text-align:center" | {| class="wikitable" style="text-align:center" | ||
|- | |- | ||
| − | ! colspan="7" | | + | ! colspan="7" | MEC elements |
|- | |- | ||
| − | ! colspan=" | + | ! rowspan="2" |Mixer |
| + | ! rowspan="2" |Pitch | ||
| + | ! colspan="3" |Radiator | ||
| + | ! rowspan="2" |Supercharger | ||
| + | ! rowspan="2" |Turbocharger | ||
|- | |- | ||
| − | ! | + | ! Oil |
| − | ! | + | ! Water |
| − | ! | + | ! Type |
| − | |||
|- | |- | ||
| − | | | + | | Controllable || rowspan="2" | Not controllable || rowspan="2" | Not controllable || rowspan="2" | Not controllable || rowspan="2" | Separate || rowspan="2" | Not controllable || rowspan="2" | Not controllable |
|- | |- | ||
|} | |} | ||
| − | {| class="wikitable" | + | |
| + | ===Modules=== | ||
| + | {| class="wikitable" | ||
| + | !colspan = "1"| Tier | ||
| + | !colspan = "2"| Flight performance | ||
| + | !colspan = "1"| Survivability | ||
| + | !colspan = "2"| Weaponry | ||
|- | |- | ||
| − | + | | I | |
| + | | Fuselage Repair | ||
| + | | Radiator | ||
| + | | | ||
| + | | | ||
|- | |- | ||
| − | + | | II | |
| + | | | ||
| + | | Compressor | ||
| + | | Airframe | ||
| + | | | ||
|- | |- | ||
| − | + | | III | |
| − | + | | Wings Repair | |
| − | + | | Engine | |
| − | + | | | |
| + | | | ||
|- | |- | ||
| − | | | + | | IV |
| + | | | ||
| + | | Engine Injection | ||
| + | | Cover | ||
| + | | | ||
|- | |- | ||
|} | |} | ||
| + | * Being a bomber, speed is not necessarily an important attribute, however, payload and defensive armament is. Upgrading the bombs allows for more target flexibility and damage potential while turret upgrades will help survivability. the turret belts and the "new turrets" upgrades are useful. The "new turrets" upgrade will allow you to fire the turrets for longer periods of time and having access to multiple ammunition belts is also helpful. The engine upgrades are also useful in that they will help you reach your target faster and will control engine temperature. Having all of the weapons upgrades will help drastically in unlocking the other modules on this aircraft. | ||
| − | + | * The best way of grinding with this aircraft is to play cautiously and to use communication. As with any bomber, if you're caught alone or off guard you are as good as lost. Although not a sure tactic, having a fighter escort will boost RP gains drastically. This goes for all game modes. Generally, try to destroy as many targets as possible without wasting bombs. If done in a speedy fashion it is possible to drop multiple payloads in RB. The same goes for simulator battles. In arcade battles, having a high reload speed and a fighter escort will allow for constant bombardment. If done correctly, flying the Ki-49 in all modes will net you large amounts of RP. | |
| − | |||
| − | |||
| − | |||
| − | |||
| − | |||
=== Pros and cons === | === Pros and cons === | ||
| − | <!-- | + | <!--Summarise and briefly evaluate the vehicle in terms of its characteristics and combat effectiveness. Mark its pros and cons in the bulleted list. Try not to use more than 6 points for each of the characteristics. Avoid using categorical definitions such as "bad", "good" and the like - use substitutions with softer forms such as "inadequate" and "effective".--> |
'''Pros:''' | '''Pros:''' | ||
| − | + | * Very good manoeuvrability and turn time for a bomber | |
| − | * | + | * Variety of payload options |
| − | * | + | * Multiple gunners for protection in almost all directions |
| − | * | + | * Armor protection around pilots and gunners |
| + | * Tremendous fuel capacity | ||
'''Cons:''' | '''Cons:''' | ||
| − | + | * Prone to engine and fuel fires | |
| − | * | + | * Relatively slow |
| − | * | + | * Low total bomb capacity (1,000 kg) |
| − | * | + | * Below average defensive armament |
| + | * Low rate of climb | ||
| + | * Gunners are closely grouped together | ||
== History == | == History == | ||
| − | <!-- | + | <!--Describe the history of the creation and combat usage of the aircraft in more detail than in the introduction. If the historical reference turns out to be too long, take it to a separate article, taking a link to the article about the vehicle and adding a block "/ History" (example: <nowiki>https://wiki.warthunder.com/(Vehicle-name)/History</nowiki>) and add a link to it here using the <code>main</code> template. Be sure to reference text and sources by using <code><nowiki><ref></nowiki></code>, as well as adding them at the end of the article. This section may also include the vehicle's dev blog entry (if applicable) and the in-game encyclopedia description (under <code><nowiki>=== Encyclopedia Info ===</nowiki></code>, also if applicable).--> |
| − | |||
| − | |||
| − | |||
| − | === | ||
| − | |||
| − | |||
| − | |||
| − | |||
| − | |||
| − | |||
| − | |||
| − | |||
| − | + | ;Nakajima Ki-49-II Donryu Army Bomber, type 100 model 2 (code name "''Helen''") | |
| − | + | Prior to the outbreak of the War in the Pacific, the Japanese utilised the Ki-49 in China where it served well. It wasn't until the spring of 1942 that the Japanese military determined that the Ki-49 should be fitted with upgraded engines, namely the Nakajima Ha-109 radial piston engines which were rated at 1450 hp. Upgrading the engines, however, required slight modification of the engine nacelles to accommodate the newer engines even though they were roughly the same size as the original engines. Unfortunately, the oil cooler would not fit inside the nacelle along with the new engine and was instead mounted on the exterior of the nacelle. Other changes were also made to improve combat conditions of this aircraft: upgraded armour protection protecting the aircrew was installed along with self-sealing fuel tanks and a bombsight. The defensive armament remained similar to that of the Ki-49-I, however, the Type 89 machine guns were replaced with Type 98 7.92 mm machine guns (which were based on the Rheinmetall-Borsig MG.15). The normal bomb-carrying capacity of the aircraft was increased to 1,000 kg. A few short months later in August of 1942, this new version of the Donryu entered production under the designation Ki-49-IIa (model 2 Ko). | |
| − | The | + | Quickly it was determined that the defensive machine guns were proven to be ineffective against Allied fighters and this required a new modification, which became the Ki-49-IIb (model 2 Otsu) implemented with stronger defensive weaponry. In the bow, stern, and ventral firing positions, the Type 98 7.92 mm machine guns were replaced with Ho-103 12.7 mm machine guns (the Type 1 Japanese version of the Browning M2 .50 calibre machine guns). The two guns on the aircraft's sides were replaced with the original Type 89 7.7mm machine guns removed during the Ki-49-Ia upgrade. The bomb load remained unchanged at 1,000 kg. In later series, the Ki-49-IIb's common exhaust tube was replaced with several individual pipes. Even though the Ki-49-II bombers went through several revisions and upgrades, they were unable to completely replace the older models still in service. These bombers were used mainly in New Guinea, and China, and, in October of 1944, they were transferred to the Phillapines where they actively participated in the Battle of Leyte Gulf. The Ki-49 was utilised as a jack-of-all-trades aircraft as she was used as both a day and a night bomber, long-range reconnaissance, transport, and anti-submarine patrols to name a few. Towards the end of the war, the Ki-49s were assigned to kamikaze units and modified for such action. Modifications for the kamikaze missions included stripping out all of the defensive armaments, the crew was reduced to two pilots and the bomb load was increased to 1,600 kg. Production of the Ki-49 ceased in December of 1944. In all its different variants, a total of 819 Ki-49s were constructed. |
| − | + | * ''7th Sentai, 2nd Chutai 1944-45'' | |
| − | + | * ''74th Sentai, 2nd Chutai Philippines 1944-45'' | |
== Media == | == Media == | ||
| − | '' | + | ''Excellent additions to the article would be video guides, screenshots from the game, and photos.'' |
| − | |||
| − | |||
| − | |||
== See also == | == See also == | ||
''Links to the articles on the War Thunder Wiki that you think will be useful for the reader, for example:'' | ''Links to the articles on the War Thunder Wiki that you think will be useful for the reader, for example:'' | ||
| − | + | * ''reference to the series of the aircraft;'' | |
| − | * ''reference to the series of the | ||
* ''links to approximate analogues of other nations and research trees.'' | * ''links to approximate analogues of other nations and research trees.'' | ||
== External links == | == External links == | ||
| − | <!-- | + | <!--Paste links to sources and external resources, such as: |
* ''topic on the official game forum;'' | * ''topic on the official game forum;'' | ||
| − | * ''encyclopedia page on | + | * ''encyclopedia page on the aircraft;'' |
* ''other literature.''--> | * ''other literature.''--> | ||
| − | [ | + | * [http://www.militaryfactory.com/aircraft/detail.asp?aircraft_id=559 [Military Factory<nowiki>]</nowiki> Nakajima Ki-49 Donryu (Helen)] |
| + | * [http://www.pilotfriend.com/photo_albums/timeline/ww2/Nakajima%20Ki%2049%20Helen.htm [Pilot Friend<nowiki>]</nowiki> Nakajima Ki 49 Helen] | ||
| + | * [http://wp.scn.ru/en/ww2/b/1033/65 [Wings Palette<nowiki>]</nowiki> Nakajima Ki-49 Donryu/Helen] | ||
| + | |||
| + | {{Japan bombers}} | ||
Revision as of 23:11, 28 April 2019
Contents
| This page is about the Japanese medium bomber Ki-49-IIb. For other uses, see Ki-49 (Family). |
Description

The Ki-49-IIb Donryu is a Rank III Japanese medium bomber
with a battle rating of 3.3 (AB), 3.7 (RB), and 4.0 (SB). This bomber has been in the game since the start of the Open Beta Test prior to Update 1.29.
The Ki-49's role is a low-altitude medium bomber capable of destroying ground targets such as pillboxes and tanks. Although hindered by a low total bomb capacity, this aircraft is renowned for its impressive maneuverability. This being said, it is very easy for the Ki-49 to hover above an area and drop all of its payload rather quickly. Heavy bombers such as the G8N1 Renzan have a harder time due to their sheer size and slow rate of turn. Make sure to select either of the 4 x 250 kg bomb load outs if attacking targets like tanks, pillboxes, bases or smaller ships or use the 1 x 800 kg Navy Type Number 80 Model 1 bomb to attack large vessels (Aircraft carriers, battleships or heavy cruisers).
General info
Flight Performance
Describe how the aircraft behaves in the air. Speed, manoeuvrability, acceleration and allowable loads - these are the most important characteristics of the vehicle.
| Characteristics | |||||||
|---|---|---|---|---|---|---|---|
| Stock | |||||||
| Max Speed (km/h at 5,150 m) |
Max altitude (meters) |
Turn time (seconds) |
Rate of climb (meters/second) |
Take-off run (meters) | |||
| AB | RB | AB | RB | AB | RB | ||
| 480 | 467 | 9300 | 31.4 | 31.9 | 8.1 | 9.7 | 650 |
| Upgraded | |||||||
| Max Speed (km/h at 5,150 m) |
Max altitude (meters) | Turn time (seconds) | Rate of climb (meters/second) |
Take-off run (meters) | |||
| AB | RB | AB | RB | AB | RB | ||
| 502 | 502 | 9300 | 30.0 | 30.0 | 18.7 | 12.5 | 650 |
Details
| Features | ||||
|---|---|---|---|---|
| Combat flap | Take-off flap | Landing flap | Air brakes | Arrestor gear |
| X | ✓ | ✓ | X | X |
| Limits | ||||
|---|---|---|---|---|
| Wing-break speed (km/h) |
Gear limit (km/h) |
Max Static G | ||
| + | - | |||
| 0 | 300 | |||
Survivability and armour
- 68 mm Bulletproof glass in front of the pilot
- 12.5 mm Steel plate in front of the pilot
- 16.5 mm Steel plate behind the pilots
- 12.5 mm Steel plate behind the dorsal gunner
- 12.5 mm Steel plates surrounding the dorsal gunner
- 12.5 mm Steel plates in front of the tail gunner
Armaments
Suspended armament
The Ki-49-IIb can be outfitted with the following ordnance:
- 12 x 50 kg Army Type 94 GPHE bombs (600 kg total)
- 4 x 250 kg Army Type 92 GPHE bombs (1,000 kg total)
- 1 x 500 kg Army Type 92 GPHE bomb (500 kg total)
Defensive armament
The Ki-49-IIb is defended by:
- 1 x 20 mm Ho-1 cannon, dorsal turret (180 rpg)
- 1 x 12.7 mm Ho-104 machine gun, nose turret (250 rpg)
- 1 x 12.7 mm Ho-104 machine gun, ventral turret (250 rpg)
- 1 x 12.7 mm Ho-104 machine gun, tail turret (250 rpg)
- 1 x 7.7 mm Type 89 machine guns, 2 x beam turrets (414 rpg = 828 total)
Usage in battles
If attacked by fighters, it is important to remember and recognize the Ki-49's turning capabilities. It is actually possible to win lateral turn fights against fighters with this aircraft. Try not to act like a "sitting duck" because the Ki-49 features little armour protection and has limited defensive capabilities as far as weapons go. If found in a sticky situation, the hard-hitting 20mm dorsal cannon is deadly. The only problem is that it isn't located directly on the tail. If an enemy is directly behind or below the Ki-49, the 20mm tail gunner's arc will not reach it. Therefore, one may need to change altitude in order to have the enemy plane both above and behind you. Pulling hard manoeuvres will throw the enemy off and allow you to set up for more defensive fire.
This aircraft has the ability to hold up to 1000 kg of bombs in several different variations. 12 x 50 kg bombs, 2 versions of 4 x 250 kg bombs, 1 x 500 kg bomb, and 2 versions of 1 x 800 kg bomb. Use the 12 x 50 kg bombs to attack light tanks and light pillboxes. They are not viable against bigger targets since direct hits are needed to destroy. This loadout is particularly useful on maps like Zhengzhou where there is an abundance on non-moving targets (light pillboxes). Use either of the 4 x 250 kg bomb versions to destroy heavier targets such as medium tanks, pillboxes, destroyers, and cargo ships. Although different in real life, both kinds of 250 kg and 800 kg bomb seem to do the exact same thing. It is purely up to choose which variation to use. It is not recommended to use the 500 kg bomb simply because one can opt for the 800 kg bomb with only a slight performance decrease. In any case, use either of these bombs to destroy targets like carriers or mini bases.
In arcade battles, this aircraft is particularly proficient at bombing bases, especially with a maxed reload crew skill. Since the Ki-49 can virtually turn on a dime, instead of having to line up longer bombing runs like heavy bombers you can "hover" over the base or airfield and attempt dive attacks. The 800 kg bomb is useful here because you only have to drop one bomb instead of spamming multiple. It's also possible to use this same tactic against pillboxes or tanks. With fighter cover, a good reload time skill and good aim it's possible to destroy dozens of ground units.
Although unconventional, this aircraft is a fantastic weapon if you want to bait the enemy. Ideally, you would want to attract a higher flying enemy down to you and to get into a turn fight. This way, depending on the enemy aircraft you can out manoeuvre and distract him while teammates fly down to finish him off. Also if the enemy aircraft attacks from above, the 20mm Ho-1 cannon can do a lot of damage.
Specific aircraft to watch out for:
- North American Aviation B-25J Mitchel (This is due to the firepower the B-25J has with its nose mounted machine guns and its air spawn).
- Bristol Beaufighter (This heavy fighter has 4 x 20 mm cannons and can destroy the Ki-49-IIb with relative ease).
- Northrop P-61 Black Widow (This heavy fighter has 4 x 20 mm cannons and 4 machine guns. This level of firepower can destroy the Ki-49-IIb with relative ease).
- Any planes with big guns (Bell P-39 Airacobra, Bell P-63 King Cobra....) this is because the Ki-49-IIb does not react well to damage.
When dealing with the Ki-49-IIb, be careful of its defensive armament. It may not be strong, however, do not underestimate it. To attack this bomber while taking minimal damage, attack it from the front of the plane or attack from below. Do not attack from above the rear of the Ki-49-IIb as the 20 mm cannon will cripple your plane if not outright destroy it.
Manual Engine Control
| MEC elements | ||||||
|---|---|---|---|---|---|---|
| Mixer | Pitch | Radiator | Supercharger | Turbocharger | ||
| Oil | Water | Type | ||||
| Controllable | Not controllable | Not controllable | Not controllable | Separate | Not controllable | Not controllable |
Modules
| Tier | Flight performance | Survivability | Weaponry | ||
|---|---|---|---|---|---|
| I | Fuselage Repair | Radiator | |||
| II | Compressor | Airframe | |||
| III | Wings Repair | Engine | |||
| IV | Engine Injection | Cover | |||
- Being a bomber, speed is not necessarily an important attribute, however, payload and defensive armament is. Upgrading the bombs allows for more target flexibility and damage potential while turret upgrades will help survivability. the turret belts and the "new turrets" upgrades are useful. The "new turrets" upgrade will allow you to fire the turrets for longer periods of time and having access to multiple ammunition belts is also helpful. The engine upgrades are also useful in that they will help you reach your target faster and will control engine temperature. Having all of the weapons upgrades will help drastically in unlocking the other modules on this aircraft.
- The best way of grinding with this aircraft is to play cautiously and to use communication. As with any bomber, if you're caught alone or off guard you are as good as lost. Although not a sure tactic, having a fighter escort will boost RP gains drastically. This goes for all game modes. Generally, try to destroy as many targets as possible without wasting bombs. If done in a speedy fashion it is possible to drop multiple payloads in RB. The same goes for simulator battles. In arcade battles, having a high reload speed and a fighter escort will allow for constant bombardment. If done correctly, flying the Ki-49 in all modes will net you large amounts of RP.
Pros and cons
Pros:
- Very good manoeuvrability and turn time for a bomber
- Variety of payload options
- Multiple gunners for protection in almost all directions
- Armor protection around pilots and gunners
- Tremendous fuel capacity
Cons:
- Prone to engine and fuel fires
- Relatively slow
- Low total bomb capacity (1,000 kg)
- Below average defensive armament
- Low rate of climb
- Gunners are closely grouped together
History
- Nakajima Ki-49-II Donryu Army Bomber, type 100 model 2 (code name "Helen")
Prior to the outbreak of the War in the Pacific, the Japanese utilised the Ki-49 in China where it served well. It wasn't until the spring of 1942 that the Japanese military determined that the Ki-49 should be fitted with upgraded engines, namely the Nakajima Ha-109 radial piston engines which were rated at 1450 hp. Upgrading the engines, however, required slight modification of the engine nacelles to accommodate the newer engines even though they were roughly the same size as the original engines. Unfortunately, the oil cooler would not fit inside the nacelle along with the new engine and was instead mounted on the exterior of the nacelle. Other changes were also made to improve combat conditions of this aircraft: upgraded armour protection protecting the aircrew was installed along with self-sealing fuel tanks and a bombsight. The defensive armament remained similar to that of the Ki-49-I, however, the Type 89 machine guns were replaced with Type 98 7.92 mm machine guns (which were based on the Rheinmetall-Borsig MG.15). The normal bomb-carrying capacity of the aircraft was increased to 1,000 kg. A few short months later in August of 1942, this new version of the Donryu entered production under the designation Ki-49-IIa (model 2 Ko).
Quickly it was determined that the defensive machine guns were proven to be ineffective against Allied fighters and this required a new modification, which became the Ki-49-IIb (model 2 Otsu) implemented with stronger defensive weaponry. In the bow, stern, and ventral firing positions, the Type 98 7.92 mm machine guns were replaced with Ho-103 12.7 mm machine guns (the Type 1 Japanese version of the Browning M2 .50 calibre machine guns). The two guns on the aircraft's sides were replaced with the original Type 89 7.7mm machine guns removed during the Ki-49-Ia upgrade. The bomb load remained unchanged at 1,000 kg. In later series, the Ki-49-IIb's common exhaust tube was replaced with several individual pipes. Even though the Ki-49-II bombers went through several revisions and upgrades, they were unable to completely replace the older models still in service. These bombers were used mainly in New Guinea, and China, and, in October of 1944, they were transferred to the Phillapines where they actively participated in the Battle of Leyte Gulf. The Ki-49 was utilised as a jack-of-all-trades aircraft as she was used as both a day and a night bomber, long-range reconnaissance, transport, and anti-submarine patrols to name a few. Towards the end of the war, the Ki-49s were assigned to kamikaze units and modified for such action. Modifications for the kamikaze missions included stripping out all of the defensive armaments, the crew was reduced to two pilots and the bomb load was increased to 1,600 kg. Production of the Ki-49 ceased in December of 1944. In all its different variants, a total of 819 Ki-49s were constructed.
- 7th Sentai, 2nd Chutai 1944-45
- 74th Sentai, 2nd Chutai Philippines 1944-45
Media
Excellent additions to the article would be video guides, screenshots from the game, and photos.
See also
Links to the articles on the War Thunder Wiki that you think will be useful for the reader, for example:
- reference to the series of the aircraft;
- links to approximate analogues of other nations and research trees.
External links
- [Military Factory] Nakajima Ki-49 Donryu (Helen)
- [Pilot Friend] Nakajima Ki 49 Helen
- [Wings Palette] Nakajima Ki-49 Donryu/Helen
| Japan bombers | |
|---|---|
| Navy | |
| Carrier-based attack bomber | |
| B5N | B5N2 |
| B6N | B6N1 · B6N2 · B6N2a |
| B7A | B7A2 · B7A2 (Homare 23) |
| Carrier-based dive bomber | |
| D3A | D3A1 |
| D4Y | D4Y1 · D4Y2 · D4Y3 Ko |
| Shipboard Observation seaplane | |
| F1M | F1M2 |
| Land-based Attack bomber | |
| G4M | G4M1 |
| G5N | G5N1 |
| G8N | G8N1 |
| Flying boat | |
| H6K | H6K4 |
| H8K | H8K2 · H8K3 |
| Land-based Bomber | |
| P1Y | P1Y1 |
| Army | |
| Light | Ki-32 |
| Ki-48-II otsu | |
| Heavy | Ki-21-Ia · Ki-21-I hei |
| Ki-49-I · Ki-49-IIa · Ki-49-IIb · Ki-49-IIb/L | |
| Ki-67-I Ko · Ki-67-I otsu | |
| Other countries | ▅B-17E |
