|
|
| Line 1: |
Line 1: |
| − | ==What is the wiki share program (WSP)== | + | {{Specs-Card|code=us_destroyer_fletcher}} |
| | | | |
| − | ===Rewards=== | + | == Description == |
| | + | <!--''In the first part of the description, cover the history of the ship’s creation and military application. In the second part, tell the reader about using this ship in the game. Add a screenshot. If a beginner player has a hard time remembering vehicles by name, a picture will help them understand which ship is being discussed.''--> |
| | + | [[File:GarageImage_{{PAGENAME}}.jpg|420px|thumb|left]] |
| | + | {{Break}} |
| | + | The '''{{specs|name}}''' is a rank {{specs|rank}} American destroyer {{Battle-rating}}. It was introduced in [[Update 1.79 "Project X"]] as part of the fleet closed beta test. |
| | | | |
| − | ===Apply here=== | + | == General info == |
| | + | === Survivability and armour === |
| | + | ''Talk about the vehicle's armour. Note the most well-defended and most vulnerable zones, e.g. the ammo magazine. Evaluate the composition of components and assemblies responsible for movement and manoeuvrability. Evaluate the survivability of the primary and secondary armament separately. Don't forget to mention the size of the crew, which plays an important role in fleet mechanics. Tips for preserving survivability should be saved for the "Use in battle" section.'' |
| | | | |
| − | ===Questions & Answers===
| + | ''If necessary, use a graphic template to show the most well-protected or most vulnerable points in the armour.'' |
| | | | |
| − | ==Examples of quality== | + | === Mobility === |
| − | === Excellent ===
| + | ''Write about the ship’s mobility. Evaluate its power and manoeuvrability, rudder rerouting speed, stopping speed at full tilt, with its maximum forward speed and reverse speed.'' |
| − | In this grade, called excellent this is what we are aiming for you to achieve. Let's start with the grade of excellent:
| |
| | | | |
| − | * What is and makes an excellent play-style.
| + | == Armament == |
| − | * What is expected to achieve the grade of excellent.
| + | === Primary armament === |
| − | * The main difference between Excellent and good grades.
| + | ''Provide information about the characteristics of the primary armament. Evaluate their efficacy in battle based on their reload speed, ballistics and the capacity of their shells. Add a link to the main article about the weapon: <code><nowiki>{{main|Weapon name (calibre)}}</nowiki></code>.'' |
| − | * Recommendations to help you achieve the grade of excellent.
| |
| | | | |
| − | '''What is and makes an excellent play-style:''' | + | ''Broadly describe the ammunition available for the primary armament, and provide recommendations on how to use it and which ammunition to choose.'' |
| | | | |
| − | Based on one of the examples below, we explore the AH-1Z Viper example, this is an example of what is expected as an excellent grade. It is mission critical that in this grade the play-style be portrayed the information written is very clear, to the point, identifies the environment the vehicle can operate in, provides a clear oversight of how it is intended to be played in battle and makes the reader want to continue reading it. In general it must focus on; how the vehicle can be played, used in specific game modes such as combined battles and what can be expected and how to do it. It also must have a general guide on how it plays in conventional battles.
| + | === Secondary armament === |
| | + | ''Some ships are fitted with weapons of various calibres. Secondary armament is defined by the weapon chosen with the control <code>Select secondary weapon</code>. Evaluate the secondary armament and give advice on how to use them. Describe the ammunition available for the secondary armament. Provide recommendations on how to use them and which ammunition to choose. Remember that anti-air armament, even heavy calibre weapons, belong in the next section.'' |
| | | | |
| − | '''What is expected to achieve the grade of excellent:''' | + | ''If there is no secondary armament, remove this section.'' |
| | | | |
| − | In-order to achieve this grade, you must be clear, direct, non-bias and in third person, that means no "I". The ideal mindset is to think along the lines of: If you where to get your friend to play it, what and how would you do in order to recommend it to them.
| + | === Anti-aircraft armament === |
| | + | ''An important part of the ship’s armament responsible for air raid defence. Anti-aircraft armament is defined by the weapon chosen with the control <code>Select anti-aircraft weapons</code>. Talk about the ship’s anti-air cannons and machine guns, the number of guns and their positions, their effective range, and about their overall effectiveness – including against surface targets.'' |
| | | | |
| − | In-order to do this 1) you must, be neutral, learn what it can and cannot do. So it is very important that you are clear and objective when doing it.
| + | ''If there is no anti-aircraft artillery, remove this section.'' |
| | | | |
| − | Find out what it can and cannot do by playing it, recall what happens and how it differentiates in each game modes such as: Handling, Reloading, Ammo choices, etc. Such as Arcade and Realistic battles.
| + | === Torpedo armament === |
| | + | ''Many ships are armed with torpedo launchers, and for some vessels such as boats, torpedoes are an extremely important means of defeating an opponent. Evaluate the position of the torpedo launchers, discuss the ammunition available, firing specifics such as dead zones, features of the torpedoes themselves, etc.'' |
| | | | |
| − | It is also expected that additional elements such as, Pros & cons, Armaments, Performance information should be added, if it is missing from the page.
| + | ''If there is no torpedo armament, remove this section.'' |
| | | | |
| − | '''The main difference between Excellent and good grades''', | + | === Special armament === |
| | + | ''Depth charges, mines, rocket launchers and missiles are also effective in skilled hands and can be an unexpected surprise for an opponent. Evaluate the ammunition of this type of armament and rate its performance in combat.'' |
| | | | |
| − | '''Recommendations to help you achieve the grade of excellent''', | + | ==Usage in battles== |
| − | ====Example of excellent: Pro's and con's ====
| + | ''Describe the technique of using this ship, the characteristics of her use in a team and tips on strategy. Abstain from writing an entire guide – don’t get try to provide a single point of view, but give the reader food for thought. Talk about the most dangerous opponents for this vehicle and provide recommendations on fighting them. If necessary, note the specifics of playing with this vehicle in various modes (AB, RB, SB).'' |
| − | '''Pros:'''
| |
| | | | |
| − | *Can carry up to 16 TOW ATGMs (TOW-2 with modification)
| + | ===Modules=== |
| − | *Flares
| + | {| class="wikitable" |
| − | *One of the fastest helicopters in the game
| + | ! Tier |
| − | *Can carry air-to-air missiles to take down aircraft
| + | ! Seakeeping |
| − | *Excellent ground attack capabilities.
| + | ! colspan="2" |Unsinkability |
| − | | + | ! colspan="3" |Firepower |
| − | '''Cons:'''
| + | |- |
| − | | + | | I |
| − | *Weak airframe can be taken down even by roof-mounted MGs from enemy tanks.
| + | | Dry-Docking |
| − | *Cannon fodder for dedicated SPAAGs
| + | | Tool Set|| |
| − | *Very slow, easy target for SPAAs and aircraft
| + | | 127 mm Common Mk.32||40 mm HE clips||Anti-Air Armament Targeting |
| − | *Priority target for the enemy team as you are extremely dangerous
| + | |- |
| − | *No armor whatsoever.
| + | | II |
| − | | + | | Rudder Replacement |
| − | ==== Play-style examples ==== | + | | Fire Protection System||Smokescreen |
| − | | + | | ||40 mm AP clips||Auxiliary Armament Targeting |
| − | | + | |- |
| − | ===== Aircraft vehicle Example =====
| + | | III |
| − | <div class="toccolours mw-collapsible mw-collapsed" style="width:1100px; overflow:auto;">
| + | | Propeller Replacement |
| − | Click '''Expand''' to show
| + | | Ventilation||Shrapnel Protection |
| − | <div class="mw-collapsible-content">
| + | | 127 mm AAVT Mk.31||Improved Rangefinder||Primary Armament Targeting |
| − | {| class="wikitable" align="left"
| + | |- |
| − | | + | | IV |
| − | <blockquote>'''''<big>Usage in battles</big>'''''</blockquote><blockquote></blockquote>
| + | | Engine Maintenance |
| − | Using the AH-1Z viper after the AH-1F requires learning time, the playstyle between this and the AH-1F has some unique differences such as ammunition, views and overall playstyle.
| + | | New Pumps||Ammo Wetting |
| − | | + | | Torpedo Mode||Bomb mortar|| |
| − | The AH-1Z is an attack helicopter, it does this role very well, in-fact it is one of the best attack helicopters in the game, with speed up to 411 Km/h (255 MPH). The AH-1Z offers a large array of ordnance selections, from Miniguns, Rockets, TOW, TOW-2 and Hellfire missiles. In addition, the AH-1Z Can carry a combination of missiles, rockets or mini-guns together.
| |
| − | To get one of the best configurations, is specialise in what you want to do air protection or ground attack either way this attack helicopter can do it.
| |
| − | | |
| − | To utilise the AH-1Z viper, make sure to adjust the tactics to the map, for example maps, with rocks and hilly terrain, stay low and use it as cover whilst you get to into a position which will allow you to dominate the battlefield. For maps which are open and flat, climb to a high altitude and assess the situation, just make sure to scan the map and not get fixed on a location.
| |
| − | | |
| − | The AH-1Z has three main playstyles, the playstyles of this attack helicopter are focused around dominating in the following roles: Air Protection/Support, Medium & Close Range and Long Range.
| |
| − | | |
| − | However, the AH-1F does have one drawback, due to the increase in size changes to the center of gravity in high pitch and tight turns, it possible to lose control. It is advisable to always counteract by keeping the noise of the helicopter level or to lessen the turn radius. If required to do one, such as evading surface to air missiles, make sure that there is enough room to recover the helicopter in – ideally at least 1000 feet and make sure to increase the pitch of the blades to a 100% adjust for yawing.
| |
| − | | |
| − | <blockquote>'''''<big>Close/medium Range</big>'''''</blockquote>
| |
| − | The AH-1Z offers a combination of wing mounted ordnance and ordnance packages which are available from TOW, TOW-2, Rocket pods, Machine guns.
| |
| − | | |
| − | The AH-1Z has the BGM-71 TOW and BGM-71 TOW-2 ATGM missile systems which perform very well. The BGM-71 TOW-2. The BGM-71 TOW-2 is faster than the BGM-71 TOW And in addition it contains a higher explosive amount. Nevertheless, both versions of the TOW missile system are able to be very decisive in combat, it is ideal to use the BGM-71 TOW-2 system over the BGM-71 TOW since it is a better system, due to its higher explosive and speed.
| |
| − | | |
| − | It can carry up to 16 TOW or TOW-2 missiles, that is enough lethality to terminate up to 16 emery units. The TOW missiles work in the same way as on the other series of cobra attack helicopters, they are able to hit, fast and hard. Combined with the speed of the AH-1Z, these make a lethal combination. The AH-1Z can find a great tactical location, engage the targets and knock them out of the fight without them even knowing.
| |
| − |
| |
| − | An AH-1Z also can carry additional ordnances which are wing mounted only, these are rocket pods & machine guns or a combination of Hellfire’s, TOW’s, Rockets & machine guns. The rockets are standard FFAR Mighty Mouse rockets which are equipped on the version of the cobra’s and hugey helicopters. A good choice of combined ordnance are Mighty mouse and TOWs or just mighty mouse. That way you can increase the engagement range when you are flying in combat after consuming all the tow missiles or getting at close range and blasting the enemy with mighty mouse rockets which will cause a lot of damage and could destroy up to 76 enemy units
| |
| − | <blockquote>'''''<big>Long Range - Hellfire missiles</big>'''''</blockquote>
| |
| − | To utilise the long-range performance of the AH-1Z, hover outside of the combat zone. It is important that you check and make sure that there are no threats in the vicinity which could shoot you down. Once the combat zone has been declared safe from vehicles which could destroy you. Increase altitude, until you have a good visual on the objectives. Hover the helicopter, change the view to the gun camera and locate a target ground vehicle and fire! The hellfire missiles offer up to 1100mm of penetration with a speed of 475 meters per second.
| |
| − | | |
| − | Firing the hellfire missiles, you will notice that you cannot see them compared to the previous TOW missiles. This is normal, you need to keep the laser designator on the target. On the Hud, left-hand side, you will see a countdown, it takes 10 seconds for the missile to hit the target. When the hellfire gets close to the target you will see the rocket, this where you can adjust the missile trajectory.
| |
| − | | |
| − | It is very important that after a few hellfire missile launches that, you disengage the hover and locate to another part of the battle zone. Performing this action will substantially reduce the chances of being shot down by emery vehicles.
| |
| − | | |
| − | One of the drawbacks of the Hellfire missiles is, at close range they cannot engage a target, due to how the hellfires are launched from the wing racks. The hellfire missile, drops from the wing rack, engages the rocket motor and immediately ascend in height, making it impossible to track from launch.
| |
| − | | |
| − | {{Notice|The hellfire missiles require time to adapt, however once learnt they become one of the most potent missiles in the game.|!!!}}
| |
| − | <blockquote> '''''<big>Air Protection/support</big>'''''</blockquote>
| |
| − | Best role armament selection: Sidewinder missiles and machine guns
| |
| − | | |
| − | An AH-1Z Viper, offers a unique capabilities compared to any other helicopter on the battlefield! It can be equipped with sidewinder air to air missiles. The sidewinder missiles provide great capacity to shoot down up to two enemy aircraft. They can shoot down other rotary-wing aircraft (helicopters) or fixed-wing aircraft (airplanes). The missiles can also be equipped with the additional payloads, such as hellfire, tow missile, machine gun and rocket pod configurations, providing a versatile offensive and defensive solution.
| |
| − | | |
| − | The AH-1Z can outmanoeuvre and can outperform, many of the rivals in air to air combat. The AH-1Z has a triple rotary m197 cannon with 750 rounds. Combined with a twin 7.62 mm M134 Minigun machine gun, which also has 1500 Rounds per gun. That’s 3000 rounds plus the 750 rounds that’s 3750 Rounds of ammunition! Then the wing mounted AIM-9L sidewinder missiles which are installed on both wings.
| |
| − | To attack other helicopters with the sidewinders, come in the from the side or rear – get a lock on and fire one of the sidewinder missiles! Bang the enemy aircraft explodes.
| |
| − | | |
| − | To attack using the cannon and mini-guns, line up with the foe, come in fast and slow down – align your angle of attack with the side of the enemy, this will be the best chance of success since the enemy unit has exposed the largest elements of the airframe to your firepower. Aim for the critical components such as cockpit, engine, fuel tanks and rear rotator elements.
| |
| | |- | | |- |
| | |} | | |} |
| − | </div>
| |
| − | </div>
| |
| | | | |
| − | ===== Ground vehicle Example ===== | + | ===Pros and cons=== |
| − | <div class="toccolours mw-collapsible mw-collapsed" style="width:1100px; overflow:auto;"> | + | <!--''Summarize and briefly evaluate the vehicle in terms of its characteristics and combat effectiveness. Mark its pros and cons in the bulleted list. Try not to use more than 6 points for each of the characteristics. Avoid using categorical definitions such as "bad", "good" and the like - they have a substitution in the form of softer "inadequate", "effective".''--> |
| − | Click '''Expand''' to show
| + | '''Pros:''' |
| − | <div class="mw-collapsible-content">
| |
| − | <blockquote>'''<big>Usage in battles</big>'''</blockquote>The IS-7, similarly to the rest of the IS line, should be played as a breakthrough tank, taking advantage of its extreme durability, and avoiding long-range engagements where its shells simply lose effectiveness. With upwards of 450mm of effective armour in places, there’s no need to shy away from taking on almost any opponent.
| |
| | | | |
| − | The IS-7's extremely thick and well-sloped armour means that the player can comfortably engage multiple threats at once without fear of being penetrated through the sides of his/her turret. With a heightened awareness and a good sense of targeting priority, a well-rounded IS-7 player can swiftly clear out entire enemy squads with ease.
| + | * Main battery has a very high ROF and quick turret traverse |
| | + | * VT shells are very effective against aircraft |
| | + | * Single twin 40 mm Bofors provides decent defence against aircraft |
| | + | * Decent speed and manoeuvrability |
| | + | * Anti-frag armour provides moderate protection from splinters and near misses |
| | | | |
| − | The IS-7 is capable of destroying almost any machine on the battlefield and should have no qualms about combatting anything on the right terms. However, it’s best to be wary of tanks with ATGMs, high-penetration HEAT, large-calibre HESH and anything with APFSDS, as they are able to disable you, often through your frontal plate. Also be wary of any tanks with two plane stabilisers, as the IS-7s main armament is not stabilised in any way and must be stopped before it can fire accurately.<blockquote><big>'''Fighting the IS-7'''</big></blockquote>[[File:IS7 mantlet weakspot.jpg|thumb|If you don't have any powerful chemical warhead, or just got suddenly attacked by IS-7 point-blank, the highlighted weak spot on the bottom of the turret your only real hope, since you won't have time to look for any others. APDS or other strong shells with the power of ~280 mm should be able to breach the 250 mm thick mantlet bottom even if it's a bit angled, potentially destroying horizontal and vertical turret drives as well as cannon breach. After that you should rush IS-7 down and destroy it ASAP, as it shouldn't be able to use it's gun and turret anymore.]]'''General tactic''':
| + | '''Cons:''' |
| | | | |
| − | It’s best to avoid taking the IS-7 on if it stands any chance of firing back - it’s very likely that if it gets a shot off, it will be able to destroy your vehicle. Try to disable the gun, or if behind or to the sides, attempt to take out the ammo - the primary store is in the back of the turret, with excess ammunition stored in the upper sides of the hull and beside the driver, as well as a small stash right below the gun breech. If forced to engage the IS-7 from the front, attempt to fire through the turret optic (just above and to the right of the gun when looking at the front), as this is your best opportunity to disable the gunner and the breech. Shooting from an angle significantly reduces the amount of effective armour your shells have to penetrate. The IS-7 can be vulnerable to trap shots or high-calibre HE rounds above the driver’s port, although it does have significantly more armour there than the IS-3. Powerful ATGM's can easily breach hull armour and potentially take out 3 crew members, or explode excessive ammo near to tank's front.
| + | * No armour, direct hits will cause damage, just depends on how much |
| | + | * Torpedo firing arcs are less effective |
| | | | |
| − | '''With 7.* vehicles''': | + | == History == |
| | + | <!--''Describe the history of the creation and combat usage of the ship in more detail than in the introduction. If the historical reference turns out to be too big, take it to a separate article, taking a link to an article about the vehicle and adding a block "/ History" (example: <nowiki>https://wiki.warthunder.com/(Vehicle-name)/History</nowiki>) and add a link to it here using the <code>main</code> template. Be sure to reference text and sources by using <code><nowiki><ref></nowiki></code>, as well as adding them at the end of the article.''--> |
| | | | |
| − | IS-7 can easily destroy your entire team with little to no effort, so if you see one, you should immediately start planning your attack or escape route. Firstly, if you can't just attack it with your entire squad, you want it to be alone. Secondly, start predicting where it's going to go, so you can get the advantage of the first attack. Some urban environment with enough cover to sneak up on it and enough space to drive around it is perfect. After that, use your tools of choice:
| + | One of the most prolific ships during World War II 175 ships of the Fletcher-class destroyer was commissioned between 1942 and 1944. The designed proved so successful that it continued to serve into the Korean and Vietnam war.<ref name="Friedman01" /> The Fletcher class saw widespread use across the pacific theatre and was highly successful due to its long operational range and a high degree of flexibility that made it able to tackle almost any task.<ref name="Friedman01" /> |
| | | | |
| − | ''Smoke and cannon'': To make this tactic easier, it's best to ask your scout ally (usually light tank) to "Scout" it constantly if they can. Use smoke shells to completely blind IS-7 and get as close to it as possible. Avoid being hit by numerous machine guns, as it will try to use it to detect you or destroy your scout buddy. Do not drive in a straight line after shooting smoke shells. After getting close, it's advisable to drop even more smokes (the hull mounted ones or the engine exhaust system works perfect, as you don't really have a lot of time), just to make sure that his teammates won't be able to stop you, then try to find out it's rear and set its engine on fire. After that, keep circling around it, setting it on fire and keeping the smoke screen up, or find it's turret's back and destroy the tank with a single well placed shot.[[File:IS7 takedown.gif|thumb|720x720px|As an example of all the attack methods, we will use this 8.3 battle rating fight. Firstly, IS7 got antagonized by another IS7 and M70A1 (AOS) which counts as '''overkill''' and '''heavy numbers'''. '''SPAA''' used this opening to flank it and break its tracks. Since it's lightly armoured, APHE didn't detonate. IS-7 didn't expect such trickery and didn't even bother to fire its HMG. Being outnumbered 3 to 1, it '''drops''' '''smokes''', which was a mistake, since it only helps IS-7s enemies to get even closer, while SPAA returns to distract it and damage every MG it has, now in range, where it can circle around it safely. By the time that smoke disappeared, IS-7 got damaged by SPAA's teammates, and it finishes the tank off by unloading APDS magazine into the back of the turret point-blank.]]''Overkill'': If you are a proud owner of FV4005, Type 60 ATM, Sturmpanzer 2, M50 Ontos, FV 4004 Conway, BMP-1 (AB), and some other vehicles with weapons that have extreme overkill potential (usually at the cost of all the mobility and/or all armour), this is your time to shine. Aim for the weak spots, or simply fire at the left side of the hull (for you it's on the right if the tank is in front of you), depending on your weapon type. If IS-7 has full ammo loadout, it will most definitely explode. In type 60 ATM's case, you can even drop ATGM right on top of its roof or swing it into the side of the turret. Since it's not completely round, unlike most Soviet designs, it has lesser bounce chance.
| + | Being the first generation of ship designed after the collapse of the Washington and London Naval treaties, the Fletcher was designed to be larger and carry more armament than previous destroyers. Due to the increased threat of air targets, the fletcher was also given substantial Anti-Aircraft armaments, which became very useful against the Imperial Japanese Navy. <ref name="Friedman02" /> |
| | | | |
| − | ''Strength in numbers'': Send someone to bait and stall IS-7, while rest are going to flank or simply rush it down. Despite being nearly invulnerable from the front, it may easily explode, when multiple tanks fire at its '''sides''' at less than 30° angle. Ideally, you want to send something like T95 or another extremely armoured tank as bait (or even another IS-7 in AB), so foe can't simply destroy it without putting an effort, but if there is none such tanks, sacrifices must be made. Unless...
| + | During World War 2, nineteen Fletcher class destroyers were sunk while 6 were damaged to such a degree that repair was not carried out<ref name="DHF" /> |
| | | | |
| − | ''Combat SPAA'': This may sound absurd, but IS-7 can easily be doomed by SPAA. SPAA can easily use some cover to attack it's exposed track with cannons, making moving IS-7 topple over, then destroy second track, to immobilize it. Even if IS-7 fires back at it, APHE is going to over penetrate, if it's armour is less than 15mm. After that, someone can be called in to make a clean side shot (about 170 mm penetration required for sides). In case if SPAA is combat-capable and has APDS shells with 110 mm of penetration, it can try to get behind the turret, while breaking every MG with autocannons, to execute it personally. If IS-7 is aware of your intentions and keeps tracking SPAA with the turret, just set the vehicle on fire by damaging the engine, the foe will have to extinguish the fire eventually or face consequences.
| + | The last Fletcher Class destroyer was decommissioned in 2001 from the Mexican Navy, which gives it an impressive service record of almost 60 years.<ref name="DHF" /> |
| − | {| class="wikitable" align="left"
| |
| − | |-
| |
| − | |}
| |
| − | </div>
| |
| − | </div>
| |
| | | | |
| − | ===== Naval vehicle Example ===== | + | == Media == |
| − | <div class="toccolours mw-collapsible mw-collapsed" style="width:1100px; overflow:auto;">
| + | ''An excellent addition to the article will be video guides, as well as screenshots from the game and photos.'' |
| − | Click '''Expand''' to show
| |
| − | <div class="mw-collapsible-content">
| |
| − | If you must advance, advance facing forward after checking for enemies. As long as your armour faces the enemy, you have relative safety. When defending, go hull-down. Make sure there are places to retreat to if needed, and take advantage of the reverse speed and smoke grenades to run from ATGMs. Use the rangefinder when you can, but if the target is moving, you will probably miss. Try to guess based on experience if it comes to it.
| |
| | | | |
| − | The Abrams main strength its its extreme mobility, even by MBT standards. However, the price comes in protection; the Abrams is quite vulnerable, and struggles to deflect incoming shells with anything except its turret cheeks. Additionally, The M1 has somewhat sub-par penetration even with its best shell. Because of these factors, it is recommended that you do not use this tank as a front line brawler. Instead, use your speed to quickly appear from angles your opponents are not expecting you to come from. This can take the form of flanking in order to get side shots, Rushing at the start of the game to take an advantageous position, or getting to choke points before the enemy does, in order to be ready to knock them out. Essentially, This tank should be played much like the M18 Hellcat at Rank III, though unlike the Hellcat it is not impossible for your armour to help you occasionally.
| + | == See also == |
| | + | ''Links to the articles on the War Thunder Wiki that you think will be useful for the reader, for example:'' |
| | | | |
| − | A useful thing to note when playing the Abrams, and most MBTs in general, is that if your opponent shows any side armour, you can penetrate them almost every time. if someone is coming towards you even at a slight angle, aim for the the front drive wheel on their tracks. Your shell will be able to penetrate into the tank and likely one shot kill them. It is recommended to use APFSDS as the main loadout, as the HEAT-FS ammunition starts coming against tanks with armour types specifically designed to resist it.
| + | * ''reference to the series of the ship;'' |
| | + | * ''links to approximate analogues of other nations and research trees.'' |
| | | | |
| − | In terms of threats:
| + | == External links == |
| | + | ''Paste links to sources and external resources, such as:'' |
| | | | |
| − | * Most tanks at its Battle rating, due to the relatively poor armour. | + | * ''topic on the official game forum;'' |
| − | * Type 90 and AMX-40, as their incredibly powerful shots can penetrate you anywhere, at any angle, at almost any distance. | + | * ''encyclopedia page on ship;'' |
| − | * The T-80B, because of its strong armament and very strong armour. it can be penetrated through its lower front plate, the drivers viewport below the gun, and just to the side or below the gun. If a T80B shows any of its side, you can penetrate it there. | + | * ''other literature.'' |
| | | | |
| − | {| class="wikitable" align="left"
| + | == References == |
| − | |-
| + | <references> |
| − | |}</div>
| + | <ref name="Friedman01">Friedman, Norman. ''US Destroyers: An Illustrated Design History'' (revised edition, Naval Institute Press, Annapolis, 2004), pp.111-112.</ref> |
| − | </div> | + | <ref name="Friedman02">Friedman, Norman. ''US Destroyers: An Illustrated Design History'' (revised edition, Naval Institute Press, Annapolis, 2004), pp 117-119</ref> |
| − | | + | <ref name="DHF">Destroyer History Foundation. (n.d.). Fletcher Class - 2,100-ton destroyers in WWII. Retrieved October 2019, from http://destroyerhistory.org/fletcherclass/.</ref> |
| − | ===Good===
| + | </references> |
| − | ===Okay===
| |
| − | <div class="toccolours mw-collapsible mw-collapsed" style="width:1100px; overflow:auto;"> | |
| − | Click '''Expand''' to show
| |
| − | <div class="mw-collapsible-content"> | |
| − | If you must advance, advance facing forward after checking for enemies. As long as your armour faces the enemy, you have relative safety. When defending, go hull-down. Make sure there are places to retreat to if needed, and take advantage of the reverse speed and smoke grenades to run from ATGMs. Use the rangefinder when you can, but if the target is moving, you will probably miss. Try to guess based on experience if it comes to it.
| |
| − | | |
| − | The Abrams main strength its its extreme mobility, even by MBT standards. However, the price comes in protection; the Abrams is quite vulnerable, and struggles to deflect incoming shells with anything except its turret cheeks. Additionally, The M1 has somewhat sub-par penetration even with its best shell. Because of these factors, it is recommended that you do not use this tank as a front line brawler. Instead, use your speed to quickly appear from angles your opponents are not expecting you to come from. This can take the form of flanking in order to get side shots, Rushing at the start of the game to take an advantageous position, or getting to choke points before the enemy does, in order to be ready to knock them out. Essentially, This tank should be played much like the M18 Hellcat at Rank III, though unlike the Hellcat it is not impossible for your armour to help you occasionally.
| |
| − | | |
| − | A useful thing to note when playing the Abrams, and most MBTs in general, is that if your opponent shows any side armour, you can penetrate them almost every time. if someone is coming towards you even at a slight angle, aim for the the front drive wheel on their tracks. Your shell will be able to penetrate into the tank and likely one shot kill them. It is recommended to use APFSDS as the main loadout, as the HEAT-FS ammunition starts coming against tanks with armour types specifically designed to resist it.
| |
| − | | |
| − | In terms of threats:
| |
| − | | |
| − | * Most tanks at its Battle rating, due to the relatively poor armour.
| |
| − | * Type 90 and AMX-40, as their incredibly powerful shots can penetrate you anywhere, at any angle, at almost any distance.
| |
| − | * The T-80B, because of its strong armament and very strong armour. it can be penetrated through its lower front plate, the drivers viewport below the gun, and just to the side or below the gun. If a T80B shows any of its side, you can penetrate it there.
| |
| − | | |
| − | {| class="wikitable" align="left"
| |
| − | |-
| |
| − | |}</div>
| |
| − | </div> | |
| | | | |
| − | ===Bad===
| + | {{USA destroyers}} |
USS Fletcher
Research:9 200 
Purchase:16 000 
Description
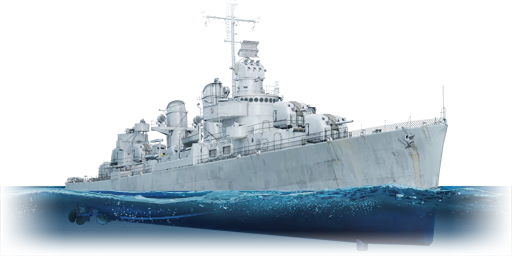
The Fletcher-class, USS Fletcher (DD-445), 1942 is a rank II American destroyer
with a battle rating of 4.7 (AB/RB/SB). It was introduced in Update 1.79 "Project X" as part of the fleet closed beta test.
General info
Survivability and armour
Talk about the vehicle's armour. Note the most well-defended and most vulnerable zones, e.g. the ammo magazine. Evaluate the composition of components and assemblies responsible for movement and manoeuvrability. Evaluate the survivability of the primary and secondary armament separately. Don't forget to mention the size of the crew, which plays an important role in fleet mechanics. Tips for preserving survivability should be saved for the "Use in battle" section.
If necessary, use a graphic template to show the most well-protected or most vulnerable points in the armour.
Mobility
Write about the ship’s mobility. Evaluate its power and manoeuvrability, rudder rerouting speed, stopping speed at full tilt, with its maximum forward speed and reverse speed.
Armament
Primary armament
Provide information about the characteristics of the primary armament. Evaluate their efficacy in battle based on their reload speed, ballistics and the capacity of their shells. Add a link to the main article about the weapon: {{main|Weapon name (calibre)}}.
Broadly describe the ammunition available for the primary armament, and provide recommendations on how to use it and which ammunition to choose.
Secondary armament
Some ships are fitted with weapons of various calibres. Secondary armament is defined by the weapon chosen with the control Select secondary weapon. Evaluate the secondary armament and give advice on how to use them. Describe the ammunition available for the secondary armament. Provide recommendations on how to use them and which ammunition to choose. Remember that anti-air armament, even heavy calibre weapons, belong in the next section.
If there is no secondary armament, remove this section.
Anti-aircraft armament
An important part of the ship’s armament responsible for air raid defence. Anti-aircraft armament is defined by the weapon chosen with the control Select anti-aircraft weapons. Talk about the ship’s anti-air cannons and machine guns, the number of guns and their positions, their effective range, and about their overall effectiveness – including against surface targets.
If there is no anti-aircraft artillery, remove this section.
Torpedo armament
Many ships are armed with torpedo launchers, and for some vessels such as boats, torpedoes are an extremely important means of defeating an opponent. Evaluate the position of the torpedo launchers, discuss the ammunition available, firing specifics such as dead zones, features of the torpedoes themselves, etc.
If there is no torpedo armament, remove this section.
Special armament
Depth charges, mines, rocket launchers and missiles are also effective in skilled hands and can be an unexpected surprise for an opponent. Evaluate the ammunition of this type of armament and rate its performance in combat.
Usage in battles
Describe the technique of using this ship, the characteristics of her use in a team and tips on strategy. Abstain from writing an entire guide – don’t get try to provide a single point of view, but give the reader food for thought. Talk about the most dangerous opponents for this vehicle and provide recommendations on fighting them. If necessary, note the specifics of playing with this vehicle in various modes (AB, RB, SB).
Modules
| Tier
|
Seakeeping
|
Unsinkability
|
Firepower
|
| I
|
Dry-Docking
|
Tool Set |
|
127 mm Common Mk.32 |
40 mm HE clips |
Anti-Air Armament Targeting
|
| II
|
Rudder Replacement
|
Fire Protection System |
Smokescreen
|
|
40 mm AP clips |
Auxiliary Armament Targeting
|
| III
|
Propeller Replacement
|
Ventilation |
Shrapnel Protection
|
127 mm AAVT Mk.31 |
Improved Rangefinder |
Primary Armament Targeting
|
| IV
|
Engine Maintenance
|
New Pumps |
Ammo Wetting
|
Torpedo Mode |
Bomb mortar |
|
Pros and cons
Pros:
- Main battery has a very high ROF and quick turret traverse
- VT shells are very effective against aircraft
- Single twin 40 mm Bofors provides decent defence against aircraft
- Decent speed and manoeuvrability
- Anti-frag armour provides moderate protection from splinters and near misses
Cons:
- No armour, direct hits will cause damage, just depends on how much
- Torpedo firing arcs are less effective
History
One of the most prolific ships during World War II 175 ships of the Fletcher-class destroyer was commissioned between 1942 and 1944. The designed proved so successful that it continued to serve into the Korean and Vietnam war.[1] The Fletcher class saw widespread use across the pacific theatre and was highly successful due to its long operational range and a high degree of flexibility that made it able to tackle almost any task.[1]
Being the first generation of ship designed after the collapse of the Washington and London Naval treaties, the Fletcher was designed to be larger and carry more armament than previous destroyers. Due to the increased threat of air targets, the fletcher was also given substantial Anti-Aircraft armaments, which became very useful against the Imperial Japanese Navy. [2]
During World War 2, nineteen Fletcher class destroyers were sunk while 6 were damaged to such a degree that repair was not carried out[3]
The last Fletcher Class destroyer was decommissioned in 2001 from the Mexican Navy, which gives it an impressive service record of almost 60 years.[3]
Media
An excellent addition to the article will be video guides, as well as screenshots from the game and photos.
See also
Links to the articles on the War Thunder Wiki that you think will be useful for the reader, for example:
- reference to the series of the ship;
- links to approximate analogues of other nations and research trees.
External links
Paste links to sources and external resources, such as:
- topic on the official game forum;
- encyclopedia page on ship;
- other literature.
References
- ↑ 1.0 1.1 Friedman, Norman. US Destroyers: An Illustrated Design History (revised edition, Naval Institute Press, Annapolis, 2004), pp.111-112.
- ↑ Friedman, Norman. US Destroyers: An Illustrated Design History (revised edition, Naval Institute Press, Annapolis, 2004), pp 117-119
- ↑ 3.0 3.1 Destroyer History Foundation. (n.d.). Fletcher Class - 2,100-ton destroyers in WWII. Retrieved October 2019, from http://destroyerhistory.org/fletcherclass/.