Difference between pages "B-25J-1" and "Sd.Kfz.234/3"
m (This is just a little bit of addition to tip and trick the player can pull if they are being attacked.) (Tag: Visual edit) |
(→Main armament) (Tag: Visual edit) |
||
| Line 1: | Line 1: | ||
| − | {{Specs-Card|code= | + | {{Specs-Card |
| − | + | |code=germ_sdkfz_234_3 | |
| − | + | |market=Sd.Kfz.234/3 (Germany) | |
| − | |||
| − | | | ||
}} | }} | ||
== Description == | == Description == | ||
| − | <!-- ''In the description, the first part should be about the history of | + | <!-- ''In the description, the first part should be about the history of the creation and combat usage of the vehicle, as well as its key features. In the second part, tell the reader about the ground vehicle in the game. Insert a screenshot of the vehicle, so that if the novice player does not remember the vehicle by name, he will immediately understand what kind of vehicle the article is talking about.'' --> |
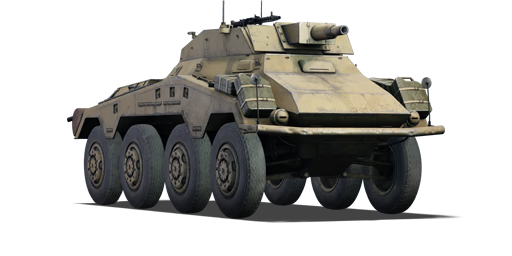
| − | [[File: | + | [[File:GarageImage_Sd.Kfz.234_3.jpg|420px|thumb|left]] |
| − | {{ | + | {{Break}} |
| − | The '''{{Specs|name}}''' is a rank {{Specs|rank}} | + | The '''{{Specs|name}}''' is a premium gift rank {{Specs|rank}} German tank destroyer {{Battle-rating}}. It was introduced during [[Update 1.79 "Project X"]] in the [[wt:en/news/5698-marathon-good-old-s-u-m-m-e-r-en|"Good Old S.U.M.M.E.R"]] event of 2018. |
| − | + | == General info == | |
| − | + | === Survivability and armour === | |
| − | + | <!--Describe armour protection. Note the most well protected and key weak areas. Appreciate the layout of modules as well as the number and location of crew members. Is the level of armour protection sufficient, is the placement of modules helpful for survival in combat?'' | |
| − | + | ''If necessary use a visual template to indicate the most secure and weak zones of the armour.--> | |
| − | + | ||
| − | + | '''Armour type:''' | |
| − | |||
| − | + | * Rolled homogeneous armour (hull, turret, gun shield, gun mantlet) | |
| − | + | * Structural steel (tires, suspension, mudguards) | |
| − | |||
| − | {| class="wikitable | + | {| class="wikitable" |
|- | |- | ||
| − | ! | + | ! Armour !! Front (Slope angle) !! Sides !! Rear !! Roof |
|- | |- | ||
| − | + | | Hull || 30 mm (40°) ''Front plate'' <br> 15 mm (70°) ''Front glacis - upper section'' <br> 30 mm (55°) ''Front glacis - lower section'' <br> 30 mm (35°) ''Lower glacis'' || 8 mm (35°) + 4 mm ''Top + Mudguards'' <br> 8 mm (19°) ''Bottom'' || 10 mm (38°) ''Plate connecting with the turret'' <br> 10 mm (21°) ''Engine compartment - upper part'' <br> 10 mm (46°) + 10 mm ''Engine compartment - lower part + add-on spare tire'' || 5 mm | |
|- | |- | ||
| − | + | | Turret || 14.5 mm (34°) <br> 14.5 mm ''Gun mantlet'' || 14.5 mm || 10 mm (33°) || N/A | |
| − | |||
| − | |||
| − | |||
| − | |||
|- | |- | ||
| − | ! | + | |} |
| + | '''Notes:''' | ||
| + | |||
| + | * Tires and suspension bars are 10 mm thick. | ||
| + | * Bottom of the hull is 8 mm thick. An additional 13 mm plate separates the crew compartment from the bottom plate. | ||
| + | * Viewports for the crew are 30 mm thick. | ||
| + | |||
| + | When dealing with the {{PAGENAME}}, the best way to deal with this tank is to catch it out of position and/or from behind. Because of its low armour values, it can be easily destroyed with 12.7 mm MG fire or HE shells to the open roof. Most AP and APHE shots will simply over-penetrate the vehicle's front armour and will not do much to the crew compartment unless aimed at specific crew locations or it hull-breaks the {{PAGENAME}}. As such, explosive ammunition or machine gun fire are the more preferred methods of elimination. | ||
| + | |||
| + | === Mobility === | ||
| + | <!-- ''Write about the mobility of the ground vehicle. Estimate the specific power and manoeuvrability, as well as the maximum speed forwards and backwards.'' --> | ||
| + | |||
| + | {{tankMobility|abMinHp= 298|rbMinHp= 186}} | ||
| + | |||
| + | The {{PAGENAME}} accelerates quickly and has a very high cruise speed on hard surfaces (solid ground, roads). | ||
| + | While its high speed is an advantage, it can turn into a disadvantage when maoeuvring at high speed: the {{PAGENAME}} starts wobbling if you turn too violently and you end up skidding incontrollably. Be aware of this before gunning towards the frontline: limit your maximum speed and anticipate the braking phases. | ||
| + | Like all WW2 wheeled vehicles, you can not turn on the spot and always need space to change direction. However, thanks to the orientable front and rear axles, your turn radius remains small at small speed. But remember that the faster you drive, the bigger the turn radius will be. | ||
| + | Changing directions in a cramped street can be difficult with the {{PAGENAME}}. However, the reverse speed is very important, which mitigates the impossibility to change direction on the spot. | ||
| + | As it is equipped with tires, the {{PAGENAME}} struggles on soft terrain (sand, mud, snow). The {{PAGENAME}} is also average at fording: 15 km/h and it loses quickly speed when driving uphill. Obstacles will also make you lose a lot of speed: avoid them as the {{PAGENAME}}'s survival relies on its mobility. | ||
| + | |||
| + | == Armaments == | ||
| + | === Main armament === | ||
| + | |||
| + | <!-- ''Give the reader information about the characteristics of the main gun. Assess its effectiveness in a battle based on the reloading speed, ballistics and the power of shells. Do not forget about the flexibility of the fire, that is how quickly the cannon can be aimed at the target, open fire on it and aim at another enemy. Add a link to the main article on the gun: <code><nowiki>{{main|Name of the weapon}}</nowiki></code>. Describe in general terms the ammunition available for the main gun. Give advice on how to use them and how to fill the ammunition storage.'' --> | ||
| + | {{main|K51 L/24 (75 mm)}} | ||
| + | |||
| + | {| class="wikitable" style="text-align:center" width="100%" | ||
|- | |- | ||
| − | | | + | ! colspan="5" | [[K51 L/24 (75 mm)|75 mm K51 L/24]] || colspan="5" | Turret rotation speed (°/s) || colspan="4" | Reloading rate (seconds) |
|- | |- | ||
| − | ! | + | ! Mode !! Capacity !! Vertical !! Horizontal !! Stabilizer |
| + | ! Stock !! Upgraded !! Full !! Expert !! Aced | ||
| + | ! Stock !! Full !! Expert !! Aced | ||
|- | |- | ||
| − | ! | + | ! ''Arcade'' |
| − | + | | rowspan="2" | 50 || rowspan="2" | -10°/+16° || rowspan="2" | ±14° || rowspan="2" | N/A || 12.3 || 17.1 ||20.1||22.9|| 24.4 || rowspan="2" | 4.3 || rowspan="2" |3.8|| rowspan="2" |3.5|| rowspan="2" | 3.3 | |
| − | |||
| − | |||
| − | |||
|- | |- | ||
| − | ! | + | ! ''Realistic'' |
| + | | 8.3 || 9.8 ||11.9||13.2|| 14.0 | ||
|- | |- | ||
| − | | | + | |} |
| + | |||
| + | The "Stumpwagen" is armed with the K51 L/24 gun, which is equivalent to the [[KwK 37 (75 mm)|75 mm KwK 37]] gun on the early Panzer IV tanks. The gun features the same four useful ammunition types as the KwK 37. The gun has great zoom and a very fast fire rate. | ||
| + | |||
| + | ==== Ammunition ==== | ||
| + | The available ammunition offers a wide range of shells to engage all types of targets: | ||
| + | |||
| + | * '''K.Gr.rot Pz.''': APCBC; a slow shell with explosive filler mass that will one-shot any tank that is penetrates but has an average penetration power. | ||
| + | * '''Hl.Gr 38B''': HEAT; a shaped charge with good penetration and without penetration loss over distance. Only penetrates flat vertical surfaces but the post-penetration damage is very effective on open and lightly armoured vehicles. | ||
| + | * '''Hl.Gr 38C''': HEAT; a shaped charge with increased penetration over the previous shell. Very useful against heavily armoured targets. | ||
| + | * '''Sprgr. 34''': HE; useful for destroying open and lightly armoured vehicles. | ||
| + | * '''K.Gr.Rot Nb.''': Smoke; useful to blind enemy vehicles that are too remote for you to disable so that you can progress towards objectives. | ||
| + | |||
| + | {| class="wikitable sortable" style="text-align:center" width="100%" | ||
| + | ! colspan="8" | Penetration statistics | ||
|- | |- | ||
| − | + | ! rowspan="2" data-sort-type="text" | Ammunition | |
| − | + | ! rowspan="2" | Type of<br>warhead | |
| − | + | ! colspan="6" | '''Penetration @ 0° Angle of Attack (mm)''' | |
| − | + | |- | |
| + | ! 10 m !! 100 m !! 500 m !! 1,000 m !! 1,500 m !! 2,000 m | ||
| + | |- | ||
| + | | K.Gr.rot Pz. || APCBC || 52 || 50 || 45 || 39 || 34 || 30 | ||
|- | |- | ||
| − | + | | Hl.Gr 38B || HEAT || 80 || 80 || 80 || 80 || 80 || 80 | |
|- | |- | ||
| − | + | | Hl.Gr 38C || HEAT || 100 || 100 || 100 || 100 || 100 || 100 | |
|- | |- | ||
| − | | | + | | Sprgr. 34 || HE || 10 || 10 || 10 || 10 || 10 || 10 |
|- | |- | ||
|} | |} | ||
| − | + | {| class="wikitable sortable" style="text-align:center" width="100%" | |
| − | {| class="wikitable" style="text-align:center" | + | ! colspan="10" | Shell details |
| + | |- | ||
| + | ! rowspan="2" data-sort-type="text" | Ammunition | ||
| + | ! rowspan="2" | Type of<br>warhead | ||
| + | ! rowspan="2" | Velocity<br>(m/s) | ||
| + | ! rowspan="2" | Projectile<br>Mass (kg) | ||
| + | ! rowspan="2" | Fuse delay<br>(m) | ||
| + | ! rowspan="2" | Fuse sensitivity<br>(mm) | ||
| + | ! rowspan="2" | Explosive Mass<br>(TNT equivalent) (g) | ||
| + | ! colspan="3" | Ricochet | ||
| + | |- | ||
| + | ! 0% !! 50% !! 100% | ||
|- | |- | ||
| − | + | | K.Gr.rot Pz. || APCBC || 385 || 6.78 || 1.2 || 14.0 || 80 || 48° || 63° || 71° | |
|- | |- | ||
| − | + | | Hl.Gr 38B || HEAT || 450 || 4.57 || 0.0 || 0.1 || 872.1 || 62° || 69° || 73° | |
| − | |||
| − | |||
| − | |||
|- | |- | ||
| − | + | | Hl.Gr 38C || HEAT || 450 || 4.80 || 0.0 || 0.1 || 875.5 || 62° || 69° || 73° | |
|- | |- | ||
| − | | | + | | Sprgr. 34 || HE || 420 || 5.74 || 0.1 || 0.1 || 686 || 79° || 80° || 81° |
|- | |- | ||
|} | |} | ||
| − | + | {| class="wikitable sortable" style="text-align:center" | |
| − | {| class="wikitable" style="text-align:center" | + | ! colspan="7" | Smoke characteristic |
| − | |||
| − | ! colspan=" | ||
|- | |- | ||
| − | ! | + | ! Ammunition |
| − | ! | + | ! Velocity <br /> in m/s |
| − | ! | + | ! Projectile<br />Mass in kg |
| − | ! | + | ! ''Screen radius <br /> in m'' |
| + | ! ''Screen time <br /> in s'' | ||
| + | ! ''Screen hold time <br /> in s:'' | ||
| + | ! ''Explosive Mass in g<br /> (TNT equivalent):'' | ||
|- | |- | ||
| − | | | + | | K.Gr.Rot Nb. || 423 || 6.20 || 13 || 5 || 20 || 50 |
|- | |- | ||
|} | |} | ||
| + | ==== [[Ammo racks]] ==== | ||
{| class="wikitable" style="text-align:center" | {| class="wikitable" style="text-align:center" | ||
|- | |- | ||
| − | ! | + | ! Full<br>ammo |
| − | + | ! 1st<br>rack empty | |
| − | ! | + | ! 2nd<br>rack empty |
| − | + | ! 3rd<br>rack empty | |
| − | ! | + | ! 4th<br>rack empty |
| − | ! | + | ! 5th<br>rack empty |
| − | ! | + | ! 6th<br>rack empty |
| − | + | ! 7th<br>rack empty | |
| − | + | ! 8th<br>rack empty | |
| − | + | ! Visual<br>discrepancy | |
| − | ! | ||
| − | |||
| − | ! | ||
| − | ! | ||
| − | ! | ||
|- | |- | ||
| − | | | + | | '''50''' || 45 ''(+5)'' || 39 ''(+11)'' || 35 ''(+15)'' || 31 ''(+19)'' || 27 ''(+23)'' || 23 ''(+27)'' || 13 ''(+37)'' || 1 ''(+49)'' || No |
|- | |- | ||
|} | |} | ||
| + | [[File:Ammoracks Sd.Kfz.234-3.png|right|thumb|x250px|[[Ammo racks]] of the {{PAGENAME}}]] | ||
| + | Notes: | ||
| − | + | * Shells in racks 1 and 2 are modeled individually and disappear after having been shot or loaded. | |
| − | + | * Shells in racks 3 to 8 are modeled by sets of 2 and disappear after both shells in the set having been shot or loaded. | |
| − | + | * Pack 27 ''(+23)'' shells (racks 1 to 5 emptied) to go into battle with the flanks empty of ammo. | |
| − | |||
| − | |||
| − | |||
| − | |||
| − | * | ||
| − | |||
| − | |||
| − | |||
| − | |||
| − | |||
| − | |||
| − | |||
| − | |||
| − | |||
| − | |||
| − | |||
| − | |||
| − | |||
| − | |||
| − | |||
| − | |||
| − | * | ||
| − | |||
| − | |||
| − | |||
| − | |||
| − | |||
| − | |||
| − | |||
| − | |||
| − | |||
| − | |||
| − | |||
| − | |||
| − | |||
| − | |||
| − | |||
| − | |||
| − | |||
| − | |||
| − | |||
| − | |||
| − | |||
| − | |||
| − | |||
| − | |||
| − | |||
| − | |||
| − | |||
| − | |||
== Usage in battles == | == Usage in battles == | ||
| − | <!-- | + | <!--Describe the tactics of playing in the vehicle, the features of using vehicles in the team and advice on tactics. Refrain from creating a "guide" - do not impose a single point of view but instead give the reader food for thought. Describe the most dangerous enemies and give recommendations on fighting them. If necessary, note the specifics of the game in different modes (AB, RB, SB).--> |
| − | [[ | + | This armoured car is as much fun to play as the [[Sd.Kfz.234/4]]. The short 75 mm gun and the 234 chassis work amazingly well within its battle rating. The best way to play this Rank I Goliath is to use your speed and to try to get side and rear shots on the enemy but since you have HEAT at your disposal, you are almost guaranteed to obliterate anything frontally at your battle rating and vice versa. The 234/3 has the same weaknesses as the 234/2 which means it can be and will be torn up by 12.7 mm machine gun fire, assume the position has been spotted after firing and move out via reverse. Engaging in a head-on is unadvised but you can come out kicking should you find yourself against any higher tanks as you should be able to reload fast enough, though this is not a go-to option. |
| − | + | The 75 mm gun is the same as early Panzer IV and can destroy any other vehicles at and above its battle rating with one hit, meanwhile, the 234/3 has a great speed of 50-60 km/h forwards and backwards to relocate. Because of this, it is possible (though not necessarily needed) to use the 75 mm and return fire while making haste. Terrain foliage such as bushes are great assets for concealment, shadows as well so use them and stay hidden. | |
| − | + | Like it's older brother, it is recommended to follow the exact same tactics, those being: | |
| − | + | # Get behind great cover, either hard cover or visual cover (so rocks and or bushes are great) | |
| + | # Use your cover for great visibility (for you to view the enemy) | ||
| + | # The ability to get deadly hits into the enemies | ||
| − | + | In its battle rating of 1.7, the 234/3 will face anything and everything between 1.0 and 2.7, It can and will be destroyed by anything and everything here. But keep in mind that tanks can use Artillery and Air-Spawns to take you down if they can't directly see you, so get under a roof and/or likewise cover where they can't see you nor hit you. | |
| − | |||
| − | |||
| − | |||
| − | |||
| − | |||
| − | |||
| − | |||
| − | |||
| − | |||
| − | |||
| − | |||
| − | |||
| − | |||
| − | |||
| − | |||
| − | |||
| − | |||
| − | |||
| − | |||
| − | |||
=== Modules === | === Modules === | ||
{| class="wikitable" | {| class="wikitable" | ||
| − | ! Tier | + | !Tier |
| − | ! colspan="2" | | + | ! colspan="2" |Mobility |
| − | ! | + | !Protection |
| − | ! colspan="2" | | + | ! colspan="2" |Firepower |
|- | |- | ||
| − | | I | + | |I |
| − | | | + | |Tires |
| − | | | + | | |
| − | | | + | |Parts |
| − | | | + | |Horizontal Drive |
| − | | | + | | |
|- | |- | ||
| − | | II | + | |II |
| + | |Suspension | ||
| + | |Brake System | ||
| + | |FPE | ||
| + | |Hl.Gr 38B | ||
| + | |Adjustment of Fire | ||
| + | |- | ||
| + | |III | ||
| + | |Filters | ||
| | | | ||
| − | | | + | |Crew Replenishment |
| − | | | + | |Hl.Gr 38C |
| − | | | + | |Elevation Mechanism |
| − | |||
|- | |- | ||
| − | | | + | |IV |
| − | | | + | |Transmission |
| − | | Engine | + | |Engine |
| | | | ||
| − | | | + | |K.Gr.Rot Nb. |
| | | | ||
|- | |- | ||
| − | | | + | ! colspan="6" |This is a premium vehicle: all modifications are unlocked on purchase |
| − | |||
| − | |||
| − | |||
| − | |||
| − | |||
|- | |- | ||
|} | |} | ||
=== Pros and cons === | === Pros and cons === | ||
| − | <!-- | + | <!--Summarise and briefly evaluate the vehicle in terms of its characteristics and combat effectiveness. Mark its pros and cons in a bulleted list. Try not to use more than 6 points for each of the characteristics. Avoid using categorical definitions such as "bad", "good" and the like - use substitutions with softer forms such as "inadequate" and "effective".--> |
| − | * | + | '''Pros:''' |
| − | * | + | |
| − | * | + | * Adequate ammo supply for prolonged combat |
| − | * | + | * Can move forward and backwards with equal speed |
| − | + | * Eight-wheel drive gives it good surface traction and handling, much better manoeuvrability | |
| − | * | + | * Shorter Gun than [[Sd.Kfz.234/2]], making it harder to identify behind bushes |
| − | * | + | * HEAT Shells are available for usage |
| + | * Premium bonus | ||
'''Cons:''' | '''Cons:''' | ||
| − | * | + | * Very weak armour, can be penetrated by aircraft weapons and heavy machine guns |
| − | * | + | * Open-topped, making it very vulnerable to attacks from the air or artillery |
| − | * | + | * Can be disabled by aircraft simply by ramming it |
| − | * | + | * Limited gun traverse |
| − | * | + | * Crew compartment is littered with ammo |
| − | * | + | * Vehicle will be immobilized if one driver is knocked out despite having two drivers in its layout, due to game mechanic limitations of having only one driver at a time |
| − | + | * Less penetration than the 234/2 | |
| − | * | ||
| − | |||
== History == | == History == | ||
| − | <!-- | + | <!--Describe the history of the creation and combat usage of the ground vehicle in more detail than in the introduction. If the historical reference turns out to be too long, take it to a separate article, taking a link to the article about the vehicle and adding a block "/ History" (example: <nowiki>https://wiki.warthunder.com/(Vehicle-name)/History</nowiki>) and add a link to it here using the <code>main</code> template. Be sure to reference text and sources by using <code><nowiki><ref></nowiki></code>, as well as adding them at the end of the article. This section may also include the vehicle's dev blog entry (if applicable) and the in-game encyclopedia description (under <code><nowiki>=== Encyclopedia Info ===</nowiki></code>, also if applicable).--> |
| + | The blitzkrieg tactics in Poland and France gave the Germans a new appreciation of mobile and lethal reconnaissance vehicles. The Germans especially valued the armoured cars due to their speed, firepower, and their pre-war build-up as they were not restricted by the Versailles Treaty. The Germans started with armoured cars like the Sd.Kfz.231 family, each with different armaments. However, these vehicles had its flaws and in August 1940, Germany sought a replacement following the conclusion of the Battle of France. | ||
| − | + | The new vehicle was built off an improved Sd.Kfz.232 chassis made in monocoque construction by Büssing-NAG, its armoured body was made by Deutsche Edelstahlwerke, the turret by Daimler-Benz and Schichau, and air-cooled diesel engines by Ringhoffer-Tatra-Werke AG. The monocoque chassis design was built with an eight-wheel steering system, six forward and reverse gears, as well as having an additional driver seat in the rear for quick reversal get-aways. This construction led to '''Sd.Kfz.234''' family. Vehicle construction first started in 1943 as the [[Sd.Kfz.234/2|Sd.Kfz.234/2]], which had a turret originally intended for the VK 1602 Leopard mounting a [[KwK 39 (50 mm)|5 cm L/60]] gun, construction continued on this vehicle until mid-1944. The Sd.Kfz.234/2 earned the nickname "Puma" from the soldiers using it. | |
| − | + | Production for Sd.Kfz.234/2 shifted towards other armaments in 1944 that replaced the original. This produced variants such as the [[Sd.Kfz.234/1]] which replaced the turret with an open-top one carrying a [[KwK38 (20 mm)|2 cm KwK 38]], this was produced between mid-1944 to early 1945. Right besides that, the Sd.Kfz.234/3 was produced with an open-top structure to mount a [[KwK 37 (75 mm)|75 mm howitzer]], this was produced from mid-1944 until the end of 1944. At the Sd.Kfz.234/3's production end, it was replaced by the [[Sd.Kfz.234/4]], also known as the "Pakwagen", that had the armament replaced by a [[KwK 40 (75 mm)|7.5 cm PaK 40]] anti-tank gun. This last variant was produced from the end of 1944 to the capitulation of Germany in World War II. A total of 478 Sd.Kfz.234 armoured cars were produced, 200 of the 234/1, 101 of the 234/2, 88 of the 234/3, and 89 of the 234/4. | |
| − | + | == Media == | |
| − | + | <!-- ''Excellent additions to the article would be video guides, screenshots from the game, and photos.'' --> | |
| − | == | ||
| − | |||
| − | |||
| − | |||
| − | |||
| − | |||
| − | |||
| − | |||
| − | |||
| − | |||
| − | |||
| − | |||
| − | |||
| − | |||
| − | |||
| − | |||
| − | |||
| − | |||
| − | |||
| − | |||
| − | + | ;Skins | |
| − | = | + | * [https://live.warthunder.com/feed/camouflages/?q=%23sdkfz234_3 Skins and camouflages for the {{PAGENAME}} from live.warthunder.com.] |
| − | |||
;Videos | ;Videos | ||
| − | {{Youtube-gallery| | + | {{Youtube-gallery|h_Gng-eiEXE|'''The Shooting Range #113''' - ''War Machines'' section at 10:49 discusses the {{PAGENAME}}.|QRLKBxSNyGk|'''{{PAGENAME}} Tank Review''' - ''NUSensei''|YtJrPmBOdOI|'''Sd.Kfz.234/3: Rapid HEAT Dispenser''' - ''Napalmratte''}} |
== See also == | == See also == | ||
| − | <!-- | + | <!--Links to the articles on the War Thunder Wiki that you think will be useful for the reader, for example: |
| − | + | * ''reference to the series of the vehicles;'' | |
| − | * ''reference to the series of the | ||
* ''links to approximate analogues of other nations and research trees.''--> | * ''links to approximate analogues of other nations and research trees.''--> | ||
| − | + | * [[Sd.Kfz.234/1]], equipped with a turreted [[KwK 38 (20 mm)|2 cm KwK 38]] autocannon. | |
| − | + | * [[Sd.Kfz.234/2]], equipped with a turreted [[KwK 39 (50 mm)|50 mm KwK 39]] gun. | |
| − | * | + | * [[Sd.Kfz.234/4]], tank destroyer version equipped with the longer [[PaK 40/3 (75 mm)|75 mm PaK 40/3]] gun. |
| − | |||
| − | * | ||
| − | |||
| − | |||
| − | |||
| − | |||
| − | |||
| − | * [[ | ||
| − | |||
| − | |||
| − | |||
== External links == | == External links == | ||
<!-- ''Paste links to sources and external resources, such as:'' | <!-- ''Paste links to sources and external resources, such as:'' | ||
* ''topic on the official game forum;'' | * ''topic on the official game forum;'' | ||
| − | * ''encyclopedia page on the | + | * ''encyclopedia page on the tank;'' |
* ''other literature.'' --> | * ''other literature.'' --> | ||
| − | * [ | + | * [[wikipedia:Sd.Kfz._234|[Wikipedia] Sd.Kfz. 234]] |
| + | * [https://tanks-encyclopedia.com/ww2/nazi_germany/Sd-Kfz-234_Puma.php <nowiki>[Tanks Encyclopedia]</nowiki> Sd.Kfz.234 Puma] | ||
| − | {{ | + | {{Germany tank destroyers}} |
| − | {{ | + | {{Germany premium ground vehicles}} |
Revision as of 10:46, 9 August 2020
Contents
Description

The s.Pz.Sp.Wg. (7,5 cm) Sd.Kfz.234/3 is a premium gift rank I German tank destroyer
with a battle rating of 2.0 (AB/RB/SB). It was introduced during Update 1.79 "Project X" in the "Good Old S.U.M.M.E.R" event of 2018.
General info
Survivability and armour
Armour type:
- Rolled homogeneous armour (hull, turret, gun shield, gun mantlet)
- Structural steel (tires, suspension, mudguards)
| Armour | Front (Slope angle) | Sides | Rear | Roof |
|---|---|---|---|---|
| Hull | 30 mm (40°) Front plate 15 mm (70°) Front glacis - upper section 30 mm (55°) Front glacis - lower section 30 mm (35°) Lower glacis |
8 mm (35°) + 4 mm Top + Mudguards 8 mm (19°) Bottom |
10 mm (38°) Plate connecting with the turret 10 mm (21°) Engine compartment - upper part 10 mm (46°) + 10 mm Engine compartment - lower part + add-on spare tire |
5 mm |
| Turret | 14.5 mm (34°) 14.5 mm Gun mantlet |
14.5 mm | 10 mm (33°) | N/A |
Notes:
- Tires and suspension bars are 10 mm thick.
- Bottom of the hull is 8 mm thick. An additional 13 mm plate separates the crew compartment from the bottom plate.
- Viewports for the crew are 30 mm thick.
When dealing with the Sd.Kfz.234/3, the best way to deal with this tank is to catch it out of position and/or from behind. Because of its low armour values, it can be easily destroyed with 12.7 mm MG fire or HE shells to the open roof. Most AP and APHE shots will simply over-penetrate the vehicle's front armour and will not do much to the crew compartment unless aimed at specific crew locations or it hull-breaks the Sd.Kfz.234/3. As such, explosive ammunition or machine gun fire are the more preferred methods of elimination.
Mobility
| Game Mode | Max Speed (km/h) | Weight (tons) | Engine power (horsepower) | Power-to-weight ratio (hp/ton) | |||
|---|---|---|---|---|---|---|---|
| Forward | Reverse | Stock | Upgraded | Stock | Upgraded | ||
| Arcade | 98 | 98 | 11.5 | 298 | 401 | 25.91 | 34.87 |
| Realistic | 90 | 90 | 186 | 210 | 16.17 | 18.26 | |
The Sd.Kfz.234/3 accelerates quickly and has a very high cruise speed on hard surfaces (solid ground, roads). While its high speed is an advantage, it can turn into a disadvantage when maoeuvring at high speed: the Sd.Kfz.234/3 starts wobbling if you turn too violently and you end up skidding incontrollably. Be aware of this before gunning towards the frontline: limit your maximum speed and anticipate the braking phases. Like all WW2 wheeled vehicles, you can not turn on the spot and always need space to change direction. However, thanks to the orientable front and rear axles, your turn radius remains small at small speed. But remember that the faster you drive, the bigger the turn radius will be. Changing directions in a cramped street can be difficult with the Sd.Kfz.234/3. However, the reverse speed is very important, which mitigates the impossibility to change direction on the spot. As it is equipped with tires, the Sd.Kfz.234/3 struggles on soft terrain (sand, mud, snow). The Sd.Kfz.234/3 is also average at fording: 15 km/h and it loses quickly speed when driving uphill. Obstacles will also make you lose a lot of speed: avoid them as the Sd.Kfz.234/3's survival relies on its mobility.
Armaments
Main armament
| 75 mm K51 L/24 | Turret rotation speed (°/s) | Reloading rate (seconds) | |||||||||||
|---|---|---|---|---|---|---|---|---|---|---|---|---|---|
| Mode | Capacity | Vertical | Horizontal | Stabilizer | Stock | Upgraded | Full | Expert | Aced | Stock | Full | Expert | Aced |
| Arcade | 50 | -10°/+16° | ±14° | N/A | 12.3 | 17.1 | 20.1 | 22.9 | 24.4 | 4.3 | 3.8 | 3.5 | 3.3 |
| Realistic | 8.3 | 9.8 | 11.9 | 13.2 | 14.0 | ||||||||
The "Stumpwagen" is armed with the K51 L/24 gun, which is equivalent to the 75 mm KwK 37 gun on the early Panzer IV tanks. The gun features the same four useful ammunition types as the KwK 37. The gun has great zoom and a very fast fire rate.
Ammunition
The available ammunition offers a wide range of shells to engage all types of targets:
- K.Gr.rot Pz.: APCBC; a slow shell with explosive filler mass that will one-shot any tank that is penetrates but has an average penetration power.
- Hl.Gr 38B: HEAT; a shaped charge with good penetration and without penetration loss over distance. Only penetrates flat vertical surfaces but the post-penetration damage is very effective on open and lightly armoured vehicles.
- Hl.Gr 38C: HEAT; a shaped charge with increased penetration over the previous shell. Very useful against heavily armoured targets.
- Sprgr. 34: HE; useful for destroying open and lightly armoured vehicles.
- K.Gr.Rot Nb.: Smoke; useful to blind enemy vehicles that are too remote for you to disable so that you can progress towards objectives.
| Penetration statistics | |||||||
|---|---|---|---|---|---|---|---|
| Ammunition | Type of warhead |
Penetration @ 0° Angle of Attack (mm) | |||||
| 10 m | 100 m | 500 m | 1,000 m | 1,500 m | 2,000 m | ||
| K.Gr.rot Pz. | APCBC | 52 | 50 | 45 | 39 | 34 | 30 |
| Hl.Gr 38B | HEAT | 80 | 80 | 80 | 80 | 80 | 80 |
| Hl.Gr 38C | HEAT | 100 | 100 | 100 | 100 | 100 | 100 |
| Sprgr. 34 | HE | 10 | 10 | 10 | 10 | 10 | 10 |
| Shell details | |||||||||
|---|---|---|---|---|---|---|---|---|---|
| Ammunition | Type of warhead |
Velocity (m/s) |
Projectile Mass (kg) |
Fuse delay (m) |
Fuse sensitivity (mm) |
Explosive Mass (TNT equivalent) (g) |
Ricochet | ||
| 0% | 50% | 100% | |||||||
| K.Gr.rot Pz. | APCBC | 385 | 6.78 | 1.2 | 14.0 | 80 | 48° | 63° | 71° |
| Hl.Gr 38B | HEAT | 450 | 4.57 | 0.0 | 0.1 | 872.1 | 62° | 69° | 73° |
| Hl.Gr 38C | HEAT | 450 | 4.80 | 0.0 | 0.1 | 875.5 | 62° | 69° | 73° |
| Sprgr. 34 | HE | 420 | 5.74 | 0.1 | 0.1 | 686 | 79° | 80° | 81° |
| Smoke characteristic | ||||||
|---|---|---|---|---|---|---|
| Ammunition | Velocity in m/s |
Projectile Mass in kg |
Screen radius in m |
Screen time in s |
Screen hold time in s: |
Explosive Mass in g (TNT equivalent): |
| K.Gr.Rot Nb. | 423 | 6.20 | 13 | 5 | 20 | 50 |
Ammo racks
| Full ammo |
1st rack empty |
2nd rack empty |
3rd rack empty |
4th rack empty |
5th rack empty |
6th rack empty |
7th rack empty |
8th rack empty |
Visual discrepancy |
|---|---|---|---|---|---|---|---|---|---|
| 50 | 45 (+5) | 39 (+11) | 35 (+15) | 31 (+19) | 27 (+23) | 23 (+27) | 13 (+37) | 1 (+49) | No |

Notes:
- Shells in racks 1 and 2 are modeled individually and disappear after having been shot or loaded.
- Shells in racks 3 to 8 are modeled by sets of 2 and disappear after both shells in the set having been shot or loaded.
- Pack 27 (+23) shells (racks 1 to 5 emptied) to go into battle with the flanks empty of ammo.
Usage in battles
This armoured car is as much fun to play as the Sd.Kfz.234/4. The short 75 mm gun and the 234 chassis work amazingly well within its battle rating. The best way to play this Rank I Goliath is to use your speed and to try to get side and rear shots on the enemy but since you have HEAT at your disposal, you are almost guaranteed to obliterate anything frontally at your battle rating and vice versa. The 234/3 has the same weaknesses as the 234/2 which means it can be and will be torn up by 12.7 mm machine gun fire, assume the position has been spotted after firing and move out via reverse. Engaging in a head-on is unadvised but you can come out kicking should you find yourself against any higher tanks as you should be able to reload fast enough, though this is not a go-to option.
The 75 mm gun is the same as early Panzer IV and can destroy any other vehicles at and above its battle rating with one hit, meanwhile, the 234/3 has a great speed of 50-60 km/h forwards and backwards to relocate. Because of this, it is possible (though not necessarily needed) to use the 75 mm and return fire while making haste. Terrain foliage such as bushes are great assets for concealment, shadows as well so use them and stay hidden.
Like it's older brother, it is recommended to follow the exact same tactics, those being:
- Get behind great cover, either hard cover or visual cover (so rocks and or bushes are great)
- Use your cover for great visibility (for you to view the enemy)
- The ability to get deadly hits into the enemies
In its battle rating of 1.7, the 234/3 will face anything and everything between 1.0 and 2.7, It can and will be destroyed by anything and everything here. But keep in mind that tanks can use Artillery and Air-Spawns to take you down if they can't directly see you, so get under a roof and/or likewise cover where they can't see you nor hit you.
Modules
| Tier | Mobility | Protection | Firepower | ||
|---|---|---|---|---|---|
| I | Tires | Parts | Horizontal Drive | ||
| II | Suspension | Brake System | FPE | Hl.Gr 38B | Adjustment of Fire |
| III | Filters | Crew Replenishment | Hl.Gr 38C | Elevation Mechanism | |
| IV | Transmission | Engine | K.Gr.Rot Nb. | ||
| This is a premium vehicle: all modifications are unlocked on purchase | |||||
Pros and cons
Pros:
- Adequate ammo supply for prolonged combat
- Can move forward and backwards with equal speed
- Eight-wheel drive gives it good surface traction and handling, much better manoeuvrability
- Shorter Gun than Sd.Kfz.234/2, making it harder to identify behind bushes
- HEAT Shells are available for usage
- Premium bonus
Cons:
- Very weak armour, can be penetrated by aircraft weapons and heavy machine guns
- Open-topped, making it very vulnerable to attacks from the air or artillery
- Can be disabled by aircraft simply by ramming it
- Limited gun traverse
- Crew compartment is littered with ammo
- Vehicle will be immobilized if one driver is knocked out despite having two drivers in its layout, due to game mechanic limitations of having only one driver at a time
- Less penetration than the 234/2
History
The blitzkrieg tactics in Poland and France gave the Germans a new appreciation of mobile and lethal reconnaissance vehicles. The Germans especially valued the armoured cars due to their speed, firepower, and their pre-war build-up as they were not restricted by the Versailles Treaty. The Germans started with armoured cars like the Sd.Kfz.231 family, each with different armaments. However, these vehicles had its flaws and in August 1940, Germany sought a replacement following the conclusion of the Battle of France.
The new vehicle was built off an improved Sd.Kfz.232 chassis made in monocoque construction by Büssing-NAG, its armoured body was made by Deutsche Edelstahlwerke, the turret by Daimler-Benz and Schichau, and air-cooled diesel engines by Ringhoffer-Tatra-Werke AG. The monocoque chassis design was built with an eight-wheel steering system, six forward and reverse gears, as well as having an additional driver seat in the rear for quick reversal get-aways. This construction led to Sd.Kfz.234 family. Vehicle construction first started in 1943 as the Sd.Kfz.234/2, which had a turret originally intended for the VK 1602 Leopard mounting a 5 cm L/60 gun, construction continued on this vehicle until mid-1944. The Sd.Kfz.234/2 earned the nickname "Puma" from the soldiers using it.
Production for Sd.Kfz.234/2 shifted towards other armaments in 1944 that replaced the original. This produced variants such as the Sd.Kfz.234/1 which replaced the turret with an open-top one carrying a 2 cm KwK 38, this was produced between mid-1944 to early 1945. Right besides that, the Sd.Kfz.234/3 was produced with an open-top structure to mount a 75 mm howitzer, this was produced from mid-1944 until the end of 1944. At the Sd.Kfz.234/3's production end, it was replaced by the Sd.Kfz.234/4, also known as the "Pakwagen", that had the armament replaced by a 7.5 cm PaK 40 anti-tank gun. This last variant was produced from the end of 1944 to the capitulation of Germany in World War II. A total of 478 Sd.Kfz.234 armoured cars were produced, 200 of the 234/1, 101 of the 234/2, 88 of the 234/3, and 89 of the 234/4.
Media
- Skins
- Videos
See also
- Sd.Kfz.234/1, equipped with a turreted 2 cm KwK 38 autocannon.
- Sd.Kfz.234/2, equipped with a turreted 50 mm KwK 39 gun.
- Sd.Kfz.234/4, tank destroyer version equipped with the longer 75 mm PaK 40/3 gun.
External links
| Germany tank destroyers | |
|---|---|
| Pz. I Derivatives | Panzerjäger I |
| Pz. II Derivatives | 15cm sIG 33 B Sfl |
| Pz. 38(t) Derivatives | Marder III · Marder III H · Jagdpanzer 38(t) |
| Pz. III Derivatives | StuG III A · StuG III F · StuG III G · StuH 42 G |
| Pz. IV Derivatives | Jagdpanzer IV · Panzer IV/70(A) · Panzer IV/70(V) · Dicker Max · Nashorn · Brummbär · VFW |
| Pz. V Derivatives | Jagdpanther G1 · Bfw. Jagdpanther G1 |
| Pz. VI Derivatives | Sturer Emil · Elefant · Ferdinand · 38 cm Sturmmörser · Jagdtiger |
| Wheeled/Half-track | 8,8 cm Flak 37 Sfl. · Sd.Kfz.251/9 · Sd.Kfz.251/10 · Sd.Kfz.251/22 · Sd.Kfz.234/3 · Sd.Kfz.234/4 · 15 cm Pz.W.42 |
| ATGM Carrier | RakJPz 2 · RakJPz 2 (HOT) · Wiesel 1A2 |
| Other | Waffenträger · M109G · JPz 4-5 · Raketenautomat · VT1-2 |
| Germany premium ground vehicles | |
|---|---|
| Light tanks | Pz.II C (DAK) · Pz.Sfl.Ic · Pz.Sp.Wg.P204(f) KwK · Sd.Kfz. 140/1 · Sd.Kfz.234/1 · Ru 251 · SPz 12-3 LGS · TAM 2IP |
| Medium tanks | Nb.Fz. · Pz.III N · Pz.Bef.Wg.IV J · ▀M4 748 (a) · ▀T 34 747 (r) · Ersatz M10 |
| mKPz M47 G · Turm III · Leopard A1A1 (L/44) · Leopard 2 (PzBtl 123) | |
| Heavy tanks | ▀Pz.Kpfw. Churchill · ▀KV-IB · ▀KW I C 756 (r) · ▀KW II 754 (r) |
| VK 45.01 (P) · ␠Tiger · Pz.Bef.Wg.VI P · Tiger II (H) Sla.16 | |
| Tank destroyers | Sd.Kfz.234/3 · Sd.Kfz.234/4 · Sd.Kfz.251/10 · Sd.Kfz.251/22 · 15 cm Pz.W.42 |
| Brummbär · Panzer IV/70(A) · VFW · Bfw. Jagdpanther G1 · Elefant · 38 cm Sturmmörser | |
