Difference between pages "F-80C-10" and "SU-100P"
blastedryan (talk | contribs) (update fm details) |
Colok76286 (talk | contribs) (→Mobility: Corrected template) |
||
| Line 1: | Line 1: | ||
| − | {{Specs-Card|code= | + | {{Specs-Card|code=ussr_su_100p}} |
== Description == | == Description == | ||
| − | <!--''In the description, the first part | + | <!-- ''In the description, the first part should be about the history of the creation and combat usage of the vehicle, as well as its key features. In the second part, tell the reader about the ground vehicle in the game. Insert a screenshot of the vehicle, so that if the novice player does not remember the vehicle by name, he will immediately understand what kind of vehicle the article is talking about.'' --> |
| + | [[File:GarageImage_{{PAGENAME}}.png|420px|thumb|left]] | ||
| + | {{break}} | ||
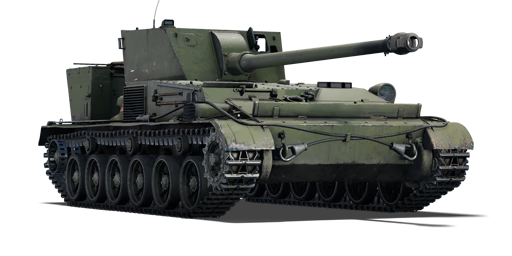
| + | The '''{{Specs|name}}''' is a rank {{Specs|rank}} Soviet tank destroyer {{Battle-rating}}. It was introduced in [[Update 1.71 "New E.R.A."]]. | ||
| + | |||
| + | == General info == | ||
| + | === Survivability and armour === | ||
| + | <!-- ''Describe armour protection. Note the most well protected and key weak areas. Appreciate the layout of modules as well as the number and location of crew members. Is the level of armour protection sufficient, is the placement of modules helpful for survival in combat? If necessary use a visual template to indicate the most secure and weak zones of the armour.'' --> | ||
| − | + | '''Armour type:''' | |
| − | |||
| − | |||
| − | + | * Rolled homogeneous armour (hull, gun shield, gun mantlet) | |
| − | + | * Structural steel (gun breech, gun mount) | |
| − | + | {| class="wikitable" | |
| − | |||
| − | |||
| − | {| class="wikitable | ||
|- | |- | ||
| − | ! | + | ! Armour !! Front (Slope angle) !! Sides !! Rear !! Roof |
|- | |- | ||
| − | + | | Hull || 15 mm (74°) ''Front glacis'' <br> 25 mm (31°) ''Radiator housing'' <br> 25 mm (16°) ''Lower glacis - upper part'' <br> 15 mm (49°) ''Lower glacis - lower part'' || 15 mm <br> 5 mm ''Radiator vent'' || 8 mm (21°) || 6 mm (86°) ''Front'' <br> 6 mm (81°) ''Rear'' | |
|- | |- | ||
| − | + | | Gun shield || 20 mm (30°) ''Front'' <br> 25 mm ''Gun mantlet (spheric)'' || 15 mm || N/A || 6 mm | |
| − | |||
| − | |||
| − | |||
| − | |||
|- | |- | ||
| − | + | |} | |
| − | + | ||
| − | + | '''Notes:''' | |
| − | + | ||
| − | ! | + | * Suspension wheels are 20 mm thick while tracks are 15 mm thick. |
| − | + | * Bottom of the hull is 6 mm thick. | |
| − | |- | + | * The engine is placed in front of the vehicle and can absorb shots to some extent. |
| − | | | + | |
| + | The armour on the SU-100P is best described as non-existent and although it may sometimes not trigger APHE fuses it would be unwise to rely on it in any way especially since most of your crew is exposed to MG fire and/or hullbreak mechanics. | ||
| + | |||
| + | === Mobility === | ||
| + | <!-- ''Write about the mobility of the ground vehicle. Estimate the specific power and manoeuvrability, as well as the maximum speed forwards and backwards.'' --> | ||
| + | |||
| + | {{tankMobility|abMinHp= 568|rbMinHp= 354}} | ||
| + | |||
| + | The {{PAGENAME}} has good mobility with a top speed of 70 km/h on a flat road capable of getting you into good firing positons early-on in the battle. | ||
| + | |||
| + | It does benefit from neutral steering when idling but not while on the move (the unsollicited track just locks, making it more difficult to turn as you lose speed). | ||
| + | |||
| + | The reverse speed is good enough to enable you to disengage easily and play peek-a-boo with the enemy. | ||
| + | |||
| + | == Armaments == | ||
| + | === Main armament === | ||
| + | <!-- ''Give the reader information about the characteristics of the main gun. Assess its effectiveness in a battle based on the reloading speed, ballistics and the power of shells. Do not forget about the flexibility of the fire, that is how quickly the cannon can be aimed at the target, open fire on it and aim at another enemy. Add a link to the main article on the gun: <code><nowiki>{{main|Name of the weapon}}</nowiki></code>. Describe in general terms the ammunition available for the main gun. Advise about how to use them and how to fill the ammunition storage.'' --> | ||
| + | {{main|D-50 (100 mm)}} | ||
| + | |||
| + | The main gun is a 100 mm rifled D-50 cannon, almost identical to the D-10T of the [[T-44-100]] and [[T-54 (1947)|T-54]]/[[T-55A|55]] only with a higher velocity. The armament is very powerful for its BR but lacks a fully traversable turret. | ||
| + | |||
| + | The open configuration of the turret gives the 100 mm an impressive 7.5 seconds reload time with an upgraded crew. | ||
| + | |||
| + | {| class="wikitable" style="text-align:center" width="100%" | ||
|- | |- | ||
| − | ! colspan=" | + | ! colspan="5" | [[D-50 (100 mm)|100 mm D-50]] || colspan="5" | Turret rotation speed (°/s) || colspan="4" | Reloading rate (seconds) |
|- | |- | ||
| − | ! | + | ! Mode !! Capacity !! Vertical !! Horizontal !! Stabilizer |
| − | ! | + | ! Stock !! Upgraded !! Full !! Expert !! Aced |
| − | ! | + | ! Stock !! Full !! Expert !! Aced |
| − | ! | ||
| − | ! | ||
|- | |- | ||
| − | ! | + | ! ''Arcade'' |
| − | + | | rowspan="2" | 50 || rowspan="2" | -4°/+37° || rowspan="2" | ±77° || rowspan="2" | N/A || 6.2 || 8.5 ||10.4||11.5|| 12.2 || rowspan="2" | 9.8 || rowspan="2" |8.6|| rowspan="2" | 8.0 || rowspan="2" | 7.5 | |
| − | |||
| − | |||
| − | |||
| − | |||
|- | |- | ||
| − | | | + | ! ''Realistic'' |
| + | | 4.2 || 4.9 ||6.0||6.6|| 7.0 | ||
|- | |- | ||
|} | |} | ||
| − | ==== | + | ==== Ammunition ==== |
| − | {| class="wikitable" style="text-align:center" | + | The main ammunition of the SU-100P is the BR-412 with the BR-412D variant being the most deadly with the best penetration values especially at longer distances and with only a smaller TNT filler (93.94g equivalent) compared to the BR-412B (100.1g). |
| + | |||
| + | The 3D3 smoke round can be used to provide cover for your team and block the enemy's line of sight. | ||
| + | |||
| + | {| class="wikitable sortable" style="text-align:center" width="100%" | ||
| + | ! colspan="8" | Penetration statistics | ||
| + | |- | ||
| + | ! rowspan="2" data-sort-type="text" | Ammunition | ||
| + | ! rowspan="2" | Type of<br>warhead | ||
| + | ! colspan="6" | '''Penetration @ 0° Angle of Attack (mm)''' | ||
| + | |- | ||
| + | ! 10 m !! 100 m !! 500 m !! 1,000 m !! 1,500 m !! 2,000 m | ||
| + | |- | ||
| + | | BR-412 || APHE || 218 || 213 || 192 || 169 || 148 || 130 | ||
|- | |- | ||
| − | + | | BR-412B || APHEBC || 218 || 214 || 195 || 173 || 154 || 137 | |
|- | |- | ||
| − | + | | BR-412D || APCBC || 239 || 236 || 223 || 207 || 192 || 178 | |
| − | |||
| − | |||
| − | |||
| − | |||
|- | |- | ||
| − | | | + | | OF-412 || HE || 19 || 19 || 19 || 19 || 19 || 19 |
|- | |- | ||
|} | |} | ||
| − | + | {| class="wikitable sortable" style="text-align:center" width="100%" | |
| − | {| class="wikitable" style="text-align:center" | + | ! colspan="10" | Shell details |
| + | |- | ||
| + | ! rowspan="2" data-sort-type="text" | Ammunition | ||
| + | ! rowspan="2" | Type of<br>warhead | ||
| + | ! rowspan="2" | Velocity<br>(m/s) | ||
| + | ! rowspan="2" | Projectile<br>Mass (kg) | ||
| + | ! rowspan="2" | Fuse delay<br>(m) | ||
| + | ! rowspan="2" | Fuse sensitivity<br>(mm) | ||
| + | ! rowspan="2" | Explosive Mass<br>(TNT equivalent) (g) | ||
| + | ! colspan="3" | Ricochet | ||
| + | |- | ||
| + | ! 0% !! 50% !! 100% | ||
|- | |- | ||
| − | + | | BR-412 || APHE || 895 || 15.9 || 1.2 || 19.0 || 100.1 || 47° || 60° || 65° | |
|- | |- | ||
| − | + | | BR-412B || APHEBC || 895 || 15.9 || 1.2 || 19.0 || 100.1 || 47° || 60° || 65° | |
| − | |||
| − | |||
| − | |||
|- | |- | ||
| − | + | | BR-412D || APCBC || 887 || 15.9 || 1.2 || 19.0 || 93.94 || 48° || 63° || 71° | |
| − | |||
|- | |- | ||
| − | | | + | | OF-412 || HE || 900 || 15.2 || 0.1 || 0.5 || 1,460 || 79° || 80° || 81° |
|- | |- | ||
|} | |} | ||
| − | {| class="wikitable" style="text-align:center" | + | {| class="wikitable sortable" style="text-align:center" |
| − | + | ! colspan="7" | Smoke shell characteristics | |
| − | ! colspan=" | ||
|- | |- | ||
| − | ! | + | ! Ammunition |
| − | ! | + | ! Velocity<br>(m/s) |
| − | ! | + | ! Projectile<br>Mass (kg) |
| − | ! | + | ! Screen radius<br>(m) |
| + | ! Screen deploy time<br>(s) | ||
| + | ! Screen hold time<br>(s) | ||
| + | ! Explosive Mass<br>(TNT equivalent) (g) | ||
|- | |- | ||
| − | | | + | | 3D3 || 880 || 15.6 || 20 || 5 || 25 || 272 |
|- | |- | ||
|} | |} | ||
| + | ==== [[Ammo racks]] ==== | ||
| + | [[File:Ammoracks_{{PAGENAME}}.png|right|thumb|x250px|[[Ammo racks]] of the {{PAGENAME}}]] | ||
{| class="wikitable" style="text-align:center" | {| class="wikitable" style="text-align:center" | ||
|- | |- | ||
| − | ! | + | ! Full<br>ammo |
| + | ! 1st<br>rack empty | ||
| + | ! Visual<br>discrepancy | ||
|- | |- | ||
| − | + | | '''50''' || 1 ''(+49)'' || No | |
|- | |- | ||
| − | + | |} | |
| − | + | Notes: | |
| − | + | ||
| − | + | * Each row of shells is depleted from left to right. Rows are then depleted from front to rear. | |
| − | + | * As they are modeled by sets of 2 or 3, shells disappear from the rack only after you've fired all shells in the set. | |
| − | + | ||
| − | <!--! colspan="3" | | + | <!--==== [[Optics]] ==== |
| − | + | {| class="wikitable" style="text-align:center" | |
| − | + | ! colspan="3" | {{PAGENAME}} Optics | |
| − | |||
| − | |||
|- | |- | ||
| − | + | ! | |
| + | ! Default magnification | ||
| + | ! Maximum magnification | ||
|- | |- | ||
| − | ! | + | ! Main Gun optics |
| + | | X5.1 || X5.5 | ||
|- | |- | ||
| − | ! | + | ! Comparable optics |
| − | + | | colspan="2" | ___ | |
| − | |||
|- | |- | ||
| − | |||
| − | |||
|} | |} | ||
| + | --> | ||
| − | == | + | == Usage in battles == |
| − | + | '''Arcade Battles''': | |
| − | |||
| − | |||
| − | |||
| − | |||
| − | |||
| − | |||
| − | |||
| − | |||
| − | |||
| − | |||
| − | |||
| − | |||
| − | + | In Arcade Battles the SU-100P can be used to great effect against enemy heavy armour but the spotting mechanic greatly impacts its ability to engage from a distance without being targeted itself, especially in an uptier. It is a great way to remove enemy heavy tanks such as the German [[Tiger II (H)|Tiger II]],the American [[T29]] and the Russian [[IS-2]]. | |
| − | |||
| − | |||
| − | |||
| − | |||
| − | |||
| − | |||
| − | |||
| − | |||
| − | |||
| − | |||
| − | |||
| − | + | '''Realistic Battles''': | |
| − | + | In Realistic Battles the SU-100P can be put to great use thanks to its good mobility. It can get to great sniping positions early-on in the game, the further away from actual combat the better. The high velocity and good penetration of the BR-412D also offer a significant advantage over longer distances. The SU-100P is very susceptible to air attacks especially allied .50 cals on the [[P-47D-25|P-47]]<nowiki/>s for instance. Use your great gun to cripple the enemy team's most armoured and dangerous tanks and exploit gaps in the enemy lines to engage them from places they will not expect you to be. | |
| − | + | Avoid going into close-quarters engagements even if your gun and reload speed are well suited because the lack of a 360° traverse can cost you greatly. | |
| − | |||
| − | |||
| − | |||
| − | |||
| − | |||
| − | |||
| − | |||
| − | |||
| − | |||
| − | |||
| − | |||
| − | |||
| − | |||
| − | |||
| − | |||
| − | |||
| − | |||
| − | ===Modules=== | + | === Modules === |
{| class="wikitable" | {| class="wikitable" | ||
| − | ! | + | ! Tier |
| − | ! colspan="2" | | + | ! colspan="2" | Mobility |
| − | ! | + | ! Protection |
| − | ! colspan="2" | | + | ! colspan="2" | Firepower |
|- | |- | ||
| I | | I | ||
| − | | | + | | Tracks |
| − | |||
| − | |||
| − | |||
| | | | ||
| + | | Parts | ||
| + | | BR-412B | ||
| + | | Horizontal Drive | ||
|- | |- | ||
| II | | II | ||
| − | | | + | | Suspension |
| − | | | + | | Brake System |
| − | | | + | | FPE |
| − | | | + | | |
| − | | | + | | Adjustment of Fire |
|- | |- | ||
| III | | III | ||
| − | | | + | | Filters |
| − | |||
| − | |||
| − | |||
| | | | ||
| + | | Crew Replenishment | ||
| + | | BR-412D | ||
| + | | Elevation Mechanism | ||
|- | |- | ||
| IV | | IV | ||
| − | | | + | | Transmission |
| − | | | + | | Engine |
| − | | | + | | |
| − | | | + | | 3D3 |
| − | | | + | | |
|- | |- | ||
|} | |} | ||
=== Pros and cons === | === Pros and cons === | ||
| − | <!--'' | + | <!-- ''Summarise and briefly evaluate the vehicle in terms of its characteristics and combat effectiveness. Mark its pros and cons in a bulleted list. Try not to use more than 6 points for each of the characteristics. Avoid using categorical definitions such as "bad", "good" and the like - use substitutions with softer forms such as "inadequate" and "effective".'' --> |
'''Pros:''' | '''Pros:''' | ||
| − | * | + | * Hard hitting and accurate gun |
| + | * Decently mobile hull (same as on the Object 120 but without the extra weight of the turret) | ||
| + | * If the BR-412B shell is used correctly it can be more effective than the BR-412D which has more penetration but less TNT | ||
'''Cons:''' | '''Cons:''' | ||
| − | * | + | * Weak armour overall prone to hullbreaks |
| + | * Large silhouette | ||
| + | * Crew is exposed to MG fire | ||
== History == | == History == | ||
| − | ''Describe the history of the creation and combat usage of the | + | ''Describe the history of the creation and combat usage of the vehicle in more detail than in the introduction. If the historical reference turns out to be too long, take it to a separate article, taking a link to the article about the vehicle and adding a block "/History" (example: <nowiki>https://wiki.warthunder.com/(Vehicle-name)/History</nowiki>) and add a link to it here using the <code>main</code> template. Be sure to reference text and sources by using <code><nowiki><ref></ref></nowiki></code>, as well as adding them at the end of the article with <code><nowiki><references /></nowiki></code>. This section may also include the vehicle's dev blog entry (if applicable) and the in-game encyclopedia description (under <code><nowiki>=== In-game description ===</nowiki></code>, also if applicable).'' |
== Media == | == Media == | ||
| − | '' | + | <!-- ''Excellent additions to the article would be video guides, screenshots from the game, and photos.'' --> |
| + | |||
| + | ;Skins | ||
| − | = | + | * [https://live.warthunder.com/feed/camouflages/?q=%23su100p Skins and camouflages for the {{PAGENAME}} from live.warthunder.com.] |
| − | |||
| − | + | ;Videos | |
| − | + | {{Youtube-gallery|stxNTgr20MM|SU-100P Tank Review - ''NUSensei''}} | |
| − | |||
| − | == | + | == See also == |
| − | '' | + | <!-- ''Links to the articles on the War Thunder Wiki that you think will be useful for the reader, for example:'' |
| + | * ''reference to the series of the vehicles;'' | ||
| + | * ''links to approximate analogues of other nations and research trees.'' --> | ||
| + | ;Other vehicles of similar configuration and role | ||
| + | * [[SU-100]] | ||
| + | * [[VFW]] | ||
| + | * [[Waffentrager|Waffenträger]] | ||
| + | == External links == | ||
| + | <!-- ''Paste links to sources and external resources, such as:'' | ||
* ''topic on the official game forum;'' | * ''topic on the official game forum;'' | ||
| − | * ''page on | + | * ''encyclopedia page on the tank;'' |
| − | * ''other literature.'' | + | * ''other literature.'' --> |
| + | |||
| + | * [[wikipedia:SU-100P|[Wikipedia] SU-100P]] | ||
| + | * [https://www.globalsecurity.org/military/world/russia/su-100p.htm <nowiki>[GlobalSecurity]</nowiki> SU-100P (Obiekt 105)] | ||
| − | {{ | + | {{USSR tank destroyers}} |
Revision as of 16:46, 4 August 2020
Contents
Description
The SU-100P is a rank IV Soviet tank destroyer
with a battle rating of 6.3 (AB/RB/SB). It was introduced in Update 1.71 "New E.R.A.".
General info
Survivability and armour
Armour type:
- Rolled homogeneous armour (hull, gun shield, gun mantlet)
- Structural steel (gun breech, gun mount)
| Armour | Front (Slope angle) | Sides | Rear | Roof |
|---|---|---|---|---|
| Hull | 15 mm (74°) Front glacis 25 mm (31°) Radiator housing 25 mm (16°) Lower glacis - upper part 15 mm (49°) Lower glacis - lower part |
15 mm 5 mm Radiator vent |
8 mm (21°) | 6 mm (86°) Front 6 mm (81°) Rear |
| Gun shield | 20 mm (30°) Front 25 mm Gun mantlet (spheric) |
15 mm | N/A | 6 mm |
Notes:
- Suspension wheels are 20 mm thick while tracks are 15 mm thick.
- Bottom of the hull is 6 mm thick.
- The engine is placed in front of the vehicle and can absorb shots to some extent.
The armour on the SU-100P is best described as non-existent and although it may sometimes not trigger APHE fuses it would be unwise to rely on it in any way especially since most of your crew is exposed to MG fire and/or hullbreak mechanics.
Mobility
| Game Mode | Max Speed (km/h) | Weight (tons) | Engine power (horsepower) | Power-to-weight ratio (hp/ton) | |||
|---|---|---|---|---|---|---|---|
| Forward | Reverse | Stock | Upgraded | Stock | Upgraded | ||
| Arcade | 69 | 26 | 21.6 | 568 | 763 | 26.3 | 35.32 |
| Realistic | 64 | 24 | 354 | 400 | 16.39 | 18.52 | |
The SU-100P has good mobility with a top speed of 70 km/h on a flat road capable of getting you into good firing positons early-on in the battle.
It does benefit from neutral steering when idling but not while on the move (the unsollicited track just locks, making it more difficult to turn as you lose speed).
The reverse speed is good enough to enable you to disengage easily and play peek-a-boo with the enemy.
Armaments
Main armament
The main gun is a 100 mm rifled D-50 cannon, almost identical to the D-10T of the T-44-100 and T-54/55 only with a higher velocity. The armament is very powerful for its BR but lacks a fully traversable turret.
The open configuration of the turret gives the 100 mm an impressive 7.5 seconds reload time with an upgraded crew.
| 100 mm D-50 | Turret rotation speed (°/s) | Reloading rate (seconds) | |||||||||||
|---|---|---|---|---|---|---|---|---|---|---|---|---|---|
| Mode | Capacity | Vertical | Horizontal | Stabilizer | Stock | Upgraded | Full | Expert | Aced | Stock | Full | Expert | Aced |
| Arcade | 50 | -4°/+37° | ±77° | N/A | 6.2 | 8.5 | 10.4 | 11.5 | 12.2 | 9.8 | 8.6 | 8.0 | 7.5 |
| Realistic | 4.2 | 4.9 | 6.0 | 6.6 | 7.0 | ||||||||
Ammunition
The main ammunition of the SU-100P is the BR-412 with the BR-412D variant being the most deadly with the best penetration values especially at longer distances and with only a smaller TNT filler (93.94g equivalent) compared to the BR-412B (100.1g).
The 3D3 smoke round can be used to provide cover for your team and block the enemy's line of sight.
| Penetration statistics | |||||||
|---|---|---|---|---|---|---|---|
| Ammunition | Type of warhead |
Penetration @ 0° Angle of Attack (mm) | |||||
| 10 m | 100 m | 500 m | 1,000 m | 1,500 m | 2,000 m | ||
| BR-412 | APHE | 218 | 213 | 192 | 169 | 148 | 130 |
| BR-412B | APHEBC | 218 | 214 | 195 | 173 | 154 | 137 |
| BR-412D | APCBC | 239 | 236 | 223 | 207 | 192 | 178 |
| OF-412 | HE | 19 | 19 | 19 | 19 | 19 | 19 |
| Shell details | |||||||||
|---|---|---|---|---|---|---|---|---|---|
| Ammunition | Type of warhead |
Velocity (m/s) |
Projectile Mass (kg) |
Fuse delay (m) |
Fuse sensitivity (mm) |
Explosive Mass (TNT equivalent) (g) |
Ricochet | ||
| 0% | 50% | 100% | |||||||
| BR-412 | APHE | 895 | 15.9 | 1.2 | 19.0 | 100.1 | 47° | 60° | 65° |
| BR-412B | APHEBC | 895 | 15.9 | 1.2 | 19.0 | 100.1 | 47° | 60° | 65° |
| BR-412D | APCBC | 887 | 15.9 | 1.2 | 19.0 | 93.94 | 48° | 63° | 71° |
| OF-412 | HE | 900 | 15.2 | 0.1 | 0.5 | 1,460 | 79° | 80° | 81° |
| Smoke shell characteristics | ||||||
|---|---|---|---|---|---|---|
| Ammunition | Velocity (m/s) |
Projectile Mass (kg) |
Screen radius (m) |
Screen deploy time (s) |
Screen hold time (s) |
Explosive Mass (TNT equivalent) (g) |
| 3D3 | 880 | 15.6 | 20 | 5 | 25 | 272 |
Ammo racks

| Full ammo |
1st rack empty |
Visual discrepancy |
|---|---|---|
| 50 | 1 (+49) | No |
Notes:
- Each row of shells is depleted from left to right. Rows are then depleted from front to rear.
- As they are modeled by sets of 2 or 3, shells disappear from the rack only after you've fired all shells in the set.
Usage in battles
Arcade Battles:
In Arcade Battles the SU-100P can be used to great effect against enemy heavy armour but the spotting mechanic greatly impacts its ability to engage from a distance without being targeted itself, especially in an uptier. It is a great way to remove enemy heavy tanks such as the German Tiger II,the American T29 and the Russian IS-2.
Realistic Battles:
In Realistic Battles the SU-100P can be put to great use thanks to its good mobility. It can get to great sniping positions early-on in the game, the further away from actual combat the better. The high velocity and good penetration of the BR-412D also offer a significant advantage over longer distances. The SU-100P is very susceptible to air attacks especially allied .50 cals on the P-47s for instance. Use your great gun to cripple the enemy team's most armoured and dangerous tanks and exploit gaps in the enemy lines to engage them from places they will not expect you to be.
Avoid going into close-quarters engagements even if your gun and reload speed are well suited because the lack of a 360° traverse can cost you greatly.
Modules
| Tier | Mobility | Protection | Firepower | ||
|---|---|---|---|---|---|
| I | Tracks | Parts | BR-412B | Horizontal Drive | |
| II | Suspension | Brake System | FPE | Adjustment of Fire | |
| III | Filters | Crew Replenishment | BR-412D | Elevation Mechanism | |
| IV | Transmission | Engine | 3D3 | ||
Pros and cons
Pros:
- Hard hitting and accurate gun
- Decently mobile hull (same as on the Object 120 but without the extra weight of the turret)
- If the BR-412B shell is used correctly it can be more effective than the BR-412D which has more penetration but less TNT
Cons:
- Weak armour overall prone to hullbreaks
- Large silhouette
- Crew is exposed to MG fire
History
Describe the history of the creation and combat usage of the vehicle in more detail than in the introduction. If the historical reference turns out to be too long, take it to a separate article, taking a link to the article about the vehicle and adding a block "/History" (example: https://wiki.warthunder.com/(Vehicle-name)/History) and add a link to it here using the main template. Be sure to reference text and sources by using <ref></ref>, as well as adding them at the end of the article with <references />. This section may also include the vehicle's dev blog entry (if applicable) and the in-game encyclopedia description (under === In-game description ===, also if applicable).
Media
- Skins
- Videos
See also
- Other vehicles of similar configuration and role
External links
| USSR tank destroyers | |
|---|---|
| SU-76M | SU-76M · SU-76M (5th Gv.Kav.Corps) · SU-85A |
| SU-57B | SU-57B · SU-76D |
| T-34 Derivatives | SU-122 · SU-85 · SU-85M · SU-100 · SU-122P |
| Heavy Tank Derivatives | SU-100Y · ISU-122 · ISU-122S · SU-152 · ISU-152 · Object 268 |
| SU-100P and Derivatives | SU-100P · Object 120 |
| Wheeled | YaG-10 (29-K) |
| Airborne | ASU-57 · ASU-85 |
| Rocket | BM-8-24 · BM-13N · BM-31-12 |
| ATGM | IT-1 · Shturm-S · Object 775 · Khrizantema-S |
| Artillery | 2S1 · 2S3M |
| Other | SU-5-1 · ZiS-30 · SU-122-54 |
| USA | SU-57 |
