Difference between pages "KwK37 (75 mm)" and "B-57A"
(Edits.) |
Inceptor57 (talk | contribs) m (Wing break speed already indicate approximate max mach speed, removed for redundancy) |
||
| Line 1: | Line 1: | ||
| + | {{Specs-Card | ||
| + | |code=b-57 | ||
| + | |cockpit=380311/1306416 | ||
| + | }} | ||
| + | {{About | ||
| + | |about=American jet bomber '''{{PAGENAME}}''' | ||
| + | |usage=other uses | ||
| + | |link=Canberra (Family) | ||
| + | }} | ||
| + | |||
== Description == | == Description == | ||
| − | <!--'' | + | <!--''In the description, the first part needs to be about the history of and the creation and combat usage of the aircraft, as well as its key features. In the second part, tell the reader about the aircraft in the game. Insert a screenshot of the vehicle. If the novice player does not remember the vehicle by name, he will immediately understand what kind of vehicle it is talking about.''--> |
| − | + | [[File:GarageImage_{{PAGENAME}}.jpg|420px|thumb|left]] | |
| − | [[File: | ||
{{break}} | {{break}} | ||
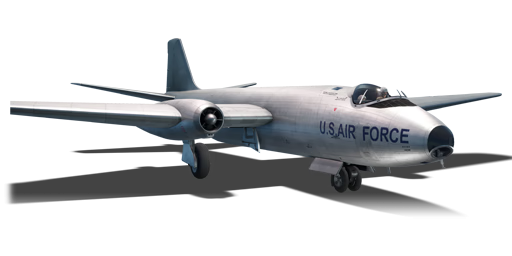
| − | The '''{{ | + | The '''{{Specs|name}}''' is a Rank {{Specs|rank}} American jet bomber {{Battle-rating}}. It was introduced in [[Update 1.43]]. |
| − | The | + | The B-57A is an unarmed plane so survivability depends on the speed. Luckily the two Wright Aeronautical J65 turbojet engines provide enough thrust to out-speed many fighters. Maximum speed is 950 km/h for a fully upgraded variant and 902 km/h for a stock variant. As was mentioned manoeuvrability is the key, but be aware of pulling your nose down, because the airframe can survive only -6G. However, +12G is almost unreachable value for the vast majority of your opponents. These attributes allow doing very sharp and high-G turns. The payload is adequate. Of course, it´s not a B-29, but 9 x 500 lb bombs or 6 x 1,000 lb bombs can do a really nice job. |
| − | + | == General info == | |
| + | === Flight Performance === | ||
| + | <!--''Describe how the aircraft behaves in the air. Maximum speed, maneuverability, speed and allowable loads - these are the most important characteristics of the vehicle.''--> | ||
| + | {| class="wikitable" style="text-align:center" | ||
| + | |- | ||
| + | ! colspan="8" | Characteristics | ||
| + | |- | ||
| + | ! colspan="8" | ''Stock'' | ||
| + | |- | ||
| + | ! colspan="2" | Max Speed<br>(km/h at 0 m - sea level) | ||
| + | ! rowspan="2" | Max altitude<br>(meters) | ||
| + | ! colspan="2" | Turn time<br>(seconds) | ||
| + | ! colspan="2" | Rate of climb<br>(meters/second) | ||
| + | ! rowspan="2" |Take-off run<br>(meters) | ||
| + | |- | ||
| + | ! AB | ||
| + | ! RB | ||
| + | ! AB | ||
| + | ! RB | ||
| + | ! AB | ||
| + | ! RB | ||
| + | |- | ||
| + | | 926 || 903 || 13,716 || 59.2 || 59.9 || 24.5 || 23.1 || 850 | ||
| + | |- | ||
| + | ! colspan="8" | ''Upgraded'' | ||
| + | |- | ||
| + | ! colspan="2" | Max Speed<br>(km/h at 0 m - sea level) | ||
| + | ! rowspan="2" |Max altitude (meters) | ||
| + | ! colspan="2" | Turn time (seconds) | ||
| + | ! colspan="2" | Rate of climb<br>(meters/second) | ||
| + | ! rowspan="2" |Take-off run (meters) | ||
| + | |- | ||
| + | ! AB | ||
| + | ! RB | ||
| + | ! AB | ||
| + | ! RB | ||
| + | ! AB | ||
| + | ! RB | ||
| + | |- | ||
| + | | 960 || 946 || 13,716 || 57.2 || 58.0 || 39.3 || 32.0 || 850 | ||
| + | |- | ||
| + | |} | ||
| − | + | ====Details==== | |
| − | === | + | {| class="wikitable" style="text-align:center" |
| − | + | |- | |
| − | + | ! colspan="5" | Features | |
| − | + | |- | |
| − | + | ! Combat flap | |
| − | + | ! Take-off flap | |
| − | + | ! Landing flap | |
| + | ! Air brakes | ||
| + | ! Arrestor gear | ||
| + | |- | ||
| + | | ✓ || ✓ || ✓ || ✓ || X <!-- ✓ --> | ||
| + | |- | ||
| + | |} | ||
| − | + | {| class="wikitable" style="text-align:center" | |
| − | + | |- | |
| − | + | ! colspan="5" | Limits | |
| − | + | |- | |
| − | + | ! rowspan="2" | Wing-break speed<br>(km/h) | |
| − | + | ! rowspan="2" | Gear limit<br>(km/h) | |
| − | {| class="wikitable | + | ! rowspan="2" | Combat flap<br> (km/h) |
| − | ! colspan=" | + | ! colspan="2" | Max Static G |
|- | |- | ||
| − | ! | + | ! + |
| − | ! | + | ! - |
| − | |||
|- | |- | ||
| − | + | | 990 || 450 || 320 || ~3 || ~2 | |
| − | |||
| − | |||
| − | |||
| − | |||
| − | |||
|- | |- | ||
| − | | | + | |} |
| + | |||
| + | {| class="wikitable" style="text-align:center" | ||
|- | |- | ||
| − | | | + | ! colspan="4" | Optimal velocities |
|- | |- | ||
| − | + | ! Ailerons<br>(km/h) | |
| + | ! Rudder<br>(km/h) | ||
| + | ! Elevators<br>(km/h) | ||
| + | ! Radiator<br>(km/h) | ||
|- | |- | ||
| − | | | + | | < 561 || < 523 || < 510 || No radiator |
|- | |- | ||
|} | |} | ||
| − | {| class="wikitable | + | |
| − | + | {| class="wikitable" style="text-align:center" | |
|- | |- | ||
| − | ! | + | ! colspan="3" | Compressor (RB/SB) |
| − | |||
| − | |||
| − | |||
| − | |||
| − | |||
| − | |||
| − | |||
| − | |||
| − | |||
| − | |||
|- | |- | ||
| − | ! | + | ! colspan="3" | Setting 1 |
| − | |||
| − | |||
|- | |- | ||
| − | + | ! Optimal altitude | |
| + | ! 100% Engine power | ||
| + | ! WEP Engine power | ||
|- | |- | ||
| − | | | + | | 0 m || 3265 kgf || No WEP |
|- | |- | ||
| − | | | + | <!--! colspan="3" | Setting 2 |
|- | |- | ||
| − | + | ! Optimal altitude | |
| + | ! 100% Engine power | ||
| + | ! WEP Engine power | ||
|- | |- | ||
| − | | | + | | ?,??? m || ?,??? hp || ?,??? hp |
| − | |||
| − | |||
|- | |- | ||
| − | ! | + | ! colspan="3" | Setting 3 |
| − | |||
| − | |||
| − | |||
| − | |||
| − | |||
| − | |||
|- | |- | ||
| − | + | ! Optimal altitude | |
| + | ! 100% Engine power | ||
| + | ! WEP Engine power | ||
|- | |- | ||
| + | | ?,??? m || ?,??? hp || ?,??? hp | ||
| + | |- --> | ||
|} | |} | ||
| − | === | + | === Survivability and armour === |
| − | + | ''Examine the survivability of the aircraft. Note how vulnerable the structure is and how secure the pilot is, whether the fuel tanks are armoured, etc. Describe the armour, if there is any, and also mention the vulnerability of other critical aircraft systems.'' | |
| − | + | ||
| − | + | == Armaments == | |
| − | + | === Suspended armament === | |
| − | + | <!--''Describe the aircraft's suspended armament: additional cannons under the wings, bombs, rockets and torpedoes. This section is especially important for bombers and attackers. If there is no suspended weaponry remove this subsection.''--> | |
| − | * | + | {{main|:Category:Suspended armaments|l1=Bombs}} |
| − | * | + | |
| − | + | The '''''{{PAGENAME}}''''' can be outfitted with the following ordinance: | |
| − | + | ||
| + | * 9 x 500 lbs AN-M64A1 bombs (4,500 lb bombs) | ||
| + | * 6 x 1,000 lbs AN-M65A1 Fin M129 bombs (6,000 lb bombs) | ||
== Usage in battles == | == Usage in battles == | ||
| − | <!--''Describe the | + | <!--''Describe the tactics of playing in an aircraft, the features of using vehicles in a team and advice on tactics. Refrain from creating a "guide" - do not impose a single point of view, but instead, give the reader food for thought. Examine the most dangerous enemies and give recommendations on fighting them. If necessary, note the specifics of the game in different modes (AB, RB, SB).''--> |
| + | As for the B-57A have 2 powerful jet engine and no guns. The tactic for this bomber is simple. Start your game at the air and dive. | ||
| + | You will gain speed while you are diving. Hold the speed until you destroyed your target. After that, pull your head up to 60 degrees. Climb to 10,000-16,000 ft. | ||
| + | |||
| + | The 1,000 lbs are lovely base-destroyers, 3 x 1,000 lb bombs are enough for a single bombing-point in RB and SB, for a AB you need more bombs, a whole bomb-load is usually enough to destroy a bombing-point. In AB I recommend flying high as it is possible, in danger you can always use your top-speed to run away. In realistic battle, mode is very important to communicate with a team. Don´t be afraid of using a chat window, just write which one base you are heading. This can avoid a situation when multiple bombers are going to bomb the same target. If you are alone bomber in your team (or something went wrong), count that you are able to destroy 3 bases in 2 runs(With the 1,000 lb bombs, 3 bases in 3 runs with the stock payload). | ||
| + | |||
| + | The 500lbs (stock bomb-load) is also a great possibility. Use these if you want to destroy some land-targets as are tanks, destroyers or pillboxes. For all tanks and pillboxes, you need only 1 x 500 lb bomb, a single bomb can be used also for destroyers. In AB I wouldn't use ground-target bombing, but if you want to, keep eye on your speed value. Be prepared for enemies with a tunnel-vision (a condition, when the player focuses only on a single goal - shut down). However, RB is awesome for ground-units score-farming. Try to be accurate. To do so, it´s recommended to fly in the same line as is the targets move. Pre-aim slightly to track the future position of the ground unit. | ||
| + | |||
| + | Try to fly low to increase a hit-change (but not to low, bombs splash damage could blow you up - 400 m over the target is optimal). However be aware, the faster are you going the less accurate the aiming cross is. You need to compensate for this. Just practising can show you how to do it. To maximize exp and lion income attack big pillboxes (not moving target = easier to hit) or destroyers. | ||
| + | TIP: To combine tactical awareness and accurate bombing try the boom and zoom tactic. Copy the line of ships movement, drop to 500 -400 meters (enjoy your highest speed), bomb the target, pull into the almost vertical flight (70% angle), reach 2500-3000 meters, turn back, and dive on the target again. Keep in mind, that B-57 is not a dive bomber, so level the plane quickly. Also, be aware of -6G limit, just don't push the nose down aggressively. | ||
| + | |||
| + | To survive on the battlefield trying to keep out of fighters radius. But if the enemy finds you and is prepared to shoot you down, try these tips: | ||
| + | |||
| + | # Enemy is Boom & Zoom on you - let him come, prepare for a sharp turn, using your +12G resistance. Turn, when the enemy is within a 1 km radius, almost no one can follow you in such an unexpected manoeuvre. It will buy you time, but try to disappear as soon as possible. | ||
| + | # Fighter on your 6 - only reaching the top-speed can save you. Only Mig-15s and Venoms (+ Sea Meteors in dive) can catch you. Find the clouds to shake them off. Don´t try to climb if any bomb is left in the bomb bay. | ||
| + | # Going to land, X enemy fighter is over the AF (airfield) - You have no chance to land. You can use the in-game chat to call for help or grab things into your own hands. Be a bait, let the enemy fly on your 6 (of course in big enough distance) and Boom & Zoom over the AF. AA may shoot down the enemy. Keep calm and watch your speed, don´t let him catch you. | ||
| + | # The last plane in the team - if you left alone (out of bombs) and enemies are circling over the AF, go high as possible. But please, don´t restrain, if you don´t have ground-unit superiority. | ||
| + | # When the enemy plane/planes have landed - go and drop bombs on it. | ||
| + | |||
| + | ===Modules=== | ||
| + | {| class="wikitable" | ||
| + | ! Tier | ||
| + | ! colspan="2" |Flight performance | ||
| + | ! Survivability | ||
| + | ! Weaponry | ||
| + | |- | ||
| + | | I | ||
| + | | Fuselage repair||Compressor | ||
| + | | | ||
| + | | EEMBC No.2 Mark 1 | ||
| + | |- | ||
| + | | II | ||
| + | | || | ||
| + | | Airframe | ||
| + | | | ||
| + | |- | ||
| + | | III | ||
| + | | Wings repair||Engine | ||
| + | | | ||
| + | | | ||
| + | |- | ||
| + | | IV | ||
| + | | G-Suit|| | ||
| + | | Cover | ||
| + | | | ||
| + | |- | ||
| + | |} | ||
| − | |||
| − | |||
| − | |||
=== Pros and cons === | === Pros and cons === | ||
| − | <!--''Summarize and briefly evaluate the | + | <!--''Summarize and briefly evaluate the vehicle in terms of its characteristics and combat effectiveness. Mark its pros and cons in the bulleted list. Try not to use more than 6 points for each of the characteristics. Avoid using categorical definitions such as "bad", "good" and the like - they can be substituted with softer forms such as "inadequate" and "effective".''--> |
| + | |||
'''Pros:''' | '''Pros:''' | ||
| − | * Fast | + | * Fast for its battle rating |
| − | * | + | * Decent acceleration |
| − | * | + | * Maneuvers well |
| + | * Powerful air brakes | ||
| + | * Climbs well even with a full payload | ||
| + | * High-speed limit allows for a speedy retreat | ||
| + | * Complete and detailed cockpit (very useful in SB) | ||
'''Cons:''' | '''Cons:''' | ||
| − | * | + | * Unarmed (no offensive/defensive weapons) |
| − | * | + | * Medium payload |
| + | * Wing can be easily destroyed in dives | ||
| + | * Aircraft overheats at low altitudes | ||
| + | * Expensive to repair in comparison to many silver lions it can generate | ||
== History == | == History == | ||
| − | '' | + | <!--''Describe the history of the creation and combat usage of the aircraft in more detail than in the introduction. If the historical reference turns out to be too big, take it to a separate article, taking a link to the article about the vehicle and adding a block "/ History" (example: <nowiki>https://wiki.warthunder.com/(Vehicle-name)/History</nowiki>) and add a link to it here using the <code>main</code> template. Be sure to reference text and sources by using <code><nowiki><ref></nowiki></code>, as well as adding them at the end of the article.''--> |
| + | |||
| + | In 1951 the US Air Force was looking for a reliable assault aircraft after the failure of the 1949 Martin XB-51 project. The English Electric Canberra was already known for its operational versatility, flexibility, ease of handling, range and payload capacity. Martin accordingly contracted for the Canberra under licence. The first Canberra B.2 left Aldergrove, Northern Ireland on February 21, 1951, and crossed the Atlantic non-stop and without refuelling, becoming the first jet to do so in 4 hours and 37 minutes. | ||
| + | |||
| + | The first eight B-57As were US conversions of this first prototype aircraft, with only some structural details adapted for US manufacturing. First flight was July 1953. The initial pre-production models were followed by 67 RB-57A reconnaissance versions, with first deliveries to the USAF commencing in April 1954. | ||
== Media == | == Media == | ||
| + | ''Excellent additions to the article would be video guides, screenshots from the game, and photos.'' | ||
== See also == | == See also == | ||
| − | + | ''Links to the articles on the War Thunder Wiki that you think will be useful for the reader, for example:'' | |
| − | |||
| − | |||
| − | * | + | * ''reference to the series of the aircraft;'' |
| + | * ''links to approximate analogues of other nations and research trees.'' | ||
== External links == | == External links == | ||
| − | ''Paste links to sources and external resources, such as:'' | + | <!--''Paste links to sources and external resources, such as:'' |
| − | |||
* ''topic on the official game forum;'' | * ''topic on the official game forum;'' | ||
| − | * ''encyclopedia page on | + | * ''encyclopedia page on the aircraft;'' |
| − | * ''other literature.'' | + | * ''other literature.''--> |
| − | + | * [https://warthunder.com/en/devblog/current/649 [Devblog<nowiki>]</nowiki> B-57A Canberra] | |
| − | + | {{USA jet aircrafts}} | |
Revision as of 16:22, 4 November 2019
Contents
| This page is about the American jet bomber B-57A. For other uses, see Canberra (Family). |
Description

The B-57A Canberra is a Rank V American jet bomber
with a battle rating of 8.0 (AB), 8.3 (RB), and 7.7 (SB). It was introduced in Update 1.43.
The B-57A is an unarmed plane so survivability depends on the speed. Luckily the two Wright Aeronautical J65 turbojet engines provide enough thrust to out-speed many fighters. Maximum speed is 950 km/h for a fully upgraded variant and 902 km/h for a stock variant. As was mentioned manoeuvrability is the key, but be aware of pulling your nose down, because the airframe can survive only -6G. However, +12G is almost unreachable value for the vast majority of your opponents. These attributes allow doing very sharp and high-G turns. The payload is adequate. Of course, it´s not a B-29, but 9 x 500 lb bombs or 6 x 1,000 lb bombs can do a really nice job.
General info
Flight Performance
| Characteristics | |||||||
|---|---|---|---|---|---|---|---|
| Stock | |||||||
| Max Speed (km/h at 0 m - sea level) |
Max altitude (meters) |
Turn time (seconds) |
Rate of climb (meters/second) |
Take-off run (meters) | |||
| AB | RB | AB | RB | AB | RB | ||
| 926 | 903 | 13,716 | 59.2 | 59.9 | 24.5 | 23.1 | 850 |
| Upgraded | |||||||
| Max Speed (km/h at 0 m - sea level) |
Max altitude (meters) | Turn time (seconds) | Rate of climb (meters/second) |
Take-off run (meters) | |||
| AB | RB | AB | RB | AB | RB | ||
| 960 | 946 | 13,716 | 57.2 | 58.0 | 39.3 | 32.0 | 850 |
Details
| Features | ||||
|---|---|---|---|---|
| Combat flap | Take-off flap | Landing flap | Air brakes | Arrestor gear |
| ✓ | ✓ | ✓ | ✓ | X |
| Limits | ||||
|---|---|---|---|---|
| Wing-break speed (km/h) |
Gear limit (km/h) |
Combat flap (km/h) |
Max Static G | |
| + | - | |||
| 990 | 450 | 320 | ~3 | ~2 |
| Optimal velocities | |||
|---|---|---|---|
| Ailerons (km/h) |
Rudder (km/h) |
Elevators (km/h) |
Radiator (km/h) |
| < 561 | < 523 | < 510 | No radiator |
| Compressor (RB/SB) | ||
|---|---|---|
| Setting 1 | ||
| Optimal altitude | 100% Engine power | WEP Engine power |
| 0 m | 3265 kgf | No WEP |
Survivability and armour
Examine the survivability of the aircraft. Note how vulnerable the structure is and how secure the pilot is, whether the fuel tanks are armoured, etc. Describe the armour, if there is any, and also mention the vulnerability of other critical aircraft systems.
Armaments
Suspended armament
The B-57A can be outfitted with the following ordinance:
- 9 x 500 lbs AN-M64A1 bombs (4,500 lb bombs)
- 6 x 1,000 lbs AN-M65A1 Fin M129 bombs (6,000 lb bombs)
Usage in battles
As for the B-57A have 2 powerful jet engine and no guns. The tactic for this bomber is simple. Start your game at the air and dive. You will gain speed while you are diving. Hold the speed until you destroyed your target. After that, pull your head up to 60 degrees. Climb to 10,000-16,000 ft.
The 1,000 lbs are lovely base-destroyers, 3 x 1,000 lb bombs are enough for a single bombing-point in RB and SB, for a AB you need more bombs, a whole bomb-load is usually enough to destroy a bombing-point. In AB I recommend flying high as it is possible, in danger you can always use your top-speed to run away. In realistic battle, mode is very important to communicate with a team. Don´t be afraid of using a chat window, just write which one base you are heading. This can avoid a situation when multiple bombers are going to bomb the same target. If you are alone bomber in your team (or something went wrong), count that you are able to destroy 3 bases in 2 runs(With the 1,000 lb bombs, 3 bases in 3 runs with the stock payload).
The 500lbs (stock bomb-load) is also a great possibility. Use these if you want to destroy some land-targets as are tanks, destroyers or pillboxes. For all tanks and pillboxes, you need only 1 x 500 lb bomb, a single bomb can be used also for destroyers. In AB I wouldn't use ground-target bombing, but if you want to, keep eye on your speed value. Be prepared for enemies with a tunnel-vision (a condition, when the player focuses only on a single goal - shut down). However, RB is awesome for ground-units score-farming. Try to be accurate. To do so, it´s recommended to fly in the same line as is the targets move. Pre-aim slightly to track the future position of the ground unit.
Try to fly low to increase a hit-change (but not to low, bombs splash damage could blow you up - 400 m over the target is optimal). However be aware, the faster are you going the less accurate the aiming cross is. You need to compensate for this. Just practising can show you how to do it. To maximize exp and lion income attack big pillboxes (not moving target = easier to hit) or destroyers. TIP: To combine tactical awareness and accurate bombing try the boom and zoom tactic. Copy the line of ships movement, drop to 500 -400 meters (enjoy your highest speed), bomb the target, pull into the almost vertical flight (70% angle), reach 2500-3000 meters, turn back, and dive on the target again. Keep in mind, that B-57 is not a dive bomber, so level the plane quickly. Also, be aware of -6G limit, just don't push the nose down aggressively.
To survive on the battlefield trying to keep out of fighters radius. But if the enemy finds you and is prepared to shoot you down, try these tips:
- Enemy is Boom & Zoom on you - let him come, prepare for a sharp turn, using your +12G resistance. Turn, when the enemy is within a 1 km radius, almost no one can follow you in such an unexpected manoeuvre. It will buy you time, but try to disappear as soon as possible.
- Fighter on your 6 - only reaching the top-speed can save you. Only Mig-15s and Venoms (+ Sea Meteors in dive) can catch you. Find the clouds to shake them off. Don´t try to climb if any bomb is left in the bomb bay.
- Going to land, X enemy fighter is over the AF (airfield) - You have no chance to land. You can use the in-game chat to call for help or grab things into your own hands. Be a bait, let the enemy fly on your 6 (of course in big enough distance) and Boom & Zoom over the AF. AA may shoot down the enemy. Keep calm and watch your speed, don´t let him catch you.
- The last plane in the team - if you left alone (out of bombs) and enemies are circling over the AF, go high as possible. But please, don´t restrain, if you don´t have ground-unit superiority.
- When the enemy plane/planes have landed - go and drop bombs on it.
Modules
| Tier | Flight performance | Survivability | Weaponry | |
|---|---|---|---|---|
| I | Fuselage repair | Compressor | EEMBC No.2 Mark 1 | |
| II | Airframe | |||
| III | Wings repair | Engine | ||
| IV | G-Suit | Cover | ||
Pros and cons
Pros:
- Fast for its battle rating
- Decent acceleration
- Maneuvers well
- Powerful air brakes
- Climbs well even with a full payload
- High-speed limit allows for a speedy retreat
- Complete and detailed cockpit (very useful in SB)
Cons:
- Unarmed (no offensive/defensive weapons)
- Medium payload
- Wing can be easily destroyed in dives
- Aircraft overheats at low altitudes
- Expensive to repair in comparison to many silver lions it can generate
History
In 1951 the US Air Force was looking for a reliable assault aircraft after the failure of the 1949 Martin XB-51 project. The English Electric Canberra was already known for its operational versatility, flexibility, ease of handling, range and payload capacity. Martin accordingly contracted for the Canberra under licence. The first Canberra B.2 left Aldergrove, Northern Ireland on February 21, 1951, and crossed the Atlantic non-stop and without refuelling, becoming the first jet to do so in 4 hours and 37 minutes.
The first eight B-57As were US conversions of this first prototype aircraft, with only some structural details adapted for US manufacturing. First flight was July 1953. The initial pre-production models were followed by 67 RB-57A reconnaissance versions, with first deliveries to the USAF commencing in April 1954.
Media
Excellent additions to the article would be video guides, screenshots from the game, and photos.
See also
Links to the articles on the War Thunder Wiki that you think will be useful for the reader, for example:
- reference to the series of the aircraft;
- links to approximate analogues of other nations and research trees.
External links
| USA jet aircraft | |
|---|---|
| Fighters | |
| F-4 | F-4C Phantom II · F-4E Phantom II · F-4J Phantom II · F-4S Phantom II |
| F-5 | F-5A · F-5C · F-5E · F-20A |
| F-8 | F8U-2 · F-8E |
| F-80 | F-80A-5 · F-80C-10 |
| F-84 | F-84B-26 · F-84F · F-84G-21-RE |
| F-86 | F-86A-5 · F-86F-25 · F-86F-2 · F-86F-35 |
| F-89 | F-89B · F-89D |
| F-100 | F-100D |
| F-104 | F-104A · F-104C |
| F-14 | F-14A Early · F-14B |
| F-15 | F-15A |
| F-16 | F-16A · F-16A ADF · F-16C |
| F9F | F9F-2 · F9F-5 · F9F-8 |
| Other | P-59A · F2H-2 · F3D-1 · F3H-2 · F4D-1 · F11F-1 |
| Strike Aircraft | |
| FJ-4 | FJ-4B · FJ-4B VMF-232 |
| A-4 | A-4B · A-4E Early |
| A-6 | A-6E TRAM |
| A-7 | A-7D · A-7E · A-7K |
| AV-8 | AV-8A · AV-8C |
| A-10 | A-10A · A-10A Late |
| B-57 | B-57A · B-57B |
| F-105 | F-105D |
| F-111 | F-111A |
