Difference between pages "IS-2 No.402" and "M3A3 Stuart (China)"
(→Modules: Fixed typo) |
Colok76286 (talk | contribs) (→Main armament: Completed section) |
||
| Line 1: | Line 1: | ||
| − | {{Specs-Card|code= | + | {{Specs-Card|code=cn_m3a3_stuart}} |
| − | + | {{About | |
| + | | about = light tank '''{{PAGENAME}}''' | ||
| + | |other | ||
| + | |usage-1 = other uses | ||
| + | |link-1 = M3 (Disambiguation) | ||
| + | |usage-2 = other vehicles of the family | ||
| + | |link-2 = M3 Stuart (Family) | ||
| + | }} | ||
== Description == | == Description == | ||
<!-- ''In the description, the first part should be about the history of the creation and combat usage of the vehicle, as well as its key features. In the second part, tell the reader about the ground vehicle in the game. Insert a screenshot of the vehicle, so that if the novice player does not remember the vehicle by name, he will immediately understand what kind of vehicle the article is talking about.'' --> | <!-- ''In the description, the first part should be about the history of the creation and combat usage of the vehicle, as well as its key features. In the second part, tell the reader about the ground vehicle in the game. Insert a screenshot of the vehicle, so that if the novice player does not remember the vehicle by name, he will immediately understand what kind of vehicle the article is talking about.'' --> | ||
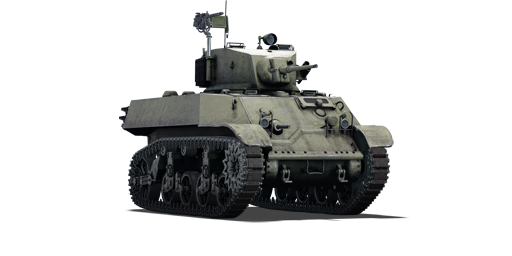
[[File:GarageImage_{{PAGENAME}}.jpg|420px|thumb|left]] | [[File:GarageImage_{{PAGENAME}}.jpg|420px|thumb|left]] | ||
| − | {{ | + | {{break}} |
| − | The '''{{Specs|name}}''' is a | + | The '''{{Specs|name}}''' is a rank {{Specs|rank}} Chinese light tank {{Battle-rating}}. It was introduced in [[Update 1.91 "Night Vision"]]. |
== General info == | == General info == | ||
=== Survivability and armour === | === Survivability and armour === | ||
| − | <!--''Describe armour protection. Note the most well protected and key weak areas. Appreciate the layout of modules as well as the number and location of crew members. Is the level of armour protection sufficient, is the placement of modules helpful for survival in combat? | + | <!-- ''Describe armour protection. Note the most well protected and key weak areas. Appreciate the layout of modules as well as the number and location of crew members. Is the level of armour protection sufficient, is the placement of modules helpful for survival in combat? If necessary use a visual template to indicate the most secure and weak zones of the armour.'' --> |
| − | |||
| − | |||
| − | |||
| − | |||
| − | |||
| − | |||
| − | |||
{| class="wikitable" | {| class="wikitable" | ||
|- | |- | ||
| − | ! Armour !! Front !! Sides !! Rear !! Roof | + | ! Armour !! Front (Slope angle) !! Sides !! Rear !! Roof |
| − | |||
| − | |||
|- | |- | ||
| − | | | + | |Hull || 25 mm (46-49°) ''Front Glacis - upper plate'' <br> 20 mm (spherical) ''MG port'' <br> 50 mm (24-27°) ''Front Glacis - joint plate'' <br> 50 mm (44-46°) ''Front Glacis - lower plate'' <br> 44.4 mm (25-43°) ''Lower Glacis'' || 25.4 mm || 25.4 mm (1-26°) ''Upper part'' <br> 25.4 mm (21°) ''Lower part'' || 12.7 mm |
|- | |- | ||
| − | + | |Turret || 38.1 mm (12-14°) ''Turret front'' <br> 50.8 mm ''Gun mantlet'' || 31.75 mm <br> 15 mm ''Add-on tracks'' || 31.75 mm || 12.7 mm | |
| − | |- | ||
| − | | | ||
|- | |- | ||
|} | |} | ||
| + | |||
'''Notes:''' | '''Notes:''' | ||
| + | * Suspension wheels, tracks and bogies are 15 mm thick. | ||
| + | * Mudguards and rear storage box are 4 mm thick | ||
| − | + | The frontal armour on the {{Specs|pseudonym}} is pretty tough for a light tank with 25 mm on the front & sides of the hull, and a large, 50 mm thick gun mantlet covering up most of its frontal turret. When angled correctly it can bounce off quite a few shots. However it can still be easily penetrated by average guns on its BR. From the front the 4 crews are sitting pretty close together, thus making it highly possible to get one-shot by shells with explosives like the Soviet 45 mm AP or the German short 75 mm APHE. The transmission and the engine are all quite small and low, and the ammoracks are also small, reducing the chance of being immobile or ammoracked. There is also an empty area under the turret crews and in front of the driving compartment, which will absorb those shells with weak damage. | |
| − | |||
| − | The | ||
=== Mobility === | === Mobility === | ||
<!-- ''Write about the mobility of the ground vehicle. Estimate the specific power and manoeuvrability, as well as the maximum speed forwards and backwards.'' --> | <!-- ''Write about the mobility of the ground vehicle. Estimate the specific power and manoeuvrability, as well as the maximum speed forwards and backwards.'' --> | ||
| − | {{tankMobility|abMinHp= | + | {{tankMobility|abMinHp= 406|rbMinHp= 232}} |
| + | |||
| + | One of the best aspects of the {{Specs|pseudonym}} is its superior mobility. It has a top speed of 58 km/h and doesn't lose too much speed on soft terrain, making it one of the fastest tanks at the BR alongside with the famous BT series tanks. The tracks are quite large and grant you a good mobility on hard (solid ground, roads) and soft terrain (mud, snow, sand). | ||
| + | |||
| + | As it benefits from regenerative steering, turning on the spot with the {{PAGENAME}} is easier than for most tanks at the same BR. Regenerative steering consists in letting the unsolicited track rotate when the tank is turning instead of locking it. The hull is also short and wide enough, allowing it to turn agilely. The reverse speed is average: it will not get you out of a dangerous situation quickly but isn't a handicap either. The {{Specs|pseudonym}} reaches 18 km/h when fording and 16 km/h when driving uphill. | ||
| + | |||
| + | While its high speed is an advantage, it can turn into a disadvantage when manoeuvring at high speed: the {{Specs|pseudonym}} starts skidding uncontrollably if you take a sharp turn. Be aware of this before rushing towards the frontline: limit your maximum speed, know the terrain and anticipate the braking phases. | ||
| + | |||
| + | The acceleration is also so powerful that it causes you hull to rock back and forth during acceleration or braking phases. This effect is however nullified by the gun stabilizer when driving under 10 km/h. | ||
| + | Light and medium obstacles (fences, posts, bushes and small trees) are not a problem for the {{Specs|pseudonym}} but large obstacles will reduce your mobility: avoid them. | ||
== Armaments == | == Armaments == | ||
=== Main armament === | === Main armament === | ||
<!-- ''Give the reader information about the characteristics of the main gun. Assess its effectiveness in a battle based on the reloading speed, ballistics and the power of shells. Do not forget about the flexibility of the fire, that is how quickly the cannon can be aimed at the target, open fire on it and aim at another enemy. Add a link to the main article on the gun: <code><nowiki>{{main|Name of the weapon}}</nowiki></code>. Describe in general terms the ammunition available for the main gun. Give advice on how to use them and how to fill the ammunition storage.'' --> | <!-- ''Give the reader information about the characteristics of the main gun. Assess its effectiveness in a battle based on the reloading speed, ballistics and the power of shells. Do not forget about the flexibility of the fire, that is how quickly the cannon can be aimed at the target, open fire on it and aim at another enemy. Add a link to the main article on the gun: <code><nowiki>{{main|Name of the weapon}}</nowiki></code>. Describe in general terms the ammunition available for the main gun. Give advice on how to use them and how to fill the ammunition storage.'' --> | ||
| − | {{main| | + | {{main|M6 (37 mm)}} |
{| class="wikitable" style="text-align:center" width="100%" | {| class="wikitable" style="text-align:center" width="100%" | ||
|- | |- | ||
| − | ! colspan="5" | [[ | + | ! colspan="5" | [[M6 (37 mm)|37 mm M6]] || colspan="5" | Turret rotation speed (°/s) || colspan="4" | Reloading rate (seconds) |
|- | |- | ||
! Mode !! Capacity !! Vertical !! Horizontal !! Stabilizer | ! Mode !! Capacity !! Vertical !! Horizontal !! Stabilizer | ||
| Line 56: | Line 62: | ||
|- | |- | ||
! ''Arcade'' | ! ''Arcade'' | ||
| − | | rowspan="2" | | + | | rowspan="2" | 174 || rowspan="2" | -10°/+20° || rowspan="2" | ±180° || rowspan="2" | Vertical || 19.04 || 26.35 || __.__ || __.__ || 37.65 || rowspan="2" | 3.77 || rowspan="2" | _.__ || rowspan="2" | _.__ || rowspan="2" | 2.90 |
|- | |- | ||
! ''Realistic'' | ! ''Realistic'' | ||
| − | | | + | | 11.90 || 14.00 || __.__ || __.__ || 20.00 |
|- | |- | ||
|} | |} | ||
| + | |||
| + | The {{Specs|pseudonym}} is armed with a 37 mm cannon as its main armament, the same gun as the preceding [[M8 LAC (China)|M8]]. While being at a BR 1.3 higher, the gun still packs a fierce punch if aiming at the correct area and firing at the correct distance. It is a small caliber fast-firing gun with a maximum penetration of 84 mm at 100 m (M51B1/B2 shell), being able to penetrate most of the opponents it will face. The penetration power and gun accuracy drop a lot beyond 500 m and become unreliable past 700 m. The gun is equipped with a vertical stabiliser, giving the {{Specs|pseudonym}} a huge advantage in some cases as you can fire precisely while moving, but keep in mind that it activates only when the tank is driving under 10 km/h. | ||
| + | While it lacks the post-penetration damage to disable most enemies in one shot, it can quickly finish them off with its fast reload. However, the gun can overheat from shooting several shots without interruption and cause a loss of accuracy noticeable even at 200 m distance. A short pause between shots will prevent this from happening. | ||
==== Ammunition ==== | ==== Ammunition ==== | ||
| + | The {{PAGENAME}} has a limited choice of ammunition, focused on dealing with armoured vehicles: | ||
| + | * '''M74B1''': AP; a solid shot with good penetration but no explosive filler. | ||
| + | * '''M51B1/B2''': APCBC; a solid shot with an even better penetration thanks to the ballistic cap but no explosive filler. | ||
| + | Knowledge of enemy vehicle layouts is essential with ammunition lacking post-penetration explosive damage. Make sure to target modules and crew positions to maximise the damage. Disabling the enemy gunner on your first shot will be critical to win engagements as you'll most likely need several shots to destroy an enemy vehicle. | ||
| + | |||
{| class="wikitable sortable" style="text-align:center" width="100%" | {| class="wikitable sortable" style="text-align:center" width="100%" | ||
! colspan="8" | Penetration statistics | ! colspan="8" | Penetration statistics | ||
| Line 73: | Line 87: | ||
! 10 m !! 100 m !! 500 m !! 1,000 m !! 1,500 m !! 2,000 m | ! 10 m !! 100 m !! 500 m !! 1,000 m !! 1,500 m !! 2,000 m | ||
|- | |- | ||
| − | | | + | | M74B1 || AP || 79 || 76 || 65 || 54 || 45 || 37 |
| − | |||
| − | |||
|- | |- | ||
| − | | | + | | M51B1/B2 || APCBC || 87 || 84 || 73 || 60 || 50 || 41 |
|- | |- | ||
|} | |} | ||
{| class="wikitable sortable" style="text-align:center" width="100%" | {| class="wikitable sortable" style="text-align:center" width="100%" | ||
| − | ! colspan=" | + | ! colspan="10" | Shell details |
|- | |- | ||
! rowspan="2" data-sort-type="text" | Ammunition | ! rowspan="2" data-sort-type="text" | Ammunition | ||
| Line 90: | Line 102: | ||
! rowspan="2" | Fuse sensitivity<br>(mm) | ! rowspan="2" | Fuse sensitivity<br>(mm) | ||
! rowspan="2" | Explosive Mass<br>(TNT equivalent) (g) | ! rowspan="2" | Explosive Mass<br>(TNT equivalent) (g) | ||
| − | |||
! colspan="3" | Ricochet | ! colspan="3" | Ricochet | ||
|- | |- | ||
! 0% !! 50% !! 100% | ! 0% !! 50% !! 100% | ||
|- | |- | ||
| − | | | + | | M74B1 || AP || 883 || 0.87 || N/A || N/A || N/A || 47° || 60° || 65° |
| − | |||
| − | |||
|- | |- | ||
| − | | | + | | M51B1/B2 || APCBC || 883 || 0.87 || N/A || N/A || N/A || 48° || 63° || 71° |
|- | |- | ||
|} | |} | ||
| − | ==== [[ | + | ==== [[Ammo racks]] ==== |
| − | [[File: | + | [[File:Ammoracks_{{PAGENAME}}.png|right|thumb|x250px|[[Ammo racks]] of the {{PAGENAME}}]] |
| − | { | ||
| − | |||
| − | |||
| − | |||
| − | |||
| − | |||
| − | |||
| − | |||
| − | |||
| − | |||
| − | |||
| − | |||
| − | |||
| − | |||
| − | |||
| − | |||
| − | |||
| − | |||
| − | |||
{| class="wikitable" style="text-align:center" | {| class="wikitable" style="text-align:center" | ||
| − | |||
| − | |||
| − | |||
| − | |||
| − | |||
|- | |- | ||
| − | ! | + | ! Full<br>ammo |
| − | + | ! 1st<br>rack empty | |
| + | ! 2nd<br>rack empty | ||
| + | ! 3rd<br>rack empty | ||
| + | ! 4th<br>rack empty | ||
| + | ! Visual<br>discrepancy | ||
|- | |- | ||
| − | + | | '''174''' || 131 ''(+43)'' || 87 ''(+87)'' || 44 ''(+130)'' || 1 ''(+173)'' || Yes | |
| − | | | ||
|- | |- | ||
|} | |} | ||
| − | + | Notes: | |
| + | * Only 144 shells are modeled in the racks 1 to 4. | ||
| + | * The 1st rack contains 13 shells but empties after having fired 43 shells. | ||
| + | * The 2nd rack contains 52 shells but empties after having fired 44 shells. | ||
| + | * The 3rd rack contains 24 shells but empties after having fired 43 shells. | ||
| + | * The 4th rack contains 55 shells but empties after having fired 44 shells. | ||
| + | * To go into battle with the turret and the flanks empty of ammo, pack 44 ''(+130)'' shells (racks 1 to 3 emptied). | ||
=== Machine guns === | === Machine guns === | ||
<!-- ''Offensive and anti-aircraft machine guns not only allow you to fight some aircraft but also are effective against lightly armoured vehicles. Evaluate machine guns and give recommendations on its use.'' --> | <!-- ''Offensive and anti-aircraft machine guns not only allow you to fight some aircraft but also are effective against lightly armoured vehicles. Evaluate machine guns and give recommendations on its use.'' --> | ||
| − | {{main| | + | {{main|M1919A4 (7.62 mm)}} |
| − | {| class="wikitable" style="text-align:center" | + | {| class="wikitable" style="text-align:center" width="50%" |
|- | |- | ||
| − | ! colspan="5" | [[ | + | ! colspan="5" | [[M1919A4 (7.62 mm)|7.62 mm M1919A4]] |
|- | |- | ||
! Mount | ! Mount | ||
| − | ! Capacity | + | ! Capacity (Belt) |
| − | ! | + | ! Fire rate |
| − | ! Vertical | + | ! Vertical |
| − | ! Horizontal | + | ! Horizontal |
|- | |- | ||
| − | | Coaxial || | + | | Coaxial || 3200 (250) || 500 || N/A || N/A |
| + | |- | ||
| + | | Pintle || 3200 (250) || 500 || -10°/+80° || -60°/+14° | ||
|- | |- | ||
|} | |} | ||
| + | |||
| + | The {{Specs|pseudonym}} has two 7.62 mm M1919A4 machine guns, one being coaxial to the main gun and the other roof mounted on the right side of the turret.. The two machine guns can quickly incapacitate the exposed crews on some vehicles or do some serious damage to those low-passing planes. However it lacks the ability to effectively damage even lightly armored vehicles due to its low penetration of only 10 mm. | ||
== Usage in battles == | == Usage in battles == | ||
| − | <!--''Describe the tactics of playing in the vehicle, the features of using vehicles in the team and advice on tactics. Refrain from creating a "guide" - do not impose a single point of view but give the reader food for thought. Describe the most dangerous enemies and give recommendations on fighting them. If necessary, note the specifics of the game in different modes (AB, RB, SB).''--> | + | <!-- ''Describe the tactics of playing in the vehicle, the features of using vehicles in the team and advice on tactics. Refrain from creating a "guide" - do not impose a single point of view but instead give the reader food for thought. Describe the most dangerous enemies and give recommendations on fighting them. If necessary, note the specifics of the game in different modes (AB, RB, SB).'' --> |
| − | |||
| − | |||
| − | |||
| − | + | The {{Specs|pseudonym}} is best used as a point-capper and a hit-n-run tank. Its extreme mobility gives the player uncountable ways to play with the enemy. At the start of a battle, it can quickly cap a nearby point first, but note that some wheeled vehicles, like the [[Sd.Kfz.234/2|Sd.kfz.234]] series, can still outrun the M3 on-road, therefore posing a great threat. Or it can get to an ambush position near the point and wait until the prey comes. With its reliable gun, the M3 should be able to destroy the first wave of enemies easily and quickly. | |
| − | |||
| − | + | In the middle stages of a battle, the M3 can utilise its excellent mobility and get to wherever needs help while carefully looking around. If the {{Specs|pseudonym}} unexpectedly encounters an enemy in its path, don't panic! Circle around the enemy and try to force it to turn, this way it usually cannot aim at the {{Specs|pseudonym}} accurately, then reduce the {{Specs|pseudonym}}'s speed down under 10 km/h and keep moving. Now the {{Specs|pseudonym}}'s stabiliser will give the tank a great chance to hit while on the move as it stabilises the gun when the tank is under 10 km/h, making it easier time to put the gun on target while moving compared to the enemy. | |
| − | + | The frontal armour of this tank is also quite good at a distance. Find a building or a big rock as cover and angle the hull for about 40 degrees. When ready to fire, go out of cover and stop once the 37 mm gun is exposed, don't go out too much or the thin side armour will be exposed to be hit. Keep in mind that with this tactic the player should only engage the low-penetrating enemies at more than 400 m, as their penetration will drop significantly at that distance while the M3 can still penetrate 73 mm of armour, which is enough to go through most of its opponents like the [[Pz.III (Disambiguation)|Pz.IIIs]]. | |
| − | + | '''Enemies worth noting:''' | |
| − | |||
| − | + | Specific enemy vehicles that bear mentioning are firstly any Germans with the [[KwK38 (20 mm)|20 mm KwK/FlaK38]] cannon, this gun might be small but can have up to 64 mm of pen, which is enough to go through the {{Specs|pseudonym}} almost anywhere. These guns can also fire 10 rounds at 280 rounds/min before having to reload the clip, meaning that they will very easily take out your crew before you have a chance to respond. To counter, the best chance you have is to angle your frontal armour which can make it difficult for the PzGr 40 rounds to penetrate. The Russian [[T-50]] and [[T-126]] are vehicles you will also see commonly, these have fairly thick and angled frontal armour that will prevent you from easily getting through. These tanks can also carry an APHEBC round that will destroy you in one shot with little difficulty, to counter you should use your speed to attempt to get a side shot into either the turret or engine. If the T-50 cannot move you can outrun its turret and finish it without much difficulty. | |
| − | + | It is likely that the M3 will encounter some rough heavies, like the [[Matilda III]] and the [[B1 bis]]. The best tactic against these types of targets is to use the {{Specs|pseudonym}}'s fast speed, get within 200 m from them and attack, with shooting at point-blank range being the most effective way. Before conducting an attack, check the {{Specs|pseudonym}}'s and the enemy's surroundings to make sure no one will ambush the {{Specs|pseudonym}}. While charging, use the {{Specs|pseudonym}}'s quick turns to suddenly change direction to avoid being shot if they are aiming and firing at the {{Specs|pseudonym}}. Once the tank is at the ideal distance, manoeuvre so that the gun is vertical to their armour. Do not shoot if the enemy is angling! The small calibre 37 mm gun is very likely to bounce off or not penetrate against sloped armour. | |
| − | + | For the Matilda III, shoot at the middle of the near-vertical frontal plate to knock out the driver first, since the 37 mm shell is not enough to knock out the gunner after penetrating. Once it is immobile, go to its side and finish it by shooting its hull sides. Or, shoot the right side of the gun mantlet to disable its gunner. For best chance of penetration, do not shoot its turret side. | |
| − | |||
| − | |||
| − | |||
| − | |||
| − | |||
| − | |||
| − | |||
| − | |||
| − | |||
| − | |||
| − | |||
| − | |||
| + | For the B1, either aim for the near-vertical frontal armour plate at the right side of the hull, or the turret ring to incapacitate the commander/gunner, or simply move to its side and knock out the crews one by one by hitting its flat side armour. | ||
=== Modules === | === Modules === | ||
| Line 205: | Line 187: | ||
| Parts | | Parts | ||
| Horizontal Drive | | Horizontal Drive | ||
| − | | | + | | M51B1/B2 |
|- | |- | ||
| II | | II | ||
| Line 212: | Line 194: | ||
| FPE | | FPE | ||
| Adjustment of Fire | | Adjustment of Fire | ||
| − | | | + | | |
|- | |- | ||
| III | | III | ||
| Line 225: | Line 207: | ||
| Engine | | Engine | ||
| | | | ||
| + | | Artillery Support | ||
| | | | ||
| − | |||
| − | |||
| − | |||
|- | |- | ||
|} | |} | ||
=== Pros and cons === | === Pros and cons === | ||
| − | <!--'' | + | <!-- ''Summarise and briefly evaluate the vehicle in terms of its characteristics and combat effectiveness. Mark its pros and cons in a bulleted list. Try not to use more than 6 points for each of the characteristics. Avoid using categorical definitions such as "bad", "good" and the like - use substitutions with softer forms such as "inadequate" and "effective".'' --> |
| + | |||
'''Pros:''' | '''Pros:''' | ||
| − | * | + | * Great cannon with good penetration, excellent rate of fire and gun depression; it can effectively penetrate common opponents like the [[Pz.II (Disambiguation)|Pz.II]] and [[Chi-Ha (Family)|Chi-Ha]], as well as heavy targets like the [[B1 bis]] or [[Matilda III]] |
| − | * | + | * Excellent acceleration, top speed and turning ability on all terrains; easily outruns slower opponents like the [[Pz.III (Disambiguation)|Pz.III]] |
| − | * | + | * Access to a vertical stabiliser which most tanks don't have, it is an advantage in close quarter encounters |
| − | * | + | * Respectable frontal armour that, if angled, might bounce some shells from a distance (eg. Japanese 37 mm/German 20 mm) |
| − | * | + | * Small turret profile makes it harder to get hit when hull-down |
| + | * Empty space below the turret crew can absorb poorly aimed shots, they tend to not do much damage | ||
| − | ''' Cons:''' | + | '''Cons:''' |
| − | * | + | * Weak armour against high-penetration shells like 50 mm Kwk 39 or 76 mm F-34 |
| − | * | + | * Its shells do not have explosive filler, severely limiting the post-penetration effect especially against spacious tanks like the [[LVT(A)(1)]] |
| − | * | + | * Inefficient brakes when trying to stop the tank at full speed |
| − | + | * Hull is fairly tall for a light tank and the crews are closely packed, reducing its survivability | |
| − | |||
== History == | == History == | ||
| − | <!--''Describe the history of the creation and combat usage of the | + | <!-- ''Describe the history of the creation and combat usage of the vehicle in more detail than in the introduction. If the historical reference turns out to be too long, take it to a separate article, taking a link to the article about the vehicle and adding a block "/History" (example: <nowiki>https://wiki.warthunder.com/(Vehicle-name)/History</nowiki>) and add a link to it here using the <code>main</code> template. Be sure to reference text and sources by using <code><nowiki><ref></ref></nowiki></code>, as well as adding them at the end of the article with <code><nowiki><references /></nowiki></code>. This section may also include the vehicle's dev blog entry (if applicable) and the in-game encyclopedia description (under <code><nowiki>=== In-game description ===</nowiki></code>, also if applicable).'' --> |
| − | === | ||
| − | |||
| − | + | The M3A3 Stuart was a substantially exported tank from the United States. Due to its proven capabilities in all theatres of the Second World War, it found itself on the battlefields of Eastern Asia. The Republic of China were supplied with over one thousand M3A3 Stuarts, making them a prolific user of the Stuart.<ref name=":0">http://www.tankarchives.ca/2017/05/light-tank-m3a3-american-emigrant.html</ref> Some tanks during the late war use were retrofitted with light up-armour packages to further protect the front and sides of the tank thus extending its service life.<ref name=":0" /> By 1946, the Kuomintang Armoured Corps were still operating at least 116 Stuart light tanks.<ref>https://tanks-encyclopedia.com/ww2/china/chinese-tanks-1925-1950/</ref> | |
| − | The | + | The use of this tank would continue post-war into the Chinese civil war. M3A3 Stuarts served with both Kuomintang and Communist Party forces until at least 1949 when the Civil war concluded in Communist Party victory. The Kuomintang were able to transport tanks over the East China Sea as they escaped to Taiwan.<ref name=":0" /> Some of these tanks remain today in museums in both China and Taiwan. |
| − | + | == Media == | |
| + | <!-- ''Excellent additions to the article would be video guides, screenshots from the game, and photos.'' --> | ||
| + | ;Skins | ||
| + | * [https://live.warthunder.com/feed/camouflages/?q=%23m3a3 Skins and camouflages for the {{PAGENAME}} from live.warthunder.com.] | ||
| − | + | ;Videos | |
| − | + | {{Youtube-gallery|h5WMlxnSp7I|'''Thick Uparmoured Stuart''' - ''Sgt.Vittie'' (Review starts at 07:06)}} | |
| − | == | + | == See also == |
| − | + | <!-- ''Links to the articles on the War Thunder Wiki that you think will be useful for the reader, for example:'' | |
| + | * ''reference to the series of the vehicles;'' | ||
| + | * ''links to approximate analogues of other nations and research trees.'' --> | ||
| − | + | ;Vehicles equipped with the same chassis | |
| + | * [[M3 Stuart (Family)]] | ||
| + | * [[M5 Stuart (Family)]] | ||
| + | * [[M8 General Scott (Family)]] | ||
| − | + | ;Vehicles equipped with the same gun | |
| + | * [[LVT(A)(1)]] | ||
| + | * [[M22]] | ||
| − | + | ;Other vehicles of similar configuration and role | |
| − | + | * [[A13 Mk II 1939]] | |
| − | |||
| − | |||
| − | |||
| − | |||
| − | |||
| − | * | ||
| − | |||
== External links == | == External links == | ||
| − | ''Paste links to sources and external resources, such as:'' | + | <!-- ''Paste links to sources and external resources, such as:'' |
* ''topic on the official game forum;'' | * ''topic on the official game forum;'' | ||
* ''encyclopedia page on the tank;'' | * ''encyclopedia page on the tank;'' | ||
| − | * ''other literature.'' | + | * ''other literature.'' --> |
| + | |||
| + | * [[wikipedia:M3_Stuart|[Wikipedia] M3 Stuart]] | ||
| + | * [https://tanks-encyclopedia.com/ww2/US/M3_stuart.php <nowiki>[Tanks Encyclopedia]</nowiki> Light Tank M3 Stuart] | ||
=== References === | === References === | ||
<references /> | <references /> | ||
| − | {{China | + | {{China light tanks}} |
| − | |||
Revision as of 12:12, 11 August 2020
Contents
| This page is about the light tank M3A3 Stuart (China). For other uses, see M3 (Disambiguation). For other vehicles of the family, see M3 Stuart (Family). |
Description
.jpg)
The ␗Light Tank M3A3 Stuart is a rank II Chinese light tank
with a battle rating of 2.3 (AB) and 2.7 (RB/SB). It was introduced in Update 1.91 "Night Vision".
General info
Survivability and armour
| Armour | Front (Slope angle) | Sides | Rear | Roof |
|---|---|---|---|---|
| Hull | 25 mm (46-49°) Front Glacis - upper plate 20 mm (spherical) MG port 50 mm (24-27°) Front Glacis - joint plate 50 mm (44-46°) Front Glacis - lower plate 44.4 mm (25-43°) Lower Glacis |
25.4 mm | 25.4 mm (1-26°) Upper part 25.4 mm (21°) Lower part |
12.7 mm |
| Turret | 38.1 mm (12-14°) Turret front 50.8 mm Gun mantlet |
31.75 mm 15 mm Add-on tracks |
31.75 mm | 12.7 mm |
Notes:
- Suspension wheels, tracks and bogies are 15 mm thick.
- Mudguards and rear storage box are 4 mm thick
The frontal armour on the ␗M3A3 Stuart is pretty tough for a light tank with 25 mm on the front & sides of the hull, and a large, 50 mm thick gun mantlet covering up most of its frontal turret. When angled correctly it can bounce off quite a few shots. However it can still be easily penetrated by average guns on its BR. From the front the 4 crews are sitting pretty close together, thus making it highly possible to get one-shot by shells with explosives like the Soviet 45 mm AP or the German short 75 mm APHE. The transmission and the engine are all quite small and low, and the ammoracks are also small, reducing the chance of being immobile or ammoracked. There is also an empty area under the turret crews and in front of the driving compartment, which will absorb those shells with weak damage.
Mobility
| Game Mode | Max Speed (km/h) | Weight (tons) | Engine power (horsepower) | Power-to-weight ratio (hp/ton) | |||
|---|---|---|---|---|---|---|---|
| Forward | Reverse | Stock | Upgraded | Stock | Upgraded | ||
| Arcade | 65 | 8 | 14.4 | 406 | 500 | 28.19 | 34.72 |
| Realistic | 59 | 7 | 232 | 262 | 16.11 | 18.19 | |
One of the best aspects of the ␗M3A3 Stuart is its superior mobility. It has a top speed of 58 km/h and doesn't lose too much speed on soft terrain, making it one of the fastest tanks at the BR alongside with the famous BT series tanks. The tracks are quite large and grant you a good mobility on hard (solid ground, roads) and soft terrain (mud, snow, sand).
As it benefits from regenerative steering, turning on the spot with the M3A3 Stuart (China) is easier than for most tanks at the same BR. Regenerative steering consists in letting the unsolicited track rotate when the tank is turning instead of locking it. The hull is also short and wide enough, allowing it to turn agilely. The reverse speed is average: it will not get you out of a dangerous situation quickly but isn't a handicap either. The ␗M3A3 Stuart reaches 18 km/h when fording and 16 km/h when driving uphill.
While its high speed is an advantage, it can turn into a disadvantage when manoeuvring at high speed: the ␗M3A3 Stuart starts skidding uncontrollably if you take a sharp turn. Be aware of this before rushing towards the frontline: limit your maximum speed, know the terrain and anticipate the braking phases.
The acceleration is also so powerful that it causes you hull to rock back and forth during acceleration or braking phases. This effect is however nullified by the gun stabilizer when driving under 10 km/h. Light and medium obstacles (fences, posts, bushes and small trees) are not a problem for the ␗M3A3 Stuart but large obstacles will reduce your mobility: avoid them.
Armaments
Main armament
| 37 mm M6 | Turret rotation speed (°/s) | Reloading rate (seconds) | |||||||||||
|---|---|---|---|---|---|---|---|---|---|---|---|---|---|
| Mode | Capacity | Vertical | Horizontal | Stabilizer | Stock | Upgraded | Full | Expert | Aced | Stock | Full | Expert | Aced |
| Arcade | 174 | -10°/+20° | ±180° | Vertical | 19.04 | 26.35 | __.__ | __.__ | 37.65 | 3.77 | _.__ | _.__ | 2.90 |
| Realistic | 11.90 | 14.00 | __.__ | __.__ | 20.00 | ||||||||
The ␗M3A3 Stuart is armed with a 37 mm cannon as its main armament, the same gun as the preceding M8. While being at a BR 1.3 higher, the gun still packs a fierce punch if aiming at the correct area and firing at the correct distance. It is a small caliber fast-firing gun with a maximum penetration of 84 mm at 100 m (M51B1/B2 shell), being able to penetrate most of the opponents it will face. The penetration power and gun accuracy drop a lot beyond 500 m and become unreliable past 700 m. The gun is equipped with a vertical stabiliser, giving the ␗M3A3 Stuart a huge advantage in some cases as you can fire precisely while moving, but keep in mind that it activates only when the tank is driving under 10 km/h. While it lacks the post-penetration damage to disable most enemies in one shot, it can quickly finish them off with its fast reload. However, the gun can overheat from shooting several shots without interruption and cause a loss of accuracy noticeable even at 200 m distance. A short pause between shots will prevent this from happening.
Ammunition
The M3A3 Stuart (China) has a limited choice of ammunition, focused on dealing with armoured vehicles:
- M74B1: AP; a solid shot with good penetration but no explosive filler.
- M51B1/B2: APCBC; a solid shot with an even better penetration thanks to the ballistic cap but no explosive filler.
Knowledge of enemy vehicle layouts is essential with ammunition lacking post-penetration explosive damage. Make sure to target modules and crew positions to maximise the damage. Disabling the enemy gunner on your first shot will be critical to win engagements as you'll most likely need several shots to destroy an enemy vehicle.
| Penetration statistics | |||||||
|---|---|---|---|---|---|---|---|
| Ammunition | Type of warhead |
Penetration @ 0° Angle of Attack (mm) | |||||
| 10 m | 100 m | 500 m | 1,000 m | 1,500 m | 2,000 m | ||
| M74B1 | AP | 79 | 76 | 65 | 54 | 45 | 37 |
| M51B1/B2 | APCBC | 87 | 84 | 73 | 60 | 50 | 41 |
| Shell details | |||||||||
|---|---|---|---|---|---|---|---|---|---|
| Ammunition | Type of warhead |
Velocity (m/s) |
Projectile Mass (kg) |
Fuse delay (m) |
Fuse sensitivity (mm) |
Explosive Mass (TNT equivalent) (g) |
Ricochet | ||
| 0% | 50% | 100% | |||||||
| M74B1 | AP | 883 | 0.87 | N/A | N/A | N/A | 47° | 60° | 65° |
| M51B1/B2 | APCBC | 883 | 0.87 | N/A | N/A | N/A | 48° | 63° | 71° |
Ammo racks
.png)
| Full ammo |
1st rack empty |
2nd rack empty |
3rd rack empty |
4th rack empty |
Visual discrepancy |
|---|---|---|---|---|---|
| 174 | 131 (+43) | 87 (+87) | 44 (+130) | 1 (+173) | Yes |
Notes:
- Only 144 shells are modeled in the racks 1 to 4.
- The 1st rack contains 13 shells but empties after having fired 43 shells.
- The 2nd rack contains 52 shells but empties after having fired 44 shells.
- The 3rd rack contains 24 shells but empties after having fired 43 shells.
- The 4th rack contains 55 shells but empties after having fired 44 shells.
- To go into battle with the turret and the flanks empty of ammo, pack 44 (+130) shells (racks 1 to 3 emptied).
Machine guns
| 7.62 mm M1919A4 | ||||
|---|---|---|---|---|
| Mount | Capacity (Belt) | Fire rate | Vertical | Horizontal |
| Coaxial | 3200 (250) | 500 | N/A | N/A |
| Pintle | 3200 (250) | 500 | -10°/+80° | -60°/+14° |
The ␗M3A3 Stuart has two 7.62 mm M1919A4 machine guns, one being coaxial to the main gun and the other roof mounted on the right side of the turret.. The two machine guns can quickly incapacitate the exposed crews on some vehicles or do some serious damage to those low-passing planes. However it lacks the ability to effectively damage even lightly armored vehicles due to its low penetration of only 10 mm.
Usage in battles
The ␗M3A3 Stuart is best used as a point-capper and a hit-n-run tank. Its extreme mobility gives the player uncountable ways to play with the enemy. At the start of a battle, it can quickly cap a nearby point first, but note that some wheeled vehicles, like the Sd.kfz.234 series, can still outrun the M3 on-road, therefore posing a great threat. Or it can get to an ambush position near the point and wait until the prey comes. With its reliable gun, the M3 should be able to destroy the first wave of enemies easily and quickly.
In the middle stages of a battle, the M3 can utilise its excellent mobility and get to wherever needs help while carefully looking around. If the ␗M3A3 Stuart unexpectedly encounters an enemy in its path, don't panic! Circle around the enemy and try to force it to turn, this way it usually cannot aim at the ␗M3A3 Stuart accurately, then reduce the ␗M3A3 Stuart's speed down under 10 km/h and keep moving. Now the ␗M3A3 Stuart's stabiliser will give the tank a great chance to hit while on the move as it stabilises the gun when the tank is under 10 km/h, making it easier time to put the gun on target while moving compared to the enemy.
The frontal armour of this tank is also quite good at a distance. Find a building or a big rock as cover and angle the hull for about 40 degrees. When ready to fire, go out of cover and stop once the 37 mm gun is exposed, don't go out too much or the thin side armour will be exposed to be hit. Keep in mind that with this tactic the player should only engage the low-penetrating enemies at more than 400 m, as their penetration will drop significantly at that distance while the M3 can still penetrate 73 mm of armour, which is enough to go through most of its opponents like the Pz.IIIs.
Enemies worth noting:
Specific enemy vehicles that bear mentioning are firstly any Germans with the 20 mm KwK/FlaK38 cannon, this gun might be small but can have up to 64 mm of pen, which is enough to go through the ␗M3A3 Stuart almost anywhere. These guns can also fire 10 rounds at 280 rounds/min before having to reload the clip, meaning that they will very easily take out your crew before you have a chance to respond. To counter, the best chance you have is to angle your frontal armour which can make it difficult for the PzGr 40 rounds to penetrate. The Russian T-50 and T-126 are vehicles you will also see commonly, these have fairly thick and angled frontal armour that will prevent you from easily getting through. These tanks can also carry an APHEBC round that will destroy you in one shot with little difficulty, to counter you should use your speed to attempt to get a side shot into either the turret or engine. If the T-50 cannot move you can outrun its turret and finish it without much difficulty.
It is likely that the M3 will encounter some rough heavies, like the Matilda III and the B1 bis. The best tactic against these types of targets is to use the ␗M3A3 Stuart's fast speed, get within 200 m from them and attack, with shooting at point-blank range being the most effective way. Before conducting an attack, check the ␗M3A3 Stuart's and the enemy's surroundings to make sure no one will ambush the ␗M3A3 Stuart. While charging, use the ␗M3A3 Stuart's quick turns to suddenly change direction to avoid being shot if they are aiming and firing at the ␗M3A3 Stuart. Once the tank is at the ideal distance, manoeuvre so that the gun is vertical to their armour. Do not shoot if the enemy is angling! The small calibre 37 mm gun is very likely to bounce off or not penetrate against sloped armour.
For the Matilda III, shoot at the middle of the near-vertical frontal plate to knock out the driver first, since the 37 mm shell is not enough to knock out the gunner after penetrating. Once it is immobile, go to its side and finish it by shooting its hull sides. Or, shoot the right side of the gun mantlet to disable its gunner. For best chance of penetration, do not shoot its turret side.
For the B1, either aim for the near-vertical frontal armour plate at the right side of the hull, or the turret ring to incapacitate the commander/gunner, or simply move to its side and knock out the crews one by one by hitting its flat side armour.
Modules
| Tier | Mobility | Protection | Firepower | ||
|---|---|---|---|---|---|
| I | Tracks | Parts | Horizontal Drive | M51B1/B2 | |
| II | Suspension | Brake System | FPE | Adjustment of Fire | |
| III | Filters | Crew Replenishment | Elevation Mechanism | ||
| IV | Transmission | Engine | Artillery Support | ||
Pros and cons
Pros:
- Great cannon with good penetration, excellent rate of fire and gun depression; it can effectively penetrate common opponents like the Pz.II and Chi-Ha, as well as heavy targets like the B1 bis or Matilda III
- Excellent acceleration, top speed and turning ability on all terrains; easily outruns slower opponents like the Pz.III
- Access to a vertical stabiliser which most tanks don't have, it is an advantage in close quarter encounters
- Respectable frontal armour that, if angled, might bounce some shells from a distance (eg. Japanese 37 mm/German 20 mm)
- Small turret profile makes it harder to get hit when hull-down
- Empty space below the turret crew can absorb poorly aimed shots, they tend to not do much damage
Cons:
- Weak armour against high-penetration shells like 50 mm Kwk 39 or 76 mm F-34
- Its shells do not have explosive filler, severely limiting the post-penetration effect especially against spacious tanks like the LVT(A)(1)
- Inefficient brakes when trying to stop the tank at full speed
- Hull is fairly tall for a light tank and the crews are closely packed, reducing its survivability
History
The M3A3 Stuart was a substantially exported tank from the United States. Due to its proven capabilities in all theatres of the Second World War, it found itself on the battlefields of Eastern Asia. The Republic of China were supplied with over one thousand M3A3 Stuarts, making them a prolific user of the Stuart.[1] Some tanks during the late war use were retrofitted with light up-armour packages to further protect the front and sides of the tank thus extending its service life.[1] By 1946, the Kuomintang Armoured Corps were still operating at least 116 Stuart light tanks.[2]
The use of this tank would continue post-war into the Chinese civil war. M3A3 Stuarts served with both Kuomintang and Communist Party forces until at least 1949 when the Civil war concluded in Communist Party victory. The Kuomintang were able to transport tanks over the East China Sea as they escaped to Taiwan.[1] Some of these tanks remain today in museums in both China and Taiwan.
Media
- Skins
- Videos
See also
- Vehicles equipped with the same chassis
- Vehicles equipped with the same gun
- Other vehicles of similar configuration and role
External links
References
| China light tanks | |
|---|---|
| Type 63 | Object 211 · Type 63 · ZTS63 |
| Type 62 | Type 62 |
| WZ551 | PTL02 · WMA301 |
| ZBL08 | ZLT11 |
| Type 86 | ZBD86 |
| WZ502 | ZBD04A |
| ROC | M41D · M64 |
| Type 59 | QN506 |
| USA | ␗M8 LAC · ␗M3A3 Stuart · ␗M3A3 (1st PTG) · ␗M5A1 · ␗M24 · ␗M18 GMC · ␗M41A3 |
| USSR | ␗T-26 · T-26 No.531 · ␗PT-76 |
