Difference between pages "Ki-27 otsu Tachiarai" and "M4 748 (a) (Germany)"
TiMe_tO_FaiL (talk | contribs) m (Added to survivability and armor) (Tag: Visual edit) |
CobraKingII (talk | contribs) (→Main armament) (Tag: Visual edit) |
||
| Line 1: | Line 1: | ||
| − | {{Specs-Card|code= | + | {{Specs-Card|code=us_m4a2_1944_germ}} |
| + | {{About | ||
| + | | about = captured American medium tank '''{{PAGENAME}}''' | ||
| + | | usage = other uses | ||
| + | | link = M4 (Disambiguation) | ||
| + | }} | ||
== Description == | == Description == | ||
| − | <!-- | + | <!--In the description, the first part should be about the history of the creation and combat usage of the vehicle, as well as its key features. In the second part, tell the reader about the ground vehicle in the game. Insert a screenshot of the vehicle, so that if the novice player does not remember the vehicle by name, he will immediately understand what kind of vehicle the article is talking about.--> |
| − | [[File: | + | [[File:GarageImage_M4 748(a).jpg|420px|thumb|left]] |
| − | {{ | + | {{break}} |
| − | The '''{{ | + | The '''{{specs|name}}''' is a gift rank {{Specs|rank}} German medium tank {{Battle-rating}}. It was available only for [[wt:en/news/356/current/|pre-order]] during the Closed Beta Test of Ground Forces during the period before [[Update 1.41]]. 500 units were also for sale during the [[wt:en/news/5079-special-hurry-up-and-get-rare-packs-en|5th Anniversary event]], which sold out within a few hours. It represented a captured [[M4A2|M4A2 Sherman]] in Wehrmacht service and was the first Sherman to be implemented in the game. Unfortunately, it is currently impossible for a new War Thunder player to acquire this rare tank. |
| + | |||
| + | The M4 748(a) plays like any other M4 Sherman as a mobile tank with adequate armour and gun. While its frontal armour and gun may not be up for the tasks against its contemporaries at its battle rating, the M4's mobility allows the M4 to get around the front line to capture the objective or hit the enemy in the sides. Though, if the heavy manoeuvring is not preferable, the M4 can also perform well as a supporting tank by backing up a more powerful tank to overwhelm a small enemy group. | ||
| + | |||
| + | Visually, the M4 748(a) is identical to the [[M4A2|M4A2 Sherman]]. The only big distinctive feature of the M4 748(a) is the paint coat on the tank, which is a combination of the yellow ''dunkelgelb'', red-brown ''rotbraun'', and green ''olivgrün'', in a manner similar to the default scheme of the [[Panther G|Panther G]]. | ||
| + | |||
| + | Features on the M4 748(a) are shared with its counterpart with a 47° front armour plate with a one-piece transmission housing. The turret features the M34A1 gun mount with the 75 mm M3 gun, the mount specified for a telescopic and periscopic scope. Unlike the [[M4|M4 Sherman model]] that has the same gun mount, the right turret side does not have a welded piece of applique armour, allowing for a more sloped contour on the 76 mm turret armour. The turret top features a spotlight on the front loader's position with his oval hatch while the commander has a usual split hatch with an M2 Browning machine gun for him to use. | ||
== General info == | == General info == | ||
| − | === | + | === Survivability and armour === |
| − | <!-- | + | <!--Describe armour protection. Note the most well protected and key weak areas. Appreciate the layout of modules as well as the number and location of crew members. Is the level of armour protection sufficient, is the placement of modules helpful for survival in combat? |
| − | |||
| − | + | If necessary use a visual template to indicate the most secure and weak zones of the armour.--> | |
| − | + | '''Armour type:''' | |
| − | + | ||
| − | + | *Rolled homogeneous armour (Hull, Turret roof) | |
| − | + | *Cast homogeneous armour (Turret, Transmission area) | |
| − | ! | + | |
| − | ! | + | {| class="wikitable" |
| + | |- | ||
| + | ! Armour !! Front (Slope angle) !! Sides !! Rear !! Roof | ||
|- | |- | ||
| − | + | | Hull || 63.5 mm (47°) ''Front glacis'' <br> 51-108 mm (12-56°) ''Transmission housing'' || 38.1 mm || 38.1 mm (7-10°) || 19.5 mm | |
|- | |- | ||
| − | + | | Turret || 76 mm (3-65°) ''Turret front'' <br> 89 + 51 mm (2-62°) ''Gun mantlet'' || 51 mm (2-64°) || 51 mm (2-60°) || 19.5 mm | |
| − | | | ||
|- | |- | ||
| − | ! | + | ! Armour !! Sides !! Roof |
| − | | | + | |- |
| + | | Cupola || 51 mm || 19.5 mm | ||
|- | |- | ||
|} | |} | ||
| + | '''Notes:''' | ||
| + | |||
| + | * Suspension wheels are 15 mm thick, the bogies are 10 mm, and the tracks are 20 mm thick. | ||
| + | * Small applique armour are placed on the side hull armour over ammunition that gives an extra 25.4 mm. | ||
| + | * Belly armour is 19.5 mm thick, though the tip near the transmission is 38.1 mm thick. | ||
| + | * Hull underside over tracks is 9.5 mm thick. | ||
| + | * A 9.5 mm RHA plate separates the engine compartment from the crew compartment. | ||
| + | * A small patch on the turret front right side is thinner (50.8 mm) than the rest (76.2 mm). | ||
| + | |||
| + | === Mobility === | ||
| + | <!-- ''Write about the mobility of the ground vehicle. Estimate the specific power and manoeuvrability, as well as the maximum speed forwards and backwards.'' --> | ||
| + | |||
| + | {{tankMobility|abMinHp= 635|rbMinHp= 363|AoAweight= 1.15}} | ||
| + | |||
| + | == Armaments == | ||
| + | === Main armament === | ||
| + | <!--Give the reader information about the characteristics of the main gun. Assess its effectiveness in a battle based on the reloading speed, ballistics and the power of shells. Do not forget about the flexibility of the fire, that is how quickly the cannon can be aimed at the target, open fire on it and aim at another enemy. Add a link to the main article on the gun: <code><nowiki>{{main|Name of the weapon}}</nowiki></code>. Describe in general terms the ammunition available for the main gun. Give advice on how to use them and how to fill the ammunition storage.--> | ||
| + | {{main|M3 (75 mm)}} | ||
| + | |||
| + | {| class="wikitable" style="text-align:center" | ||
| + | |- | ||
| + | ! colspan="6" | [[M3 (75 mm)|75 mm M3]] | ||
| + | |- | ||
| + | ! colspan="3" rowspan="1" style="width:5em" |Capacity | ||
| + | ! rowspan="1" | Vertical <br> guidance | ||
| + | ! rowspan="1" | Horizontal <br> guidance | ||
| + | ! rowspan="1" | Stabilizer | ||
| − | |||
| − | |||
|- | |- | ||
| − | + | | colspan="3" | 97 || -10°/+25° || ±180° || Vertical | |
|- | |- | ||
| − | ! | + | ! colspan="6" | Turret rotation speed (°/s) |
|- | |- | ||
| − | | | + | ! style="width:4em" |Mode |
| + | ! style="width:4em" |Stock | ||
| + | ! style="width:4em" |Upgraded | ||
| + | ! style="width:4em" |Prior + Full crew | ||
| + | ! style="width:4em" |Prior + Expert qualif. | ||
| + | ! style="width:4em" |Prior + Ace qualif. | ||
| + | |- | ||
| + | | ''Arcade'' ||22.85||31.62||38.40||42.47||45.18 | ||
| + | |- | ||
| + | | ''Realistic'' || 14.28 || 16.80 || 20.4 || 22.60 || 24.00 | ||
| + | |- | ||
| + | ! colspan="4" | Reloading rate (seconds) | ||
| + | |- | ||
| + | ! colspan="1" style="width:4em" |Stock | ||
| + | ! colspan="1" style="width:4em" |Prior + Full crew | ||
| + | ! colspan="1" style="width:4em" |Prior + Expert qualif. | ||
| + | ! colspan="1" style="width:4em" |Prior + Ace qualif. | ||
| + | |- | ||
| + | | 6.50 || 5.75 || 5.30 || 5.00 | ||
|- | |- | ||
|} | |} | ||
| − | {| class="wikitable" style="text-align:center" width=" | + | ===== Ammunition ===== |
| + | {| class="wikitable sortable" style="text-align:center" width="100%" | ||
| + | ! colspan="8" | Penetration statistics | ||
|- | |- | ||
| − | ! colspan=" | + | ! rowspan="2" data-sort-type="text" | Ammunition |
| + | ! rowspan="2" class="unsortable" | Type of <br /> warhead | ||
| + | ! colspan="6" | '''Penetration''' '''''in mm''''' '''@ 90°''' | ||
|- | |- | ||
| − | ! | + | ! 10m |
| − | ! | + | ! 100m |
| − | ! | + | ! 500m |
| − | ! | + | ! 1000m |
| + | ! 1500m | ||
| + | ! 2000m | ||
|- | |- | ||
| − | + | | M72 shot || AP ||90||88||78||67||57||49 | |
|- | |- | ||
| − | | | + | | M48 shell || HE || 10 || 10 || 10 || 10 || 10 || 10 |
|- | |- | ||
| + | | M61 shot || APCBC ||103||101||90||78||68|| 59 | ||
| + | |- | ||
| + | | T45 shot || APCR || 143 || 137 || 127 || 106 || 86 || 70 | ||
| + | |- | ||
|} | |} | ||
| − | + | {| class="wikitable sortable" style="text-align:center" width="100%" | |
| − | {| class="wikitable" style="text-align:center" | + | ! colspan="10" | Shell details |
| + | |- | ||
| + | ! rowspan="2" data-sort-type="text" | Ammunition | ||
| + | ! rowspan="2" class="unsortable" | Type of <br /> warhead | ||
| + | ! rowspan="2" |Velocity <br /> in m/s | ||
| + | ! rowspan="2" |Projectile<br />Mass in kg | ||
| + | ! rowspan="2" | ''Fuse delay'' | ||
| + | ''in m:'' | ||
| + | ! rowspan="2" | ''Fuse sensitivity'' | ||
| + | ''in mm:'' | ||
| + | ! rowspan="2" | ''Explosive Mass in g<br /> (TNT equivalent):'' | ||
| + | ! rowspan="2" | ''Normalization At 30° <br> from horizontal:'' | ||
| + | ! colspan="3" | ''Ricochet:'' | ||
| + | |- | ||
| + | ! 0% | ||
| + | ! 50% | ||
| + | ! 100% | ||
| + | |- | ||
| + | | M72 shot || AP || 619 || 6.3 || N/A || N/A || N/A || -1° || 47° || 60° || 65° | ||
| + | |- | ||
| + | | M48 shell || HE || 463 || 6.3 || 0.4 || 0.5 || 666 || +0° || 79° || 80° || 81° | ||
|- | |- | ||
| − | ! colspan=" | + | | M61 shot || APCBC || 618 || 6.8 || 1.2 || 20 || 63.7 || +4° || 48° || 63° || 71° |
| + | |- | ||
| + | | T45 shot || APCR || 868 || 3.8 || N/A || N/A || N/A || +1.5° || 66° || 70° || 72° | ||
| + | |- | ||
| + | |} | ||
| + | {| class="wikitable sortable" style="text-align:center" | ||
| + | ! colspan="7" | Smoke characteristic | ||
|- | |- | ||
| − | ! | + | ! Ammunition |
| + | ! Velocity <br /> in m/s | ||
| + | ! Projectile<br />Mass in kg | ||
| + | ! ''Screen radius <br /> in m'' | ||
| + | ! ''Screen time <br /> in s'' | ||
| + | ! ''Screen hold time <br /> in s:'' | ||
| + | ! ''Explosive Mass in g<br /> (TNT equivalent):'' | ||
|- | |- | ||
| − | | | + | | M89 || 259 || 3 || 13 || 5 || 20 || 50 |
|- | |- | ||
|} | |} | ||
| − | === | + | ===== [[Ammo racks|Ammo racks]] ===== |
| − | <!- | + | {| class="wikitable sortable" style="text-align:center" |
| − | + | |- | |
| + | ! class="wikitable unsortable" |Full<br /> ammo | ||
| + | ! class="wikitable unsortable" |1st<br /> rack empty | ||
| + | ! class="wikitable unsortable" |2nd<br /> rack empty | ||
| + | ! class="wikitable unsortable" |3rd<br /> rack empty | ||
| + | ! class="wikitable unsortable" |4th<br /> rack empty | ||
| + | ! class="wikitable unsortable" |5th<br /> rack empty | ||
| + | ! class="wikitable unsortable" |6th<br /> rack empty | ||
| + | ! class="wikitable unsortable" |7th<br /> rack empty | ||
| + | ! class="wikitable unsortable" |8th<br /> rack empty | ||
| + | ! class="wikitable unsortable" |Visual<br /> discrepancy | ||
| + | |- | ||
| + | || '''97''' || 91 ''(+6)'' || 88 ''(+9)'' || 86 ''(+11)'' || 78 ''(+19)'' || 63 ''(+34)'' || 46 ''(+51)'' || 31 ''(+66)'' || 1 ''(+96)'' || style="text-align:center" | No | ||
| + | |- | ||
| + | |} | ||
| + | [[File:Ammoracks M4.png|right|thumbnail|x250px|[[Ammo racks|Ammo racks]] of the M4 Sherman.]] | ||
| + | Notes: | ||
| − | + | * To go into battle with the turret basket empty of ammo, pack 78 ''(+19)'' shells (racks 1 to 4 emptied). | |
| − | + | * To go into battle with the turret basket and the flanks empty of ammo, pack 31 ''(+66)'' shells (Racks 1 to 7 empty). | |
| − | + | * The 8th rack is large and located at a a weak spot: the bottom section of the armor. In case of penetration, there is a high risk of ammo rack detonation. Make sure not to expose your flanks unnecessarily. | |
| − | |||
| − | + | === Machine guns === | |
| + | <!--Offensive and anti-aircraft machine guns not only allow you to fight some aircraft but also are effective against lightly armoured vehicles. Evaluate machine guns and give recommendations on its use.--> | ||
| + | {{main|M2HB (12.7 mm)|M1919A4 (7.62 mm)}} | ||
| − | |||
| − | |||
| − | |||
| − | |||
| − | |||
| − | |||
| − | |||
| − | |||
| − | |||
| − | |||
| − | |||
| − | |||
| − | |||
| − | |||
| − | |||
| − | |||
| − | |||
{| class="wikitable" style="text-align:center" | {| class="wikitable" style="text-align:center" | ||
|- | |- | ||
| − | ! colspan="7" | | + | ! colspan="7" | [[M2HB (12.7 mm)|12.7 mm M2HB]] |
|- | |- | ||
| − | + | ! colspan="7" | ''Pintle mount'' | |
| − | |||
| − | ! colspan=" | ||
| − | |||
| − | |||
|- | |- | ||
| − | ! | + | ! colspan="4" rowspan="1" style="width:5em" |Capacity (Belt capacity) |
| − | ! | + | ! rowspan="1" | Fire rate <br> (shots/minute) |
| − | ! | + | ! rowspan="1" | Vertical <br> guidance |
| + | ! rowspan="1" | Horizontal <br> guidance | ||
|- | |- | ||
| − | | | + | | colspan="4" | 300 (200) || 577 || -10°/+25° || ±60° |
|- | |- | ||
|} | |} | ||
| − | + | {| class="wikitable" style="text-align:center" | |
| − | |||
| − | {| class="wikitable" | ||
| − | |||
| − | |||
| − | |||
| − | |||
| − | |||
| − | |||
| − | |||
| − | |||
| − | |||
| − | |||
|- | |- | ||
| − | | | + | ! colspan="7" | [[M1919A4 (7.62 mm)|7.62 mm M1919A4]] |
| − | |||
| − | |||
| − | |||
| − | | | ||
|- | |- | ||
| − | | | + | ! colspan="7" | ''Coaxial mount'' |
| − | |||
| − | |||
| − | |||
| − | |||
|- | |- | ||
| − | | | + | ! colspan="4" rowspan="1" style="width:5em" |Capacity (Belt capacity) |
| − | | | + | ! rowspan="1" | Fire rate <br> (shots/minute) |
| − | | | + | ! rowspan="1" | Vertical <br> guidance |
| − | + | ! rowspan="1" | Horizontal <br> guidance | |
| − | | | ||
|- | |- | ||
| − | + | | colspan="4" | 3,000 (250) || 500 || N/A || N/A | |
|- | |- | ||
|} | |} | ||
| + | |||
| + | == Usage in battles == | ||
| + | <!--Describe the tactics of playing in the vehicle, the features of using vehicles in the team and advice on tactics. Refrain from creating a "guide" - do not impose a single point of view but instead give the reader food for thought. Describe the most dangerous enemies and give recommendations on fighting them. If necessary, note the specifics of the game in different modes (AB, RB, SB).--> | ||
| + | |||
| + | The M4 748(a) is a very versatile weapons platform that can be used in multiple roles and tactics. It can use its decent armour and gun to support friendlies against enemies, use its mobility to outmanoeuvre and exploit undefended location to reach an unsuspecting area, and a combination of the traits to deal with its contemporary medium tanks with the 75 mm gun with its APCBC and APCR ammunition. | ||
| + | |||
| + | While most tanks in the BR range of the M4 748(a) are quite capable of destroying the tank through the front, the most worrisome tanks are those that are quite immune to the 75 mm gun on the M4. APCR ammunition is given to the 75 mm gun, but its poor slope characteristics still make it situational ammunition than a universal tank annihilator. As such, exploiting side armour and general weak points of opposing tanks are still a must. | ||
| + | |||
| + | :'''Exploitation'''<br> | ||
| + | |||
| + | The M4 748(a) tank's mobility can be used to travel the distance on the battlefield in a satisfactory fashion. As the M4 748(a) cannot stand against the more heavily armoured and armed enemies at the higher BR range, a manoeuvre around the enemy force or in a location prime for an ambush location can allow the M4 Sherman to damage or destroy enemy tanks. The engine power allows the M4 to travel across rough terrain to get to its destination. The only drawback in this action would be an unexpected encounter with another enemy trying the same manoeuvre, which would be an enemy tank class of equal to the M4 or lower so a good engagement against them could let the M4 continue its merry way. | ||
| + | |||
| + | :'''Supporting'''<br> | ||
| + | |||
| + | There are many instances on a War Thunder battlefield where two opposing tanks face off against each other on a corner of cover, waiting for the other to pop out so it can deal a crippling blow with its gun or waiting for the other to prematurely fire so it can advance unhindered to a prime firing location. The M4 748(a) can alleviate this problem by giving the friendly tank additional support. In this scenario, go around the enemy through another angle while the teammate keeps the enemy busy. This way, the M4 can go around and prepare itself for a firing solution on the enemy tank. This will either end with 1) a successful out-manoeuvre and the M4 landing a shot on the enemy's side and weak point while it was preoccupied with the ally, or 2) the tank is forced to turn its attention to the M4, leaving your ally able to advance and do the same to get on the enemy's side. | ||
| + | |||
| + | On a larger battle scale with multiple allies and enemies, work in cohesion with the others behind the front lines as the allies absorb most of the enemy shots, allowing the M4 to line a perfect shot on a spent enemy to land a penetrating shot into the hull and knocking out the crew. Always aim for a crippling or defeating blow so that the enemy tank will not be an immediate threat to the rest of the team while it repairs or replenishes. | ||
| + | |||
| + | :'''Capturing the Objective'''<br> | ||
| + | |||
| + | While not as fast as some of the lighter tanks at the BR, the M4 748(a)'s upgraded mobility makes it usable as a vehicle to run towards the objective and capture the zone. It has the decent firepower and armour to handle enemy light tanks that are expected to also rush towards points, and so it could last for some time capturing and defending the zones. However, once heavier tanks and contemporary medium tanks start arriving in droves, it is recommended to start withdrawing from the position or else the M4 will be overwhelmed and destroyed at the first priority due to being an easy target, even if allies are present to support the M4 on the position. | ||
=== Pros and cons === | === Pros and cons === | ||
| − | <!-- | + | <!--Summarise and briefly evaluate the vehicle in terms of its characteristics and combat effectiveness. Mark its pros and cons in a bulleted list. Try not to use more than 6 points for each of the characteristics. Avoid using categorical definitions such as "bad", "good" and the like - use substitutions with softer forms such as "inadequate" and "effective".-->'''Pros:''' |
| − | |||
| − | '''Pros:''' | ||
| − | * Great | + | * Excellent gun depression of -10° plus the angled frontal turret allows it to utilise hills very well |
| − | * | + | * Great penetration and post-penetration damage when using M61 shells; can frontally penetrate and one-shot most opponents like the [[T-34 (Family)|T-34,]] Crusader, [[M4]] and others |
| − | * | + | * Vertical stabiliser allows it to fire on the move, or, in a sudden encounter, fire before the enemy which is critical |
| − | * | + | * Well angled frontal armour; when angling the hull it can deflect some low calibre / low-penetrating shells like the Stuarts' 37 mm, 75 mm M1, 76 mm F-34 / Zis-5 and others |
| + | * Adequate top speed allows it to get to positions in time, or to do tactical manoeuvres like flanking | ||
| + | * Rather fast reload speed for follow up shots | ||
| + | * Plenty of reserve ammunition for prolonged fighting without replenishing at captured points | ||
| + | * Due to it being a part of the German tech tree, you will not have to face the long barrel 75 mm (RB/SB) which increases its survivability quite a bit | ||
'''Cons:''' | '''Cons:''' | ||
| − | * | + | * Large profile and weak side armour; flankers like the M24 Chaffee can easily see and penetrate it |
| − | * | + | * Frontal armour is still inadequate, will get frontally penetrated and one-shot by tanks like Achilles, [[M10 (Family)|M10]] and T-34-57 |
| − | * | + | * The best M61 shell struggles to penetrate heavy targets like [[KV-1 (ZiS-5)]], Churchill Mk.III or even the T-34 and M10 when angled |
| − | * | + | * Trajectory is curved and velocity is low due to its short barrel, thus distant/moving targets are hard to shoot at |
| + | * Hull traverse is quite slow, making it sluggish in a turn | ||
| + | * Roof armour of 19.5 mm thick is vulnerable to airstrikes with AP cannons. For example the widely used [[M2 Browning (12.7 mm)|M2 Browning]] | ||
== History == | == History == | ||
| − | <!-- | + | <!--Describe the history of the creation and combat usage of the ground vehicle in more detail than in the introduction. If the historical reference turns out to be too long, take it to a separate article, taking a link to the article about the vehicle and adding a block "/ History" (example: <nowiki>https://wiki.warthunder.com/(Vehicle-name)/History</nowiki>) and add a link to it here using the <code>main</code> template. Be sure to reference text and sources by using <code><nowiki><ref></nowiki></code>, as well as adding them at the end of the article. This section may also include the vehicle's dev blog entry (if applicable) and the in-game encyclopedia description (under <code><nowiki>=== In-game description ===</nowiki></code>, also if applicable).--> |
| − | + | ||
| + | ===Captured equipment=== | ||
| + | In the midst of the battlefield in World War II, wreckage and broken down equipment are often left behind by the army on the field due to either the inability to recover them or they are no longer operable. This equipment, if salvageable, are often taken by the occupiers and used for their own purposes. The Allies mostly captured German vehicles for use in gun tests and target practice, with the Soviets going as far as fielding captured tanks in their own ranks such as the [[Pz.III J|Panzer III]] as the [[T-III (USSR)|T-III]]. The German forces also captured Allied tanks as well, mostly fielding them in the Panzer forces to supplement the growing attrition of their armoured forces. The [[M4A2|M4 Sherman]], one of the most common tanks in the Allied forces, was often captured and fielded by the German forces. The fielded Shermans in the German army was given the designation '''M4-748(a)'''. | ||
| + | |||
| + | ===Combat usage=== | ||
| + | It is unknown exactly how many Shermans have been captured and used by the German forces during World War II, but the German-captured Shermans have been documented in the battlefields of Tunisia, Italy, France, Soviet Union, and in Germany itself in the last days of the war. The Shermans were reported to be used in the 14th Panzer Division, 16th Panzer Division, Fallschirmjäger Division, and Kampfgruppe Berlin. When used by the Germans, the Shermans were often painted with ''Balkenkreuz'' cross symbol of the Wehrmacht to distinguish between friend and foe. | ||
| + | |||
| + | The German captured M4 Sherman's most notable combat performance was in the Ardennes Offensive in December 1944, the Baltic Offensive against the Soviet Union in late 1944, and the Battle of Berlin. The Shermans were also reported to play a role as armour-recovery vehicles rather than tanks due to Sherman's great power-to-weight ratio and reliable design that allows for the ability to tow the heavier German vehicles reliably. | ||
| + | |||
| + | === In-game description === | ||
| + | The American M4A2 medium tank is a variant of the M4 with a diesel engine. In April 1942, the first M4A2 prototype was tested, and the tank was put into production. The tank had a welded hull. A low-speed diesel engine gave the M4A2 good cross-country ability and a much larger maximum range than tanks with gasoline engines. | ||
| + | A total of 8053 of these tanks were built. About 2000 of them were delivered to the Soviet Union under the Lend-Lease program. | ||
| + | |||
| + | This vehicle was actively used in combat operations on the Eastern Front. Sometimes, entire tank battalions were made up of this tank. | ||
| + | Captured serviceable tanks were used by the Wehrmacht as subdivision command vehicles and sometimes even full-fledged combat vehicles. Captured M4A2 tanks served with the self-propelled artillery regiment of the 14th Armored Division of the Wehrmacht and with the 15th Parachute Division of the Luftwaffe. Most of the tanks were marked with an Iron Cross to show they belonged to the German army. Some tanks were repainted to match the standard camouflage schemes of the German army. The armor protection of these tanks was often supplemented with spare treads. | ||
| + | Captured M4-748 (a) tanks were used by German troops until the end of the war. The divisions of the Wehrmacht had several such tanks which survived until Germany surrendered. | ||
== Media == | == Media == | ||
| − | |||
''Excellent additions to the article would be video guides, screenshots from the game, and photos.'' | ''Excellent additions to the article would be video guides, screenshots from the game, and photos.'' | ||
== See also == | == See also == | ||
<!-- ''Links to the articles on the War Thunder Wiki that you think will be useful for the reader, for example:'' | <!-- ''Links to the articles on the War Thunder Wiki that you think will be useful for the reader, for example:'' | ||
| − | * ''reference to the series of the | + | * ''reference to the series of the vehicles;'' |
* ''links to approximate analogues of other nations and research trees.'' --> | * ''links to approximate analogues of other nations and research trees.'' --> | ||
| − | |||
| − | * | + | ;Vehicles equipped with the same chassis |
| − | * | + | |
| + | * [[M4]] | ||
| + | * [[M4A2]] | ||
| + | * [[Calliope]] | ||
== External links == | == External links == | ||
| − | <!-- | + | <!--Paste links to sources and external resources, such as: |
* ''topic on the official game forum;'' | * ''topic on the official game forum;'' | ||
| − | * ''encyclopedia page on the | + | * ''encyclopedia page on the tank;'' |
| − | * ''other literature.'' --> | + | * ''other literature.''--> |
| − | |||
| − | * | + | * [http://beutepanzer.ru/Beutepanzer/us/M4_sherman/m4-75-sherman-01.htm Images of M4-748(a).] |
| − | |||
| − | |||
| − | {{ | + | {{Germany medium tanks}} |
| − | {{ | + | {{Germany premium ground vehicles}} |
| − | |||
Revision as of 15:18, 31 July 2020
Contents
| This page is about the captured American medium tank M4 748 (a) (Germany). For other uses, see M4 (Disambiguation). |
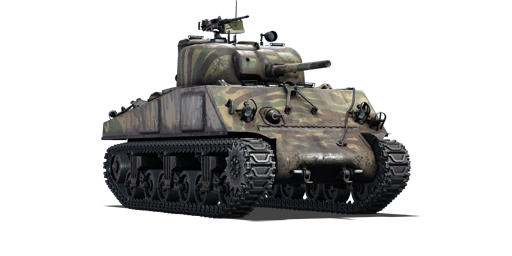
Description
_(Germany).jpg)
The ▀Pz.Kpfw. M4 748 (a) is a gift rank III German medium tank
with a battle rating of 4.0 (AB/RB/SB). It was available only for pre-order during the Closed Beta Test of Ground Forces during the period before Update 1.41. 500 units were also for sale during the 5th Anniversary event, which sold out within a few hours. It represented a captured M4A2 Sherman in Wehrmacht service and was the first Sherman to be implemented in the game. Unfortunately, it is currently impossible for a new War Thunder player to acquire this rare tank.
The M4 748(a) plays like any other M4 Sherman as a mobile tank with adequate armour and gun. While its frontal armour and gun may not be up for the tasks against its contemporaries at its battle rating, the M4's mobility allows the M4 to get around the front line to capture the objective or hit the enemy in the sides. Though, if the heavy manoeuvring is not preferable, the M4 can also perform well as a supporting tank by backing up a more powerful tank to overwhelm a small enemy group.
Visually, the M4 748(a) is identical to the M4A2 Sherman. The only big distinctive feature of the M4 748(a) is the paint coat on the tank, which is a combination of the yellow dunkelgelb, red-brown rotbraun, and green olivgrün, in a manner similar to the default scheme of the Panther G.
Features on the M4 748(a) are shared with its counterpart with a 47° front armour plate with a one-piece transmission housing. The turret features the M34A1 gun mount with the 75 mm M3 gun, the mount specified for a telescopic and periscopic scope. Unlike the M4 Sherman model that has the same gun mount, the right turret side does not have a welded piece of applique armour, allowing for a more sloped contour on the 76 mm turret armour. The turret top features a spotlight on the front loader's position with his oval hatch while the commander has a usual split hatch with an M2 Browning machine gun for him to use.
General info
Survivability and armour
Armour type:
- Rolled homogeneous armour (Hull, Turret roof)
- Cast homogeneous armour (Turret, Transmission area)
| Armour | Front (Slope angle) | Sides | Rear | Roof |
|---|---|---|---|---|
| Hull | 63.5 mm (47°) Front glacis 51-108 mm (12-56°) Transmission housing |
38.1 mm | 38.1 mm (7-10°) | 19.5 mm |
| Turret | 76 mm (3-65°) Turret front 89 + 51 mm (2-62°) Gun mantlet |
51 mm (2-64°) | 51 mm (2-60°) | 19.5 mm |
| Armour | Sides | Roof | ||
| Cupola | 51 mm | 19.5 mm |
Notes:
- Suspension wheels are 15 mm thick, the bogies are 10 mm, and the tracks are 20 mm thick.
- Small applique armour are placed on the side hull armour over ammunition that gives an extra 25.4 mm.
- Belly armour is 19.5 mm thick, though the tip near the transmission is 38.1 mm thick.
- Hull underside over tracks is 9.5 mm thick.
- A 9.5 mm RHA plate separates the engine compartment from the crew compartment.
- A small patch on the turret front right side is thinner (50.8 mm) than the rest (76.2 mm).
Mobility
| Game Mode | Max Speed (km/h) | Weight (tons) | Engine power (horsepower) | Power-to-weight ratio (hp/ton) | ||||
|---|---|---|---|---|---|---|---|---|
| Forward | Reverse | Stock | AoA | Stock | Upgraded | Stock | Upgraded | |
| Arcade | 53 | 7 | 31.3 | 1.15 | 635 | 782 | 20.26 | 24.06 |
| Realistic | 48 | 7 | 363 | 410 | 11.58 | 12.62 | ||
Armaments
Main armament
| 75 mm M3 | |||||
|---|---|---|---|---|---|
| Capacity | Vertical guidance |
Horizontal guidance |
Stabilizer | ||
| 97 | -10°/+25° | ±180° | Vertical | ||
| Turret rotation speed (°/s) | |||||
| Mode | Stock | Upgraded | Prior + Full crew | Prior + Expert qualif. | Prior + Ace qualif. |
| Arcade | 22.85 | 31.62 | 38.40 | 42.47 | 45.18 |
| Realistic | 14.28 | 16.80 | 20.4 | 22.60 | 24.00 |
| Reloading rate (seconds) | |||||
| Stock | Prior + Full crew | Prior + Expert qualif. | Prior + Ace qualif. | ||
| 6.50 | 5.75 | 5.30 | 5.00 | ||
Ammunition
| Penetration statistics | |||||||
|---|---|---|---|---|---|---|---|
| Ammunition | Type of warhead |
Penetration in mm @ 90° | |||||
| 10m | 100m | 500m | 1000m | 1500m | 2000m | ||
| M72 shot | AP | 90 | 88 | 78 | 67 | 57 | 49 |
| M48 shell | HE | 10 | 10 | 10 | 10 | 10 | 10 |
| M61 shot | APCBC | 103 | 101 | 90 | 78 | 68 | 59 |
| T45 shot | APCR | 143 | 137 | 127 | 106 | 86 | 70 |
| Shell details | ||||||||||
|---|---|---|---|---|---|---|---|---|---|---|
| Ammunition | Type of warhead |
Velocity in m/s |
Projectile Mass in kg |
Fuse delay
in m: |
Fuse sensitivity
in mm: |
Explosive Mass in g (TNT equivalent): |
Normalization At 30° from horizontal: |
Ricochet: | ||
| 0% | 50% | 100% | ||||||||
| M72 shot | AP | 619 | 6.3 | N/A | N/A | N/A | -1° | 47° | 60° | 65° |
| M48 shell | HE | 463 | 6.3 | 0.4 | 0.5 | 666 | +0° | 79° | 80° | 81° |
| M61 shot | APCBC | 618 | 6.8 | 1.2 | 20 | 63.7 | +4° | 48° | 63° | 71° |
| T45 shot | APCR | 868 | 3.8 | N/A | N/A | N/A | +1.5° | 66° | 70° | 72° |
| Smoke characteristic | ||||||
|---|---|---|---|---|---|---|
| Ammunition | Velocity in m/s |
Projectile Mass in kg |
Screen radius in m |
Screen time in s |
Screen hold time in s: |
Explosive Mass in g (TNT equivalent): |
| M89 | 259 | 3 | 13 | 5 | 20 | 50 |
Ammo racks
| Full ammo |
1st rack empty |
2nd rack empty |
3rd rack empty |
4th rack empty |
5th rack empty |
6th rack empty |
7th rack empty |
8th rack empty |
Visual discrepancy |
|---|---|---|---|---|---|---|---|---|---|
| 97 | 91 (+6) | 88 (+9) | 86 (+11) | 78 (+19) | 63 (+34) | 46 (+51) | 31 (+66) | 1 (+96) | No |

Notes:
- To go into battle with the turret basket empty of ammo, pack 78 (+19) shells (racks 1 to 4 emptied).
- To go into battle with the turret basket and the flanks empty of ammo, pack 31 (+66) shells (Racks 1 to 7 empty).
- The 8th rack is large and located at a a weak spot: the bottom section of the armor. In case of penetration, there is a high risk of ammo rack detonation. Make sure not to expose your flanks unnecessarily.
Machine guns
| 12.7 mm M2HB | ||||||
|---|---|---|---|---|---|---|
| Pintle mount | ||||||
| Capacity (Belt capacity) | Fire rate (shots/minute) |
Vertical guidance |
Horizontal guidance | |||
| 300 (200) | 577 | -10°/+25° | ±60° | |||
| 7.62 mm M1919A4 | ||||||
|---|---|---|---|---|---|---|
| Coaxial mount | ||||||
| Capacity (Belt capacity) | Fire rate (shots/minute) |
Vertical guidance |
Horizontal guidance | |||
| 3,000 (250) | 500 | N/A | N/A | |||
Usage in battles
The M4 748(a) is a very versatile weapons platform that can be used in multiple roles and tactics. It can use its decent armour and gun to support friendlies against enemies, use its mobility to outmanoeuvre and exploit undefended location to reach an unsuspecting area, and a combination of the traits to deal with its contemporary medium tanks with the 75 mm gun with its APCBC and APCR ammunition.
While most tanks in the BR range of the M4 748(a) are quite capable of destroying the tank through the front, the most worrisome tanks are those that are quite immune to the 75 mm gun on the M4. APCR ammunition is given to the 75 mm gun, but its poor slope characteristics still make it situational ammunition than a universal tank annihilator. As such, exploiting side armour and general weak points of opposing tanks are still a must.
- Exploitation
The M4 748(a) tank's mobility can be used to travel the distance on the battlefield in a satisfactory fashion. As the M4 748(a) cannot stand against the more heavily armoured and armed enemies at the higher BR range, a manoeuvre around the enemy force or in a location prime for an ambush location can allow the M4 Sherman to damage or destroy enemy tanks. The engine power allows the M4 to travel across rough terrain to get to its destination. The only drawback in this action would be an unexpected encounter with another enemy trying the same manoeuvre, which would be an enemy tank class of equal to the M4 or lower so a good engagement against them could let the M4 continue its merry way.
- Supporting
There are many instances on a War Thunder battlefield where two opposing tanks face off against each other on a corner of cover, waiting for the other to pop out so it can deal a crippling blow with its gun or waiting for the other to prematurely fire so it can advance unhindered to a prime firing location. The M4 748(a) can alleviate this problem by giving the friendly tank additional support. In this scenario, go around the enemy through another angle while the teammate keeps the enemy busy. This way, the M4 can go around and prepare itself for a firing solution on the enemy tank. This will either end with 1) a successful out-manoeuvre and the M4 landing a shot on the enemy's side and weak point while it was preoccupied with the ally, or 2) the tank is forced to turn its attention to the M4, leaving your ally able to advance and do the same to get on the enemy's side.
On a larger battle scale with multiple allies and enemies, work in cohesion with the others behind the front lines as the allies absorb most of the enemy shots, allowing the M4 to line a perfect shot on a spent enemy to land a penetrating shot into the hull and knocking out the crew. Always aim for a crippling or defeating blow so that the enemy tank will not be an immediate threat to the rest of the team while it repairs or replenishes.
- Capturing the Objective
While not as fast as some of the lighter tanks at the BR, the M4 748(a)'s upgraded mobility makes it usable as a vehicle to run towards the objective and capture the zone. It has the decent firepower and armour to handle enemy light tanks that are expected to also rush towards points, and so it could last for some time capturing and defending the zones. However, once heavier tanks and contemporary medium tanks start arriving in droves, it is recommended to start withdrawing from the position or else the M4 will be overwhelmed and destroyed at the first priority due to being an easy target, even if allies are present to support the M4 on the position.
Pros and cons
Pros:
- Excellent gun depression of -10° plus the angled frontal turret allows it to utilise hills very well
- Great penetration and post-penetration damage when using M61 shells; can frontally penetrate and one-shot most opponents like the T-34, Crusader, M4 and others
- Vertical stabiliser allows it to fire on the move, or, in a sudden encounter, fire before the enemy which is critical
- Well angled frontal armour; when angling the hull it can deflect some low calibre / low-penetrating shells like the Stuarts' 37 mm, 75 mm M1, 76 mm F-34 / Zis-5 and others
- Adequate top speed allows it to get to positions in time, or to do tactical manoeuvres like flanking
- Rather fast reload speed for follow up shots
- Plenty of reserve ammunition for prolonged fighting without replenishing at captured points
- Due to it being a part of the German tech tree, you will not have to face the long barrel 75 mm (RB/SB) which increases its survivability quite a bit
Cons:
- Large profile and weak side armour; flankers like the M24 Chaffee can easily see and penetrate it
- Frontal armour is still inadequate, will get frontally penetrated and one-shot by tanks like Achilles, M10 and T-34-57
- The best M61 shell struggles to penetrate heavy targets like KV-1 (ZiS-5), Churchill Mk.III or even the T-34 and M10 when angled
- Trajectory is curved and velocity is low due to its short barrel, thus distant/moving targets are hard to shoot at
- Hull traverse is quite slow, making it sluggish in a turn
- Roof armour of 19.5 mm thick is vulnerable to airstrikes with AP cannons. For example the widely used M2 Browning
History
Captured equipment
In the midst of the battlefield in World War II, wreckage and broken down equipment are often left behind by the army on the field due to either the inability to recover them or they are no longer operable. This equipment, if salvageable, are often taken by the occupiers and used for their own purposes. The Allies mostly captured German vehicles for use in gun tests and target practice, with the Soviets going as far as fielding captured tanks in their own ranks such as the Panzer III as the T-III. The German forces also captured Allied tanks as well, mostly fielding them in the Panzer forces to supplement the growing attrition of their armoured forces. The M4 Sherman, one of the most common tanks in the Allied forces, was often captured and fielded by the German forces. The fielded Shermans in the German army was given the designation M4-748(a).
Combat usage
It is unknown exactly how many Shermans have been captured and used by the German forces during World War II, but the German-captured Shermans have been documented in the battlefields of Tunisia, Italy, France, Soviet Union, and in Germany itself in the last days of the war. The Shermans were reported to be used in the 14th Panzer Division, 16th Panzer Division, Fallschirmjäger Division, and Kampfgruppe Berlin. When used by the Germans, the Shermans were often painted with Balkenkreuz cross symbol of the Wehrmacht to distinguish between friend and foe.
The German captured M4 Sherman's most notable combat performance was in the Ardennes Offensive in December 1944, the Baltic Offensive against the Soviet Union in late 1944, and the Battle of Berlin. The Shermans were also reported to play a role as armour-recovery vehicles rather than tanks due to Sherman's great power-to-weight ratio and reliable design that allows for the ability to tow the heavier German vehicles reliably.
In-game description
The American M4A2 medium tank is a variant of the M4 with a diesel engine. In April 1942, the first M4A2 prototype was tested, and the tank was put into production. The tank had a welded hull. A low-speed diesel engine gave the M4A2 good cross-country ability and a much larger maximum range than tanks with gasoline engines. A total of 8053 of these tanks were built. About 2000 of them were delivered to the Soviet Union under the Lend-Lease program.
This vehicle was actively used in combat operations on the Eastern Front. Sometimes, entire tank battalions were made up of this tank. Captured serviceable tanks were used by the Wehrmacht as subdivision command vehicles and sometimes even full-fledged combat vehicles. Captured M4A2 tanks served with the self-propelled artillery regiment of the 14th Armored Division of the Wehrmacht and with the 15th Parachute Division of the Luftwaffe. Most of the tanks were marked with an Iron Cross to show they belonged to the German army. Some tanks were repainted to match the standard camouflage schemes of the German army. The armor protection of these tanks was often supplemented with spare treads. Captured M4-748 (a) tanks were used by German troops until the end of the war. The divisions of the Wehrmacht had several such tanks which survived until Germany surrendered.
Media
Excellent additions to the article would be video guides, screenshots from the game, and photos.
See also
- Vehicles equipped with the same chassis
External links
| Germany medium tanks | |
|---|---|
| Pz.III | Pz.III B · Pz.III E · Pz.III F · Pz.III J · Pz.III J1 · Pz.III J1 TD · Pz.III L · Pz.III M · Pz.III N |
| Pz.IV | Pz.IV C · Pz.IV E · Pz.IV F1 · Pz.IV F2 · Pz.IV G · Pz.IV H · Pz.IV J · Pz.Bef.Wg.IV J |
| Pz.V | VK 3002 (M) · Panther A · Panther D · Panther F · Panther G · Ersatz M10 · Panther II |
| M48 upgrades | M48A2 G A2 · M48 Super |
| Leopard 1 | Leopard I · Leopard A1A1 · Leopard A1A1 (L/44) · Leopard 1A5 · C2A1 · Turm III |
| Leopard 2 | PT-16/T14 mod. · Leopard 2K · Leopard 2AV |
| Leopard 2A4 · Leopard 2 (PzBtl 123) · Leopard 2 PL · Leopard 2A5 · Leopard 2 PSO · Leopard 2A6 · Leopard 2A7V | |
| Trophies | ▀M4 748 (a) · ▀T 34 747 (r) |
| Other | Nb.Fz. · KPz-70 |
| USA | mKPz M47 G · M48A2 C |
| USSR | ◊T-72M1 |
| Germany premium ground vehicles | |
|---|---|
| Light tanks | Pz.II C (DAK) · Pz.Sfl.Ic · Pz.Sp.Wg.P204(f) KwK · Sd.Kfz. 140/1 · Sd.Kfz.234/1 · Ru 251 · SPz 12-3 LGS · TAM 2IP |
| Medium tanks | Nb.Fz. · Pz.III N · Pz.Bef.Wg.IV J · ▀M4 748 (a) · ▀T 34 747 (r) · Ersatz M10 |
| mKPz M47 G · Turm III · Leopard A1A1 (L/44) · Leopard 2 (PzBtl 123) | |
| Heavy tanks | ▀Pz.Kpfw. Churchill · ▀KV-IB · ▀KW I C 756 (r) · ▀KW II 754 (r) |
| VK 45.01 (P) · ␠Tiger · Pz.Bef.Wg.VI P · Tiger II (H) Sla.16 | |
| Tank destroyers | Sd.Kfz.234/3 · Sd.Kfz.234/4 · Sd.Kfz.251/10 · Sd.Kfz.251/22 · 15 cm Pz.W.42 |
| Brummbär · Panzer IV/70(A) · VFW · Bfw. Jagdpanther G1 · Elefant · 38 cm Sturmmörser | |
