Difference between pages "Ki-61-I otsu" and "T-54 (1947)"
(→Usage in battles) (Tag: Visual edit) |
Colok76286 (talk | contribs) |
||
| Line 1: | Line 1: | ||
| − | {{Specs-Card|code= | + | {{Specs-Card|code=ussr_t_54_1947}} |
| − | |||
| − | |||
| − | |||
| − | |||
| − | }} | ||
== Description == | == Description == | ||
| − | <!-- ''In the description, the first part | + | <!--''In the description, the first part needs to be about the history of the creation and combat usage of the vehicle, as well as its key features. In the second part, tell the reader about the ground vehicle in the game. Insert the screenshot of the vehicle. If the novice player does not remember the vehicle by name, they will immediately understand what kind of vehicle it is talking about.''--> |
| − | [[File: | + | [[File:GarageImage_T-54 (1947).jpg|420px|thumb|left]] |
{{break}} | {{break}} | ||
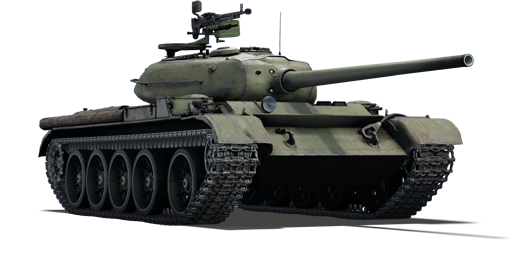
| − | The '''{{ | + | The '''{{specs|name}}''' is a rank {{specs|rank}} Soviet medium tank {{Battle-rating}}. This medium tank was introduced in [[Update 1.43]]. The T-54 mod. 1947 is the first of the three T-54 variants in the game, and it features the best frontal hull armour of its variants albeit with the weakest turret and gun ammunition. The T-54 is a tank that excels in close-range engagements, where its relatively poor gun performance is less of an issue, and its frontal armour and stopping power can be used to its greatest potential. |
| − | + | The T-54 mod. 1947 is the first T-54 tank available to the player. A good throw-back to player's experience is in the gun, which is the same as the one on the [[T-44-100]], though with a better APCR ammunition. The firepower, speed, and armour of the T-54 makes it an amazing tank and can be played in a variety of roles, ranging from a short-range brawler, a support tank, and a sniper. Basically, the tank has a Jack-of-all-Trade characteristic and can be easily exploited to the player's advantage on the battlefield. | |
| − | + | The T-54 is a beautifully armoured tank. Unlike its [[T-54 (1949)|successors]], the model 1947 has more armour at 120 mm thick front hull compared to the 100 mm in the next variants. This means that the front hull armour is vastly superior, but keep in mind that despite that the side armour is still only 80 mm thick. Thus it is actually best to minimize hull angling so the enemy cannot hit the weak side armour and cripple the tank. | |
| − | The | + | The T-54 mod. 1947 does have an "Achille's heel". The biggest weakness is the "trap shot" under the gun mantlet, and the enemy will know about it from experience. Take note of this weakness and hide it by only exposing the top part of the turret if possible. The significance of the trap shot is that tanks like the [[Tiger II (H)|Tiger II]] and [[Panther II]], which cannot penetrate through the front hull, can indeed penetrate through the shot trap. |
| − | The | + | The T-54 mod. 1947 position on the battle rating scale has it gets put into a lower battle rating bracket frequently, making it likely to fight tanks that don't have powerful guns to obliterate it. However, if up tiered, the T-54 will have to start being played conservatively as there will suddenly be a lot of enemy tanks able to destroy the T-54. |
== General info == | == General info == | ||
| − | === | + | === Survivability and armour === |
| − | ''Describe | + | <!--''Describe armour protection. Note the most well protected and key weak areas. Appreciate the layout of modules as well as the number and location of crew members. Is the level of armour protection sufficient, is the placement of modules helpful for survival in combat?'' |
| + | |||
| + | ''If necessary use a visual template to indicate the most secure and weak zones of the armour.''--> | ||
| + | '''Armour type:''' | ||
| + | |||
| + | * Rolled homogeneous armour (Hull, Turret roof) | ||
| + | * Cast homogeneous armour (Turret) | ||
| + | |||
| + | {| class="wikitable" | ||
| + | |- | ||
| + | ! Armour !! Front !! Sides !! Rear !! Roof | ||
| + | |- | ||
| + | | Hull || 120 mm (61°) ''Front glacis'' <br> 120 mm (53°) ''Lower glacis'' || 80 mm || 45 mm (18°) ''Upper'' <br> 30 mm (73°) ''Lower'' || 30 mm | ||
| + | |- | ||
| + | | Turret || 200 mm (2-74°) ''Turret front'' <br> 200 mm ''Gun mantlet'' || 160 mm (19-46°) ''Lower'' <br> 125 mm (34-42°) ''Upper'' || 50 mm (6-54°) || 30 mm | ||
| + | |- | ||
| + | ! Armour !! Sides !! Roof | ||
| + | |- | ||
| + | | Cupola || 100 mm || 30 mm | ||
| + | |- | ||
| + | |} | ||
| + | '''Notes:''' | ||
| + | |||
| + | * The first series of the legendary T-54 has got the strongest frontal armour, 120 mm instead of the later version's 100 mm. Albeit the turret is the weakest one. The big side profile and a rather flat side and rear turret form. | ||
| + | * Suspensions wheels and tracks are 20 mm thick. | ||
| + | * The turret side armour is not all equally the same armour thickness. As it goes toward the top, it gradually becomes thinner with 160 mm to 125 mm. | ||
| + | |||
| + | === Mobility === | ||
| + | <!-- ''Write about the mobility of the ground vehicle. Estimate the specific power and manoeuvrability, as well as the maximum speed forwards and backwards.'' --> | ||
| + | |||
| + | {{tankMobility|abMinHp= 806|rbMinHp= 460|<!--AoAweight=(optional) -->}} | ||
| + | |||
| + | == Armaments == | ||
| + | === Main armament === | ||
| + | <!--''Give the reader information about the characteristics of the main gun. Assess its effectiveness in a battle based on the reloading speed, ballistics and the power of shells. Do not forget about the flexibility of the fire, that is how quickly the cannon can be aimed at the target, open fire on it and aim at another enemy. Add a link to the main article on the gun: <code><nowiki>{{main|Name of the weapon}}</nowiki></code>. Describe in general terms the ammunition available for the main gun. Give advice on how to use them and how to fill the ammunition storage.''--> | ||
| + | {{main|D-10T (100 mm)}} | ||
{| class="wikitable" style="text-align:center" | {| class="wikitable" style="text-align:center" | ||
|- | |- | ||
| − | ! colspan=" | + | ! colspan="6" | [[D-10T (100 mm)|100 mm D-10T]] |
| + | |- | ||
| + | ! colspan="3" rowspan="1" style="width:5em" |Capacity | ||
| + | ! rowspan="1" | Vertical <br> guidance | ||
| + | ! rowspan="1" | Horizontal <br> guidance | ||
| + | ! rowspan="1" | Stabilizer | ||
|- | |- | ||
| − | + | | colspan="3" | 34 || -4°/+17° || ±180° || N/A | |
|- | |- | ||
| − | ! colspan=" | + | ! colspan="6" | Turret rotation speed (°/s) |
| − | |||
| − | |||
| − | |||
| − | |||
|- | |- | ||
| − | ! | + | ! style="width:4em" |Mode |
| + | ! style="width:4em" |Stock | ||
| + | ! style="width:4em" |Upgraded | ||
| + | ! style="width:4em" |Prior + Full crew | ||
| + | ! style="width:4em" |Prior + Expert qualif. | ||
| + | ! style="width:4em" |Prior + Ace qualif. | ||
|- | |- | ||
| − | | | + | | ''Arcade'' ||12.38||17.13||20.8||23.00||24.47 |
|- | |- | ||
| − | + | | ''Realistic'' ||7.74||9.1||11.05||12.22||13 | |
|- | |- | ||
| − | ! colspan=" | + | ! colspan="4" | Reloading rate (seconds) |
| − | |||
| − | |||
| − | |||
| − | |||
|- | |- | ||
| − | ! | + | ! colspan="1" style="width:4em" |Stock |
| + | ! colspan="1" style="width:4em" |Prior + Full crew | ||
| + | ! colspan="1" style="width:4em" |Prior + Expert qualif. | ||
| + | ! colspan="1" style="width:4em" |Prior + Ace qualif. | ||
|- | |- | ||
| − | | | + | |11.05||9.78||9.01||8.5 |
|- | |- | ||
|} | |} | ||
| − | ==== | + | ===== Ammunition ===== |
| − | {| class="wikitable" style="text-align:center" | + | {| class="wikitable sortable" style="text-align:center" width="100%" |
| + | ! colspan="8" | Penetration statistics | ||
| + | |- | ||
| + | ! rowspan="2" data-sort-type="text" | Ammunition | ||
| + | ! rowspan="2" class="unsortable" | Type of <br /> warhead | ||
| + | ! colspan="6" | '''Penetration''' '''''in mm''''' '''@ 0° Angle of Attack''' | ||
| + | |- | ||
| + | ! 10m | ||
| + | ! 100m | ||
| + | ! 500m | ||
| + | ! 1000m | ||
| + | ! 1500m | ||
| + | ! 2000m | ||
| + | |- | ||
| + | | BR-412 || APHE || 218 || 213 || 192 || 169 || 148 || 130 | ||
| + | |- | ||
| + | | BR-412B || APHEBC || 218 || 214 || 195 || 173 || 154 || 137 | ||
| + | |- | ||
| + | | BR-412D || APCBC || 239 || 236 || 223 || 207 || 192 || 178 | ||
| + | |- | ||
| + | | BR-412P || APCR || 224 || 216 || 186 || 153 || 127 || 105 | ||
| + | |- | ||
| + | | OF-412 || HE || 19 || 19 || 19 || 19 || 19 || 19 | ||
| + | |- | ||
| + | |} | ||
| + | {| class="wikitable sortable" style="text-align:center" width="100%" | ||
| + | ! colspan="11" | Shell details | ||
| + | |- | ||
| + | ! rowspan="2" data-sort-type="text" | Ammunition | ||
| + | ! rowspan="2" class="unsortable" | Type of <br /> warhead | ||
| + | ! rowspan="2" |Velocity <br /> in m/s | ||
| + | ! rowspan="2" |Projectile<br />Mass in kg | ||
| + | ! rowspan="2" | ''Fuse delay'' | ||
| + | ''in m:'' | ||
| + | ! rowspan="2" | ''Fuse sensitivity'' | ||
| + | ''in mm:'' | ||
| + | ! rowspan="2" | ''Explosive Mass in g<br /> (TNT equivalent):'' | ||
| + | ! rowspan="2" | ''Normalization At 30° <br> from horizontal:'' | ||
| + | ! colspan="3" | ''Ricochet:'' | ||
| + | |- | ||
| + | ! 0% | ||
| + | ! 50% | ||
| + | ! 100% | ||
|- | |- | ||
| − | + | | BR-412 || APHE || 895 || 15.9 || 1.2 || 19 || 100.1 || -1° || 47° || 60° || 65° | |
|- | |- | ||
| − | + | | BR-412B || APHEBC || 895 || 15.9 || 1.2 || 19 || 100.1 || +4° || 48° || 63° || 71° | |
| + | |- | ||
| + | | BR-412D || APCBC || 887 || 15.9 || 1.2 || 19 || 93.94 || +4° || 48° || 63° || 71° | ||
|- | |- | ||
| − | | | + | | BR-412P || APCR || 1,050 || 8.53 || N/A || N/A || N/A || +1.5° || 66° || 70° || 72° |
| + | |- | ||
| + | | OF-412 || HE || 880 || 15.2 || 0.1 || 0.5 || 1,460 || +0° || 79° || 80° || 81° | ||
|- | |- | ||
|} | |} | ||
| − | + | {| class="wikitable sortable" style="text-align:center" | |
| − | {| class="wikitable" style="text-align:center" | + | ! colspan="7" | Smoke characteristic |
| + | |- | ||
| + | ! Ammunition | ||
| + | ! Velocity <br /> in m/s | ||
| + | ! Projectile<br />Mass in kg | ||
| + | ! ''Screen radius <br /> in m'' | ||
| + | ! ''Screen time <br /> in s'' | ||
| + | ! ''Screen hold time <br /> in s:'' | ||
| + | ! ''Explosive Mass in g<br /> (TNT equivalent):'' | ||
|- | |- | ||
| − | + | | 3D3 || 880 || 15.6 || 20 || 5 || 25 || 272 | |
|- | |- | ||
| − | + | |} | |
| − | + | ||
| − | + | ===== [[Ammo racks|Ammo racks]] ===== | |
| − | + | [[File:Ammoracks_T-54 (1947).png|right|thumbnail|x250px|[[Ammo racks|Ammo racks]] of the T-54 mod. 1947.]] | |
| + | {| class="wikitable sortable" style="text-align:center" | ||
|- | |- | ||
| − | ! | + | ! class="wikitable unsortable" |Full<br /> ammo |
| + | ! class="wikitable unsortable" |1st<br /> rack empty | ||
| + | ! class="wikitable unsortable" |2nd<br /> rack empty | ||
| + | ! class="wikitable unsortable" |3rd<br /> rack empty | ||
| + | ! class="wikitable unsortable" |4th<br /> rack empty | ||
| + | ! class="wikitable unsortable" |5th<br /> rack empty | ||
| + | ! class="wikitable unsortable" |6th<br /> rack empty | ||
| + | ! class="wikitable unsortable" |Visual<br /> discrepancy | ||
|- | |- | ||
| − | | | + | || '''34''' || 28 ''(+6)'' || 27 ''(+7)'' || 26 ''(+8)'' || 23 ''(+11)'' || 21 ''(+13)'' || 1 ''(+33)'' || No |
|- | |- | ||
|} | |} | ||
| + | |||
| + | Turret empty: 27 ''(+7)'' <br> One rack only: 21 ''(+13)'' | ||
| + | |||
| + | === Machine guns === | ||
| + | <!--''Offensive and anti-aircraft machine guns not only allow you to fight some aircraft, but also are effective against lightly armoured vehicles. Evaluate machine guns and give recommendations on its use.''--> | ||
| + | {{main|DShK (12.7 mm)|SGMT (7.62 mm)}} | ||
{| class="wikitable" style="text-align:center" | {| class="wikitable" style="text-align:center" | ||
|- | |- | ||
| − | ! colspan=" | + | ! colspan="7" | [[DShK (12.7 mm)|12.7 mm DShK]] |
| + | |- | ||
| + | ! colspan="7" | ''Pintle mount'' | ||
|- | |- | ||
| − | ! | + | ! colspan="4" rowspan="1" style="width:5em" |Capacity (Belt capacity) |
| − | ! | + | ! rowspan="1" | Fire rate <br> (shots/minute) |
| − | ! | + | ! rowspan="1" | Vertical <br> guidance |
| − | ! | + | ! rowspan="1" | Horizontal <br> guidance |
|- | |- | ||
| − | | | + | | colspan="4" | 250 (50) || 600 || -10°/+60° || ±180° |
|- | |- | ||
|} | |} | ||
| − | |||
{| class="wikitable" style="text-align:center" | {| class="wikitable" style="text-align:center" | ||
|- | |- | ||
| − | ! colspan=" | + | ! colspan="7" | [[SGMT (7.62 mm)|7.62 mm SGMT]] |
|- | |- | ||
| − | ! colspan=" | + | ! colspan="7" | ''Coaxial mount'' |
|- | |- | ||
| − | ! | + | ! colspan="4" rowspan="1" style="width:5em" |Capacity (Belt capacity) |
| − | ! | + | ! rowspan="1" | Fire rate <br> (shots/minute) |
| − | ! | + | ! rowspan="1" | Vertical <br> guidance |
| + | ! rowspan="1" | Horizontal <br> guidance | ||
|- | |- | ||
| − | | 3, | + | | colspan="4" | 3,500 (250) || 600 || N/A || N/A |
|- | |- | ||
|} | |} | ||
| − | |||
| − | |||
| − | |||
| − | |||
| − | |||
| − | |||
| − | |||
| − | |||
| − | |||
| − | |||
| − | |||
| − | |||
| − | |||
| − | |||
| − | |||
| − | |||
| − | |||
| − | |||
| − | |||
| − | |||
| − | |||
| − | |||
| − | |||
| − | |||
| − | |||
| − | |||
== Usage in battles == | == Usage in battles == | ||
| − | <!-- ''Describe the tactics of playing in | + | <!--''Describe the tactics of playing in the vehicle, the features of using vehicles in the team and advice on tactics. Refrain from creating a "guide" - do not impose a single point of view but give the reader food for thought. Describe the most dangerous enemies and give recommendations on fighting them. If necessary, note the specifics of the game in different modes (AB, RB, SB).''--> |
| − | ''' | + | The T-54 '47 is a great starting tank for rank V Soviets. It has armour, a good gun and decent mobility, all traits similar to pre-modern MBTs. However, you should still use any available cover, and it's even better if you can remain unseen. The turret of the '47 can be quite hard to penetrate, due to awkward bounces, and wiggling it can make it even more difficult for enemies to do any damage. In a down-tier, this tank is almost over-powered, because BR-412D can penetrate everything, while the T-54 is mobile and well-protected. You still need to play smart, mind you, but it's easy to get over 5k research points in a match (without premium) in a down-tier. |
| − | The | + | === General Playstyle === |
| + | The T-54 is often described as a Jack-of-All-Trades, similar to late-game MBTs. However, at its current battle rating, its armour still plays an important role, so the title 'Medium Tank' fits better. In Arcade Battles, the T-54 '47 is a joy to play. It can be compared to a Leopard with armour and, arguably, a better gun, because of improved mobility in Arcade. This iteration of the T-54 doesn't get high-penetration rounds, but BR-412D is usually enough to deal with the vast majority of enemies, especially when flanking is so easy in Arcade. In Realistic Battles, this tank is less mobile, but it is still able to cause a lot of damage when played to its strengths, notably the bouncy turret and the high explosive rounds that one-shot enemies - obviously this hints at an ambush or flanking playstyle. | ||
| − | + | '''<u>Arcade Battles</u>''' | |
| − | + | In Arcade Battles, T-54 '47 is very capable even in an up-tier. You should never rely on attacking enemies upfront, rather by flanking and getting to their sides, which shouldn't be a problem because even when stock this tank is quite fast (upgrades mostly improve mobility, rather than raw speed). Flanking is much easier in city combat because there are paved roads and a lot of covers. Flanking on hilly maps is difficult because the T-54 has very little depression, so be cautious on those maps and use any cover you can find (e.g. rocks, buildings etc). | |
| − | '' | + | You should use the speed to push forward and gain capture points, because when at speed, it's harder for opponents to penetrate you, or even hit you. After capturing a point you can choose to move into an ambush position to defend it, or you can choose to traverse the map to another objective or to help a teammate. This choice depends on your playstyle, and whether you're playing for fun or for research points. |
| − | + | '''''Side-Note:''''' Using your speed to make it harder for enemies to hit you is a strategy that can be used to get into any strategic position, not just objectives. | |
| − | + | '''''Important Note:''''' You don't have a stabilizer, so it can be difficult to take fast shots and to shoot on the move. Basically, don't play reactively in this tank, because some tanks (especially the British) can easily outplay you. | |
| − | If you are | + | If you find yourself in a stand-off, aim for the enemy's weak spots (turret rings and lower plates are usually penetrable). Remember to wiggle your turret (and even the hull), because it can be quite difficult to penetrate, especially with conventional rounds. If you don't know how to penetrate the enemy, it's best to retreat and either try to flank or run away from that enemy hoping that your team can handle them. |
| − | + | ==== <u>Realistic Battles</u> ==== | |
| + | In Realistic Battles, T-54 '47 behaves much more like a heavy tank. At the range, it's hard for opponents to hit your turret, but it's also hard for you to hit them, due to bullet drop. Overall, you should play by using cover and by getting behind the enemy lines. This can be easily accomplished by pushing up to objectives, and waiting for the enemies to push past you. This way, you will have the advantage, and your armour can help you survive some shots from other enemies or if your prey survives your shot. However, you should adapt to the game situation - if your team stomps the enemy on one objective, it might be better to flank to another objective and help out your team there, instead of pushing for the enemy spawn (attacking enemies head-on from spawn vs. attacking enemies from behind/side). | ||
| − | + | When upgraded, the T-54 becomes much faster, and the strategy of rushing can work, especially in a down-tier, where most enemies also have conventional rounds. Generally, your armour can be relied upon against certain enemies, which allows you to be a breakthrough tank, especially when there are teammates pushing with you. For example, on Fulda, the B point can be easily captured or overrun with 2-3 T-54s, because usually, enemies cannot deal with that much armour and firepower (attacking from the lower side proved more effective, too). | |
| − | + | '''''Important Note:''''' Your armour is most effective on the move, standing in the open trying to snipe an enemy will make it easier for them to hit you. Using any sort of cover to advance is still the better option. | |
| − | + | === The Stock Grind === | |
| + | When grinding the first modifications, Arcade Battles might be more fun, because of faster-paced gameplay and the ability to see all threats. Now, it's '''a priority to research Parts and FPE,''' and it may also be a good idea '''to activate 3-5 universal vehicle back-ups''' to be able to respawn twice in one match. In this case, it's worth it, because the T-54 '47 is a grinder for rank V and first rank VI vehicles - the faster you spade it, the faster you can grind! | ||
| − | + | General tips for the stock grind are these: | |
| − | * | + | * In the case of T-54, it can be a good idea to let enemies shoot at you because it gives the "Adamant" award and also quite a decent amount of research points. |
| − | * | + | ** In Arcade, you can hide your turret, but show your angled front plate. Enemies will see your marker, and try to shoot at you, but they will bounce and just give you points. Then you can just drive out and return fire to try to get a kill or two. |
| − | + | * Don't try to penetrate tanks frontally with stock rounds - it's no use. You have to flank around and try to get in the rear of the enemies. If you're successful, it usually grants multiple kills. | |
| + | * Play the objectives - they award points, and if you stay to defend them, you will be able to get some easy kills for those who try to get it back (by ambushing them). | ||
| + | ** You can also set up ambushes ''before'' the objective so that enemies will push past you and you can shoot their sides. | ||
| − | + | The American [[M60|M60]], German [[Leopard I|Leopards]] and the British [[Chieftain Mk 3|Chieftain]] are perhaps the biggest worry the T-54 has against medium tanks. These tanks with their [[L7A1 (105 mm)|105 mm guns]] ([[Ordnance BL Tk. L11 (120 mm)|120 mm]] in the Chieftain's case) can penetrate through the T-54's armour at longer ranges with their APDS and HEATFS rounds. Once heavy tanks are taken into the equation with the [[M103]], [[T-10M]], and [[Conqueror|Conqueror]], suddenly the T-54's armour no longer sounds very sufficient against their heavy-hitting rounds. Be wary of many tanks in the 7.7-8.3 BR range. | |
| − | |||
| − | |- | ||
| − | |||
| − | |- | ||
| − | |||
| − | |||
| − | |||
| − | |||
| − | |||
| − | |- | ||
| − | |||
| − | |||
| − | |||
| − | |||
| − | |||
| − | === Modules === | + | ===Modules=== |
{| class="wikitable" | {| class="wikitable" | ||
| − | ! Tier | + | !Tier |
| − | ! colspan="2" | | + | ! colspan="2" |Mobility |
| − | ! | + | !Protection |
| − | ! colspan=" | + | ! colspan="3" |Firepower |
|- | |- | ||
| − | | I | + | |I |
| − | | | + | |Tracks |
| − | | | + | | |
| + | |Parts | ||
| + | |BR-412B | ||
| + | |Horizontal Drive | ||
| | | | ||
| − | |||
| − | |||
|- | |- | ||
| − | | II | + | |II |
| − | | | + | |Suspension |
| − | | | + | |Brake System |
| − | | | + | |FPE |
| | | | ||
| − | | | + | |Adjustment of Fire |
| + | |Smoke grenade | ||
|- | |- | ||
| − | | III | + | |III |
| − | | | + | |Filters |
| − | |||
| | | | ||
| − | | | + | |Crew Replenishment |
| − | | | + | |BR-412D |
| + | |Elevation Mechanism | ||
| + | |BR-412P | ||
|- | |- | ||
| − | | IV | + | |IV |
| − | | | + | |Transmission |
| − | | Engine | + | |Engine |
| − | |||
| | | | ||
| + | |Artillery Support | ||
| + | |3D3 | ||
| | | | ||
|- | |- | ||
| − | |} | + | |}After Parts and FPE, the player should focus on mobility upgrades or the Horizontal Drive modification, since both mobility and turret rotation are limited when the tank is stock. |
| − | |||
| − | |||
| − | |||
=== Pros and cons === | === Pros and cons === | ||
| − | <!-- '' | + | <!--''Summarize and briefly evaluate the vehicle in terms of its characteristics and combat effectiveness. Mark its pros and cons in a bulleted list. Try not to use more than 6 points for each of the characteristics. Avoid using categorical definitions such as "bad", "good" and the like - they have a substitution in the form of softer "inadequate", "effective".''--> |
| − | |||
'''Pros:''' | '''Pros:''' | ||
| − | * | + | * Strongest frontal armour of the T-54 series at 120 mm |
| − | * | + | * Angled armour is particularly bouncy when on the move |
| − | * | + | * AP-HE filled rounds are particularly devastating upon a penetration |
| − | * | + | * Good mobility and speed |
| − | * | + | * Good reload for a gun |
| + | * Pintle 12.7 mm machine gun for fighting soft or air targets | ||
| + | * Low profile | ||
| + | * Access to smoke shells and canisters | ||
'''Cons:''' | '''Cons:''' | ||
| − | * | + | * Relatively poor penetration at the rank with only AP type rounds to work with |
| − | * | + | * Terrible gun depression of -4 degrees |
| − | * No frontal | + | * Weak gun mantlet |
| − | * | + | * Slow turret traverse hampers reaction times |
| + | * No stabilizer | ||
| + | * Only one reverse gear | ||
| + | * Flat side armour tend to be penetrated easily and can be overmatched by some guns | ||
| + | * Hits to the frontal fuel tanks and ammunition can cause an ammo detonation, loss, or a fire | ||
| + | * Highly vulnerable to HEAT-FS or Sabot shells | ||
| + | * Low profile makes it possible for tall vehicles to shoot down at less angled armour during a brawl | ||
== History == | == History == | ||
| − | <!-- ''Describe the history of the creation and combat usage of the | + | <!--''Describe the history of the creation and combat usage of the ground vehicle in more detail than in the introduction. If the historical reference turns out to be too big, take it to a separate article, taking a link to an article about the vehicle and adding a block "/ History" (example: <nowiki>https://wiki.warthunder.com/(Vehicle-name)/History</nowiki>) and add a link to it here using the <code>main</code> template. Be sure to reference text and sources by using <code><nowiki><ref></nowiki></code>, as well as adding them at the end of the article.''--> |
| − | The | + | ===Predecessors=== |
| + | During World War II, the Soviet Union fielded the [[T-34 (1942)|T-34]] in large numbers to overrun the German tanks. The initial T-34 variant with the 76 mm gun soon became insufficient due to further German development on potent anti-tank weaponry. The response was the development of the [[T-34-85]] with the more powerful 85 mm gun. However, the T-34-85 was still insufficient fighting against the German "big cats" tanks. This prompted for further tank development to make a more protected medium tank for the Soviet armoured forces. This developed into the [[T-44]], which proved superior to the T-34 in armour, but retained the same 85 mm gun. | ||
| + | |||
| + | ===Development=== | ||
| + | The army then requested that the gun on the tank be increased for additional firepower. This developed into adding the 100 mm gun onto the T-44 and was designated the [[T-44-100]]. The T-44-100 proved successful in testing, but still suffered drawbacks that impeded its efficiency. It was decided that instead of quickly sending the tank into production, further development and modernization on the overall tank design should be made to make the tank the full transition from a World-War-II-era tank into the next generation. This developed into the '''T-54''' tank that was accepted into service on 29 April 1946. | ||
| + | |||
| + | The tank would enter production at Nizhni Tagil in 1947 and Kharkov in 1948. However, the initial production was slow as the serial production models underwent 1,490 different modifications. The first model produced was designated the [[T-54 (1947)|T-54-1]] (''Object 137''), which had a thicker hull armour than its future model. This production model suffered a quality deficiency, and was cancelled and upgraded into the [[T-54 (1949)|T-54-2]] (''Object 137R'') in 1949 that featured a new turret and other changes to the hull, transmission, and track design. In 1951, another change was made to the design and was designated the [[T-54 (1951)|T-54-3]] (''Object 137Sh''). The T-54-3 design featured a new turret design that removed shot traps. New gun sight and the smoke generating system were also installed into the tank. The T-54-3 would become the basis of future T-54 design, with the turret design staying in all of its successors. | ||
| + | |||
| + | Despite the T-54's great performance in its design, the T-54 did not stop at its base model. The first upgrades done was in 1953 and 1955 when the tank's D-10 gun was given stabilization gear, first with a vertical stabilizer in 1953 before upgrading again with a 2-plane stabilizer in 1955. These tank upgrades renamed the T-54 to ''T-54A'' and ''T-54B'' for the respective years. While an improvement in the tank's performance, the biggest jump came with the advent of nuclear technology in the Soviet arsenal. When testings show that a T-54 can survive the blast of a 2 - 15 kt nuclear charge at 300 meters (700 m for crew survival), the T-54 was slated for the instalment of a Nuclear, Biological, and Chemical (NBC) protection system to protect the crew from the weapons of mass destruction. This project was given to the KB-60 design bureau in Kharkov and this was finished in 1956. Along with many other changes to the tank interior, such as a new engine, heating system, fuel tanks, ammo storage, and new guns sights, the tank became the more common ''T-55'' tank, which would replace the T-54 design in production past 1958. The difference in the T-54 and the T-55 other than the mechanical differences in the presence of a dome-shaped ventilator in front of the loaders hatch, it is a T-54 if present as it was removed in order to seal the tank with NBC protection. All in all, the T-54/55 tank series became the most widely produced tank ever, surpassing the T-34 with an estimated 100,000+ built, many due to the export market and licensed manufacturing the Soviets gave to their allies. | ||
| + | |||
| + | ===Design=== | ||
| + | The T-54 is a simple and reliable, yet deadly machine compared to its contemporaries at its introduction. The T-54 retained the same interior compartments as traditional designs, with the driving in the front, fighting and turret in the centre, and the engine at the rear. The most distinctive features on the T-54 is the dome turret and the space between the first and second road wheels in the front, which would be absent in its successor, the [[T-62]]. | ||
| + | |||
| + | The T-54 simplicity and reliability made it a very easy tank to operate, not requiring a thoroughly trained crew to operate (though a better crew can give better performance). The T-54 also presents a very low profile compared to the American and British tank, which makes it a smaller target to hit. The lightweight of the design at only 36 tons made it very easy to transport around on flatbed. The tank also features extra abilities like a cold-weather starting system and a snorkel for deep-wading that were mostly absent on similar vehicles. Finally, the [[D-10T (100 mm)|100 mm D-10T gun]] was much better than anything fielded as tank armament, able to defeat the American [[M47|Patton]] and the British [[Centurion Mk 3|Centurions]], which were their mainstay tanks. Even after the introduction of superior tanks like the [[M60|M60 tank]] with the 105 mm M68 gun, the T-54 is able to keep up with new HEAT and APDS rounds. | ||
| + | |||
| + | However, the T-54 design suffered from some of these advantages. The small profile gave the tank a small interior volume, which causes such a constraint to crew space that a height limit had to be set. The low turret silhouette also made the tank unable to depress the gun in a large angle due to the gun's breech hitting the roof, which restricts the T-54 ability to enter a hull-down position. Like other tanks in its generation, the T-54 also had unprotected ammo storage, which increased the chance of a catastrophic explosion of the ammunition if the tank is penetrated in battle. | ||
| + | |||
| + | Despite that, the T-54 design, upgraded into the T-55, proved very successful as a cost-effective weapon of war that can still stand on its own today. Its utility is further demonstrated by the many variants created from the chassis, such as bridge-layers, fire-fighting vehicles, flamethrowers, armoured-personnel carriers, engineer vehicles, and [[ZSU-57-2|anti-aircraft vehicles]]. | ||
| + | |||
| + | ===Combat usage=== | ||
| + | Most of the service recorded in the T-54 and the T-55 are interchangeable as the two are essentially identical aside from the NBC protection. They will be referred to as the "T-54/55" unless specified otherwise. | ||
| + | |||
| + | The Soviets main tank during the course of the Cold War was the T-54/55 and the T-62 tanks, comprising about 85% of the Soviet armoured force in the mid-1970s. The first combat usage of the T-54 was in the Hungarian Revolution of 1956. During the conflict, one T-54A was captured by the Hungarian rebels and delivered it to the British embassy. This act inspired the production of the [[L7A1 (105 mm)|105 mm L7 gun]] and the [[M60|M60 MBT]] when tests on this T-54 found it superior in firepower and armour. Afterwards, the Soviets did not have many activities with the T-54/55, but they are still in reserve status after being replaced by the Soviet [[T-72A|T-72]] and T-90 tanks. | ||
| + | |||
| + | The Middle East region saw more usage of the T-54/55 in the conflicts that ensured there, notably in the Israel-Arab conflicts in the Six-Day War and the Yom Kippur War. Israel was able to beat back the T-54/55 in both conflicts due to superior tactics and air superiority in the Six-Day War, and the presence of superior tanks such as the 105 mm equipped M60 and Centurion tanks, which could more easily deal with the T-54/55 in the Yom Kippur War. Israel was able to capture many T-54/55 tanks intact in both wars and upgraded these tanks with the 105 mm L7 gun, designated as the ''Tiran-5''. The T-54/55 also saw usage in the Jordanian Civil War of 1970 on the Syrian side, the Iran-Iraq War in the 1980s, and even as recent as Operation Desert Storm in 1991 and Operation Iraqi Freedom in 2003, a testament to the utility and reliability of the T-54/55 tanks to still be in use 60 years after its introduction despite its inferiority to the American [[M1A1 Abrams]] and the British [[Challenger 2]]'s. | ||
| + | |||
| + | The T-54/55 also saw use in the Vietnam War on the North Vietnamese side, equipping the NVA 203rd Armoured Regiment and many other divisions. The T-54/55 also made an appearance in Angola and Mozambique, which were supplied from the Soviets to support the rising Marxist influences in South Africa. These T-54/55s saw use in the South African Border War and Angolan Civil War, but many were lost against the turreted armoured car with HEAT rounds. Many other countries in the world used the T-54/55 as well, whether given by the Soviets and their allies or licensed to produce in-country, up to 50 countries in the world used the T-54/55 in their military, including irregular forces in these countries. Notable conflicts using the T-54/55 was in the Indo-Pakistani War in the Indian Army, in the Ugandan-Tanzanian War, Yugoslav Wars, Sino-Vietnamese War, and the Sri Lankan Civil War. The T-54/55 is still being used today in the modern century, such as the Libyan Civil War in 2011, and the ongoing conflicts of the Syrian Civil War in many sides, including ISIS and the Syrian Army. | ||
=== In-game description === | === In-game description === | ||
| − | + | The first mass-produced post-war Soviet tank. Developed in 1945-1946 using the hull, transmission and a number of other technical solutions from the T-44. | |
| − | + | The driver's compartment had an altered observation instrument layout. Instead of a viewing slot in the frontal hull plate, two periscopes were placed directly in front of the hatch. This decision had a positive affect on the upper frontal plate's durability and improved vision of the surrounding area from the driver's seat. The engine compartment underwent the most significant changes. | |
| − | The | + | Instead of the old B-2 diesel engine, the vehicle was equipped with its modernised 520 hp B-54 model. The tank received a new rounded turret similar to that of the IS-3, but with a shot trap all along its perimeter, particularly prominent in the rear. The turret's frontal armour was 200 mm thick, and the side armour between 125 mm and 160 mm thick. The turret's vertical slope reached 45°. The undercarriage received toothed track action. Additionally, the capacity of the internal fuel tanks was increased to 545 litres. |
| − | + | The tank was equipped with a 100 mm D-10T cannon with a 56 calibre barrel length, two 7.62 mm SG-43 machine guns mounted on the track fenders in armoured boxes and used by the driver to lay down unaimed fire, and a 12.7 mm DShK anti-aircraft gun installed in a turret on the roof by the loader's hatch. The vehicle was outfitted with semi-automatic carbon-dioxide fire suppression equipment. Two MDSh smoke canisters were mounted outside on the frontal hull. | |
| − | + | In April 1946, the T-54 tank was put into service and began to be mass-produced the following year. In total, 713 of them were built in 1947-1949. | |
| + | These vehicles were supplied to Vietnam and also took part in suppressing the 1956 Hungarian uprising in Budapest. | ||
== Media == | == Media == | ||
| − | + | ''An excellent addition to the article will be video guides, as well as screenshots from the game and photos.'' | |
| − | |||
== See also == | == See also == | ||
| − | ''Links to the articles on the War Thunder Wiki that you think will be useful for the reader, for example:'' | + | <!--''Links to the articles on the War Thunder Wiki that you think will be useful for the reader, for example:'' |
| + | * ''reference to the series of the vehicles;'' | ||
| + | * ''links to approximate analogues of other nations and research trees.''--> | ||
| − | * | + | * [[T-54 (1949)]] - Next prototype version, featuring a reduced front glacis plate, new ammo, and new turret eliminating front shot traps. |
| − | * | + | * [[T-54 (1951)]] - Production version, improved turret design from 1949 eliminating rear shot trap. |
== External links == | == External links == | ||
| − | ''Paste links to sources and external resources, such as:'' | + | <!--''Paste links to sources and external resources, such as:'' |
| + | * ''topic on the official game forum;'' | ||
| + | * ''encyclopedia page on tank;'' | ||
| + | * ''other literature.''--> | ||
| − | * | + | * [https://warthunder.com/en/devblog/current/622 [Devblog<nowiki>]</nowiki> T-54 (1947)] |
| − | |||
| − | |||
| − | {{ | + | {{USSR medium tanks}} |
| − | |||
Revision as of 05:59, 11 August 2020
Contents
Description
.jpg)
The T-54 (1947) is a rank V Soviet medium tank
with a battle rating of 7.7 (AB/RB/SB). This medium tank was introduced in Update 1.43. The T-54 mod. 1947 is the first of the three T-54 variants in the game, and it features the best frontal hull armour of its variants albeit with the weakest turret and gun ammunition. The T-54 is a tank that excels in close-range engagements, where its relatively poor gun performance is less of an issue, and its frontal armour and stopping power can be used to its greatest potential.
The T-54 mod. 1947 is the first T-54 tank available to the player. A good throw-back to player's experience is in the gun, which is the same as the one on the T-44-100, though with a better APCR ammunition. The firepower, speed, and armour of the T-54 makes it an amazing tank and can be played in a variety of roles, ranging from a short-range brawler, a support tank, and a sniper. Basically, the tank has a Jack-of-all-Trade characteristic and can be easily exploited to the player's advantage on the battlefield.
The T-54 is a beautifully armoured tank. Unlike its successors, the model 1947 has more armour at 120 mm thick front hull compared to the 100 mm in the next variants. This means that the front hull armour is vastly superior, but keep in mind that despite that the side armour is still only 80 mm thick. Thus it is actually best to minimize hull angling so the enemy cannot hit the weak side armour and cripple the tank.
The T-54 mod. 1947 does have an "Achille's heel". The biggest weakness is the "trap shot" under the gun mantlet, and the enemy will know about it from experience. Take note of this weakness and hide it by only exposing the top part of the turret if possible. The significance of the trap shot is that tanks like the Tiger II and Panther II, which cannot penetrate through the front hull, can indeed penetrate through the shot trap.
The T-54 mod. 1947 position on the battle rating scale has it gets put into a lower battle rating bracket frequently, making it likely to fight tanks that don't have powerful guns to obliterate it. However, if up tiered, the T-54 will have to start being played conservatively as there will suddenly be a lot of enemy tanks able to destroy the T-54.
General info
Survivability and armour
Armour type:
- Rolled homogeneous armour (Hull, Turret roof)
- Cast homogeneous armour (Turret)
| Armour | Front | Sides | Rear | Roof |
|---|---|---|---|---|
| Hull | 120 mm (61°) Front glacis 120 mm (53°) Lower glacis |
80 mm | 45 mm (18°) Upper 30 mm (73°) Lower |
30 mm |
| Turret | 200 mm (2-74°) Turret front 200 mm Gun mantlet |
160 mm (19-46°) Lower 125 mm (34-42°) Upper |
50 mm (6-54°) | 30 mm |
| Armour | Sides | Roof | ||
| Cupola | 100 mm | 30 mm |
Notes:
- The first series of the legendary T-54 has got the strongest frontal armour, 120 mm instead of the later version's 100 mm. Albeit the turret is the weakest one. The big side profile and a rather flat side and rear turret form.
- Suspensions wheels and tracks are 20 mm thick.
- The turret side armour is not all equally the same armour thickness. As it goes toward the top, it gradually becomes thinner with 160 mm to 125 mm.
Mobility
| Game Mode | Max Speed (km/h) | Weight (tons) | Engine power (horsepower) | Power-to-weight ratio (hp/ton) | |||
|---|---|---|---|---|---|---|---|
| Forward | Reverse | Stock | Upgraded | Stock | Upgraded | ||
| Arcade | 56 | 9 | 36 | 806 | 992 | 22.39 | 27.56 |
| Realistic | 51 | 8 | 460 | 520 | 12.78 | 14.44 | |
Armaments
Main armament
| 100 mm D-10T | |||||
|---|---|---|---|---|---|
| Capacity | Vertical guidance |
Horizontal guidance |
Stabilizer | ||
| 34 | -4°/+17° | ±180° | N/A | ||
| Turret rotation speed (°/s) | |||||
| Mode | Stock | Upgraded | Prior + Full crew | Prior + Expert qualif. | Prior + Ace qualif. |
| Arcade | 12.38 | 17.13 | 20.8 | 23.00 | 24.47 |
| Realistic | 7.74 | 9.1 | 11.05 | 12.22 | 13 |
| Reloading rate (seconds) | |||||
| Stock | Prior + Full crew | Prior + Expert qualif. | Prior + Ace qualif. | ||
| 11.05 | 9.78 | 9.01 | 8.5 | ||
Ammunition
| Penetration statistics | |||||||
|---|---|---|---|---|---|---|---|
| Ammunition | Type of warhead |
Penetration in mm @ 0° Angle of Attack | |||||
| 10m | 100m | 500m | 1000m | 1500m | 2000m | ||
| BR-412 | APHE | 218 | 213 | 192 | 169 | 148 | 130 |
| BR-412B | APHEBC | 218 | 214 | 195 | 173 | 154 | 137 |
| BR-412D | APCBC | 239 | 236 | 223 | 207 | 192 | 178 |
| BR-412P | APCR | 224 | 216 | 186 | 153 | 127 | 105 |
| OF-412 | HE | 19 | 19 | 19 | 19 | 19 | 19 |
| Shell details | ||||||||||
|---|---|---|---|---|---|---|---|---|---|---|
| Ammunition | Type of warhead |
Velocity in m/s |
Projectile Mass in kg |
Fuse delay
in m: |
Fuse sensitivity
in mm: |
Explosive Mass in g (TNT equivalent): |
Normalization At 30° from horizontal: |
Ricochet: | ||
| 0% | 50% | 100% | ||||||||
| BR-412 | APHE | 895 | 15.9 | 1.2 | 19 | 100.1 | -1° | 47° | 60° | 65° |
| BR-412B | APHEBC | 895 | 15.9 | 1.2 | 19 | 100.1 | +4° | 48° | 63° | 71° |
| BR-412D | APCBC | 887 | 15.9 | 1.2 | 19 | 93.94 | +4° | 48° | 63° | 71° |
| BR-412P | APCR | 1,050 | 8.53 | N/A | N/A | N/A | +1.5° | 66° | 70° | 72° |
| OF-412 | HE | 880 | 15.2 | 0.1 | 0.5 | 1,460 | +0° | 79° | 80° | 81° |
| Smoke characteristic | ||||||
|---|---|---|---|---|---|---|
| Ammunition | Velocity in m/s |
Projectile Mass in kg |
Screen radius in m |
Screen time in s |
Screen hold time in s: |
Explosive Mass in g (TNT equivalent): |
| 3D3 | 880 | 15.6 | 20 | 5 | 25 | 272 |
Ammo racks
.png)
| Full ammo |
1st rack empty |
2nd rack empty |
3rd rack empty |
4th rack empty |
5th rack empty |
6th rack empty |
Visual discrepancy |
|---|---|---|---|---|---|---|---|
| 34 | 28 (+6) | 27 (+7) | 26 (+8) | 23 (+11) | 21 (+13) | 1 (+33) | No |
Turret empty: 27 (+7)
One rack only: 21 (+13)
Machine guns
| 12.7 mm DShK | ||||||
|---|---|---|---|---|---|---|
| Pintle mount | ||||||
| Capacity (Belt capacity) | Fire rate (shots/minute) |
Vertical guidance |
Horizontal guidance | |||
| 250 (50) | 600 | -10°/+60° | ±180° | |||
| 7.62 mm SGMT | ||||||
|---|---|---|---|---|---|---|
| Coaxial mount | ||||||
| Capacity (Belt capacity) | Fire rate (shots/minute) |
Vertical guidance |
Horizontal guidance | |||
| 3,500 (250) | 600 | N/A | N/A | |||
Usage in battles
The T-54 '47 is a great starting tank for rank V Soviets. It has armour, a good gun and decent mobility, all traits similar to pre-modern MBTs. However, you should still use any available cover, and it's even better if you can remain unseen. The turret of the '47 can be quite hard to penetrate, due to awkward bounces, and wiggling it can make it even more difficult for enemies to do any damage. In a down-tier, this tank is almost over-powered, because BR-412D can penetrate everything, while the T-54 is mobile and well-protected. You still need to play smart, mind you, but it's easy to get over 5k research points in a match (without premium) in a down-tier.
General Playstyle
The T-54 is often described as a Jack-of-All-Trades, similar to late-game MBTs. However, at its current battle rating, its armour still plays an important role, so the title 'Medium Tank' fits better. In Arcade Battles, the T-54 '47 is a joy to play. It can be compared to a Leopard with armour and, arguably, a better gun, because of improved mobility in Arcade. This iteration of the T-54 doesn't get high-penetration rounds, but BR-412D is usually enough to deal with the vast majority of enemies, especially when flanking is so easy in Arcade. In Realistic Battles, this tank is less mobile, but it is still able to cause a lot of damage when played to its strengths, notably the bouncy turret and the high explosive rounds that one-shot enemies - obviously this hints at an ambush or flanking playstyle.
Arcade Battles
In Arcade Battles, T-54 '47 is very capable even in an up-tier. You should never rely on attacking enemies upfront, rather by flanking and getting to their sides, which shouldn't be a problem because even when stock this tank is quite fast (upgrades mostly improve mobility, rather than raw speed). Flanking is much easier in city combat because there are paved roads and a lot of covers. Flanking on hilly maps is difficult because the T-54 has very little depression, so be cautious on those maps and use any cover you can find (e.g. rocks, buildings etc).
You should use the speed to push forward and gain capture points, because when at speed, it's harder for opponents to penetrate you, or even hit you. After capturing a point you can choose to move into an ambush position to defend it, or you can choose to traverse the map to another objective or to help a teammate. This choice depends on your playstyle, and whether you're playing for fun or for research points.
Side-Note: Using your speed to make it harder for enemies to hit you is a strategy that can be used to get into any strategic position, not just objectives.
Important Note: You don't have a stabilizer, so it can be difficult to take fast shots and to shoot on the move. Basically, don't play reactively in this tank, because some tanks (especially the British) can easily outplay you.
If you find yourself in a stand-off, aim for the enemy's weak spots (turret rings and lower plates are usually penetrable). Remember to wiggle your turret (and even the hull), because it can be quite difficult to penetrate, especially with conventional rounds. If you don't know how to penetrate the enemy, it's best to retreat and either try to flank or run away from that enemy hoping that your team can handle them.
Realistic Battles
In Realistic Battles, T-54 '47 behaves much more like a heavy tank. At the range, it's hard for opponents to hit your turret, but it's also hard for you to hit them, due to bullet drop. Overall, you should play by using cover and by getting behind the enemy lines. This can be easily accomplished by pushing up to objectives, and waiting for the enemies to push past you. This way, you will have the advantage, and your armour can help you survive some shots from other enemies or if your prey survives your shot. However, you should adapt to the game situation - if your team stomps the enemy on one objective, it might be better to flank to another objective and help out your team there, instead of pushing for the enemy spawn (attacking enemies head-on from spawn vs. attacking enemies from behind/side).
When upgraded, the T-54 becomes much faster, and the strategy of rushing can work, especially in a down-tier, where most enemies also have conventional rounds. Generally, your armour can be relied upon against certain enemies, which allows you to be a breakthrough tank, especially when there are teammates pushing with you. For example, on Fulda, the B point can be easily captured or overrun with 2-3 T-54s, because usually, enemies cannot deal with that much armour and firepower (attacking from the lower side proved more effective, too).
Important Note: Your armour is most effective on the move, standing in the open trying to snipe an enemy will make it easier for them to hit you. Using any sort of cover to advance is still the better option.
The Stock Grind
When grinding the first modifications, Arcade Battles might be more fun, because of faster-paced gameplay and the ability to see all threats. Now, it's a priority to research Parts and FPE, and it may also be a good idea to activate 3-5 universal vehicle back-ups to be able to respawn twice in one match. In this case, it's worth it, because the T-54 '47 is a grinder for rank V and first rank VI vehicles - the faster you spade it, the faster you can grind!
General tips for the stock grind are these:
- In the case of T-54, it can be a good idea to let enemies shoot at you because it gives the "Adamant" award and also quite a decent amount of research points.
- In Arcade, you can hide your turret, but show your angled front plate. Enemies will see your marker, and try to shoot at you, but they will bounce and just give you points. Then you can just drive out and return fire to try to get a kill or two.
- Don't try to penetrate tanks frontally with stock rounds - it's no use. You have to flank around and try to get in the rear of the enemies. If you're successful, it usually grants multiple kills.
- Play the objectives - they award points, and if you stay to defend them, you will be able to get some easy kills for those who try to get it back (by ambushing them).
- You can also set up ambushes before the objective so that enemies will push past you and you can shoot their sides.
The American M60, German Leopards and the British Chieftain are perhaps the biggest worry the T-54 has against medium tanks. These tanks with their 105 mm guns (120 mm in the Chieftain's case) can penetrate through the T-54's armour at longer ranges with their APDS and HEATFS rounds. Once heavy tanks are taken into the equation with the M103, T-10M, and Conqueror, suddenly the T-54's armour no longer sounds very sufficient against their heavy-hitting rounds. Be wary of many tanks in the 7.7-8.3 BR range.
Modules
| Tier | Mobility | Protection | Firepower | |||
|---|---|---|---|---|---|---|
| I | Tracks | Parts | BR-412B | Horizontal Drive | ||
| II | Suspension | Brake System | FPE | Adjustment of Fire | Smoke grenade | |
| III | Filters | Crew Replenishment | BR-412D | Elevation Mechanism | BR-412P | |
| IV | Transmission | Engine | Artillery Support | 3D3 | ||
Pros and cons
Pros:
- Strongest frontal armour of the T-54 series at 120 mm
- Angled armour is particularly bouncy when on the move
- AP-HE filled rounds are particularly devastating upon a penetration
- Good mobility and speed
- Good reload for a gun
- Pintle 12.7 mm machine gun for fighting soft or air targets
- Low profile
- Access to smoke shells and canisters
Cons:
- Relatively poor penetration at the rank with only AP type rounds to work with
- Terrible gun depression of -4 degrees
- Weak gun mantlet
- Slow turret traverse hampers reaction times
- No stabilizer
- Only one reverse gear
- Flat side armour tend to be penetrated easily and can be overmatched by some guns
- Hits to the frontal fuel tanks and ammunition can cause an ammo detonation, loss, or a fire
- Highly vulnerable to HEAT-FS or Sabot shells
- Low profile makes it possible for tall vehicles to shoot down at less angled armour during a brawl
History
Predecessors
During World War II, the Soviet Union fielded the T-34 in large numbers to overrun the German tanks. The initial T-34 variant with the 76 mm gun soon became insufficient due to further German development on potent anti-tank weaponry. The response was the development of the T-34-85 with the more powerful 85 mm gun. However, the T-34-85 was still insufficient fighting against the German "big cats" tanks. This prompted for further tank development to make a more protected medium tank for the Soviet armoured forces. This developed into the T-44, which proved superior to the T-34 in armour, but retained the same 85 mm gun.
Development
The army then requested that the gun on the tank be increased for additional firepower. This developed into adding the 100 mm gun onto the T-44 and was designated the T-44-100. The T-44-100 proved successful in testing, but still suffered drawbacks that impeded its efficiency. It was decided that instead of quickly sending the tank into production, further development and modernization on the overall tank design should be made to make the tank the full transition from a World-War-II-era tank into the next generation. This developed into the T-54 tank that was accepted into service on 29 April 1946.
The tank would enter production at Nizhni Tagil in 1947 and Kharkov in 1948. However, the initial production was slow as the serial production models underwent 1,490 different modifications. The first model produced was designated the T-54-1 (Object 137), which had a thicker hull armour than its future model. This production model suffered a quality deficiency, and was cancelled and upgraded into the T-54-2 (Object 137R) in 1949 that featured a new turret and other changes to the hull, transmission, and track design. In 1951, another change was made to the design and was designated the T-54-3 (Object 137Sh). The T-54-3 design featured a new turret design that removed shot traps. New gun sight and the smoke generating system were also installed into the tank. The T-54-3 would become the basis of future T-54 design, with the turret design staying in all of its successors.
Despite the T-54's great performance in its design, the T-54 did not stop at its base model. The first upgrades done was in 1953 and 1955 when the tank's D-10 gun was given stabilization gear, first with a vertical stabilizer in 1953 before upgrading again with a 2-plane stabilizer in 1955. These tank upgrades renamed the T-54 to T-54A and T-54B for the respective years. While an improvement in the tank's performance, the biggest jump came with the advent of nuclear technology in the Soviet arsenal. When testings show that a T-54 can survive the blast of a 2 - 15 kt nuclear charge at 300 meters (700 m for crew survival), the T-54 was slated for the instalment of a Nuclear, Biological, and Chemical (NBC) protection system to protect the crew from the weapons of mass destruction. This project was given to the KB-60 design bureau in Kharkov and this was finished in 1956. Along with many other changes to the tank interior, such as a new engine, heating system, fuel tanks, ammo storage, and new guns sights, the tank became the more common T-55 tank, which would replace the T-54 design in production past 1958. The difference in the T-54 and the T-55 other than the mechanical differences in the presence of a dome-shaped ventilator in front of the loaders hatch, it is a T-54 if present as it was removed in order to seal the tank with NBC protection. All in all, the T-54/55 tank series became the most widely produced tank ever, surpassing the T-34 with an estimated 100,000+ built, many due to the export market and licensed manufacturing the Soviets gave to their allies.
Design
The T-54 is a simple and reliable, yet deadly machine compared to its contemporaries at its introduction. The T-54 retained the same interior compartments as traditional designs, with the driving in the front, fighting and turret in the centre, and the engine at the rear. The most distinctive features on the T-54 is the dome turret and the space between the first and second road wheels in the front, which would be absent in its successor, the T-62.
The T-54 simplicity and reliability made it a very easy tank to operate, not requiring a thoroughly trained crew to operate (though a better crew can give better performance). The T-54 also presents a very low profile compared to the American and British tank, which makes it a smaller target to hit. The lightweight of the design at only 36 tons made it very easy to transport around on flatbed. The tank also features extra abilities like a cold-weather starting system and a snorkel for deep-wading that were mostly absent on similar vehicles. Finally, the 100 mm D-10T gun was much better than anything fielded as tank armament, able to defeat the American Patton and the British Centurions, which were their mainstay tanks. Even after the introduction of superior tanks like the M60 tank with the 105 mm M68 gun, the T-54 is able to keep up with new HEAT and APDS rounds.
However, the T-54 design suffered from some of these advantages. The small profile gave the tank a small interior volume, which causes such a constraint to crew space that a height limit had to be set. The low turret silhouette also made the tank unable to depress the gun in a large angle due to the gun's breech hitting the roof, which restricts the T-54 ability to enter a hull-down position. Like other tanks in its generation, the T-54 also had unprotected ammo storage, which increased the chance of a catastrophic explosion of the ammunition if the tank is penetrated in battle.
Despite that, the T-54 design, upgraded into the T-55, proved very successful as a cost-effective weapon of war that can still stand on its own today. Its utility is further demonstrated by the many variants created from the chassis, such as bridge-layers, fire-fighting vehicles, flamethrowers, armoured-personnel carriers, engineer vehicles, and anti-aircraft vehicles.
Combat usage
Most of the service recorded in the T-54 and the T-55 are interchangeable as the two are essentially identical aside from the NBC protection. They will be referred to as the "T-54/55" unless specified otherwise.
The Soviets main tank during the course of the Cold War was the T-54/55 and the T-62 tanks, comprising about 85% of the Soviet armoured force in the mid-1970s. The first combat usage of the T-54 was in the Hungarian Revolution of 1956. During the conflict, one T-54A was captured by the Hungarian rebels and delivered it to the British embassy. This act inspired the production of the 105 mm L7 gun and the M60 MBT when tests on this T-54 found it superior in firepower and armour. Afterwards, the Soviets did not have many activities with the T-54/55, but they are still in reserve status after being replaced by the Soviet T-72 and T-90 tanks.
The Middle East region saw more usage of the T-54/55 in the conflicts that ensured there, notably in the Israel-Arab conflicts in the Six-Day War and the Yom Kippur War. Israel was able to beat back the T-54/55 in both conflicts due to superior tactics and air superiority in the Six-Day War, and the presence of superior tanks such as the 105 mm equipped M60 and Centurion tanks, which could more easily deal with the T-54/55 in the Yom Kippur War. Israel was able to capture many T-54/55 tanks intact in both wars and upgraded these tanks with the 105 mm L7 gun, designated as the Tiran-5. The T-54/55 also saw usage in the Jordanian Civil War of 1970 on the Syrian side, the Iran-Iraq War in the 1980s, and even as recent as Operation Desert Storm in 1991 and Operation Iraqi Freedom in 2003, a testament to the utility and reliability of the T-54/55 tanks to still be in use 60 years after its introduction despite its inferiority to the American M1A1 Abrams and the British Challenger 2's.
The T-54/55 also saw use in the Vietnam War on the North Vietnamese side, equipping the NVA 203rd Armoured Regiment and many other divisions. The T-54/55 also made an appearance in Angola and Mozambique, which were supplied from the Soviets to support the rising Marxist influences in South Africa. These T-54/55s saw use in the South African Border War and Angolan Civil War, but many were lost against the turreted armoured car with HEAT rounds. Many other countries in the world used the T-54/55 as well, whether given by the Soviets and their allies or licensed to produce in-country, up to 50 countries in the world used the T-54/55 in their military, including irregular forces in these countries. Notable conflicts using the T-54/55 was in the Indo-Pakistani War in the Indian Army, in the Ugandan-Tanzanian War, Yugoslav Wars, Sino-Vietnamese War, and the Sri Lankan Civil War. The T-54/55 is still being used today in the modern century, such as the Libyan Civil War in 2011, and the ongoing conflicts of the Syrian Civil War in many sides, including ISIS and the Syrian Army.
In-game description
The first mass-produced post-war Soviet tank. Developed in 1945-1946 using the hull, transmission and a number of other technical solutions from the T-44.
The driver's compartment had an altered observation instrument layout. Instead of a viewing slot in the frontal hull plate, two periscopes were placed directly in front of the hatch. This decision had a positive affect on the upper frontal plate's durability and improved vision of the surrounding area from the driver's seat. The engine compartment underwent the most significant changes.
Instead of the old B-2 diesel engine, the vehicle was equipped with its modernised 520 hp B-54 model. The tank received a new rounded turret similar to that of the IS-3, but with a shot trap all along its perimeter, particularly prominent in the rear. The turret's frontal armour was 200 mm thick, and the side armour between 125 mm and 160 mm thick. The turret's vertical slope reached 45°. The undercarriage received toothed track action. Additionally, the capacity of the internal fuel tanks was increased to 545 litres.
The tank was equipped with a 100 mm D-10T cannon with a 56 calibre barrel length, two 7.62 mm SG-43 machine guns mounted on the track fenders in armoured boxes and used by the driver to lay down unaimed fire, and a 12.7 mm DShK anti-aircraft gun installed in a turret on the roof by the loader's hatch. The vehicle was outfitted with semi-automatic carbon-dioxide fire suppression equipment. Two MDSh smoke canisters were mounted outside on the frontal hull.
In April 1946, the T-54 tank was put into service and began to be mass-produced the following year. In total, 713 of them were built in 1947-1949. These vehicles were supplied to Vietnam and also took part in suppressing the 1956 Hungarian uprising in Budapest.
Media
An excellent addition to the article will be video guides, as well as screenshots from the game and photos.
See also
- T-54 (1949) - Next prototype version, featuring a reduced front glacis plate, new ammo, and new turret eliminating front shot traps.
- T-54 (1951) - Production version, improved turret design from 1949 eliminating rear shot trap.
External links
| USSR medium tanks | |
|---|---|
| T-28 | T-28 (1938) · T-28 · T-28E |
| T-34-76 | T-34 (Prototype) · T-34 (1940) · T-34 (1941) · T-34 (1st Gv.T.Br.) · T-34 (1942) · T-34E STZ · T-34E |
| T-34-57 | T-34-57 · T-34-57 (1943) |
| T-34-85 | T-34-85 (D-5T) · T-34-85 · T-34-85E |
| T-34-100 | T-34-100 |
| T-44 | T-44 · T-44-100 · T-44-122 |
| T-54 | T-54 (1947) · T-54 (1949) · T-54 (1951) |
| T-55 | TO-55 · T-55A · T-55AM-1 · T-55AMD-1 |
| T-62 | T-62 · T-62M-1 |
| T-64 | Object 435 · T-64A (1971) · T-64B |
| T-72 | T-72A · T-72AV (TURMS-T) · T-72B · T-72B (1989) · T-72B3 · T-72M2 Moderna |
| T-80 | T-80B · T-80U · T-80UD · T-80UK · T-80UM2 · T-80BVM · Object 292 |
| T-90 | Т-90А · T-90M |
| Trophies/Lend-Lease | |
| Germany | ▂T-III · ▂T-V |
| Great Britain | ▂МК-IX "Valentine" |
| USA | ▂M3 Medium · ▂M4A2 |
