Difference between pages "IJN Yuudachi" and "Category:Fourth rank aircraft"
(Difference between pages)
Inceptor57 (talk | contribs) (→History: Poi!) |
(Updated for 1.99) |
||
| Line 1: | Line 1: | ||
| − | {{ | + | {{DISPLAYTITLE:Fourth rank aircraft}} |
| + | {{Aircraft by ranks}} | ||
| + | {{Tree-Start|7}} | ||
| − | + | {{Tree-Line|USA}} | |
| − | + | | | |
| − | + | {{Tree-Skip}} | |
| − | {{ | + | | |
| − | + | {{Tree-Group-Start}} | |
| + | {{Tree-Unit|p-38j}} | ||
| + | {{Tree-Arrow}} | ||
| + | {{Tree-Unit|p-38l}} | ||
| + | {{Tree-Group-End|p-38_late_group|P-38 (l)}} | ||
| + | {{Tree-Arrow}} | ||
| + | {{Tree-Unit|p-47n-15}} | ||
| + | {{Tree-Arrow}} | ||
| + | {{Tree-Group-Start}} | ||
| + | {{Tree-Unit|p-51d-5}} | ||
| + | {{Tree-Arrow}} | ||
| + | {{Tree-Unit|p-51d-30_usaaf_korea}} | ||
| + | {{Tree-Arrow}} | ||
| + | {{Tree-Unit|f-82e}} | ||
| + | {{Tree-Group-End|p-51_group|P-51 (l)}} | ||
| + | {{Tree-Arrow}} | ||
| + | {{Tree-Unit|p-51h-5_na}} | ||
| + | {{Tree-Skip}} | ||
| + | | | ||
| + | {{Tree-Unit|f4u-4b}} | ||
| + | {{Tree-Arrow}} | ||
| + | {{Tree-Unit|f8f1}} | ||
| + | {{Tree-Arrow}} | ||
| + | {{Tree-Unit|f8f1b}} | ||
| + | {{Tree-Arrow}} | ||
| + | {{Tree-Unit|f7f1}} | ||
| + | {{Tree-Skip}} | ||
| + | | | ||
| + | {{Tree-Unit|a-26b_10}} | ||
| + | {{Tree-Arrow}} | ||
| + | {{Tree-Unit|a-26b}} | ||
| + | {{Tree-Arrow}} | ||
| + | {{Tree-Unit|am_1_mauler}} | ||
| + | {{Tree-Arrow}} | ||
| + | {{Tree-Unit|douglas_ad_2}} | ||
| + | {{Tree-Arrow}} | ||
| + | {{Tree-Unit|douglas_ad_4}} | ||
| + | {{Tree-Skip}} | ||
| + | | | ||
| + | {{Tree-Unit|b-17g}} | ||
| + | {{Tree-Arrow}} | ||
| + | {{Tree-Unit|b_24d}} | ||
| + | {{Tree-Arrow}} | ||
| + | {{Tree-Unit|b-29}} | ||
| + | {{Tree-Skip}} | ||
| + | | style="border-left: solid 1px #ccc;" | | ||
| + | {{Tree-Unit-Prem|p-47m-1-re}} | ||
| + | {{Tree-Skip}} | ||
| + | {{Tree-Unit-Prem|p-51d-10}} | ||
| + | {{Tree-Skip}} | ||
| + | {{Tree-Unit-Prem|p-51d-20-na}} | ||
| + | {{Tree-Skip}} | ||
| + | {{Tree-Unit-Prem|p-38j_marge}} | ||
| + | {{Tree-Skip}} | ||
| + | {{Tree-Unit-Prem|p-38k}} | ||
| + | {{Tree-Skip}} | ||
| + | {{Tree-Unit-Prem|p-47m-1-re_boxted}} | ||
| + | {{Tree-Skip}} | ||
| + | {{Tree-Unit-Prem|p-59a}} | ||
| + | {{Tree-Skip}} | ||
| + | {{Tree-Unit-Prem|f4u-6_au-1}} | ||
| + | {{Tree-Skip}} | ||
| + | | | ||
| + | {{Tree-Unit-Prem|fw-190a-8_usa}} | ||
| + | {{Tree-Skip}} | ||
| + | {{Tree-Unit-Prem|spitfire_ix_usa}} | ||
| + | {{Tree-Skip}} | ||
| + | {{Tree-Unit-Prem|xa_38}} | ||
| + | {{Tree-Skip}} | ||
| + | {{Tree-Unit-Prem|f7f3}} | ||
| + | {{Tree-Skip}} | ||
| + | {{Tree-Unit|a-26c}} | ||
| + | {{Tree-Skip}} | ||
| + | {{Tree-Unit-Prem|a-26c-45-dt}} | ||
| + | {{Tree-Skip}} | ||
| + | {{Tree-Unit-Prem|a2d}} | ||
| + | {{Tree-Skip}} | ||
| + | {{Tree-Unit-Prem|f4u-4b_vmf_214}} | ||
| + | {{Tree-Skip}} | ||
| − | + | {{Tree-Line|Germany}} | |
| − | + | | | |
| − | + | {{Tree-Group-Start}} | |
| + | {{Tree-Unit|bf-109g-6}} | ||
| + | {{Tree-Arrow}} | ||
| + | {{Tree-Unit|bf-109g-14}} | ||
| + | {{Tree-Arrow}} | ||
| + | {{Tree-Unit|bf-109g-10}} | ||
| + | {{Tree-Group-End|bf-109g_group|Bf 109 G}} | ||
| + | {{Tree-Arrow}} | ||
| + | {{Tree-Unit|bf-109k-4}} | ||
| + | {{Tree-Skip}} | ||
| + | | | ||
| + | {{Tree-Group-Start}} | ||
| + | {{Tree-Unit|fw-190a-8}} | ||
| + | {{Tree-Arrow}} | ||
| + | {{Tree-Unit|fw-190f-8}} | ||
| + | {{Tree-Group-End|fw-190a-f-8_group|Fw 190 A/F-8}} | ||
| + | {{Tree-Arrow}} | ||
| + | {{Tree-Group-Start}} | ||
| + | {{Tree-Unit|fw-190d-9}} | ||
| + | {{Tree-Arrow}} | ||
| + | {{Tree-Unit|fw-190d-12}} | ||
| + | {{Tree-Group-End|fw-190d_group|Fw 190 D}} | ||
| + | {{Tree-Arrow}} | ||
| + | {{Tree-Unit|ta-152h-1}} | ||
| + | {{Tree-Arrow}} | ||
| + | {{Tree-Unit|ta-152c}} | ||
| + | {{Tree-Skip}} | ||
| + | | | ||
| + | {{Tree-Unit|me-410b-6_r3}} | ||
| + | {{Tree-Arrow}} | ||
| + | {{Tree-Unit|do_335a_0}} | ||
| + | {{Tree-Skip}} | ||
| + | | | ||
| + | {{Tree-Unit|do_335a_1}} | ||
| + | {{Tree-Skip}} | ||
| + | | | ||
| + | {{Tree-Unit|do_217k_1}} | ||
| + | {{Tree-Arrow}} | ||
| + | {{Tree-Unit|do_217m_1}} | ||
| + | {{Tree-Arrow}} | ||
| + | {{Tree-Unit|ju-188a-2}} | ||
| + | {{Tree-Arrow}} | ||
| + | {{Tree-Unit|he-177a-5}} | ||
| + | {{Tree-Skip}} | ||
| + | | style="border-left: solid 1px #ccc;" | | ||
| + | {{Tree-Unit-Prem|fw-190d-13}} | ||
| + | {{Tree-Skip}} | ||
| + | {{Tree-Unit-Prem|do_335b_2}} | ||
| + | {{Tree-Skip}} | ||
| + | {{Tree-Unit-Prem|bf-109z}} | ||
| + | {{Tree-Skip}} | ||
| + | {{Tree-Unit-Prem|fw-190c}} | ||
| + | {{Tree-Skip}} | ||
| + | | | ||
| + | {{Tree-Unit-Prem|he_219a_7}} | ||
| + | {{Tree-Skip}} | ||
| + | {{Tree-Unit-Prem|ju-288c}} | ||
| + | {{Tree-Skip}} | ||
| + | {{Tree-Unit-Prem|tempest_mkv_luftwaffe}} | ||
| + | {{Tree-Skip}} | ||
| + | {{Tree-Unit-Prem|ju-388j}} | ||
| + | {{Tree-Skip}} | ||
| − | + | {{Tree-Line|USSR}} | |
| + | | | ||
| + | {{Tree-Unit|yak-9u}} | ||
| + | {{Tree-Arrow}} | ||
| + | {{Tree-Unit|yak-9p}} | ||
| + | {{Tree-Arrow}} | ||
| + | {{Tree-Unit|yak-9ut}} | ||
| + | {{Tree-Arrow}} | ||
| + | {{Tree-Unit|yak-3u}} | ||
| + | {{Tree-Skip}} | ||
| + | | | ||
| + | {{Tree-Unit|i_185_m71_standard}} | ||
| + | {{Tree-Arrow}} | ||
| + | {{Tree-Unit|i_225}} | ||
| + | {{Tree-Skip}} | ||
| + | | | ||
| + | {{Tree-Unit|la-7}} | ||
| + | {{Tree-Arrow}} | ||
| + | {{Tree-Unit|la-7b-20}} | ||
| + | {{Tree-Arrow}} | ||
| + | {{Tree-Unit|la-9}} | ||
| + | {{Tree-Skip}} | ||
| + | | | ||
| + | {{Tree-Unit|su-6_am42}} | ||
| + | {{Tree-Arrow}} | ||
| + | {{Tree-Unit|il-10}} | ||
| + | {{Tree-Arrow}} | ||
| + | {{Tree-Unit|il-10_1946}} | ||
| + | {{Tree-Arrow}} | ||
| + | {{Tree-Unit|su-6_m71}} | ||
| + | {{Tree-Skip}} | ||
| + | | | ||
| + | {{Tree-Group-Start}} | ||
| + | {{Tree-Unit|er-2_ach30b_early}} | ||
| + | {{Tree-Arrow}} | ||
| + | {{Tree-Unit|er-2_ach30b_late}} | ||
| + | {{Tree-Group-End|er-2_ach30b_group|Yer-2 (l)}} | ||
| + | {{Tree-Arrow}} | ||
| + | {{Tree-Unit|tu-2}} | ||
| + | {{Tree-Arrow}} | ||
| + | {{Tree-Group-Start}} | ||
| + | {{Tree-Unit|tu-2_postwar}} | ||
| + | {{Tree-Arrow}} | ||
| + | {{Tree-Unit|tu-2_postwar_late}} | ||
| + | {{Tree-Group-End|tu-2_group|Tu-2}} | ||
| + | {{Tree-Arrow}} | ||
| + | {{Tree-Unit|tu_4}} | ||
| + | {{Tree-Skip}} | ||
| + | | style="border-left: solid 1px #ccc;" | | ||
| + | {{Tree-Unit-Prem|la-7_dolgushin}} | ||
| + | {{Tree-Skip}} | ||
| + | {{Tree-Unit-Prem|la-11}} | ||
| + | {{Tree-Skip}} | ||
| + | {{Tree-Unit-Prem|yak-3_vk107}} | ||
| + | {{Tree-Skip}} | ||
| + | {{Tree-Unit-Prem|be_6}} | ||
| + | {{Tree-Skip}} | ||
| + | | | ||
| + | {{Tree-Unit-Prem|p-63c-5_ussr}} | ||
| + | {{Tree-Skip}} | ||
| + | {{Tree-Unit-Prem|p-63a-10_ussr}} | ||
| + | {{Tree-Skip}} | ||
| + | {{Tree-Unit-Prem|spitfire_ix_ussr}} | ||
| + | {{Tree-Skip}} | ||
| + | {{Tree-Unit-Prem|fw-190d-9_ussr}} | ||
| + | {{Tree-Skip}} | ||
| − | = | + | {{Tree-Line|Britain}} |
| − | + | | | |
| + | {{Tree-Group-Start}} | ||
| + | {{Tree-Unit|tempest_mkv}} | ||
| + | {{Tree-Arrow}} | ||
| + | {{Tree-Unit|tempest_mkv_vikkers}} | ||
| + | {{Tree-Group-End|tempest_mkv_group|Tempest Mk V}} | ||
| + | {{Tree-Arrow}} | ||
| + | {{Tree-Unit|tempest_mk2}} | ||
| + | {{Tree-Skip}} | ||
| + | | | ||
| + | {{Tree-Unit|spitfire_xvi}} | ||
| + | {{Tree-Arrow}} | ||
| + | {{Tree-Unit|spitfire_ix}} | ||
| + | {{Tree-Arrow}} | ||
| + | {{Tree-Group-Start}} | ||
| + | {{Tree-Unit|spitfire_mk14e}} | ||
| + | {{Tree-Arrow}} | ||
| + | {{Tree-Unit|spitfire_mk18e}} | ||
| + | {{Tree-Arrow}} | ||
| + | {{Tree-Unit|spitfire_f22}} | ||
| + | {{Tree-Arrow}} | ||
| + | {{Tree-Unit|spitfire_f24}} | ||
| + | {{Tree-Group-End|spitfire_f2x_group|Spitfire (Griffon)}} | ||
| + | {{Tree-Skip}} | ||
| + | | | ||
| + | {{Tree-Unit|seafire_mk17}} | ||
| + | {{Tree-Arrow}} | ||
| + | {{Tree-Unit|seafire_fr47}} | ||
| + | {{Tree-Arrow}} | ||
| + | {{Tree-Unit|sea_fury_fb11}} | ||
| + | {{Tree-Skip}} | ||
| + | | | ||
| + | {{Tree-Unit|whirlwind_mk1}} | ||
| + | {{Tree-Arrow}} | ||
| + | {{Tree-Unit|brigand_b1}} | ||
| + | {{Tree-Arrow}} | ||
| + | {{Tree-Unit|hornet_mk3}} | ||
| + | {{Tree-Skip}} | ||
| + | | | ||
| + | {{Tree-Unit|lancaster_mk1}} | ||
| + | {{Tree-Arrow}} | ||
| + | {{Tree-Unit|lancaster_mk3}} | ||
| + | {{Tree-Arrow}} | ||
| + | {{Tree-Unit|lincoln_b2}} | ||
| + | {{Tree-Skip}} | ||
| + | | style="border-left: solid 1px #ccc;" | | ||
| + | {{Tree-Unit-Prem|spitfire_ix_plagis}} | ||
| + | {{Tree-Skip}} | ||
| + | {{Tree-Unit-Prem|spitfire_mk14c}} | ||
| + | {{Tree-Skip}} | ||
| + | {{Tree-Unit-Prem|spitfire_fr_mk14e}} | ||
| + | {{Tree-Skip}} | ||
| + | | | ||
| + | {{Tree-Unit-Prem|wyvern_s4}} | ||
| + | {{Tree-Skip}} | ||
| + | {{Tree-Unit-Prem|mb_5}} | ||
| + | {{Tree-Skip}} | ||
| − | = | + | {{Tree-Line|Japan}} |
| − | + | | | |
| − | + | {{Tree-Group-Start}} | |
| + | {{Tree-Unit|n1k1_ja}} | ||
| + | {{Tree-Arrow}} | ||
| + | {{Tree-Unit|n1k2_j}} | ||
| + | {{Tree-Arrow}} | ||
| + | {{Tree-Unit|n1k2_jko}} | ||
| + | {{Tree-Group-End|n1k2_group|N1K}} | ||
| + | {{Tree-Arrow}} | ||
| + | {{Tree-Group-Start}} | ||
| + | {{Tree-Unit|j2m3}} | ||
| + | {{Tree-Arrow}} | ||
| + | {{Tree-Unit|j2m5}} | ||
| + | {{Tree-Group-End|j2m_group|J2M}} | ||
| + | {{Tree-Arrow}} | ||
| + | {{Tree-Unit|j7w1}} | ||
| + | {{Tree-Skip}} | ||
| + | | | ||
| + | {{Tree-Unit|ki_84_ko}} | ||
| + | {{Tree-Arrow}} | ||
| + | {{Tree-Unit|ki_84_otsu}} | ||
| + | {{Tree-Arrow}} | ||
| + | {{Tree-Unit|ki_84_hei}} | ||
| + | {{Tree-Skip}} | ||
| + | | | ||
| + | {{Tree-Unit|j5n1}} | ||
| + | {{Tree-Arrow}} | ||
| + | {{Tree-Unit|ki-83}} | ||
| + | {{Tree-Skip}} | ||
| + | | | ||
| + | {{Tree-Unit|p1y1_mod11}} | ||
| + | {{Tree-Skip}} | ||
| + | | | ||
| + | {{Tree-Unit|g5n1}} | ||
| + | {{Tree-Arrow}} | ||
| + | {{Tree-Unit|g8n1}} | ||
| + | {{Tree-Skip}} | ||
| + | | style="border-left: solid 1px #ccc;" | | ||
| + | {{Tree-Unit-Prem|j2m4_kai}} | ||
| + | {{Tree-Skip}} | ||
| + | {{Tree-Unit-Prem|j2m5_30mm}} | ||
| + | {{Tree-Skip}} | ||
| + | {{Tree-Unit-Prem|ki_87}} | ||
| + | {{Tree-Skip}} | ||
| + | {{Tree-Unit-Prem|j6k1}} | ||
| + | {{Tree-Skip}} | ||
| + | | | ||
| + | {{Tree-Unit-Prem|a6m5ko}} | ||
| + | {{Tree-Skip}} | ||
| + | {{Tree-Unit-Prem|b-17e_japan}} | ||
| + | {{Tree-Skip}} | ||
| + | {{Tree-Unit|ki_94_2}} | ||
| + | {{Tree-Skip}} | ||
| − | + | {{Tree-Line|China}} | |
| − | {{ | + | | |
| + | {{Tree-Unit|p-51d-20_china}} | ||
| + | {{Tree-Arrow}} | ||
| + | {{Tree-Unit|p-38l_1_china_rocaf}} | ||
| + | {{Tree-Arrow}} | ||
| + | {{Tree-Unit|p-51k}} | ||
| + | {{Tree-Skip}} | ||
| + | | | ||
| + | {{Tree-Unit|la-9_china}} | ||
| + | {{Tree-Skip}} | ||
| + | | | ||
| + | {{Tree-Unit|il-10_1946_china}} | ||
| + | {{Tree-Skip}} | ||
| + | | | ||
| + | {{Tree-Unit|tu-2_postwar_china}} | ||
| + | {{Tree-Arrow}} | ||
| + | {{Tree-Unit|tu_4_china}} | ||
| + | {{Tree-Skip}} | ||
| + | | | ||
| + | | style="border-left: solid 1px #ccc;" | | ||
| + | {{Tree-Unit-Prem|ki_84_ko_china}} | ||
| + | {{Tree-Skip}} | ||
| + | | | ||
| + | {{Tree-Skip}} | ||
| − | = | + | {{Tree-Line|Italy}} |
| − | + | | | |
| + | {{Tree-Unit|re_2005_serie0}} | ||
| + | {{Tree-Skip}} | ||
| + | | | ||
| + | {{Tree-Unit|mc-205_n2}} | ||
| + | {{Tree-Arrow}} | ||
| + | {{Tree-Unit|bf-109g-14as}} | ||
| + | {{Tree-Arrow}} | ||
| + | {{Tree-Unit|g_56}} | ||
| + | {{Tree-Skip}} | ||
| + | | | ||
| + | {{Tree-Unit|sm_91}} | ||
| + | {{Tree-Arrow}} | ||
| + | {{Tree-Unit|sm_92}} | ||
| + | {{Tree-Skip}} | ||
| + | | | ||
| + | {{Tree-Unit|p_108b_serie1}} | ||
| + | {{Tree-Arrow}} | ||
| + | {{Tree-Unit|p_108b_serie2}} | ||
| + | {{Tree-Skip}} | ||
| + | | | ||
| + | | style="border-left: solid 1px #ccc;" | | ||
| + | {{Tree-Unit-Prem|g_55s}} | ||
| + | {{Tree-Skip}} | ||
| + | | | ||
| + | {{Tree-Skip}} | ||
| − | + | {{Tree-Line|France}} | |
| − | {{ | + | | |
| + | {{Tree-Unit|vb_10c1}} | ||
| + | {{Tree-Arrow}} | ||
| + | {{Tree-Unit|vb_10_02}} | ||
| + | {{Tree-Skip}} | ||
| + | | | ||
| + | {{Tree-Unit|f6f-5n_france}} | ||
| + | {{Tree-Arrow}} | ||
| + | {{Tree-Unit|douglas_ad_4_france}} | ||
| + | {{Tree-Arrow}} | ||
| + | {{Tree-Unit|f4u-7}} | ||
| + | {{Tree-Arrow}} | ||
| + | {{Tree-Unit|f8f1b_france}} | ||
| + | {{Tree-Skip}} | ||
| + | | | ||
| + | {{Tree-Unit|pb4y-2_france}} | ||
| + | {{Tree-Skip}} | ||
| + | | | ||
| + | | | ||
| + | | style="border-left: solid 1px #ccc;" | | ||
| + | {{Tree-Unit-Prem|so_8000_narval}} | ||
| + | {{Tree-Skip}} | ||
| + | | | ||
| + | {{Tree-Skip}} | ||
| − | = | + | {{Tree-Line|Sweden}} |
| − | + | | | |
| + | {{Tree-Unit|saab_j21a_2}} | ||
| + | {{Tree-Arrow}} | ||
| + | {{Tree-Unit|p-51d-20-na_j26}} | ||
| + | {{Tree-Skip}} | ||
| + | | | ||
| + | {{Tree-Unit|saab_a21a_3}} | ||
| + | {{Tree-Skip}} | ||
| + | | | ||
| + | {{Tree-Unit|saab_t18b_1}} | ||
| + | {{Tree-Arrow}} | ||
| + | {{Tree-Unit|saab_t18b_2}} | ||
| + | {{Tree-Skip}} | ||
| + | | | ||
| + | | | ||
| + | | style="border-left: solid 1px #ccc;" | | ||
| + | {{Tree-Skip}} | ||
| + | | | ||
| + | {{Tree-Skip}} | ||
| + | {{Tree-End}} | ||
| − | + | [[Category:Aircraft by ranks|4]] | |
| − | |||
| − | |||
| − | |||
| − | |||
| − | |||
| − | |||
| − | |||
| − | |||
| − | |||
| − | |||
| − | |||
| − | |||
| − | |||
| − | |||
| − | |||
| − | |||
| − | |||
| − | |||
| − | |||
| − | |||
| − | |||
| − | |||
| − | |||
| − | |||
| − | |||
| − | |||
| − | |||
| − | |||
| − | |||
| − | |||
| − | |||
| − | |||
| − | |||
| − | |||
| − | |||
| − | |||
| − | |||
| − | |||
| − | |||
| − | |||
| − | |||
| − | |||
| − | |||
| − | |||
Revision as of 20:17, 27 May 2020
| First rank | Second rank | Third rank | Fourth rank | Fifth rank | Sixth rank | Seventh rank | Eighth rank |
| Researchable vehicles | Premium vehicles | ||||||
|---|---|---|---|---|---|---|---|
USA
|
P-38J-15 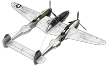 P-38L-5-LO 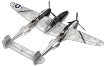 P-38 (l)  P-47N-15  P-51D-5 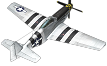 P-51D-30 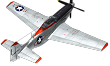 F-82E  P-51 (l)  P-51H-5-NA  |
F4U-4B  F8F-1  F8F-1B  F7F-1  |
A-26B-10  A-26B-50  AM-1  AD-2  AD-4  |
B-17G-60-VE  B-24D-25-CO  B-29A-BN  |
P-47M-1-RE  P-51D-10  P-51D-20-NA  Bong's P-38J-15  P-38K  ⋠P-47M-1-RE  P-59A  AU-1  |
▃Fw 190 A-8  ▃Spitfire LF Mk IXc  XA-38  F7F-3  A-26C-45  A-26C-45DT  A2D-1  F4U-4B VMF-214  | |
Germany
|
Bf 109 G-6  Bf 109 G-14  Bf 109 G-10  Bf 109 G  Bf 109 K-4  |
Fw 190 A-8  Fw 190 F-8  Fw 190 A/F-8  Fw 190 D-9  Fw 190 D-12  Fw 190 D  Ta 152 H-1  Ta 152 C-3  |
Me 410 B-6/R3  Do 335 A-0  |
Do 335 A-1  |
Do 217 K-1  Do 217 M-1  Ju 188 A-2  He 177 A-5  |
Fw 190 D-13  Do 335 B-2  Bf 109 Z-1  Fw 190 C  |
He 219 A-7  Ju 288 C  ▀Tempest Mk V  Ju 388 J  |
USSR
|
Yak-9U  Yak-9P  Yak-9UT  Yak-3U  |
I-185 (M-71)  I-225  |
La-7  La-7B-20  La-9  |
Su-6 (AM-42)  IL-10  IL-10 (1946)  Su-6 (M-71F)  |
Yer-2 (ACh-30B) (e)  Yer-2 (ACh-30B) (l)  Yer-2 (l)  Tu-2S  Tu-2S-44  Tu-2S-59  Tu-2  Tu-4  |
Dolgushin's La-7  La-11  Yak-3 (VK-107)  Be-6  |
▂P-63C-5  ▂P-63A-10  ▂Spitfire Mk IXc  ▂Fw 190 D-9  |
Britain
|
Tempest Mk V  Tempest Mk V (Vickers P)  Tempest Mk V  Tempest Mk II  |
Spitfire F Mk XVI  Spitfire LF Mk IX  Spitfire F Mk XIVe  Spitfire F Mk XVIIIe  Spitfire F Mk 22  Spitfire F Mk 24  Spitfire (Griffon)  |
Seafire F Mk XVII  Seafire FR 47 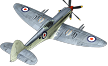 Sea Fury FB 11  |
Whirlwind Mk I 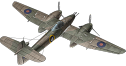 Brigand B 1 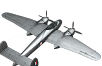 Hornet Mk.III 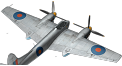 |
Lancaster B Mk I 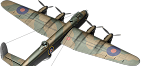 Lancaster B Mk III 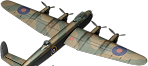 Lincoln B Mk II 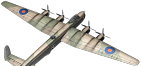 |
Plagis' Spitfire LF Mk IXc 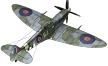 Spitfire F Mk XIVc  Prendergast's Spitfire FR Mk XIVe  |
Wyvern S4  MB.5  |
Japan
|
N1K1-Ja  N1K2-J  N1K2-Ja  N1K  J2M3  J2M5  J2M  J7W1  |
Ki-84 ko  Ki-84 otsu  Ki-84 hei  |
J5N1 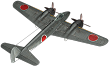 Ki-83 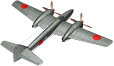 |
P1Y1 mod. 11 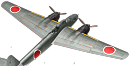 |
G5N1 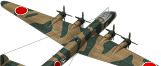 G8N1  |
J2M4 Kai  J2M5  Ki-87  J6K1  |
A6M5 Ko  ▅B-17E  Ki-94-II  |
China
|
␗P-51D-20  ␗P-38L-1  ␗P-51K  |
␗La-9  |
␗IL-10 (1946) 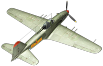 |
␗Tu-2S-44 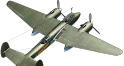 ␗Tu-4 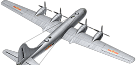 |
␗Ki-84 ko 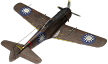 |
||
Italy
|
Re.2005 serie 0  |
C. 205N2  ▄Bf 109 G-14/AS  G.56  |
SM.91  SM.92  |
P.108B serie 1  P.108B serie 2  |
G.55S  |
||
France
|
VB.10C-1  VB.10-02  |
▄F6F-5N  ▄AD-4  F4U-7 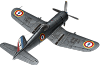 ▄F8F-1B  |
▄PB4Y-2 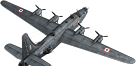 |
S.O.8000 Narval  |
|||
Sweden
|
J21A-2 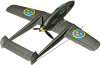 J26  |
A21A-3 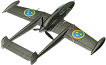 |
T18B  T18B (57)  |
||||
