Difference between pages "M13/40 (III)" and "AS 42"
CobraKingII (talk | contribs) (→Survivability and armour) (Tag: Visual edit) |
CobraKingII (talk | contribs) (→Survivability and armour) (Tag: Visual edit) |
||
| Line 1: | Line 1: | ||
| − | {{Specs-Card|code= | + | {{Specs-Card|code=it_as_42_metropolitana}} |
| − | |||
| − | |||
| − | |||
| − | |||
| − | }} | ||
== Description == | == Description == | ||
| − | <!-- | + | <!--In the description, the first part should be about the history of the creation and combat usage of the vehicle, as well as its key features. In the second part, tell the reader about the ground vehicle in the game. Insert a screenshot of the vehicle, so that if the novice player does not remember the vehicle by name, he will immediately understand what kind of vehicle the article is talking about.--> |
| − | [[File: | + | [[File:GarageImage_{{PAGENAME}}.jpg|420px|thumb|left]] |
{{break}} | {{break}} | ||
| − | The '''{{Specs|name}}''' (shortened as '''{{Specs|pseudonym}}''') is a | + | The '''{{Specs|name}}''' (shortened as just '''{{Specs|pseudonym}}''') is a rank {{Specs|rank}} Italian self-propelled anti-aircraft gun {{Battle-rating}}. It was introduced in [[Update 1.85 "Supersonic"]]. |
| − | |||
| − | |||
| − | |||
| − | |||
== General info == | == General info == | ||
=== Survivability and armour === | === Survivability and armour === | ||
| − | <!-- | + | <!--Describe armour protection. Note the most well protected and key weak areas. Appreciate the layout of modules as well as the number and location of crew members. Is the level of armour protection sufficient, is the placement of modules helpful for survival in combat? |
| − | |||
| − | |||
| − | + | If necessary use a visual template to indicate the most secure and weak zones of the armour.--> | |
| − | + | The AS42 lacks in armour and is very vulnerable to attacks from the air. While the sloped 3 mm of armour may be sufficient against standard machine guns, most heavy machine guns are able to shred this tank and as such it is not recommended to engage in slugging matches. | |
| − | + | Though the armour itself is not sufficient against heavy machine guns, it is possible to use the rear engine compartment as armour to protect the crew from the heavy machine guns projectiles. The ammunition compartments at the sides of the vehicle may stop machine guns from penetrating all the way through to harm the crew, but these have dubious protection values in the long run. However, due to these extreme thin armour thickness, standard armour-piercing rounds tend to penetrate straight through with minimal damage. | |
| − | + | The AS42 has 2 crew with ammo to the turret placements sides. The gun's armour is thick enough to protect the gunner in rare circumstances. | |
'''Armor Composition:''' | '''Armor Composition:''' | ||
| − | * | + | * Structural Steel - Main |
| − | + | * Gun Steel - Cannon Barrel | |
| − | * | + | * Wheel - Tires |
| − | * | ||
| − | |||
{| class="wikitable" | {| class="wikitable" | ||
| Line 46: | Line 33: | ||
|- | |- | ||
|Hull | |Hull | ||
| − | | | + | |3 mm |
| − | + | |3 mm | |
| + | |3 mm | ||
| + | |N/A | ||
| + | |- | ||
| + | |Turret | ||
| + | | colspan="4" |10 mm ''Gun Barrel'' | ||
| + | 150 mm ''Gun Breech'' | ||
| − | + | 20 mm ''Gunner's Seat'' | |
| − | |||
| − | |||
| − | + | 20 mm ''Elevation and Traverse Mechanisms'' | |
| − | |||
| − | |||
| − | |||
| − | |||
| − | |||
| − | |||
| − | |||
| − | |||
| − | |||
| − | |||
|} | |} | ||
'''Notes:''' | '''Notes:''' | ||
| − | * | + | * Tires - 10 mm |
| − | + | * There is a spare tire on the front and on the rear of the vehicle | |
| − | |||
| − | |||
| − | * | ||
| − | |||
=== Mobility === | === Mobility === | ||
<!-- ''Write about the mobility of the ground vehicle. Estimate the specific power and manoeuvrability, as well as the maximum speed forwards and backwards.'' --> | <!-- ''Write about the mobility of the ground vehicle. Estimate the specific power and manoeuvrability, as well as the maximum speed forwards and backwards.'' --> | ||
| − | {{tankMobility|abMinHp= | + | {{tankMobility|abMinHp= 156|rbMinHp= 97}} |
| − | + | The tank has very high mobility with speeds exceeding 80 km/h on concrete and 35 km/h offroad. | |
== Armaments == | == Armaments == | ||
=== Main armament === | === Main armament === | ||
| − | <!-- | + | <!--Give the reader information about the characteristics of the main gun. Assess its effectiveness in a battle based on the reloading speed, ballistics and the power of shells. Do not forget about the flexibility of the fire, that is how quickly the cannon can be aimed at the target, open fire on it and aim at another enemy. Add a link to the main article on the gun: <code><nowiki>{{main|Name of the weapon}}</nowiki></code>. Describe in general terms the ammunition available for the main gun. Give advice on how to use them and how to fill the ammunition storage.--> |
| − | + | {{main|Breda Mod.35 (20 mm)}} | |
| − | |||
| − | |||
| − | |||
| − | |||
| − | |||
| − | |||
| − | {{main| | ||
{| class="wikitable" style="text-align:center" | {| class="wikitable" style="text-align:center" | ||
|- | |- | ||
| − | ! colspan="6" | [[ | + | ! colspan="6" | [[Breda Mod.35 (20 mm)|20 mm Breda Mod.35]] |
|- | |- | ||
| − | ! colspan=" | + | ! colspan="2" rowspan="1" style="width:5em" |Capacity (Belt capacity) |
| + | ! rowspan="1" | Fire rate <br> (shots/minute) | ||
! rowspan="1" | Vertical <br> guidance | ! rowspan="1" | Vertical <br> guidance | ||
! rowspan="1" | Horizontal <br> guidance | ! rowspan="1" | Horizontal <br> guidance | ||
! rowspan="1" | Stabilizer | ! rowspan="1" | Stabilizer | ||
|- | |- | ||
| − | | colspan=" | + | | colspan="2" | 1,200 (12) || 501 || -10°/+90° || ±150° || N/A |
|- | |- | ||
! colspan="6" | Turret rotation speed (°/s) | ! colspan="6" | Turret rotation speed (°/s) | ||
| Line 113: | Line 84: | ||
! style="width:4em" |Prior + Ace qualif. | ! style="width:4em" |Prior + Ace qualif. | ||
|- | |- | ||
| − | | ''Arcade'' || | + | | ''Arcade'' || 30.8 || __.__ || __.__ || __.__ || __.__ |
|- | |- | ||
| − | | ''Realistic'' || 8 | + | | ''Realistic'' || 20.8 || __.__ || __.__ || __.__ || __.__ |
|- | |- | ||
! colspan="4" | Reloading rate (seconds) | ! colspan="4" | Reloading rate (seconds) | ||
| Line 124: | Line 95: | ||
! colspan="1" style="width:4em" |Prior + Ace qualif. | ! colspan="1" style="width:4em" |Prior + Ace qualif. | ||
|- | |- | ||
| − | | | + | | 3.9 || __.__ || __.__ || __.__ |
|- | |- | ||
|} | |} | ||
| Line 143: | Line 114: | ||
! 2000m | ! 2000m | ||
|- | |- | ||
| − | | Granata Perforante mod.35 || | + | | Granata mod.35 || HEFI-T || 2 || 2 || 2 || 2 || 2 || 2 |
| + | |- | ||
| + | | Perforante mod.35 || API-T || 40 || 38 || 29 || 20 || 14 || 10 | ||
| + | |- | ||
| + | | PzGr 40 || HVAP-T || 64 || 63 || 29 || 20 || 14 || 10 | ||
|- | |- | ||
| − | |||
| − | |||
|} | |} | ||
{| class="wikitable sortable" style="text-align:center" width="100%" | {| class="wikitable sortable" style="text-align:center" width="100%" | ||
| − | ! colspan=" | + | ! colspan="10" | Shell details |
|- | |- | ||
! rowspan="2" data-sort-type="text" | Ammunition | ! rowspan="2" data-sort-type="text" | Ammunition | ||
| Line 160: | Line 133: | ||
''in mm:'' | ''in mm:'' | ||
! rowspan="2" | ''Explosive Mass in g<br /> (TNT equivalent):'' | ! rowspan="2" | ''Explosive Mass in g<br /> (TNT equivalent):'' | ||
| − | |||
! colspan="3" | ''Ricochet:'' | ! colspan="3" | ''Ricochet:'' | ||
|- | |- | ||
| Line 167: | Line 139: | ||
! 100% | ! 100% | ||
|- | |- | ||
| − | | Granata Perforante mod.35 || | + | | Granata mod.35 || HEFI-T || 830 || 0.14 || 0.3 || 0.1 || 3 || 79° || 80° || 81° |
| + | |- | ||
| + | | Perforante mod.35 || API-T || 832 || 0.14 || 1.3 || 15 || 1 || 47° || 60° || 65° | ||
| + | |- | ||
| + | | PzGr 40 || HVAP-T || N/A || N/A || N/A || N/A || N/A || N/A || N/A || N/A | ||
|- | |- | ||
| − | |||
| − | |||
|} | |} | ||
| Line 185: | Line 159: | ||
! class="wikitable unsortable" |Visual<br /> discrepancy | ! class="wikitable unsortable" |Visual<br /> discrepancy | ||
|- | |- | ||
| − | || ''' | + | || '''XX''' || XX ''(+XX)'' || XX ''(+XX)'' || XX ''(+XX)'' || XX ''(+XX)'' || XX ''(+XX)'' || XX ''(+XX)'' || style="text-align:left" | No |
| − | |||
| − | |||
| − | |||
| − | |||
| − | |||
| − | |||
| − | |||
| − | |||
| − | |||
| − | |||
| − | |||
| − | |||
| − | |||
| − | |||
| − | |||
| − | |||
| − | |||
| − | |||
| − | |||
| − | |||
| − | |||
| − | |||
| − | |||
| − | |||
| − | |||
| − | |||
| − | |||
| − | |||
| − | |||
| − | |||
|- | |- | ||
|} | |} | ||
== Usage in battles == | == Usage in battles == | ||
| − | <!-- | + | <!--Describe the tactics of playing in the vehicle, the features of using vehicles in the team and advice on tactics. Refrain from creating a "guide" - do not impose a single point of view but instead give the reader food for thought. Describe the most dangerous enemies and give recommendations on fighting them. If necessary, note the specifics of the game in different modes (AB, RB, SB).--> |
| − | |||
| − | |||
| − | |||
| − | |||
| − | + | With its high speed, the AS42 has the ability to flank and, with its autocannon, able to cause high amounts of damage fast. If unable to penetrate, you will be able to escape quite quickly and leave to fight another day. The tank loses most of its advantages of stealth and positioning when going into Arcade Battles. | |
| − | |||
| − | |||
=== Modules === | === Modules === | ||
| Line 239: | Line 177: | ||
|- | |- | ||
|I | |I | ||
| − | | | + | |Tires |
| | | | ||
|Parts | |Parts | ||
|Horizontal Drive | |Horizontal Drive | ||
| − | | | + | |Granata mod.35 |
|- | |- | ||
|II | |II | ||
| Line 250: | Line 188: | ||
|FPE | |FPE | ||
|Adjustment of Fire | |Adjustment of Fire | ||
| − | | | + | |Perforante mod.35 |
|- | |- | ||
|III | |III | ||
| Line 264: | Line 202: | ||
| | | | ||
|Artillery Support | |Artillery Support | ||
| − | | | + | |PzGr 40 |
|} | |} | ||
=== Pros and cons === | === Pros and cons === | ||
| − | <!-- | + | <!--Summarise and briefly evaluate the vehicle in terms of its characteristics and combat effectiveness. Mark its pros and cons in a bulleted list. Try not to use more than 6 points for each of the characteristics. Avoid using categorical definitions such as "bad", "good" and the like - use substitutions with softer forms such as "inadequate" and "effective".--> |
'''Pros:''' | '''Pros:''' | ||
| − | * | + | * High top speed |
| − | * | + | * Access to PzGr 40 rounds |
| − | * | + | * Sloped frontal armor, may deflect some rounds |
| − | * | + | * High penetration for the 20mm cannon |
'''Cons:''' | '''Cons:''' | ||
| − | * | + | * Small magazine for SPAA |
| − | * | + | * Virtually no protection at all. Even rifle rounds will penetrate the armour |
| − | * | + | * Only has two crew members |
| + | * Crew is exposed | ||
== History == | == History == | ||
| − | <!--''Describe the history of the creation and combat usage of the ground vehicle in more detail than in the introduction. If the historical reference turns out to be too | + | <!--''Describe the history of the creation and combat usage of the ground vehicle in more detail than in the introduction. If the historical reference turns out to be too long, take it to a separate article, taking a link to the article about the vehicle and adding a block "/ History" (example: <nowiki>https://wiki.warthunder.com/(Vehicle-name)/History</nowiki>) and add a link to it here using the <code>main</code> template. Be sure to reference text and sources by using <code><nowiki><ref></nowiki></code>, as well as adding them at the end of the article. This section may also include the vehicle's dev blog entry (if applicable) and the in-game encyclopedia description (under <code><nowiki>=== In-game description ===</nowiki></code>, also if applicable).''--> |
| − | |||
| − | |||
| − | The | + | The AS (Autosahariana) 42 was derived from the AB 41 armoured car. It was, however, unarmored and did not have the rear driver position. Designed for long-range reconnaissance in North Africa, it had a cross country range of almost 500 miles (800 km). It was also known as the Camionetta Desertica (Desert Weapons Carrier) mod. 42, or "la Sahariana" (the Saharan). The main armament varied: 20 mm anti-aircraft cannons, 20 mm anti-tank rifles, and machine guns were common alternatives. About 200 were built and saw service in North Africa, Sicily and Italy. After the armistice, some continued in use with Fascist Italian forces and Germany, including on the Eastern Front, and in the Ardennes in 1944-5. |
| − | |||
== Media == | == Media == | ||
| − | '' | + | ''Excellent additions to the article would be video guides, screenshots from the game, and photos.'' |
== See also == | == See also == | ||
| Line 304: | Line 240: | ||
* ''topic on the official game forum;'' | * ''topic on the official game forum;'' | ||
| − | * ''encyclopedia page on tank;'' | + | * ''encyclopedia page on the tank;'' |
* ''other literature.'' | * ''other literature.'' | ||
| − | {{Italy | + | {{Italy anti-aircraft vehicles}} |
Revision as of 19:03, 5 August 2020
Contents
Description

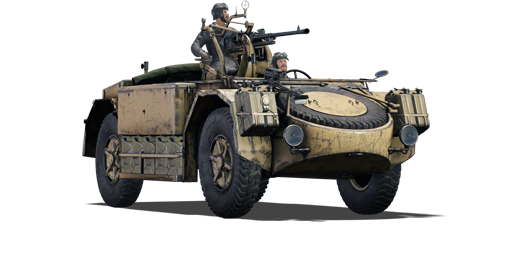
The Camionetta AS 42 Tipo II "Metropolitana" (shortened as just AS 42) is a rank I Italian self-propelled anti-aircraft gun
with a battle rating of 1.3 (AB/RB/SB). It was introduced in Update 1.85 "Supersonic".
General info
Survivability and armour
The AS42 lacks in armour and is very vulnerable to attacks from the air. While the sloped 3 mm of armour may be sufficient against standard machine guns, most heavy machine guns are able to shred this tank and as such it is not recommended to engage in slugging matches.
Though the armour itself is not sufficient against heavy machine guns, it is possible to use the rear engine compartment as armour to protect the crew from the heavy machine guns projectiles. The ammunition compartments at the sides of the vehicle may stop machine guns from penetrating all the way through to harm the crew, but these have dubious protection values in the long run. However, due to these extreme thin armour thickness, standard armour-piercing rounds tend to penetrate straight through with minimal damage.
The AS42 has 2 crew with ammo to the turret placements sides. The gun's armour is thick enough to protect the gunner in rare circumstances.
Armor Composition:
- Structural Steel - Main
- Gun Steel - Cannon Barrel
- Wheel - Tires
| Armour | Front (Slope angle) | Sides | Rear | Roof |
|---|---|---|---|---|
| Hull | 3 mm | 3 mm | 3 mm | N/A |
| Turret | 10 mm Gun Barrel
150 mm Gun Breech 20 mm Gunner's Seat 20 mm Elevation and Traverse Mechanisms | |||
Notes:
- Tires - 10 mm
- There is a spare tire on the front and on the rear of the vehicle
Mobility
| Game Mode | Max Speed (km/h) | Weight (tons) | Engine power (horsepower) | Power-to-weight ratio (hp/ton) | |||
|---|---|---|---|---|---|---|---|
| Forward | Reverse | Stock | Upgraded | Stock | Upgraded | ||
| Arcade | 92 | 24 | 6 | 156 | 210 | 26 | 35 |
| Realistic | 85 | 22 | 97 | 110 | 16.17 | 18.33 | |
The tank has very high mobility with speeds exceeding 80 km/h on concrete and 35 km/h offroad.
Armaments
Main armament
| 20 mm Breda Mod.35 | |||||
|---|---|---|---|---|---|
| Capacity (Belt capacity) | Fire rate (shots/minute) |
Vertical guidance |
Horizontal guidance |
Stabilizer | |
| 1,200 (12) | 501 | -10°/+90° | ±150° | N/A | |
| Turret rotation speed (°/s) | |||||
| Mode | Stock | Upgraded | Prior + Full crew | Prior + Expert qualif. | Prior + Ace qualif. |
| Arcade | 30.8 | __.__ | __.__ | __.__ | __.__ |
| Realistic | 20.8 | __.__ | __.__ | __.__ | __.__ |
| Reloading rate (seconds) | |||||
| Stock | Prior + Full crew | Prior + Expert qualif. | Prior + Ace qualif. | ||
| 3.9 | __.__ | __.__ | __.__ | ||
Ammunition
| Penetration statistics | |||||||
|---|---|---|---|---|---|---|---|
| Ammunition | Type of warhead |
Penetration in mm @ 90° | |||||
| 10m | 100m | 500m | 1000m | 1500m | 2000m | ||
| Granata mod.35 | HEFI-T | 2 | 2 | 2 | 2 | 2 | 2 |
| Perforante mod.35 | API-T | 40 | 38 | 29 | 20 | 14 | 10 |
| PzGr 40 | HVAP-T | 64 | 63 | 29 | 20 | 14 | 10 |
| Shell details | |||||||||
|---|---|---|---|---|---|---|---|---|---|
| Ammunition | Type of warhead |
Velocity in m/s |
Projectile Mass in kg |
Fuse delay
in m: |
Fuse sensitivity
in mm: |
Explosive Mass in g (TNT equivalent): |
Ricochet: | ||
| 0% | 50% | 100% | |||||||
| Granata mod.35 | HEFI-T | 830 | 0.14 | 0.3 | 0.1 | 3 | 79° | 80° | 81° |
| Perforante mod.35 | API-T | 832 | 0.14 | 1.3 | 15 | 1 | 47° | 60° | 65° |
| PzGr 40 | HVAP-T | N/A | N/A | N/A | N/A | N/A | N/A | N/A | N/A |
Ammo racks
| Full ammo |
1st rack empty |
2nd rack empty |
3rd rack empty |
4th rack empty |
5th rack empty |
6th rack empty |
Visual discrepancy |
|---|---|---|---|---|---|---|---|
| XX | XX (+XX) | XX (+XX) | XX (+XX) | XX (+XX) | XX (+XX) | XX (+XX) | No |
Usage in battles
With its high speed, the AS42 has the ability to flank and, with its autocannon, able to cause high amounts of damage fast. If unable to penetrate, you will be able to escape quite quickly and leave to fight another day. The tank loses most of its advantages of stealth and positioning when going into Arcade Battles.
Modules
| Tier | Mobility | Protection | Firepower | ||
|---|---|---|---|---|---|
| I | Tires | Parts | Horizontal Drive | Granata mod.35 | |
| II | Suspension | Brake System | FPE | Adjustment of Fire | Perforante mod.35 |
| III | Filters | Crew Replenishment | Elevation Mechanism | ||
| IV | Transmission | Engine | Artillery Support | PzGr 40 | |
Pros and cons
Pros:
- High top speed
- Access to PzGr 40 rounds
- Sloped frontal armor, may deflect some rounds
- High penetration for the 20mm cannon
Cons:
- Small magazine for SPAA
- Virtually no protection at all. Even rifle rounds will penetrate the armour
- Only has two crew members
- Crew is exposed
History
The AS (Autosahariana) 42 was derived from the AB 41 armoured car. It was, however, unarmored and did not have the rear driver position. Designed for long-range reconnaissance in North Africa, it had a cross country range of almost 500 miles (800 km). It was also known as the Camionetta Desertica (Desert Weapons Carrier) mod. 42, or "la Sahariana" (the Saharan). The main armament varied: 20 mm anti-aircraft cannons, 20 mm anti-tank rifles, and machine guns were common alternatives. About 200 were built and saw service in North Africa, Sicily and Italy. After the armistice, some continued in use with Fascist Italian forces and Germany, including on the Eastern Front, and in the Ardennes in 1944-5.
Media
Excellent additions to the article would be video guides, screenshots from the game, and photos.
See also
Links to the articles on the War Thunder Wiki that you think will be useful for the reader, for example:
- reference to the series of the vehicles;
- links to approximate analogues of other nations and research trees.
External links
Paste links to sources and external resources, such as:
- topic on the official game forum;
- encyclopedia page on the tank;
- other literature.
| Italy anti-aircraft vehicles | |
|---|---|
| R3 Capraia | R3 T20 FA-HS |
| SIDAM 25 | SIDAM 25 · SIDAM 25 (Mistral) |
| Wheeled | AS 42 · CM52 |
| Tracked | M42 Contraereo · Leopard 40/70 · OTOMATIC |
| Hungary | ◔ZSU-57-2 · ◔ZSU-23-4 |
